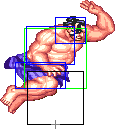
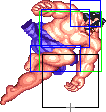
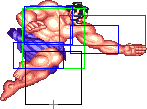
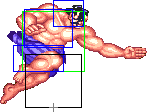
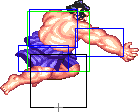
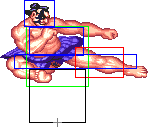
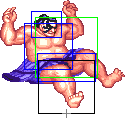
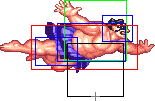
m (→Sumo Smash) |
|||
| (265 intermediate revisions by 13 users not shown) | |||
| Line 1: | Line 1: | ||
{{Infobox Character SSF2T | |||
|name=E. Honda | |||
|image = EHonda.png | |||
|dmgscal = 25/32 | |||
|fwalk = 38 | |||
|bwalk = 26 | |||
|prejump = 5 | |||
|njumpdr = 45 | |||
|fjumpdr = 44 | |||
|bjumpdr = 45 | |||
|landing = {{Tooltip | text=7* | hovertext = Can be canceled into a throw from Frame 1 onward, or jumps, attacks, or blocks on Frame 2 onward.}} | |||
|jumpa = 71 | |||
|fjumpdt = 121 | |||
|bjumpdt = 129 | |||
|skdr = 37 | |||
|hkdr = 72 | |||
}} | |||
{{TOClimit|3}} | |||
== | ==Normal Moves== | ||
<b>Disclaimer</b>: To better understand the diagrams, read [https://wiki.supercombo.gg/w/Super_Street_Fighter_2_Turbo/FAQ#SSF2T.27s_Wiki_Diagram_Conventions this]. | |||
=== | ===Standing Normals=== | ||
=== | ===== <span class="invisible-header">cllp</span> ===== | ||
{{MoveData | |||
| name = Close Jab | |||
| input = 5LP / cl.{{lp}} | |||
| subtitle = Close Light Punch | |||
| image = EHonda_stcljab3_stclstrng3.png | |||
| imageSize = 121x85px | |||
| caption = | |||
| data = | |||
{{AttackData-SSF2T | |||
|damage = {{tooltip|text=20[1]|hovertext=[1] Random Damage Table: -2 = 3.125%, -1 = 3.125%, +0 = 68.75%, +1 = 9.375%, +2 = 9.375%, +3 = 6.25%}} | |||
|dizzy= 0~5 | |||
|dizzytime= 40 | |||
|cancel = Special, Super | |||
|guard = Mid | |||
|startup= 4 | |||
|active= 2 | |||
|recovery= 3 | |||
|total = 9 | |||
|frameAdv = +8 | |||
|actrange = 0~32 | |||
|meter = 2/1 | |||
|description= A quick palm thrust. | |||
*Good as a tick and for some combos. | |||
*Useful for mixing up your tick throws alongside close Strong. | |||
}} | |||
}} | |||
<span class="mw-customtoggle-cllp" style="color: cyan">'''Click to toggle detailed hitbox data.'''</span> | |||
<div class="mw-collapsible mw-collapsed" id="mw-customcollapsible-cllp"> | |||
{{STDiagramHeader}} | |||
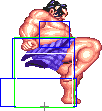
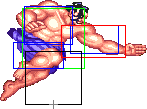
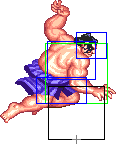
{{STDiagramCell|}} |{{STDiagramImageCell| 1 | EHonda_stcljab1&6_stfarjab1&5_stclstrng1&6_stfarstrng1&7_stclfrc1&9_stfarfrc1_stclshrt1&8_stfarshrt1_stclfrwrd1&8_stfarfrwrdt1_stclrh1&9_stfarrh1&9.png}} |{{STDiagramImageCell| 1 | EHonda_stcljab2&5_stclstrng2&5_stfarstrng2&6.png}} |{{STDiagramImageCell| 1 | EHonda_stcljab3_stclstrng3.png}} |{{STDiagramImageCell| 1 | EHonda_stcljab4_stclstrng4.png}} |{{STDiagramImageCell| 1 | EHonda_stcljab2&5_stclstrng2&5_stfarstrng2&6.png}} |{{STDiagramImageCell| 1 | EHonda_stcljab1&6_stfarjab1&5_stclstrng1&6_stfarstrng1&7_stclfrc1&9_stfarfrc1_stclshrt1&8_stfarshrt1_stclfrwrd1&8_stfarfrwrdt1_stclrh1&9_stfarrh1&9.png}} | |||
{| | |||
|- | |- | ||
| | {{STDiagramCell| Frame Count}} |{{STDiagramCell| 1 + 1}} |{{STDiagramCell| 2}} |{{STDiagramCell| 2}} |{{STDiagramCell| 1}} |{{STDiagramCell| 1}} |{{STDiagramCell| 1}} | ||
|- | |- | ||
| | {{STDiagramCell| Simplified}} |{{STDiagramCellColSpan| 2 | 4}} |{{STDiagramCell| 2}} |{{STDiagramCellColSpan| 3 | 3}} | ||
|} | |} | ||
== | </div> | ||
==== <span class="invisible-header">frlp</span> ==== | |||
{{MoveData | |||
| name = Far Jab | |||
| input = 5LP / cl.{{lp}} | |||
| subtitle = Far Light Punch | |||
| image = EHonda_stfarjab3.png | |||
| imageSize = 149x91px | |||
| caption = | |||
| data = | |||
{{AttackData-SSF2T | |||
|damage = {{tooltip|text=20[1]|hovertext=[1] Random Damage Table: -2 = 3.125%, -1 = 3.125%, +0 = 68.75%, +1 = 9.375%, +2 = 9.375%, +3 = 6.25%}} | |||
|dizzy= 0~5 | |||
|dizzytime= 40 | |||
|cancel = None | |||
|guard = Mid | |||
|startup= 6 | |||
|active= 4 | |||
|recovery= 5 | |||
|total = 15 | |||
|frameAdv = +4 | |||
|invul = N/A | |||
|actrange = 33+ | |||
|juggle = No | |||
|meter = 2/1 | |||
|description= A far-reaching thrust. | |||
*Good priority makes it a great way to deal with "rushing" moves (Blanka Rolls, Hawk Dives, Honda Headbutts, etc. | |||
*Also a decent anti-air. | |||
*Beats most pokes. | |||
*The best attack to start a Fierce HHS from due to the startup, but this adds to the move's execution. | |||
*Hits every crouching opponent except Blanka, so it can be used as a safe meaty on most knockdowns. | |||
*Especially handy against Shoto wakeup jab Shoryuukens (Harder to do against Ken since his Shoryuken has more horizontal range than Ryu's). | |||
}} | |||
}} | |||
=== | <span class="mw-customtoggle-frlp" style="color: cyan">'''Click to toggle detailed hitbox data.'''</span> | ||
<div class="mw-collapsible mw-collapsed" id="mw-customcollapsible-frlp"> | |||
{{STDiagramHeader}} | |||
{{STDiagramCell|}} |{{STDiagramImageCell| 1 | EHonda_stcljab1&6_stfarjab1&5_stclstrng1&6_stfarstrng1&7_stclfrc1&9_stfarfrc1_stclshrt1&8_stfarshrt1_stclfrwrd1&8_stfarfrwrdt1_stclrh1&9_stfarrh1&9.png}} |{{STDiagramImageCell| 1 | EHonda_stfarjab2&4.png}} |{{STDiagramImageCell| 1 | EHonda_stfarjab3.png}} |{{STDiagramImageCell| 1 | EHonda_stfarjab2&4.png}} |{{STDiagramImageCell| 1 | EHonda_stcljab1&6_stfarjab1&5_stclstrng1&6_stfarstrng1&7_stclfrc1&9_stfarfrc1_stclshrt1&8_stfarshrt1_stclfrwrd1&8_stfarfrwrdt1_stclrh1&9_stfarrh1&9.png}} | |||
{| | |||
|- | |- | ||
| | {{STDiagramCell| Frame Count}} |{{STDiagramCell| 1 + 2}} |{{STDiagramCell| 3}} |{{STDiagramCell| 4}} |{{STDiagramCell| 4}} |{{STDiagramCell| 1}} | ||
|- | |- | ||
| | {{STDiagramCell| Simplified}} |{{STDiagramCellColSpan| 2 | 6}} |{{STDiagramCell| 4}} |{{STDiagramCellColSpan | 2 | 5}} | ||
| | |||
|} | |} | ||
</div> | |||
==== <span class="invisible-header">cl.mp</span> ==== | |||
{| | {{MoveData | ||
| | | name = Close Strong | ||
| input = 5MP / cl.{{mp}} | |||
| subtitle = Close Medium Punch | |||
| image = EHonda_stcljab3_stclstrng3.png | |||
| imageSize = 121x85px | |||
| caption = | |||
| data = | |||
{{AttackData-SSF2T | |||
|damage ={{tooltip|text=24[1]|hovertext=[1] Random Damage Table: -2 = 3.125%, -1 = 3.125%, +0 = 68.75%, +1 = 9.375%, +2 = 9.375%, +3 = 6.25%}} | |||
|dizzy= 5~11 | |||
|dizzytime= 60 | |||
|cancel = Super | |||
|guard = Mid | |||
|startup= 5 | |||
|active= 2 | |||
|recovery= 5 | |||
|total = 12 | |||
|frameAdv = +11 | |||
|actrange = 0~32 | |||
|meter = 4/3 | |||
|description= Another palm strike. | |||
*Gives immense frame advantage, allowing you to link into most normal moves for some decent combos. | |||
*Can also be used as an unexpected tick into Oicho: Since Honda players usually use normals with low blockstun (usually crouching Jab) when tick throwing, having a move with medium blockstun can mixup your opponent. | |||
*When using this as a tick, keep in mind you'll need to walk forward a little before you Oicho on everyone except Zangief. | |||
*Can also be mixed in with close Jab for a different blockstun time. | |||
}} | |||
}} | |||
<span class="mw-customtoggle-clmp" style="color: cyan">'''Click to toggle detailed hitbox data.'''</span> | |||
<div class="mw-collapsible mw-collapsed" id="mw-customcollapsible-clmp"> | |||
{{STDiagramHeader}} | |||
{{STDiagramCell|}} |{{STDiagramImageCell| 1 | EHonda_stcljab1&6_stfarjab1&5_stclstrng1&6_stfarstrng1&7_stclfrc1&9_stfarfrc1_stclshrt1&8_stfarshrt1_stclfrwrd1&8_stfarfrwrdt1_stclrh1&9_stfarrh1&9.png}} |{{STDiagramImageCell| 1 | EHonda_stcljab2&5_stclstrng2&5_stfarstrng2&6.png}} |{{STDiagramImageCell| 1 | EHonda_stcljab3_stclstrng3.png}} |{{STDiagramImageCell| 1 | EHonda_stcljab4_stclstrng4.png}} |{{STDiagramImageCell| 1 | EHonda_stcljab2&5_stclstrng2&5_stfarstrng2&6.png}} |{{STDiagramImageCell| 1 | EHonda_stcljab1&6_stfarjab1&5_stclstrng1&6_stfarstrng1&7_stclfrc1&9_stfarfrc1_stclshrt1&8_stfarshrt1_stclfrwrd1&8_stfarfrwrdt1_stclrh1&9_stfarrh1&9.png}} | |||
|- | |- | ||
| | {{STDiagramCell| Frame Count}} |{{STDiagramCell| 1 + 2}} |{{STDiagramCell| 2}} |{{STDiagramCell| 2}} |{{STDiagramCell| 2}} |{{STDiagramCell| 2}} |{{STDiagramCell| 1}} | ||
|- | |- | ||
| | {{STDiagramCell| Simplified}} |{{STDiagramCellColSpan| 2 | 5}} |{{STDiagramCell| 2}} |{{STDiagramCellColSpan| 3 | 5}} | ||
|} | |} | ||
</div> | |||
==== <span class="invisible-header">frmp</span> ==== | |||
{| | {{MoveData | ||
| | | name = Far Strong | ||
| | | input = 5MP / fr.{{mp}} | ||
| | | subtitle = Far Medium Punch | ||
| image = EHonda_stfarstrng4.png | |||
| imageSize = 148x88px | |||
| | | caption = | ||
| | | data = | ||
| | {{AttackData-SSF2T | ||
| | |damage ={{tooltip|text=24[1]|hovertext=[1] Random Damage Table: -2 = 3.125%, -1 = 3.125%, +0 = 68.75%, +1 = 9.375%, +2 = 9.375%, +3 = 6.25%}} | ||
| | |dizzy= 5~11 | ||
| | |dizzytime= 60 | ||
|cancel = None | |||
|guard = Mid | |||
|startup= 7 | |||
|active= 4 | |||
|recovery= 6 | |||
|total = 17 | |||
|frameAdv = +8 | |||
|actrange = 33+ | |||
|meter = 4/3 | |||
|description= Similar to far st.jab with more range. | |||
*Another great way to mask a Fierce HHS. | |||
*Can be used to stuff/trade with the startup of projectiles. | |||
}} | |||
}} | |||
<span class="mw-customtoggle-frmp" style="color: cyan">'''Click to toggle detailed hitbox data.'''</span> | |||
<div class="mw-collapsible mw-collapsed" id="mw-customcollapsible-frmp"> | |||
{{STDiagramHeader}} | |||
{{STDiagramCell|}} |{{STDiagramImageCell| 1 | EHonda_stcljab1&6_stfarjab1&5_stclstrng1&6_stfarstrng1&7_stclfrc1&9_stfarfrc1_stclshrt1&8_stfarshrt1_stclfrwrd1&8_stfarfrwrdt1_stclrh1&9_stfarrh1&9.png}} |{{STDiagramImageCell| 1 | EHonda_stcljab2&5_stclstrng2&5_stfarstrng2&6.png}} |{{STDiagramImageCell| 1 | EHonda_stfarstrng3&5.png}} |{{STDiagramImageCell| 1 | EHonda_stfarstrng4.png}} |{{STDiagramImageCell| 1 | EHonda_stfarstrng3&5.png}} |{{STDiagramImageCell| 1 | EHonda_stcljab2&5_stclstrng2&5_stfarstrng2&6.png}} |{{STDiagramImageCell| 1 | EHonda_stcljab1&6_stfarjab1&5_stclstrng1&6_stfarstrng1&7_stclfrc1&9_stfarfrc1_stclshrt1&8_stfarshrt1_stclfrwrd1&8_stfarfrwrdt1_stclrh1&9_stfarrh1&9.png}} | |||
|- | |- | ||
| | {{STDiagramCell| Frame Count}} |{{STDiagramCell| 1 + 2}} |{{STDiagramCell| 2}} |{{STDiagramCell| 2}} |{{STDiagramCell| 4}} |{{STDiagramCell| 3}} |{{STDiagramCell| 2}} |{{STDiagramCell| 1}} | ||
|- | |- | ||
| | {{STDiagramCell| Simplified}} |{{STDiagramCellColSpan | 3 | 7}} |{{STDiagramCell| 4}} |{{STDiagramCellColSpan | 3 | 6}} | ||
|} | |} | ||
</div> | |||
{| | ==== <span class="invisible-header">clhp</span> ==== | ||
| | {{MoveData | ||
| name = Close Fierce | |||
| input = 5HP / cl.{{hp}} | |||
| subtitle = Close Heavy Punch | |||
| image = EHonda_stclfrc3.png | |||
| imageSize = 110x118px | |||
| caption = First Hitbox | |||
| image2 = EHonda_stclfrc4.png | |||
| imageSize2 = 161x90px | |||
| caption2 = Second Hitbox. | |||
| data = | |||
{{AttackData-SSF2T | |||
|damage ={{tooltip|text=30[2]|hovertext=[2] Random Damage Table: -3 = 3.125%, -2 = 3.125%, -1 = 3.125%, +0 = 46.875%, +1 = 12.5%, +2 = 15.625%, +3 = 6.25%, +4 = 9.375%}} | |||
|dizzy= 10~16 | |||
|dizzytime= 80 | |||
|cancel = None | |||
|guard = Mid | |||
|startup= 7 | |||
|active= 7 (5 / 2) | |||
|recovery= 18 | |||
|total = 32 | |||
|frameAdv = -3 / +2 | |||
|actrange = 0~48 | |||
|meter = 5/4 | |||
|description= A chop with a huge arc. | |||
*Anti-airs attacks directly above you (Such as when Claw wall dives you in the corner) | |||
*Main weakness is the strict activation range. | |||
*The huge startup makes it one of Honda's lesser used attacks. | |||
}} | |||
}} | |||
<span class="mw-customtoggle-clhp" style="color: cyan">'''Click to toggle detailed hitbox data.'''</span> | |||
<div class="mw-collapsible mw-collapsed" id="mw-customcollapsible-clhp"> | |||
'''Startup/Active:''' | |||
{{STDiagramHeader}} | |||
{{STDiagramCell|}} |{{STDiagramImageCell| 1 | EHonda_stcljab1&6_stfarjab1&5_stclstrng1&6_stfarstrng1&7_stclfrc1&9_stfarfrc1_stclshrt1&8_stfarshrt1_stclfrwrd1&8_stfarfrwrdt1_stclrh1&9_stfarrh1&9.png}} |{{STDiagramImageCell| 1 | EHonda_stclfrc2&8.png}} |{{STDiagramImageCell| 1 | EHonda_stclfrc3.png}} |{{STDiagramImageCell| 1 | EHonda_stclfrc4.png}} | |||
|- | |- | ||
| | {{STDiagramCell| Frame Count}} |{{STDiagramCell| 1 + 3}} |{{STDiagramCell| 3}} |{{STDiagramCell| 5}} |{{STDiagramCell| 2}} | ||
|- | |- | ||
| | {{STDiagramCell| Simplified}} |{{STDiagramCellColSpan | 2 | 7}} |{{STDiagramCellColSpan | 2 | 7}} | ||
| | |} | ||
| | '''Recovery:''' | ||
| | {{STDiagramHeader}} | ||
| | {{STDiagramCell|}} |{{STDiagramImageCell| 1 | EHonda_stclfrc5.png}} |{{STDiagramImageCell| 1 | EHonda_stclfrc6.png}} |{{STDiagramImageCell| 1 | EHonda_stclfrc7.png}} |{{STDiagramImageCell| 1 | EHonda_stclfrc2&8.png}} |{{STDiagramImageCell| 1 | EHonda_stcljab1&6_stfarjab1&5_stclstrng1&6_stfarstrng1&7_stclfrc1&9_stfarfrc1_stclshrt1&8_stfarshrt1_stclfrwrd1&8_stfarfrwrdt1_stclrh1&9_stfarrh1&9.png}} | ||
|- | |- | ||
| | {{STDiagramCell| Frame Count}} |{{STDiagramCell| 7}} |{{STDiagramCell| 5}} |{{STDiagramCell| 3}} |{{STDiagramCell| 2}} |{{STDiagramCell| 1}} | ||
|- | |- | ||
{{STDiagramCell| Simplified}} |{{STDiagramCellColSpan | 5 | 18}} | |||
|} | |} | ||
</div> | |||
==== <span class="invisible-header">frhp</span> ==== | |||
{| | {{MoveData | ||
| | | name = Far Fierce | ||
| input = 5HP / fr.{{hp}} | |||
| subtitle = Far Heavy Punch | |||
| image = EHonda_stfarfrc3.png | |||
| imageSize = 159x67px | |||
| caption = This isn't a sweep, more like a light dusting. | |||
| data = | |||
{{AttackData-SSF2T | |||
|damage ={{tooltip|text=30[2]|hovertext=[2] Random Damage Table: -3 = 3.125%, -2 = 3.125%, -1 = 3.125%, +0 = 46.875%, +1 = 12.5%, +2 = 15.625%, +3 = 6.25%, +4 = 9.375%}} | |||
|dizzy= 10~16 | |||
|dizzytime= 80 | |||
|cancel = None | |||
|guard = Mid | |||
|startup= 8 | |||
|active= 4 | |||
|recovery= 18 | |||
|total = 30 | |||
|frameAdv = 0 | |||
|actrange = 49+ | |||
|meter = 5/4 | |||
|description= A low punch that doesn't hit low. | |||
*Usually what you get for mistiming close Fierce or incorrectly mashing out a Fierce HHS. | |||
*Severely nerfed from his Old version, where it hit low, was faster, and could be Special canceled. | |||
*Tends to leave you wide open | |||
*Not very useful outside of a particular combo. | |||
}} | |||
}} | |||
<span class="mw-customtoggle-frhp" style="color: cyan">'''Click to toggle detailed hitbox data.'''</span> | |||
<div class="mw-collapsible mw-collapsed" id="mw-customcollapsible-frhp"> | |||
'''Startup/Active:''' | |||
{{STDiagramHeader}} | |||
{{STDiagramCell|}} |{{STDiagramImageCell| 1 | EHonda_stcljab1&6_stfarjab1&5_stclstrng1&6_stfarstrng1&7_stclfrc1&9_stfarfrc1_stclshrt1&8_stfarshrt1_stclfrwrd1&8_stfarfrwrdt1_stclrh1&9_stfarrh1&9.png}} |{{STDiagramImageCell| 1 | EHonda_stfarfrc2.png}} |{{STDiagramImageCell| 1 | EHonda_stfarfrc3.png}} | |||
|- | |- | ||
| | {{STDiagramCell| Frame Count}} |{{STDiagramCell| 1 + 3}} |{{STDiagramCell| 4}} |{{STDiagramCell| 4}} | ||
|- | |- | ||
| | {{STDiagramCell| Simplified}} |{{STDiagramCellColSpan | 2 | 8}} |{{STDiagramCell| 4}} | ||
| | |} | ||
| | '''Recovery:''' | ||
| | {{STDiagramHeader}} | ||
| | {{STDiagramCell|}} |{{STDiagramImageCell| 1 | EHonda_stfarfrc4&6.png}} |{{STDiagramImageCell| 1 | EHonda_stfarfrc5.png}} |{{STDiagramImageCell| 1 | EHonda_stfarfrc4&6.png}} |{{STDiagramImageCell| 1 | EHonda_stfarfrc7.png}} |{{STDiagramImageCell| 1 | EHonda_stfarfrc8.png}} |{{STDiagramImageCell| 1 | EHonda_stfarfrc9_stfarshrt7_stfarfrwrd7.png}} | ||
| | |||
| | |||
|- | |- | ||
| | {{STDiagramCell| Frame Count}} |{{STDiagramCell| 4}} |{{STDiagramCell| 6}} |{{STDiagramCell| 4}} |{{STDiagramCell| 2}} |{{STDiagramCell| 1}} |{{STDiagramCell| 1}} | ||
|- | |- | ||
{{STDiagramCell| Simplified}} |{{STDiagramCellColSpan | 6 | 18}} | |||
|} | |} | ||
</div> | |||
==== <span class="invisible-header">cllk</span> ==== | |||
{{MoveData | |||
| name = Close Short | |||
| input = 5LK / cl.{{lk}} | |||
| subtitle = Close Light Kick | |||
| image = EHonda_stclshrt4_stclfrwrd4.png | |||
| imageSize = 108x111px | |||
| caption = | |||
| data = | |||
{{AttackData-SSF2T | |||
|damage = {{tooltip|text=18[1]|hovertext=[1] Random Damage Table: -2 = 3.125%, -1 = 3.125%, +0 = 68.75%, +1 = 9.375%, +2 = 9.375%, +3 = 6.25%}} | |||
|dizzy= 0~5 | |||
|dizzytime= 40 | |||
|cancel = Special, Super | |||
|guard = Mid | |||
|startup= 4 | |||
|active= 3 | |||
|recovery= 5 | |||
|total = 12 | |||
|frameAdv = +5 | |||
|actrange = 0~11 | |||
|meter = 2/1 | |||
|description= A knee strike. | |||
*Outprioritized by close Standing Jab. | |||
*Impossible to use against some characters (unless they jump over you) since the maximum activation range isn't close enough to activate the move even when point blank. | |||
*Avoid like the plague. | |||
}} | |||
}} | |||
<span class="mw-customtoggle-cllk" style="color: cyan">'''Click to toggle detailed hitbox data.'''</span> | |||
<div class="mw-collapsible mw-collapsed" id="mw-customcollapsible-cllk"> | |||
{{STDiagramHeader}} | |||
{| | {{STDiagramCell|}} |{{STDiagramImageCell| 1 | EHonda_stcljab1&6_stfarjab1&5_stclstrng1&6_stfarstrng1&7_stclfrc1&9_stfarfrc1_stclshrt1&8_stfarshrt1_stclfrwrd1&8_stfarfrwrdt1_stclrh1&9_stfarrh1&9.png}} |{{STDiagramImageCell| 1 | EHonda_stclshrt2&7_stclfrwrd2&7_stclrh2&8_stfarrh2&8.png}} |{{STDiagramImageCell| 1 | EHonda_stclshrt3&6_stclfrwrd3&6_stclrh3&7_stfarrh3&7.png}} |{{STDiagramImageCell| 1 | EHonda_stclshrt4_stclfrwrd4.png}} |{{STDiagramImageCell| 1 | EHonda_stclshrt5_stclfrwrd5.png}} |{{STDiagramImageCell| 1 | EHonda_stclshrt3&6_stclfrwrd3&6_stclrh3&7_stfarrh3&7.png}} |{{STDiagramImageCell| 1 | EHonda_stclshrt2&7_stclfrwrd2&7_stclrh2&8_stfarrh2&8.png}} |{{STDiagramImageCell| 1 | EHonda_stcljab1&6_stfarjab1&5_stclstrng1&6_stfarstrng1&7_stclfrc1&9_stfarfrc1_stclshrt1&8_stfarshrt1_stclfrwrd1&8_stfarfrwrdt1_stclrh1&9_stfarrh1&9.png}} | ||
| | |||
|- | |- | ||
| | {{STDiagramCell| Frame Count}} |{{STDiagramCell| 1 + 1}} |{{STDiagramCell| 1}} |{{STDiagramCell| 1}} |{{STDiagramCell| 3}} |{{STDiagramCell| 2}} |{{STDiagramCell| 1}} |{{STDiagramCell| 1}} |{{STDiagramCell| 1}} | ||
|- | |- | ||
| | {{STDiagramCell| Simplified}} |{{STDiagramCellColSpan | 3 | 4}} |{{STDiagramCell| 3}} |{{STDiagramCellColSpan | 4 | 5}} | ||
|} | |} | ||
</div> | |||
==== <span class="invisible-header">frlk</span> ==== | |||
{{MoveData | |||
| name = Far Short | |||
| input = 5LK / fr.{{lk}} | |||
| subtitle = Far Light Kick | |||
| image = EHonda_stfarshrt4.png | |||
| imageSize = 146x73px | |||
| caption = Fun fact: Kicks above the kneecap are an illegal move in sumo wrestling and will result in an immediate loss. | |||
| data = | |||
{{AttackData-SSF2T | |||
|damage = {{tooltip|text=18[1]|hovertext=[1] Random Damage Table: -2 = 3.125%, -1 = 3.125%, +0 = 68.75%, +1 = 9.375%, +2 = 9.375%, +3 = 6.25%}} | |||
|dizzy= 0~5 | |||
|dizzytime= 40 | |||
|cancel = None | |||
|guard = Mid | |||
|startup= 10 | |||
|active= 3 | |||
|recovery= 7 | |||
|total = 20 | |||
|frameAdv = +3 | |||
|actrange = 12+ | |||
|meter = 2/1 | |||
|description= A strange, high-ish kick. | |||
*Actually slower than far Forward in terms of startup, believe it or not. | |||
*It does have less recovery frames overall but why. | |||
*Nigh useless. | |||
}} | |||
}} | |||
<span class="mw-customtoggle-frlk" style="color: cyan">'''Click to toggle detailed hitbox data.'''</span> | |||
<div class="mw-collapsible mw-collapsed" id="mw-customcollapsible-frlk"> | |||
{{STDiagramHeader}} | |||
{| | {{STDiagramCell|}} |{{STDiagramImageCell| 1 | EHonda_stcljab1&6_stfarjab1&5_stclstrng1&6_stfarstrng1&7_stclfrc1&9_stfarfrc1_stclshrt1&8_stfarshrt1_stclfrwrd1&8_stfarfrwrdt1_stclrh1&9_stfarrh1&9.png}} |{{STDiagramImageCell| 1 |EHonda_stfarshrt2&6_stfarfrwrd2&6.png}} |{{STDiagramImageCell| 1 | EHonda_stfarshrt3&5_stfarfrwrd5.png}} |{{STDiagramImageCell| 1 | EHonda_stfarshrt4.png}} |{{STDiagramImageCell| 1 | EHonda_stfarshrt3&5_stfarfrwrd5.png}} |{{STDiagramImageCell| 1 | EHonda_stfarshrt2&6_stfarfrwrd2&6.png}} |{{STDiagramImageCell| 1 | EHonda_stfarfrc9_stfarshrt7_stfarfrwrd7.png}} | ||
| | |||
| | |||
| | |||
| | |||
| | |||
|- | |- | ||
| | {{STDiagramCell| Frame Count}} |{{STDiagramCell| 1 + 3}} |{{STDiagramCell| 3}} |{{STDiagramCell| 3}} |{{STDiagramCell| 3}} |{{STDiagramCell| 3}} |{{STDiagramCell| 3}} |{{STDiagramCell| 1}} | ||
|- | |- | ||
| | {{STDiagramCell| Simplified}} |{{STDiagramCellColSpan | 3 | 10}} |{{STDiagramCell| 3}} |{{STDiagramCellColSpan | 3 | 7}} | ||
| | |||
|} | |} | ||
{| | |||
</div> | |||
==== <span class="invisible-header">clmk</span> ==== | |||
{{MoveData | |||
| name = Close Forward | |||
| input = 5MK / cl.{{mk}} | |||
| subtitle = Close Medium Kick | |||
| image = EHonda_stclshrt4_stclfrwrd4.png | |||
| imageSize = 108x111px | |||
| caption = | |||
| data = | |||
{{AttackData-SSF2T | |||
|damage = {{tooltip|text=22[1]|hovertext=[1] Random Damage Table: -2 = 3.125%, -1 = 3.125%, +0 = 68.75%, +1 = 9.375%, +2 = 9.375%, +3 = 6.25%}} | |||
|dizzy= 5~11 | |||
|dizzytime= 60 | |||
|cancel = None | |||
|guard = Mid | |||
|startup= 6 | |||
|active= 3 | |||
|recovery= 7 | |||
|total = 16 | |||
|frameAdv = +8 | |||
|actrange = 0~11 | |||
|meter = 4/3 | |||
|description= Close Short except you can't cancel it and it's slower. | |||
*Outprioritized again by close Strong. | |||
*Can't use while charging since it overlaps with the Knees command normal. | |||
*Impossible to use against some characters (unless they jump over you) since the maximum activation range isn't close enough to activate the move even when point blank. | |||
*Avoid like the plague (again). | |||
}} | |||
}} | |||
<span class="mw-customtoggle-clmk" style="color: cyan">'''Click to toggle detailed hitbox data.'''</span> | |||
<div class="mw-collapsible mw-collapsed" id="mw-customcollapsible-clmk"> | |||
{{STDiagramHeader}} | |||
{{STDiagramCell|}} |{{STDiagramImageCell| 1 | EHonda_stcljab1&6_stfarjab1&5_stclstrng1&6_stfarstrng1&7_stclfrc1&9_stfarfrc1_stclshrt1&8_stfarshrt1_stclfrwrd1&8_stfarfrwrdt1_stclrh1&9_stfarrh1&9.png}} |{{STDiagramImageCell| 1 | EHonda_stclshrt2&7_stclfrwrd2&7_stclrh2&8_stfarrh2&8.png}} |{{STDiagramImageCell| 1 | EHonda_stclshrt3&6_stclfrwrd3&6_stclrh3&7_stfarrh3&7.png}} |{{STDiagramImageCell| 1 | EHonda_stclshrt4_stclfrwrd4.png}} |{{STDiagramImageCell| 1 | EHonda_stclshrt5_stclfrwrd5.png}} |{{STDiagramImageCell| 1 | EHonda_stclshrt3&6_stclfrwrd3&6_stclrh3&7_stfarrh3&7.png}} |{{STDiagramImageCell| 1 | EHonda_stclshrt2&7_stclfrwrd2&7_stclrh2&8_stfarrh2&8.png}} |{{STDiagramImageCell| 1 | EHonda_stcljab1&6_stfarjab1&5_stclstrng1&6_stfarstrng1&7_stclfrc1&9_stfarfrc1_stclshrt1&8_stfarshrt1_stclfrwrd1&8_stfarfrwrdt1_stclrh1&9_stfarrh1&9.png}} | |||
|- | |- | ||
{{STDiagramCell| Frame Count}} |{{STDiagramCell| 1 + 1}} |{{STDiagramCell| 2}} |{{STDiagramCell| 2}} |{{STDiagramCell| 3}} |{{STDiagramCell| 2}} |{{STDiagramCell| 2}} |{{STDiagramCell| 2}} |{{STDiagramCell| 1}} | |||
|- | |- | ||
| | {{STDiagramCell| Simplified}} |{{STDiagramCellColSpan | 3 | 6}} |{{STDiagramCell| 3}} |{{STDiagramCellColSpan | 4 | 7}} | ||
|} | |} | ||
</div> | |||
==== <span class="invisible-header">frmk</span> ==== | |||
{| | {{MoveData | ||
| | | name = Far Forward | ||
| | | input = 5MK / fr.{{mk}} | ||
| | | subtitle = Far Medium Kick | ||
|- | | image = EHonda_stfarfrwrd3.png | ||
| | | imageSize = 118x72px | ||
|- | | caption = First Hit | ||
| image2 = EHonda_stfarfrwrd4.png | |||
| imageSize2 = 147x72px | |||
| caption2 = Second Hit | |||
| data = | |||
{{AttackData-SSF2T | |||
|damage = {{tooltip|text=4[1] + 24[1]|hovertext=[1] Random Damage Table: -2 = 3.125%, -1 = 3.125%, +0 = 68.75%, +1 = 9.375%, +2 = 9.375%, +3 = 6.25%}} | |||
|dizzy= 5~11 x 2 | |||
|dizzytime= 60 x 2 | |||
|cancel = None | |||
|guard = Mid | |||
|startup= 7 | |||
|active= 9 (3 + 6) | |||
|recovery= 10 | |||
|total = 26 | |||
|frameAdv = -1 / +2(+1) | |||
|actrange = 12+ | |||
|meter = 4/3 | |||
|description= Another weird high-ish kick. | |||
*Can be used as a counter pokea gainst Dhalsim's standing kicks, Boxer's standing Fierce, and Claw's standing Strong. | |||
*The second hitbox isn't as good as Old Honda's crouching Forward, but it does have better leg hurtboxes which allow it to whiff against some low normals. | |||
*Still, not a very good tool to use in neutral. | |||
}} | |||
}} | |||
<span class="mw-customtoggle-frmk" style="color: cyan">'''Click to toggle detailed hitbox data.'''</span> | |||
<div class="mw-collapsible mw-collapsed" id="mw-customcollapsible-frmk"> | |||
{{STDiagramHeader}} | |||
{{STDiagramCell|}} |{{STDiagramImageCell| 1 | EHonda_stcljab1&6_stfarjab1&5_stclstrng1&6_stfarstrng1&7_stclfrc1&9_stfarfrc1_stclshrt1&8_stfarshrt1_stclfrwrd1&8_stfarfrwrdt1_stclrh1&9_stfarrh1&9.png}} |{{STDiagramImageCell| 1 |EHonda_stfarshrt2&6_stfarfrwrd2&6.png}} |{{STDiagramImageCell| 1 | EHonda_stfarfrwrd3.png}} |{{STDiagramImageCell| 1 | EHonda_stfarfrwrd4.png}} |{{STDiagramImageCell| 1 | EHonda_stfarshrt3&5_stfarfrwrd5.png}} |{{STDiagramImageCell| 1 | EHonda_stfarshrt2&6_stfarfrwrd2&6.png}} |{{STDiagramImageCell| 1 | EHonda_stfarfrc9_stfarshrt7_stfarfrwrd7.png}} | |||
|- | |- | ||
| | {{STDiagramCell| Frame Count}} |{{STDiagramCell| 1 + 3}} |{{STDiagramCell| 3}} |{{STDiagramCell| 3}} |{{STDiagramCell| 6}} |{{STDiagramCell| 5}} |{{STDiagramCell| 4}} |{{STDiagramCell| 1}} | ||
|- | |- | ||
{{STDiagramCell| Simplified}} |{{STDiagramCellColSpan | 2 | 7}} |{{STDiagramCell| 3}} |{{STDiagramCell| 6}} |{{STDiagramCellColSpan | 3 | 10}} | |||
{| | |||
|} | |} | ||
</div> | |||
==== <span class="invisible-header">frhk</span> ==== | |||
{{MoveData | |||
| name = Roundhouse | |||
| input = 5HK / {{hk}} | |||
| subtitle = Standing Heavy Kick | |||
| image = EHonda_stclrh4_stfarrh4.png | |||
| imageSize = 121x111px | |||
| caption = First Hit. | |||
| image2 = EHonda_stclrh5_stfarrh5.png | |||
| imageSize2 = 147x112px | |||
| caption2 = Second Hit. | |||
| data = | |||
{{AttackData-SSF2T | |||
|damage = {{tooltip|text=4[2]|hovertext=[2] Random Damage Table: -3 = 3.125%, -2 = 3.125%, -1 = 3.125%, +0 = 46.875%, +1 = 12.5%, +2 = 15.625%, +3 = 6.25%, +4 = 9.375%}} + {{tooltip|text=30[0]|hovertext=[0] Random Damage Table: -2 = 3.125%, -1 = 3.125%, +0 = 78.125%, +1 = 6.25%, +2 = 6.25%, +3 = 3.125%}} | |||
|dizzy= 3~9 + 10~16 | |||
|dizzytime= 40 + 80 | |||
|cancel = None | |||
|guard = Mid | |||
|startup = 8 | |||
|active = 8 (3 + 5) | |||
|recovery= 18 | |||
|total = 34 | |||
|frameAdv = -4 / -1(-2) | |||
|actrange = N/A | |||
|meter = 5/4 | |||
|description= An actual roundhouse kick. | |||
*Good damage and stun, but no follow ups. | |||
*Works as a simple 2-hitter, but it's safer to just use your Double Knee command forward instead since it does more damage and actually has frame advantage. | |||
*Can be used as an anti-air, but Honda has better options. | |||
*Can't be used while charging back (Overlaps with command sweep) | |||
}} | |||
}} | |||
<span class="mw-customtoggle-frhk" style="color: cyan">'''Click to toggle detailed hitbox data.'''</span> | |||
<div class="mw-collapsible mw-collapsed" id="mw-customcollapsible-frhk"> | |||
'''Startup/Active:''' | |||
{ | {{STDiagramHeader}} | ||
| | {{STDiagramCell|}} |{{STDiagramImageCell| 1 | EHonda_stcljab1&6_stfarjab1&5_stclstrng1&6_stfarstrng1&7_stclfrc1&9_stfarfrc1_stclshrt1&8_stfarshrt1_stclfrwrd1&8_stfarfrwrdt1_stclrh1&9_stfarrh1&9.png}} |{{STDiagramImageCell| 1 | EHonda_stclshrt2&7_stclfrwrd2&7_stclrh2&8_stfarrh2&8.png}} |{{STDiagramImageCell| 1 | EHonda_stclshrt3&6_stclfrwrd3&6_stclrh3&7_stfarrh3&7.png}} |{{STDiagramImageCell| 1 | EHonda_stclrh4_stfarrh4.png}} |{{STDiagramImageCell| 1 | EHonda_stclrh5_stfarrh5.png}} | ||
| | |||
| | |||
| | |||
|- | |- | ||
{{STDiagramCell| Frame Count}} |{{STDiagramCell| 1 + 2}} |{{STDiagramCell| 2}} |{{STDiagramCell| 3}} |{{STDiagramCell| 3}} |{{STDiagramCell| 5}} | |||
|- | |- | ||
{{STDiagramCell| Simplified}} |{{STDiagramCellColSpan | 3 | 8}} |{{STDiagramCell| 3}} |{{STDiagramCell| 5}} | |||
|} | |} | ||
{ | '''Recovery:''' | ||
| | {{STDiagramHeader}} | ||
{{STDiagramCell|}} |{{STDiagramImageCell| 1 | EHonda_stclrh6_stfarrh6.png}} |{{STDiagramImageCell| 1 | EHonda_stclshrt3&6_stclfrwrd3&6_stclrh3&7_stfarrh3&7.png}} |{{STDiagramImageCell| 1 | EHonda_stclshrt2&7_stclfrwrd2&7_stclrh2&8_stfarrh2&8.png}} |{{STDiagramImageCell| 1 | EHonda_stcljab1&6_stfarjab1&5_stclstrng1&6_stfarstrng1&7_stclfrc1&9_stfarfrc1_stclshrt1&8_stfarshrt1_stclfrwrd1&8_stfarfrwrdt1_stclrh1&9_stfarrh1&9.png}} | |||
|- | |- | ||
{{STDiagramCell| Frame Count}} |{{STDiagramCell| 8}} |{{STDiagramCell| 6}} |{{STDiagramCell| 3}} |{{STDiagramCell| 1}} | |||
|- | |- | ||
{{STDiagramCell| Simplified}} |{{STDiagramCellColSpan | 4 | 18}} | |||
|} | |} | ||
</div> | |||
===Crouching Normals=== | |||
{| | |||
| | ==== <span class="invisible-header">crlp</span> ==== | ||
{{MoveData | |||
| name = Crouching Jab | |||
| input = 2LP / {{d}}+{{lp}} | |||
| | | subtitle = Crouching Light Punch | ||
| | | image = EHonda_crjab3_crfrc3.png | ||
| | | imageSize = 157x66px | ||
| | | caption = Strikes to the groin are another illegal move in sumo wrestling. | ||
| | | data = | ||
{{AttackData-SSF2T | |||
|damage = {{tooltip|text=20[1]|hovertext=[1] Random Damage Table: -2 = 3.125%, -1 = 3.125%, +0 = 68.75%, +1 = 9.375%, +2 = 9.375%, +3 = 6.25%}} | |||
|dizzy= 0~5 | |||
|dizzytime= 40 | |||
|cancel = Super | |||
|guard = Mid | |||
|startup= 5 | |||
|active= 8 | |||
|recovery= 3 | |||
|total = 16 | |||
|frameAdv = +2 | |||
|actrange = N/A | |||
|meter = 2/1 | |||
|description= A crouching palm thrust. | |||
*Good poke that trades Standing Jab's priority for better range and less vulnerability against lows. | |||
*Great for buffering Fierce HHS due to its long active time. | |||
*Also a great meaty to start ticks. | |||
}} | |||
}} | |||
<span class="mw-customtoggle-crlp" style="color: cyan">'''Click to toggle detailed hitbox data.'''</span> | |||
<div class="mw-collapsible mw-collapsed" id="mw-customcollapsible-crlp"> | |||
{{STDiagramHeader}} | |||
{{STDiagramCell|}} |{{STDiagramImageCell| 1 | EHonda_crjab1&5_crstrng1&7_crfrc1&10_crshrt1&5_crfrwrd1&5_crrh1&7.png}} |{{STDiagramImageCell| 1 | EHonda_crjab2&4_crfrc2&4.png}} |{{STDiagramImageCell| 1 | EHonda_crjab3_crfrc3.png}} |{{STDiagramImageCell| 1 | EHonda_crjab2&4_crfrc2&4.png}} |{{STDiagramImageCell| 1 | EHonda_crjab1&5_crstrng1&7_crfrc1&10_crshrt1&5_crfrwrd1&5_crrh1&7.png}} | |||
|- | |- | ||
| | {{STDiagramCell| Frame Count}} |{{STDiagramCell| 1 + 2}} |{{STDiagramCell| 2}} |{{STDiagramCell| 8}} |{{STDiagramCell| 2}} |{{STDiagramCell| 1}} | ||
|- | |- | ||
| | {{STDiagramCell| Simplified}} |{{STDiagramCellColSpan| 2 | 5}} |{{STDiagramCell| 8}} |{{STDiagramCellColSpan | 2 | 3}} | ||
| | |||
|} | |} | ||
</div> | |||
==== <span class="invisible-header">crmp</span> ==== | |||
{{MoveData | |||
| name = Crouching Strong | |||
| input = 2MP / {{d}}+{{mp}} | |||
| subtitle = Crouching Medium Punch | |||
| image = EHonda_crstrng4.png | |||
| imageSize = 150x70px | |||
| caption = | |||
| data = | |||
{{AttackData-SSF2T | |||
|damage ={{tooltip|text=24[1]|hovertext=[1] Random Damage Table: -2 = 3.125%, -1 = 3.125%, +0 = 68.75%, +1 = 9.375%, +2 = 9.375%, +3 = 6.25%}} | |||
|dizzy= 5~11 | |||
|dizzytime= 60 | |||
|cancel = None | |||
|guard = Mid | |||
|startup= 7 | |||
|active= 8 | |||
|recovery= 11 | |||
|total = 26 | |||
|frameAdv = -1 | |||
|actrange = N/A | |||
|meter = 4/3 | |||
|description=A palm strike, now right handed. | |||
*Hitbox makes it great for beating some key crouching attacks, like Guile and Chun's Crouching Forwards. | |||
*Still slow. | |||
}} | |||
}} | |||
<span class="mw-customtoggle-crmp" style="color: cyan">'''Click to toggle detailed hitbox data.'''</span> | |||
<div class="mw-collapsible mw-collapsed" id="mw-customcollapsible-crmp"> | |||
{{STDiagramHeader}} | |||
{| | {{STDiagramCell|}} |{{STDiagramImageCell| 1 | EHonda_crjab1&5_crstrng1&7_crfrc1&10_crshrt1&5_crfrwrd1&5_crrh1&7.png}} |{{STDiagramImageCell| 1 | EHonda_crstrng2&6_crfrc5&9.png}} |{{STDiagramImageCell| 1 | EHonda_crstrng3&5_crfrc6&8.png}} |{{STDiagramImageCell| 1 | EHonda_crstrng4.png }} |{{STDiagramImageCell| 1 | EHonda_crstrng3&5_crfrc6&8.png}} |{{STDiagramImageCell| 1 | EHonda_crstrng2&6_crfrc5&9.png}} |{{STDiagramImageCell| 1 | EHonda_crjab1&5_crstrng1&7_crfrc1&10_crshrt1&5_crfrwrd1&5_crrh1&7.png}} | ||
| | |||
|- | |- | ||
| | {{STDiagramCell| Frame Count}} |{{STDiagramCell| 1 + 2}} |{{STDiagramCell| 2}} |{{STDiagramCell| 2}} |{{STDiagramCell| 8}} |{{STDiagramCell| 6}} |{{STDiagramCell| 4}} |{{STDiagramCell| 1}} | ||
|- | |- | ||
{{STDiagramCell| Simplified}} |{{STDiagramCellColSpan | 3 | 7}} |{{STDiagramCell| 8}} |{{STDiagramCellColSpan | 3 | 11}} | |||
|} | |} | ||
</div> | |||
==== <span class="invisible-header">crhp</span> ==== | |||
{{MoveData | |||
| name = Crouching Fierce | |||
| input = 2HP / {{d}}+{{hp}} | |||
| subtitle = Crouching Heavy Punch | |||
| image = EHonda_crjab3_crfrc3.png | |||
| imageSize = 157x66px | |||
| caption = First Hit | |||
| image2 = EHonda_crfrc7.png | |||
| imageSize2 = 157x70px | |||
| caption2 = Second Hit. | |||
| data = | |||
{{AttackData-SSF2T | |||
|damage ={{tooltip|text=16[2]|hovertext=[2] Random Damage Table: -3 = 3.125%, -2 = 3.125%, -1 = 3.125%, +0 = 46.875%, +1 = 12.5%, +2 = 15.625%, +3 = 6.25%, +4 = 9.375%}} x 2 | |||
|dizzy= 1~7 x 2 | |||
|dizzytime= 70 x 2 | |||
|cancel = Super / None | |||
|guard = Mid | |||
|startup= 5 | |||
|active= 4(6)8 | |||
|recovery= 11 | |||
|total = 34 | |||
|frameAdv = -6 / +3(+2) | |||
|actrange = N/A | |||
|meter = 5/4 | |||
|description= Two palm strikes, one left, one right. | |||
*Not very useful outside of a few combos. | |||
*Can be used to deter Boxer's low punches. | |||
*Usually seen when you mess up an Oicho Throw. | |||
}} | |||
}} | |||
<span class="mw-customtoggle-crhp" style="color: cyan">'''Click to toggle detailed hitbox data.'''</span> | |||
<div class="mw-collapsible mw-collapsed" id="mw-customcollapsible-crhp"> | |||
{{STDiagramHeader}} | |||
{| | {{STDiagramCell|}} |{{STDiagramImageCell| 1 | EHonda_crjab1&5_crstrng1&7_crfrc1&10_crshrt1&5_crfrwrd1&5_crrh1&7.png}} |{{STDiagramImageCell| 1 | EHonda_crjab2&4_crfrc2&4.png}} |{{STDiagramImageCell| 1 | EHonda_crjab3_crfrc3.png}} |{{STDiagramImageCell| 1 | EHonda_crjab2&4_crfrc2&4.png}} |{{STDiagramImageCell| 1 | EHonda_crstrng2&6_crfrc5&9.png}} |{{STDiagramImageCell| 1 | EHonda_crstrng3&5_crfrc6&8.png}} | ||
|- | |- | ||
| | {{STDiagramCell| Frame Count}} |{{STDiagramCell| 1 + 2}} |{{STDiagramCell| 2}} |{{STDiagramCell| 4}} |{{STDiagramCell| 2}} |{{STDiagramCell| 2}} |{{STDiagramCell| 2}} | ||
|- | |- | ||
| | {{STDiagramCell| Simplified}} |{{STDiagramCellColSpan| 2 | 5}} |{{STDiagramCell| 4}} |{{STDiagramCellColSpan | 3 | 6}} | ||
| | |} | ||
| | {{STDiagramHeader}} | ||
{{STDiagramCell|}} |{{STDiagramImageCell| 1 | EHonda_crfrc7.png}} |{{STDiagramImageCell| 1 | EHonda_crstrng3&5_crfrc6&8.png}} |{{STDiagramImageCell| 1 | EHonda_crstrng2&6_crfrc5&9.png}} |{{STDiagramImageCell| 1 | EHonda_crjab1&5_crstrng1&7_crfrc1&10_crshrt1&5_crfrwrd1&5_crrh1&7.png}} | |||
|- | |- | ||
| | {{STDiagramCell| Frame Count}} |{{STDiagramCell| 8}} |{{STDiagramCell| 6}} |{{STDiagramCell| 4}} |{{STDiagramCell| 1}} | ||
|- | |- | ||
{{STDiagramCell| Simplified}} |{{STDiagramCell| 8}} |{{STDiagramCellColSpan | 3 | 11}} | |||
|} | |} | ||
</div> | |||
===== <span class="invisible-header">crlk</span> ===== | |||
{{MoveData | |||
| name = Crouching Short | |||
| input = 2LK / {{d}}+{{lk}} | |||
| subtitle = Crouching Light Kick | |||
| image = EHonda_crshrt3.png | |||
| imageSize = 155x78px | |||
| caption = | |||
| data = | |||
{{AttackData-SSF2T | |||
|damage = {{tooltip|text=18[1]|hovertext=[1] Random Damage Table: -2 = 3.125%, -1 = 3.125%, +0 = 68.75%, +1 = 9.375%, +2 = 9.375%, +3 = 6.25%}} | |||
|dizzy= 0~5 | |||
|dizzytime= 40 | |||
|cancel = Special, Super | |||
|guard = Low | |||
|startup= 4 | |||
|active= 3 | |||
|recovery= 4 | |||
|total = 11 | |||
|frameAdv = +6 | |||
|actrange = N/A | |||
|meter = 2/1 | |||
|description= An excellent low kick. | |||
*Cancelable, and good for tick throwing. | |||
*Experienced Hondas can cancel this normal into any strength HHS for a nasty frame trap, but it takes serious button mashing skills to do (especially the Strong and Fierce versions). | |||
*You're almost always in range for an Oicho if you cancel this into a Strong or Fierce HHS. | |||
}} | |||
}} | |||
<span class="mw-customtoggle-crlk" style="color: cyan">'''Click to toggle detailed hitbox data.'''</span> | |||
<div class="mw-collapsible mw-collapsed" id="mw-customcollapsible-crlk"> | |||
{{STDiagramHeader}} | |||
{| | {{STDiagramCell|}} |{{STDiagramImageCell| 1 | EHonda_crjab1&5_crstrng1&7_crfrc1&10_crshrt1&5_crfrwrd1&5_crrh1&7.png}} |{{STDiagramImageCell| 1 | EHonda_crshrt2&4_crfrwrd2&4.png}} |{{STDiagramImageCell| 1 | EHonda_crshrt3.png}} |{{STDiagramImageCell| 1 | EHonda_crshrt2&4_crfrwrd2&4.png}} |{{STDiagramImageCell| 1 | EHonda_crjab1&5_crstrng1&7_crfrc1&10_crshrt1&5_crfrwrd1&5_crrh1&7.png}} | ||
| | |||
|- | |- | ||
{{STDiagramCell| Frame Count}} |{{STDiagramCell| 1 + 1}} |{{STDiagramCell| 2}} |{{STDiagramCell| 3}} |{{STDiagramCell| 3}} |{{STDiagramCell| 1}} | |||
|- | |- | ||
{{STDiagramCell| Simplified}} |{{STDiagramCellColSpan| 2 | 4}} |{{STDiagramCell| 3}} |{{STDiagramCellColSpan | 2 | 4}} | |||
|} | |} | ||
</div> | |||
===== <span class="invisible-header">frmk</span> ===== | |||
{{MoveData | |||
| name = Crouching Forward | |||
| input = 2MK / {{d}}+{{mk}} | |||
| subtitle = Crouching Medium Kick | |||
| image = EHonda_crfrwrd3.png | |||
| imageSize = 167x78px | |||
| caption = | |||
| data = | |||
{{AttackData-SSF2T | |||
|damage = {{tooltip|text=22[1]|hovertext=[1] Random Damage Table: -2 = 3.125%, -1 = 3.125%, +0 = 68.75%, +1 = 9.375%, +2 = 9.375%, +3 = 6.25%}} | |||
|dizzy= 5~11 | |||
|dizzytime= 60 | |||
|cancel = None | |||
|guard = Low | |||
|startup= 7 | |||
|active= 5 | |||
|recovery= 8 | |||
|total = 20 | |||
|frameAdv = +5 | |||
|actrange = N/A | |||
|meter = 4/3 | |||
|description= A low kick that looks the exact same as crouching Short but it's different. | |||
*Can be used to buffer Strong or Fierce HHS on block. | |||
*The timing of the buffered HHS coming out from this move can be awkward for an opponent to deal with, making it good for surprises. | |||
*Works great as a counter-poke against certain other character's pokes, like Guile's crouching Forward. | |||
}} | |||
}} | |||
<span class="mw-customtoggle-crmk" style="color: cyan">'''Click to toggle detailed hitbox data.'''</span> | |||
<div class="mw-collapsible mw-collapsed" id="mw-customcollapsible-crmk"> | |||
{{STDiagramHeader}} | |||
{| | {{STDiagramCell|}} |{{STDiagramImageCell| 1 | EHonda_crjab1&5_crstrng1&7_crfrc1&10_crshrt1&5_crfrwrd1&5_crrh1&7.png}} |{{STDiagramImageCell| 1 | EHonda_crshrt2&4_crfrwrd2&4.png}} |{{STDiagramImageCell| 1 | EHonda_crfrwrd3.png}} |{{STDiagramImageCell| 1 | EHonda_crshrt2&4_crfrwrd2&4.png}} |{{STDiagramImageCell| 1 | EHonda_crjab1&5_crstrng1&7_crfrc1&10_crshrt1&5_crfrwrd1&5_crrh1&7.png}} | ||
|- | |- | ||
| | {{STDiagramCell| Frame Count}} |{{STDiagramCell| 1 + 3}} |{{STDiagramCell| 3}} |{{STDiagramCell| 5}} |{{STDiagramCell| 7}} |{{STDiagramCell| 1}} | ||
|- | |- | ||
| | {{STDiagramCell| Simplified}} |{{STDiagramCellColSpan| 2 | 7}} |{{STDiagramCell| 5}} |{{STDiagramCellColSpan | 2 | 8}} | ||
| | |||
| | |||
|} | |} | ||
</div> | |||
{| | ===== <span class="invisible-header">crhk</span> ===== | ||
| | {{MoveData | ||
| name = Crouching Roundhouse | |||
| input = 2HK / {{d}}+{{hk}} | |||
| subtitle = Crouching Heavy Kick | |||
| image = EHonda_crrh3.png | |||
| imageSize = 146x77px | |||
| caption = First hitbox. | |||
| image2 = EHonda_crrh5.png | |||
| imageSize2 = 161x75px | |||
| caption2 = Second hitbox. In case someone sneaks up on you. | |||
| data = | |||
{{AttackData-SSF2T | |||
|damage = {{tooltip|text=32[2]|hovertext=[2] Random Damage Table: -3 = 3.125%, -2 = 3.125%, -1 = 3.125%, +0 = 46.875%, +1 = 12.5%, +2 = 15.625%, +3 = 6.25%, +4 = 9.375%}} | |||
|dizzy= 5~11 | |||
|dizzytime= 130 | |||
|cancel = None | |||
|guard = Low | |||
|startup = 8 | |||
|active = 6(4)8 | |||
|recovery = 7 | |||
|total = 33 | |||
|frameAdv = Hit: Soft KD<br>Block: -3 / +7 | |||
|actrange = N/A | |||
|meter = 5/4 | |||
|description= Honda's fully rotating sweep. | |||
*Has a bit faster startup than his 6HK sweep. | |||
*Much more useful in the corner, as it allows several shenanigans such as [https://www.youtube.com/watch?v=NlT2KOGCjBo#t=08m23s walking under a throw and then hiting your opponent with its backwards hitbox] or [https://www.youtube.com/watch?v=pGV2ufeQFE0#t=00m11s timing it early so it whiffs and then using a negative edge Oicho as you recover]. | |||
*You can use this move in the corner after a Fierce Hold to crossup. This works on everyone BUT Sagat, Chun-Li, and Claw. | |||
**The secret to timing this is to walk forward until your opponent gets released from the hold, then hit 2HK as soon as they hit the wall. This sequence is cool, but it's not fool-proof since you can get hit with a reversal throw/special (though this is VERY risky) and it's easy to anticipate once you know how to defend against it (but it does give you frame advantage). | |||
*Can also be used as a safe meaty against horizontal-based reversals (Shoryukens, Chun-Li's Tenshokyaku upkicks, etc.). By hitting this move on the last few active frames on these characters (like Ryu, for example), if you're outside of their throw range they'll either whiff a Shoryuken, whiff a normal, or block. | |||
**A harder variation involves purposely missing the meaty timing by a very small amount while in Oicho range to get an Oicho coming right out of the recovery. | |||
*Sets up a built in safe jump against Sagat and Claw. Just hold up-forward after a successful knockdown, and you'll get a guaranteed safe jump unless they touch the corner or hit a breakable object. | |||
}} | |||
}} | |||
<span class="mw-customtoggle-crhk" style="color: cyan">'''Click to toggle detailed hitbox data.'''</span> | |||
<div class="mw-collapsible mw-collapsed" id="mw-customcollapsible-crhk"> | |||
{{STDiagramHeader}} | |||
{{STDiagramCell|}} |{{STDiagramImageCell| 1 | EHonda_crjab1&5_crstrng1&7_crfrc1&10_crshrt1&5_crfrwrd1&5_crrh1&7.png}} |{{STDiagramImageCell| 1 | EHonda_crrh2.png}} |{{STDiagramImageCell| 1 | EHonda_crrh3.png}} |{{STDiagramImageCell| 1 | EHonda_crrh4.png}} |{{STDiagramImageCell| 1 | EHonda_crrh5.png}} |{{STDiagramImageCell| 1 | EHonda_crrh6.png}} |{{STDiagramImageCell| 1 | EHonda_crjab1&5_crstrng1&7_crfrc1&10_crshrt1&5_crfrwrd1&5_crrh1&7.png}} | |||
|- | |- | ||
| | {{STDiagramCell| Frame Count}} |{{STDiagramCell| 1 + 3}} |{{STDiagramCell| 4}} |{{STDiagramCell| 6}} |{{STDiagramCell| 4}} |{{STDiagramCell| 8}} |{{STDiagramCell| 6}} |{{STDiagramCell| 1}} | ||
|- | |- | ||
| | {{STDiagramCell| Simplified}} |{{STDiagramCellColSpan| 2 | 8}} |{{STDiagramCell| 6}} |{{STDiagramCell| 4}} |{{STDiagramCell| 8}} |{{STDiagramCellColSpan| 2 | 7}} | ||
| | |||
| | |||
| | |||
|} | |} | ||
</div> | |||
===Jumping Normals=== | |||
===== <span class="invisible-header">njlp</span> ===== | |||
{{MoveData | |||
| name = Neutral Jumping Jab | |||
| input = 8LP / {{u}}+{{lp}} | |||
| | | subtitle = Neutral Jumping Light Punch | ||
| image = EHonda_njjab4.png | |||
| | | imageSize = 147x109px | ||
| caption = | |||
| | | data = | ||
| | {{AttackData-SSF2T | ||
|damage = {{tooltip|text=20[1]|hovertext=[1] Random Damage Table: -2 = 3.125%, -1 = 3.125%, +0 = 68.75%, +1 = 9.375%, +2 = 9.375%, +3 = 6.25%}} | |||
| | |dizzy= 1~7(-2) | ||
|dizzytime= 40 | |||
| | |cancel = None | ||
|guard = High | |||
|startup = 8 | |||
| | |active = 30 | ||
|recovery = ∞ | |||
|total = 38+∞ | |||
|frameAdv = Dependent | |||
|actrange = N/A | |||
| | |meter = 2/1 | ||
| | |description= A jumping chop. | ||
| | *Not particularly useful, but has decent reach. | ||
}} | |||
}} | |||
<span class="mw-customtoggle-njlp" style="color: cyan">'''Click to toggle detailed hitbox data.'''</span> | |||
<div class="mw-collapsible mw-collapsed" id="mw-customcollapsible-njlp"> | |||
{{STDiagramHeader}} | |||
{| | {{STDiagramCell|}} |{{STDiagramImageCell| 1 | EHonda_njjab1_djjab1&9_njstrng1_djstrng9_njfrc1&7_djfrc1&7_djfrwrd9_djrh9.png}} |{{STDiagramImageCell| 1 | EHonda_njjab2_djjab2&8_njstrng2&8_djstrng2&8.png}} |{{STDiagramImageCell| 1 | EHonda_njjab3_djjab3&7_njstrng7_djstrng7.png}} |{{STDiagramImageCell| 1 | EHonda_njjab4.png}} |{{STDiagramImageCell| 1 | EHonda_njjab5_djjab5_njstrng5_djstrng5.png}} | ||
| | |||
|- | |- | ||
| | {{STDiagramCell| Frame Count}} |{{STDiagramCell| 2}} |{{STDiagramCell| 3}} |{{STDiagramCell| 3}} |{{STDiagramCell| 30}} |{{STDiagramCell| ∞}} | ||
|- | |- | ||
| | {{STDiagramCell | Simplified}} |{{STDiagramCellColSpan| 3 | 8}} |{{STDiagramCell| 30}} |{{STDiagramCell| ∞}} | ||
|} | |} | ||
</div> | |||
===== <span class="invisible-header">djlp</span> ===== | |||
{{MoveData | |||
| name = Diagonal Jumping Jab | |||
| input = 7 or 9 LP<br>{{ub}} or {{uf}}+{{lp}} | |||
| subtitle = Diagonal Jumping Light Punch | |||
| image = EHonda_djjab4.png | |||
| imageSize = 147x109px | |||
| caption = | |||
| data = | |||
{{AttackData-SSF2T | |||
|damage = {{tooltip|text=12[0]|hovertext=[0] Random Damage Table: -2 = 3.125%, -1 = 3.125%, +0 = 78.125%, +1 = 6.25%, +2 = 6.25%, +3 = 3.125%}} | |||
|dizzy= 1~7(-2) | |||
|dizzytime= 40 | |||
|cancel = None | |||
|guard = High | |||
|actrange = N/A | |||
|startup = 5 | |||
|active = 12 | |||
|recovery = N/A | |||
|total = 2+∞ | |||
|frameAdv = Dependent | |||
|meter = 2/1 | |||
|description= A jumping chop. | |||
*Good air-to-air move thanks to the long horizontal hitbox. | |||
*Can trade or beat touch jump ins like Chun-Li's LK/MK if you've got good reflexes. | |||
*Excellent for tick throws and safe jumps. | |||
*Dictator and Blanka can duck under this move and punish you for using it. | |||
}} | |||
}} | |||
<span class="mw-customtoggle-djlp" style="color: cyan">'''Click to toggle detailed hitbox data.'''</span> | |||
<div class="mw-collapsible mw-collapsed" id="mw-customcollapsible-djlp"> | |||
'''Startup/Active:''' | |||
{ | {{STDiagramHeader}} | ||
| | {{STDiagramCell|}} |{{STDiagramImageCell| 1 | EHonda_njjab1_djjab1&9_njstrng1_djstrng9_njfrc1&7_djfrc1&7_djfrwrd9_djrh9.png}} |{{STDiagramImageCell| 1 | EHonda_njjab2_djjab2&8_njstrng2&8_djstrng2&8.png}} |{{STDiagramImageCell| 1 | EHonda_njjab3_djjab3&7_njstrng7_djstrng7.png}} |{{STDiagramImageCell| 1 | EHonda_djjab4.png}} | ||
|- | |- | ||
| | {{STDiagramCell| Frame Count}} |{{STDiagramCell| 1}} |{{STDiagramCell| 2}} |{{STDiagramCell| 2}} |{{STDiagramCell| 12}} | ||
|- | |- | ||
{{STDiagramCell| Simplified}} |{{STDiagramCellColSpan| 3 | 5}} |{{STDiagramCell| 12}} | |||
|} | |} | ||
{ | '''Recovery:''' | ||
| | {{STDiagramHeader}} | ||
{{STDiagramCell|}} |{{STDiagramImageCell| 1 | EHonda_njjab5_djjab5_njstrng5_djstrng5.png}} |{{STDiagramImageCell| 1 | EHonda_djjab6_njstrng6_djstrng6.png}} |{{STDiagramImageCell| 1 | EHonda_njjab3_djjab3&7_njstrng7_djstrng7.png}} |{{STDiagramImageCell| 1 | EHonda_njjab2_djjab2&8_njstrng2&8_djstrng2&8.png}} |{{STDiagramImageCell| 1 | EHonda_njjab1_djjab1&9_njstrng1_djstrng9_njfrc1&7_djfrc1&7_djfrwrd9_djrh9.png}} | |||
|- | |- | ||
{{STDiagramCell| Frame Count}} |{{STDiagramCell| 8}} |{{STDiagramCell| 4}} |{{STDiagramCell| 4}} |{{STDiagramCell| 4}} |{{STDiagramCell| ∞}} | |||
|- | |- | ||
{{STDiagramCell| Simplified}} |{{STDiagramCellColSpan| 5 | ∞}} | |||
|} | |} | ||
</div> | |||
===== <span class="invisible-header">njmp</span> ===== | |||
{{MoveData | |||
| name = Neutral Jumping Strong | |||
| input = 8MP / {{u}}+{{mp}} | |||
| subtitle = Neutral Jumping Medium Punch | |||
| image = EHonda_njstrng3_djstrng3.png | |||
| imageSize = 126x129px | |||
| caption = First Hitbox. | |||
| image2 = EHonda_njstrng4.png | |||
| imageSize2 = 147x109px | |||
| caption2 = Second Hitbox. | |||
| data = | |||
{{AttackData-SSF2T | |||
|damage = {{tooltip|text=22[1]|hovertext=[1] Random Damage Table: -2 = 3.125%, -1 = 3.125%, +0 = 68.75%, +1 = 9.375%, +2 = 9.375%, +3 = 6.25%}} | |||
|dizzy= 5~11 | |||
|dizzytime= 50(+10) | |||
|cancel = None | |||
|guard = High | |||
|startup = 7 | |||
|active = 16 (4/12) | |||
|recovery = ∞ | |||
|total = 23+∞ | |||
|frameAdv = Dependent | |||
|actrange = N/A | |||
|meter = 4/3 | |||
|description= Another chop, this time with windback. | |||
*First part has great priority, second part not so much. | |||
*Still a decent air to air/walldive counter. | |||
}} | |||
}} | |||
<span class="mw-customtoggle-njmp" style="color: cyan">'''Click to toggle detailed hitbox data.'''</span> | |||
<div class="mw-collapsible mw-collapsed" id="mw-customcollapsible-njmp"> | |||
'''Startup/Active:''' | |||
{ | {{STDiagramHeader}} | ||
| | {{STDiagramCell|}} |{{STDiagramImageCell| 1 | EHonda_njjab1_djjab1&9_njstrng1_djstrng9_njfrc1&7_djfrc1&7_djfrwrd9_djrh9.png}} |{{STDiagramImageCell| 1 | EHonda_njjab2_djjab2&8_njstrng2&8_djstrng2&8.png}} |{{STDiagramImageCell| 1 | EHonda_njstrng3_djstrng3.png}} |{{STDiagramImageCell| 1 |EHonda_njstrng4.png}} | ||
|- | |- | ||
| | {{STDiagramCell| Frame Count}} |{{STDiagramCell| 3}} |{{STDiagramCell| 4}} |{{STDiagramCell| 4}} |{{STDiagramCell| 12}} | ||
|- | |- | ||
{{STDiagramCell| Simplified}} |{{STDiagramCellColSpan| 2 | 7}} |{{STDiagramCellColSpan| 2 | 16}} | |||
|} | |} | ||
{ | '''Recovery''' | ||
| | {{STDiagramHeader}} | ||
{{STDiagramCell|}} |{{STDiagramImageCell| 1 | EHonda_njjab5_djjab5_njstrng5_djstrng5.png}} |{{STDiagramImageCell| 1 | EHonda_njjab2_djjab2&8_njstrng2&8_djstrng2&8.png}} |{{STDiagramImageCell| 1 | EHonda_njjab3_djjab3&7_njstrng7_djstrng7.png}} |{{STDiagramImageCell| 1 | EHonda_njjab2_djjab2&8_njstrng2&8_djstrng2&8.png}} | |||
|- | |- | ||
{{STDiagramCell| Frame Count}} |{{STDiagramCell| 8}} |{{STDiagramCell| 4}} |{{STDiagramCell| 4}} |{{STDiagramCell| ∞}} | |||
|- | |- | ||
{{STDiagramCell| Simplified}} |{{STDiagramCellColSpan| 4 | ∞}} | |||
|} | |} | ||
</div> | |||
===== <span class="invisible-header">djmp</span> ===== | |||
{| | {{MoveData | ||
| | | name = Diagonal Jumping Strong | ||
| input = 7 or 9 MP<br>{{ub}} or {{uf}}+{{mp}} | |||
| subtitle = Diagonal Jumping Medium Punch | |||
| image = EHonda_njstrng3_djstrng3.png | |||
| imageSize = 126x129px | |||
| data = | |||
{{AttackData-SSF2T | |||
|damage = {{tooltip|text=22[2]|hovertext=[2] Random Damage Table: -3 = 3.125%, -2 = 3.125%, -1 = 3.125%, +0 = 46.875%, +1 = 12.5%, +2 = 15.625%, +3 = 6.25%, +4 = 9.375%}} | |||
|dizzy= 5~11 | |||
|dizzytime= 50 | |||
|cancel = None | |||
|guard = High | |||
|actrange = N/A | |||
|startup = 7 | |||
|active = 8 | |||
|recovery = ∞ | |||
|total = 15+∞ | |||
|frameAdv = Dependent | |||
|meter = 4/3 | |||
|description= Another chop. The downwards motion doesn't have a hitbox for some reason. | |||
*Useful against Claw's walldives while jumping back. | |||
*One of your only reliable moves with a hitbox above you, which can save you in a pinch when you don't have a charge for jab Headbutt. | |||
}} | |||
}} | |||
<span class="mw-customtoggle-djmp" style="color: cyan">'''Click to toggle detailed hitbox data.'''</span> | |||
<div class="mw-collapsible mw-collapsed" id="mw-customcollapsible-djmp"> | |||
'''Startup/Active:''' | |||
{{STDiagramHeader}} | |||
{{STDiagramCell|}} |{{STDiagramImageCell| 1 | EHonda_djstrng1.png}} |{{STDiagramImageCell| 1 | EHonda_njjab2_djjab2&8_njstrng2&8_djstrng2&8.png}} |{{STDiagramImageCell| 1 | EHonda_njstrng3_djstrng3.png}} | |||
|- | |- | ||
| | {{STDiagramCell| Frame Count}} |{{STDiagramCell| 3}} |{{STDiagramCell| 4}} |{{STDiagramCell| 8}} | ||
|- | |- | ||
{{STDiagramCell| Simplified}} |{{STDiagramCellColSpan| 2 | 7}} |{{STDiagramCell| 8}} | |||
|} | |} | ||
{ | '''Recovery:''' | ||
| | {{STDiagramHeader}} | ||
{{STDiagramCell|}} |{{STDiagramImageCell| 1 | EHonda_djstrng4.png}} |{{STDiagramImageCell| 1 | EHonda_njjab5_djjab5_njstrng5_djstrng5.png}} |{{STDiagramImageCell| 1 | EHonda_djjab6_njstrng6_djstrng6.png}} |{{STDiagramImageCell| 1 | EHonda_njjab3_djjab3&7_njstrng7_djstrng7.png}} |{{STDiagramImageCell| 1 | EHonda_njjab2_djjab2&8_njstrng2&8_djstrng2&8.png}} |{{STDiagramImageCell| 1 | EHonda_njjab1_djjab1&9_njstrng1_djstrng9_njfrc1&7_djfrc1&7_djfrwrd9_djrh9.png}} | |||
|- | |- | ||
{{STDiagramCell| Frame Count}} |{{STDiagramCell| 6}} |{{STDiagramCell| 8}} |{{STDiagramCell| 4}} |{{STDiagramCell| 4}} |{{STDiagramCell| 4}}|{{STDiagramCell| ∞}} | |||
|- | |- | ||
{{STDiagramCell| Simplified}} |{{STDiagramCellColSpan| 6 | ∞}} | |||
|} | |} | ||
</div> | |||
===== <span class="invisible-header">njhp</span> ===== | |||
{| | {{MoveData | ||
| | | name = Neutral Jumping Fierce | ||
| input = 8HP / {{u}}+{{hp}} | |||
| subtitle = Neutral Jumping Heavy Punch | |||
| image = EHonda_njfrc3_djfrc3.png | |||
| imageSize = 147x112px | |||
| caption = Can be steered midair. In case of fireballs, break glass. | |||
| data = | |||
{{AttackData-SSF2T | |||
|damage = {{tooltip|text=32[2]|hovertext=[2] Random Damage Table: -3 = 3.125%, -2 = 3.125%, -1 = 3.125%, +0 = 46.875%, +1 = 12.5%, +2 = 15.625%, +3 = 6.25%, +4 = 9.375%}} | |||
|dizzy= 11~17(-1) | |||
|dizzytime= 60(+20) | |||
|cancel = None | |||
|guard = High | |||
|startup = 7 | |||
|active = 6 | |||
|recovery = ∞ | |||
|total = 13+∞ | |||
|frameAdv = Dependent | |||
|actrange = N/A | |||
|meter = 5/4 | |||
|description= Honda does a curved slap. | |||
*This move can be steered in midair, allowing for slight movement after you've left the ground. | |||
*Steering allows safe jumping over projectiles, making it an invaluable tool in his kit. | |||
}} | |||
}} | |||
<span class="mw-customtoggle-njhp" style="color: cyan">'''Click to toggle detailed hitbox data.'''</span> | |||
<div class="mw-collapsible mw-collapsed" id="mw-customcollapsible-njhp"> | |||
{{STDiagramHeader}} | |||
{{STDiagramCell|}} |{{STDiagramImageCell| 1 | EHonda_njjab1_djjab1&9_njstrng1_djstrng9_njfrc1&7_djfrc1&7_djfrwrd9_djrh9.png}} |{{STDiagramImageCell| 1 | EHonda_njfrc2&6_djfrc2&6.png}} |{{STDiagramImageCell| 1 | EHonda_njfrc3_djfrc3.png}} |{{STDiagramImageCell| 1 | EHonda_njfrc4_djfrc4.png}} |{{STDiagramImageCell| 1 | EHonda_njfrc5_djfrc5.png}} |{{STDiagramImageCell| 1 | EHonda_njfrc2&6_djfrc2&6.png}} |{{STDiagramImageCell| 1 | EHonda_njjab1_djjab1&9_njstrng1_djstrng9_njfrc1&7_djfrc1&7_djfrwrd9_djrh9.png}} | |||
|- | |- | ||
{{STDiagramCell| Frame Count}} |{{STDiagramCell| 3}} |{{STDiagramCell| 4}} |{{STDiagramCell| 6}} |{{STDiagramCell| 8}} |{{STDiagramCell| 4}} |{{STDiagramCell| 4}} |{{STDiagramCell| ∞}} | |||
|- | |- | ||
{{STDiagramCell| Simplified}} |{{STDiagramCellColSpan| 2 | 7}} |{{STDiagramCell| 6}} |{{STDiagramCellColSpan| 4 | ∞}} | |||
|} | |} | ||
</div> | |||
===== <span class="invisible-header">djhp</span> ===== | |||
{{MoveData | |||
| name = Diagonal Jumping Fierce | |||
| input = 7 or 9 HP<br>{{ub}} or {{uf}}+{{hp}} | |||
| subtitle = Diagonal Jumping Heavy Punch | |||
| image = EHonda_njfrc3_djfrc3.png | |||
| imageSize = 147x112px | |||
| caption = | |||
| data = | |||
{{AttackData-SSF2T | |||
|damage = {{tooltip|text=30[2]|hovertext=[2] Random Damage Table: -3 = 3.125%, -2 = 3.125%, -1 = 3.125%, +0 = 46.875%, +1 = 12.5%, +2 = 15.625%, +3 = 6.25%, +4 = 9.375%}} | |||
|dizzy= 3~9 | |||
|dizzytime= 40 | |||
|cancel = None | |||
|guard = High | |||
|startup = 7 | |||
|active = 8 | |||
|recovery = ∞ | |||
|total = 15+∞ | |||
|frameAdv = Dependent | |||
|actrange = N/A | |||
|meter = 5/4 | |||
|description= A sweeping slap. The diagonal version can't be steered. | |||
*Some players prefer to use this instead of diagonal Forward as their main jump-in for the extra damage. | |||
*Slightly less vertical priority than dj.mk but more horizontal priority. Also slightly less reach. Use what feels more comfortable. | |||
}} | |||
}} | |||
<span class="mw-customtoggle-djhp" style="color: cyan">'''Click to toggle detailed hitbox data.'''</span> | |||
<div class="mw-collapsible mw-collapsed" id="mw-customcollapsible-djhp"> | |||
{{STDiagramHeader}} | |||
{| | {{STDiagramCell|}} |{{STDiagramImageCell| 1 | EHonda_njjab1_djjab1&9_njstrng1_djstrng9_njfrc1&7_djfrc1&7_djfrwrd9_djrh9.png}} |{{STDiagramImageCell| 1 | EHonda_njfrc2&6_djfrc2&6.png}} |{{STDiagramImageCell| 1 | EHonda_njfrc3_djfrc3.png}} |{{STDiagramImageCell| 1 | EHonda_njfrc4_djfrc4.png}} |{{STDiagramImageCell| 1 | EHonda_njfrc5_djfrc5.png}} |{{STDiagramImageCell| 1 | EHonda_njfrc2&6_djfrc2&6.png}} |{{STDiagramImageCell| 1 | EHonda_njjab1_djjab1&9_njstrng1_djstrng9_njfrc1&7_djfrc1&7_djfrwrd9_djrh9.png}} | ||
|- | |- | ||
| | {{STDiagramCell| Frame Count}} |{{STDiagramCell| 3}} |{{STDiagramCell| 4}} |{{STDiagramCell| 8}} |{{STDiagramCell| 8}} |{{STDiagramCell| 4}} |{{STDiagramCell| 4}} |{{STDiagramCell| ∞}} | ||
|- | |- | ||
{{STDiagramCell| Simplified}} |{{STDiagramCellColSpan| 2 | 7}} |{{STDiagramCell| 8}} |{{STDiagramCellColSpan| 4 | ∞}} | |||
|} | |} | ||
</div> | |||
{| | |||
| | ===== <span class="invisible-header">njlk</span> ===== | ||
{{MoveData | |||
| name = Neutral Jumping Short | |||
| input = 8LK / {{u}}+{{lk}} | |||
| subtitle = Neutral Jumping Light Kick | |||
| image = EHonda_njshrt3.png | |||
| imageSize = 148x127px | |||
| data = | |||
{{AttackData-SSF2T | |||
|damage = {{tooltip|text=16[1]|hovertext=[1] Random Damage Table: -2 = 3.125%, -1 = 3.125%, +0 = 68.75%, +1 = 9.375%, +2 = 9.375%, +3 = 6.25%}} | |||
|dizzy= 1~7(-2) | |||
|dizzytime= 40 | |||
|cancel = None | |||
|guard = High | |||
|startup = 7 | |||
|active = 30 | |||
|recovery = ∞ | |||
|total = 37+∞ | |||
|frameAdv = Dependent | |||
|actrange = N/A | |||
|meter = 2/1 | |||
|description= A jumping kick. | |||
*Landing this move as a tick will push you out of most characters throw ranges and leave you in Oicho range for an unexpected and hard to deal with tick. | |||
**Ticking with this move is circumstantial however, likely requiring a knockdown in the corner. | |||
*Otherwise this move is hot garbage. | |||
}} | |||
}} | |||
<span class="mw-customtoggle-njlk" style="color: cyan">'''Click to toggle detailed hitbox data.'''</span> | |||
<div class="mw-collapsible mw-collapsed" id="mw-customcollapsible-njlk"> | |||
{{STDiagramHeader}} | |||
{{STDiagramCell|}} |{{STDiagramImageCell| 1 | EHonda_njshrt1&5_djfrwrd1&5_djrh1&5.png}} |{{STDiagramImageCell| 1 | EHonda_njshrt2&4_djfrwrd2&4_djrh2&4.png}} |{{STDiagramImageCell| 1 | EHonda_njshrt3.png}} |{{STDiagramImageCell| 1 | EHonda_njshrt2&4_djfrwrd2&4_djrh2&4.png}} |{{STDiagramImageCell| 1 | EHonda_njshrt1&5_djfrwrd1&5_djrh1&5.png}} | |||
|- | |- | ||
| | {{STDiagramCell| Frame Count}} |{{STDiagramCell| 3}} |{{STDiagramCell| 4}} |{{STDiagramCell| 30}} |{{STDiagramCell| 4}} |{{STDiagramCell| ∞}} | ||
|- | |- | ||
{{STDiagramCell| Simplified}} |{{STDiagramCellColSpan| 2 | 7}} |{{STDiagramCell| 30}} |{{STDiagramCellColSpan| 2 | ∞}} | |||
|} | |} | ||
</div> | |||
===== <span class="invisible-header">djlk</span> ===== | |||
{| | {{MoveData | ||
| | | name = Diagonal Jumping Short | ||
|- | | input = 7 or 9 LK<br>{{ub}} or {{uf}}+{{lk}} | ||
| | | subtitle = Diagonal Jumping Light Kick | ||
| | | image = EHonda_djshrt3.png | ||
| | | imageSize = 98x80px | ||
|- | | caption = | ||
| data = | |||
{{AttackData-SSF2T | |||
|damage = {{tooltip|text=16[1]|hovertext=[1] Random Damage Table: -2 = 3.125%, -1 = 3.125%, +0 = 68.75%, +1 = 9.375%, +2 = 9.375%, +3 = 6.25%}} | |||
|dizzy= 1~7(-2) | |||
|dizzytime= 40 | |||
|cancel = None | |||
|guard = High | |||
|startup = 7 | |||
|active = ∞ | |||
|recovery = N/A | |||
|total = 7+∞ | |||
|frameAdv = Dependent | |||
|actrange = N/A | |||
|meter = 2/1 | |||
|description= A quick jumping buttslam makes an important move move for Honda. | |||
*Small hurtbox helps with jumping over projectiles. | |||
*The hitbox has decent vertical priority and hits low to the ground, which makes it good for stuffing slides and poorly spaced anti-air sweeps. | |||
}} | |||
}} | |||
<span class="mw-customtoggle-djlk" style="color: cyan">'''Click to toggle detailed hitbox data.'''</span> | |||
<div class="mw-collapsible mw-collapsed" id="mw-customcollapsible-djlk"> | |||
{{STDiagramHeader}} | |||
{{STDiagramCell|}} |{{STDiagramImageCell| 1 | EHonda_djshrt1.png}} |{{STDiagramImageCell| 1 | EHonda_djshrt2.png}} |{{STDiagramImageCell| 1 | EHonda_djshrt3.png}} | |||
|- | |- | ||
{{STDiagramCell| Frame Count}} |{{STDiagramCell| 3}} |{{STDiagramCell| 4}} |{{STDiagramCell| ∞}} | |||
|- | |- | ||
{{STDiagramCell| Simplified}} |{{STDiagramCellColSpan| 2 | 7}} |{{STDiagramCell| ∞}} | |||
|} | |} | ||
</div> | |||
===== <span class="invisible-header">njmk</span> ===== | |||
{{MoveData | |||
| name = Jumping Forward | |||
| input = 8MK / {{u}}+{{mk}} | |||
| subtitle = Neutral Jumping Medium Kick | |||
| image = EHonda_njfrwrd3.png | |||
| imageSize = 148x124px | |||
| caption = Neutral Jump version | |||
| image2 = EHonda_djfrwrd3.png | |||
| imageSize2 = 148x127px | |||
| caption2 = Diagonal Jump version | |||
| data = | |||
{{AttackData-SSF2T | |||
|damage = {{tooltip|text=22[1]|hovertext=[1] Random Damage Table: -2 = 3.125%, -1 = 3.125%, +0 = 68.75%, +1 = 9.375%, +2 = 9.375%, +3 = 6.25%}} | |||
|dizzy= 5~11 | |||
|dizzytime= 50(+10) | |||
|cancel = None | |||
|guard = High | |||
|startup = 7 | |||
|active = 12 | |||
|recovery = ∞ | |||
|total = 19+∞ | |||
|frameAdv = Dependent | |||
|actrange = N/A | |||
|meter = 4/3 | |||
|description= Your best frontal jump-in. | |||
*The diagonal jump version has a much more vulnerable upper body hurtbox, other than that the neutral jump version behaves the exact same. | |||
*Very good vertical priority, letting you stuff a lot of anti-air normals if spaced properly. | |||
*Ok in neutral jumps as you come down, but nj.HP is often favored as it can be steered. | |||
}} | |||
}} | |||
<span class="mw-customtoggle-jmk" style="color: cyan">'''Click to toggle detailed hitbox data.'''</span> | |||
<div class="mw-collapsible mw-collapsed" id="mw-customcollapsible-jmk"> | |||
*'''Neutral Jump Version:''' | |||
{{STDiagramHeader}} | |||
{{STDiagramCell|}} |{{STDiagramImageCell| 1 | EHonda_njfrwrd1&5_njrh1&5.png}} |{{STDiagramImageCell| 1 | EHonda_njfrwrd2&4_njrh2&4.png}} |{{STDiagramImageCell| 1 | EHonda_njfrwrd3.png}} |{{STDiagramImageCell| 1 | EHonda_njfrwrd2&4_njrh2&4.png}} |{{STDiagramImageCell| 1 | EHonda_njfrwrd1&5_njrh1&5.png}} |{{STDiagramImageCell| 1 | EHonda_njfrwrd6_njrh6.png}} |{{STDiagramImageCell| 1 | EHonda_njfrwrd7_njrh7.png}} |{{STDiagramImageCell| 1 | EHonda_njfrwrd8_njrh8.png}} |{{STDiagramImageCell| 1 | EHonda_njfrwrd9_njrh9.png}} | |||
|- | |- | ||
| | {{STDiagramCell| Frame Count}} |{{STDiagramCell| 3}} |{{STDiagramCell| 4}} |{{STDiagramCell| 12}} |{{STDiagramCell| 4}} |{{STDiagramCell| 4}} |{{STDiagramCell| 4}} |{{STDiagramCell| 4}} |{{STDiagramCell| 4}} |{{STDiagramCell| ∞}} | ||
|- | |- | ||
{{STDiagramCell| Simplified}} |{{STDiagramCellColSpan| 2 | 7}} |{{STDiagramCell| 12}} |{{STDiagramCellColSpan| 6 | ∞}} | |||
|} | |} | ||
* | |||
{ | *'''Diagonal Jump Version:''' | ||
| | {{STDiagramHeader}} | ||
{{STDiagramCell|}} |{{STDiagramImageCell| 1 | EHonda_njshrt1&5_djfrwrd1&5_djrh1&5.png}} |{{STDiagramImageCell| 1 | EHonda_njshrt2&4_djfrwrd2&4_djrh2&4.png}} |{{STDiagramImageCell| 1 | EHonda_djfrwrd3.png}} |{{STDiagramImageCell| 1 |EHonda_njshrt2&4_djfrwrd2&4_djrh2&4.png}} |{{STDiagramImageCell| 1 |EHonda_njshrt1&5_djfrwrd1&5_djrh1&5.png}} |{{STDiagramImageCell| 1 |EHonda_djfrwrd6_djrh6.png}} |{{STDiagramImageCell| 1 |EHonda_djfrwrd7_djrh7.png}} |{{STDiagramImageCell| 1 |EHonda_djfrwrd8_djrh8.png}} |{{STDiagramImageCell| 1 |EHonda_njjab1_djjab1&9_njstrng1_djstrng9_njfrc1&7_djfrc1&7_djfrwrd9_djrh9.png}} | |||
|- | |- | ||
{{STDiagramCell| Frame Count}} |{{STDiagramCell| 3}} |{{STDiagramCell| 4}} |{{STDiagramCell| 12}} |{{STDiagramCell| 4}} |{{STDiagramCell| 4}} |{{STDiagramCell| 4}} |{{STDiagramCell| 4}} |{{STDiagramCell| 4}} |{{STDiagramCell| ∞}} | |||
|- | |- | ||
{{STDiagramCell| Simplified}} |{{STDiagramCellColSpan| 2 | 7}} |{{STDiagramCell| 12}} |{{STDiagramCellColSpan| 6 | ∞}} | |||
|} | |} | ||
</div> | |||
===== <span class="invisible-header">njhk</span> ===== | |||
{| | {{MoveData | ||
| | | name = Jumping Roundhouse | ||
| | | input = 8HK / {{u}}+{{hk}} | ||
| | | subtitle = Jumping Heavy Kick | ||
| | | image = EHonda_njrh3.png | ||
| | | imageSize = 148x124px | ||
| caption = Neutral Jump version | |||
| image2 = EHonda_djrh3.png | |||
| imageSize2 = 148x127px | |||
| caption2 = Diagonal jump version.<br>The developers got a lot of mileage out of this sprite. | |||
| data = | |||
{{AttackData-SSF2T | |||
|version = Neutral Jump | |||
|damage = {{tooltip|text=30[2]|hovertext=[2] Random Damage Table: -3 = 3.125%, -2 = 3.125%, -1 = 3.125%, +0 = 46.875%, +1 = 12.5%, +2 = 15.625%, +3 = 6.25%, +4 = 9.375%}} | |||
|dizzy= 11~17(-1) | |||
|dizzytime= 60(+20) | |||
|cancel = None | |||
|guard = High | |||
|startup = 7 | |||
|active = 6 | |||
|recovery = ∞ | |||
|total = 13+∞ | |||
|frameAdv = Dependent | |||
|actrange = N/A | |||
|meter = 5/4 | |||
|description= Two more jumping kicks. The neutral jump and diagonal jump versions share the same animation, but have different properties. | |||
*Trades nj.mk's better priority for better damage. | |||
*Some Honda plsyers use this over his steerable nj.HP because of its truncated hurtboxes for jumping over projectiles. Try both and see what works best for your playstyle. -x64 | |||
}} | |||
{{AttackData-SSF2T | |||
|version = Diagonal Jump | |||
|damage = {{tooltip|text=30[2]|hovertext=[2] Random Damage Table: -3 = 3.125%, -2 = 3.125%, -1 = 3.125%, +0 = 46.875%, +1 = 12.5%, +2 = 15.625%, +3 = 6.25%, +4 = 9.375%}} | |||
|dizzy= 3~9 | |||
|dizzytime= 40 | |||
|cancel = None | |||
|guard = High | |||
|startup = 7 | |||
|active = 10 | |||
|recovery = ∞ | |||
|total = 17+∞ | |||
|frameAdv = Dependent | |||
|actrange = N/A | |||
|meter = 5/4 | |||
|description= | |||
*A great crossup, usually harder to counter than a dj.mk crossup. | |||
*A critical crossup against Chun-Li, since Tenshokyaku will whiff if you space this correctly. -x64 | |||
}} | |||
}} | |||
<span class="mw-customtoggle-jhk" style="color: cyan">'''Click to toggle detailed hitbox data.'''</span> | |||
<div class="mw-collapsible mw-collapsed" id="mw-customcollapsible-jhk"> | |||
*'''Neutral Jump Version:''' | |||
{{STDiagramHeader}} | |||
{{STDiagramCell|}} |{{STDiagramImageCell| 1 | EHonda_njfrwrd1&5_njrh1&5.png}} |{{STDiagramImageCell| 1 | EHonda_njfrwrd2&4_njrh2&4.png}} |{{STDiagramImageCell| 1 | EHonda_njrh3.png}} |{{STDiagramImageCell| 1 | EHonda_njfrwrd2&4_njrh2&4.png}} |{{STDiagramImageCell| 1 | EHonda_njfrwrd1&5_njrh1&5.png}} |{{STDiagramImageCell| 1 | EHonda_njfrwrd6_njrh6.png}} |{{STDiagramImageCell| 1 | EHonda_njfrwrd7_njrh7.png}} |{{STDiagramImageCell| 1 | EHonda_njfrwrd8_njrh8.png}} |{{STDiagramImageCell| 1 | EHonda_njfrwrd9_njrh9.png}} | |||
|- | |- | ||
{{STDiagramCell| Frame Count}} |{{STDiagramCell| 3}} |{{STDiagramCell| 4}} |{{STDiagramCell| 6}} |{{STDiagramCell| 4}} |{{STDiagramCell| 4}} |{{STDiagramCell| 4}} |{{STDiagramCell| 4}} |{{STDiagramCell| 4}} |{{STDiagramCell| ∞}} | |||
|- | |- | ||
{{STDiagramCell| Simplified}} |{{STDiagramCellColSpan| 2 | 7}} |{{STDiagramCell| 6}} |{{STDiagramCellColSpan| 6 | ∞}} | |||
|} | |} | ||
* | |||
{ | *'''Diagonal Jump Version:''' | ||
| | {{STDiagramHeader}} | ||
{{STDiagramCell|}} |{{STDiagramImageCell| 1 | EHonda_njshrt1&5_djfrwrd1&5_djrh1&5.png}} |{{STDiagramImageCell| 1 | EHonda_njshrt2&4_djfrwrd2&4_djrh2&4.png}} |{{STDiagramImageCell| 1 | EHonda_djrh3.png}} |{{STDiagramImageCell| 1 |EHonda_njshrt2&4_djfrwrd2&4_djrh2&4.png}} |{{STDiagramImageCell| 1 |EHonda_njshrt1&5_djfrwrd1&5_djrh1&5.png}} |{{STDiagramImageCell| 1 |EHonda_djfrwrd6_djrh6.png}} |{{STDiagramImageCell| 1 |EHonda_djfrwrd7_djrh7.png}} |{{STDiagramImageCell| 1 |EHonda_djfrwrd8_djrh8.png}} |{{STDiagramImageCell| 1 |EHonda_njjab1_djjab1&9_njstrng1_djstrng9_njfrc1&7_djfrc1&7_djfrwrd9_djrh9.png}} | |||
|- | |- | ||
| | {{STDiagramCell| Frame Count}} |{{STDiagramCell| 3}} |{{STDiagramCell| 4}} |{{STDiagramCell| 10}} |{{STDiagramCell| 4}} |{{STDiagramCell| 4}} |{{STDiagramCell| 4}} |{{STDiagramCell| 4}} |{{STDiagramCell| 4}} |{{STDiagramCell| ∞}} | ||
|- | |- | ||
{{STDiagramCell| Simplified}} |{{STDiagramCellColSpan| 2 | 7}} |{{STDiagramCell| 10}} |{{STDiagramCellColSpan| 6 | ∞}} | |||
|} | |} | ||
</div> | |||
===Command Normals=== | ===Command Normals=== | ||
{| | |||
| | |||
| | ===== <span class="invisible-header">Knee Strike</span> ===== | ||
| | {{MoveData | ||
| | | name = Knee Strike | ||
| | | input = cl. 4 or 6MK<br>cl.{{b}} or {{f}}+{{mk}} | ||
| subtitle = Hiza Geri | |||
| image = EHonda_knee4.png | |||
| imageSize = 108x111px | |||
| | | caption = First Hit | ||
| | | image2 = EHonda_knee5.png | ||
| | | imageSize2 = 120x112px | ||
| | | caption2 = Second Hit | ||
| | | data = | ||
{{AttackData-SSF2T | |||
|damage = {{tooltip|text=26[1] + 16[1]|hovertext=[1] Random Damage Table: -2 = 3.125%, -1 = 3.125%, +0 = 68.75%, +1 = 9.375%, +2 = 9.375%, +3 = 6.25%}} | |||
|dizzy= 5~11 x 2 | |||
|dizzytime= 60 x 2 | |||
|cancel = None | |||
|guard = Mid | |||
|startup = 10 | |||
|active = 6 (3 + 3) | |||
|recovery = 7 | |||
|total = 23 | |||
|frameAdv = +5 / +8(+7) | |||
|actrange = 0~11 | |||
|meter = 4/3 x 2 | |||
|description= A two hit knee attack. | |||
*Somewhat slow. | |||
*This can be linked after a crossup if it hits very deep. | |||
*Not much use since you can't do much afterwards, and Honda has better tick options. | |||
}} | |||
}} | |||
<span class="mw-customtoggle-kneeattack" style="color: cyan">'''Click to toggle detailed hitbox data.'''</span> | |||
<div class="mw-collapsible mw-collapsed" id="mw-customcollapsible-kneeattack"> | |||
'''Startup/Active:''' | |||
{{STDiagramHeader}} | |||
{{STDiagramCell|}} |{{STDiagramImageCell| 1 | EHonda_knee1&9.png}} |{{STDiagramImageCell| 1 | EHonda_knee2&8.png}} |{{STDiagramImageCell| 1 | EHonda_knee3&7.png}} |{{STDiagramImageCell| 1 | EHonda_knee4.png}} |{{STDiagramImageCell| 1 | EHonda_knee5.png}} | |||
|- | |- | ||
{{STDiagramCell| Frame Count}} |{{STDiagramCell| 1 + 3}} |{{STDiagramCell| 3}} |{{STDiagramCell| 3}} |{{STDiagramCell| 3}} |{{STDiagramCell| 3}} | |||
|- | |- | ||
{{STDiagramCell| Simplified}} |{{STDiagramCellColSpan| 3 | 10}} |{{STDiagramCell| 3}} |{{STDiagramCell| 3}} | |||
|} | |} | ||
{ | '''Recovery:''' | ||
| | {{STDiagramHeader}} | ||
{{STDiagramCell|}} |{{STDiagramImageCell| 1 | EHonda_knee6.png}} |{{STDiagramImageCell| 1 | EHonda_knee3&7.png}} |{{STDiagramImageCell| 1 | EHonda_knee2&8.png}} |{{STDiagramImageCell| 1 | EHonda_knee1&9.png}} | |||
|- | |- | ||
{{STDiagramCell| Frame Count}} |{{STDiagramCell| 2}} |{{STDiagramCell| 2}} |{{STDiagramCell| 2}} |{{STDiagramCell| 1}} | |||
|- | |- | ||
{{STDiagramCell| Simplified}} |{{STDiagramCellColSpan| 4 | 7}} | |||
|} | |} | ||
</div> | |||
===== <span class="invisible-header">Sweep Kick</span> ===== | |||
{| | {{MoveData | ||
| | | name = Sweep Kick | ||
| input = 4 or 6HK<br>{{b}} or {{f}}+{{hk}} | |||
| | | subtitle = Harai Geri | ||
|- | | image = EHonda_sweep4.png | ||
| imageSize = 170x99px | |||
| caption = | |||
| data = | |||
| | {{AttackData-SSF2T | ||
| | |damage = {{tooltip|text=28[2]|hovertext=[2] Random Damage Table: -3 = 3.125%, -2 = 3.125%, -1 = 3.125%, +0 = 46.875%, +1 = 12.5%, +2 = 15.625%, +3 = 6.25%, +4 = 9.375%}} | ||
| | |dizzy= 5~11 | ||
| | |dizzytime= 130 | ||
| | |cancel = None | ||
| | |guard = Low | ||
|startup = 10 | |||
|active = 6 | |||
|recovery = 19 | |||
|total = 35 | |||
|frameAdv = Hit: Soft KD<br>Block: -3 | |||
|actrange = N/A | |||
|meter = 5/4 | |||
|description= Honda's command sweep, and his longest ranged normal. | |||
*You'll be using this a lot against projectile characters. Using this from max range to stop/trade with projectile attempts allows you to keep the initiative with a knockdown and get a chance to get in close. | |||
*Honda's hurtbox shifts out when the leg is extended, making it harder to use as an anti-air. | |||
*Hitting this will create a built in safe jump against Sagat and Claw, as long as they don't hit the corner or a breakable object. | |||
}} | |||
}} | |||
<span class="mw-customtoggle-sweep" style="color: cyan">'''Click to toggle detailed hitbox data.'''</span> | |||
<div class="mw-collapsible mw-collapsed" id="mw-customcollapsible-sweep"> | |||
{{STDiagramHeader}} | |||
{{STDiagramCell|}} |{{STDiagramImageCell| 1 | EHonda_sweep1&7.png}} |{{STDiagramImageCell| 1 | EHonda_sweep2&6.png}} |{{STDiagramImageCell| 1 | EHonda_sweep3&5.png}} |{{STDiagramImageCell| 1 | EHonda_sweep4.png}} |{{STDiagramImageCell| 1 | EHonda_sweep3&5.png}} |{{STDiagramImageCell| 1 | EHonda_sweep2&6.png}} |{{STDiagramImageCell| 1 | EHonda_sweep1&7.png}} | |||
|- | |- | ||
{{STDiagramCell| Frame Count}} |{{STDiagramCell| 1 + 3}} |{{STDiagramCell| 3}} |{{STDiagramCell| 3}} |{{STDiagramCell| 6}} |{{STDiagramCell| 8}} |{{STDiagramCell| 10}} |{{STDiagramCell| 1}} | |||
|- | |- | ||
{{STDiagramCell| Simplified}} |{{STDiagramCellColSpan| 3 | 10}} |{{STDiagramCell| 6}} |{{STDiagramCellColSpan| 3 | 19}} | |||
|} | |} | ||
</div> | |||
===== <span class="invisible-header">Flying Sumo Press</span> ===== | |||
{{MoveData | |||
| name = Flying Sumo Press | |||
| input = 2MK during diagonal jump<br>{{d}}+{{mk}} during diagonal jump. | |||
| subtitle = | |||
| image = EHonda_sumo3.png | |||
| imageSize = 155x101px | |||
| caption = | |||
| data = | |||
{{AttackData-SSF2T | |||
|damage = {{tooltip|text=24[2]|hovertext=[2] Random Damage Table: -3 = 3.125%, -2 = 3.125%, -1 = 3.125%, +0 = 46.875%, +1 = 12.5%, +2 = 15.625%, +3 = 6.25%, +4 = 9.375%}} | |||
|dizzy= 5~11 | |||
|dizzytime= 50(+10) | |||
|cancel = None | |||
|guard = High | |||
|startup = 7 | |||
|active = ∞ | |||
|recovery = N/A | |||
|total = 7+∞ | |||
|frameAdv = Dependent | |||
|actrange = N/A | |||
|meter = 4/3 | |||
|description= A full body slam. | |||
*Good crossup. Not much priority for frontal jumps though. | |||
}} | |||
}} | |||
<span class="mw-customtoggle-sumo" style="color: cyan">'''Click to toggle detailed hitbox data.'''</span> | |||
<div class="mw-collapsible mw-collapsed" id="mw-customcollapsible-sumo"> | |||
{ | {{STDiagramHeader}} | ||
| | {{STDiagramCell|}} |{{STDiagramImageCell| 1 | EHonda_sumo1.png}} |{{STDiagramImageCell| 1 | EHonda_sumo2.png}} |{{STDiagramImageCell| 1 | EHonda_sumo3.png}} | ||
|- | |- | ||
| | {{STDiagramCell| Frame Count}} |{{STDiagramCell| 3}} |{{STDiagramCell| 4}} |{{STDiagramCell| ∞}} | ||
|- | |- | ||
{{STDiagramCell| Simplified}} |{{STDiagramCellColSpan| 2 | 7}} |{{STDiagramCell| ∞}} | |||
|} | |} | ||
== | |||
E.Honda can throw | </div> | ||
{| | -x64 | ||
| | |||
|- | ==Throws== | ||
| | |||
| | E.Honda can throw with {{Icon-Capcom|mp}}, {{Icon-Capcom|hp}}, and {{Icon-Capcom|hk}}. He has the longest normal throw range in the game, as well as some nasty throw loops off his Fierce and Roundhouse throws. | ||
| | |||
| | {{MoveData | ||
| | | name = Rice Bale Throw | ||
|- | | input = cl. 4/6 + MP<br>cl. {{b}} or {{f}}+{{mp}} | ||
| | | subtitle = Tawara Nage | ||
| image = ssf2t_ehonda_pthrow.png | |||
| imageSize = 147x107px | |||
| caption = | |||
| data = | |||
{{AttackData-SSF2T | |||
|damage = {{Tooltip | text=32* | hovertext = 34 if behind in rounds.}} | |||
|dizzy= 7~13 | |||
|dizzytime= 100 | |||
|cancel = | |||
|guard = Grab | |||
|startup = 0 | |||
|active = 1 | |||
|recovery = Dependent | |||
|total = 1 | |||
|frameAdv = N/A | |||
|actrange = 64 (from axis)<br>36 (from throwable box) | |||
|description= Honda's one and only normal Throw. | |||
*The direction you're holding determines the direction you'll throw in. | |||
*Useful to throw characters at a corner | |||
*Can't softlock the game like Old Honda's version can. | |||
}} | |||
}} | |||
{{MoveData | |||
| name = Saba Ori | |||
| input = cl. 4/6 + HP<br>cl.{{b}} or {{f}}+{{hp}} | |||
| subtitle = | |||
| image = ssf2t_honda_phold.png | |||
| imageSize = 107x135px | |||
| caption = Hug the life out of them. | |||
| data = | |||
{{AttackData-SSF2T | |||
|damage = {{tooltip|text=24*|hovertext=26 if behind in rounds.}} + 4 x n<br>{{tooltip|text=Set amount of hits = 8|hovertext=Added/subtracted through mashing.}} | |||
|dizzy= 0 | |||
|dizzytime= 0 | |||
|cancel = | |||
|guard = Grab | |||
|startup = 0 | |||
|active = 1 | |||
|recovery = Dependent | |||
|total = 1 | |||
|frameAdv = N/A | |||
|invul = N/A | |||
|actrange = 64 (from axis)<br>36 (from throwable box) | |||
|juggle = No | |||
|description= Honda's "bear hug" hold. You'll be using this one the most. | |||
*Untechable (like all holds), does nice damage, and sets up crossup/walk under/tick shenanigans. | |||
*In the corner, you can walk under > cr.hk for a crossup, crossup with dj.mk, cr.lp into Oicho, etc. | |||
*Some characters (Boxer, Cammy, Dee Jay, Claw, and Fei Long) can only be walked under at the corner. | |||
*This grab sets up a built-in safejump/crossup against most characters. This won't work on Ryu/Ken, Sagat, and Blanka. This won't crossup against Dee Jay, Claw, and Boxer. | |||
*Both this and Honda's HK hold loops will whiff if the opponent is close to the corner. | |||
}} | |||
}} | |||
{{MoveData | |||
| name = Sekkan Keri | |||
| input = cl. 4/6 + HK<br>cl.{{b}} or{{f}}+{{hk}} | |||
| subtitle = | |||
| image = ssf2t_honda_khold.png | |||
| imageSize = 132x107px | |||
| caption = | |||
| data = | |||
{{AttackData-SSF2T | |||
|damage = {{tooltip|text=24*|hovertext=26 if behind in rounds.}} + 4 x n<br>{{tooltip|text=Set amount of hits = 7|hovertext=Added/subtracted through mashing.}} | |||
|dizzy= 0 | |||
|dizzytime= 0 | |||
|cancel = | |||
|guard = Grab | |||
|startup = 0 | |||
|active = 1 | |||
|recovery = Dependent | |||
|total = 1 | |||
|frameAdv = N/A | |||
|invul = N/A | |||
|actrange = 64 (from axis)<br>36 (from throwable box) | |||
|juggle = No | |||
|description= Honda's Heavy Kick hold. | |||
*You can start a loop against any character with this grab (unless they recover against the corner or hit a breakable object). After a successful grab, jump in with an attack (such as dj.mk) right as the grab ends, and you'll be able to repeat the tick. | |||
*This loop is not safe on any character with a 3 frame or less reversal, so don't use this against Ken/Chun-Li/Sagat/Blanka unless you know their reversal timing isn't great. | |||
*May not be a safejump against Ryu depending on how he mashes out. | |||
}} | |||
}} | |||
<span class="mw-customtoggle-throw" style="color: cyan">'''Click to toggle throwbox data.'''</span> | |||
<div class="mw-collapsible mw-collapsed" id="mw-customcollapsible-throw"> | |||
{{STDiagramHeader}} | |||
{{STDiagramImageCell| 1 6| EHonda_throwb.png}} |{{STDiagramImageCell| 1 | EHonda_throw.png}} |{{STDiagramImageCell| 1 | EHonda_throwf.png}} | |||
|} | |} | ||
</div> | |||
-x64 | |||
| | |||
| | ==Special Moves== | ||
| | |||
|- | === <span class="invisible-header">Hundred Hand Slap</span> === | ||
| | {{MoveData | ||
| | | name = Hundred Hand Slap | ||
| | | input = {{tooltip|text=Press {{Icon-Capcom|p}} Repeatedly|hovertext=Detailed Input: (Pressing a Punch button increases an invisible counter. If the button is not pressed again within 15/12/9f (Jab/Strong/Fierce) of the last press, it resets back to 0. Pressing P while the counter equals 4 during a state where the move can come out will start the move. The move will continue as long as you keep pressing the button or until the move's cycle limit is reached)}} | ||
| | | subtitle = HHS | ||
| | | image = EHonda_hhs3.png | ||
|} | | imageSize = 183x95px | ||
| caption = | |||
| image2 = EHonda_hhs4.png | |||
| imageSize2 = 143x97px | |||
| caption2 = | |||
| image3 = EHonda_hhs5.png | |||
| imageSize3 = 178x95px | |||
| caption3 = | |||
| image4 = EHonda_hhs6.png | |||
| imageSize4 = 154x95px | |||
| caption4 = | |||
| image5 = EHonda_hhs7.png | |||
| imageSize5 = 182x97px | |||
| caption5 = | |||
| image6 = EHonda_hhs8.png | |||
| imageSize6 = 142x95px | |||
| caption6 = The hundred is figurative, in most cases. | |||
| data = | |||
{{AttackData-SSF2T | |||
|version = {{Icon-Capcom|lp}} | |||
|damage = {{tooltip|text=24[1] / 22[1]|hovertext=[1] Random Damage Table: -2 = 3.125%, -1 = 3.125%, +0 = 68.75%, +1 = 9.375%, +2 = 9.375%, +3 = 6.25%}} | |||
|dizzy= 5~11 | |||
|dizzytime= 100 | |||
|cancel = None | |||
|guard = Mid / Low | |||
|startup = 5 | |||
|active = {{Tooltip | text=25 + 24* per cycle| hovertext= The last frame of some later cycles are skipped.}} | |||
|recovery = 13 | |||
|total = {{Tooltip | text=53 + 24* per cycle| hovertext= The last frame of some later cycles are skipped.}} | |||
|frameAdv = Dependent | |||
|actrange = N/A | |||
|meter = 6 | |||
|description= *Can stay active for a maximum of 164 frames. You can replicate this in Training Mode by pressing LP every 10 frames. | |||
}} | |||
{{AttackData-SSF2T | |||
|version = {{Icon-Capcom|mp}} | |||
|damage = {{tooltip|text=26[2] / 24[2]|hovertext=[2] Random Damage Table: -3 = 3.125%, -2 = 3.125%, -1 = 3.125%, +0 = 46.875%, +1 = 12.5%, +2 = 15.625%, +3 = 6.25%, +4 = 9.375%}} | |||
|dizzy= 5~11 | |||
|dizzytime= 100 | |||
|cancel = None | |||
|guard = Mid / Low | |||
|startup = 8 | |||
|active = {{Tooltip | text=13 + 12* per cycle| hovertext= The last frame of some later cycles are skipped.}} | |||
|recovery = 15 | |||
|total = {{Tooltip | text=25 + 24* per cycle| hovertext= The last frame of some later cycles are skipped.}} | |||
|frameAdv = Dependent | |||
|actrange = N/A | |||
|meter = 6 | |||
|description= *Can stay active for a maximum of 142 frames. You can replicate this in training mode by pressing MP every 10 or 9 frames. | |||
}} | |||
{{AttackData-SSF2T | |||
|version = {{Icon-Capcom|hp}} | |||
|damage = {{tooltip|text=28[3] / 26[3]|hovertext=[3] Random Damage Table: -5 = 3.125%, -4 = 3.125%, -3 = 3.125%, -2 = 3.125%, -1 = 3.125%, +0 =37.5%, +2 = 6.25%, +3 = 9.375%, +4 = 12.5%, +5 = 9.375%, +6 = 9.375%}} | |||
|dizzy= 5~11 | |||
|dizzytime= 100 | |||
|cancel = None | |||
|guard = Mid / Low | |||
|startup = 11 | |||
|active = {{Tooltip | text=13 + 12* per cycle| hovertext= The last frame of some later cycles are skipped.}} | |||
|recovery = 19 | |||
|total = {{Tooltip | text=43 + 12* per cycle| hovertext= The last frame of some later cycles are skipped.}} | |||
|frameAdv = Dependent | |||
|actrange = N/A | |||
|meter = 6 | |||
|description= *Can stay active for a maximum of 136 frames. You can replicate this in training mode by pressing HP every 9 frames. | |||
Honda unleashes a barrage of hand slaps. | |||
*Press the Punch button 4 times quickly to pull this move off. Continue mashing to keep the move going. | |||
*The move will fail if you press the button during a state where Honda can't attack (During an attack animation or a jump, for example). If you mash too fast, the move will end prematurely. (This likely won't happen unless you're REALLY good or using Turbo.) | |||
*Will never combo into itself. Once this attack hits, subsequent hitboxes will whiff until your opponent can block. | |||
*The first 3 hitboxes of each animation cycle do more damage than the last 3. | |||
*Each animation cycle loops once, each hitbox being only 1 frame. | |||
'''General Strategies''' | |||
*The LP version is good for turtling and building meter, since it doesn't move you forward. | |||
*The MP version moves you forward a little, making it great for pressure, chipping, and ticking. | |||
*The HP version moves you even farther and faster forward, making it a good attempt to get into the range of certain fireballers (such as Chun-Li), especially after a nj.Fierce. | |||
*It's recomended to stop this move early when chipping, so you can quickly recover and go for a throw or another HHS. (This goes for all versions.) | |||
*Using this after a sweep is also a good idea. | |||
}} | |||
}} | |||
<span class="mw-customtoggle-hhs" style="color: cyan">'''Click to toggle detailed hitbox data.'''</span> | |||
<div class="mw-collapsible mw-collapsed" id="mw-customcollapsible-hhs"> | |||
'''Startup:''' | |||
{{STDiagramHeader}} | |||
{{STDiagramCell|}} |{{STDiagramImageCell| 1 | EHonda_hhs1&13.png}} |{{STDiagramImageCell| 1 | EHonda_hhs2&9.png}} | |||
{ | |||
| | |||
|- | |- | ||
{{STDiagramCell| Frame Count (Jab)}} |{{STDiagramCell| 2}} |{{STDiagramCell| 3}} | |||
|- | |- | ||
{{STDiagramCell| Simplified (Jab)}} |{{STDiagramCellColSpan| 2 | 5}} | |||
|- | |- | ||
{{STDiagramCell| Frame Count (Strong)}} |{{STDiagramCell| 4}} |{{STDiagramCell| 4}} | |||
|- | |- | ||
{{STDiagramCell| Simplified (Strong)}} |{{STDiagramCellColSpan| 2 | 8}} | |||
|- | |- | ||
{{STDiagramCell| Frame Count (Fierce)}} |{{STDiagramCell| 5}} |{{STDiagramCell| 6}} | |||
|- | |- | ||
{{STDiagramCell| Simplified (Fierce)}} |{{STDiagramCellColSpan| 2 | 11}} | |||
|} | |} | ||
'''Active:''' | |||
{ | {{STDiagramHeader}} | ||
| | {{STDiagramCell|}} |{{STDiagramImageCell| 1 | EHonda_hhs3.png}} |{{STDiagramImageCell| 1 | EHonda_hhs4.png}} |{{STDiagramImageCell| 1 | EHonda_hhs5.png}} | ||
|- | |- | ||
{{STDiagramCell| Frame Count (Jab)}} |{{STDiagramCell| 4*}} |{{STDiagramCell| 4}} |{{STDiagramCell| 4}} | |||
|- | |- | ||
{{STDiagramCell| Frame Count (Strong)}} |{{STDiagramCell| 2*}} |{{STDiagramCell| 2}} |{{STDiagramCell| 2}} | |||
|- | |- | ||
{{STDiagramCell| Frame Count (Fierce)}} |{{STDiagramCell| 1*}} |{{STDiagramCell| 1}} |{{STDiagramCell| 1}} | |||
|} | |} | ||
{ | * '''NOTE: '''The first hitbox that comes out when performing this move has 1 extra active frame. | ||
| | {{STDiagramHeader}} | ||
{{STDiagramCell|}} |{{STDiagramImageCell| 1 | EHonda_hhs6.png}} |{{STDiagramImageCell| 1 | EHonda_hhs7.png}} |{{STDiagramImageCell| 1 | EHonda_hhs8.png}} | |||
|- | |- | ||
{{STDiagramCell| Frame Count (Jab)}} |{{STDiagramCell| 4}} |{{STDiagramCell| 4}} |{{STDiagramCell| 4*}} | |||
|- | |- | ||
{{STDiagramCell| Frame Count (Strong)}} |{{STDiagramCell| 2}} |{{STDiagramCell| 2}} |{{STDiagramCell| 2*}} | |||
|- | |- | ||
{{STDiagramCell| Frame Count (Fierce)}} |{{STDiagramCell| 1}} |{{STDiagramCell| 1}} |{{STDiagramCell| 1*}} | |||
|} | |} | ||
* '''NOTE 2: '''The last active frame on some animation cycles are skipped. This depends on the frequency of your button presses. | |||
{ | '''Recovery:''' | ||
| | {{STDiagramHeader}} | ||
{{STDiagramCell|}} |{{STDiagramImageCell| 1 | EHonda_hhs2&9.png}} |{{STDiagramImageCell| 1 | EHonda_hhs10&12.png}} |{{STDiagramImageCell| 1 | EHonda_hhs11.png}} |{{STDiagramImageCell| 1 | EHonda_hhs10&12.png}} |{{STDiagramImageCell| 1 | EHonda_hhs1&13.png}} | |||
|- | |- | ||
| | {{STDiagramCell| Frame Count (Jab)}} |{{STDiagramCell| 5}} |{{STDiagramCell| 2}} |{{STDiagramCell| 3}} |{{STDiagramCell| 2}} |{{STDiagramCell| 1}} | ||
|- | |- | ||
| | {{STDiagramCell| Simplified (Jab)}} |{{STDiagramCellColSpan| 5 | 13}} | ||
|- | |- | ||
| | {{STDiagramCell| Frame Count (Strong)}} |{{STDiagramCell| 7}} |{{STDiagramCell| 2}} |{{STDiagramCell| 3}} |{{STDiagramCell| 2}} |{{STDiagramCell| 1}} | ||
|- | |- | ||
| | {{STDiagramCell| Simplified (Strong)}} |{{STDiagramCellColSpan| 5 | 15}} | ||
|- | |- | ||
| | {{STDiagramCell| Frame Count (Fierce)}} |{{STDiagramCell| 8}} |{{STDiagramCell| 3}} |{{STDiagramCell| 4}} |{{STDiagramCell| 3}} |{{STDiagramCell| 1}} | ||
|- | |- | ||
| | {{STDiagramCell| Simplified (Fierce)}} |{{STDiagramCellColSpan| 5 | 19}} | ||
|} | |} | ||
</div> | |||
=== <span class="invisible-header">Sumo Headbutt</span> === | |||
{| | {{MoveData | ||
| | | name = Sumo Headbutt | ||
| input = {{tooltip|text=[4]6P / {{cb}}{{f}}+{{p}}|hovertext=Detailed Input: (Charge ←/↙/↖ for at least 60f, [7~14f] → [10/9/7f] Jab/Strong/Fierce. It is needed to wait at least 1 frame after leaving the charge direction to enter with the P button)}} | |||
| subtitle = Headbutt | |||
| image = EHonda_hb3jab.png | |||
| imageSize = 97x104px | |||
| caption = | |||
| image2 = EHonda_hb4jab.png | |||
| imageSize2 = 108x92px | |||
| caption2 = | |||
| image3 = EHonda_hb5.png | |||
| imageSize3 = 135x90px | |||
| caption3 = Jab version depicted. Dosu-koi! | |||
| data = | |||
{{AttackData-SSF2T | |||
|version = {{Icon-Capcom|lp}} | |||
|damage = {{tooltip|text=28[1]|hovertext=[1] Random Damage Table: -2 = 3.125%, -1 = 3.125%, +0 = 68.75%, +1 = 9.375%, +2 = 9.375%, +3 = 6.25%}} / {{tooltip|text=28[2]|hovertext=[2] Random Damage Table: -3 = 3.125%, -2 = 3.125%, -1 = 3.125%, +0 = 46.875%, +1 = 12.5%, +2 = 15.625%, +3 = 6.25%, +4 = 9.375%}} | |||
|dizzy= 9~15 | |||
|dizzytime= 100 | |||
|cancel = None | |||
|guard = Mid | |||
|startup = 8 | |||
|active = 28 ((3 / 3) + 22) | |||
|recovery = {{Tooltip | text=25/26| hovertext= 26 on hit, 25 on whiff.}} | |||
|total = {{Tooltip | text=61/62| hovertext= 62 on hit, 61 on whiff.}} | |||
|frameAdv = Hit: Hard KD<br>Block: -17 / -10 / -6(-7) | |||
|actrange = N/A | |||
|meter = 9 | |||
|description= *Invincible on Frames 1~11. | |||
}} | |||
{{AttackData-SSF2T | |||
|version = {{Icon-Capcom|mp}} | |||
|damage = {{tooltip|text=30[2]|hovertext=[2] Random Damage Table: -3 = 3.125%, -2 = 3.125%, -1 = 3.125%, +0 = 46.875%, +1 = 12.5%, +2 = 15.625%, +3 = 6.25%, +4 = 9.375%}} / {{tooltip|text=30[3]|hovertext=[3] Random Damage Table: -5 = 3.125%, -4 = 3.125%, -3 = 3.125%, -2 = 3.125%, -1 = 3.125%, +0 =37.5%, +2 = 6.25%, +3 = 9.375%, +4 = 12.5%, +5 = 9.375%, +6 = 9.375%}} | |||
|dizzy= 9~15 | |||
|dizzytime= 100 | |||
|cancel = None | |||
|guard = Mid | |||
|startup = 11 | |||
|active = 27 (2 + 25) | |||
|recovery = {{Tooltip | text=25/26| hovertext= 26 on hit, 25 on whiff.}} | |||
|total = {{Tooltip | text=63/64| hovertext= 64 on hit, 63 on whiff.}} | |||
|frameAdv = Hit: Hard KD<br>Block: -9 / -6(-7) | |||
|actrange = N/A | |||
|meter = 9 | |||
|description= *Invincible on Frames 1~11. | |||
}} | |||
{{AttackData-SSF2T | |||
|version = {{Icon-Capcom|hp}} | |||
|damage = {{tooltip|text=32[3]|hovertext=[3] Random Damage Table: -5 = 3.125%, -4 = 3.125%, -3 = 3.125%, -2 = 3.125%, -1 = 3.125%, +0 =37.5%, +2 = 6.25%, +3 = 9.375%, +4 = 12.5%, +5 = 9.375%, +6 = 9.375%}} / {{tooltip|text=32[4]|hovertext=[4] Random Damage Table: -5 = 6.25%, -4 = 6.25%, -3 = 3.125%, +0 = 46.875%, +4 = 6.25%, +5 = 6.25%, +6 = 15.625%, +7 = 3.125%, +8 = 6.25%}} | |||
|dizzy= 9~15 | |||
|dizzytime= 100 | |||
|cancel = None | |||
|guard = Mid | |||
|startup = 6 | |||
|active = 54 (1 + 53) | |||
|recovery = {{Tooltip | text=25/26| hovertext= 26 on hit, 25 on whiff.}} | |||
|total = {{Tooltip | text=85/86| hovertext= 86 on hit, 85 on whiff.}} | |||
|frameAdv = Hit: Hard KD<br>Block: -8 / -6(-7) | |||
|actrange = N/A | |||
|meter = 9 | |||
|description= *Invincible on Frames 1~6. | |||
Honda shouts a sumo battle cry and flies forward. | |||
*Damage and speed increase with strength. | |||
*Honda will keep going until he hits the opponent or the maximum active frames are hit. | |||
'''General Strategies''' | |||
*{{Icon-Capcom|lp}} version: | |||
**Your main defensive tool. The invincibility combines well with the excellent vertical and horizontal range, making jumping or getting in on Honda nearly impossible when he has charge. | |||
**Learn to time this move properly and matches against non-fireballers become way easier. | |||
*{{Icon-Capcom|mp}} version: | |||
**Should only really be used for positioning. An example being if you know your opponent is going to jump backwards at round start, using Strong Headbutt lands you right next to them, close to the corner. | |||
*{{Icon-Capcom|hp}} version: | |||
**Very fast, making it a great tool to safely pressure and punish mid-range mistakes (such as whiffs or opponents falling down from a jumping attack). | |||
**It also has a much better horitontal hitbox than the Jab version, making for a better anti air if your opponent is jumping in front of you rather than above you. | |||
**While you may trade with the Fierce version, you'll almost always come out on top positioning wise. | |||
**Avoid using the Firce version from full screen, especially if your opponent is near the corner. They can jump it on reaction and punish. | |||
}} | |||
}} | |||
<span class="mw-customtoggle-smash" style="color: cyan">'''Click to toggle detailed hitbox data.'''</span> | |||
<div class="mw-collapsible mw-collapsed" id="mw-customcollapsible-smash"> | |||
'''Startup:''' | |||
{{STDiagramHeader}} | |||
{{STDiagramCellBorderRight|}} |{{STDiagramCell | Jab and Strong Only}} |{{STDiagramImageCellBorderLeft| 2 | EHonda_hb1.png}} |{{STDiagramImageCellBorderRight| 2 | EHonda_hb2.png}} |{{STDiagramCell| Strong and Fierce Only}} | |||
|- | |- | ||
| | {{STDiagramCellBorderRight|}} |{{STDiagramImageCellBorderRight| 1 | EHonda_hb0jab&strng.png}} |{{STDiagramImageCellBorderRight| 1 | EHonda_hb3.png}} | ||
|- | |- | ||
| | {{STDiagramCell| Frame Count (Jab)}} |{{STDiagramCell| 1}} |{{STDiagramCell| 3}} |{{STDiagramCell| 4}} |{{STDiagramCellNull| 1}} | ||
|- | |- | ||
| | {{STDiagramCell| Simplified (Jab)}} |{{STDiagramCellColSpan| 3 | 8}} |{{STDiagramCellNull| 1}} | ||
|- | |- | ||
| | {{STDiagramCell| Frame Count (Strong)}} |{{STDiagramCell| 1}} |{{STDiagramCell| 2}} |{{STDiagramCell| 6}} |{{STDiagramCell| 2}} | ||
|- | |- | ||
| | {{STDiagramCell| Simplified (Strong)}} |{{STDiagramCellColSpan| 4 | 11}} | ||
|- | |- | ||
{{STDiagramCell| Frame Count (Fierce)}} |{{STDiagramCellNull| 1}} |{{STDiagramCell| 1}} |{{STDiagramCell| 4}} |{{STDiagramCell| 1}} | |||
|- | |- | ||
{{STDiagramCell| Simplified (Fierce)}} |{{STDiagramCellNull| 1}} |{{STDiagramCellColSpan| 3 | 6}} | |||
|} | |||
'''Active:''' | |||
*'''Jab Version:''' | |||
{{STDiagramHeader}} | |||
{{STDiagramCell|}} |{{STDiagramImageCell| 1 | EHonda_hb3jab.png}} |{{STDiagramImageCell| 1 | EHonda_hb4jab.png}} |{{STDiagramImageCell| 1 | EHonda_hb5.png}} | |||
|- | |- | ||
{{STDiagramCell| Frame Count}} |{{STDiagramCell| 3}} |{{STDiagramCell| 3}} |{{STDiagramCell| 22}} | |||
|- | |- | ||
| | {{STDiagramCell| Simplified}} |{{STDiagramCellColSpan| 2 | 6}} |{{STDiagramCell| 22}} | ||
|} | |||
*'''Strong and Fierce Version:''' | |||
{{STDiagramHeader}} | |||
{{STDiagramCell|}} |{{STDiagramImageCell| 1 | EHonda_hb4.png}} |{{STDiagramImageCell| 1 | EHonda_hb5.png}} | |||
|- | |- | ||
{{STDiagramCell| Frame Count (Strong)}} |{{STDiagramCell| 2}} |{{STDiagramCell| 25}} | |||
|- | |- | ||
| | {{STDiagramCell| Frame Count (Fierce)}} |{{STDiagramCell| 1}} |{{STDiagramCell| 53}} | ||
|} | |} | ||
'''Recovery:''' | |||
{ | {{STDiagramHeader}} | ||
| | {{STDiagramCell|}} |{{STDiagramImageCell| 1 | EHonda_hblands1.png}} |{{STDiagramImageCell| 1 | EHonda_hblands2.png}} |{{STDiagramImageCell| 1 | EHonda_hblands3.png}} |{{STDiagramImageCell| 1 | EHonda_hblands4.png}} |{{STDiagramImageCell| 1 | EHonda_hblands5.png}} |{{STDiagramImageCell| 1 | EHonda_hblands6.png}} |{{STDiagramImageCell| 1 | EHonda_hblands7.png}} | ||
|- | |- | ||
{{STDiagramCell| Frame Count}} |{{STDiagramCell| 4}} |{{STDiagramCell| 4}} |{{STDiagramCell| 4}} |{{STDiagramCell| 8/9}} |{{STDiagramCell| 2}} |{{STDiagramCell| 2}} |{{STDiagramCell| 1}} | |||
|- | |- | ||
{{STDiagramCell| Simplified}} |{{STDiagramCellColSpan| 7 | 25/26}} | |||
|} | |} | ||
</div> | |||
=== <span class="invisible-header">Sumo Smash</span> === | |||
{{MoveData | |||
| | | name = Sumo Smash | ||
| input = {{tooltip|text=[2]8K / {{cd}}{{u}}+{{k}}|hovertext=Detailed Input: (Charge ↓/↙/↘ for at least 60f, [7~14f] ↑/↖/↗ [10/9/7/5f] Short/Forward/Roundhouse/any K if you are at a jumpable state. It is needed to wait at least 1 frame after leaving the charge direction to enter with the K button)}} | |||
| subtitle = Buttslam | |||
| image = EHonda_bdrop7.png | |||
| imageSize = 155x108px | |||
| caption = Rising Hitbox (Short and Forward Only) | |||
| image2 = EHonda_bdrop13.png | |||
| imageSize2 = 98x101px | |||
| caption2 = Falling Hitbox. | |||
| data = | |||
{{AttackData-SSF2T | |||
|version = {{Icon-Capcom|lk}} | |||
|damage = {{tooltip|text=24[2]|hovertext=[2] Random Damage Table: -3 = 3.125%, -2 = 3.125%, -1 = 3.125%, +0 = 46.875%, +1 = 12.5%, +2 = 15.625%, +3 = 6.25%, +4 = 9.375%}} | |||
|dizzy= 9~15 / 2~8 | |||
|dizzytime= 100 / 90 | |||
|cancel = None | |||
|guard = Mid / High | |||
|startup = 19 | |||
|active = 9(13)12 | |||
|recovery = 5 | |||
|total = 58 | |||
|frameAdv = Dependent | |||
|actrange = N/A | |||
|meter = 9 | |||
|description= | |||
*Invincible on frames 1~21. | |||
}} | |||
{{AttackData-SSF2T | |||
|version = {{Icon-Capcom|mk}} | |||
|damage = {{tooltip|text=28[2]|hovertext=[2] Random Damage Table: -3 = 3.125%, -2 = 3.125%, -1 = 3.125%, +0 = 46.875%, +1 = 12.5%, +2 = 15.625%, +3 = 6.25%, +4 = 9.375%}} | |||
|dizzy= 9~15 | |||
|dizzytime= 100 | |||
|cancel = None | |||
|guard = Mid / High | |||
|startup = 19 | |||
|active = 9(13)12 | |||
|recovery = 5 | |||
|total = 58 | |||
|frameAdv = Dependent | |||
|actrange = N/A | |||
|meter = 9 | |||
|description= | |||
*Invincible on frames 1~19. | |||
}} | |||
{{AttackData-SSF2T | |||
|version = {{Icon-Capcom|hk}} | |||
|damage = {{tooltip|text=32[2]|hovertext=[2] Random Damage Table: -3 = 3.125%, -2 = 3.125%, -1 = 3.125%, +0 = 46.875%, +1 = 12.5%, +2 = 15.625%, +3 = 6.25%, +4 = 9.375%}} | |||
|dizzy= 9~15 | |||
|dizzytime= 100 | |||
|cancel = None | |||
|guard = High | |||
|startup = 42 | |||
|active = 15 | |||
|recovery = 6 | |||
|total = 63 | |||
|frameAdv = Dependent | |||
|actrange = N/A | |||
|meter = 9 | |||
|description=*Invincible on frames 1~21. | |||
<br> | |||
Honda leaps into the air and comes crashing down with the weight of a piano. | |||
*Short and Forward have a rising hitbox, while Roundhouse does not. | |||
*Rising part hits mid, while the falling part hits high. Not that this move hits most crouching opponents anyway. | |||
'''General Strategies''' | |||
*cr.lk > Smash is a good pressure/mixup tool. Just make sure to vary your strengths and mix in some ticks. | |||
*The Short version serves as both a decent anti-air and is useful to get over projectiles from far away. It won't pass through Hadoukens and Kikoukens though. | |||
*The Short version can also hit a crouch blocking Deejay during the rising part. | |||
*Also a good mixup for Oicho setups. | |||
*The Forward version can be used to stuff projectile attempts at the right distance. | |||
*It also doubles as a risky way to get over projectiles. (It can be punished by Shoto sweeps and Guile/Dee Jay's jumping attacks.) | |||
*Be careful about using both Short and Forward as anti-airs. The long startup frames give your opponent time to block the rising hit when standing, and leaves an opportunity for them to punish as you fall down. | |||
*The Roundhouse version is mainly for crossups, mixups, and setting ticks rather than as a way to avoid projectiles, since it's very easily punishable. | |||
* | |||
}} | |||
}} | |||
<span class="mw-customtoggle-smash" style="color: cyan">'''Click to toggle detailed hitbox data.'''</span> | |||
<div class="mw-collapsible mw-collapsed" id="mw-customcollapsible-smash"> | |||
*'''Short and Forward Versions:''' | |||
'''Startup:''' | |||
{{STDiagramHeader}} | |||
{{STDiagramCell|}} |{{STDiagramImageCell| 1 | EHonda_bdrop1.png}} |{{STDiagramImageCell| 1 | EHonda_bdrop2.png}} |{{STDiagramImageCell| 1 | EHonda_bdrop3.png}} |{{STDiagramImageCell| 1 | EHonda_bdrop4.png}} |{{STDiagramImageCell| 1 | EHonda_bdrop5.png}} |{{STDiagramImageCell| 1 | EHonda_bdrop6.png}} | |||
|- | |||
{{STDiagramCell| Frame Count (Short)}} |{{STDiagramCell| 1}} |{{STDiagramCell| 4}} |{{STDiagramCell| 5}} |{{STDiagramCell| 2}} |{{STDiagramCell| 5}} |{{STDiagramCell| 4}} | |||
|- | |- | ||
| | {{STDiagramCell| Simplified (Short)}} |{{STDiagramCellColSpan| 6 | 21}} | ||
|- | |- | ||
{{STDiagramCell| Frame Count (Forward)}} |{{STDiagramCell| 1 }} |{{STDiagramCell| 3}} |{{STDiagramCell| 4}} |{{STDiagramCell| 2}} |{{STDiagramCell| 5}} |{{STDiagramCell| 4}} | |||
|- | |- | ||
{{STDiagramCell| Simplified (Forward)}} |{{STDiagramCellColSpan| 6 | 19}} | |||
|} | |||
'''Active + Recovery:''' | |||
{{STDiagramHeader}} | |||
{{STDiagramCell|}} |{{STDiagramImageCell| 1 | EHonda_bdrop7.png}} |{{STDiagramImageCell| 1 | EHonda_bdrop8to10anm.gif}} |{{STDiagramImageCell| 1 | EHonda_bdrop11.png}} |{{STDiagramImageCell| 1 | EHonda_bdrop12.png}} |{{STDiagramImageCell| 1 | EHonda_bdrop13.png}} |{{STDiagramImageCell| 1 | EHonda_bdrop14.png}} | |||
|- | |- | ||
{{STDiagramCell| Frame Count (Short)}} |{{STDiagramCell| 9}} |{{STDiagramCell| 9 (3 + 3 + 3)}} |{{STDiagramCell| 2}} |{{STDiagramCell| 2}} |{{STDiagramCell| 10}} |{{STDiagramCell| 4}} | |||
|- | |- | ||
{{STDiagramCell| Simplified (Short)}} |{{STDiagramCell| 9}} |{{STDiagramCellColSpan| 3 | 13}} |{{STDiagramCell| 10}} |{{STDiagramCell| 4}} | |||
|- | |- | ||
{{STDiagramCell| Frame Count (Forward)}} |{{STDiagramCell| 9}} |{{STDiagramCell| 9 (3 + 3 + 3)}} |{{STDiagramCell| 2}} |{{STDiagramCell| 2}} |{{STDiagramCell| 12}} |{{STDiagramCell| 5}} | |||
|- | |- | ||
{{STDiagramCell| Simplified (Forward)}} |{{STDiagramCell| 9}} |{{STDiagramCellColSpan| 3 | 13}} |{{STDiagramCell| 12}} |{{STDiagramCell| 5}} | |||
|} | |} | ||
* | |||
{ | *'''Roundhouse Version:''' | ||
| | '''Startup:''' | ||
{{STDiagramHeader}} | |||
{{STDiagramCell|}} |{{STDiagramImageCell| 1 | EHonda_bdrop1.png}} |{{STDiagramImageCell| 1 | EHonda_bdrop2.png}} |{{STDiagramImageCell| 1 | EHonda_bdrop3.png}} |{{STDiagramImageCell| 1 | EHonda_bdrop4.png}} |{{STDiagramImageCell| 1 | EHonda_bdrop5.png}} |{{STDiagramImageCell| 1 | EHonda_bdrop6.png}} | |||
|- | |- | ||
| | {{STDiagramCell| Frame Count}} |{{STDiagramCell| 1 }} |{{STDiagramCell| 3}} |{{STDiagramCell| 4}} |{{STDiagramCell| 2}} |{{STDiagramCell| 4}} |{{STDiagramCell| 4}} | ||
|- | |- | ||
| | {{STDiagramCell| Simplified}} |{{STDiagramCellColSpan| 6 | 18... (42)}} | ||
|} | |||
{{STDiagramHeader}} | |||
{{STDiagramCell|}} |{{STDiagramImageCell| 1 | EHonda_bdrop7rh.png}} |{{STDiagramImageCell| 1 | EHonda_bdrop8to10anm.gif}} |{{STDiagramImageCell| 1 | EHonda_bdrop11.png}} |{{STDiagramImageCell| 1 | EHonda_bdrop12.png}} | |||
|- | |- | ||
| | {{STDiagramCell| Frame Count}} |{{STDiagramCell| 11}} |{{STDiagramCell| 9 (3 + 3 + 3)}} |{{STDiagramCell| 2}} |{{STDiagramCell| 2}} | ||
|- | |- | ||
| | {{STDiagramCell| Simplified}} |{{STDiagramCellColSpan| 4 | ...24 (42)}} | ||
|} | |||
'''Active/Recovery:''' | |||
{{STDiagramHeader}} | |||
{{STDiagramCell|}} |{{STDiagramImageCell| 1 | EHonda_bdrop13.png}} |{{STDiagramImageCell| 1 | EHonda_bdrop14.png}} | |||
|- | |- | ||
| | {{STDiagramCell| Frame Count}} |{{STDiagramCell| 15}} |{{STDiagramCell| 6}} | ||
|} | |||
</div> | |||
=== <span class="invisible-header">Oicho Throw</span> === | |||
{{MoveData | |||
| name = Oicho Throw | |||
| input = {{Tooltip| text= 6324P<br>{{qcfd}}{{b}} + {{p}} | hovertext= Detailed Input: (→ [7~14f] ↘ [7~14f] ↓ [7~14f] ←/↙/↖ [SSF2T: ∞f / HSF2: 10/9/7f] Jab/Strong/Fierce}} | |||
| subtitle = | |||
| image = ssf2t_honda_oicho.png | |||
| imageSize = 137x135px | |||
| caption = Who needs shading with mixups like these? | |||
| data = | |||
{{AttackData-SSF2T | |||
|damage = {{lp}}: {{tooltip|text=16[1] + 28[1]|hovertext=[1] Random Damage Table: -2 = 3.125%, -1 = 3.125%, +0 = 68.75%, +1 = 9.375%, +2 = 9.375%, +3 = 6.25%}}<br>{{mp}}: {{tooltip|text=18[1] + 30[1]|hovertext=[1] Random Damage Table: -2 = 3.125%, -1 = 3.125%, +0 = 68.75%, +1 = 9.375%, +2 = 9.375%, +3 = 6.25%}}<br>{{hp}}: {{tooltip|text=20[1] + 32[1]|hovertext=[1] Random Damage Table: -2 = 3.125%, -1 = 3.125%, +0 = 68.75%, +1 = 9.375%, +2 = 9.375%, +3 = 6.25%}} | |||
|dizzy= 7~13 x 2 | |||
|dizzytime= 100 x 2 | |||
|cancel = | |||
|guard = Grab | |||
|startup = 0 | |||
|active = 1 | |||
|recovery = Dependent | |||
|total = 1 | |||
|frameAdv = Dependent | |||
|actrange = N/A | |||
|meter = 12 | |||
|description= Honda slams his opponent to the ground, then follows up with a buttslam. | |||
*Honda's main offensive weapon. Easy to tick into, great damage, high dizzy. | |||
*You can Negative Edge this move to create a command grab with essentially 0 recovery frames. | |||
*Affected by the Input Storing Glitch. You can hold ←, ↙ or ↖ as long as you want before performing the move. | |||
*The Input Storing Glitch allows this move to be a powerful defensive tool as well. (See Strategies for more info.) | |||
**'''NOTE:''' The Input Storing Glitch was fixed in Hyper Street Fighter 2. An alternate version of Honda with the glitch restored can be selected by holding Start on Version Select, selecting the Super Turbo/Super X version, and then picking Honda. | |||
}} | |||
}} | |||
<span class="mw-customtoggle-oicho" style="color: cyan">'''Click to toggle detailed throwbox data.'''</span> | |||
<div class="mw-collapsible mw-collapsed" id="mw-customcollapsible-oicho"> | |||
{{STDiagramHeader}} | |||
{{STDiagramImageCell| 1 |EHonda_oicho.png}} |{{STDiagramImageCell| 1 | EHonda_oichocr.png}} | |||
|} | |||
</div> | |||
==Super Combo== | |||
{{MoveData | |||
| name = Super Killer Head Ram | |||
| input = {{Tooltip | text=[4]646P<br>{{cb}}{{f}}{{b}}{{f}} + {{p}} | hovertext = Detailed Input: (Charge ←/↙/↖ for at least 60f, [7~14f] →/↘/↗ [7~14f] ←/↙/↖ [7~14f] →/↘/↗ →/↘/↗ [SSF2T: ∞f / HSF2: 13f] P)}} | |||
| subtitle = | |||
| image = EHonda_super4.png | |||
| imageSize = 111x96px | |||
| caption = | |||
| image2 = EHonda_super5.png | |||
| imageSize2 = 137x90px | |||
| caption2 = | |||
| image3 = EHonda_super11.png | |||
| imageSize3 = 118x96px | |||
| caption3 = | |||
| image4 = EHonda_super12.png | |||
| imageSize4 = 135x90px | |||
| caption4 = It's Super Killer, but you're the one who's probably getting killed. | |||
| data = | |||
{{AttackData-SSF2T | |||
|damage = {{tooltip|text=20[2]|hovertext=[2] Random Damage Table: -3 = 3.125%, -2 = 3.125%, -1 = 3.125%, +0 = 46.875%, +1 = 12.5%, +2 = 15.625%, +3 = 6.25%, +4 = 9.375%}} x 4 | |||
|dizzy= 0~4 x 4 | |||
|dizzytime= 20 x 4 | |||
|cancel = None | |||
|guard = Mid | |||
|startup = {{Tooltip | text=6 | hovertext = Plus 18 frames of Super flash.}} | |||
|active = 1 + ∞(7)1 + ∞ | |||
|recovery = 25 | |||
|total = | |||
|frameAdv = -13 (Second Attack)/ {{Tooltip| text = Hard Knockdown*| hovertext = Will not knock down if the first hit doesn't result in a gut reel animation.}} | |||
|actrange = N/A | |||
|description= Honda brings out the big guns: One of the worst Super Combos in the game. | |||
*Affected by the Input Storing glitch. The second towards input can be held as long as you need before performing the move. | |||
**'''NOTE:''' The Input Storing Glitch was fixed in Hyper Street Fighter 2. An alternate version of Honda with the glitch restored can be selected by holding Start on Version Select, selecting the Super Turbo/Super X version, and then picking Honda. | |||
*Invincible on frames 1-7. Honda only has 1 invincible hitbox frame, compared to the 3 on his jab Headbutt. | |||
*Extremely unsafe on block (Some characters can DP after blocking the first hit, others can punish after blocking both). | |||
*If used at point blank range, this move will occasionally shoot straight through your opponent. | |||
*The second hit will occasionally miss, seemingly at random. | |||
*Can go through projectiles. | |||
*Will not knock down if the first hit results in a "gut reel" hitstun animation. This is obviously a downside in most cases, but it can be an occasional upside since you're right in Oicho range. | |||
'''General Strategies''' | |||
*You can store the super motion to use as a walking anti-air. This one frame is still a lot larger than Jab Headbutt's hitbox, letting you catch several things that a regular Jab Headbutt can't catch. | |||
}} | |||
}} | |||
<span class="mw-customtoggle-oniheadbutt" style="color: cyan">'''Click to toggle detailed hitbox data.'''</span> | |||
<div class="mw-collapsible mw-collapsed" id="mw-customcollapsible-oniheadbutt"> | |||
{{STDiagramHeader}} | |||
{{STDiagramCell|}} |{{STDiagramImageCell| 1 | EHonda_super1.png}} |{{STDiagramImageCell| 1 | EHonda_super2.png}} |{{STDiagramImageCell| 1 | EHonda_super3.png}} |{{STDiagramImageCell| 1 | EHonda_super4.png}} |{{STDiagramImageCell| 1 | EHonda_super5.png}} | |||
|- | |- | ||
{{STDiagramCell| Frame Count}} |{{STDiagramCell| 1}} |{{STDiagramCell| [18] + 4}} |{{STDiagramCell| 1}} |{{STDiagramCell| 1}} |{{STDiagramCell| ∞}} | |||
|- | |- | ||
| | {{STDiagramCell | Simplified}} |{{STDiagramCellColSpan| 3 | 6}} |{{STDiagramCell| 1}} |{{STDiagramCell| ∞}} | ||
|} | |||
{{STDiagramHeader}} | |||
{{STDiagramCell|}} |{{STDiagramImageCell| 1 | EHonda_super6&13_superlands1.png}} |{{STDiagramImageCell| 1 | EHonda_super7&14_superlands2.png}} |{{STDiagramImageCell| 1 | EHonda_super8&15_superlands3.png}} |{{STDiagramImageCell| 1 | EHonda_super9.png}} |{{STDiagramImageCell| 1 | EHonda_super10.png}} |{{STDiagramImageCell| 1 | EHonda_super11.png}} |{{STDiagramImageCell| 1 | EHonda_super12.png}} | |||
|- | |- | ||
{{STDiagramCell| Frame Count}} |{{STDiagramCell| 1}} |{{STDiagramCell| 1}} |{{STDiagramCell| 1}} |{{STDiagramCell| 3}} |{{STDiagramCell| 1}} |{{STDiagramCell| 1}} |{{STDiagramCell| ∞}} | |||
|- | |- | ||
| | {{STDiagramCell| Simplified}} |{{STDiagramCellColSpan| 5 | 7}} |{{STDiagramCell| 1}} |{{STDiagramCell| ∞}} | ||
|} | |||
'''Recovery/Knockback:''' | |||
{{STDiagramHeader}} | |||
{{STDiagramCell|}} |{{STDiagramImageCell| 1 | EHonda_super6&13_superlands1.png}} |{{STDiagramImageCell| 1 | EHonda_super7&14_superlands2.png}} |{{STDiagramImageCell| 1 | EHonda_super8&15_superlands3.png}} |{{STDiagramImageCell| 1 | EHonda_super16_superlands4.png}} |{{STDiagramImageCell| 1 | EHonda_super17_superlands5.png}} |{{STDiagramImageCell| 1 | EHonda_super18_superlands6.png}} |{{STDiagramImageCell| 1 | EHonda_super19_superlands7.png}} | |||
|- | |- | ||
{{STDiagramCell| Frame Count}} |{{STDiagramCell| 4}} |{{STDiagramCell| 4}} |{{STDiagramCell| 4}} |{{STDiagramCell| 8}} |{{STDiagramCell| 2}} |{{STDiagramCell| 2}} |{{STDiagramCell| 1}} | |||
|- | |- | ||
{{STDiagramCell| Simplified}} |{{STDiagramCellColSpan| 7 | 25}} | |||
|} | |} | ||
</div> | |||
<b> | |||
{| | ==Misc Animations== | ||
| | ====Jump Animations==== | ||
<!-- | |||
*<b>Neutral/Back Jump:</b> | |||
{{STDiagramHeader}} | |||
{{STDiagramCell|}} |{{STDiagramImageCell| 1 | EHonda_bj1_nj1_fj1.png}} |{{STDiagramImageCell| 1 | EHonda_bj2_nj2_fj2.png}} |{{STDiagramImageCell| 1 | EHonda_bj3_nj3_fj3.png}} |{{STDiagramImageCell| 1 | EHonda_bj4_nj4_fj4.png}} |{{STDiagramImageCell| 1 | EHonda_bj5&11_nj5&11.png}} |{{STDiagramImageCell| 1 | EHonda_bj6&10_nj6&10.png}} |{{STDiagramImageCell| 1 | EHonda_bj7&9_nj7&9.png}} |{{STDiagramImageCell| 1 | EHonda_bj8_nj8.png}} |{{STDiagramImageCell| 1 | EHonda_bj7&9_nj7&9.png}} |{{STDiagramImageCell| 1 | EHonda_bj6&10_nj6&10.png}} |{{STDiagramImageCell| 1 | EHonda_bj5&11_nj5&11.png}} |{{STDiagramImageCell| 1 | EHonda_bj12_nj12.png}} |{{STDiagramImageCell| 1 | EHonda_bj13_nj13_fj12.png}} | |||
|- | |- | ||
| | {{STDiagramCell| Frame Count (Neutral)}} |{{STDiagramCell| 2}} |{{STDiagramCell| 2}} |{{STDiagramCell| 1}} |{{STDiagramCell| 1}} |{{STDiagramCell| 10}} |{{STDiagramCell| 5}} |{{STDiagramCell| 5}} |{{STDiagramCell| 5}} |{{STDiagramCell| 5}} |{{STDiagramCell| 5}} |{{STDiagramCell| 8}} |{{STDiagramCell| 1}} |{{STDiagramCell| 7*}} | ||
|- | |- | ||
| | {{STDiagramCell| Simplified (Neutral)}} |{{STDiagramCellColSpan| 3 | 5}} |{{STDiagramCell| 1}} |{{STDiagramCellColSpan| 7 | 43}} |{{STDiagramCell| 1}} |{{STDiagramCell| 7*}} | ||
|- | |- | ||
| | {{STDiagramCell| Frame Count (Back)}} |{{STDiagramCell| 2}} |{{STDiagramCell| 2}} |{{STDiagramCell| 1}} |{{STDiagramCell| 1}} |{{STDiagramCell| 10}} |{{STDiagramCell| 5}} |{{STDiagramCell| 5}} |{{STDiagramCell| 5}} |{{STDiagramCell| 5}} |{{STDiagramCell| 5}} |{{STDiagramCell| 8}} |{{STDiagramCell| 1}} |{{STDiagramCell| 7*}} | ||
|- | |- | ||
| | {{STDiagramCell| Simplified (Back)}} |{{STDiagramCellColSpan| 3 | 5}} |{{STDiagramCell| 1}} |{{STDiagramCellColSpan| 7 | 43}} |{{STDiagramCell| 1}} |{{STDiagramCell| 7*}} | ||
|} | |||
*<b>Forward Jump:</b> | |||
{{STDiagramHeader}} | |||
{{STDiagramCell|}} |{{STDiagramImageCell| 1 | EHonda_bj1_nj1_fj1.png}} |{{STDiagramImageCell| 1 | EHonda_bj2_nj2_fj2.png}} |{{STDiagramImageCell| 1 | EHonda_bj3_nj3_fj3.png}} |{{STDiagramImageCell| 1 | EHonda_bj4_nj4_fj4.png}} |{{STDiagramImageCell| 1 | EHonda_fj5.png}} |{{STDiagramImageCell| 1 | EHonda_fj6.png}} |{{STDiagramImageCell| 1 | EHonda_fj7.png}} |{{STDiagramImageCell| 1 | EHonda_fj8.png}} |{{STDiagramImageCell| 1 | EHonda_fj9.png}} |{{STDiagramImageCell| 1 | EHonda_fj10.png}} |{{STDiagramImageCell| 1 | EHonda_fj11.png}} |{{STDiagramImageCell| 1 | EHonda_bj13_nj13_fj12.png}} | |||
|- | |- | ||
| | {{STDiagramCell| Frame Count}} |{{STDiagramCell| 2}} |{{STDiagramCell| 2}} |{{STDiagramCell| 1}} |{{STDiagramCell| 1}} |{{STDiagramCell| 10}} |{{STDiagramCell| 6}} |{{STDiagramCell| 4}} |{{STDiagramCell| 4}} |{{STDiagramCell| 6}} |{{STDiagramCell| 12}} |{{STDiagramCell| 1}} |{{STDiagramCell| 7*}} | ||
|- | |- | ||
| | {{STDiagramCell| Simplified}} |{{STDiagramCellColSpan| 3 | 5}} |{{STDiagramCell| 1}} |{{STDiagramCellColSpan| 6 | 42}} |{{STDiagramCell| 1}} |{{STDiagramCell| 7*}} | ||
| | |||
| | |||
|} | |} | ||
--> | |||
*<b>Prejump:</b> | |||
{{STDiagramHeader}} | |||
{{STDiagramCell|}} |{{STDiagramImageCell| 1 | EHonda_bj1_nj1_fj1.png}} |{{STDiagramImageCell| 1 | EHonda_bj2_nj2_fj2.png}} |{{STDiagramImageCell| 1 | EHonda_bj3_nj3_fj3.png}} | |||
*<b> | |||
{| | |||
| | |||
|- | |- | ||
{{STDiagramCell| Frame Count}} |{{STDiagramCell| 2}} |{{STDiagramCell| 2}} |{{STDiagramCell| 1}} | |||
|- | |- | ||
{{STDiagramCell| Simplified}} |{{STDiagramCellColSpan| 3 | 5}} | |||
|} | |} | ||
{| | *<b>Neutral/Back Jump, Airborne + Landing:</b> | ||
| | {{STDiagramHeader}} | ||
{{STDiagramCell|}} |{{STDiagramImageCell| 1 | EHonda_bj4_nj4_fj4.png}} |{{STDiagramImageCell| 1 | EHonda_bj5&11_nj5&11.png}} |{{STDiagramImageCell| 1 | EHonda_bj6&10_nj6&10.png}} |{{STDiagramImageCell| 1 | EHonda_bj7&9_nj7&9.png}} |{{STDiagramImageCell| 1 | EHonda_bj8_nj8.png}} |{{STDiagramImageCell| 1 | EHonda_bj7&9_nj7&9.png}} |{{STDiagramImageCell| 1 | EHonda_bj6&10_nj6&10.png}} |{{STDiagramImageCell| 1 | EHonda_bj5&11_nj5&11.png}} |{{STDiagramImageCell| 1 | EHonda_bj12_nj12.png}} |{{STDiagramImageCell| 1 | EHonda_bj13_nj13_fj12.png}} | |||
|- | |- | ||
{{STDiagramCell| Frame Count (Neutral)}} |{{STDiagramCell| 1}} |{{STDiagramCell| 10}} |{{STDiagramCell| 5}} |{{STDiagramCell| 5}} |{{STDiagramCell| 5}} |{{STDiagramCell| 5}} |{{STDiagramCell| 5}} |{{STDiagramCell| 8}} |{{STDiagramCell| 1}} |{{STDiagramCell| 7*}} | |||
|- | |- | ||
{{STDiagramCell| Simplified (Neutral)}} |{{STDiagramCell| 1}} |{{STDiagramCellColSpan| 7 | 43}} |{{STDiagramCell| 1}} |{{STDiagramCell| 7*}} | |||
|} | |||
|- | |- | ||
{{STDiagramCell| Frame Count (Back)}} |{{STDiagramCell| 1}} |{{STDiagramCell| 10}} |{{STDiagramCell| 5}} |{{STDiagramCell| 5}} |{{STDiagramCell| 5}} |{{STDiagramCell| 5}} |{{STDiagramCell| 5}} |{{STDiagramCell| 8}} |{{STDiagramCell| 1}} |{{STDiagramCell| 7*}} | |||
|- | |- | ||
| | {{STDiagramCell| Simplified (Back)}} |{{STDiagramCell| 1}} |{{STDiagramCellColSpan| 7 | 43}} |{{STDiagramCell| 1}} |{{STDiagramCell| 7*}} | ||
|} | |} | ||
*<b> | *<b>Forward Jump, Airborne + Landing:</b> | ||
{| | {{STDiagramHeader}} | ||
| | {{STDiagramCell|}} |{{STDiagramImageCell| 1 | EHonda_bj4_nj4_fj4.png}} |{{STDiagramImageCell| 1 | EHonda_fj5.png}} |{{STDiagramImageCell| 1 | EHonda_fj6.png}} |{{STDiagramImageCell| 1 | EHonda_fj7.png}} |{{STDiagramImageCell| 1 | EHonda_fj8.png}} |{{STDiagramImageCell| 1 | EHonda_fj9.png}} |{{STDiagramImageCell| 1 | EHonda_fj10.png}} |{{STDiagramImageCell| 1 | EHonda_fj11.png}} |{{STDiagramImageCell| 1 | EHonda_bj13_nj13_fj12.png}} | ||
|- | |- | ||
{{STDiagramCell| Frame Count}} |{{STDiagramCell| 1}} |{{STDiagramCell| 10}} |{{STDiagramCell| 6}} |{{STDiagramCell| 4}} |{{STDiagramCell| 4}} |{{STDiagramCell| 6}} |{{STDiagramCell| 12}} |{{STDiagramCell| 1}} |{{STDiagramCell| 7*}} | |||
|- | |- | ||
| | {{STDiagramCell| Simplified}} |{{STDiagramCell| 1}} |{{STDiagramCellColSpan| 6 | 42}} |{{STDiagramCell| 1}} |{{STDiagramCell| 7*}} | ||
|} | |} | ||
Honda | Honda has the slowest prejump animation on the game. This is part of the reason why he suffers so much to get in vs projectile zoners. With that said, knowing how to jump correctly can make these matchups less annoying.<br> | ||
First of all, you'll be jumping neutrally frequently, since it will not always be possible to jump forward safely. Looking at Honda's Neutral Jump hurtboxes, it's easy to notice that the last 9 frames of the jump animation have the leg hurtbox positioned very low, which will make jumping over projectiles extra hard. To deal with that, it's wise to do a move that reduces Honda's hurtboxes during that time, so you can avoid having big vulnerable hurtboxes. A good option is to press HK as soon as you hit the apex of the jump, that way you'll not only have very small "lower-back" hurtboxes through out the entirety of the jump, but also may trigger the opponents proximity block. This is extra effective with Old Honda, as his Neutral Jumping Roundhouse has amazing priority at the front. New Honda can also control the horizontal movement of the Neutral Jump if he does a Fierce, but keep in mind that Neutral Jumping Fierce have bigger "lower-back" hurtboxes, leaving him more vulnerable to projectiles. It's also optimal to activate Fierce a little before Honda hits the apex of the jump so it's possible to steer the maximum possible.<br> | |||
As for forward jumps, an important thing to be aware of is how his hurtboxes are positioned on the last 13 frames of the jump. Take a look at the hitbox images above, did you notice how Honda's hurtboxes are way less vulnerable at his front than if he did a move? Just compare the forward edge of the pushbox (green box) which is the same on all jumping animations, with the edge of the closest hurtbox (blue box) on all diagonal jumping animations (empty jump + diagonal jumping normals). A well spaced empty jump can be usefull if the opponent defaults to non sweep anti airs, as this can make these anti airs simply whiff (e.g. vs a Dee Jay that defaults to Upkick anti air when he has charge). This trick can be just what Honda needs to finally get in and apply his extremelly strong close range pressure. Of course, if the opponent is aware of this, he may counter it appropriately, but then Honda can just jump with one of his good anti-anti-air normals instead, creating a mix-up situation.<br> | |||
' | |||
' | |||
' | |||
Honda | |||
This | |||
{{STSharedJumpDescription}} | |||
{{ | {{Character Subnav SSF2T|name=E. Honda}} | ||
{{Navbox-ST}} | |||
[[Category:Hyper Street Fighter 2]] | [[Category: Super Street Fighter 2 Turbo]] | ||
[[Category: Hyper Street Fighter 2]] | |||
[[Category: E. Honda]] | |||
Latest revision as of 09:36, 23 July 2023
Story
Date of Birth: 11/3/1960
Height: 6'2"
Weight: 304lbs
Measurements: B83", W 70", H 82"
Blood Type: A
Likes: Tiramisu, Chankonabe (A traditional Japanese stew)
Dislikes: Indecision, Chocolate cookies
Edmond Honda always loved sumo wrestling. From childhood, he would train single-mindedly with the end goal of becoming the greatest sumo wrestler of all time. As he grew up, so did his skills, landing Honda the title of Ōzeki. But the rest of the world didn't see sumo the same way as him. Not helping matters are recent cases of sumo wrestlers taking biochemical drugs in an attempt to strengthen themselves, placing doubt on the competitors. After capturing some dealers and learning of Shadaloo's involvment, he joins the World Warrior tournament, wishing to spread his love of sumo worldwide, use his dual-nationality name and face paint to remain covert as he investigates Shadaloo's dealings, and maybe even attain the coveted title of Yokozuna.
Overview
E. Honda is a character that alternates between rushdown, mixups, and extreme turtling to play him effectively. While he is nigh unbeatable when he's up close and personal, he has a hard time getting in from a distance, and lacks the tools to play from afar. This leads to Honda typically performing very well against characters without fireballs, but as soon as fireballs come into play the game turns into a test of patience where you will likely spend the entire match looking for a single opportunity to get in, and end the round right then and there once you do. He is generally considered a high-mid tier character.
| Strengths | Weaknesses |
|---|---|
|
|
New & Old Versions Comparison
To select Old E.Honda, choose E.Honda and then press ↑ ↑ ↑ ↓ Jab/Fierce, pressing Short simultaneously with the punch button for the alternate color.
Here is the list of differences:
- System Changes: O.E.Honda can not tech throws, does not have the Oicho Throw and Super;
- O.E.Honda has some differences in some of his normals:
- Close Standing Jab is exactly like the Far version. N.E.Honda received a new Close punch that combos into itself;
- Far Standing Jab has faster startup/recovery and can be special canceled;
- Crouching Jab can be special canceled;
- Close Standing Strong is exactly like the Far version. N.E.Honda received a new Close punch that can be used in ticking;
- Far Standing Strong has faster recovery;
- Crouching Strong has better range and priority and can be used as anti air;
- Close Standing Fierce first active part has less active frames and the other active part has more active frames and better priority/range. The total of active frames is the same though;
- Far Standing Fierce is exactly like the Far version. N.E.Honda has a different version of O.E.Honda's Crouching Fierce with worse priority, worse startup, no knockdown, less damage potential, and no special cancel, but with a lot better recovery;
- Crouching Fierce is his classic sweep punch. N.E.Honda received a new Crouching punch that hits twice;
- Close Standing Short is a low hitting kick. N.E.Honda received a new Close knee that can be used in ticking;
- Far Standing Short is a fast hitting sweep. N.E.Honda has a different version of O.E.Honda's Crouching Short with bigger hurtbox and worse priority;
- Crouching Short is his classic spear kick. N.E.Honda received a near identical version of O.E.Honda Close Standing Short instead;
- Close Standing Forward is a low hitting kick. N.E.Honda received a new Close knee that can be used in ticking;
- Far Standing Forward is a fast hitting sweep. N.E.Honda has a different version of O.E.Honda's Crouching Forward with bigger hurtbox, less damage on the first hit and worse priority;
- Crouching Forward is his classic 2-hit spear kick. N.E.Honda received a near identical version of O.E.Honda Close Standing Forward;
- Far Standing Roundhouse is his classic long range sweep. For N.E.Honda it's the same as the Close version and that long range sweep became a Command Normal;
- Neutral Jumping Jab is basically the same but with bigger hurtbox during the active frames. The horizontal priority is the same though;
- Diagonal Jumping Jab has faster startup and a lot more active frames but with bigger hurtbox during the active frames. The horizontal priority is the same though;
- Neutral Jumping Strong second active part has bigger hurtbox. The horizontal priority is the same though;
- Diagonal Jumping Strong has 2 active parts and more active frames, but the first hitting part has less active frames if compared with N.E.Honda's version;
- Neutral Jumping Fierce can not be steered and has bigger hurtbox during the active frames and some frames later. The horizontal priority is the same though;
- Diagonal Jumping Fierce has bigger hurtbox during the active frames and some frames later. The horizontal priority is the same though;
- Neutral Jumping Short has better horizontal priority;
- Both Jumping Forwards have better horizontal priority but worse vertical priority. Overall N.E.Honda's version is better;
- Neutral Jumping Roundhouse has a lot better priority and twice as many active frames;
- Diagonal Jumping Roundhouse has a lot better priority but can not be used as a crossup attack;
- O.E.Honda's HHS behaves differently: has a little faster startup, a lot faster recovery, less minimal attacking duration and steerable properties. N.E.Honda's version is slower and cannot be steered but Strong and Fierce versions create a fast impulse once activated;
- O.E.Honda's Headbutts do less knockback on block/hit;
- O.E.Honda's Jab Headbutt has slower startup and Strong headbutt has twice as much active frames;
- O.E.Honda's Butt Drop has smaller hitbox on the second active part (when he's falling) which gives him worse crossup ability;
In general, O.E.Honda has a better normal set (has a awesome Standing Jab, can use his Fierce Chop from any range, has all his knockdown normals from HF and most of his other normals have little benefits). But because his HHS is so different he is played in a different way (like HF Honda). Both versions have pretty much the same strength though, they are just played differently. Choose whichever version suits your style better.
Color Options
| Jab | Strong | Fierce | Start | Old |
 |
 |
 |
 |

|
 |
 |
 |
 |

|
| Short | Forward | Roundhouse | Hold | Old Alternative |
--Born2SPD
Video Overview
| E. Honda | |
|---|---|
| Character Data | |
| Damage Scaling Factor | 25/32 |
| Forward Walk Speed | 38 |
| Backwards Walk Speed | 26 |
| Pre-Jump Frames | 5 |
| Forwards Jump Duration | 44 |
| Backwards Jump Duration | 45 |
| Landing Frames | 7* |
| Jump Height Apex | 71 |
| Forwards Jump Distance | 121 |
| Backwards Jump Distance | 129 |
| Soft Knockdown Recovery | 37 |
| Hard Knockdown Recovery | 72 |
Normal Moves
Disclaimer: To better understand the diagrams, read this.
Standing Normals
cllp
| Damage | Dizzy | Dizzy Time | Cancel | Guard | Act. Range |
|---|---|---|---|---|---|
| 20[1] | 0~5 | 40 | Special, Super | Mid | 0~32 |
| Startup | Active | Recovery | Total | Frame Adv. | Meter |
| 4 | 2 | 3 | 9 | +8 | 2/1 |
|
A quick palm thrust.
| |||||
Click to toggle detailed hitbox data.
frlp
| Damage | Dizzy | Dizzy Time | Cancel | Guard | Act. Range |
|---|---|---|---|---|---|
| 20[1] | 0~5 | 40 | None | Mid | 33+ |
| Startup | Active | Recovery | Total | Frame Adv. | Meter |
| 6 | 4 | 5 | 15 | +4 | 2/1 |
|
A far-reaching thrust.
| |||||
Click to toggle detailed hitbox data.
cl.mp
| Damage | Dizzy | Dizzy Time | Cancel | Guard | Act. Range |
|---|---|---|---|---|---|
| 24[1] | 5~11 | 60 | Super | Mid | 0~32 |
| Startup | Active | Recovery | Total | Frame Adv. | Meter |
| 5 | 2 | 5 | 12 | +11 | 4/3 |
|
Another palm strike.
| |||||
Click to toggle detailed hitbox data.
frmp
| Damage | Dizzy | Dizzy Time | Cancel | Guard | Act. Range |
|---|---|---|---|---|---|
| 24[1] | 5~11 | 60 | None | Mid | 33+ |
| Startup | Active | Recovery | Total | Frame Adv. | Meter |
| 7 | 4 | 6 | 17 | +8 | 4/3 |
|
Similar to far st.jab with more range.
| |||||
Click to toggle detailed hitbox data.
clhp
| Damage | Dizzy | Dizzy Time | Cancel | Guard | Act. Range |
|---|---|---|---|---|---|
| 30[2] | 10~16 | 80 | None | Mid | 0~48 |
| Startup | Active | Recovery | Total | Frame Adv. | Meter |
| 7 | 7 (5 / 2) | 18 | 32 | -3 / +2 | 5/4 |
|
A chop with a huge arc.
| |||||
Click to toggle detailed hitbox data.
Startup/Active:
 |
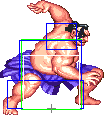 |
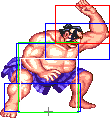 |

| |
| Frame Count | 1 + 3 | 3 | 5 | 2 |
| Simplified | 7 | 7 | ||
Recovery:
 |
 |
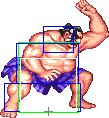 |
 |

| |
| Frame Count | 7 | 5 | 3 | 2 | 1 |
| Simplified | 18 | ||||
frhp
| Damage | Dizzy | Dizzy Time | Cancel | Guard | Act. Range |
|---|---|---|---|---|---|
| 30[2] | 10~16 | 80 | None | Mid | 49+ |
| Startup | Active | Recovery | Total | Frame Adv. | Meter |
| 8 | 4 | 18 | 30 | 0 | 5/4 |
|
A low punch that doesn't hit low.
| |||||
Click to toggle detailed hitbox data.
Startup/Active:
 |
 |

| |
| Frame Count | 1 + 3 | 4 | 4 |
| Simplified | 8 | 4 | |
Recovery:
 |
 |
 |
 |
 |

| |
| Frame Count | 4 | 6 | 4 | 2 | 1 | 1 |
| Simplified | 18 | |||||
cllk
| Damage | Dizzy | Dizzy Time | Cancel | Guard | Act. Range |
|---|---|---|---|---|---|
| 18[1] | 0~5 | 40 | Special, Super | Mid | 0~11 |
| Startup | Active | Recovery | Total | Frame Adv. | Meter |
| 4 | 3 | 5 | 12 | +5 | 2/1 |
|
A knee strike.
| |||||
Click to toggle detailed hitbox data.
frlk
| Damage | Dizzy | Dizzy Time | Cancel | Guard | Act. Range |
|---|---|---|---|---|---|
| 18[1] | 0~5 | 40 | None | Mid | 12+ |
| Startup | Active | Recovery | Total | Frame Adv. | Meter |
| 10 | 3 | 7 | 20 | +3 | 2/1 |
|
A strange, high-ish kick.
| |||||
Click to toggle detailed hitbox data.
clmk
| Damage | Dizzy | Dizzy Time | Cancel | Guard | Act. Range |
|---|---|---|---|---|---|
| 22[1] | 5~11 | 60 | None | Mid | 0~11 |
| Startup | Active | Recovery | Total | Frame Adv. | Meter |
| 6 | 3 | 7 | 16 | +8 | 4/3 |
|
Close Short except you can't cancel it and it's slower.
| |||||
Click to toggle detailed hitbox data.
frmk
| Damage | Dizzy | Dizzy Time | Cancel | Guard | Act. Range |
|---|---|---|---|---|---|
| 4[1] + 24[1] | 5~11 x 2 | 60 x 2 | None | Mid | 12+ |
| Startup | Active | Recovery | Total | Frame Adv. | Meter |
| 7 | 9 (3 + 6) | 10 | 26 | -1 / +2(+1) | 4/3 |
|
Another weird high-ish kick.
| |||||
Click to toggle detailed hitbox data.
frhk
| Damage | Dizzy | Dizzy Time | Cancel | Guard | Act. Range |
|---|---|---|---|---|---|
| 4[2] + 30[0] | 3~9 + 10~16 | 40 + 80 | None | Mid | N/A |
| Startup | Active | Recovery | Total | Frame Adv. | Meter |
| 8 | 8 (3 + 5) | 18 | 34 | -4 / -1(-2) | 5/4 |
|
An actual roundhouse kick.
| |||||
Click to toggle detailed hitbox data.
Startup/Active:
 |
 |
 |
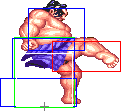 |
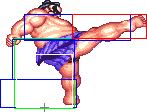
| |
| Frame Count | 1 + 2 | 2 | 3 | 3 | 5 |
| Simplified | 8 | 3 | 5 | ||
Recovery:
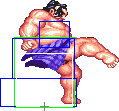 |
 |
 |

| |
| Frame Count | 8 | 6 | 3 | 1 |
| Simplified | 18 | |||
Crouching Normals
crlp
| Damage | Dizzy | Dizzy Time | Cancel | Guard | Act. Range |
|---|---|---|---|---|---|
| 20[1] | 0~5 | 40 | Super | Mid | N/A |
| Startup | Active | Recovery | Total | Frame Adv. | Meter |
| 5 | 8 | 3 | 16 | +2 | 2/1 |
|
A crouching palm thrust.
| |||||
Click to toggle detailed hitbox data.
crmp
| Damage | Dizzy | Dizzy Time | Cancel | Guard | Act. Range |
|---|---|---|---|---|---|
| 24[1] | 5~11 | 60 | None | Mid | N/A |
| Startup | Active | Recovery | Total | Frame Adv. | Meter |
| 7 | 8 | 11 | 26 | -1 | 4/3 |
|
A palm strike, now right handed.
| |||||
Click to toggle detailed hitbox data.
crhp
| Damage | Dizzy | Dizzy Time | Cancel | Guard | Act. Range |
|---|---|---|---|---|---|
| 16[2] x 2 | 1~7 x 2 | 70 x 2 | Super / None | Mid | N/A |
| Startup | Active | Recovery | Total | Frame Adv. | Meter |
| 5 | 4(6)8 | 11 | 34 | -6 / +3(+2) | 5/4 |
|
Two palm strikes, one left, one right.
| |||||
Click to toggle detailed hitbox data.
crlk
| Damage | Dizzy | Dizzy Time | Cancel | Guard | Act. Range |
|---|---|---|---|---|---|
| 18[1] | 0~5 | 40 | Special, Super | Low | N/A |
| Startup | Active | Recovery | Total | Frame Adv. | Meter |
| 4 | 3 | 4 | 11 | +6 | 2/1 |
|
An excellent low kick.
| |||||
Click to toggle detailed hitbox data.
frmk
| Damage | Dizzy | Dizzy Time | Cancel | Guard | Act. Range |
|---|---|---|---|---|---|
| 22[1] | 5~11 | 60 | None | Low | N/A |
| Startup | Active | Recovery | Total | Frame Adv. | Meter |
| 7 | 5 | 8 | 20 | +5 | 4/3 |
|
A low kick that looks the exact same as crouching Short but it's different.
| |||||
Click to toggle detailed hitbox data.
crhk
| Damage | Dizzy | Dizzy Time | Cancel | Guard | Act. Range |
|---|---|---|---|---|---|
| 32[2] | 5~11 | 130 | None | Low | N/A |
| Startup | Active | Recovery | Total | Frame Adv. | Meter |
| 8 | 6(4)8 | 7 | 33 | Hit: Soft KD Block: -3 / +7 |
5/4 |
|
Honda's fully rotating sweep.
| |||||
Click to toggle detailed hitbox data.
Jumping Normals
njlp
| Damage | Dizzy | Dizzy Time | Cancel | Guard | Act. Range |
|---|---|---|---|---|---|
| 20[1] | 1~7(-2) | 40 | None | High | N/A |
| Startup | Active | Recovery | Total | Frame Adv. | Meter |
| 8 | 30 | ∞ | 38+∞ | Dependent | 2/1 |
|
A jumping chop.
| |||||
Click to toggle detailed hitbox data.
djlp
| Damage | Dizzy | Dizzy Time | Cancel | Guard | Act. Range |
|---|---|---|---|---|---|
| 12[0] | 1~7(-2) | 40 | None | High | N/A |
| Startup | Active | Recovery | Total | Frame Adv. | Meter |
| 5 | 12 | N/A | 2+∞ | Dependent | 2/1 |
|
A jumping chop.
| |||||
Click to toggle detailed hitbox data.
njmp
| Damage | Dizzy | Dizzy Time | Cancel | Guard | Act. Range |
|---|---|---|---|---|---|
| 22[1] | 5~11 | 50(+10) | None | High | N/A |
| Startup | Active | Recovery | Total | Frame Adv. | Meter |
| 7 | 16 (4/12) | ∞ | 23+∞ | Dependent | 4/3 |
|
Another chop, this time with windback.
| |||||
Click to toggle detailed hitbox data.
djmp
| Damage | Dizzy | Dizzy Time | Cancel | Guard | Act. Range |
|---|---|---|---|---|---|
| 22[2] | 5~11 | 50 | None | High | N/A |
| Startup | Active | Recovery | Total | Frame Adv. | Meter |
| 7 | 8 | ∞ | 15+∞ | Dependent | 4/3 |
|
Another chop. The downwards motion doesn't have a hitbox for some reason.
| |||||
Click to toggle detailed hitbox data.
njhp
| Damage | Dizzy | Dizzy Time | Cancel | Guard | Act. Range |
|---|---|---|---|---|---|
| 32[2] | 11~17(-1) | 60(+20) | None | High | N/A |
| Startup | Active | Recovery | Total | Frame Adv. | Meter |
| 7 | 6 | ∞ | 13+∞ | Dependent | 5/4 |
|
Honda does a curved slap.
| |||||
Click to toggle detailed hitbox data.
djhp
| Damage | Dizzy | Dizzy Time | Cancel | Guard | Act. Range |
|---|---|---|---|---|---|
| 30[2] | 3~9 | 40 | None | High | N/A |
| Startup | Active | Recovery | Total | Frame Adv. | Meter |
| 7 | 8 | ∞ | 15+∞ | Dependent | 5/4 |
|
A sweeping slap. The diagonal version can't be steered.
| |||||
Click to toggle detailed hitbox data.
njlk
| Damage | Dizzy | Dizzy Time | Cancel | Guard | Act. Range |
|---|---|---|---|---|---|
| 16[1] | 1~7(-2) | 40 | None | High | N/A |
| Startup | Active | Recovery | Total | Frame Adv. | Meter |
| 7 | 30 | ∞ | 37+∞ | Dependent | 2/1 |
|
A jumping kick.
| |||||
Click to toggle detailed hitbox data.
djlk
| Damage | Dizzy | Dizzy Time | Cancel | Guard | Act. Range |
|---|---|---|---|---|---|
| 16[1] | 1~7(-2) | 40 | None | High | N/A |
| Startup | Active | Recovery | Total | Frame Adv. | Meter |
| 7 | ∞ | N/A | 7+∞ | Dependent | 2/1 |
|
A quick jumping buttslam makes an important move move for Honda.
| |||||
Click to toggle detailed hitbox data.
njmk
| Damage | Dizzy | Dizzy Time | Cancel | Guard | Act. Range |
|---|---|---|---|---|---|
| 22[1] | 5~11 | 50(+10) | None | High | N/A |
| Startup | Active | Recovery | Total | Frame Adv. | Meter |
| 7 | 12 | ∞ | 19+∞ | Dependent | 4/3 |
|
Your best frontal jump-in.
| |||||
Click to toggle detailed hitbox data.
- Neutral Jump Version:
 |
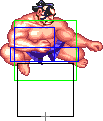 |
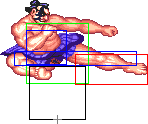 |
 |
 |
 |
 |
 |

| |
| Frame Count | 3 | 4 | 12 | 4 | 4 | 4 | 4 | 4 | ∞ |
| Simplified | 7 | 12 | ∞ | ||||||
- Diagonal Jump Version:
 |
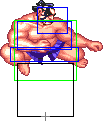 |
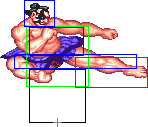 |
 |
 |
 |
 |
 |

| |
| Frame Count | 3 | 4 | 12 | 4 | 4 | 4 | 4 | 4 | ∞ |
| Simplified | 7 | 12 | ∞ | ||||||
njhk
| Neutral Jump | Damage | Dizzy | Dizzy Time | Cancel | Guard | Act. Range |
|---|---|---|---|---|---|---|
| 30[2] | 11~17(-1) | 60(+20) | None | High | N/A | |
| Startup | Active | Recovery | Total | Frame Adv. | Meter | |
| 7 | 6 | ∞ | 13+∞ | Dependent | 5/4 | |
|
Two more jumping kicks. The neutral jump and diagonal jump versions share the same animation, but have different properties.
| ||||||
| Diagonal Jump | Damage | Dizzy | Dizzy Time | Cancel | Guard | Act. Range |
| 30[2] | 3~9 | 40 | None | High | N/A | |
| Startup | Active | Recovery | Total | Frame Adv. | Meter | |
| 7 | 10 | ∞ | 17+∞ | Dependent | 5/4 | |
| ||||||
Click to toggle detailed hitbox data.
- Neutral Jump Version:
 |
 |
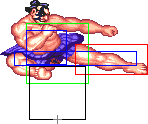 |
 |
 |
 |
 |
 |

| |
| Frame Count | 3 | 4 | 6 | 4 | 4 | 4 | 4 | 4 | ∞ |
| Simplified | 7 | 6 | ∞ | ||||||
- Diagonal Jump Version:
 |
 |
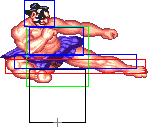 |
 |
 |
 |
 |
 |

| |
| Frame Count | 3 | 4 | 10 | 4 | 4 | 4 | 4 | 4 | ∞ |
| Simplified | 7 | 10 | ∞ | ||||||
Command Normals
Knee Strike
| Damage | Dizzy | Dizzy Time | Cancel | Guard | Act. Range |
|---|---|---|---|---|---|
| 26[1] + 16[1] | 5~11 x 2 | 60 x 2 | None | Mid | 0~11 |
| Startup | Active | Recovery | Total | Frame Adv. | Meter |
| 10 | 6 (3 + 3) | 7 | 23 | +5 / +8(+7) | 4/3 x 2 |
|
A two hit knee attack.
| |||||
Click to toggle detailed hitbox data.
Startup/Active:
 |
 |
 |
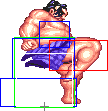 |
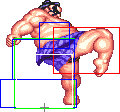
| |
| Frame Count | 1 + 3 | 3 | 3 | 3 | 3 |
| Simplified | 10 | 3 | 3 | ||
Recovery:
 |
 |
 |

| |
| Frame Count | 2 | 2 | 2 | 1 |
| Simplified | 7 | |||
Sweep Kick
| Damage | Dizzy | Dizzy Time | Cancel | Guard | Act. Range |
|---|---|---|---|---|---|
| 28[2] | 5~11 | 130 | None | Low | N/A |
| Startup | Active | Recovery | Total | Frame Adv. | Meter |
| 10 | 6 | 19 | 35 | Hit: Soft KD Block: -3 |
5/4 |
|
Honda's command sweep, and his longest ranged normal.
| |||||
Click to toggle detailed hitbox data.
Flying Sumo Press
| Damage | Dizzy | Dizzy Time | Cancel | Guard | Act. Range |
|---|---|---|---|---|---|
| 24[2] | 5~11 | 50(+10) | None | High | N/A |
| Startup | Active | Recovery | Total | Frame Adv. | Meter |
| 7 | ∞ | N/A | 7+∞ | Dependent | 4/3 |
|
A full body slam.
| |||||
Click to toggle detailed hitbox data.
-x64
Throws
E.Honda can throw with ![]() ,
, ![]() , and
, and ![]() . He has the longest normal throw range in the game, as well as some nasty throw loops off his Fierce and Roundhouse throws.
. He has the longest normal throw range in the game, as well as some nasty throw loops off his Fierce and Roundhouse throws.
| Damage | Dizzy | Dizzy Time | Cancel | Guard | Act. Range |
|---|---|---|---|---|---|
| 32* | 7~13 | 100 | - | Grab | 64 (from axis) 36 (from throwable box) |
| Startup | Active | Recovery | Total | Frame Adv. | Meter |
| 0 | 1 | Dependent | 1 | N/A | - |
|
Honda's one and only normal Throw.
| |||||
| Damage | Dizzy | Dizzy Time | Cancel | Guard | Act. Range |
|---|---|---|---|---|---|
| 24* + 4 x n Set amount of hits = 8 |
0 | 0 | - | Grab | 64 (from axis) 36 (from throwable box) |
| Startup | Active | Recovery | Total | Frame Adv. | Meter |
| 0 | 1 | Dependent | 1 | N/A | - |
|
Honda's "bear hug" hold. You'll be using this one the most.
| |||||
| Damage | Dizzy | Dizzy Time | Cancel | Guard | Act. Range |
|---|---|---|---|---|---|
| 24* + 4 x n Set amount of hits = 7 |
0 | 0 | - | Grab | 64 (from axis) 36 (from throwable box) |
| Startup | Active | Recovery | Total | Frame Adv. | Meter |
| 0 | 1 | Dependent | 1 | N/A | - |
|
Honda's Heavy Kick hold.
| |||||
Click to toggle throwbox data.
-x64
Special Moves
Hundred Hand Slap
Click to toggle detailed hitbox data.
Startup:
 |

| |
| Frame Count (Jab) | 2 | 3 |
| Simplified (Jab) | 5 | |
| Frame Count (Strong) | 4 | 4 |
| Simplified (Strong) | 8 | |
| Frame Count (Fierce) | 5 | 6 |
| Simplified (Fierce) | 11 | |
Active:
 |
 |

| |
| Frame Count (Jab) | 4* | 4 | 4 |
| Frame Count (Strong) | 2* | 2 | 2 |
| Frame Count (Fierce) | 1* | 1 | 1 |
- NOTE: The first hitbox that comes out when performing this move has 1 extra active frame.
 |
 |

| |
| Frame Count (Jab) | 4 | 4 | 4* |
| Frame Count (Strong) | 2 | 2 | 2* |
| Frame Count (Fierce) | 1 | 1 | 1* |
- NOTE 2: The last active frame on some animation cycles are skipped. This depends on the frequency of your button presses.
Recovery:
 |
 |
 |
 |

| |
| Frame Count (Jab) | 5 | 2 | 3 | 2 | 1 |
| Simplified (Jab) | 13 | ||||
| Frame Count (Strong) | 7 | 2 | 3 | 2 | 1 |
| Simplified (Strong) | 15 | ||||
| Frame Count (Fierce) | 8 | 3 | 4 | 3 | 1 |
| Simplified (Fierce) | 19 | ||||
Sumo Headbutt
Click to toggle detailed hitbox data.
Startup:
| Jab and Strong Only |  |
 |
Strong and Fierce Only | |
 |

| |||
| Frame Count (Jab) | 1 | 3 | 4 | |
| Simplified (Jab) | 8 | |||
| Frame Count (Strong) | 1 | 2 | 6 | 2 |
| Simplified (Strong) | 11 | |||
| Frame Count (Fierce) | 1 | 4 | 1 | |
| Simplified (Fierce) | 6 | |||
Active:
- Jab Version:
 |
 |

| |
| Frame Count | 3 | 3 | 22 |
| Simplified | 6 | 22 | |
- Strong and Fierce Version:
 |

| |
| Frame Count (Strong) | 2 | 25 |
| Frame Count (Fierce) | 1 | 53 |
Recovery:
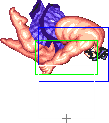 |
 |
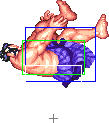 |
 |
 |
 |

| |
| Frame Count | 4 | 4 | 4 | 8/9 | 2 | 2 | 1 |
| Simplified | 25/26 | ||||||
Sumo Smash
Click to toggle detailed hitbox data.
- Short and Forward Versions:
Startup:
 |
 |
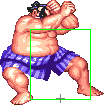 |
 |
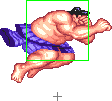 |
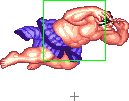
| |
| Frame Count (Short) | 1 | 4 | 5 | 2 | 5 | 4 |
| Simplified (Short) | 21 | |||||
| Frame Count (Forward) | 1 | 3 | 4 | 2 | 5 | 4 |
| Simplified (Forward) | 19 | |||||
Active + Recovery:
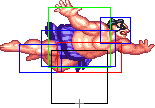 |
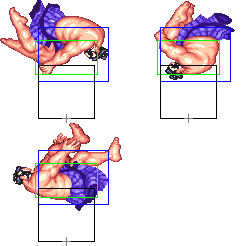 |
 |
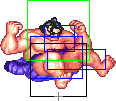 |
 |

| |
| Frame Count (Short) | 9 | 9 (3 + 3 + 3) | 2 | 2 | 10 | 4 |
| Simplified (Short) | 9 | 13 | 10 | 4 | ||
| Frame Count (Forward) | 9 | 9 (3 + 3 + 3) | 2 | 2 | 12 | 5 |
| Simplified (Forward) | 9 | 13 | 12 | 5 | ||
- Roundhouse Version:
Startup:
 |
 |
 |
 |
 |

| |
| Frame Count | 1 | 3 | 4 | 2 | 4 | 4 |
| Simplified | 18... (42) | |||||
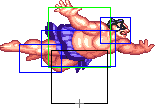 |
 |
 |

| |
| Frame Count | 11 | 9 (3 + 3 + 3) | 2 | 2 |
| Simplified | ...24 (42) | |||
Active/Recovery:
 |

| |
| Frame Count | 15 | 6 |
Oicho Throw
| Damage | Dizzy | Dizzy Time | Cancel | Guard | Act. Range |
|---|---|---|---|---|---|
| 7~13 x 2 | 100 x 2 | - | Grab | N/A | |
| Startup | Active | Recovery | Total | Frame Adv. | Meter |
| 0 | 1 | Dependent | 1 | Dependent | 12 |
|
Honda slams his opponent to the ground, then follows up with a buttslam.
| |||||
Click to toggle detailed throwbox data.
Super Combo
| Damage | Dizzy | Dizzy Time | Cancel | Guard | Act. Range |
|---|---|---|---|---|---|
| 20[2] x 4 | 0~4 x 4 | 20 x 4 | None | Mid | N/A |
| Startup | Active | Recovery | Total | Frame Adv. | Meter |
| 6 | 1 + ∞(7)1 + ∞ | 25 | - | -13 (Second Attack)/ Hard Knockdown* | - |
|
Honda brings out the big guns: One of the worst Super Combos in the game.
| |||||
Click to toggle detailed hitbox data.
Misc Animations
Jump Animations
- Prejump:
 |
 |

| |
| Frame Count | 2 | 2 | 1 |
| Simplified | 5 | ||
- Neutral/Back Jump, Airborne + Landing:
 |
 |
 |
 |
 |
 |
 |
 |
 |

| |
| Frame Count (Neutral) | 1 | 10 | 5 | 5 | 5 | 5 | 5 | 8 | 1 | 7* |
| Simplified (Neutral) | 1 | 43 | 1 | 7* | ||||||
| Frame Count (Back) | 1 | 10 | 5 | 5 | 5 | 5 | 5 | 8 | 1 | 7* |
| Simplified (Back) | 1 | 43 | 1 | 7* | ||||||
- Forward Jump, Airborne + Landing:
 |
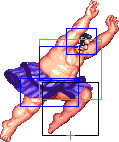 |
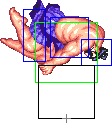 |
 |
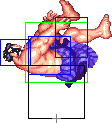 |
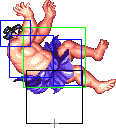 |
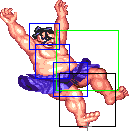 |
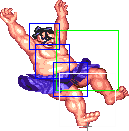 |

| |
| Frame Count | 1 | 10 | 6 | 4 | 4 | 6 | 12 | 1 | 7* |
| Simplified | 1 | 42 | 1 | 7* | |||||
Honda has the slowest prejump animation on the game. This is part of the reason why he suffers so much to get in vs projectile zoners. With that said, knowing how to jump correctly can make these matchups less annoying.
First of all, you'll be jumping neutrally frequently, since it will not always be possible to jump forward safely. Looking at Honda's Neutral Jump hurtboxes, it's easy to notice that the last 9 frames of the jump animation have the leg hurtbox positioned very low, which will make jumping over projectiles extra hard. To deal with that, it's wise to do a move that reduces Honda's hurtboxes during that time, so you can avoid having big vulnerable hurtboxes. A good option is to press HK as soon as you hit the apex of the jump, that way you'll not only have very small "lower-back" hurtboxes through out the entirety of the jump, but also may trigger the opponents proximity block. This is extra effective with Old Honda, as his Neutral Jumping Roundhouse has amazing priority at the front. New Honda can also control the horizontal movement of the Neutral Jump if he does a Fierce, but keep in mind that Neutral Jumping Fierce have bigger "lower-back" hurtboxes, leaving him more vulnerable to projectiles. It's also optimal to activate Fierce a little before Honda hits the apex of the jump so it's possible to steer the maximum possible.
As for forward jumps, an important thing to be aware of is how his hurtboxes are positioned on the last 13 frames of the jump. Take a look at the hitbox images above, did you notice how Honda's hurtboxes are way less vulnerable at his front than if he did a move? Just compare the forward edge of the pushbox (green box) which is the same on all jumping animations, with the edge of the closest hurtbox (blue box) on all diagonal jumping animations (empty jump + diagonal jumping normals). A well spaced empty jump can be usefull if the opponent defaults to non sweep anti airs, as this can make these anti airs simply whiff (e.g. vs a Dee Jay that defaults to Upkick anti air when he has charge). This trick can be just what Honda needs to finally get in and apply his extremelly strong close range pressure. Of course, if the opponent is aware of this, he may counter it appropriately, but then Honda can just jump with one of his good anti-anti-air normals instead, creating a mix-up situation.
The landing recovery has a special property which allows it to be canceled into certain actions. At the first landing frame, you can perform throws (including command throws), and on the second landing frame, you can start another jump, attack with a normal or special move, or block. Blocking not being until the second landing frame, as well as hitbox-hurtbox interactions having priority over throwbox-throw hurtbox is why sweeps work as anti airs in this game.
Things are different when jumping over your opponent, however. In that situation it's possible to walk back/forward, to jump again or to even block on the first landing frame! Strangely, if a throw is timed on the first landing frame of a jump that crosses over, a throwbox will never come out, even though that input will result in a normal coming out 2 frames later (like it normally would). Anyway, being able to block on the first landing frame can help a little bit on some safe jump crossup setups, or maybe in other situations as well if your character has a huge jump arc.
