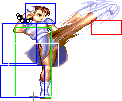
m (→Tenshokyaku) |
RagingStormX (talk | contribs) (→Throws) |
||
| (53 intermediate revisions by 2 users not shown) | |||
| Line 26: | Line 26: | ||
===Standing Normals=== | ===Standing Normals=== | ||
===== <span class="invisible-header"> | ===== <span class="invisible-header">cllp</span> ===== | ||
{{MoveData | {{MoveData | ||
| name = Close Jab | | name = Close Jab | ||
| Line 36: | Line 36: | ||
| data = | | data = | ||
{{AttackData-SSF2T | {{AttackData-SSF2T | ||
|damage = 18[0] | |damage = {{tooltip|text=18[0]|hovertext=[0] Random Damage Table: -2 = 3.125%, -1 = 3.125%, +0 = 78.125%, +1 = 6.25%, +2 = 6.25%, +3 = 3.125%}} | ||
|dizzy= 0~5 | |dizzy= 0~5 | ||
|dizzytime= 40 | |dizzytime= 40 | ||
| Line 46: | Line 46: | ||
|total = 12 | |total = 12 | ||
|frameAdv = +5 | |frameAdv = +5 | ||
|actrange = 0 | |actrange = 0~21 | ||
|meter = 2/1 | |meter = 2/1 | ||
|description= A quick rapid-fire jab. | |description= A quick rapid-fire jab. | ||
| Line 78: | Line 78: | ||
| data = | | data = | ||
{{AttackData-SSF2T | {{AttackData-SSF2T | ||
|damage = 4[0] | |damage = {{tooltip|text=4[0]|hovertext=[0] Random Damage Table: -2 = 3.125%, -1 = 3.125%, +0 = 78.125%, +1 = 6.25%, +2 = 6.25%, +3 = 3.125%}} | ||
|dizzy= 0~5 | |dizzy= 0~5 | ||
|dizzytime= 40 | |dizzytime= 40 | ||
| Line 109: | Line 109: | ||
</div> | </div> | ||
==== <span class="invisible-header"> | |||
==== <span class="invisible-header">clmp</span> ==== | |||
{{MoveData | {{MoveData | ||
| name = Close Strong | | name = Close Strong | ||
| Line 119: | Line 120: | ||
| data = | | data = | ||
{{AttackData-SSF2T | {{AttackData-SSF2T | ||
|damage =22[1] | |damage ={{tooltip|text=22[1]|hovertext=[1] Random Damage Table: -2 = 3.125%, -1 = 3.125%, +0 = 68.75%, +1 = 9.375%, +2 = 9.375%, +3 = 6.25%}} | ||
|dizzy= 5~11 | |dizzy= 5~11 | ||
|dizzytime= 60 | |dizzytime= 60 | ||
| Line 129: | Line 130: | ||
|total = 13 | |total = 13 | ||
|frameAdv = +10 | |frameAdv = +10 | ||
|actrange = 0 | |actrange = 0~36 | ||
|meter = 4/3 | |meter = 4/3 | ||
|description= A punch with huge frame advantage. | |description= A punch with huge frame advantage. | ||
| Line 144: | Line 145: | ||
{{STDiagramCell|}} |{{STDiagramImageCell| 1 | ChunLi_stclstrng1&5.png}} |{{STDiagramImageCell| 1 | ChunLi_stclstrng2&4.png}} |{{STDiagramImageCell| 1 | ChunLi_stclstrng3.png}} |{{STDiagramImageCell| 1 | ChunLi_stclstrng2&4.png}} |{{STDiagramImageCell| 1 | ChunLi_stclstrng1&5.png}} | {{STDiagramCell|}} |{{STDiagramImageCell| 1 | ChunLi_stclstrng1&5.png}} |{{STDiagramImageCell| 1 | ChunLi_stclstrng2&4.png}} |{{STDiagramImageCell| 1 | ChunLi_stclstrng3.png}} |{{STDiagramImageCell| 1 | ChunLi_stclstrng2&4.png}} |{{STDiagramImageCell| 1 | ChunLi_stclstrng1&5.png}} | ||
|- | |- | ||
{{STDiagramCell| Frame Count}} |{{STDiagramCell| 2}} |{{STDiagramCell| 2}} |{{STDiagramCell| 4}} |{{STDiagramCell| 3}} |{{STDiagramCell| 1}} | {{STDiagramCell| Frame Count}} |{{STDiagramCell| 1 + 2}} |{{STDiagramCell| 2}} |{{STDiagramCell| 4}} |{{STDiagramCell| 3}} |{{STDiagramCell| 1}} | ||
|- | |- | ||
{{STDiagramCell| Simplified}} |{{STDiagramCellColSpan| 2 | 5}} |{{STDiagramCell| 4}} |{{STDiagramCellColSpan| 2 | 4}} | {{STDiagramCell| Simplified}} |{{STDiagramCellColSpan| 2 | 5}} |{{STDiagramCell| 4}} |{{STDiagramCellColSpan| 2 | 4}} | ||
| Line 161: | Line 162: | ||
| data = | | data = | ||
{{AttackData-SSF2T | {{AttackData-SSF2T | ||
|damage =22[0] | |damage ={{tooltip|text=22[0]|hovertext=[0] Random Damage Table: -2 = 3.125%, -1 = 3.125%, +0 = 78.125%, +1 = 6.25%, +2 = 6.25%, +3 = 3.125%}} | ||
|dizzy= 5~11 | |dizzy= 5~11 | ||
|dizzytime= 60 | |dizzytime= 60 | ||
| Line 191: | Line 192: | ||
</div> | </div> | ||
==== <span class="invisible-header">clhp</span> ==== | ==== <span class="invisible-header">clhp</span> ==== | ||
| Line 202: | Line 204: | ||
| data = | | data = | ||
{{AttackData-SSF2T | {{AttackData-SSF2T | ||
|damage =24[1] | |damage ={{tooltip|text=24[1]|hovertext=[1] Random Damage Table: -2 = 3.125%, -1 = 3.125%, +0 = 68.75%, +1 = 9.375%, +2 = 9.375%, +3 = 6.25%}} | ||
|dizzy= 10~16 | |dizzy= 10~16 | ||
|dizzytime= 80 | |dizzytime= 80 | ||
| Line 212: | Line 214: | ||
|total = 35 | |total = 35 | ||
|frameAdv = -9 | |frameAdv = -9 | ||
|actrange = 0 | |actrange = 0~41 | ||
|meter = 5/4 | |meter = 5/4 | ||
|description= A double open palmed strike. | |description= A double open palmed strike. | ||
| Line 244: | Line 246: | ||
| data = | | data = | ||
{{AttackData-SSF2T | {{AttackData-SSF2T | ||
|damage =24[0] | |damage ={{tooltip|text=24[0]|hovertext=[0] Random Damage Table: -2 = 3.125%, -1 = 3.125%, +0 = 78.125%, +1 = 6.25%, +2 = 6.25%, +3 = 3.125%}} | ||
|dizzy= 10~16 | |dizzy= 10~16 | ||
|dizzytime= 80 | |dizzytime= 80 | ||
| Line 273: | Line 275: | ||
</div> | </div> | ||
==== <span class="invisible-header">cllk</span> ==== | ==== <span class="invisible-header">cllk</span> ==== | ||
| Line 284: | Line 287: | ||
| data = | | data = | ||
{{AttackData-SSF2T | {{AttackData-SSF2T | ||
|damage = 20[1] | |damage = {{tooltip|text=20[1]|hovertext=[1] Random Damage Table: -2 = 3.125%, -1 = 3.125%, +0 = 68.75%, +1 = 9.375%, +2 = 9.375%, +3 = 6.25%}} | ||
|dizzy= 0~5 | |dizzy= 0~5 | ||
|dizzytime= 40 | |dizzytime= 40 | ||
| Line 294: | Line 297: | ||
|total = 14 | |total = 14 | ||
|frameAdv = +3 | |frameAdv = +3 | ||
|actrange = 0 | |actrange = 0~36 | ||
|meter = 2/1 | |meter = 2/1 | ||
|description= A knee strike. | |description= A knee strike. | ||
| Line 325: | Line 328: | ||
| data = | | data = | ||
{{AttackData-SSF2T | {{AttackData-SSF2T | ||
|damage = 20[0] | |damage = {{tooltip|text=20[0]|hovertext=[0] Random Damage Table: -2 = 3.125%, -1 = 3.125%, +0 = 78.125%, +1 = 6.25%, +2 = 6.25%, +3 = 3.125%}} | ||
|dizzy= 0~5 | |dizzy= 0~5 | ||
|dizzytime= 40 | |dizzytime= 40 | ||
| Line 352: | Line 355: | ||
{{STDiagramCell| Frame Count}} |{{STDiagramCell| 1 + 3}} |{{STDiagramCell| 3}} |{{STDiagramCell| 5}} |{{STDiagramCell| 4}} |{{STDiagramCell| 1}} | {{STDiagramCell| Frame Count}} |{{STDiagramCell| 1 + 3}} |{{STDiagramCell| 3}} |{{STDiagramCell| 5}} |{{STDiagramCell| 4}} |{{STDiagramCell| 1}} | ||
|- | |- | ||
{{STDiagramCell| Simplified}} |{{STDiagramCellColSpan | 2 | 7}} |{{STDiagramCell| | {{STDiagramCell| Simplified}} |{{STDiagramCellColSpan | 2 | 7}} |{{STDiagramCell| 5}} |{{STDiagramCellColSpan | 3 | 5}} | ||
|} | |} | ||
| Line 370: | Line 373: | ||
| data = | | data = | ||
{{AttackData-SSF2T | {{AttackData-SSF2T | ||
|damage = 24[1] | |damage = {{tooltip|text=24[1]|hovertext=[1] Random Damage Table: -2 = 3.125%, -1 = 3.125%, +0 = 68.75%, +1 = 9.375%, +2 = 9.375%, +3 = 6.25%}} | ||
|dizzy= 5~11 | |dizzy= 5~11 | ||
|dizzytime= 60 | |dizzytime= 60 | ||
| Line 380: | Line 383: | ||
|total = 21 | |total = 21 | ||
|frameAdv = +1 / +4 | |frameAdv = +1 / +4 | ||
|actrange = 0 | |actrange = 0~41 | ||
|meter = 4/3 | |meter = 4/3 | ||
|description= A full split kick. | |description= A full split kick. | ||
| Line 411: | Line 414: | ||
| data = | | data = | ||
{{AttackData-SSF2T | {{AttackData-SSF2T | ||
|damage = 24[0] | |damage = {{tooltip|text=24[0]|hovertext=[0] Random Damage Table: -2 = 3.125%, -1 = 3.125%, +0 = 78.125%, +1 = 6.25%, +2 = 6.25%, +3 = 3.125%}} | ||
|dizzy= 5~11 | |dizzy= 5~11 | ||
|dizzytime= 60 | |dizzytime= 60 | ||
| Line 441: | Line 444: | ||
</div> | </div> | ||
==== <span class="invisible-header">clhk</span> ==== | ==== <span class="invisible-header">clhk</span> ==== | ||
| Line 452: | Line 456: | ||
| data = | | data = | ||
{{AttackData-SSF2T | {{AttackData-SSF2T | ||
|damage = 28[1] | |damage = {{tooltip|text=28[1]|hovertext=[1] Random Damage Table: -2 = 3.125%, -1 = 3.125%, +0 = 68.75%, +1 = 9.375%, +2 = 9.375%, +3 = 6.25%}} | ||
|dizzy= 10~16 | |dizzy= 10~16 | ||
|dizzytime= 80 | |dizzytime= 80 | ||
| Line 462: | Line 466: | ||
|total = 37 | |total = 37 | ||
|frameAdv = -5 | |frameAdv = -5 | ||
|actrange = 0 | |actrange = 0~56 | ||
|meter = 5/4 | |meter = 5/4 | ||
|description= Chun's panty-slippin high sidekick. | |description= Chun's panty-slippin high sidekick. | ||
| Line 492: | Line 496: | ||
| data = | | data = | ||
{{AttackData-SSF2T | {{AttackData-SSF2T | ||
|damage = 28[0] | |damage = {{tooltip|text=28[0]|hovertext=[0] Random Damage Table: -2 = 3.125%, -1 = 3.125%, +0 = 78.125%, +1 = 6.25%, +2 = 6.25%, +3 = 3.125%}} | ||
|dizzy= 10~16 | |dizzy= 10~16 | ||
|dizzytime= 80 | |dizzytime= 80 | ||
| Line 534: | Line 538: | ||
| data = | | data = | ||
{{AttackData-SSF2T | {{AttackData-SSF2T | ||
|damage = 4[0] | |damage = {{tooltip|text=4[0]|hovertext=[0] Random Damage Table: -2 = 3.125%, -1 = 3.125%, +0 = 78.125%, +1 = 6.25%, +2 = 6.25%, +3 = 3.125%}} | ||
|dizzy= 0~5 | |dizzy= 0~5 | ||
|dizzytime= 40 | |dizzytime= 40 | ||
| Line 565: | Line 569: | ||
</div> | </div> | ||
==== <span class="invisible-header">crmp</span> ==== | ==== <span class="invisible-header">crmp</span> ==== | ||
| Line 576: | Line 581: | ||
| data = | | data = | ||
{{AttackData-SSF2T | {{AttackData-SSF2T | ||
|damage =18[1] | |damage ={{tooltip|text=18[1]|hovertext=[1] Random Damage Table: -2 = 3.125%, -1 = 3.125%, +0 = 68.75%, +1 = 9.375%, +2 = 9.375%, +3 = 6.25%}} | ||
|dizzy= 5~11 | |dizzy= 5~11 | ||
|dizzytime= 60 | |dizzytime= 60 | ||
| Line 606: | Line 611: | ||
</div> | </div> | ||
==== <span class="invisible-header">crhp</span> ==== | ==== <span class="invisible-header">crhp</span> ==== | ||
| Line 617: | Line 623: | ||
| data = | | data = | ||
{{AttackData-SSF2T | {{AttackData-SSF2T | ||
|damage =22[2] | |damage ={{tooltip|text=22[2]|hovertext=[2] Random Damage Table: -3 = 3.125%, -2 = 3.125%, -1 = 3.125%, +0 = 46.875%, +1 = 12.5%, +2 = 15.625%, +3 = 6.25%, +4 = 9.375%}} | ||
|dizzy= 10~16 | |dizzy= 10~16 | ||
|dizzytime= 80 | |dizzytime= 80 | ||
| Line 646: | Line 652: | ||
</div> | </div> | ||
===== <span class="invisible-header">crlk</span> ===== | ===== <span class="invisible-header">crlk</span> ===== | ||
| Line 657: | Line 664: | ||
| data = | | data = | ||
{{AttackData-SSF2T | {{AttackData-SSF2T | ||
|damage = 14[0] | |damage = {{tooltip|text=14[0]|hovertext=[0] Random Damage Table: -2 = 3.125%, -1 = 3.125%, +0 = 78.125%, +1 = 6.25%, +2 = 6.25%, +3 = 3.125%}} | ||
|dizzy= 0~5 | |dizzy= 0~5 | ||
|dizzytime= 40 | |dizzytime= 40 | ||
| Line 688: | Line 695: | ||
</div> | </div> | ||
===== <span class="invisible-header"> | |||
===== <span class="invisible-header">crmk</span> ===== | |||
{{MoveData | {{MoveData | ||
| name = Crouching Forward | | name = Crouching Forward | ||
| Line 698: | Line 706: | ||
| data = | | data = | ||
{{AttackData-SSF2T | {{AttackData-SSF2T | ||
|damage = 18[1] | |damage = {{tooltip|text=18[1]|hovertext=[1] Random Damage Table: -2 = 3.125%, -1 = 3.125%, +0 = 68.75%, +1 = 9.375%, +2 = 9.375%, +3 = 6.25%}} | ||
|dizzy= 5~11 | |dizzy= 5~11 | ||
|dizzytime= 60 | |dizzytime= 60 | ||
| Line 740: | Line 748: | ||
| data = | | data = | ||
{{AttackData-SSF2T | {{AttackData-SSF2T | ||
|damage = 22[2] | |damage = {{tooltip|text=22[2]|hovertext=[2] Random Damage Table: -3 = 3.125%, -2 = 3.125%, -1 = 3.125%, +0 = 46.875%, +1 = 12.5%, +2 = 15.625%, +3 = 6.25%, +4 = 9.375%}} | ||
|dizzy= 5~11 | |dizzy= 5~11 | ||
|dizzytime= 130 | |dizzytime= 130 | ||
| Line 749: | Line 757: | ||
|recovery = 19 | |recovery = 19 | ||
|total = 32 | |total = 32 | ||
|frameAdv = -3 | |frameAdv = Hit: Soft KD<br>Block: -3 | ||
|actrange = N/A | |actrange = N/A | ||
|meter = 5/4 | |meter = 5/4 | ||
| Line 766: | Line 774: | ||
{{STDiagramCell| Frame Count}} |{{STDiagramCell| 1 + 3}} |{{STDiagramCell| 3}} |{{STDiagramCell| 6}} |{{STDiagramCell| 8}} |{{STDiagramCell| 11}} | {{STDiagramCell| Frame Count}} |{{STDiagramCell| 1 + 3}} |{{STDiagramCell| 3}} |{{STDiagramCell| 6}} |{{STDiagramCell| 8}} |{{STDiagramCell| 11}} | ||
|- | |- | ||
{{STDiagramCell| Simplified}} |{{STDiagramCellColSpan| 2 | 7}} |{{STDiagramCellColSpan| 2 | 19}} | {{STDiagramCell| Simplified}} |{{STDiagramCellColSpan| 2 | 7}} |{{STDiagramCell| 6}} |{{STDiagramCellColSpan| 2 | 19}} | ||
|} | |} | ||
| Line 783: | Line 791: | ||
| data = | | data = | ||
{{AttackData-SSF2T | {{AttackData-SSF2T | ||
|damage = 18[2] | |damage = {{tooltip|text=18[2]|hovertext=[2] Random Damage Table: -3 = 3.125%, -2 = 3.125%, -1 = 3.125%, +0 = 46.875%, +1 = 12.5%, +2 = 15.625%, +3 = 6.25%, +4 = 9.375%}} | ||
|dizzy= 1~7(-2) | |dizzy= 1~7(-2) | ||
|dizzytime= 40 | |dizzytime= 40 | ||
| Line 823: | Line 831: | ||
| data = | | data = | ||
{{AttackData-SSF2T | {{AttackData-SSF2T | ||
|damage = 16[2] | |damage = {{tooltip|text=16[2]|hovertext=[2] Random Damage Table: -3 = 3.125%, -2 = 3.125%, -1 = 3.125%, +0 = 46.875%, +1 = 12.5%, +2 = 15.625%, +3 = 6.25%, +4 = 9.375%}} | ||
|dizzy= 1~7(-2) | |dizzy= 1~7(-2) | ||
|dizzytime= 40 | |dizzytime= 40 | ||
| Line 830: | Line 838: | ||
|actrange = N/A | |actrange = N/A | ||
|startup = 6 | |startup = 6 | ||
|active = | |active = 40 | ||
|recovery = | |recovery = ∞ | ||
|total = 6+∞ | |total = 6+∞ | ||
|frameAdv = Dependent | |frameAdv = Dependent | ||
| Line 844: | Line 852: | ||
{{STDiagramHeader}} | {{STDiagramHeader}} | ||
{{STDiagramCell|}} |{{STDiagramImageCell| 1 | | {{STDiagramCell|}} |{{STDiagramImageCell| 1 | ChunLi_djjab1&5_djstrng1&5_djfrc1&5.png}} |{{STDiagramImageCell| 1 | ChunLi_djjab2&4_djstrng2&4_djfrc2&4.png}} |{{STDiagramImageCell| 1 | ChunLi_djjab3.png}} |{{STDiagramImageCell| 1 | ChunLi_djjab2&4_djstrng2&4_djfrc2&4.png}} |{{STDiagramImageCell| 1 | ChunLi_djjab1&5_djstrng1&5_djfrc1&5.png}} |{{STDiagramImageCell| 1 |ChunLi_njstrng8_njfrc8_djjab6_djstrng6_djfrc6.png}} | ||
|- | |- | ||
{{STDiagramCell| Frame Count}} |{{STDiagramCell| 3}} |{{STDiagramCell| 3}} |{{STDiagramCell| ∞}} | {{STDiagramCell| Frame Count}} |{{STDiagramCell| 3}} |{{STDiagramCell| 3}} |{{STDiagramCell| 40}} |{{STDiagramCell| 3}} |{{STDiagramCell| 4}} |{{STDiagramCell| ∞}} | ||
|- | |- | ||
{{STDiagramCell| Simplified}} |{{STDiagramCellColSpan| 2 | 6}} |{{STDiagramCell| ∞}} | {{STDiagramCell| Simplified}} |{{STDiagramCellColSpan| 2 | 6}} |{{STDiagramCell| 40}} |{{STDiagramCellColSpan| 3 | ∞}} | ||
|} | |} | ||
</div> | </div> | ||
===== <span class="invisible-header">njmp</span> ===== | ===== <span class="invisible-header">njmp</span> ===== | ||
| Line 863: | Line 872: | ||
| data = | | data = | ||
{{AttackData-SSF2T | {{AttackData-SSF2T | ||
|damage = 22[2] | |damage = {{tooltip|text=22[2]|hovertext=[2] Random Damage Table: -3 = 3.125%, -2 = 3.125%, -1 = 3.125%, +0 = 46.875%, +1 = 12.5%, +2 = 15.625%, +3 = 6.25%, +4 = 9.375%}} | ||
|dizzy= 5~11 | |dizzy= 5~11 | ||
|dizzytime= 50(+10) | |dizzytime= 50(+10) | ||
| Line 884: | Line 893: | ||
{{STDiagramHeader}} | {{STDiagramHeader}} | ||
{{STDiagramCell|}} |{{STDiagramImageCell| 1 | ChunLi_njjab1_njstrng1&7_njfrc1&7.png}} |{{STDiagramImageCell| 1 | ChunLi_njjab2_njstrng2&6_njfrc2&6.png}} |{{STDiagramImageCell| 1 | ChunLi_njjab3_njstrng3&5_njfrc3&5.png}} |{{STDiagramImageCell| 1 |ChunLi_njstrng4.png}} |{{STDiagramImageCell| 1 |ChunLi_njjab3_njstrng3&5_njfrc3&5.png}} |{{STDiagramImageCell| 1 |ChunLi_njjab2_njstrng2&6_njfrc2&6.png}} |{{STDiagramImageCell| 1 |ChunLi_njjab1_njstrng1&7_njfrc1&7.png}} |{{STDiagramImageCell| 1 | | {{STDiagramCell|}} |{{STDiagramImageCell| 1 | ChunLi_njjab1_njstrng1&7_njfrc1&7.png}} |{{STDiagramImageCell| 1 | ChunLi_njjab2_njstrng2&6_njfrc2&6.png}} |{{STDiagramImageCell| 1 | ChunLi_njjab3_njstrng3&5_njfrc3&5.png}} |{{STDiagramImageCell| 1 |ChunLi_njstrng4.png}} |{{STDiagramImageCell| 1 |ChunLi_njjab3_njstrng3&5_njfrc3&5.png}} |{{STDiagramImageCell| 1 |ChunLi_njjab2_njstrng2&6_njfrc2&6.png}} |{{STDiagramImageCell| 1 |ChunLi_njjab1_njstrng1&7_njfrc1&7.png}} |{{STDiagramImageCell| 1 |ChunLi_njstrng8_njfrc8_djjab6_djstrng6_djfrc6.png}} | ||
|- | |- | ||
{{STDiagramCell| Frame Count}} |{{STDiagramCell| 3}} |{{STDiagramCell| 3}} |{{STDiagramCell| 2}} |{{STDiagramCell| 16}} |{{STDiagramCell| 2}} |{{STDiagramCell| 3}} |{{STDiagramCell| 4}} |{{STDiagramCell| ∞}} | {{STDiagramCell| Frame Count}} |{{STDiagramCell| 3}} |{{STDiagramCell| 3}} |{{STDiagramCell| 2}} |{{STDiagramCell| 16}} |{{STDiagramCell| 2}} |{{STDiagramCell| 3}} |{{STDiagramCell| 4}} |{{STDiagramCell| ∞}} | ||
| Line 902: | Line 911: | ||
| data = | | data = | ||
{{AttackData-SSF2T | {{AttackData-SSF2T | ||
|damage = 20[2] | |damage = {{tooltip|text=20[2]|hovertext=[2] Random Damage Table: -3 = 3.125%, -2 = 3.125%, -1 = 3.125%, +0 = 46.875%, +1 = 12.5%, +2 = 15.625%, +3 = 6.25%, +4 = 9.375%}} | ||
|dizzy= 5~11 | |dizzy= 5~11 | ||
|dizzytime= 50(+10) | |dizzytime= 50(+10) | ||
| Line 922: | Line 931: | ||
{{STDiagramHeader}} | {{STDiagramHeader}} | ||
{{STDiagramCell|}} |{{STDiagramImageCell| 1 | | {{STDiagramCell|}} |{{STDiagramImageCell| 1 | ChunLi_djjab1&5_djstrng1&5_djfrc1&5.png}} |{{STDiagramImageCell| 1 | ChunLi_djjab2&4_djstrng2&4_djfrc2&4.png}} |{{STDiagramImageCell| 1 | ChunLi_djstrng3.png}} |{{STDiagramImageCell| 1 | ChunLi_djjab2&4_djstrng2&4_djfrc2&4.png}} |{{STDiagramImageCell| 1 | ChunLi_djjab1&5_djstrng1&5_djfrc1&5.png}} |{{STDiagramImageCell| 1 | ChunLi_njstrng8_njfrc8_djjab6_djstrng6_djfrc6.png}} | ||
|- | |- | ||
{{STDiagramCell| Frame Count}} |{{STDiagramCell| 3}} |{{STDiagramCell| 3}} |{{STDiagramCell| 8}} |{{STDiagramCell| 3}} |{{STDiagramCell| 4}} |{{STDiagramCell| ∞}} | {{STDiagramCell| Frame Count}} |{{STDiagramCell| 3}} |{{STDiagramCell| 3}} |{{STDiagramCell| 8}} |{{STDiagramCell| 3}} |{{STDiagramCell| 4}} |{{STDiagramCell| ∞}} | ||
| Line 930: | Line 939: | ||
</div> | </div> | ||
===== <span class="invisible-header">njhp</span> ===== | ===== <span class="invisible-header">njhp</span> ===== | ||
| Line 941: | Line 951: | ||
| data = | | data = | ||
{{AttackData-SSF2T | {{AttackData-SSF2T | ||
|damage = 26[2] | |damage = {{tooltip|text=26[2]|hovertext=[2] Random Damage Table: -3 = 3.125%, -2 = 3.125%, -1 = 3.125%, +0 = 46.875%, +1 = 12.5%, +2 = 15.625%, +3 = 6.25%, +4 = 9.375%}} | ||
|dizzy= 11~17(-1) | |dizzy= 11~17(-1) | ||
|dizzytime= 60(+20) | |dizzytime= 60(+20) | ||
| Line 962: | Line 972: | ||
{{STDiagramHeader}} | {{STDiagramHeader}} | ||
{{STDiagramCell|}} |{{STDiagramImageCell| 1 | ChunLi_njjab1_njstrng1&7_njfrc1&7.png}} |{{STDiagramImageCell| 1 | ChunLi_njjab2_njstrng2&6_njfrc2&6.png}} |{{STDiagramImageCell| 1 | ChunLi_njjab3_njstrng3&5_njfrc3&5.png}} |{{STDiagramImageCell| 1 | ChunLi_njfrc4.png}} |{{STDiagramImageCell| 1 | ChunLi_njjab3_njstrng3&5_njfrc3&5.png}} |{{STDiagramImageCell| 1 | ChunLi_njjab2_njstrng2&6_njfrc2&6.png}} |{{STDiagramImageCell| 1 | ChunLi_njjab1_njstrng1&7_njfrc1&7.png}} |{{STDiagramImageCell| 1 | | {{STDiagramCell|}} |{{STDiagramImageCell| 1 | ChunLi_njjab1_njstrng1&7_njfrc1&7.png}} |{{STDiagramImageCell| 1 | ChunLi_njjab2_njstrng2&6_njfrc2&6.png}} |{{STDiagramImageCell| 1 | ChunLi_njjab3_njstrng3&5_njfrc3&5.png}} |{{STDiagramImageCell| 1 | ChunLi_njfrc4.png}} |{{STDiagramImageCell| 1 | ChunLi_njjab3_njstrng3&5_njfrc3&5.png}} |{{STDiagramImageCell| 1 | ChunLi_njjab2_njstrng2&6_njfrc2&6.png}} |{{STDiagramImageCell| 1 | ChunLi_njjab1_njstrng1&7_njfrc1&7.png}} |{{STDiagramImageCell| 1 | ChunLi_njstrng8_njfrc8_djjab6_djstrng6_djfrc6.png}} | ||
|- | |- | ||
{{STDiagramCell| Frame Count}} |{{STDiagramCell| 3}} |{{STDiagramCell| 3}} |{{STDiagramCell| 2}} |{{STDiagramCell| 8}} |{{STDiagramCell| 2}} |{{STDiagramCell| 3}} |{{STDiagramCell| 4}} |{{STDiagramCell| ∞}} | {{STDiagramCell| Frame Count}} |{{STDiagramCell| 3}} |{{STDiagramCell| 3}} |{{STDiagramCell| 2}} |{{STDiagramCell| 8}} |{{STDiagramCell| 2}} |{{STDiagramCell| 3}} |{{STDiagramCell| 4}} |{{STDiagramCell| ∞}} | ||
| Line 981: | Line 991: | ||
| data = | | data = | ||
{{AttackData-SSF2T | {{AttackData-SSF2T | ||
|damage = 24[2] | |damage = {{tooltip|text=24[2]|hovertext=[2] Random Damage Table: -3 = 3.125%, -2 = 3.125%, -1 = 3.125%, +0 = 46.875%, +1 = 12.5%, +2 = 15.625%, +3 = 6.25%, +4 = 9.375%}} | ||
|dizzy= 11~17(-1) | |dizzy= 11~17(-1) | ||
|dizzytime= 60(+20) | |dizzytime= 60(+20) | ||
| Line 1,002: | Line 1,012: | ||
{{STDiagramHeader}} | {{STDiagramHeader}} | ||
{{STDiagramCell|}} |{{STDiagramImageCell| 1 | | {{STDiagramCell|}} |{{STDiagramImageCell| 1 | ChunLi_djjab1&5_djstrng1&5_djfrc1&5.png}} |{{STDiagramImageCell| 1 | ChunLi_djjab2&4_djstrng2&4_djfrc2&4.png}} |{{STDiagramImageCell| 1 | ChunLi_djfrc3.png}} |{{STDiagramImageCell| 1 | ChunLi_djjab2&4_djstrng2&4_djfrc2&4.png}} |{{STDiagramImageCell| 1 | ChunLi_djjab1&5_djstrng1&5_djfrc1&5.png}} |{{STDiagramImageCell| 1 | ChunLi_njstrng8_njfrc8_djjab6_djstrng6_djfrc6.png}} | ||
|- | |- | ||
{{STDiagramCell| Frame Count}} |{{STDiagramCell| 3}} |{{STDiagramCell| 3}} |{{STDiagramCell| 8}} |{{STDiagramCell| 3}} |{{STDiagramCell| 4}} |{{STDiagramCell| ∞}} | {{STDiagramCell| Frame Count}} |{{STDiagramCell| 3}} |{{STDiagramCell| 3}} |{{STDiagramCell| 8}} |{{STDiagramCell| 3}} |{{STDiagramCell| 4}} |{{STDiagramCell| ∞}} | ||
| Line 1,010: | Line 1,020: | ||
</div> | </div> | ||
===== <span class="invisible-header">njlk</span> ===== | ===== <span class="invisible-header">njlk</span> ===== | ||
| Line 1,020: | Line 1,031: | ||
| data = | | data = | ||
{{AttackData-SSF2T | {{AttackData-SSF2T | ||
|damage = 18[2] | |damage = {{tooltip|text=18[2]|hovertext=[2] Random Damage Table: -3 = 3.125%, -2 = 3.125%, -1 = 3.125%, +0 = 46.875%, +1 = 12.5%, +2 = 15.625%, +3 = 6.25%, +4 = 9.375%}} | ||
|dizzy= 1~7(-2) | |dizzy= 1~7(-2) | ||
|dizzytime= 40 | |dizzytime= 40 | ||
| Line 1,060: | Line 1,071: | ||
| data = | | data = | ||
{{AttackData-SSF2T | {{AttackData-SSF2T | ||
|damage = 20[2] | |damage = {{tooltip|text=20[2]|hovertext=[2] Random Damage Table: -3 = 3.125%, -2 = 3.125%, -1 = 3.125%, +0 = 46.875%, +1 = 12.5%, +2 = 15.625%, +3 = 6.25%, +4 = 9.375%}} | ||
|dizzy= 1~7(-2) | |dizzy= 1~7(-2) | ||
|dizzytime= 40 | |dizzytime= 40 | ||
| Line 1,066: | Line 1,077: | ||
|guard = High | |guard = High | ||
|startup = 6 | |startup = 6 | ||
|active = | |active = 40 | ||
|recovery = | |recovery = ∞ | ||
|total = 6+∞ | |total = 6+∞ | ||
|frameAdv = Dependent | |frameAdv = Dependent | ||
| Line 1,082: | Line 1,093: | ||
{{STDiagramHeader}} | {{STDiagramHeader}} | ||
{{STDiagramCell|}} |{{STDiagramImageCell| 1 | | {{STDiagramCell|}} |{{STDiagramImageCell| 1 | ChunLi_djshrt1&5_djfrwrd1&5.png}} |{{STDiagramImageCell| 1 | ChunLi_djshrt2&4_djfrwrd2&4.png}} |{{STDiagramImageCell| 1 | ChunLi_djshrt3.png}} |{{STDiagramImageCell| 1 | ChunLi_djshrt2&4_djfrwrd2&4.png}} |{{STDiagramImageCell| 1 | ChunLi_djshrt1&5_djfrwrd1&5.png}} | ||
|- | |- | ||
{{STDiagramCell| Frame Count}} |{{STDiagramCell| 3}} |{{STDiagramCell| 3}} |{{STDiagramCell| ∞}} | {{STDiagramCell| Frame Count}} |{{STDiagramCell| 3}} |{{STDiagramCell| 3}} |{{STDiagramCell| 40}} |{{STDiagramCell| 3}} |{{STDiagramCell| ∞}} | ||
|- | |- | ||
{{STDiagramCell| Simplified}} |{{STDiagramCellColSpan| 2 | 6}} | {{STDiagramCell| Simplified}} |{{STDiagramCellColSpan| 2 | 6}} |{{STDiagramCell| 40}} |{{STDiagramCellColSpan| 2 | ∞}} | ||
|} | |} | ||
| Line 1,101: | Line 1,112: | ||
| data = | | data = | ||
{{AttackData-SSF2T | {{AttackData-SSF2T | ||
|damage = 22[2] | |damage = {{tooltip|text=22[2]|hovertext=[2] Random Damage Table: -3 = 3.125%, -2 = 3.125%, -1 = 3.125%, +0 = 46.875%, +1 = 12.5%, +2 = 15.625%, +3 = 6.25%, +4 = 9.375%}} | ||
|dizzy= 5~11 | |dizzy= 5~11 | ||
|dizzytime= 50(+10) | |dizzytime= 50(+10) | ||
| Line 1,142: | Line 1,153: | ||
| data = | | data = | ||
{{AttackData-SSF2T | {{AttackData-SSF2T | ||
|damage = 20[2] | |damage = {{tooltip|text=20[2]|hovertext=[2] Random Damage Table: -3 = 3.125%, -2 = 3.125%, -1 = 3.125%, +0 = 46.875%, +1 = 12.5%, +2 = 15.625%, +3 = 6.25%, +4 = 9.375%}} | ||
|dizzy= 5~11 | |dizzy= 5~11 | ||
|dizzytime= 50(+10) | |dizzytime= 50(+10) | ||
| Line 1,164: | Line 1,175: | ||
{{STDiagramHeader}} | {{STDiagramHeader}} | ||
{{STDiagramCell|}} |{{STDiagramImageCell| 1 | | {{STDiagramCell|}} |{{STDiagramImageCell| 1 | ChunLi_djshrt1&5_djfrwrd1&5.png}} |{{STDiagramImageCell| 1 | ChunLi_djshrt2&4_djfrwrd2&4.png}} |{{STDiagramImageCell| 1 | ChunLi_djfrwrd3.png}} |{{STDiagramImageCell| 1 | ChunLi_djshrt2&4_djfrwrd2&4.png}} |{{STDiagramImageCell| 1 | ChunLi_djshrt1&5_djfrwrd1&5.png}} | ||
|- | |- | ||
{{STDiagramCell| Frame Count}} |{{STDiagramCell| 3}} |{{STDiagramCell| 3}} |{{STDiagramCell| 16}} |{{STDiagramCell| 3}} |{{STDiagramCell| ∞}} | {{STDiagramCell| Frame Count}} |{{STDiagramCell| 3}} |{{STDiagramCell| 3}} |{{STDiagramCell| 16}} |{{STDiagramCell| 3}} |{{STDiagramCell| ∞}} | ||
| Line 1,187: | Line 1,198: | ||
| data = | | data = | ||
{{AttackData-SSF2T | {{AttackData-SSF2T | ||
|damage = 26[2] | |damage = {{tooltip|text=26[2]|hovertext=[2] Random Damage Table: -3 = 3.125%, -2 = 3.125%, -1 = 3.125%, +0 = 46.875%, +1 = 12.5%, +2 = 15.625%, +3 = 6.25%, +4 = 9.375%}} | ||
|dizzy= 10~16 | |dizzy= 10~16 | ||
|dizzytime= 80 | |dizzytime= 80 | ||
| Line 1,196: | Line 1,207: | ||
|recovery = ∞ | |recovery = ∞ | ||
|total = 16+∞ | |total = 16+∞ | ||
|frameAdv = | |frameAdv = Hit: Hard KD<br>Block: Dependent | ||
|actrange = N/A | |actrange = N/A | ||
|meter = 5/4 | |meter = 5/4 | ||
| Line 1,235: | Line 1,246: | ||
| data = | | data = | ||
{{AttackData-SSF2T | {{AttackData-SSF2T | ||
|damage = 24[2] | |damage = {{tooltip|text=24[2]|hovertext=[2] Random Damage Table: -3 = 3.125%, -2 = 3.125%, -1 = 3.125%, +0 = 46.875%, +1 = 12.5%, +2 = 15.625%, +3 = 6.25%, +4 = 9.375%}} | ||
|dizzy= 11~17(-1) | |dizzy= 11~17(-1) | ||
|dizzytime= 60(+20) | |dizzytime= 60(+20) | ||
| Line 1,307: | Line 1,318: | ||
| data = | | data = | ||
{{AttackData-SSF2T | {{AttackData-SSF2T | ||
|damage = 22[0] | |damage = {{tooltip|text=22[0]|hovertext=[0] Random Damage Table: -2 = 3.125%, -1 = 3.125%, +0 = 78.125%, +1 = 6.25%, +2 = 6.25%, +3 = 3.125%}} | ||
|dizzy= 0~5 | |dizzy= 0~5 | ||
|dizzytime= 40 | |dizzytime= 40 | ||
| Line 1,316: | Line 1,327: | ||
|recovery = 43 | |recovery = 43 | ||
|total = 59 | |total = 59 | ||
|frameAdv = | |frameAdv = Hit: Hard KD<br>Block: -39 / -34 | ||
|actrange = | |actrange = N/A | ||
|meter = 2/1 | |meter = 2/1 | ||
|description= Chun-Li does a jump off the opponent (or thin air) into a flip. | |description= Chun-Li does a jump off the opponent (or thin air) into a flip. | ||
| Line 1,350: | Line 1,361: | ||
| data = | | data = | ||
{{AttackData-SSF2T | {{AttackData-SSF2T | ||
|damage = 20[0] | |damage = {{tooltip|text=20[0]|hovertext=[0] Random Damage Table: -2 = 3.125%, -1 = 3.125%, +0 = 78.125%, +1 = 6.25%, +2 = 6.25%, +3 = 3.125%}} | ||
|dizzy= 10~16 | |dizzy= 10~16 | ||
|dizzytime= 80 | |dizzytime= 80 | ||
| Line 1,359: | Line 1,370: | ||
|recovery = 0 | |recovery = 0 | ||
|total = 51 | |total = 51 | ||
|frameAdv | |frameAdv = Hit: Hard KD<br>Block: Dependent | ||
|actrange = N/A | |actrange = N/A | ||
|meter = 5/4 | |meter = 5/4 | ||
| Line 1,393: | Line 1,404: | ||
| data = | | data = | ||
{{AttackData-SSF2T | {{AttackData-SSF2T | ||
|damage = 20[0] | |damage = {{tooltip|text=20[0]|hovertext=[0] Random Damage Table: -2 = 3.125%, -1 = 3.125%, +0 = 78.125%, +1 = 6.25%, +2 = 6.25%, +3 = 3.125%}} | ||
|dizzy= 2~8 | |dizzy= 2~8 | ||
|dizzytime= 60 | |dizzytime= 60 | ||
| Line 1,431: | Line 1,442: | ||
{{MoveData | {{MoveData | ||
| name = Koshuto | | name = Koshuto | ||
| input = cl. 4 | | input = cl. 4/6 + MP/HP<br>cl. {{b}} or {{f}}+{{mp}}/{{hp}} | ||
| subtitle = | | subtitle = | ||
| image = ssf2t_chunli_pthrow.png | | image = ssf2t_chunli_pthrow.png | ||
| Line 1,441: | Line 1,452: | ||
|dizzy= 7~13 | |dizzy= 7~13 | ||
|dizzytime= 100 | |dizzytime= 100 | ||
|cancel = | |cancel = | ||
|guard = Grab | |guard = Grab | ||
|startup = | |startup = 0 | ||
|active = 1 | |active = 1 | ||
|recovery = Dependent | |recovery = Dependent | ||
| Line 1,454: | Line 1,465: | ||
*Be careful when throwing cornered opponents towards the corner, since most characters can actually punish Chun-Li's recovery if they tech. | *Be careful when throwing cornered opponents towards the corner, since most characters can actually punish Chun-Li's recovery if they tech. | ||
*If facing a charge character, know that if the throw is teched the opponent will not have enough back charge for his specials right after recovering from being thrown. This happens because there's a side switch during the throw animation. This means that Chun-Li can try to follow it up with a meaty without having to fear certain reversals (e.g. Boxer's or Dictator's Super), but know that they may have enough down charge since it's possible to tech throws with {{Motion|1}} or {{Motion|3}}. | *If facing a charge character, know that if the throw is teched the opponent will not have enough back charge for his specials right after recovering from being thrown. This happens because there's a side switch during the throw animation. This means that Chun-Li can try to follow it up with a meaty without having to fear certain reversals (e.g. Boxer's or Dictator's Super), but know that they may have enough down charge since it's possible to tech throws with {{Motion|1}} or {{Motion|3}}. | ||
*You can keep stored super during this throw by hitting the opposite direction as you throw, then switching back to forward. If you throw normally, you will lose stored super due to a side switch during the throw animation. Example: Forward+M, quickly hold back as she throws, hold forward. Charge should still be stored. | |||
}} | }} | ||
}} | }} | ||
| Line 1,470: | Line 1,483: | ||
|dizzy= 7~13 | |dizzy= 7~13 | ||
|dizzytime= 100 | |dizzytime= 100 | ||
|cancel = | |cancel = | ||
|guard = Grab | |guard = Grab | ||
|startup = | |startup = 0 | ||
|active = 1 | |active = 1 | ||
|recovery = Dependent | |recovery = Dependent | ||
|total = 2 | |total = 2 | ||
|frameAdv = N/A | |frameAdv = N/A | ||
|actrange = 58 (from axis) 33 (from throwable box) | |actrange = 58 (from axis)<br>33 (from throwable box)<br>{{Tooltip | text=Minimum height: 48/48 | hovertext=Must be 48 units upwards/48 units downward to use in air.}} | ||
|description= Same sprite and basic function as Chun's grounded throw. | |description= Same sprite and basic function as Chun's grounded throw. | ||
*Very good range for an air throw. | *Very good range for an air throw. | ||
| Line 1,486: | Line 1,499: | ||
<div class="mw-collapsible mw-collapsed" id="mw-customcollapsible-throw"> | <div class="mw-collapsible mw-collapsed" id="mw-customcollapsible-throw"> | ||
*''' | *'''Ground Throw:''' | ||
{{STDiagramHeader}} | {{STDiagramHeader}} | ||
{{STDiagramImageCell| 1| ChunLi_throwb.png}} |{{STDiagramImageCell| 1 | ChunLi_throw.png}} |{{STDiagramImageCell| 1 | ChunLi_throwf.png}} | {{STDiagramImageCell| 1| ChunLi_throwb.png}} |{{STDiagramImageCell| 1 | ChunLi_throw.png}} |{{STDiagramImageCell| 1 | ChunLi_throwf.png}} | ||
| Line 1,505: | Line 1,518: | ||
{{MoveData | {{MoveData | ||
| name = Kikoken | | name = Kikoken | ||
| input = {{tooltip|text=[4]6P / {{cb}}{{f}}+{{p}}|hovertext=Detailed Input: Charge ←/↙/↖ for at least 61f, [7~14f] → [10/9/7f] Jab/Strong/Fierce. It is needed to wait at least 1 frame after leaving the charge direction to enter with the P button }} | | input = {{tooltip|text=[4]6P / {{cb}}{{f}}+{{p}}|hovertext=Detailed Input: (Charge ←/↙/↖ for at least 61f, [7~14f] → [10/9/7f] Jab/Strong/Fierce. It is needed to wait at least 1 frame after leaving the charge direction to enter with the P button)}} | ||
| subtitle = Fireball | | subtitle = Fireball | ||
| image = ChunLi_fb11jab.png | | image = ChunLi_fb11jab.png | ||
| Line 1,512: | Line 1,525: | ||
{{AttackData-SSF2T | {{AttackData-SSF2T | ||
|version = {{Icon-Capcom|lp}} | |version = {{Icon-Capcom|lp}} | ||
|damage = 17[1] | |damage = {{tooltip|text=17[1]|hovertext=[1] Random Damage Table: -2 = 3.125%, -1 = 3.125%, +0 = 68.75%, +1 = 9.375%, +2 = 9.375%, +3 = 6.25%}} | ||
|dizzy= 5~11 | |dizzy= 5~11 | ||
|dizzytime= 90 | |dizzytime= 90 | ||
| Line 1,519: | Line 1,532: | ||
|startup = 5 | |startup = 5 | ||
|active = {{Tooltip | text=75| hovertext= Projectile travels 222 pixels}} | |active = {{Tooltip | text=75| hovertext= Projectile travels 222 pixels}} | ||
|recovery = {{Tooltip | text=42*|hovertext = Affected by the Fireball Recovery Glitch.}} | |recovery = {{Tooltip | text=42*|hovertext = Decrements during hitfreeze. Affected by the Fireball Recovery Glitch.}} | ||
|total = 47 | |total = 47 | ||
|frameAdv = Dependent | |frameAdv = Dependent | ||
| Line 1,529: | Line 1,542: | ||
{{AttackData-SSF2T | {{AttackData-SSF2T | ||
|version = {{Icon-Capcom|mp}} | |version = {{Icon-Capcom|mp}} | ||
|damage = 18[1] | |damage = {{tooltip|text=18[1]|hovertext=[1] Random Damage Table: -2 = 3.125%, -1 = 3.125%, +0 = 68.75%, +1 = 9.375%, +2 = 9.375%, +3 = 6.25%}} | ||
|dizzy= 7~13 | |dizzy= 7~13 | ||
|dizzytime= 90 | |dizzytime= 90 | ||
| Line 1,536: | Line 1,549: | ||
|startup = 5 | |startup = 5 | ||
|active = {{Tooltip | text=45| hovertext= Projectile travels 176 pixels.}} | |active = {{Tooltip | text=45| hovertext= Projectile travels 176 pixels.}} | ||
|recovery = {{Tooltip | text=40*|hovertext = Affected by the Fireball Recovery Glitch.}} | |recovery = {{Tooltip | text=40*|hovertext = Decrements during hitfreeze. Affected by the Fireball Recovery Glitch.}} | ||
|total = 45 | |total = 45 | ||
|frameAdv = Dependent | |frameAdv = Dependent | ||
| Line 1,545: | Line 1,558: | ||
{{AttackData-SSF2T | {{AttackData-SSF2T | ||
|version = {{Icon-Capcom|hp}} | |version = {{Icon-Capcom|hp}} | ||
|damage = 20[1] | |damage = {{tooltip|text=20[1]|hovertext=[1] Random Damage Table: -2 = 3.125%, -1 = 3.125%, +0 = 68.75%, +1 = 9.375%, +2 = 9.375%, +3 = 6.25%}} | ||
|dizzy= 7~13 | |dizzy= 7~13 | ||
|dizzytime= 90 | |dizzytime= 90 | ||
| Line 1,552: | Line 1,565: | ||
|startup = 5 | |startup = 5 | ||
|active = {{Tooltip | text=31| hovertext= Projectile travels 150 pixels.}} | |active = {{Tooltip | text=31| hovertext= Projectile travels 150 pixels.}} | ||
|recovery = {{Tooltip | text=38*|hovertext = Affected by the Fireball Recovery Glitch.}} | |recovery = {{Tooltip | text=38*|hovertext = Decrements during hitfreeze. Affected by the Fireball Recovery Glitch.}} | ||
|total = 43 | |total = 43 | ||
|frameAdv = Dependent | |frameAdv = Dependent | ||
| Line 1,569: | Line 1,582: | ||
<div class="mw-collapsible mw-collapsed" id="mw-customcollapsible-kikoken"> | <div class="mw-collapsible mw-collapsed" id="mw-customcollapsible-kikoken"> | ||
'''Startup:''' | |||
{{STDiagramHeader}} | {{STDiagramHeader}} | ||
{{STDiagramCell|}} |{{STDiagramImageCell| 1 | ChunLi_fb1.png}} |{{STDiagramImageCell| 1 | ChunLi_fb2.png}} |{{STDiagramImageCell| 1 | ChunLi_fb3.png}} |{{STDiagramImageCell| 1 | ChunLi_fb4.png}} |{{STDiagramImageCell| 1 | ChunLi_fb5.png}} | {{STDiagramCell|}} |{{STDiagramImageCell| 1 | ChunLi_fb1.png}} |{{STDiagramImageCell| 1 | ChunLi_fb2.png}} |{{STDiagramImageCell| 1 | ChunLi_fb3.png}} |{{STDiagramImageCell| 1 | ChunLi_fb4.png}} |{{STDiagramImageCell| 1 | ChunLi_fb5.png}} | ||
| Line 1,578: | Line 1,590: | ||
{{STDiagramCell| Simplified}} |{{STDiagramCellColSpan| 5 | 5}} | {{STDiagramCell| Simplified}} |{{STDiagramCellColSpan| 5 | 5}} | ||
|} | |} | ||
'''Active:''' | |||
*'''Jab Version:''' | *'''Jab Version:''' | ||
{{STDiagramHeader}} | {{STDiagramHeader}} | ||
{{STDiagramCell|}} |{{STDiagramImageCell| 1 | ChunLi_fb6.png}} |{{STDiagramImageCell| 1 | ChunLi_fb7jab.png}} |{{STDiagramImageCell| 1 | ChunLi_fb8jab.png}} |{{STDiagramImageCell| 1 | ChunLi_fb9jab.png}} |{{STDiagramImageCell| 1 | ChunLi_fb10jab.png}} |{{STDiagramImageCell| 1 | ChunLi_fb11jab.png}} | {{STDiagramCell|}} |{{STDiagramImageCell| 1 | ChunLi_fb6.png}} |{{STDiagramImageCell| 1 | ChunLi_fb7jab.png}} |{{STDiagramImageCell| 1 | ChunLi_fb8jab.png}} |{{STDiagramImageCell| 1 | ChunLi_fb9jab.png}} |{{STDiagramImageCell| 1 | ChunLi_fb10jab.png}} |{{STDiagramImageCell| 1 | ChunLi_fb11jab.png}} | ||
| Line 1,590: | Line 1,599: | ||
{{STDiagramCell| Simplified}} |{{STDiagramCellColSpan| 6 | 42}} | {{STDiagramCell| Simplified}} |{{STDiagramCellColSpan| 6 | 42}} | ||
|} | |} | ||
*'''Strong Version:''' | *'''Strong Version:''' | ||
{{STDiagramHeader}} | {{STDiagramHeader}} | ||
{{STDiagramCell|}} |{{STDiagramImageCell| 1 | ChunLi_fb6.png}} |{{STDiagramImageCell| 1 | ChunLi_fb7strng.png}} |{{STDiagramImageCell| 1 | ChunLi_fb8strng.png}} |{{STDiagramImageCell| 1 | ChunLi_fb9strng.png}} |{{STDiagramImageCell| 1 | ChunLi_fb10strng.png}} |{{STDiagramImageCell| 1 | ChunLi_fb11strng.png}} | {{STDiagramCell|}} |{{STDiagramImageCell| 1 | ChunLi_fb6.png}} |{{STDiagramImageCell| 1 | ChunLi_fb7strng.png}} |{{STDiagramImageCell| 1 | ChunLi_fb8strng.png}} |{{STDiagramImageCell| 1 | ChunLi_fb9strng.png}} |{{STDiagramImageCell| 1 | ChunLi_fb10strng.png}} |{{STDiagramImageCell| 1 | ChunLi_fb11strng.png}} | ||
| Line 1,600: | Line 1,607: | ||
{{STDiagramCell| Simplified}} |{{STDiagramCellColSpan| 6 | 40}} | {{STDiagramCell| Simplified}} |{{STDiagramCellColSpan| 6 | 40}} | ||
|} | |} | ||
*'''Fierce Version:''' | *'''Fierce Version:''' | ||
{{STDiagramHeader}} | {{STDiagramHeader}} | ||
{{STDiagramCell|}} |{{STDiagramImageCell| 1 | ChunLi_fb6.png}} |{{STDiagramImageCell| 1 | ChunLi_fb7frc.png}} |{{STDiagramImageCell| 1 | ChunLi_fb8frc.png}} |{{STDiagramImageCell| 1 | ChunLi_fb9frc.png}} |{{STDiagramImageCell| 1 | ChunLi_fb10frc.png}} |{{STDiagramImageCell| 1 | ChunLi_fb11frc.png}} | {{STDiagramCell|}} |{{STDiagramImageCell| 1 | ChunLi_fb6.png}} |{{STDiagramImageCell| 1 | ChunLi_fb7frc.png}} |{{STDiagramImageCell| 1 | ChunLi_fb8frc.png}} |{{STDiagramImageCell| 1 | ChunLi_fb9frc.png}} |{{STDiagramImageCell| 1 | ChunLi_fb10frc.png}} |{{STDiagramImageCell| 1 | ChunLi_fb11frc.png}} | ||
| Line 1,612: | Line 1,617: | ||
'''Total Distance Traveled:''' | |||
{{STDiagramHeader}} | {{STDiagramHeader}} | ||
{{STDiagramCell| <b>Jab:</b> 222 pixels after 75 frames}} |{{STDiagramCell| <b>Strong:</b> 176 pixels after 45 frames}} |{{STDiagramCell| <b>Fierce:</b> 150 pixels after 31 frames}} | {{STDiagramCell| <b>Jab:</b> 222 pixels after 75 frames}} |{{STDiagramCell| <b>Strong:</b> 176 pixels after 45 frames}} |{{STDiagramCell| <b>Fierce:</b> 150 pixels after 31 frames}} | ||
|- | |- | ||
{{ | {{STDiagramImageCellBorderRight| 1 | ChunLi_fbjab.png}} |{{STDiagramImageCellBorderRight| 1 | ChunLi_fbstrng.png}} |{{STDiagramImageCell| 1 | ChunLi_fbfrc.png}} | ||
|} | |} | ||
| Line 1,625: | Line 1,629: | ||
{{MoveData | {{MoveData | ||
| name = Hyakuretsukyaku | | name = Hyakuretsukyaku | ||
| input = {{tooltip|text=Press {{k}} Repeatedly|hovertext=Detailed Input: Pressing a Kick button increases an invisible counter. If the button is not pressed again within 15/12/9f (Short/Forward/Roundhouse) of the last press, it resets back to 0. Pressing K while the counter equals 5 during a state where the move can come out will start the move. The move will continue as long as you keep pressing the button | | input = {{tooltip|text=Press {{k}} Repeatedly|hovertext=Detailed Input: (Pressing a Kick button increases an invisible counter. If the button is not pressed again within 15/12/9f (Short/Forward/Roundhouse) of the last press, it resets back to 0. Pressing K while the counter equals 5 during a state where the move can come out will start the move. The move will continue as long as you keep pressing the button)}} | ||
| subtitle = Lightning Legs | | subtitle = Lightning Legs | ||
| image = ChunLi_ll3.png | | image = ChunLi_ll3.png | ||
| Line 1,642: | Line 1,646: | ||
{{AttackData-SSF2T | {{AttackData-SSF2T | ||
|version = {{Icon-Capcom|lk}} | |version = {{Icon-Capcom|lk}} | ||
|damage = 28[2] | |damage = {{tooltip|text=28[2]|hovertext=[2] Random Damage Table: -3 = 3.125%, -2 = 3.125%, -1 = 3.125%, +0 = 46.875%, +1 = 12.5%, +2 = 15.625%, +3 = 6.25%, +4 = 9.375%}} | ||
|dizzy= 5~11 | |dizzy= 5~11 | ||
|dizzytime= 100 | |dizzytime= 100 | ||
| Line 1,658: | Line 1,662: | ||
{{AttackData-SSF2T | {{AttackData-SSF2T | ||
|version = {{Icon-Capcom|mk}} | |version = {{Icon-Capcom|mk}} | ||
|damage = 30[2] | |damage = {{tooltip|text=30[2]|hovertext=[2] Random Damage Table: -3 = 3.125%, -2 = 3.125%, -1 = 3.125%, +0 = 46.875%, +1 = 12.5%, +2 = 15.625%, +3 = 6.25%, +4 = 9.375%}} | ||
|dizzy= 5~11 | |dizzy= 5~11 | ||
|dizzytime= 100 | |dizzytime= 100 | ||
| Line 1,674: | Line 1,678: | ||
{{AttackData-SSF2T | {{AttackData-SSF2T | ||
|version = {{Icon-Capcom|hk}} | |version = {{Icon-Capcom|hk}} | ||
|damage = 32[2] | |damage = {{tooltip|text=32[2]|hovertext=[2] Random Damage Table: -3 = 3.125%, -2 = 3.125%, -1 = 3.125%, +0 = 46.875%, +1 = 12.5%, +2 = 15.625%, +3 = 6.25%, +4 = 9.375%}} | ||
|dizzy= 5~11 | |dizzy= 5~11 | ||
|dizzytime= 100 | |dizzytime= 100 | ||
| Line 1,703: | Line 1,707: | ||
<div class="mw-collapsible mw-collapsed" id="mw-customcollapsible-legs"> | <div class="mw-collapsible mw-collapsed" id="mw-customcollapsible-legs"> | ||
'''Startup:''' | |||
{{STDiagramHeader}} | {{STDiagramHeader}} | ||
{{STDiagramCell|}} |{{STDiagramImageCell| 1 | ChunLi_ll1&12.png}} |{{STDiagramImageCell| 1 | ChunLi_ll2&11.png}} | {{STDiagramCell|}} |{{STDiagramImageCell| 1 | ChunLi_ll1&12.png}} |{{STDiagramImageCell| 1 | ChunLi_ll2&11.png}} | ||
| Line 1,720: | Line 1,723: | ||
{{STDiagramCell| Simplified (Rh)}} |{{STDiagramCellColSpan| 2 | 10}} | {{STDiagramCell| Simplified (Rh)}} |{{STDiagramCellColSpan| 2 | 10}} | ||
|} | |} | ||
'''Active:''' | |||
{{STDiagramHeader}} | {{STDiagramHeader}} | ||
{{STDiagramCell|}} |{{STDiagramImageCell| 1 | ChunLi_ll3.png}} |{{STDiagramImageCell| 1 | ChunLi_ll4.png}} |{{STDiagramImageCell| 1 | ChunLi_ll5.png}} |{{STDiagramImageCell| 1 | ChunLi_ll6&10.png}} | {{STDiagramCell|}} |{{STDiagramImageCell| 1 | ChunLi_ll3.png}} |{{STDiagramImageCell| 1 | ChunLi_ll4.png}} |{{STDiagramImageCell| 1 | ChunLi_ll5.png}} |{{STDiagramImageCell| 1 | ChunLi_ll6&10.png}} | ||
| Line 1,732: | Line 1,733: | ||
{{STDiagramCell| Frame Count (Rh)}} |{{STDiagramCell| 1}} |{{STDiagramCell| 1}} |{{STDiagramCell| 1}} |{{STDiagramCell| 1}} | {{STDiagramCell| Frame Count (Rh)}} |{{STDiagramCell| 1}} |{{STDiagramCell| 1}} |{{STDiagramCell| 1}} |{{STDiagramCell| 1}} | ||
|} | |} | ||
{{STDiagramHeader}} | {{STDiagramHeader}} | ||
{{STDiagramCell|}} |{{STDiagramImageCell| 1 | ChunLi_ll7.png}} |{{STDiagramImageCell| 1 | ChunLi_ll8.png}} |{{STDiagramImageCell| 1 | ChunLi_ll9.png}} |{{STDiagramImageCell| 1 | ChunLi_ll6&10.png}} | {{STDiagramCell|}} |{{STDiagramImageCell| 1 | ChunLi_ll7.png}} |{{STDiagramImageCell| 1 | ChunLi_ll8.png}} |{{STDiagramImageCell| 1 | ChunLi_ll9.png}} |{{STDiagramImageCell| 1 | ChunLi_ll6&10.png}} | ||
| Line 1,743: | Line 1,742: | ||
{{STDiagramCell| Frame Count (Rh)}} |{{STDiagramCell| 1}} |{{STDiagramCell| 1}} |{{STDiagramCell| 1}} |{{STDiagramCell| 1}} | {{STDiagramCell| Frame Count (Rh)}} |{{STDiagramCell| 1}} |{{STDiagramCell| 1}} |{{STDiagramCell| 1}} |{{STDiagramCell| 1}} | ||
|} | |} | ||
'''NOTE:''' The diagram shown refers to one complete cycle of the Lightning Legs animation. The minimal durations for each are as follows: | '''NOTE:''' The diagram shown refers to one complete cycle of the Lightning Legs animation. The minimal durations for each are as follows: | ||
| Line 1,750: | Line 1,748: | ||
*The HK version will make 2 full cycles, then stop at the 6th cell. (22 frames in total) | *The HK version will make 2 full cycles, then stop at the 6th cell. (22 frames in total) | ||
'''Recovery:''' | |||
{{STDiagramHeader}} | {{STDiagramHeader}} | ||
{{STDiagramCell|}} |{{STDiagramImageCell| 1 | ChunLi_ll2&11.png}} |{{STDiagramImageCell| 1 | ChunLi_ll1&12.png}} | {{STDiagramCell|}} |{{STDiagramImageCell| 1 | ChunLi_ll2&11.png}} |{{STDiagramImageCell| 1 | ChunLi_ll1&12.png}} | ||
| Line 1,786: | Line 1,783: | ||
{{AttackData-SSF2T | {{AttackData-SSF2T | ||
|version = {{Icon-Capcom|lk}} | |version = {{Icon-Capcom|lk}} | ||
|damage = 12[2] x 3 | |damage = {{tooltip|text=12[2]|hovertext=[2] Random Damage Table: -3 = 3.125%, -2 = 3.125%, -1 = 3.125%, +0 = 46.875%, +1 = 12.5%, +2 = 15.625%, +3 = 6.25%, +4 = 9.375%}} x 3 | ||
|dizzy= 0~4 x 3 | |dizzy= 0~4 x 3 | ||
|dizzytime= 20 x 3 | |dizzytime= 20 x 3 | ||
| Line 1,795: | Line 1,792: | ||
|recovery = 37 | |recovery = 37 | ||
|total = 67 | |total = 67 | ||
|frameAdv = -39 | |frameAdv = Hit: Hard KD<br>Block: -39 (First Hit) | ||
|actrange = N/A | |actrange = N/A | ||
|meter = 8 | |meter = 8 | ||
| Line 1,802: | Line 1,799: | ||
{{AttackData-SSF2T | {{AttackData-SSF2T | ||
|version = {{Icon-Capcom|mk}} | |version = {{Icon-Capcom|mk}} | ||
|damage = 12[2] x 3 | |damage = {{tooltip|text=12[2]|hovertext=[2] Random Damage Table: -3 = 3.125%, -2 = 3.125%, -1 = 3.125%, +0 = 46.875%, +1 = 12.5%, +2 = 15.625%, +3 = 6.25%, +4 = 9.375%}} x 3 | ||
|dizzy= 0~4 x 3 | |dizzy= 0~4 x 3 | ||
|dizzytime= 20 x 3 | |dizzytime= 20 x 3 | ||
| Line 1,811: | Line 1,808: | ||
|recovery = 34 | |recovery = 34 | ||
|total = 74 | |total = 74 | ||
|frameAdv = -48 | |frameAdv = Hit: Hard KD<br>Block: -48 (First Hit) | ||
|actrange = N/A | |actrange = N/A | ||
|meter = 8 | |meter = 8 | ||
| Line 1,818: | Line 1,815: | ||
{{AttackData-SSF2T | {{AttackData-SSF2T | ||
|version = {{Icon-Capcom|hk}} | |version = {{Icon-Capcom|hk}} | ||
|damage = 12[2] x 3 | |damage = {{tooltip|text=12[2]|hovertext=[2] Random Damage Table: -3 = 3.125%, -2 = 3.125%, -1 = 3.125%, +0 = 46.875%, +1 = 12.5%, +2 = 15.625%, +3 = 6.25%, +4 = 9.375%}} x 3 | ||
|dizzy= 0~4 x 3 | |dizzy= 0~4 x 3 | ||
|dizzytime= 20 x 3 | |dizzytime= 20 x 3 | ||
| Line 1,827: | Line 1,824: | ||
|recovery = 23 | |recovery = 23 | ||
|total = 71 | |total = 71 | ||
|frameAdv = {{tooltip|text=- | |frameAdv = Hit: Hard KD<br>{{tooltip|text=Block: -47 (First Hit)|hovertext=-42 if the first 2 hits are blocked (Point Blank)}} | ||
|actrange = N/A | |actrange = N/A | ||
|meter = 8 | |meter = 8 | ||
|description= *Invincible on frames 1-4 | |description= *Invincible on frames 1-4. | ||
| Line 1,839: | Line 1,836: | ||
'''General Strategies''' | '''General Strategies''' | ||
*{{Icon-Capcom|lk}} version: | *{{Icon-Capcom|lk}} version: | ||
**Has the slowest startup but also the most invincibility, which is optimal for various situations (e.g. anti airs). But, even on this version the invincibility does not last for very long, which often forces Chun to activate the move at the very last moment for it to anti air successfully. The problem is that Chun-Li will have standing up hurtboxes right before the move coming out (because the transition from | **Has the slowest startup but also the most invincibility, which is optimal for various situations (e.g. anti airs). But, even on this version the invincibility does not last for very long, which often forces Chun to activate the move at the very last moment for it to anti air successfully. The problem is that Chun-Li will have standing up hurtboxes right before the move coming out (because the transition from ↓ to ↑ doesn't happen instantly), which may result in Chun-Li being hit before her move can come out. To alleviate that problem, it's recommended to kara cancel a crouching normal into this move, so Chun-Li can transition from her crouching stance into this move's invincible startup without having standing hurtboxes in between. | ||
*{{Icon-Capcom|mk}} version: | *{{Icon-Capcom|mk}} version: | ||
**Has slightly less invincibility than the Short version, but if the kara cancel method is used then its invincibility will often be just enough to anti-air most air moves, with the added benefit of having more horizontal reach than the Short version. Basically, this is the more rounded version of the move, which is to be used whenever you don't particularly need the extra invincibility of the Short version, nor the extremely fast startup of the Roundhouse version. | **Has slightly less invincibility than the Short version, but if the kara cancel method is used then its invincibility will often be just enough to anti-air most air moves, with the added benefit of having more horizontal reach than the Short version. Basically, this is the more rounded version of the move, which is to be used whenever you don't particularly need the extra invincibility of the Short version, nor the extremely fast startup of the Roundhouse version. | ||
*{{Icon-Capcom|hk}} version: | *{{Icon-Capcom|hk}} version: | ||
**Is your go-to reversal outside of Super. It can't be safe jumped due to the 2 frame startup and can also thwart meaty crossups. The invincibility on it is very short so the other versions should be favored for anti-air situations. | **Is your go-to reversal outside of Super. It can't be safe jumped due to the 2 frame startup and can also thwart meaty crossups. The invincibility on it is very short so the other versions should be favored for anti-air situations. | ||
**Don't be too over confident on its anti safe-jump capabilities though. The move has poor priority and reach overall, this means that air moves with very good priority can be used as "fake" safe jumps by spacing the jump so they don't land too close to Chun, making her move whiff completely or even straight out beaten (since right after the invulnerability ends, Chun is vulnerable and NOT attacking - and this is | **Don't be too over confident on its anti safe-jump capabilities though. The move has poor priority and reach overall, this means that air moves with very good priority can be used as "fake" safe jumps by spacing the jump so they don't land too close to Chun, making her move whiff completely or even straight out beaten (since right after the invulnerability ends, Chun is vulnerable and NOT attacking - and this is even more of a problem with the Roundhouse version, since its invulnerability doesn't last very long). Also, the poor upwards reach must be emphasized: there are a some air moves that don't even have good priority at the front that can still be used as "fake" safe jumps due to their leg hurtboxes being out of reach. These moves are Ken's Jumping Forward and Roundhouse, E.Honda's Jumping Forward and Roundhouse, Claw's Neutral Jumping Short and Forward, Sagat's Jumping Forward and Roundhouse, Dictator's Jumping Fierce, T.Hawk's Jumping Roundhouse and Fei's Jumping Roundhouse. | ||
}} | }} | ||
}} | }} | ||
| Line 1,896: | Line 1,893: | ||
{{STDiagramCell|}} |{{STDiagramImageCell| 1 | ChunLi_upk1.png}} |{{STDiagramImageCell| 1 | ChunLi_upk2.png}} |{{STDiagramImageCell| 1 | ChunLi_upk4shrt_4frwrd_3&13rh.png}} |{{STDiagramImageCell| 1 | ChunLi_upk5shrt_5frwrd_4&14rh.png}} |{{STDiagramImageCell| 1 | ChunLi_upk6shrt_6frwrd_5&15rh.png}} |{{STDiagramImageCell| 1 | ChunLi_upk7shrt_7frwrd_6&16rh.png}} |{{STDiagramImageCell| 1 | ChunLi_upk8shrt_8frwrd_7&17rh.png}} |{{STDiagramImageCell| 1 | ChunLi_upk9shrt_9&14frwrd_8&18rh.png}} |{{STDiagramImageCell| 1 | ChunLi_upk10shrt_10&15frwrd_9&19rh.png}} |{{STDiagramImageCell| 1 | ChunLi_upk11shrt_11frwrd_10&20rh.png}} | {{STDiagramCell|}} |{{STDiagramImageCell| 1 | ChunLi_upk1.png}} |{{STDiagramImageCell| 1 | ChunLi_upk2.png}} |{{STDiagramImageCell| 1 | ChunLi_upk4shrt_4frwrd_3&13rh.png}} |{{STDiagramImageCell| 1 | ChunLi_upk5shrt_5frwrd_4&14rh.png}} |{{STDiagramImageCell| 1 | ChunLi_upk6shrt_6frwrd_5&15rh.png}} |{{STDiagramImageCell| 1 | ChunLi_upk7shrt_7frwrd_6&16rh.png}} |{{STDiagramImageCell| 1 | ChunLi_upk8shrt_8frwrd_7&17rh.png}} |{{STDiagramImageCell| 1 | ChunLi_upk9shrt_9&14frwrd_8&18rh.png}} |{{STDiagramImageCell| 1 | ChunLi_upk10shrt_10&15frwrd_9&19rh.png}} |{{STDiagramImageCell| 1 | ChunLi_upk11shrt_11frwrd_10&20rh.png}} | ||
|- | |- | ||
{{STDiagramCell| Frame Count | {{STDiagramCell| Frame Count}} |{{STDiagramCell| 2}} |{{STDiagramCell| 2}} |{{STDiagramCell| 2}} |{{STDiagramCell| 2}} |{{STDiagramCell| 4}} |{{STDiagramCell| 2}} |{{STDiagramCell| 2}} |{{STDiagramCell| 2}} |{{STDiagramCell| 2}} |{{STDiagramCell| 4}} | ||
|- | |- | ||
{{STDiagramCell| Simplified}} |{{STDiagramCell| 2}} |{{STDiagramCell| 2}} |{{STDiagramCellColSpan| 2 |4}} |{{STDiagramCell| 4}} |{{STDiagramCellColSpan| 4 | 8}} |{{STDiagramCell| 4}} | {{STDiagramCell| Simplified}} |{{STDiagramCell| 2}} |{{STDiagramCell| 2}} |{{STDiagramCellColSpan| 2 |4}} |{{STDiagramCell| 4}} |{{STDiagramCellColSpan| 4 | 8}} |{{STDiagramCell| 4}} | ||
| Line 1,903: | Line 1,900: | ||
{{STDiagramCell|}} |{{STDiagramImageCell| 1 | ChunLi_upk12shrt_12&17frwrd_11&21rh.png}} |{{STDiagramImageCell| 1 | ChunLi_upk13shrt_13&18frwrd_12&22rh.png}} |{{STDiagramImageCell| 1 | ChunLi_upk4shrt_4frwrd_3&13rh.png}} |{{STDiagramImageCell| 1 | ChunLi_upk5shrt_5frwrd_4&14rh.png}} |{{STDiagramImageCell| 1 | ChunLi_upk6shrt_6frwrd_5&15rh.png}} |{{STDiagramImageCell| 1 | ChunLi_upk7shrt_7frwrd_6&16rh.png}} |{{STDiagramImageCell| 1 | ChunLi_upk8shrt_8frwrd_7&17rh.png}} |{{STDiagramImageCell| 1 | ChunLi_upk9shrt_9&14frwrd_8&18rh.png}} |{{STDiagramImageCell| 1 | ChunLi_upk10shrt_10&15frwrd_9&19rh.png}} | {{STDiagramCell|}} |{{STDiagramImageCell| 1 | ChunLi_upk12shrt_12&17frwrd_11&21rh.png}} |{{STDiagramImageCell| 1 | ChunLi_upk13shrt_13&18frwrd_12&22rh.png}} |{{STDiagramImageCell| 1 | ChunLi_upk4shrt_4frwrd_3&13rh.png}} |{{STDiagramImageCell| 1 | ChunLi_upk5shrt_5frwrd_4&14rh.png}} |{{STDiagramImageCell| 1 | ChunLi_upk6shrt_6frwrd_5&15rh.png}} |{{STDiagramImageCell| 1 | ChunLi_upk7shrt_7frwrd_6&16rh.png}} |{{STDiagramImageCell| 1 | ChunLi_upk8shrt_8frwrd_7&17rh.png}} |{{STDiagramImageCell| 1 | ChunLi_upk9shrt_9&14frwrd_8&18rh.png}} |{{STDiagramImageCell| 1 | ChunLi_upk10shrt_10&15frwrd_9&19rh.png}} | ||
|- | |- | ||
{{STDiagramCell| | {{STDiagramCell| Frame Count}} |{{STDiagramCell| 2}} |{{STDiagramCell| 2}} |{{STDiagramCell| 2}} |{{STDiagramCell| 2}} |{{STDiagramCell| 4}} |{{STDiagramCell| 2}} |{{STDiagramCell| 2}} |{{STDiagramCell| 2}} |{{STDiagramCell| 2}} | ||
|- | |- | ||
{{STDiagramCell| Simplified}} |{{STDiagramCellColSpan| 4 | 8}} |{{STDiagramCell| 4}} |{{STDiagramCellColSpan| 4 | 8}} | {{STDiagramCell| Simplified}} |{{STDiagramCellColSpan| 4 | 8}} |{{STDiagramCell| 4}} |{{STDiagramCellColSpan| 4 | 8}} | ||
| Line 1,910: | Line 1,907: | ||
{{STDiagramCell|}} |{{STDiagramImageCell| 1 | ChunLi_upk11shrt_11frwrd_10&20rh.png}} |{{STDiagramImageCell| 1 | ChunLi_upk12shrt_12&17frwrd_11&21rh.png}} |{{STDiagramImageCell| 1 | ChunLi_upk13shrt_13&18frwrd_12&22rh.png}} |{{STDiagramImageCell| 1 | ChunLi_upk14shrt_19frwrd_23rh.png}} |{{STDiagramImageCell| 1 | ChunLi_upk15shrt_20frwrd_24rh.png}} |{{STDiagramImageCell| 1 | ChunLi_upk16shrt_21frwrd_25rh.png }} | {{STDiagramCell|}} |{{STDiagramImageCell| 1 | ChunLi_upk11shrt_11frwrd_10&20rh.png}} |{{STDiagramImageCell| 1 | ChunLi_upk12shrt_12&17frwrd_11&21rh.png}} |{{STDiagramImageCell| 1 | ChunLi_upk13shrt_13&18frwrd_12&22rh.png}} |{{STDiagramImageCell| 1 | ChunLi_upk14shrt_19frwrd_23rh.png}} |{{STDiagramImageCell| 1 | ChunLi_upk15shrt_20frwrd_24rh.png}} |{{STDiagramImageCell| 1 | ChunLi_upk16shrt_21frwrd_25rh.png }} | ||
|- | |- | ||
{{STDiagramCell| | {{STDiagramCell| Frame Count}} |{{STDiagramCell| 4}} |{{STDiagramCell| 3}} |{{STDiagramCell| 3}} |{{STDiagramCell| 3}} |{{STDiagramCell| 7}} |{{STDiagramCell| 7}} | ||
|- | |- | ||
{{STDiagramCell| Simplified}} |{{STDiagramCell| 4}} |{{STDiagramCellColSpan| 5 | 23}} | {{STDiagramCell| Simplified}} |{{STDiagramCell| 4}} |{{STDiagramCellColSpan| 5 | 23}} | ||
| Line 1,919: | Line 1,916: | ||
{{MoveData | {{MoveData | ||
| name = Spinning Bird Kick | | name = Spinning Bird Kick | ||
| input = {{Tooltip| text= [4]6K<br>{{cb}}{{f}} + {{k}} | hovertext= Charge ←/↙/↖ for at least 60f, [7~14f] → [10/9/7f] Short/Forward/Roundhouse. It is needed to wait at least 1 frame after leaving the charge direction to enter with the K button}} | | input = {{Tooltip| text= [4]6K<br>{{cb}}{{f}} + {{k}}|hovertext=Detailed Input: (Charge ←/↙/↖ for at least 60f, [7~14f] → [10/9/7f] Short/Forward/Roundhouse. It is needed to wait at least 1 frame after leaving the charge direction to enter with the K button)}} | ||
| subtitle = | | subtitle = | ||
| image = ChunLi_sbk12&20shrt_12&20&28frwrd_12&20&28&36&44rh.png | | image = ChunLi_sbk12&20shrt_12&20&28frwrd_12&20&28&36&44rh.png | ||
| Line 1,929: | Line 1,926: | ||
| data = | | data = | ||
{{AttackData-SSF2T | {{AttackData-SSF2T | ||
|version = {{lk}} | |version = {{Icon-Capcom|lk}} | ||
|damage = 14[1] / 12[1] | |damage = {{tooltip|text=14[1] / 12[1]|hovertext=[1] Random Damage Table: -2 = 3.125%, -1 = 3.125%, +0 = 68.75%, +1 = 9.375%, +2 = 9.375%, +3 = 6.25%}} | ||
|dizzy= 7~13 | |dizzy= 7~13 | ||
|dizzytime= 90 | |dizzytime= 90 | ||
| Line 1,945: | Line 1,942: | ||
}} | }} | ||
{{AttackData-SSF2T | {{AttackData-SSF2T | ||
|version = {{mk}} | |version = {{Icon-Capcom|mk}} | ||
|damage = 16[1] / 14[1] | |damage = {{tooltip|text=16[1] / 14[1]|hovertext=[1] Random Damage Table: -2 = 3.125%, -1 = 3.125%, +0 = 68.75%, +1 = 9.375%, +2 = 9.375%, +3 = 6.25%}} | ||
|dizzy= 7~13 | |dizzy= 7~13 | ||
|dizzytime= 90 | |dizzytime= 90 | ||
| Line 1,961: | Line 1,958: | ||
}} | }} | ||
{{AttackData-SSF2T | {{AttackData-SSF2T | ||
|version = {{hk}} | |version = {{Icon-Capcom|hk}} | ||
|damage = 18[1] / 16[1] | |damage = {{tooltip|text=18[1] / 16[1]|hovertext=[1] Random Damage Table: -2 = 3.125%, -1 = 3.125%, +0 = 68.75%, +1 = 9.375%, +2 = 9.375%, +3 = 6.25%}} | ||
|dizzy= 7~13 | |dizzy= 7~13 | ||
|dizzytime= 90 | |dizzytime= 90 | ||
| Line 2,105: | Line 2,102: | ||
{{MoveData | {{MoveData | ||
| name = Aerial Spinning Bird Kick | | name = Aerial Spinning Bird Kick | ||
| input = {{Tooltip| text= Air [4]6K<br>Air {{cb}}{{f}} + {{k}} | hovertext= Charge ←/↙/↖ for at least 60f, [7~14f] → [10/9/7f] Short/Forward/Roundhouse. It is needed to wait at least 1 frame after leaving the charge direction to enter with the K button}} | | input = {{Tooltip| text= Air [4]6K<br>Air {{cb}}{{f}} + {{k}}|hovertext=Detailed Input: (Charge ←/↙/↖ for at least 60f, [7~14f] → [10/9/7f] Short/Forward/Roundhouse. It is needed to wait at least 1 frame after leaving the charge direction to enter with the K button)}} | ||
| subtitle = | | subtitle = | ||
| image = ChunLi_asbk9.png | | image = ChunLi_asbk9.png | ||
| Line 2,115: | Line 2,112: | ||
| data = | | data = | ||
{{AttackData-SSF2T | {{AttackData-SSF2T | ||
|version = {{lk}} | |version = {{Icon-Capcom|lk}} | ||
|damage = 12[1] | |damage = {{tooltip|text=12[1]|hovertext=[1] Random Damage Table: -2 = 3.125%, -1 = 3.125%, +0 = 68.75%, +1 = 9.375%, +2 = 9.375%, +3 = 6.25%}} | ||
|dizzy= 7~13 | |dizzy= 7~13 | ||
|dizzytime= 90 | |dizzytime= 90 | ||
| Line 2,131: | Line 2,128: | ||
}} | }} | ||
{{AttackData-SSF2T | {{AttackData-SSF2T | ||
|version = {{mk}} | |version = {{Icon-Capcom|mk}} | ||
|damage = 12[1] | |damage = {{tooltip|text=12[1]|hovertext=[1] Random Damage Table: -2 = 3.125%, -1 = 3.125%, +0 = 68.75%, +1 = 9.375%, +2 = 9.375%, +3 = 6.25%}} | ||
|dizzy= 7~13 | |dizzy= 7~13 | ||
|dizzytime= 90 | |dizzytime= 90 | ||
| Line 2,147: | Line 2,144: | ||
}} | }} | ||
{{AttackData-SSF2T | {{AttackData-SSF2T | ||
|version = {{hk}} | |version = {{Icon-Capcom|hk}} | ||
|damage = 12[1] | |damage = {{tooltip|text=12[1]|hovertext=[1] Random Damage Table: -2 = 3.125%, -1 = 3.125%, +0 = 68.75%, +1 = 9.375%, +2 = 9.375%, +3 = 6.25%}} | ||
|dizzy= 7~13 | |dizzy= 7~13 | ||
|dizzytime= 90 | |dizzytime= 90 | ||
| Line 2,174: | Line 2,171: | ||
'''Startup:''' | '''Startup:''' | ||
{{STDiagramHeader}} | {{STDiagramHeader}} | ||
{{STDiagramCell|}} |{{STDiagramImageCell| 1 | ChunLi_asbk1.png}} |{{STDiagramImageCell| 1 | ChunLi_asbk2.png}} |{{STDiagramImageCell| 1 | ChunLi_asbk3.png}} |{{STDiagramImageCell| 1 | ChunLi_asbk4.png}} |{{STDiagramImageCell| 1 | ChunLi_asbk5&14.png}} | {{STDiagramCell|}} |{{STDiagramImageCell| 1 | ChunLi_asbk1.png}} |{{STDiagramImageCell| 1 | ChunLi_asbk2.png}} |{{STDiagramImageCell| 1 | ChunLi_asbk3.png}} |{{STDiagramImageCell| 1 | ChunLi_asbk4.png}} |{{STDiagramImageCell| 1 | ChunLi_asbk5&14.png}} | ||
| Line 2,182: | Line 2,178: | ||
{{STDiagramCell| Simplified}} |{{STDiagramCellColSpan| 5 | 15}} | {{STDiagramCell| Simplified}} |{{STDiagramCellColSpan| 5 | 15}} | ||
|} | |} | ||
'''Active/Recovery:''' | '''Active/Recovery:''' | ||
{{STDiagramHeader}} | {{STDiagramHeader}} | ||
{{STDiagramCell|}} |{{STDiagramImageCell| 1 | ChunLi_asbk6.png}} |{{STDiagramImageCell| 1 | ChunLi_asbk7.png}} |{{STDiagramImageCell| 1 | ChunLi_asbk8.png}} |{{STDiagramImageCell| 1 | ChunLi_asbk9.png}} |{{STDiagramImageCell| 1 | ChunLi_asbk10.png}} |{{STDiagramImageCell| 1 | ChunLi_asbk11.png}} |{{STDiagramImageCell| 1 | ChunLi_asbk12.png}} |{{STDiagramImageCell| 1 | ChunLi_asbk13.png}} | {{STDiagramCell|}} |{{STDiagramImageCell| 1 | ChunLi_asbk6.png}} |{{STDiagramImageCell| 1 | ChunLi_asbk7.png}} |{{STDiagramImageCell| 1 | ChunLi_asbk8.png}} |{{STDiagramImageCell| 1 | ChunLi_asbk9.png}} |{{STDiagramImageCell| 1 | ChunLi_asbk10.png}} |{{STDiagramImageCell| 1 | ChunLi_asbk11.png}} |{{STDiagramImageCell| 1 | ChunLi_asbk12.png}} |{{STDiagramImageCell| 1 | ChunLi_asbk13.png}} | ||
| Line 2,204: | Line 2,194: | ||
{{STDiagramCell| Simplified (Rh)}} |{{STDiagramCell| 2}} |{{STDiagramCellColSpan| 7 | 14}} | {{STDiagramCell| Simplified (Rh)}} |{{STDiagramCell| 2}} |{{STDiagramCellColSpan| 7 | 14}} | ||
|} | |} | ||
{{STDiagramHeader}} | {{STDiagramHeader}} | ||
{{STDiagramCell|}} |{{STDiagramImageCell| 1 | ChunLi_asbk5&14.png}} |{{STDiagramImageCell| 1 | ChunLi_asbk15.png}} |{{STDiagramImageCell| 1 | ChunLi_asbk16.png}} |{{STDiagramImageCell| 1 | ChunLi_asbk17.png}} |{{STDiagramImageCell| 1 | ChunLi_asbk18.png}} | {{STDiagramCell|}} |{{STDiagramImageCell| 1 | ChunLi_asbk5&14.png}} |{{STDiagramImageCell| 1 | ChunLi_asbk15.png}} |{{STDiagramImageCell| 1 | ChunLi_asbk16.png}} |{{STDiagramImageCell| 1 | ChunLi_asbk17.png}} |{{STDiagramImageCell| 1 | ChunLi_asbk18.png}} | ||
| Line 2,213: | Line 2,201: | ||
{{STDiagramCell| Simplified}} |{{STDiagramCellColSpan| 5 | ∞}} | {{STDiagramCell| Simplified}} |{{STDiagramCellColSpan| 5 | ∞}} | ||
|} | |} | ||
*<b>Landing, partial:</b> (When Chun lands before the last hitting frame) | *<b>Landing, partial:</b> (When Chun lands before the last hitting frame) | ||
{{STDiagramHeader}} | {{STDiagramHeader}} | ||
{{STDiagramCell|}} |{{STDiagramImageCell| 1 | ChunLi_asbkl1&3.png}} |{{STDiagramImageCell| 1 | ChunLi_asbkl2.png}} |{{STDiagramImageCell| 1 | ChunLi_asbkl1&3.png}} |{{STDiagramImageCell| 1 | ChunLi_asbkl4.png}} |{{STDiagramImageCell| 1 | ChunLi_asbkl5.png}} |{{STDiagramImageCell| 1 | ChunLi_asbkl6.png}} |{{STDiagramImageCell| 1 | ChunLi_asbkl7.png}} |{{STDiagramImageCell| 1 | ChunLi_asbkl8.png}} | {{STDiagramCell|}} |{{STDiagramImageCell| 1 | ChunLi_asbkl1&3.png}} |{{STDiagramImageCell| 1 | ChunLi_asbkl2.png}} |{{STDiagramImageCell| 1 | ChunLi_asbkl1&3.png}} |{{STDiagramImageCell| 1 | ChunLi_asbkl4.png}} |{{STDiagramImageCell| 1 | ChunLi_asbkl5.png}} |{{STDiagramImageCell| 1 | ChunLi_asbkl6.png}} |{{STDiagramImageCell| 1 | ChunLi_asbkl7.png}} |{{STDiagramImageCell| 1 | ChunLi_asbkl8.png}} | ||
| Line 2,227: | Line 2,209: | ||
{{STDiagramCell| Simplified}} |{{STDiagramCellColSpan| 8 | 25}} | {{STDiagramCell| Simplified}} |{{STDiagramCellColSpan| 8 | 25}} | ||
|} | |} | ||
*<b>Landing, complete:</b> (When Chun lands after the last hitting frame) | *<b>Landing, complete:</b> (When Chun lands after the last hitting frame) | ||
{{STDiagramHeader}} | {{STDiagramHeader}} | ||
| Line 2,238: | Line 2,217: | ||
{{STDiagramCell| Simplified}} |{{STDiagramCellColSpan| 3 | 10}} | {{STDiagramCell| Simplified}} |{{STDiagramCellColSpan| 3 | 10}} | ||
|} | |} | ||
</div> | </div> | ||
==Super Combo== | ==Super Combo== | ||
{{MoveData | {{MoveData | ||
| name = Senretsukyaku | | name = Senretsukyaku | ||
| input = {{Tooltip | text=[4]646K<br>{{cb}}{{f}}{{b}}{{f}} + {{ | | input = {{Tooltip | text=[4]646K<br>{{cb}}{{f}}{{b}}{{f}} + {{k}} | hovertext = Detailed Input: (Charge ←/↙/↖ for at least 60f, [7~14f] →/↘/↗ [7~14f] ←/↙/↖ [7~14f] →/↘/↗ [SSF2T: ∞f / HSF2: 11f] K)}} | ||
| subtitle = | | subtitle = | ||
| image = ChunLi_super6.png | | image = ChunLi_super6.png | ||
| Line 2,265: | Line 2,246: | ||
| data = | | data = | ||
{{AttackData-SSF2T | {{AttackData-SSF2T | ||
|damage = 16[0] x 6 | |damage = {{tooltip|text=16[0]|hovertext=[0] Random Damage Table: -2 = 3.125%, -1 = 3.125%, +0 = 78.125%, +1 = 6.25%, +2 = 6.25%, +3 = 3.125%}} x 6 | ||
|dizzy= 0~4 x 6 | |dizzy= 0~4 x 6 | ||
|dizzytime= 20 x 6 | |dizzytime= 20 x 6 | ||
| Line 2,272: | Line 2,253: | ||
|startup = {{Tooltip | text=10 | hovertext = Plus 18 frames of Super flash.}} | |startup = {{Tooltip | text=10 | hovertext = Plus 18 frames of Super flash.}} | ||
|active = 4(9)6(6)1(1)1(1)1(1)1 | |active = 4(9)6(6)1(1)1(1)1(1)1 | ||
|recovery = | |recovery = 14 | ||
|total = | |total = 56 | ||
|frameAdv = +9 | |frameAdv = Hit: Hard KD<br>Block: +9 | ||
|actrange = N/A | |actrange = N/A | ||
|description= Chun-Li goes full power with a non-stop barrage of kicks. Often considered one of if not the best Super Combo in the game. | |description= Chun-Li goes full power with a non-stop barrage of kicks. Often considered one of if not the best Super Combo in the game. | ||
| Line 2,285: | Line 2,266: | ||
}} | }} | ||
<span class="mw-customtoggle-senretsukyaku" style="color: cyan">Click to toggle detailed hitbox data.</span> | <span class="mw-customtoggle-senretsukyaku" style="color: cyan">'''Click to toggle detailed hitbox data.'''</span> | ||
<div class="mw-collapsible mw-collapsed" id="mw-customcollapsible-senretsukyaku"> | <div class="mw-collapsible mw-collapsed" id="mw-customcollapsible-senretsukyaku"> | ||
'''Invincible part:''' | |||
{{STDiagramHeader}} | {{STDiagramHeader}} | ||
{{STDiagramCell|}} |{{STDiagramImageCell| 1 | ChunLi_super1.png}} |{{STDiagramImageCell| 1 | ChunLi_super2.png}} |{{STDiagramImageCell| 1 | ChunLi_super3.png}} |{{STDiagramImageCell| 1 | ChunLi_super4.png}} |{{STDiagramImageCell| 1 | ChunLi_super5.png}} |{{STDiagramImageCell| 1 | ChunLi_super6.png}} | {{STDiagramCell|}} |{{STDiagramImageCell| 1 | ChunLi_super1.png}} |{{STDiagramImageCell| 1 | ChunLi_super2.png}} |{{STDiagramImageCell| 1 | ChunLi_super3.png}} |{{STDiagramImageCell| 1 | ChunLi_super4.png}} |{{STDiagramImageCell| 1 | ChunLi_super5.png}} |{{STDiagramImageCell| 1 | ChunLi_super6.png}} | ||
| Line 2,296: | Line 2,277: | ||
{{STDiagramCell| Simplified}} |{{STDiagramCellColSpan| 5 | 10}} |{{STDiagramCell| 4}} | {{STDiagramCell| Simplified}} |{{STDiagramCellColSpan| 5 | 10}} |{{STDiagramCell| 4}} | ||
|} | |} | ||
'''Non-invincible part:''' | |||
{{STDiagramHeader}} | {{STDiagramHeader}} | ||
{{STDiagramCell|}} |{{STDiagramImageCell| 1 | ChunLi_super7.png}} |{{STDiagramImageCell| 1 | ChunLi_super8.png}} |{{STDiagramImageCell| 1 | ChunLi_super9.png}} |{{STDiagramImageCell| 1 | ChunLi_super10.png}} |{{STDiagramImageCell| 1 | ChunLi_super11&13.png}} |{{STDiagramImageCell| 1 | ChunLi_super12.png}} | {{STDiagramCell|}} |{{STDiagramImageCell| 1 | ChunLi_super7.png}} |{{STDiagramImageCell| 1 | ChunLi_super8.png}} |{{STDiagramImageCell| 1 | ChunLi_super9.png}} |{{STDiagramImageCell| 1 | ChunLi_super10.png}} |{{STDiagramImageCell| 1 | ChunLi_super11&13.png}} |{{STDiagramImageCell| 1 | ChunLi_super12.png}} | ||
Latest revision as of 02:48, 12 May 2025
Story
Date of Birth: 3/1/1968
Height: 5'8"
Weight: Secret!
Measurements: B34", W 22", H 35"
Blood Type: A
Likes: Crepes, fruits, candy
Dislikes: Crime, shady people, indecisiveness.
At the age of 5, Chun-Li saw her first Beijing opera, planting images of actors moving elegantly across the stage in her mind. Upon witnessing her father one day practicing his martial arts, those very same images came back to her, and she begged her father to teach her. Chun-Li's father would teach her a variety of Chinese martial arts, teaching her a style revolving around kicks with his renowned legs. These teachings would go on until his sudden disappearance.
Chun-Li would become a narcotics investigator at the age of 18 to both find her father and follow his footsteps. Despite hopes of reuniting with him, Chun-Li would learn of the worst possible outcome: Her father was dead, and the leader of the crime ring Shadaloo was responsible. After more investigation on her part, she would ultimately receive a direct invitation to the World Warrior tournament, hosted by Shadaloo, the ones responsible for her father's demise. Seeking revenge, Chun-Li gets ready to fight her way through the tournament...
Overview
Chun is ranked high tier. There are certain characters that she beats, certain characters she has even matches with, and certain characters who beat her. Some of her "even" matches are not even in the traditional sense. For example, against Fei she does really well as long as she's not in the corner. However, if Chun gets put in the corner and Fei starts doing st.Fierce xx Chicken Wing (his 3-hit spin kick), it is a nightmare for Chun, and she has no easy way out.
The same is true against Claw. Chun does well if she can keep the game on the ground, but if Claw can get his wall dive shenanigans going, Chun has no escape, and she must guess correctly which way to block, and that can be very difficult.
--NKI
| Strengths | Weaknesses |
|---|---|
|
|
New & Old Versions Comparison
To select O.Chun Li, choose Chun Li and then press ↓ ↓ ↓ ↑ Jab/Fierce, pressing Short simultaneously with the punch button for the alternate color.
Here is the list of differences:
- System Changes: O.Chun Li cannot tech throws, or use a Super Combo;
- Old Chun does not have access to Tenshokyaku;
- O.Chun Li has some differences in some of her normals:
- Close Standing Jab has a 1 frame slower startup;
- Crouching Jab has a 1 frame slower startup;
- Far Standing Strong hits high and so whiffs on crouching characters;
- Far Standing Fierce has special cancel properties;
- Close Standing Short has a 3 frames slower startup and can't be special canceled;
- Far Standing Short hits high and so whiffs on crouching characters;
- Crouching Short has a 2 frame slower startup and can't be special canceled;
- Close Standing Forward has a 3 frame slower startup and can't be special canceled;
- Far Standing Forward have better priority;
- Diagonal Jumping Fierce has a much fatter hitbox, though the priority doesn't change much;
- Diagonal Jumping Short has much better priority but do a little less damage;
- Neutral Jumping Forward has much better priority plus 6 more active frames;
- Diagonal Jumping Forward has much better priority but cannot be used as a cross up attack;
- Neutral Jumping Roundhouse has much better priority;
- Diagonal Jumping Roundhouse hits lower;
- O.Chun Li's Head Stomp can be performed with any downward direction;
- O.Chun Li's flip kick and neck breaker command normals have proximity requirements;
- O.Chun Li's neckbreaker and flip kick are performed with forward/back/any upwards direction instead of df;
- O.Chun Li's flip kick combo for two hits, the start-up is faster by 2 frames and can be special cancelled;
- O.Chun Li can kara-cancel Kikoukens from Roundhouse easily (for the shorter recovery), where N.Chun Li has trouble with this due to the different command for the Spinning Bird Kick;
- O.Chun's Spinning Bird Kick becomes active and knocks down before the spinning part during her handspring, and demands a "down" charge instead of a "back/away" one.
Basically, O.Chun Li has better aerial tools but worse ground ones, mainly for her standing strong whiffing on crouched characters and the lack of Super. Choose whichever version you think it's best suited for your style.
Color Options
| Jab | Strong | Fierce | Start | Old |
 |
 |
 |
 |

|
 |
 |
 |
 |

|
| Short | Forward | Roundhouse | Hold | Old Alternative |
--Born2SPD
Video Overview
| Chun-Li | |
|---|---|
| Character Data | |
| Damage Scaling Factor | 27/32 |
| Forward Walk Speed | 64 |
| Backwards Walk Speed | 48 |
| Pre-Jump Frames | 3 |
| Forwards Jump Duration | 44+ |
| Backwards Jump Duration | 46 |
| Landing Frames | 7* |
| Jump Height Apex | 114 |
| Forwards Jump Distance | 166 |
| Backwards Jump Distance | 177 |
| Soft Knockdown Recovery | 35 |
| Hard Knockdown Recovery | 69 |
Normal Moves
Disclaimer: To better understand the diagrams, read this.
Standing Normals
cllp
| Damage | Dizzy | Dizzy Time | Cancel | Guard | Act. Range |
|---|---|---|---|---|---|
| 18[0] | 0~5 | 40 | Chain, Special, Super | Mid | 0~21 |
| Startup | Active | Recovery | Total | Frame Adv. | Meter |
| 4 | 4 | 4 | 12 | +5 | 2/1 |
|
A quick rapid-fire jab.
| |||||
Click to toggle detailed hitbox data.
frlp
| Damage | Dizzy | Dizzy Time | Cancel | Guard | Act. Range |
|---|---|---|---|---|---|
| 4[0] | 0~5 | 40 | Chain, Special, Super | Mid | 22+ |
| Startup | Active | Recovery | Total | Frame Adv. | Meter |
| 3 | 2 | 8 | 13 | +3 | 2/1 |
|
A rapid-fire slap.
| |||||
Click to toggle detailed hitbox data.
clmp
| Damage | Dizzy | Dizzy Time | Cancel | Guard | Act. Range |
|---|---|---|---|---|---|
| 22[1] | 5~11 | 60 | Special, Super | Mid | 0~36 |
| Startup | Active | Recovery | Total | Frame Adv. | Meter |
| 5 | 4 | 4 | 13 | +10 | 4/3 |
|
A punch with huge frame advantage.
| |||||
Click to toggle detailed hitbox data.
frmp
| Damage | Dizzy | Dizzy Time | Cancel | Guard | Act. Range |
|---|---|---|---|---|---|
| 22[0] | 5~11 | 60 | Special, Super | Mid | 37+ |
| Startup | Active | Recovery | Total | Frame Adv. | Meter |
| 5 | 4 | 4 | 13 | +10 | 4/3 |
|
A poke with the same excellent frame advantage as the close version.
| |||||
Click to toggle detailed hitbox data.
clhp
| Damage | Dizzy | Dizzy Time | Cancel | Guard | Act. Range |
|---|---|---|---|---|---|
| 24[1] | 10~16 | 80 | Special, Super | Mid | 0~41 |
| Startup | Active | Recovery | Total | Frame Adv. | Meter |
| 4 | 20 | 11 | 35 | -9 | 5/4 |
|
A double open palmed strike.
| |||||
Click to toggle detailed hitbox data.
frhp
| Damage | Dizzy | Dizzy Time | Cancel | Guard | Act. Range |
|---|---|---|---|---|---|
| 24[0] | 10~16 | 80 | Super | Mid | 42+ |
| Startup | Active | Recovery | Total | Frame Adv. | Meter |
| 6 | 6 | 18 | 30 | -2 | 5/4 |
|
A powered-up high punch.
| |||||
Click to toggle detailed hitbox data.
cllk
| Damage | Dizzy | Dizzy Time | Cancel | Guard | Act. Range |
|---|---|---|---|---|---|
| 20[1] | 0~5 | 40 | Special, Super | Mid | 0~36 |
| Startup | Active | Recovery | Total | Frame Adv. | Meter |
| 4 | 5 | 5 | 14 | +3 | 2/1 |
|
A knee strike.
| |||||
Click to toggle detailed hitbox data.
frlk
| Damage | Dizzy | Dizzy Time | Cancel | Guard | Act. Range |
|---|---|---|---|---|---|
| 20[0] | 0~5 | 40 | None | Mid | 37+ |
| Startup | Active | Recovery | Total | Frame Adv. | Meter |
| 7 | 5 | 5 | 17 | +3 | 2/1 |
|
A straightforward kick.
| |||||
Click to toggle detailed hitbox data.
clmk
| Damage | Dizzy | Dizzy Time | Cancel | Guard | Act. Range |
|---|---|---|---|---|---|
| 24[1] | 5~11 | 60 | 1st part: Special, Super 2nd part: None |
Mid | 0~41 |
| Startup | Active | Recovery | Total | Frame Adv. | Meter |
| 4 | 9 (3 / 6) | 8 | 21 | +1 / +4 | 4/3 |
|
A full split kick.
| |||||
Click to toggle detailed hitbox data.
frmk
| Damage | Dizzy | Dizzy Time | Cancel | Guard | Act. Range |
|---|---|---|---|---|---|
| 24[0] | 5~11 | 60 | None | Mid | 42+ |
| Startup | Active | Recovery | Total | Frame Adv. | Meter |
| 7 | 5 | 8 | 20 | +5 | 4/3 |
|
A kick straight to the face.
| |||||
Click to toggle detailed hitbox data.
clhk
| Damage | Dizzy | Dizzy Time | Cancel | Guard | Act. Range |
|---|---|---|---|---|---|
| 28[1] | 10~16 | 80 | None | Mid | 0~56 |
| Startup | Active | Recovery | Total | Frame Adv. | Meter |
| 10 | 6 | 21 | 37 | -5 | 5/4 |
|
Chun's panty-slippin high sidekick.
| |||||
Click to toggle detailed hitbox data.
frhk
| Damage | Dizzy | Dizzy Time | Cancel | Guard | Act. Range |
|---|---|---|---|---|---|
| 28[0] | 10~16 | 80 | None | Mid | 57+ |
| Startup | Active | Recovery | Total | Frame Adv. | Meter |
| 11 | 8 | 14 | 33 | 0 | 5/4 |
|
A heavy kick to the face.
| |||||
Click to toggle detailed hitbox data.
Crouching Normals
crlp
| Damage | Dizzy | Dizzy Time | Cancel | Guard | Act. Range |
|---|---|---|---|---|---|
| 4[0] | 0~5 | 40 | Special, Super | Mid | N/A |
| Startup | Active | Recovery | Total | Frame Adv. | Meter |
| 4 | 4 | 5 | 13 | +4 | 2/1 |
|
A short punch.
| |||||
Click to toggle detailed hitbox data.
crmp
| Damage | Dizzy | Dizzy Time | Cancel | Guard | Act. Range |
|---|---|---|---|---|---|
| 18[1] | 5~11 | 60 | Special, Super | Mid | N/A |
| Startup | Active | Recovery | Total | Frame Adv. | Meter |
| 5 | 4 | 5 | 14 | +9 | 4/3 |
|
Far Standing Strong but crouching.
| |||||
Click to toggle detailed hitbox data.
crhp
| Damage | Dizzy | Dizzy Time | Cancel | Guard | Act. Range |
|---|---|---|---|---|---|
| 22[2] | 10~16 | 80 | None | Mid | N/A |
| Startup | Active | Recovery | Total | Frame Adv. | Meter |
| 7 | 6 | 19 | 32 | -3 | 5/4 |
|
Crouching Strong but bigger.
| |||||
Click to toggle detailed hitbox data.
crlk
| Damage | Dizzy | Dizzy Time | Cancel | Guard | Act. Range |
|---|---|---|---|---|---|
| 14[0] | 0~5 | 40 | Special, Super | Low | N/A |
| Startup | Active | Recovery | Total | Frame Adv. | Meter |
| 5 | 4 | 5 | 14 | +4 | 2/1 |
|
A low split kick.
| |||||
Click to toggle detailed hitbox data.
crmk
| Damage | Dizzy | Dizzy Time | Cancel | Guard | Act. Range |
|---|---|---|---|---|---|
| 18[1] | 5~11 | 60 | Special, Super | Low | N/A |
| Startup | Active | Recovery | Total | Frame Adv. | Meter |
| 5 | 5 | 4 | 14 | +9 | 4/3 |
|
Easily one of the best pokes in the game. One of the main reasons it's very annoying playing against a competent Chun.
| |||||
Click to toggle detailed hitbox data.
crhk
| Damage | Dizzy | Dizzy Time | Cancel | Guard | Act. Range |
|---|---|---|---|---|---|
| 22[2] | 5~11 | 130 | None | Low | N/A |
| Startup | Active | Recovery | Total | Frame Adv. | Meter |
| 7 | 6 | 19 | 32 | Hit: Soft KD Block: -3 |
5/4 |
|
Chun's sweep.
| |||||
Click to toggle detailed hitbox data.
Jumping Normals
njlp
| Damage | Dizzy | Dizzy Time | Cancel | Guard | Act. Range |
|---|---|---|---|---|---|
| 18[2] | 1~7(-2) | 40 | None | High | N/A |
| Startup | Active | Recovery | Total | Frame Adv. | Meter |
| 8 | ∞ | N/A | 8+∞ | Dependent | 2/1 |
|
A jumping chop.
| |||||
Click to toggle detailed hitbox data.
djlp
| Damage | Dizzy | Dizzy Time | Cancel | Guard | Act. Range |
|---|---|---|---|---|---|
| 16[2] | 1~7(-2) | 40 | None | High | N/A |
| Startup | Active | Recovery | Total | Frame Adv. | Meter |
| 6 | 40 | ∞ | 6+∞ | Dependent | 2/1 |
|
Like the neutral jump version except it's a punch with worse priority.
| |||||
Click to toggle detailed hitbox data.
njmp
| Damage | Dizzy | Dizzy Time | Cancel | Guard | Act. Range |
|---|---|---|---|---|---|
| 22[2] | 5~11 | 50(+10) | None | High | N/A |
| Startup | Active | Recovery | Total | Frame Adv. | Meter |
| 8 | 16 | ∞ | 24+∞ | Dependent | 4/3 |
|
Another chop.
| |||||
Click to toggle detailed hitbox data.
djmp
| Damage | Dizzy | Dizzy Time | Cancel | Guard | Act. Range |
|---|---|---|---|---|---|
| 20[2] | 5~11 | 50(+10) | None | High | - |
| Startup | Active | Recovery | Total | Frame Adv. | Meter |
| 6 | 8 | ∞ | 14+∞ | Dependent | 4/3 |
|
Another punch.
| |||||
Click to toggle detailed hitbox data.
njhp
| Damage | Dizzy | Dizzy Time | Cancel | Guard | Act. Range |
|---|---|---|---|---|---|
| 26[2] | 11~17(-1) | 60(+20) | None | High | N/A |
| Startup | Active | Recovery | Total | Frame Adv. | Meter |
| 8 | 8 | ∞ | 16+∞ | Dependent | 5/4 |
|
Yet another chop.
| |||||
Click to toggle detailed hitbox data.
djhp
| Damage | Dizzy | Dizzy Time | Cancel | Guard | Act. Range |
|---|---|---|---|---|---|
| 24[2] | 11~17(-1) | 60(+20) | None | High | N/A |
| Startup | Active | Recovery | Total | Frame Adv. | Meter |
| 6 | 8 | ∞ | 14+∞ | Dependent | 5/4 |
|
Yet another punch.
| |||||
Click to toggle detailed hitbox data.
njlk
| Damage | Dizzy | Dizzy Time | Cancel | Guard | Act. Range |
|---|---|---|---|---|---|
| 18[2] | 1~7(-2) | 40 | None | High | N/A |
| Startup | Active | Recovery | Total | Frame Adv. | Meter |
| 6 | ∞ | N/A | 6+∞ | Dependent | 2/1 |
|
A jumping split kick. Don't think too hard about how the hitbox works.
| |||||
Click to toggle detailed hitbox data.
djlk
| Damage | Dizzy | Dizzy Time | Cancel | Guard | Act. Range |
|---|---|---|---|---|---|
| 20[2] | 1~7(-2) | 40 | None | High | N/A |
| Startup | Active | Recovery | Total | Frame Adv. | Meter |
| 6 | 40 | ∞ | 6+∞ | Dependent | 2/1 |
|
A confident jumping kick.
| |||||
Click to toggle detailed hitbox data.
njmk
| Damage | Dizzy | Dizzy Time | Cancel | Guard | Act. Range |
|---|---|---|---|---|---|
| 22[2] | 5~11 | 50(+10) | None | High | N/A |
| Startup | Active | Recovery | Total | Frame Adv. | Meter |
| 6 | 10 | ∞ | 16+∞ | Dependent | 4/3 |
|
Another split kick. Don't think too hard about how the hurtbox works.
| |||||
Click to toggle detailed hitbox data.
djmk
| Damage | Dizzy | Dizzy Time | Cancel | Guard | Act. Range |
|---|---|---|---|---|---|
| 20[2] | 5~11 | 50(+10) | None | High | N/A |
| Startup | Active | Recovery | Total | Frame Adv. | Meter |
| 6 | 16 | ∞ | 22+∞ | Dependent | 4/3 |
|
A stronger version of Diagonal Jumping Short.
| |||||
Click to toggle detailed hitbox data.
njhk
| Damage | Dizzy | Dizzy Time | Cancel | Guard | Act. Range |
|---|---|---|---|---|---|
| 26[2] | 10~16 | 80 | 1st part: Special 2nd and 3rd parts: None |
Mid | N/A |
| Startup | Active | Recovery | Total | Frame Adv. | Meter |
| 3 | 13 (5/4/4) | ∞ | 16+∞ | Hit: Hard KD Block: Dependent |
5/4 |
|
Essentially a jumping version of Chun's towards+Forward kick command normal.
| |||||
Click to toggle detailed hitbox data.
djhk
| Damage | Dizzy | Dizzy Time | Cancel | Guard | Act. Range |
|---|---|---|---|---|---|
| 24[2] | 11~17(-1) | 60(+20) | None | High | N/A |
| Startup | Active | Recovery | Total | Frame Adv. | Meter |
| 6 | 16 | ∞ | 22+∞ | Dependent | 5/4 |
|
Chun does 2 split kicks in a row. They don't combo.
| |||||
Click to toggle detailed hitbox data.
Command Normals
Sankaku Tobi (Wall Jump)
- The jumping animation is 6 frames long.
- Useful for getting out of the corner or avoiding attacks.
- The jump can be performed during an air normal. You can also do an air attack after wall jumping. You can bounce off someone with her Head Stomp normal, then walljump afterwards. You can even air throw, walljump, then attack or air throw again.
- If you're quick enough, you can cancel the jump itself into a Spinning Bird Kick, retaining the directional momentum of your original jump arc.
Click to toggle detailed hitbox data.
Rear Spin Kick
| Damage | Dizzy | Dizzy Time | Cancel | Guard | Act. Range |
|---|---|---|---|---|---|
| 22[0] | 0~5 | 40 | None | Mid | N/A |
| Startup | Active | Recovery | Total | Frame Adv. | Meter |
| 7 | 9 (5/4) | 43 | 59 | Hit: Hard KD Block: -39 / -34 |
2/1 |
|
Chun-Li does a jump off the opponent (or thin air) into a flip.
| |||||
Click to toggle detailed hitbox data.
Kyakukyakuraku
| Damage | Dizzy | Dizzy Time | Cancel | Guard | Act. Range |
|---|---|---|---|---|---|
| 20[0] | 10~16 | 80 | None | Mid/Low | N/A |
| Startup | Active | Recovery | Total | Frame Adv. | Meter |
| 37 | 14 | 0 | 51 | Hit: Hard KD Block: Dependent |
5/4 |
|
Chun-Li flips over her opponent and lands on top with a knee strike.
| |||||
Click to toggle detailed hitbox data.
Yosokyakus
Click to toggle detailed hitbox data.
Throws
Chun-Li can throw with ![]() and
and ![]() . She also has an air throw, performed with the same buttons.
. She also has an air throw, performed with the same buttons.
| Damage | Dizzy | Dizzy Time | Cancel | Guard | Act. Range |
|---|---|---|---|---|---|
| 34 | 7~13 | 100 | - | Grab | 58 (from axis) 33 (from throwable box) Minimum height: 48/48 |
| Startup | Active | Recovery | Total | Frame Adv. | Meter |
| 0 | 1 | Dependent | 2 | N/A | - |
|
Same sprite and basic function as Chun's grounded throw.
| |||||
Click to toggle throwbox data.
--Raisin (March 12, 2007), some info courtesy T.Akiba
Special Moves
Kikoken
| Damage | Dizzy | Dizzy Time | Cancel | Guard | Act. Range | |
|---|---|---|---|---|---|---|
| 17[1] | 5~11 | 90 | None | Mid | N/A | |
| Startup | Active | Recovery | Total | Frame Adv. | Meter | |
| 5 | 75 | 42* | 47 | Dependent | 5 | |
|
| ||||||
| Damage | Dizzy | Dizzy Time | Cancel | Guard | Act. Range | |
| 18[1] | 7~13 | 90 | None | Mid | N/A | |
| Startup | Active | Recovery | Total | Frame Adv. | Meter | |
| 5 | 45 | 40* | 45 | Dependent | 5 | |
|
| ||||||
| Damage | Dizzy | Dizzy Time | Cancel | Guard | Act. Range | |
| 20[1] | 7~13 | 90 | None | Mid | N/A | |
| Startup | Active | Recovery | Total | Frame Adv. | Meter | |
| 5 | 31 | 38* | 43 | Dependent | 5 | |
|
Chun-Li puts her back into a fireball.
| ||||||
Click to toggle detailed hitbox data.
Startup:
 |
 |
 |
 |

| |
| Frame Count | 1 | 1 | 1 | 1 | 1 |
| Simplified | 5 | ||||
Active:
- Jab Version:
 |
 |
 |
 |
 |

| |
| Frame Count | 1 | 1 | 1 | 1 | 1 | 1... |
| Simplified | 42 | |||||
- Strong Version:
 |
 |
 |
 |
 |

| |
| Frame Count | 1 | 1 | 1 | 1 | 1 | 1... |
| Simplified | 40 | |||||
- Fierce Version:
 |
 |
 |
 |
 |

| |
| Frame Count | 1 | 1 | 1 | 1 | 1 | 1... |
| Simplified | 38 | |||||
Total Distance Traveled:
| Jab: 222 pixels after 75 frames | Strong: 176 pixels after 45 frames | Fierce: 150 pixels after 31 frames |
 |
 |

|
Hyakuretsukyaku
Click to toggle detailed hitbox data.
Startup:
 |

| |
| Frame Count (Short) | 1 | 3 |
| Simplified (Short) | 4 | |
| Frame Count (Forward) | 3 | 4 |
| Simplified (Forward) | 7 | |
| Frame Count (Rh) | 4 | 6 |
| Simplified (Rh) | 10 | |
Active:
 |
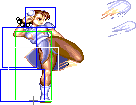 |
 |

| |
| Frame Count (Short) | 4 | 4 | 4 | 4 |
| Frame Count (Forward) | 2 | 2 | 2 | 2 |
| Frame Count (Rh) | 1 | 1 | 1 | 1 |
 |
 |
 |

| |
| Frame Count (Short) | 4 | 4 | 4 | 4 |
| Frame Count (Forward) | 2 | 2 | 2 | 2 |
| Frame Count (Rh) | 1 | 1 | 1 | 1 |
NOTE: The diagram shown refers to one complete cycle of the Lightning Legs animation. The minimal durations for each are as follows:
- The LK version will make a full cycle once, then will stop at frame 3 of the third cell. (35 frames in total)
- The MK version will make a full cycle once, then will stop at frame 1 of the 7th cell. (29 frames in total)
- The HK version will make 2 full cycles, then stop at the 6th cell. (22 frames in total)
Recovery:
 |

| |
| Frame Count (Short) | 2 | 2 |
| Simplified (Short) | 4 | |
| Frame Count (Forward) | 4 | 4 |
| Simplified (Forward) | 8 | |
| Frame Count (Rh) | 6 | 6 |
| Simplified (Rh) | 12 | |
Tenshokyaku
Click to toggle detailed hitbox data.
- Short Version:
 |
 |
 |
 |
 |
 |
 |
 |
 |
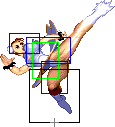
| |
| Frame Count | 6 | 4 | 1 | 1 | 2 | 4 | 2 | 2 | 2 | 2 |
| Simplified | 6 | 4 | 4 | 4 | 8 | |||||
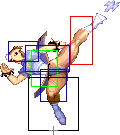 |
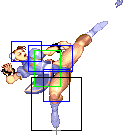 |
 |
 |
 |

| |
| Frame Count | 4 | 3 | 3 | 3 | 24 | 4 |
| Simplified | 4 | 37 | ||||
- Forward Version:
 |
 |
 |
 |
 |
 |
 |
 |
 |

| |
| Frame Count | 4 | 4 | 1 | 1 | 2 | 4 | 2 | 2 | 2 | 2 |
| Simplified | 4 | 4 | 4 | 4 | 8 | |||||
 |
 |
 |
 |
 |
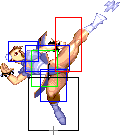
| |
| Frame Count | 4 | 2 | 2 | 2 | 2 | 4 |
| Simplified | 4 | 8 | 4 | |||
 |
 |
 |
 |

| |
| Frame Count | 2 | 2 | 3 | 21 | 6 |
| Simplified | 34 | ||||
- Roundhouse Version:
 |
 |
 |
 |
 |
 |
 |
 |
 |

| |
| Frame Count | 2 | 2 | 2 | 2 | 4 | 2 | 2 | 2 | 2 | 4 |
| Simplified | 2 | 2 | 4 | 4 | 8 | 4 | ||||
 |
 |
 |
 |
 |
 |
 |
 |

| |
| Frame Count | 2 | 2 | 2 | 2 | 4 | 2 | 2 | 2 | 2 |
| Simplified | 8 | 4 | 8 | ||||||
 |
 |
 |
 |
 |

| |
| Frame Count | 4 | 3 | 3 | 3 | 7 | 7 |
| Simplified | 4 | 23 | ||||
Spinning Bird Kick
Click to toggle detailed hitbox data.
Startup:
 |
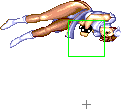 |
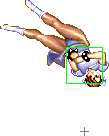 |
 |
 |
 |

| ||
| Frame Count | 1 | 4 | 3 | 2 | 3 | 4 | 4 | 2 |
| Simplified | 23 | |||||||
Active/Recovery:
- Short Version:
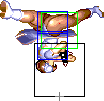 |
 |
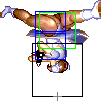 |
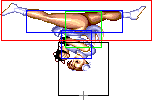 |
 |
 |
 |
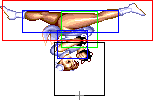
| |
| Frame Count | 4 | 3 | 2 | 2 | 1 | 1 | 1 | 1 |
| Simplified | 15 | |||||||
 |
 |
 |
 |
 |
 |
 |

| |
| Frame Count | 2 | 1 | 2 | 2 | 3 | 4 | 4 | 2 |
| Simplified | 20 | |||||||
 |
 |
 |
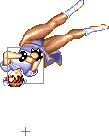 |
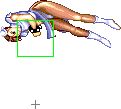 |
 |

| |
| Frame Count | 2 | 3 | 2 | 2 | 3 | 3 | 6 |
| Simplified | 21 | ||||||
- Forward Version:
 |
 |
 |
 |
 |
 |
 |

| |
| Frame Count | 4 | 4 | 3 | 3 | 2 | 2 | 1 | 1 |
| Simplified | 4 | 16 | ||||||
 |
 |
 |
 |
 |
 |
 |

| |
| Frame Count | 1 | 1 | 1 | 1 | 1 | 1 | 1 | 1 |
| Simplified | 1 | 7 | ||||||
 |
 |
 |
 |
 |
 |
 |

| |
| Frame Count | 2 | 1 | 1 | 2 | 2 | 3 | 3 | 4 |
| Simplified | 2 | 16 | ||||||

| |
| Frame Count | 2 |
 |
 |
 |
 |
 |
 |

| |
| Frame Count | 2 | 3 | 2 | 2 | 3 | 3 | 6 |
| Simplified | 21 | ||||||
- Roundhouse Version:
 |
 |
 |
 |
 |
 |
 |

| |
| Frame Count | 5 | 4 | 4 | 3 | 3 | 2 | 2 | 2 |
| 2 | 25 | |||||||
 |
 |
 |
 |
 |
 |
 |

| |
| Frame Count | 1 | 1 | 1 | 1 | 1 | 1 | 1 | 1 |
| Simplified | 8 | |||||||
 |
 |
 |
 |
 |
 |
 |

| |
| Frame Count | 1 | 1 | 1 | 1 | 1 | 1 | 1 | 1 |
| Simplified | 8 | |||||||
 |
 |
 |
 |
 |
 |
 |

| |
| Frame Count | 1 | 1 | 1 | 1 | 1 | 2 | 1 | 1 |
| Simplified | 9 | |||||||
 |
 |
 |
 |
 |

| |
| Frame Count | 2 | 2 | 3 | 3 | 3 | 3 |
| Simplified | 16 | |||||
 |
 |
 |
 |
 |
 |

| ||
| Frame Count | 2 | 3 | 2 | 2 | 3 | 3 | 4 | 6 |
| Simplified | 25 | |||||||
Aerial Spinning Bird Kick
Click to toggle detailed hitbox data.
Startup:
 |
 |
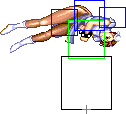 |
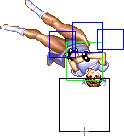 |

| |
| Frame Count | 2 | 4 | 3 | 2 | 4 |
| Simplified | 15 | ||||
Active/Recovery:
 |
 |
 |
 |
 |
 |
 |

| |
| Frame Count (Short) | 3 | 3 | 3 | 3 | 3 | 3 | 3 | 2 |
| Simplified (Short) | 3 | 20 | ||||||
| Frame Count (Forward) | 3 | 3 | 3 | 3 | 3 | 3 | 3 | 2 |
| Simplified (Forward) | 3 | 20 | ||||||
| Frame Count (Rh) | 2 | 2 | 2 | 2 | 2 | 2 | 2 | 2 |
| Simplified (Rh) | 2 | 14 | ||||||
 |
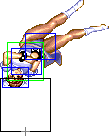 |
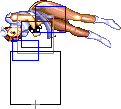 |
 |

| |
| Frame Count | 3 | 2 | 3 | 3 | ∞ |
| Simplified | ∞ | ||||
- Landing, partial: (When Chun lands before the last hitting frame)
 |
 |
 |
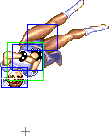 |
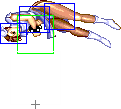 |
 |
 |

| |
| Frame Count | 3 | 3 | 2 | 2 | 3 | 3 | 4 | 5 |
| Simplified | 25 | |||||||
- Landing, complete: (When Chun lands after the last hitting frame)
 |
 |

| |
| Frame Count | 2 | 5 | 3 |
| Simplified | 10 | ||
Super Combo
| Damage | Dizzy | Dizzy Time | Cancel | Guard | Act. Range |
|---|---|---|---|---|---|
| 16[0] x 6 | 0~4 x 6 | 20 x 6 | None | Mid | N/A |
| Startup | Active | Recovery | Total | Frame Adv. | Meter |
| 10 | 4(9)6(6)1(1)1(1)1(1)1 | 14 | 56 | Hit: Hard KD Block: +9 |
- |
|
Chun-Li goes full power with a non-stop barrage of kicks. Often considered one of if not the best Super Combo in the game.
| |||||
Click to toggle detailed hitbox data.
Misc Animations
Jump Animations
- Neutral Jump:
 |
 |
 |
 |
 |
 |
 |
 |
 |
 |

| |
| Frame Count | 2 | 1 | 12 | 5 | 4 | 8 | 4 | 5 | 7 | 1 | 7* |
| Simplified | 2 | 1 | 45 | 1 | 7* | ||||||
- Back Jump:
 |
 |
 |
 |
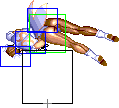 |
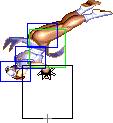 |
 |
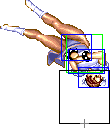 |
 |
 |
 |
 |

| |
| Frame Count | 2 | 1 | 10 | 6 | 5 | 4 | 3 | 4 | 5 | 6 | 3 | 1 | 7* |
| Simplified | 2 | 1 | 46 | 1 | 7* | ||||||||
- Forward Jump:
 |
 |
 |
 |
 |
 |
 |
 |
 |
 |
 |
 |

| |
| Frame Count | 2 | 1 | 10 | 6 | 5 | 4 | 3 | 4 | 5 | 6 | 1+ | 1 | 7* |
| Simplified | 2 | 1 | 44+ | 1 | 7* | ||||||||
Chun has a considerably fast prejump. In contrast, she has a huge jump arc that's easy to react to. This is especially true against characters with DP moves; Ryu for instance can punish her with his DP most of the time.
Chun-Li, just like Claw, has the ability to do wall jumps. That's why the Forward Jump has a '+' on the final frame of the aerial jumping part: that animation will have longer duration in case it's a wall jump.
The landing recovery has a special property which allows it to be canceled into certain actions. At the first landing frame, you can perform throws (including command throws), and on the second landing frame, you can start another jump, attack with a normal or special move, or block. Blocking not being until the second landing frame, as well as hitbox-hurtbox interactions having priority over throwbox-throw hurtbox is why sweeps work as anti airs in this game.
Things are different when jumping over your opponent, however. In that situation it's possible to walk back/forward, to jump again or to even block on the first landing frame! Strangely, if a throw is timed on the first landing frame of a jump that crosses over, a throwbox will never come out, even though that input will result in a normal coming out 2 frames later (like it normally would). Anyway, being able to block on the first landing frame can help a little bit on some safe jump crossup setups, or maybe in other situations as well if your character has a huge jump arc.
