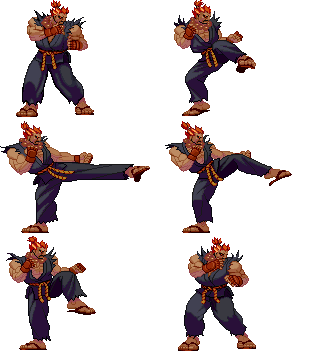
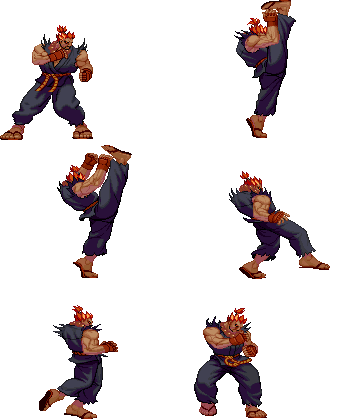
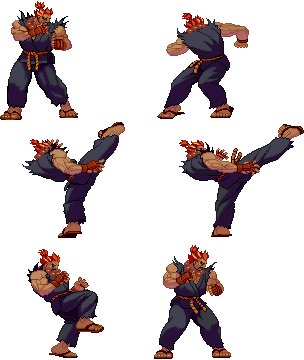
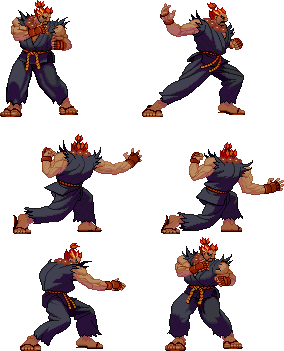
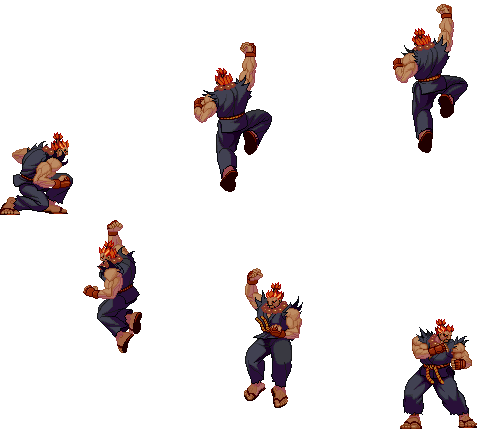
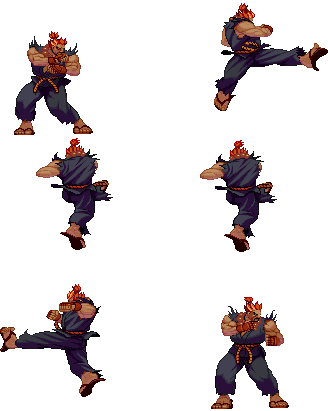
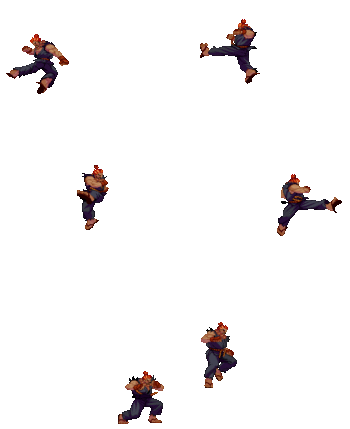
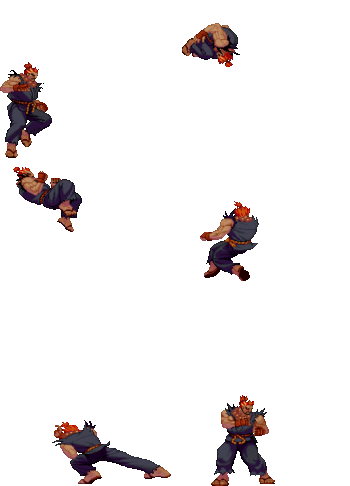
No edit summary |
|||
| (64 intermediate revisions by 6 users not shown) | |||
| Line 1: | Line 1: | ||
{{TOClimit|3}} | |||
{{Infobox Character 3S | {{Infobox Character 3S | ||
|name=Akuma | |name=Akuma | ||
| Line 8: | Line 10: | ||
|SA2=2/112 | |SA2=2/112 | ||
|SA3=2/112 | |SA3=2/112 | ||
|fDash=13 | |fDash=13 (95px) | ||
|bDash= | |bDash=15 (47px) | ||
|nJump=41(4+34+3) | |nJump=41(4+34+3) | ||
|bJump=43(4+36+3) | |bJump=43(4+36+3) | ||
| Line 23: | Line 25: | ||
== Frame Data == | == Frame Data == | ||
====Standing Normals==== | |||
=====<font style="visibility:hidden; float:right">5LP (cl)</font>===== | =====<font style="visibility:hidden; float:right">5LP (cl)</font>===== | ||
{{MoveData | {{MoveData | ||
| Line 36: | Line 39: | ||
|onHitCrouch=3 | |onHitCrouch=3 | ||
|onBlock=3 | |onBlock=3 | ||
| | |attackLevel=H | ||
|parry= | |parry=HL | ||
|damage=5 | |damage=5 | ||
|stun=3 | |stun=3 | ||
| Line 60: | Line 63: | ||
|onHitCrouch=4 | |onHitCrouch=4 | ||
|onBlock=4 | |onBlock=4 | ||
| | |attackLevel=H | ||
|parry= | |parry=HL | ||
|damage=3 | |damage=3 | ||
|stun=3 | |stun=3 | ||
| Line 83: | Line 86: | ||
|onHitCrouch=3 | |onHitCrouch=3 | ||
|onBlock=1 | |onBlock=1 | ||
| | |attackLevel=H | ||
|parry=H | |parry=H | ||
|damage=20 | |damage=20 | ||
| Line 109: | Line 112: | ||
|onHitCrouch=5 | |onHitCrouch=5 | ||
|onBlock=4 | |onBlock=4 | ||
| | |attackLevel=H | ||
|parry=H | |parry=H | ||
|damage=18 | |damage=18 | ||
| Line 134: | Line 137: | ||
|onHit=-2 | |onHit=-2 | ||
|onBlock=-4 | |onBlock=-4 | ||
| | |attackLevel=H | ||
|parry=H | |parry=H | ||
|damage=24 | |damage=24 | ||
| Line 160: | Line 163: | ||
|onHitCrouch=-2 | |onHitCrouch=-2 | ||
|onBlock=-6 | |onBlock=-6 | ||
| | |attackLevel=H | ||
|parry=H | |parry=H | ||
|damage=24 | |damage=24 | ||
| Line 184: | Line 187: | ||
|onHitCrouch=2 | |onHitCrouch=2 | ||
|onBlock=2 | |onBlock=2 | ||
| | |attackLevel=H | ||
|parry=A | |parry=A | ||
|damage=7 | |damage=7 | ||
| Line 206: | Line 209: | ||
|onHitCrouch=6 | |onHitCrouch=6 | ||
|onBlock=2 | |onBlock=2 | ||
| | |attackLevel=H | ||
|parry=H | |parry=H | ||
|damage=20 | |damage=20 | ||
| Line 232: | Line 235: | ||
|onHitCrouch=-5 | |onHitCrouch=-5 | ||
|onBlock=-7 | |onBlock=-7 | ||
| | |attackLevel=H | ||
|parry=H | |parry=H | ||
|damage=16 | |damage=16 | ||
| Line 255: | Line 258: | ||
|onHit=-4 | |onHit=-4 | ||
|onBlock=-6 | |onBlock=-6 | ||
| | |attackLevel=H*M | ||
|parry=H*H | |parry=H*H | ||
|damage=33 | |damage=33 | ||
| Line 284: | Line 287: | ||
|onHitCrouch=-3 | |onHitCrouch=-3 | ||
|onBlock=-7 | |onBlock=-7 | ||
| | |attackLevel=H | ||
|parry=H | |parry=H | ||
|damage=25 | |damage=25 | ||
| Line 298: | Line 301: | ||
<br> | <br> | ||
<br> | <br> | ||
==== Command Normals ==== | ==== Command Normals ==== | ||
=====<font style="visibility:hidden; float:right">6MP</font>===== | =====<font style="visibility:hidden; float:right">6MP</font>===== | ||
| Line 313: | Line 317: | ||
|onHitCrouch=3 | |onHitCrouch=3 | ||
|onBlock=-1 | |onBlock=-1 | ||
| | |attackLevel=M | ||
|parry=H | |parry=H | ||
|damage=14 | |damage=14 | ||
| Line 329: | Line 333: | ||
<br> | <br> | ||
<br> | <br> | ||
==== Crouching Normals ==== | ==== Crouching Normals ==== | ||
=====<font style="visibility:hidden; float:right">2LP</font>===== | =====<font style="visibility:hidden; float:right">2LP</font>===== | ||
| Line 343: | Line 348: | ||
|onHitCrouch=3 | |onHitCrouch=3 | ||
|onBlock=3 | |onBlock=3 | ||
| | |attackLevel=H | ||
|parry=A | |parry=A | ||
|damage=3 | |damage=3 | ||
| Line 366: | Line 371: | ||
|onHitCrouch=5 | |onHitCrouch=5 | ||
|onBlock=3 | |onBlock=3 | ||
| | |attackLevel=H | ||
|parry=A | |parry=A | ||
|damage=16 | |damage=16 | ||
| Line 374: | Line 379: | ||
* Self meter gain: Whiff: 2, Hit: 11, Block: 6. | * Self meter gain: Whiff: 2, Hit: 11, Block: 6. | ||
* Opponent meter gain: Whiff: 0, Hit: 2, Block: 0. | * Opponent meter gain: Whiff: 0, Hit: 2, Block: 0. | ||
* You will use this if you're trying to build meter. | |||
{{3S Button FAT|link=https://fullmeter.com/fatonline/#/framedata/movedetail/3S/Akuma/normal/Crouch%20MP}} | {{3S Button FAT|link=https://fullmeter.com/fatonline/#/framedata/movedetail/3S/Akuma/normal/Crouch%20MP}} | ||
}} | }} | ||
| Line 391: | Line 397: | ||
|onHitCrouch=-4 | |onHitCrouch=-4 | ||
|onBlock=-8 | |onBlock=-8 | ||
| | |attackLevel=H | ||
|parry=A | |parry=A | ||
|damage=24 | |damage=24 | ||
| Line 416: | Line 422: | ||
|onHitCrouch=1 | |onHitCrouch=1 | ||
|onBlock=1 | |onBlock=1 | ||
| | |attackLevel=L | ||
|parry=L | |parry=L | ||
|damage=3 | |damage=3 | ||
| Line 439: | Line 445: | ||
|onHitCrouch=-1 | |onHitCrouch=-1 | ||
|onBlock=-3 | |onBlock=-3 | ||
| | |attackLevel=L | ||
|parry=L | |parry=L | ||
|damage=16 | |damage=16 | ||
| Line 465: | Line 471: | ||
|onHitCrouch=28 | |onHitCrouch=28 | ||
|onBlock=-15 | |onBlock=-15 | ||
| | |attackLevel=L | ||
|parry=L | |parry=L | ||
|damage=24 | |damage=24 | ||
| Line 479: | Line 485: | ||
<br> | <br> | ||
<br> | <br> | ||
==== Jumping Normals ==== | ==== Jumping Normals ==== | ||
=====<font style="visibility:hidden; float:right">j.LP</font>===== | =====<font style="visibility:hidden; float:right">j.LP</font>===== | ||
| Line 488: | Line 495: | ||
{{AttackData-3S | {{AttackData-3S | ||
|startup=4 | |startup=4 | ||
| | |attackLevel=M | ||
|parry=H | |parry=H | ||
|damage=7 | |damage=7 | ||
| Line 506: | Line 513: | ||
|startup=5 | |startup=5 | ||
|active=5 | |active=5 | ||
| | |attackLevel=M | ||
|parry=H | |parry=H | ||
|damage=16 | |damage=16 | ||
| Line 526: | Line 533: | ||
|startup=6 | |startup=6 | ||
|active=3 | |active=3 | ||
| | |attackLevel=M | ||
|parry=H | |parry=H | ||
|damage=23 | |damage=23 | ||
| Line 540: | Line 547: | ||
{{MoveData | {{MoveData | ||
|name=Jump HP | |name=Jump HP | ||
|input={{uf}}+{{ | |input={{uf}}+{{hp}} | ||
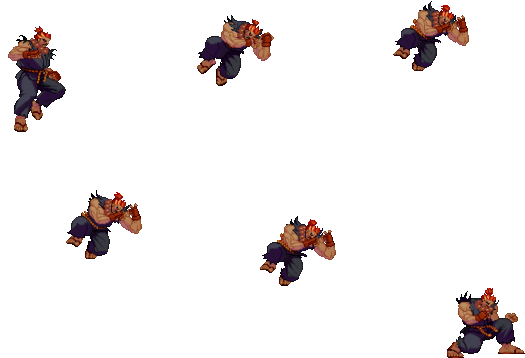
|image=(akumajhp).gif | |image=(akumajhp).gif | ||
|data= | |data= | ||
| Line 546: | Line 553: | ||
|startup=6 | |startup=6 | ||
|active=4 | |active=4 | ||
| | |attackLevel=M | ||
|parry=H | |parry=H | ||
|damage=23 | |damage=23 | ||
| Line 566: | Line 573: | ||
|startup=4 | |startup=4 | ||
|active=10 | |active=10 | ||
| | |attackLevel=M | ||
|parry=H | |parry=H | ||
|damage=7 | |damage=7 | ||
| Line 584: | Line 591: | ||
|startup=5 | |startup=5 | ||
|active=6 | |active=6 | ||
| | |attackLevel=M | ||
|parry=H | |parry=H | ||
|damage=14 | |damage=14 | ||
| Line 604: | Line 611: | ||
|startup=5 | |startup=5 | ||
|active=6 | |active=6 | ||
| | |attackLevel=M | ||
|parry=H | |parry=H | ||
|damage=14 | |damage=14 | ||
| Line 611: | Line 618: | ||
* Self meter gain: Whiff: 2, Hit: 11, Block: 6. | * Self meter gain: Whiff: 2, Hit: 11, Block: 6. | ||
* Opponent meter gain: Whiff: 0, Hit: 2, Block: 0. | * Opponent meter gain: Whiff: 0, Hit: 2, Block: 0. | ||
* The worse j.HK | |||
{{3S Button FAT|link=https://fullmeter.com/fatonline/#/framedata/movedetail/3S/Akuma/normal/Jump%20MK}} | {{3S Button FAT|link=https://fullmeter.com/fatonline/#/framedata/movedetail/3S/Akuma/normal/Jump%20MK}} | ||
}} | }} | ||
| Line 624: | Line 632: | ||
|startup=6 | |startup=6 | ||
|active=5 | |active=5 | ||
| | |attackLevel=M | ||
|parry=H | |parry=H | ||
|damage=21 | |damage=21 | ||
| Line 644: | Line 652: | ||
|startup=6 | |startup=6 | ||
|active=4 | |active=4 | ||
| | |attackLevel=M | ||
|parry=H | |parry=H | ||
|damage=21 | |damage=21 | ||
| Line 666: | Line 674: | ||
|active=10 | |active=10 | ||
|recovery=7 | |recovery=7 | ||
| | |attackLevel=M | ||
|onHit=-1 ~ 12 | |||
|onHitCrouch=4~12 | |||
|onBlock=-1 ~ 12 | |||
|parry=H | |parry=H | ||
|damage=16 | |damage=16 | ||
| Line 673: | Line 684: | ||
* Self meter gain: Whiff: 2, Hit: 11, Block: 6. | * Self meter gain: Whiff: 2, Hit: 11, Block: 6. | ||
* Opponent meter gain: Whiff: 0, Hit: 2, Block: 0. | * Opponent meter gain: Whiff: 0, Hit: 2, Block: 0. | ||
* Essential move in Akuma's mixup game | |||
{{3S Button FAT|link=https://fullmeter.com/fatonline/#/framedata/movedetail/3S/Akuma/normal/Tenma%20Kujin%20Kyaku}} | {{3S Button FAT|link=https://fullmeter.com/fatonline/#/framedata/movedetail/3S/Akuma/normal/Tenma%20Kujin%20Kyaku}} | ||
}} | }} | ||
}} | }} | ||
=====<font style="visibility:hidden; float:right">5MP > | ==== Target Combos ==== | ||
=====<font style="visibility:hidden; float:right">5MP > 5HP</font>===== | |||
{{MoveData | {{MoveData | ||
|name=Close Standing MP-HP (TC) | |name=Close Standing MP-HP (TC) | ||
|input=5MP > | |input=5MP > 5HP | ||
|image= | |image= | ||
|data= | |data= | ||
{{AttackData-3S | {{AttackData-3S | ||
| Line 690: | Line 703: | ||
|onHitCrouch=-8 | |onHitCrouch=-8 | ||
|onBlock=-12 | |onBlock=-12 | ||
| | |attackLevel=H*H | ||
|parry=H | |parry=H | ||
|damage=11 | |damage=11 | ||
|stun=3 | |stun=3 | ||
|description= | |description= | ||
* Creates distance but is extremely unsafe on hit | * Creates distance but is extremely unsafe on hit. Not very useful | ||
{{3S Button FAT|link=https://fullmeter.com/fatonline/#/framedata/movedetail/3S/Akuma/normal/Close%20Standing%20MP-HP%20(TC)}} | {{3S Button FAT|link=https://fullmeter.com/fatonline/#/framedata/movedetail/3S/Akuma/normal/Close%20Standing%20MP-HP%20(TC)}} | ||
}} | }} | ||
| Line 702: | Line 715: | ||
<br> | <br> | ||
<br> | <br> | ||
==== Throws ==== | ==== Throws ==== | ||
=====<font style="visibility:hidden; float:right">5LPLK</font>===== | =====<font style="visibility:hidden; float:right">5LPLK</font>===== | ||
| Line 714: | Line 728: | ||
|active=1 | |active=1 | ||
|recovery=21 | |recovery=21 | ||
|onHit= | |onHit=D | ||
| | |onHitCrouch=D | ||
|attackLevel=T | |||
|parry=N | |parry=N | ||
|damage=19 | |damage=19 | ||
| Line 736: | Line 751: | ||
|active=1 | |active=1 | ||
|recovery=21 | |recovery=21 | ||
|onHit= | |onHit=D | ||
| | |onHitCrouch=D | ||
|attackLevel=T | |||
|parry=N | |parry=N | ||
|damage=19 | |damage=19 | ||
| Line 749: | Line 765: | ||
<br> | <br> | ||
<br> | <br> | ||
==== Universal Overheads ==== | ==== Universal Overheads ==== | ||
=====<font style="visibility:hidden; float:right">5MPHK</font>===== | =====<font style="visibility:hidden; float:right">5MPHK</font>===== | ||
| Line 761: | Line 778: | ||
|active=8 | |active=8 | ||
|recovery=7 | |recovery=7 | ||
| | |onHit=0 ~ 7 | ||
|onHitCrouch=1 ~ 8 | |||
|onBlock=-5 ~ 0 | |||
|attackLevel=M | |||
|parry=H | |parry=H | ||
|damage=7 | |damage=7 | ||
|stun=3 | |stun=3 | ||
|description= | |description= | ||
{{3S Button FAT|link=https://fullmeter.com/fatonline/#/framedata/movedetail/3S/Akuma/normal/Straight%20Hit}} | {{3S Button FAT|link=https://fullmeter.com/fatonline/#/framedata/movedetail/3S/Akuma/normal/Straight%20Hit}} | ||
}} | }} | ||
| Line 773: | Line 792: | ||
<br> | <br> | ||
<br> | <br> | ||
==== Taunt ==== | ==== Taunt ==== | ||
=====<font style="visibility:hidden; float:right">5HPHK</font>===== | =====<font style="visibility:hidden; float:right">5HPHK</font>===== | ||
| Line 794: | Line 814: | ||
<br> | <br> | ||
<br> | <br> | ||
==== Special Moves ==== | ==== Special Moves ==== | ||
=====<font style="visibility:hidden; float:right">236P</font>===== | =====<font style="visibility:hidden; float:right">236P</font>===== | ||
| Line 805: | Line 826: | ||
|startup=8 | |startup=8 | ||
|recovery=38 | |recovery=38 | ||
|onHit=-10 | |||
|onHitCrouch=-10 | |||
|onBlock=-11 | |onBlock=-11 | ||
| | |attackLevel=H | ||
|parry=H | |parry=H | ||
|damage=17 | |damage=17 | ||
| Line 825: | Line 848: | ||
|data= | |data= | ||
{{AttackData-3S | {{AttackData-3S | ||
|startup= | |startup=11 | ||
|active= | |active=varies | ||
|recovery= | |recovery=7 land | ||
|onBlock= | |onHit=-17 ~ 13 | ||
| | |onHitCrouch=-16 ~ 14 | ||
|onBlock=-18 ~ 12 | |||
|attackLevel=H | |||
|parry=H | |parry=H | ||
|damage=10 | |damage=10 | ||
| Line 836: | Line 861: | ||
* Cancel options: su | * Cancel options: su | ||
* Can make Akuma temporarily pause in mid-air, especially before landing | * Can make Akuma temporarily pause in mid-air, especially before landing | ||
* Can be | * Can be performed from any angled or neutral jump | ||
* | * Fireball speed is determined by button strength; LP = slowest, HP = fastest | ||
* | ** Button strength does not affect the fireball angle | ||
* Holding down on the frame Akuma lands causes him to crouch during landing recovery | |||
{{3S Button FAT|link=https://fullmeter.com/fatonline/#/framedata/movedetail/3S/Akuma/normal/Zankuu%20Hadouken}} | {{3S Button FAT|link=https://fullmeter.com/fatonline/#/framedata/movedetail/3S/Akuma/normal/Zankuu%20Hadouken}} | ||
}} | }} | ||
| Line 846: | Line 872: | ||
{{MoveData | {{MoveData | ||
|name=Shakunetsu Hadouken | |name=Shakunetsu Hadouken | ||
|input={{ | |input={{hcb}}+{{p}} | ||
|subtitle=Red Fireball | |subtitle=Red Fireball | ||
|image=(akumashdk).gif | |image=(akumashdk).gif | ||
| Line 856: | Line 882: | ||
|active=44 | |active=44 | ||
|recovery=42 | |recovery=42 | ||
|onHit=D | |||
|onHitCrouch=D | |||
|onBlock=-23 | |onBlock=-23 | ||
| | |attackLevel=H | ||
|parry=H | |parry=H | ||
|damage=8 | |damage=8 | ||
| Line 872: | Line 900: | ||
|recovery=43 | |recovery=43 | ||
|onBlock=-18 | |onBlock=-18 | ||
| | |attackLevel=H*H | ||
|parry=H*H | |parry=H*H | ||
|damage=16 | |damage=16 | ||
| Line 888: | Line 916: | ||
|recovery=44 | |recovery=44 | ||
|onBlock=-15 | |onBlock=-15 | ||
| | |attackLevel=H*H*H | ||
|parry=H*H*H | |parry=H*H*H | ||
|damage=24 | |damage=24 | ||
| Line 904: | Line 932: | ||
|name=Gou Shoryuken | |name=Gou Shoryuken | ||
|input={{dp}}+{{p}} | |input={{dp}}+{{p}} | ||
|subtitle=DP | |subtitle=DP/Shoryu/Uppercut | ||
|image=(akumasrk).gif | |image=(akumasrk).gif | ||
|caption={{lp}}/{{mp}}/{{hp}} | |caption={{lp}}/{{mp}}/{{hp}} | ||
|data= | |data= | ||
{{AttackData-3S | {{AttackData-3S | ||
| Line 917: | Line 941: | ||
|active=14 | |active=14 | ||
|recovery=26 | |recovery=26 | ||
|onHit=D | |||
|onHitCrouch=D | |||
|onBlock=-24 | |onBlock=-24 | ||
| | |attackLevel=H | ||
|parry=A | |parry=A | ||
|damage=23 | |damage=23 | ||
| Line 924: | Line 950: | ||
|description= | |description= | ||
* Cancel options: su | * Cancel options: su | ||
* 1-3f fully invulnerable, 4-5f upper body invulnerable | |||
** Can trade with overlapping attacks on its first active frame, depending on priority and hitbox height | |||
* 1-5f throw invulnerable, 6f airborne | |||
* Self meter gain: Whiff: 3, Hit: 21, Block: 15. | * Self meter gain: Whiff: 3, Hit: 21, Block: 15. | ||
* Opponent meter gain: Whiff: 0, Hit: 6, Block: 0. | * Opponent meter gain: Whiff: 0, Hit: 6, Block: 0. | ||
{{3S Button FAT|link=https://fullmeter.com/fatonline/#/framedata/movedetail/3S/Akuma/normal/LP%20Gou%20Shoryuken}} | {{3S Button FAT|link=https://fullmeter.com/fatonline/#/framedata/movedetail/3S/Akuma/normal/LP%20Gou%20Shoryuken}} | ||
}} | }} | ||
| Line 936: | Line 962: | ||
|active=7 | |active=7 | ||
|recovery=41 | |recovery=41 | ||
|onHit=D | |||
|onHitCrouch=D | |||
|onBlock=-30 | |onBlock=-30 | ||
| | |attackLevel=H*H | ||
|parry=A*A | |parry=A*A | ||
|damage=25 | |damage=25 | ||
|stun=13 | |stun=13 | ||
|description= | |description= | ||
* Cancel options: su | * Cancel options: su (first hit only) | ||
* 1-2f fully invulnerable, 3-4f upper body invulnerable | |||
** Can trade with overlapping attacks on its first active frame, depending on priority and hitbox height | |||
* 1-4f throw invulnerable, 5f airborne | |||
* 2nd hit knocks down, but misses most crouching characters except at point blank, leaving Akuma vulnerable on recovery | |||
** This makes it unreliable as a wakeup reversal, since properly spaced crouching attacks can force the move to whiff | |||
* Self meter gain: Whiff: 3, Hit: 22, Block: 16. | * Self meter gain: Whiff: 3, Hit: 22, Block: 16. | ||
* Opponent meter gain: Whiff: 0, Hit: 6, Block: 0. | * Opponent meter gain: Whiff: 0, Hit: 6, Block: 0. | ||
{{3S Button FAT|link=https://fullmeter.com/fatonline/#/framedata/movedetail/3S/Akuma/normal/MP%20Gou%20Shoryuken}} | {{3S Button FAT|link=https://fullmeter.com/fatonline/#/framedata/movedetail/3S/Akuma/normal/MP%20Gou%20Shoryuken}} | ||
}} | }} | ||
| Line 955: | Line 985: | ||
|active=23 | |active=23 | ||
|recovery=35 | |recovery=35 | ||
|onHit=D | |||
|onHitCrouch=D | |||
|onBlock=-34 | |onBlock=-34 | ||
| | |attackLevel=H*H*H | ||
|parry=A*A*A | |parry=A*A*A | ||
|damage=29 | |damage=29 | ||
|stun=15 | |stun=15 | ||
|description= | |description= | ||
* Cancel options: su | * Cancel options: su (first 2 hits only) | ||
* 1-3f fully invulnerable, 4-5f upper body invulnerable | |||
* 1-5f throw invuln, 6f airborne | |||
* 3rd hit knocks down, but misses most crouching characters except at point blank, leaving Akuma vulnerable on recovery | |||
** This makes it unreliable as a wakeup reversal, since properly spaced crouching attacks can force the move to whiff | |||
* Does NOT force standing | |||
* Self meter gain: Whiff: 3, Hit: 23, Block: 17. | * Self meter gain: Whiff: 3, Hit: 23, Block: 17. | ||
* Opponent meter gain: Whiff: 0, Hit: 6, Block: 0. | * Opponent meter gain: Whiff: 0, Hit: 6, Block: 0. | ||
{{3S Button FAT|link=https://fullmeter.com/fatonline/#/framedata/movedetail/3S/Akuma/normal/HP%20Gou%20Shoryuken}} | {{3S Button FAT|link=https://fullmeter.com/fatonline/#/framedata/movedetail/3S/Akuma/normal/HP%20Gou%20Shoryuken}} | ||
}} | }} | ||
}} | }} | ||
| Line 1,010: | Line 1,009: | ||
|name=Tatsumaki Zankuu Kyaku | |name=Tatsumaki Zankuu Kyaku | ||
|input={{qcb}}+{{k}} | |input={{qcb}}+{{k}} | ||
|subtitle=Tatsu | |subtitle=Tatsu/Hurricane | ||
|image=(akumatzk).gif | |image=(akumatzk).gif | ||
|caption= | |caption={{lk}}/{{mk}}/{{hk}} | ||
|data= | |data= | ||
{{AttackData-3S | {{AttackData-3S | ||
| Line 1,023: | Line 1,018: | ||
|active=4 | |active=4 | ||
|recovery=17 | |recovery=17 | ||
|onHit=D | |||
|onHitCrouch=D | |||
|onBlock=-12 | |onBlock=-12 | ||
| | |attackLevel=H | ||
|parry=H | |parry=H | ||
|damage=17 | |damage=17 | ||
| Line 1,032: | Line 1,029: | ||
* Self meter gain: Whiff: 6, Hit: 21, Block: 15. | * Self meter gain: Whiff: 6, Hit: 21, Block: 15. | ||
* Opponent meter gain: Whiff: 0, Hit: 4, Block: 0. | * Opponent meter gain: Whiff: 0, Hit: 4, Block: 0. | ||
* | * Against crouching, only hits Dudley, Hugo, Q, Urien; sometimes Akuma or Remy depending on idle animation | ||
** Also connects vs. crouch blocking Akuma (at farther ranges, Twelve | |||
{{3S Button FAT|link=https://fullmeter.com/fatonline/#/framedata/movedetail/3S/Akuma/normal/LK%20Tatsumaki%20Zankuu%20Kyaku}} | {{3S Button FAT|link=https://fullmeter.com/fatonline/#/framedata/movedetail/3S/Akuma/normal/LK%20Tatsumaki%20Zankuu%20Kyaku}} | ||
}} | }} | ||
| Line 1,040: | Line 1,038: | ||
|active=10 | |active=10 | ||
|recovery=16 | |recovery=16 | ||
|onHit=D | |||
|onHitCrouch=D | |||
|onBlock=-8 | |onBlock=-8 | ||
| | |attackLevel=H*H | ||
|parry=H*H*H | |parry=H*H*H | ||
|damage=21 | |damage=21 | ||
| Line 1,059: | Line 1,059: | ||
|active=18 | |active=18 | ||
|recovery=10 | |recovery=10 | ||
|onHit=D | |||
|onHitCrouch=D | |||
|onBlock=-5 | |onBlock=-5 | ||
| | |attackLevel=H*H*H | ||
|parry=H*H*H*H*H | |parry=H*H*H*H*H | ||
|damage=25 | |damage=25 | ||
| Line 1,080: | Line 1,082: | ||
|name=Air Tatsumaki Zankuu Kyaku | |name=Air Tatsumaki Zankuu Kyaku | ||
|input={{qcb}}+{{k}} | |input={{qcb}}+{{k}} | ||
|subtitle=Air Tatsu | |subtitle=Air Tatsu/Air Hurricane | ||
|image=(akumaatzk).gif | |image=(akumaatzk).gif | ||
|caption={{lk}}/{{mk}}/{{hk}} | |caption={{lk}}/{{mk}}/{{hk}} | ||
| Line 1,089: | Line 1,091: | ||
|active=3 | |active=3 | ||
|recovery=40 | |recovery=40 | ||
|onHit=D | |||
|onHitCrouch=D | |||
|onBlock=-8 | |onBlock=-8 | ||
| | |attackLevel=H | ||
|parry=H | |parry=H | ||
|damage=14 | |damage=14 | ||
| Line 1,105: | Line 1,109: | ||
|active=6 | |active=6 | ||
|recovery=31 | |recovery=31 | ||
|onHit=D | |||
|onHitCrouch=D | |||
|onBlock=-7 | |onBlock=-7 | ||
| | |attackLevel=H*H | ||
|parry=H*H | |parry=H*H | ||
|damage=27 | |damage=27 | ||
| Line 1,121: | Line 1,127: | ||
|active=12 | |active=12 | ||
|recovery=16 | |recovery=16 | ||
|onHit=D | |||
|onHitCrouch=D | |||
|onBlock=-8 | |onBlock=-8 | ||
| | |attackLevel=H*H*H | ||
|parry=H*H*H | |parry=H*H*H | ||
|damage=40 | |damage=40 | ||
| Line 1,145: | Line 1,153: | ||
|active=15 | |active=15 | ||
|recovery=13 | |recovery=13 | ||
|onHit=D | |||
|onHitCrouch=D | |||
|onBlock=-11 | |onBlock=-11 | ||
| | |attackLevel=L | ||
|parry=L | |parry=L | ||
|damage=17 | |damage=17 | ||
|stun=3 | |stun=3 | ||
|description= | |description= | ||
* Button strength determines the distance traveled | |||
* Followup inputs can be input starting on the 17th frame | |||
* Maximum advantage is +13f (Special) | * Maximum advantage is +13f (Special) | ||
* Self meter gain: Whiff: 3, Hit: 19, Block: 10. | * Self meter gain: Whiff: 3, Hit: 19, Block: 10. | ||
| Line 1,162: | Line 1,174: | ||
{{MoveData | {{MoveData | ||
|name=Hyakki Goushou | |name=Hyakki Goushou | ||
|input={{dp}}+{{k}} | |input={{dp}}+{{k}}, {{p}} | ||
|subtitle=Demon Flip > Palm | |subtitle=Demon Flip > Palm | ||
|image=(akumahgoushou).gif | |image=(akumahgoushou).gif | ||
| Line 1,170: | Line 1,182: | ||
|active=3 | |active=3 | ||
|recovery=20 | |recovery=20 | ||
| | |attackLevel=M | ||
|onHit=D | |||
|onHitCrouch=D | |||
|onBlock=-12 ~ -2 | |||
|parry=H | |parry=H | ||
|damage=23 | |damage=23 | ||
|stun=13 | |stun=13 | ||
|description= | |description= | ||
* Can be input starting from the 17th frame of Demon Flip | |||
* Self meter gain: Whiff: 3, Hit: 19, Block: 10. | * Self meter gain: Whiff: 3, Hit: 19, Block: 10. | ||
* Opponent meter gain: Whiff: 0, Hit: 4, Block: 0. | * Opponent meter gain: Whiff: 0, Hit: 4, Block: 0. | ||
| Line 1,184: | Line 1,200: | ||
{{MoveData | {{MoveData | ||
|name=Hyakki Goujin | |name=Hyakki Goujin | ||
|input={{dp}}+{{k}} | |input={{dp}}+{{k}}, {{k}} | ||
|subtitle=Demon Flip > Divekick | |subtitle=Demon Flip > Divekick | ||
|image=(akumahgoujin).gif | |image=(akumahgoujin).gif | ||
| Line 1,192: | Line 1,208: | ||
|active=10 | |active=10 | ||
|recovery=7 | |recovery=7 | ||
| | |attackLevel=H | ||
|onHit=-1 ~ 12 | |||
|onHitCrouch=-1 ~ 12 | |||
|onBlock=-1 ~ 12 | |||
|parry=H | |parry=H | ||
|damage=17 | |damage=17 | ||
|stun=11 | |stun=11 | ||
|description= | |description= | ||
* Can be input starting from the 17th frame of Demon Flip | |||
* Self meter gain: Whiff: 3, Hit: 19, Block: 10. | * Self meter gain: Whiff: 3, Hit: 19, Block: 10. | ||
* Opponent meter gain: Whiff: 0, Hit: 4, Block: 0. | * Opponent meter gain: Whiff: 0, Hit: 4, Block: 0. | ||
* Has least amount of landing recovery out of all options | * Has least amount of landing recovery out of all options | ||
** If done close to the ground (so that the hitbox doesn't come out), only 2f landing recovery | |||
{{3S Button FAT|link=https://fullmeter.com/fatonline/#/framedata/movedetail/3S/Akuma/normal/Hyakki%20Goujin}} | {{3S Button FAT|link=https://fullmeter.com/fatonline/#/framedata/movedetail/3S/Akuma/normal/Hyakki%20Goujin}} | ||
}} | }} | ||
| Line 1,207: | Line 1,228: | ||
{{MoveData | {{MoveData | ||
|name=Hyakki Gousai | |name=Hyakki Gousai | ||
|input={{dp}}+{{k}} | |input={{dp}}+{{k}}, {{lp}}+{{lk}} | ||
|subtitle=Demon Flip > Throw | |subtitle=Demon Flip > Throw | ||
|image=(akumahgousai).gif | |image=(akumahgousai).gif | ||
| Line 1,215: | Line 1,236: | ||
|active=2 | |active=2 | ||
|recovery=34 | |recovery=34 | ||
| | |onHit=D | ||
|onHitCrouch=D | |||
|onBlock=- | |||
|attackLevel=T | |||
|parry=N | |parry=N | ||
|damage=19 | |damage=19 | ||
|stun=14 | |stun=14 | ||
|description= | |description= | ||
* Can be input starting from the 17th frame of Demon Flip | |||
* Can grab crouching characters with strict timing | * Can grab crouching characters with strict timing | ||
{{3S Button FAT|link=https://fullmeter.com/fatonline/#/framedata/movedetail/3S/Akuma/normal/Hyakki%20Gousai}} | {{3S Button FAT|link=https://fullmeter.com/fatonline/#/framedata/movedetail/3S/Akuma/normal/Hyakki%20Gousai}} | ||
}} | |||
}} | |||
=====<font style="visibility:hidden; float:right">623PP</font>===== | |||
{{MoveData | |||
|name=Ashura Senkuu (Long) | |||
|input={{dp}}+{{p}}{{p}} | |||
|subtitle=Teleport (Long) | |||
|image=(akumaasf).gif | |||
|data= | |||
{{AttackData-3S | |||
|active=65 | |||
|recovery=9 | |||
|description= | |||
* Completely invulnerable upon startup but can be interrupted from certain Super Art activations after 15f startup and has 13f recovery | |||
* Punch version travels full screen with longer invulnerability | |||
{{3S Button FAT|link=https://fullmeter.com/fatonline/#/framedata/movedetail/3S/Akuma/normal/Ashura%20Senkuu%20(Long)}} | |||
}} | |||
}} | |||
=====<font style="visibility:hidden; float:right">623KK</font>===== | |||
{{MoveData | |||
|name=Ashura Senkuu (Short) | |||
|input={{dp}}+{{k}}{{k}} | |||
|subtitle=Teleport (Short) | |||
|image=(akumaasf).gif | |||
|data= | |||
{{AttackData-3S | |||
|active=49 | |||
|recovery=9 | |||
|description= | |||
* Completely invulnerable upon startup but can be interrupted from certain Super Art activations after 15f startup and has 13f recovery | |||
* Kick version travels half-screen distance | |||
{{3S Button FAT|link=https://fullmeter.com/fatonline/#/framedata/movedetail/3S/Akuma/normal/Ashura%20Senkuu%20(Short)}} | |||
}} | }} | ||
}} | }} | ||
| Line 1,227: | Line 1,286: | ||
<br> | <br> | ||
<br> | <br> | ||
==== | |||
==== Super Arts ==== | |||
=====<font style="visibility:hidden; float:right">236236P (SA1)</font>===== | =====<font style="visibility:hidden; float:right">236236P (SA1)</font>===== | ||
{{MoveData | {{MoveData | ||
|name=Messatsu Gou Hadou | |name=Messatsu Gou Hadou | ||
|input={{qcf}}{{qcf}}+{{p}} | |input={{qcf}}{{qcf}}+{{p}} | ||
|subtitle=SA1 | |subtitle=SA1 | ||
|image=(akumamgh).gif | |image=(akumamgh).gif | ||
| Line 1,238: | Line 1,298: | ||
|startup=2 | |startup=2 | ||
|active=42 | |active=42 | ||
|onHit=D | |||
|onHitCrouch=D | |||
|onBlock=-13 | |onBlock=-13 | ||
| | |attackLevel=H x6 | ||
|parry=H | |parry=H x6 | ||
|damage=47 | |damage=47 | ||
|stun=0 | |||
|description= | |description= | ||
* Stock: x2 | * Stock: x2 | ||
* Akuma's preffered Super Art. | |||
{{3S Button FAT|link=https://fullmeter.com/fatonline/#/framedata/movedetail/3S/Akuma/normal/Messatsu%20Gou%20Hadou}} | {{3S Button FAT|link=https://fullmeter.com/fatonline/#/framedata/movedetail/3S/Akuma/normal/Messatsu%20Gou%20Hadou}} | ||
}} | }} | ||
| Line 1,251: | Line 1,315: | ||
{{MoveData | {{MoveData | ||
|name=Tenma Gou Zankuu | |name=Tenma Gou Zankuu | ||
|input={{qcf}}{{qcf}}+{{p}} | |input={{qcf}}{{qcf}}+{{p}} | ||
|subtitle=Air SA1 | |subtitle=Air SA1 | ||
|image=(akumatgz).gif | |image=(akumatgz).gif | ||
| Line 1,258: | Line 1,322: | ||
|startup=7 | |startup=7 | ||
|active=32 | |active=32 | ||
|onBlock=- | |recovery=13 land | ||
| | |onHit=D | ||
|parry=H | |onHitCrouch=D | ||
|onBlock=-24 ~ -14 | |||
|attackLevel=H x6 | |||
|parry=H x6 | |||
|damage=53 | |damage=53 | ||
|stun=0 | |||
|description= | |description= | ||
* Stock: x2 | * Stock: x2 | ||
* If Akuma holds down when landing, he will be in a crouching recovery state | |||
{{3S Button FAT|link=https://fullmeter.com/fatonline/#/framedata/movedetail/3S/Akuma/normal/Tenma%20Gou%20Zankuu}} | {{3S Button FAT|link=https://fullmeter.com/fatonline/#/framedata/movedetail/3S/Akuma/normal/Tenma%20Gou%20Zankuu}} | ||
}} | }} | ||
| Line 1,271: | Line 1,340: | ||
{{MoveData | {{MoveData | ||
|name=Messatsu Gou Shoryuu | |name=Messatsu Gou Shoryuu | ||
|input= | |input={{qcf}}{{qcf}}{{p}} | ||
|subtitle=SA2 | |subtitle=SA2 | ||
|image=(akumamgs).gif | |image=(akumamgs).gif | ||
| Line 1,279: | Line 1,348: | ||
|active=24 | |active=24 | ||
|recovery=37 | |recovery=37 | ||
|onHit=D | |||
|onHitCrouch=D | |||
|onBlock=-25 | |onBlock=-25 | ||
| | |attackLevel=H x7 | ||
|parry=A | |parry=A x7 | ||
|damage=66 | |damage=66 | ||
|stun=16 | |stun=16 | ||
|description= | |description= | ||
* Stock: x2 | * Stock: x2 | ||
* Can OTG Dudley after a neutral/forward throw if he doesn't | * Can OTG Dudley after a neutral/forward throw if he doesn't quick rise | ||
* Active frame distribution: 2*4(13), 2*4(15), 2*2*8 | |||
** 52 total frames from first to final active frame | |||
{{3S Button FAT|link=https://fullmeter.com/fatonline/#/framedata/movedetail/3S/Akuma/normal/Messatsu%20Gou%20Shoryuu}} | {{3S Button FAT|link=https://fullmeter.com/fatonline/#/framedata/movedetail/3S/Akuma/normal/Messatsu%20Gou%20Shoryuu}} | ||
}} | }} | ||
| Line 1,294: | Line 1,367: | ||
{{MoveData | {{MoveData | ||
|name=Messatsu Gou Rasen (Ground) | |name=Messatsu Gou Rasen (Ground) | ||
|input={{qcf}}{{qcf}}+{{k}} | |input={{qcf}}{{qcf}}+{{k}} | ||
|subtitle=SA3 | |subtitle=SA3 | ||
|image=(akumamgr).gif | |image=(akumamgr).gif | ||
| Line 1,301: | Line 1,374: | ||
|startup=4 | |startup=4 | ||
|active=22 | |active=22 | ||
|recovery= | |recovery=42 + 9 land | ||
|onHit=D | |||
|onHitCrouch=D | |||
|onBlock=-76 | |onBlock=-76 | ||
| | |attackLevel=H | ||
|parry=A | |parry=A | ||
|damage=65 | |damage=65 | ||
|stun=0 | |||
|description= | |description= | ||
* Stock: x2 | * Stock: x2 | ||
* Number of parries depends on stand/crouch and character height | |||
* If Akuma holds down when landing, he will be in a crouching recovery state | |||
* Active frame distribution: 2(2), 1(1) x17, 1(2)1(2)1 | |||
** 45 total frames from first to final active frame; hitbox switches sides between each set of active frames | |||
{{3S Button FAT|link=https://fullmeter.com/fatonline/#/framedata/movedetail/3S/Akuma/normal/Messatsu%20Gou%20Rasen%20(Ground)}} | {{3S Button FAT|link=https://fullmeter.com/fatonline/#/framedata/movedetail/3S/Akuma/normal/Messatsu%20Gou%20Rasen%20(Ground)}} | ||
}} | }} | ||
| Line 1,315: | Line 1,395: | ||
{{MoveData | {{MoveData | ||
|name=Messatsu Gou Rasen (Air) | |name=Messatsu Gou Rasen (Air) | ||
|input={{qcf}}{{qcf}}+{{k}} | |input={{qcf}}{{qcf}}+{{k}} | ||
|subtitle=Air SA3 | |subtitle=Air SA3 | ||
|image= | |image= | ||
|data= | |data= | ||
{{AttackData-3S | {{AttackData-3S | ||
|startup=2 | |startup=2 | ||
|active=27 | |active=27 | ||
|recovery= | |recovery=42 + 9 land | ||
|onHit=D | |||
|onHitCrouch=D | |||
|onBlock=-56 | |onBlock=-56 | ||
| | |attackLevel=H | ||
|parry=A | |parry=A | ||
|damage=67 | |damage=67 | ||
|stun=0 | |||
|description= | |description= | ||
* Stock: x2 | * Stock: x2 | ||
* Does less damage the higher | * Does less damage the higher it connects, as opponents will fall out of the juggle near max stage height | ||
* If Akuma holds down when landing, he will be in a crouching recovery state | |||
* Active frame distribution: 7*1(1), 1(1) x14, 1(2)1(2)3 | |||
** 47 total frames from first to final active frame; hitbox switches sides between each set of active frames | |||
** First 7 active frames hit behind Akuma, making it much slower for practical purposes | |||
{{3S Button FAT|link=https://fullmeter.com/fatonline/#/framedata/movedetail/3S/Akuma/normal/Messatsu%20Gou%20Rasen%20(Air)}} | {{3S Button FAT|link=https://fullmeter.com/fatonline/#/framedata/movedetail/3S/Akuma/normal/Messatsu%20Gou%20Rasen%20(Air)}} | ||
}} | }} | ||
| Line 1,345: | Line 1,432: | ||
|active=39 | |active=39 | ||
|recovery=2 | |recovery=2 | ||
| | |onHit=D | ||
|onHitCrouch=D | |||
|attackLevel=T | |||
|parry=N | |parry=N | ||
|damage=87 | |damage=87 | ||
|stun=0 | |||
|description= | |description= | ||
* 8 throw range | * 8 throw range | ||
| Line 1,354: | Line 1,444: | ||
* Invincible from frames 1-4 | * Invincible from frames 1-4 | ||
* Can cancel from any non-command standing or crouching attack on hit or whiff, universal overhead on grounded frames, from recovery frames of dive kick, from grounded hits of Goushoryu, or instantly from any fireball | * Can cancel from any non-command standing or crouching attack on hit or whiff, universal overhead on grounded frames, from recovery frames of dive kick, from grounded hits of Goushoryu, or instantly from any fireball | ||
* Cannot cancel from Ashura Senkuu | * Can be comboed into from (far) st.HK and sees some use in Demon Flip mixups | ||
* Cannot cancel from Ashura Senkuu (Teleport) | |||
{{3S Button FAT|link=https://fullmeter.com/fatonline/#/framedata/movedetail/3S/Akuma/normal/Shun%20Goku%20Satsu}} | {{3S Button FAT|link=https://fullmeter.com/fatonline/#/framedata/movedetail/3S/Akuma/normal/Shun%20Goku%20Satsu}} | ||
}} | }} | ||
| Line 1,363: | Line 1,454: | ||
|name=Kongou Kokuretsu Zan | |name=Kongou Kokuretsu Zan | ||
|input={{d}}{{d}}{{d}}+{{p}}{{p}} | |input={{d}}{{d}}{{d}}+{{p}}{{p}} | ||
|subtitle= | |subtitle=KKZ/Geyser/Ground Pound | ||
|image=(akumakkz).gif | |image=(akumakkz).gif | ||
|data= | |data= | ||
| Line 1,370: | Line 1,461: | ||
|active=24 | |active=24 | ||
|recovery=64 | |recovery=64 | ||
|onHit=D | |||
|onHitCrouch=D | |||
|onBlock=-28 | |onBlock=-28 | ||
| | |attackLevel=H * H x9 | ||
|parry=N * A | |parry=N * A x9 | ||
|damage= | |damage=65*42 | ||
|stun= | |stun=15*13 | ||
|description= | |description= | ||
* Requires 2 | * Requires 2 stocks, can be used with any SA | ||
* Lightning Strike cannot be parried | * Lightning Strike's first hit cannot be parried but the rest of the hits can be parried. | ||
* Inflicts massive chip damag. | |||
* If used as a reversal whiff punish, it can KO opponents at point blank. | |||
* Can hit air-reset opponents as a guaranteed juggle | * Can hit air-reset opponents as a guaranteed juggle | ||
* Cannot be cancelled into | * Cannot be cancelled into apart from itself (not possible ingame) | ||
* Invincible until after the lightning strike | * Invincible from startup until the 4th active frame | ||
** If used from around sweep range, there is a short window where Akuma can be hit after the lightning strike but before the shockwaves | |||
{{3S Button FAT|link=https://fullmeter.com/fatonline/#/framedata/movedetail/3S/Akuma/normal/Kongou%20Kokuretsu%20Zan}} | {{3S Button FAT|link=https://fullmeter.com/fatonline/#/framedata/movedetail/3S/Akuma/normal/Kongou%20Kokuretsu%20Zan}} | ||
}} | }} | ||
Latest revision as of 16:47, 30 April 2024
Introduction
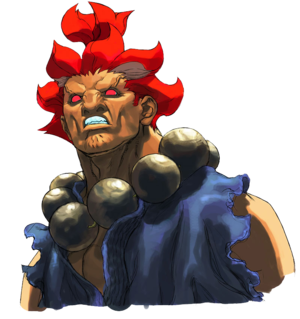
Akuma (known as Gouki in Japan) is an extremely powerful warrior obsessed with mastery of the Satsui no Hado, a dark energy-based force, the antithesis of the Kyosui no Hado (Power of Nothingness) that Ryu employs. He believes only another practitioner of the Satsui no Hado will ever be able to contest his power. His first appearance was in Super Street Fighter II Turbo as a secret boss.
When playing Akuma, the basic goal is either to use his zoning ability to control your opponent’s options, minimizing the risk of getting hit yourself, or to simply go on total offense and decimate the opponent as quickly as possible, as they can take him out just about as quickly. It is very important to note that Akuma has the absolute worst defense rating of all the characters in the game, and is tied with Remy for having the smallest stun bar. One should also note that Akuma's supers are all the same length, and that he has no EX moves. All this was done to counter balance his incredible offense and mixups.
Super Arts
SA1: Messatsu Gouhadou
Akuma's fireball super, and by far the most practical choice. SA1 offers Akuma the most opportunities to land a super. It's the safest of the three, and is hard to punish unless it's blocked at close range. Because it's a projectile, Akuma can move freely if the opponent chooses to parry it, giving him time to mix up the opponent with high/low sequences or Demon Flip. Its long parry time also makes it an excellent anti-air. SA1 can be confirmed from a variety of moves, including cr.LK x 2, cr.MK, or any of his uppercuts. It also does good chip damage, especially when preceded by a fireball or red fireball. The main downside is its fairly low damage, but it's still respectable, especially against the lower health characters.
SA2: Messatsu Goushoryu
Akuma's uppercut super, similar to Ken's SA1. Does better damage than SA1, and has many of the same confirms and cancels. On the other hand, this super is much more unsafe if missed, and basically gives the opponent a free combo. Also has less chip potential, since the last 3 hits are easily parried. Not a bad super, but SA1 is preferable.
SA3: Messatsu Gourasen
Akuma's Hurricane Kick super, goes straight up. Does the most damage out of all of his supers, but has the worst recovery and chip damage by far. Also lacks range and confirm routes, making it hard to easily integrate into his ground pressure/offense. Almost certainly his worst super.
Shun Goku Satsu/Raging Demon (any SA)
Akuma's signature special art, requires 2 full meters regardless of which super is selected. An unblockable throw super that does tons of damage. It is ordinarily hard to connect since the range is very short if not done from a kara, allowing the opponent to jump away after the super flash. Techniques such as f.MP kara-Demon or hiding the jabs with a forward dash make it a much more useful. It can also combo from far HK (which causes a back turned state). While the high damage is tempting, the difficulty of successfully landing it means that it is often better to land any of his other supers twice instead.
Kongou Kokuretsu Zan (Any SA)
Akuma channels his energy into a shockwave, requiring 2 full meters. Even more damaging than the Raging Demon (and is the most damaging Super Art in the game, provided all of the hits connect). Good for countering early jump-ins and cross-ups, but is somewhat slow to come out and does severely reduced damage if the first hit misses. His most common combo with this super involves a jab reset into KKZ after a LK Tatsumaki Zankuukyaku. This is also the ultimate chip out super - if you get a knockdown with 2 full meters and your opponent has only a few pixels of life, this super guarantees the win with proper timing. This is because the first hit is unparryable and does great chip damage. If, by some ridiculous chance, your opponent survives the first hit and starts red parrying the rest, you have many opportunities to continue a high/low mixup during the parries (similar his SA1).
| Strengths | Weaknesses |
|---|---|
|
|
Character Colors
| Akuma #3S_AK | |
|---|---|
| Vitals | |
| Life Points | 985 |
| Stun Points | 56 |
| Super Art Stock/Size | |
| SA1 | 2/112 |
| SA2 | 2/112 |
| SA3 | 2/112 |
| Ground Movement | |
| Forward Dash duration/distance | 13 (95px) |
| Back Dash duration/distance | 15 (47px) |
| Jumping | |
| Back Jump duration | 43(4+36+3) |
| Neutral Jump duration | 41(4+34+3) |
| Forward Jump duration | 42(4+35+3) |
| Back Super Jump duration | 48(6+39+3) |
| Neutral Super Jump duration | 47(6+38+3) |
| Forward Super Jump duration | 47(6+38+3) |
| Wake up | |
| Wake up duration | 77 |
| Quick rise duration | 50 |
| 3S Frame Data Glossary | |
|---|---|
| Active |
How many frames a move remains active (can hurt opponents) for. Consecutive sets of active frames on a multi-hit move are separated by an asterisk (ex: 3*5). If there is a gap between sets of active frames, the gap is denoted by a number in parentheses (ex: 2(4)2) |
| Attack |
Attack level is L for low attacks (must be blocked crouching), H is for High attacks (which can be blocked high or low) and M for overhead (must be blocked standing). T is for throw attacks (which cannot be blocked). |
| Cancel options |
Available cancel options.
|
| Damage |
Attack damage on hit in life points. Notation may denote multi-hit or "sweet spot" damage values on certain frames. |
| Hit/Block |
These are frame advantage values when the attack hits or is blocked. If the number is positive, then the move will end before the defender can act again. If the number is negative, the defender will be able to act before the attacker and maybe even punish. D refers to knockdown on hit. "Cr. Hit" is an additional frame advantage value denoting if the advantage on hit changes when the defender is being hit while crouching. |
| Kara Range |
Almost all normal attacks can be canceled into a special or a multi-button command within three frames of startup. During that time, some attacks will shift position forward or backward and affect the reach of the special or command accordingly. This is denoted in pixels of range. There are a handful of moves in the game that can be kara-canceled after this initial window and will be denoted as a late kara-cancel. |
| Link |
A combo that is performed by inputting the second move after the first move has completely recovered (as opposed to cancelling the first move's animation). In 3S, the final frame of a move's hitstun allows a character to block a normal or special move, as well as some projectile supers. Therefore, an attack's frame advantage must be 2 frames greater than the followup move's startup in order to link. Ex: a +6 normal can link into a 4f normal/special, or a 5f super. |
| Parry |
This field will show a value of A if the attack can be parried standing or crouching, H if it must be parried standing or L if it must be parried crouching. |
| Recovery |
How many frames it takes for a move to finish after it's been active. |
| Startup |
How many frames it takes before the move becomes 'active' or has a hitbox. 3S uses classic startup notation, which does not include the first active frame. A move with 3 startup becomes active on frame 4. |
| Stun |
Amount of stun added to the opponent's stun bar on hit. |
| Throw range |
Range in pixels from the center of the character to the center of the opponent which allows a grab to connect. |
Frame Data
Standing Normals
5LP (cl)
5LP (far)
5MP (cl)
5MP (far)
5HP (cl)
5HP (far)
5LK
5MK (cl)
5MK (far)
5HK (cl)
5HK (far)
Command Normals
6MP
Crouching Normals
2LP
2MP
2HP
2LK
2MK
2HK
Jumping Normals
j.LP
j.MP
8HP
j.HP
j.LK
8MK
j.MK
8HK
j.HK
2MK (air)
Target Combos
5MP > 5HP
Throws
5LPLK
4LPLK
Universal Overheads
5MPHK
Taunt
5HPHK
Special Moves
236P
236P (air)
63214P
623P
214K
214K
623K
623K-P
623K-K
623K-LP+K
623PP
623KK

