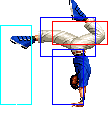
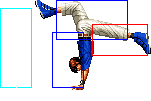
mNo edit summary |
|||
| (35 intermediate revisions by 6 users not shown) | |||
| Line 1: | Line 1: | ||
==Introduction== | ==Introduction== | ||
heyheyheyyy c'maahn I'm a little sweidsh guy, I'm just a little swedish guyy, noo, it's also my birthday, I'm a little swedish meatball birthday boyy | |||
===Colors=== | ===Colors=== | ||
| Line 20: | Line 20: | ||
His mixup options are almost unparalleled; he has a high/low game either from short hop or from blocked attacks, he has a scary crossup game with j.D, and his Head Grab is much faster than O.Yashiro's and partially invincible to boot. | His mixup options are almost unparalleled; he has a high/low game either from short hop or from blocked attacks, he has a scary crossup game with j.D, and his Head Grab is much faster than O.Yashiro's and partially invincible to boot. | ||
In top of that he has some of the highest priority moves in the game in j.CD, | In top of that he has some of the highest priority moves in the game in j.CD, df + B, and cr.C. | ||
He has the fastest short hop in the game, and if you pick him in Extra mode, he has the fastest dash in the game as well. | He has the fastest short hop in the game, and if you pick him in Extra mode, he has the fastest dash in the game as well. | ||
| Line 29: | Line 29: | ||
==In-depth Analysis== | ==In-depth Analysis== | ||
===[[ | ===[[The King of Fighters 2002/Normals Guide|Movelist]]=== | ||
{|border="1" | {|border="1" | ||
!width="8%"| | !width="8%"| | ||
| Line 44: | Line 44: | ||
|align="center"| 4/3/5 | |align="center"| 4/3/5 | ||
|align="center"| +4/+2 | |align="center"| +4/+2 | ||
|align="center"| | |align="center"| C | ||
|align="center"| HL | |align="center"| HL | ||
|colspan="2" | [[image:Chris98_stA.png|center]] | |colspan="2" | [[image:Chris98_stA.png|center]] | ||
| Line 52: | Line 52: | ||
|align="center"| 4/3/7 | |align="center"| 4/3/7 | ||
|align="center"| +2/0 | |align="center"| +2/0 | ||
|align="center"| | |align="center"| C | ||
|align="center"| HL | |align="center"| HL | ||
|colspan="2" | [[image:Chris98_clB.png|center]] | |colspan="2" | [[image:Chris98_clB.png|center]] | ||
| Cancelable move that will connect vs crouchers. Usable as a meaty 'tick' into dp+A to either tick or bait a CD counter if you don't feel like doing cr.A | | Cancelable move that will connect vs crouchers. Usable as a meaty 'tick' into dp + A to either tick or bait a CD counter if you don't feel like doing cr.A > dp + A. | ||
|- | |- | ||
! [[image:snkc.gif]] | ! [[image:snkc.gif]] | ||
|align="center"| 3/3+3/29 | |align="center"| 3/3+3/29 | ||
|align="center"| -15/-17 | |align="center"| -15/-17 | ||
|align="center"| | |align="center"| C | ||
|align="center"| HL | |align="center"| HL | ||
|valign="bottom" style="border-right:0px;"| [[image:Chris98_clC1.png|center]] | |valign="bottom" style="border-right:0px;"| [[image:Chris98_clC1.png|center]] | ||
| Line 69: | Line 69: | ||
|align="center"| 3/4/18 | |align="center"| 3/4/18 | ||
|align="center"| -2/-4 | |align="center"| -2/-4 | ||
|align="center"| | |align="center"| S | ||
|align="center"| HL | |align="center"| HL | ||
|colspan="2" | [[image:Chris98_clD.png|center]] | |colspan="2" | [[image:Chris98_clD.png|center]] | ||
| Line 79: | Line 79: | ||
|align="center"| 4/3/5 | |align="center"| 4/3/5 | ||
|align="center"| +4/+2 | |align="center"| +4/+2 | ||
| | |align="center"| C | ||
|align="center"| HL | |align="center"| HL | ||
|colspan="2" | [[image:Chris98_stA.png|center]] | |colspan="2" | [[image:Chris98_stA.png|center]] | ||
| Line 87: | Line 87: | ||
|align="center"| 7/6/9 | |align="center"| 7/6/9 | ||
|align="center"| -3/-5 | |align="center"| -3/-5 | ||
| | |align="center"| - | ||
|align="center"| HL | |align="center"| HL | ||
|colspan="2" | [[image:Chris98_stB.png|center]] | |colspan="2" | [[image:Chris98_stB.png|center]] | ||
| Line 95: | Line 95: | ||
|align="center"| 7/3(12)6/17 | |align="center"| 7/3(12)6/17 | ||
|align="center"| -3/-5 | |align="center"| -3/-5 | ||
| | |align="center"| C/- | ||
|align="center"| HL | |align="center"| HL/HL | ||
|valign="bottom" style="border-right:0px;"| [[image:Chris98_stC1.png|center]] | |valign="bottom" style="border-right:0px;"| [[image:Chris98_stC1.png|center]] | ||
|valign="bottom" style="border-left:0px;"| [[image:Chris98_stC2.png|center]] | |valign="bottom" style="border-left:0px;"| [[image:Chris98_stC2.png|center]] | ||
| Line 104: | Line 104: | ||
|align="center"| 8/4/29 | |align="center"| 8/4/29 | ||
|align="center"| -13/-15 | |align="center"| -13/-15 | ||
| | |align="center"| - | ||
|align="center"| HL | |align="center"| HL | ||
|colspan="2"| [[image:Chris98_stD.png|center]] | |colspan="2"| [[image:Chris98_stD.png|center]] | ||
| Line 112: | Line 112: | ||
|align="center"| 15/3/28 | |align="center"| 15/3/28 | ||
|align="center"| KD/-9 | |align="center"| KD/-9 | ||
| | |align="center"| S | ||
|align="center"| HL | |align="center"| HL | ||
|colspan="2"| [[image:Chris98_stCD.png|center]] | |colspan="2"| [[image:Chris98_stCD.png|center]] | ||
| Line 122: | Line 122: | ||
|align="center"| 4/3/5 | |align="center"| 4/3/5 | ||
|align="center"| +4/+2 | |align="center"| +4/+2 | ||
|align="center"| | |align="center"| C | ||
|align="center"| HL | |align="center"| HL | ||
|colspan="2" | [[image:Chris98_crA.png|center]] | |colspan="2" | [[image:Chris98_crA.png|center]] | ||
| Use it to combo into f+A off jump-ins if you don't want to worry about not being close enough to hit cl.C. Links into cr.C. | | Use it to combo into f + A off jump-ins if you don't want to worry about not being close enough to hit cl.C. Links into cr.C. | ||
|- | |- | ||
! [[image:snkb.gif]] | ! [[image:snkb.gif]] | ||
|align="center"| 3/4/5 | |align="center"| 3/4/5 | ||
|align="center"| +3/+1 | |align="center"| +3/+1 | ||
|align="center"| | |align="center"| - | ||
|align="center"| L | |align="center"| L | ||
|colspan="2" | [[image:Chris98_crB.png|center]] | |colspan="2" | [[image:Chris98_crB.png|center]] | ||
| Line 138: | Line 138: | ||
|align="center"| 2/7+3/17 | |align="center"| 2/7+3/17 | ||
|align="center"| -7/-9 | |align="center"| -7/-9 | ||
|align="center"| | |align="center"| C (1st part) | ||
|align="center"| HL | |align="center"| HL | ||
|valign="bottom" style="border-right:0px;"| [[image:Chris98_crC1.png|center]] | |valign="bottom" style="border-right:0px;"| [[image:Chris98_crC1.png|center]] | ||
|valign="bottom" style="border-left:0px;"| [[image:Chris98_crC2.png|center]] | |valign="bottom" style="border-left:0px;"| [[image:Chris98_crC2.png|center]] | ||
| | | cancelable on the first part. Super fast startup and awesome priority on the first hit. Can be used as an anti-air or a ground poke to hit limbs. As an anti-air, try canceling it into B Scramble Dash (qcf + B) into cr.B meaty as they land or a short hop D crossup setup. On the ground, whiff cancel it into something like df + B so you don't whiff the long recovery. | ||
|- | |- | ||
! [[image:snkd.gif]] | ! [[image:snkd.gif]] | ||
|align="center"| 8/7/19 | |align="center"| 8/7/19 | ||
|align="center"| KD/-8 | |align="center"| KD/-8 | ||
|align="center"| | |align="center"| - | ||
|align="center"| L | |align="center"| L | ||
|colspan="2" | [[image:Chris98_crD.png|center]] | |colspan="2" | [[image:Chris98_crD.png|center]] | ||
| Line 157: | Line 157: | ||
|align="center"| 5/9 | |align="center"| 5/9 | ||
|align="center"| -/- | |align="center"| -/- | ||
| | |align="center"| - | ||
|align="center"| H | |align="center"| H | ||
|colspan="2" | [[image:Chris98_jA.png|center]] | |colspan="2" | [[image:Chris98_jA.png|center]] | ||
| Line 165: | Line 165: | ||
|align="center"| 5/9 | |align="center"| 5/9 | ||
|align="center"| -/- | |align="center"| -/- | ||
| | |align="center"| - | ||
|align="center"| H | |align="center"| H | ||
|colspan="2" | [[image:Chris98_jB.png|center]] | |colspan="2" | [[image:Chris98_jB.png|center]] | ||
| Line 173: | Line 173: | ||
|align="center"| 6/4 | |align="center"| 6/4 | ||
|align="center"| -/- | |align="center"| -/- | ||
| | |align="center"| - | ||
|align="center"| H | |align="center"| H | ||
|colspan="2" | [[image:Chris98_jC.png|center]] | |colspan="2" | [[image:Chris98_jC.png|center]] | ||
| Line 181: | Line 181: | ||
|align="center"| 6/4 | |align="center"| 6/4 | ||
|align="center"| -/- | |align="center"| -/- | ||
| | |align="center"| - | ||
|align="center"| H | |align="center"| H | ||
|colspan="2"| [[image:Chris98_jD.png|center]] | |colspan="2"| [[image:Chris98_jD.png|center]] | ||
| Line 189: | Line 189: | ||
|align="center"| 15/3+3 | |align="center"| 15/3+3 | ||
|align="center"| KD/- | |align="center"| KD/- | ||
| | |align="center"| S | ||
|align="center"| HL | |align="center"| HL | ||
|valign="bottom" style="border-right:0px;"| [[image:Chris98_jCD1.png|center]] | |valign="bottom" style="border-right:0px;"| [[image:Chris98_jCD1.png|center]] | ||
| Line 200: | Line 200: | ||
|align="center"| 6/9 | |align="center"| 6/9 | ||
|align="center"| -/- | |align="center"| -/- | ||
| | |align="center"| - | ||
|align="center"| H | |align="center"| H | ||
|colspan="2" | [[image:Chris98_njB.png|center]] | |colspan="2" | [[image:Chris98_njB.png|center]] | ||
| Line 207: | Line 207: | ||
|colspan="8" align="center"| '''Command Normals''' | |colspan="8" align="center"| '''Command Normals''' | ||
|- | |- | ||
! f+[[image:snka.gif]] | ! f + [[image:snka.gif]] | ||
|align="center"| 10/3/26 | |align="center"| 10/3/26 | ||
|align="center"| -9/-11 | |align="center"| -9/-11 | ||
| | |align="center"| S | ||
|align="center"| HL | |align="center"| HL | ||
|colspan="2" | [[image:Chris98_fA.png|center]] | |colspan="2" | [[image:Chris98_fA.png|center]] | ||
| Relatively fast and long range cancelable move. Other than being a combo filler, you can use it to punish some things, like incompleted Iori rekkas. Never ever end with this if your combo gets blocked, as it is very unsafe. | | Relatively fast and long range cancelable move. Other than being a combo filler, you can use it to punish some things, like incompleted Iori rekkas. Never ever end with this if your combo gets blocked, as it is very unsafe. | ||
|- | |- | ||
! <br>f+[[image:snkb.gif]]<br><br> | ! <br>f + [[image:snkb.gif]]<br><br> | ||
|align="center"| 10/2(2)2/23 | |align="center"| 10/2(2)2/23 | ||
|align="center"| -5/-7 | |align="center"| -5/-7 | ||
|align="center"| | |align="center"| -/- | ||
|align="center"| HL,H | |align="center"| HL,H | ||
|rowspan="2" valign="bottom" style="border-right:0px;"| [[image:Chris98_fB1.png|center]] | |rowspan="2" valign="bottom" style="border-right:0px;"| [[image:Chris98_fB1.png|center]] | ||
|rowspan="2" valign="bottom" style="border-left:0px;"| [[image:Chris98_fB2.png|center]] | |rowspan="2" valign="bottom" style="border-left:0px;"| [[image:Chris98_fB2.png|center]] | ||
| rowspan="2"| 2 hits, second is overhead. 2nd hit becomes cancelable and non-overhead when chained. Nice fast overhead poke to use at it's max range, and a great move to slow cancel (delay the chain a tiny bit from a cancelable attack to make the 2nd hit retain it's overhead properties). A common high/low mixup is to slow cancel into this or | | rowspan="2"| 2 hits, second is overhead. 2nd hit becomes cancelable and non-overhead when chained. Nice fast overhead poke to use at it's max range, and a great move to slow cancel (delay the chain a tiny bit from a cancelable attack to make the 2nd hit retain it's overhead properties). A common high/low mixup is to slow cancel into this or df + B from a cr.C. | ||
|- | |- | ||
! f+[[image:snkb.gif]] (cancel) | ! f + [[image:snkb.gif]] (cancel) | ||
|align="center"| 10/2(2)2/23 | |align="center"| 10/2(2)2/23 | ||
|align="center"| -5/-7 | |align="center"| -5/-7 | ||
|align="center"| | |align="center"| -/S | ||
|align="center"| HL | |align="center"| HL/HL | ||
|- | |- | ||
! df+[[image:snkb.gif]] | ! df + [[image:snkb.gif]] | ||
|align="center"| 8/13/10 | |align="center"| 8/13/10 | ||
|align="center"| -3/-5 | |align="center"| -3/-5 | ||
|align="center"| | |align="center"| - | ||
|align="center"| L | |align="center"| L | ||
|colspan="2"| [[image:Chris98_dfB.png|center]] | |colspan="2"| [[image:Chris98_dfB.png|center]] | ||
| Line 241: | Line 241: | ||
===Normal Throws=== | ===Normal Throws=== | ||
'''b or f+ | * '''b or f + C''' - Breakable, front knockdown, face forward, rollable. | ||
- | * '''b or f + D''' - Breakable, reverse knockdown, back turned, un-rollable. | ||
D throw is preferred. Sets up anything you want; a crossup, ambiguous roll, Direction Change, the list goes on. Here are some example setups: | |||
* D throw, wait a moment (whiff a light), sj.D crossup | |||
* D throw, B Scramble Dash (qcf + B), j.D crossup or A Direction Change (dp + A) or CD whiff canceled into A Direction Change (dp + A) | |||
===Other Normal Moves=== | |||
* Run: Chris has a short hurtbox during his run and is able to pass below high moves and fireballs - similar to Iori's Maiden Masher super (qcf hcb + P). | |||
List of low profileable fireballs: <br> | |||
EX Ryo 236A/C <br> | |||
EX Yuri 236A/C <br> | |||
EX Robert 236A/C <br> | |||
EX Andy 214A/C <br> | |||
Takuma 236A/C <br> | |||
Heidern [4]6A/C <br> | |||
Leona [4]6A/C <br> | |||
Orochi Shermie 214A/C and 41236A/B/C/D <br> | |||
Yamazaki 214]B[ <br> | |||
Chin 214A/214C first portion of the move and 236236A <br> | |||
===Special Moves=== | ===Special Moves=== | ||
'''Shooting Dancer: Thrust (hcb+P)''' - You main combo ender. A version has better recovery, sets up for a crossup, leaves you closer, and ends with a low hit, while the C version does more damage. The A version is almost safe on block, but very fast attacks can still hit you. I would recommend stopping at cr.B,cr.A or jump-in, cr.A off a jump-in if you get blocked. | * '''Slide Touch (qcf + P)''' - A version preferred because C version doesn't combo from anything. Just use if you want a knockdown in the corner off a combo. It's unsafe on block. | ||
* '''Shooting Dancer: Thrust (hcb + P)''' - You main combo ender. A version has better recovery, sets up for a crossup, leaves you closer, and ends with a low hit, while the C version does more damage. The A version is almost safe on block, but very fast attacks can still hit you. I would recommend stopping at cr.B, cr.A or jump-in, cr.A off a jump-in if you get blocked. | |||
* '''Shooting Dancer: Step (hcb + K)''' - Same as Thrust except the 2nd hit is overhead. Really punishable. You can use it to goof off or be a dick. It's not really a mixup with hcb + A, as the timing is completely different for blocking high/low. After second attack block/hit you bounce, and may use Glider Stamp (air qcf + K), but it will not combo. | |||
'''Scramble Dash (qcf+K)''' - B version travels on the ground and is invincible on the bottom of his feet and the top of his head. D version travels in the air and has a larger invincible area on the bottom, but is vulnerable above waist-height. It can go over ground fireballs. Also note that if oyu get hit out of the D version, it counts as an anti-air hit. | * '''Scramble Dash (qcf + K)''' - B version travels on the ground and is invincible on the bottom of his feet and the top of his head. D version travels in the air and has a larger invincible area on the bottom, but is vulnerable above waist-height. It can go over ground fireballs. Also note that if oyu get hit out of the D version, it counts as an anti-air hit. | ||
''' | * '''Glider Stamp (air qcf + K)''' - Dive kick-type move, can be canceled from a jump C or jump CD. You could use this to hit someone after they block your j.CD very high. You can also jump back and do it I guess. The recovery sucks so I wouldn't recommend using it much. | ||
'''Direction Change (dp+P)''' - A version preferred of course. Really annoying grab move that is similar to O.Yashiro's but much faster,harder to see, and has some invincibility. You can even use this is a reversal wakeup move if you think your opponent won't jump, or to go through a CD counter by canceling into it. At high levels, players seem to be able to see this almost as well as O.Yashiro's, so test your opponent with it and change accordingly. | |||
* '''Hunting Air (dp + K)''' - Weak for an anti-air move, even for KOF98. You can use the B version to hit pokes on the ground after blocked chains but I wouldn't recommend it. D version doesn't knock down so use as anti-air only. | |||
* '''Direction Change (dp + P)''' - A version preferred of course. Really annoying grab move that is similar to O.Yashiro's but much faster, harder to see, and has some invincibility. You can even use this is a reversal wakeup move if you think your opponent won't jump, or to go through a CD counter by canceling into it. At high levels, players seem to be able to see this almost as well as O.Yashiro's, so test your opponent with it and change accordingly. It will miss against some crouching characters. | |||
===Desperation Moves=== | ===Desperation Moves=== | ||
'''Twister Drive aka Honkey Das Mas Ne (qcb | * '''Chain Slide Touch aka Talk To The Hand (qcf qcf + P)''' - Usually used to combo from a dp + A when you have meter. MAX version does more damage. 65% from a grab? | ||
* '''Twister Drive aka Honkey Das Mas Ne (qcb qcb + K)''' - Invincible flash kick super. B version is faster with shorter invincibility, D version is slower with longer invincibility. MAX version does more damage. You can use this to go through a CD counter by canceling into it if you're feeling cool. | |||
== Fastest Attacks == | |||
* 0F: C throw; D throw | |||
* 1F: - | |||
* 2F: '''cr.C''' | |||
* 3F: '''cl.C'''; '''cl.D'''; cr.B | |||
* 4F: '''cl.A'''; '''cl.B'''; '''st.A'''; '''cr.A''' | |||
* 5F: - | |||
* 6F: - | |||
* 7F: st.B; '''st.C''' | |||
* 8F: st.D; cr.D; df + B | |||
* 9F: - | |||
* 10F: '''f + A'''; f + B | |||
==Combos== | ==Combos== | ||
| Line 277: | Line 321: | ||
Chris has quite a few combo options as far as enders go. | Chris has quite a few combo options as far as enders go. | ||
*cr.B,cr.A | * Best jump-ins: | ||
** j.D (Can crossup.) | |||
* cl.C / cr.C (1 hit) / st.C (1 hit) > | |||
** f + A | |||
*** (S)DM Chain Slide Touch (qcf qcf + P) | |||
*** (S)DM qcb qcb + K (not too far) | |||
*** C Thrust (hcb + C) | |||
*** A Thrust (hcb + A) | |||
*** dp + B (Very close. Only on some characters.) | |||
*** A Slide Touch (qcf + A) | |||
** (S)DM Chain Slide Touch (qcf qcf + P) | |||
** (S)DM qcb qcb + K (not too far) | |||
** C Thrust (hcb + C) | |||
** A Thrust (hcb + A) | |||
** dp + B | |||
** A Slide Touch (qcf + A) | |||
** df + B | |||
** f + B | |||
* cr.B, cr.A > | |||
** f + A > | |||
*** (S)DM Chain Slide Touch (qcf qcf + P) | |||
*** (S)DM qcb qcb + K (not too far) | |||
*** C Thrust (hcb + C) | |||
*** A Thrust (hcb + A) | |||
*** dp + B (Very close. Only on some characters.) | |||
*** A Slide Touch (qcf + A) | |||
** (S)DM Chain Slide Touch (qcf qcf + P) | |||
** (S)DM qcb qcb + K (not too far) | |||
** dp + B | |||
** df + B | |||
** f + B | |||
Omit the cr.B off a front jump-in. | |||
* cr.B, cr.B, cr.B, st.B | |||
* dp + P, | |||
** 1st combo (Preferably with cr.C or st.C, because you end up out of close range and will need to walk to use cl.C.) | |||
** st.C (1 hit) > (S)DM qcb qcb + K (Easy buffer to super.) | |||
** (S)DM Chain Slide Touch (qcf qcf + P) | |||
** (S)DM qcb qcb + K | |||
** dp + B | |||
* cr.C (1 hit) > df + B | |||
Whiff cancel timing in case it misses. | |||
* Large opponents only: cr.B, cr.A, cr.C (1 hit) > f + A > | |||
** (S)DM Chain Slide Touch (qcf qcf + P) | |||
** C Thrust (hcb + C) | |||
** A Thrust (hcb + A) | |||
** A Slide Touch (qcf + A) | |||
You can omit the cr.B to make this work on most characters at point blank range. | |||
*cr.B,cr.B,cr.B, | * Simple buffers: | ||
** cl.C / st.C (1 hit) / cl.D / cl.A / cl.B > (S)DM qcb qcb + K | |||
*** qcb + C/D/A/B > qcb + K | |||
** cr.B, st.A / cl.A / cl.B > (S)DM qcf qcf + P | |||
*** cr.B, qcf + A/B > qcf + P (As cr.B is not cancelable, qcf + A/B will chain into a normal attack.) | |||
Generally you will always want to end with Shooting Dancer: Thrust (hcb+P). The A version does a bit less but recovers much better. The C version gets you maximum meterless damage. The first combo listed is the combo to use after you connect with a Direction Change (dp+P), using cr.C as the starter. | Generally you will always want to end with Shooting Dancer: Thrust (hcb + P). The A version does a bit less damage but recovers much better. The C version gets you maximum meterless damage. The first combo listed is the combo to use after you connect with a Direction Change (dp + P), using cr.C as the starter. | ||
Slide Touch (qcf + P) A version will knockdown if you want that (not worth it in my opinion because it puts them pretty far away). On some characters after a dp + P, you can connect cr.C > f + A > B Hunting Air (dp + B), which is better damage than Slide Touch and better knockdown advantage too. Just make sure it works on the character you're doing it on because if you miss, you're getting comboed. | |||
Note that all of these combos other than the last one work in MAX mode as well, so Chris is a great character to use MAX mode with, as his single pokes are great as well. | Note that all of these combos other than the last one work in MAX mode as well, so Chris is a great character to use MAX mode with, as his single pokes are great as well. | ||
{{ | |||
{{StrategyCorner| | |||
* MAX: cl.C > {{f}} + A > {{hcb}} + C | |||
deals ??? than | |||
* cl.C > {{f}} + A > {{qcf}} {{qcf}} + P | |||
Keep this in mind, when you need to decide whether to trigger MAX or keep meter for a DM. | |||
}} | |||
== Links == | |||
< [[Shermie (KoF '98)|Shermie]] | [[The King of Fighters '98/Orochi Chris|Orochi Chris]] | [[Ryuji Yamazaki (KoF '98)|Ryuji Yamazaki]] > | |||
{{The King of Fighters '98: The Slugfest}} | |||
[[Category:The King of Fighters '98: The Slugfest]] | [[Category:The King of Fighters '98: The Slugfest]] | ||
Latest revision as of 06:47, 21 July 2023
Introduction
heyheyheyyy c'maahn I'm a little sweidsh guy, I'm just a little swedish guyy, noo, it's also my birthday, I'm a little swedish meatball birthday boyy
Colors

|

|

|

|
Gameplay Overview
Chris is an extremely fast, top-tier pressure/mixup/trickery character with high priority air/ground moves and great combo damage.
His mixup options are almost unparalleled; he has a high/low game either from short hop or from blocked attacks, he has a scary crossup game with j.D, and his Head Grab is much faster than O.Yashiro's and partially invincible to boot.
In top of that he has some of the highest priority moves in the game in j.CD, df + B, and cr.C.
He has the fastest short hop in the game, and if you pick him in Extra mode, he has the fastest dash in the game as well.
His run in Advanced mode is similar to Leona/Heidern's run, in that he can run under some of the higher traveling fireballs in the game (ie the old Art of Fighting team fireballs and Takuma's).
He is a great character for a beginner as well, as he doesn't require godly execution (though it helps).
In-depth Analysis
Movelist
Normal Throws
- b or f + C - Breakable, front knockdown, face forward, rollable.
- b or f + D - Breakable, reverse knockdown, back turned, un-rollable.
D throw is preferred. Sets up anything you want; a crossup, ambiguous roll, Direction Change, the list goes on. Here are some example setups:
- D throw, wait a moment (whiff a light), sj.D crossup
- D throw, B Scramble Dash (qcf + B), j.D crossup or A Direction Change (dp + A) or CD whiff canceled into A Direction Change (dp + A)
Other Normal Moves
- Run: Chris has a short hurtbox during his run and is able to pass below high moves and fireballs - similar to Iori's Maiden Masher super (qcf hcb + P).
List of low profileable fireballs:
EX Ryo 236A/C
EX Yuri 236A/C
EX Robert 236A/C
EX Andy 214A/C
Takuma 236A/C
Heidern [4]6A/C
Leona [4]6A/C
Orochi Shermie 214A/C and 41236A/B/C/D
Yamazaki 214]B[
Chin 214A/214C first portion of the move and 236236A
Special Moves
- Slide Touch (qcf + P) - A version preferred because C version doesn't combo from anything. Just use if you want a knockdown in the corner off a combo. It's unsafe on block.
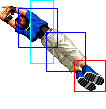
- Shooting Dancer: Thrust (hcb + P) - You main combo ender. A version has better recovery, sets up for a crossup, leaves you closer, and ends with a low hit, while the C version does more damage. The A version is almost safe on block, but very fast attacks can still hit you. I would recommend stopping at cr.B, cr.A or jump-in, cr.A off a jump-in if you get blocked.
- Shooting Dancer: Step (hcb + K) - Same as Thrust except the 2nd hit is overhead. Really punishable. You can use it to goof off or be a dick. It's not really a mixup with hcb + A, as the timing is completely different for blocking high/low. After second attack block/hit you bounce, and may use Glider Stamp (air qcf + K), but it will not combo.
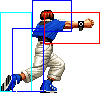
- Scramble Dash (qcf + K) - B version travels on the ground and is invincible on the bottom of his feet and the top of his head. D version travels in the air and has a larger invincible area on the bottom, but is vulnerable above waist-height. It can go over ground fireballs. Also note that if oyu get hit out of the D version, it counts as an anti-air hit.
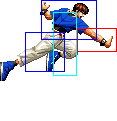
- Glider Stamp (air qcf + K) - Dive kick-type move, can be canceled from a jump C or jump CD. You could use this to hit someone after they block your j.CD very high. You can also jump back and do it I guess. The recovery sucks so I wouldn't recommend using it much.
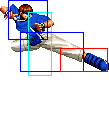
- Hunting Air (dp + K) - Weak for an anti-air move, even for KOF98. You can use the B version to hit pokes on the ground after blocked chains but I wouldn't recommend it. D version doesn't knock down so use as anti-air only.
- Direction Change (dp + P) - A version preferred of course. Really annoying grab move that is similar to O.Yashiro's but much faster, harder to see, and has some invincibility. You can even use this is a reversal wakeup move if you think your opponent won't jump, or to go through a CD counter by canceling into it. At high levels, players seem to be able to see this almost as well as O.Yashiro's, so test your opponent with it and change accordingly. It will miss against some crouching characters.
Desperation Moves
- Chain Slide Touch aka Talk To The Hand (qcf qcf + P) - Usually used to combo from a dp + A when you have meter. MAX version does more damage. 65% from a grab?
- Twister Drive aka Honkey Das Mas Ne (qcb qcb + K) - Invincible flash kick super. B version is faster with shorter invincibility, D version is slower with longer invincibility. MAX version does more damage. You can use this to go through a CD counter by canceling into it if you're feeling cool.
Fastest Attacks
- 0F: C throw; D throw
- 1F: -
- 2F: cr.C
- 3F: cl.C; cl.D; cr.B
- 4F: cl.A; cl.B; st.A; cr.A
- 5F: -
- 6F: -
- 7F: st.B; st.C
- 8F: st.D; cr.D; df + B
- 9F: -
- 10F: f + A; f + B
Combos
Chris has quite a few combo options as far as enders go.
- Best jump-ins:
- j.D (Can crossup.)
- cl.C / cr.C (1 hit) / st.C (1 hit) >
- f + A
- (S)DM Chain Slide Touch (qcf qcf + P)
- (S)DM qcb qcb + K (not too far)
- C Thrust (hcb + C)
- A Thrust (hcb + A)
- dp + B (Very close. Only on some characters.)
- A Slide Touch (qcf + A)
- (S)DM Chain Slide Touch (qcf qcf + P)
- (S)DM qcb qcb + K (not too far)
- C Thrust (hcb + C)
- A Thrust (hcb + A)
- dp + B
- A Slide Touch (qcf + A)
- df + B
- f + B
- f + A
- cr.B, cr.A >
- f + A >
- (S)DM Chain Slide Touch (qcf qcf + P)
- (S)DM qcb qcb + K (not too far)
- C Thrust (hcb + C)
- A Thrust (hcb + A)
- dp + B (Very close. Only on some characters.)
- A Slide Touch (qcf + A)
- (S)DM Chain Slide Touch (qcf qcf + P)
- (S)DM qcb qcb + K (not too far)
- dp + B
- df + B
- f + B
- f + A >
Omit the cr.B off a front jump-in.
- cr.B, cr.B, cr.B, st.B
- dp + P,
- 1st combo (Preferably with cr.C or st.C, because you end up out of close range and will need to walk to use cl.C.)
- st.C (1 hit) > (S)DM qcb qcb + K (Easy buffer to super.)
- (S)DM Chain Slide Touch (qcf qcf + P)
- (S)DM qcb qcb + K
- dp + B
- cr.C (1 hit) > df + B
Whiff cancel timing in case it misses.
- Large opponents only: cr.B, cr.A, cr.C (1 hit) > f + A >
- (S)DM Chain Slide Touch (qcf qcf + P)
- C Thrust (hcb + C)
- A Thrust (hcb + A)
- A Slide Touch (qcf + A)
You can omit the cr.B to make this work on most characters at point blank range.
- Simple buffers:
- cl.C / st.C (1 hit) / cl.D / cl.A / cl.B > (S)DM qcb qcb + K
- qcb + C/D/A/B > qcb + K
- cr.B, st.A / cl.A / cl.B > (S)DM qcf qcf + P
- cr.B, qcf + A/B > qcf + P (As cr.B is not cancelable, qcf + A/B will chain into a normal attack.)
- cl.C / st.C (1 hit) / cl.D / cl.A / cl.B > (S)DM qcb qcb + K
Generally you will always want to end with Shooting Dancer: Thrust (hcb + P). The A version does a bit less damage but recovers much better. The C version gets you maximum meterless damage. The first combo listed is the combo to use after you connect with a Direction Change (dp + P), using cr.C as the starter.
Slide Touch (qcf + P) A version will knockdown if you want that (not worth it in my opinion because it puts them pretty far away). On some characters after a dp + P, you can connect cr.C > f + A > B Hunting Air (dp + B), which is better damage than Slide Touch and better knockdown advantage too. Just make sure it works on the character you're doing it on because if you miss, you're getting comboed.
Note that all of these combos other than the last one work in MAX mode as well, so Chris is a great character to use MAX mode with, as his single pokes are great as well.
Strategy Corner
- MAX: cl.C >
 + A >
+ A >  + C
+ C
deals ??? than
- cl.C >
 + A >
+ A > 
 + P
+ P
Keep this in mind, when you need to decide whether to trigger MAX or keep meter for a DM.
Links
< Shermie | Orochi Chris | Ryuji Yamazaki >


