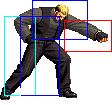
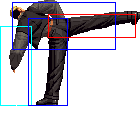
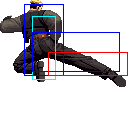
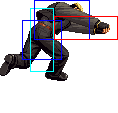
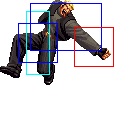
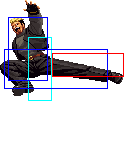
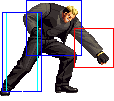
No edit summary |
|||
| (27 intermediate revisions by 10 users not shown) | |||
| Line 1: | Line 1: | ||
= | ===Colors=== | ||
{| | |||
! [[image:snka.gif]] | |||
! [[image:snkb.gif]] | |||
! [[image:snkc.gif]] | |||
! [[image:snkd.gif]] | |||
|- | |||
| [[image:Yamazaki98_colorA.png]] | |||
| [[image:Yamazaki98_colorB.png]] | |||
| [[image:Yamazaki98_colorC.png]] | |||
| [[image:Yamazaki98_colorD.png]] | |||
|} | |||
==Gameplay Overview== | |||
Yamazaki generally has two modes of play: Using his far reaching normal and specials to keep opponents out with his strong neutral game, and using his strong high/low/command throw mix-ups to relentlessly open up an opponent's defense. To be played optimally, he requires a good sense of zoning and spacing as well as having keen reaction times to punish certain approaches and attacks that one sets up with Yamazaki. Many players seem to exhibit a general game around Yamazaki's far Standing A as it's hard to get around as its reach is pretty long. Characters with short sweeps have a hard time getting around this move because once it whiffs and the opponent commits to a jump/hop or pushing a button outside of Yamazaki's close range, the opponent is susceptible to being hit by Hebi Tsukai (Joudan & Chuudan) (qcb + A/B respectively), a very far reaching sweep, Crouching C which is made safe by whiff canceling into a Hebi Tsukai move then feint canceled, another Standing A, an anti-air super called Guillotine (qcf qcf + P), or far reaching air-to-air attacks such as Jumping B, Jumping C, and Jumping CD. If an opponent recklessly tries to roll into Yamazaki's inner-space, the opponent will become susceptible to not only throws, command throws, and command throw supers that can't be Recovery Rolled but by full blown combos as well. | |||
*An example would be a character such as Ryo trying to get on Yamazaki from mid-range. Yamazaki's far Standing A would typically hit Ryo out of most of his grounded attempts to approach Yamazaki and the only normals having a cancel of trying to control the area Ryo has are far Standing B and Standing CD. Ryo could try to attack outside of far Standing A range but Yamazaki will make sure that Ryo will remain in range of Hebi Tsukai (Chuudan) (qcb + B) so that Ryo will be forced to block or have something punished by it due to the speed, range, and quick recovery of the move. If Ryo tries to roll around it, Yamazaki is able to either just hold the move and release the Hebi Tsukai when Ryo is finished rolling so that Ryo would be hit or Yamazaki could just feint cancel the Hebi Tsukai by holding the move and pressing D, then go on and punish Ryo as he would like. Ryo could try jumping or hopping but there is a huge risk that he'll be hit by a far Standing A, Crouching C that is canceled, Guillotine, or Hebi Tsukai (Joudan & Chuudan). Now that jumping isn't much of an option nor rolling, Ryo could try to time his attacks such as Kou'ou Ken (qcf + P), Kohou (dp + P), far Standing B, or Standing CD to use their high priority hitboxes to catch one of Yamazaki's limbs during Hebi Tsukai or far Standing A; but Yamazaki's far Standing A is still fast and recovers quickly that it's hard to hit and Yamazaki could wait out for such attempt and use his long sweep to punish Ryo's attacks. It doesn't help either that Ryo's sweep only has moderate range and has difficulty trying to reach Yamazaki. Couple this example and Yamazaki's great jump-in attack, Jumping D, that functions as an instant overhead with huge hit & block stun, damaging, low-hitting, hitconfirm combos, and good command throws and throws that can't be Recovery Rolled, Yamazaki's mid-range and close game are extremely deadly. | |||
Yamazaki | |||
Higher tiered characters, though, could circumvent his game and counter-pressure on the ground and rival Yamazaki in the air with better air-to-air attacks and air-to-ground attacks. Once characters such as Kyo gain the momentum and pressure Yamazaki, it's hard for Yamazaki to get out. Although Guillotine is pretty good for a KOF super in terms of being a reversal, it still trades way too many times against meaty jump-in attacks that aren't even safe jump attempts and Yamazaki's command throw and command throw super have limited range let alone still lose to safe jumps/hops. To play Yamazaki well, one requires to have good reaction and execution to set the pace for the beginning of the round and then work the opponent pragmatically into the corner then apply his great close game. | |||
==In-depth Analysis== | |||
===[[The King of Fighters 2002/Normals Guide|Movelist]]=== | |||
{|border="1" | |||
!width="8%"| | |||
! Frames | |||
! Advantage | |||
! Cancel | |||
! Block | |||
!colspan="2"| Hitbox | |||
! Notes | |||
|- | |||
|colspan="8" align="center"| '''Standing Close''' | |||
|- | |||
! [[image:snka.gif]] | |||
|align="center"| 3/5/5 | |||
|align="center"| +2/0 | |||
|align="center"| C | |||
|align="center"| HL | |||
|colspan="2" | [[image:Yama98_clA.png|center]] | |||
| Hits mid. Not really that good to pressure or combo with since Yamazaki's other close normals do a better job of doing so. | |||
|- | |||
! [[image:snkb.gif]] | |||
|align="center"| 4/4/7 | |||
|align="center"| +1/-1 | |||
|align="center"| C | |||
|align="center"| L | |||
|colspan="2" | [[image:Yama98_clB.png|center]] | |||
| Similar to Iori's Close B as it has low hitting properties and is faster than doing Crouching B. This move also has cancelable properties and could combo into another Close B, Crouching B, Crouching A, and Close A. | |||
|- | |||
! [[image:snkc.gif]] | |||
|align="center"| 2/6/22 | |||
|align="center"| -8/-10 | |||
|align="center"| C | |||
|align="center"| HL | |||
|colspan="2" | [[image:Yama98_clC.png|center]] | |||
| A good Close C attack that is used typically for bnb combos and frame traps. | |||
|- | |||
! [[image:snkd.gif]] | |||
|align="center"| 5/3*7/16 | |||
|align="center"| -3/-5 | |||
|align="center"| C/- | |||
|align="center"| HL/HL | |||
|valign="bottom" style="border-right:0px;"| [[image:Yama98_clD1.png|center]] | |||
|valign="bottom" style="border-left:0px;"| [[image:Yama98_clD2.png|center]] | |||
| The first hit is cancelable and the second hit usually whiffs on crouching characters. Once the opponent can't alternate guard and is scared of empty-jump > command throw mix ups, the opponent will try jumping or hopping backwards. If Yamazaki does an empty-hop > f.D during this set up, the opponent will be hit by Close D while jumping/hopping backwards. If the opponent perchance didn't jump or hop back, the opponent will be grabbed by Bun Nage (b or f + D). You could substitute this set up by doing Close C to grab an opponent in the corner to keep the opponent in the corner, but Close is also better on frame advantage after hitting a jumping/hopping back opponent. It's preference. | |||
|- | |||
|colspan="8" align="center"| '''Standing Far''' | |||
|- | |||
! [[image:snka.gif]] | |||
|align="center"| 6/5/7 | |||
|align="center"| 0/-2 | |||
|align="center"| - | |||
|align="center"| HL | |||
|colspan="2" | [[image:Yama98_stA.png|center]] | |||
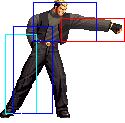
| Great far Standing A anti-air. Some characters can't approach Yamazaki because of this move. The opponent has to walk forward to get near Yamazaki's close range but far Standing A stops the opponent. Sometimes the opponent's sweep can't reach under the far Standing A to punish it and the opponent's hop will be beaten by it. The opponent might try full/super jumping over it, but far Standing A recovers too quickly to actually punish it. A really annoyingly good move. It will whiff over most crouching characters, but large characters such as Goro and Chang will be forced to block it even on crouch. | |||
|- | |||
! [[image:snkb.gif]] | |||
|align="center"| 5/4/9 | |||
|align="center"| -1/-3 | |||
|align="center"| - | |||
|align="center"| HL | |||
|colspan="2" | [[image:Yama98_stB.png|center]] | |||
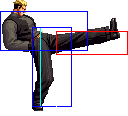
| A complement to far Standing A. Its range may not be as long as far Standing A but covers that low space to push out crouching characters back towards the tip of far Standing A's range. Hops, although, go over this move. Use well in conjunction with far Standing A. | |||
|- | |||
! [[image:snkc.gif]] | |||
|align="center"| 13/5/26 | |||
|align="center"| -11/-13 | |||
|align="center"| - | |||
|align="center"| HL | |||
|colspan="2" | [[image:Yama98_stC.png|center]] | |||
| This move is the in between of far Standing A and B due to the fact it hits crouching characters but still covers that far Standing A range. The huge difference is that this move is largely slow and not that reliable. | |||
|- | |||
! [[image:snkd.gif]] | |||
|align="center"| 9/6/26 | |||
|align="center"| -12/-14 | |||
|align="center"| - | |||
|align="center"| HL | |||
|colspan="2"| [[image:Yama98_stD.png|center]] | |||
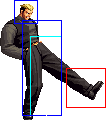
| A huge, fast poke. Could be used in frame traps to catch opponents trying to jump out. This move is one of Yamazaki's better punishes from mid-screen to hi the opponent on reaction. Anti-airs jumps spaced from far distance. | |||
|- | |||
! [[image:snkc.gif]]+[[image:snkd.gif]] | |||
|align="center"| 16/8/18 | |||
|align="center"| KD/-4 | |||
|align="center"| S | |||
|align="center"| HL | |||
|colspan="2"| [[image:Yama98_stCD.png|center]] | |||
| A typical standing CD attack. It's alright as a meaty. | |||
|- | |||
|colspan="8" align="center"| '''Crouching''' | |||
|- | |||
! [[image:snka.gif]] | |||
|align="center"| 5/4/7 | |||
|align="center"| +1/-1 | |||
|align="center"| C | |||
|align="center"| HL | |||
|colspan="2" | [[image:Yama98_crA.png|center]] | |||
| Cancelable, mid-hitting attack. Doesn't have as much range as st.B in poking a character and pushing the character out but it still benefits from having a smaller hurtbox due to the crouched state of Yamazaki and that it could cancel into a special or super attack. Mainly used in hit-confirm, bnb combos. | |||
|- | |||
! [[image:snkb.gif]] | |||
|align="center"| 5/5/7 | |||
|align="center"| 0/-2 | |||
|align="center"| - | |||
|align="center"| L | |||
|colspan="2" | [[image:Yama98_crB.png|center]] | |||
| It's slower than Close B but has further range and smaller hurtbox than Close B. Unlike Close B, this move isn't cancelable and has to combo into a different normal to create a combo into a special move. Still a relatively good crouching B attack to pressure with. Of course, this move has low-hitting properties. | |||
|- | |||
! [[image:snkc.gif]] | |||
|align="center"| 4/3+3/24 | |||
|align="center"| -10/-12 | |||
|align="center"| C | |||
|align="center"| HL | |||
|valign="bottom" style="border-right:0px;"| [[image:Yama98_crC1.png|center]] | |||
|valign="bottom" style="border-left:0px;"| [[image:Yama98_crC2.png|center]] | |||
| A pretty good "Mexican Upper" attack. Covers good vertical range as an anti-air attack. It usually has bad frame advantage or lack there of on hit and block but it could be reduced by canceling into a held Hebi Tsukai (qcb + A/B/C and hold) stance and canceling the stance by pressing the D button. This particular cancel could be done on whiff as well to make this move safer while building meter at the same time. Can combo into Hebi Tsukai (Chuudan & Gedan) on a grounded opponent as well. | |||
|- | |||
! [[image:snkd.gif]] | |||
|align="center"| 8/12/18 | |||
|align="center"| KD/-12 | |||
|align="center"| - | |||
|align="center"| L | |||
|colspan="2" | [[image:Yama98_crD.png|center]] | |||
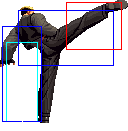
| A very lovely sweep. It has great range, and although it is not the fastest sweep it's still pretty fast amongst most of the fast. Compared to many other characters' sweeps, though, this move can't cancel on hit nor whiff. | |||
|- | |||
|colspan="8" align="center"| '''Jump''' | |||
|- | |||
! [[image:snka.gif]] | |||
|align="center"| 3/11 | |||
|align="center"| -/- | |||
|align="center"| - | |||
|align="center"| H | |||
|colspan="2" | [[image:Yama98_jA.png|center]] | |||
| A balance between all of Yamazaki's "extreme" jumping attacks. It's similar to Kyo's Jumping B but it has to hit really deep on an opponent to combo into a grounded light attack. | |||
|- | |||
! [[image:snkb.gif]] | |||
|align="center"| 6/9 | |||
|align="center"| -/- | |||
|align="center"| - | |||
|align="center"| H | |||
|colspan="2" | [[image:Yama98_jB.png|center]] | |||
| This move has absolute horizontal range below Yamazaki's waist. It's great for air-to-air and covering the ground space during a hop to allow Yamazaki to close in the space between himself and the opponent. Be wary as the space above his waist isn't covered and a well spaced hop or jump on top of Yamazaki's own hop could hit Yamazaki out of this attack. As a light attack, this move doesn't generate much hit-stun on hit so it has to be hit some-what deep to combo but not as extreme as Jumping A has to hit in deep. | |||
|- | |||
! [[image:snkc.gif]] | |||
|align="center"| 5/3+3 | |||
|align="center"| -/- | |||
|align="center"| - | |||
|align="center"| H | |||
|valign="bottom" style="border-right:0px;"| [[image:Yama98_jC1.png|center]] | |||
|valign="bottom" style="border-left:0px;"| [[image:Yama98_jC2.png|center]] | |||
| An absolute vertical attack that controls the space from Yamazaki's shoulders and upwards. Acts like an air-to-air or even an "air-to-above" in situations such as a hop vs. a jump. Lack moderate let alone huge horizontal range that his Jumping B and Jumping CD have. | |||
|- | |||
! [[image:snkd.gif]] | |||
|align="center"| 8/9 | |||
|align="center"| -/- | |||
|align="center"| - | |||
|align="center"| H | |||
|colspan="2" | [[image:Yama98_jD.png|center]] | |||
| Yamazaki's absolute, vertically downwards attack. Induces large hit-stun and block-stun and it could instant overhead. One could lock down an opponent with frame traps and force the opponent to block a deep Jumping D and Yamazaki could follow up with another hop and do Jumping D early and the Opponent will not be able to punish the hop in between. After the early Jumping D from a hop, the opponent would be able to punish another re-hop if Yamazaki attempts it, but the opponent could be tricked into thinking that and be mixed up by low hitting attacks, command throws, or Forward C/D Option Selects/Frame Traps. Great part of Yamazaki's pressure but lacks Horizontal range to close in or be safe from mid to mid-close distance. It may cross-up in strange instances or with proper set-ups. | |||
|- | |||
! [[image:snkc.gif]]+[[image:snkd.gif]] | |||
|align="center"| 12/4 | |||
|align="center"| KD/- | |||
|align="center"| - | |||
|align="center"| HL | |||
|colspan="2"| [[image:Yama98_jCD.png|center]] | |||
| This move compliments Jumping B as it also has pretty good horizontal coverage but above Yamazaki's waist. In return though, it whiffs on most crouching opponents. One of the faster Jumping CD attacks in the game. Doesn't have as much range as Jumping B though. | |||
|- | |||
|colspan="8" align="center"| '''Neutral Jump''' | |||
|- | |||
! [[image:snkb.gif]] | |||
|align="center"| 3/11 | |||
|align="center"| -/- | |||
|align="center"| - | |||
|align="center"| H | |||
|colspan="2" | [[image:Yama98_njB.png|center]] | |||
| Functions mostly as an instant overhead to finished off an opponent. Unsafe on hit or block if used in this fashion. As an instant overhead, it's faster than Jumping D so it's harder to block. | |||
|- | |||
! [[image:snkc.gif]] | |||
|align="center"| 12/7 | |||
|align="center"| -/- | |||
|align="center"| - | |||
|align="center"| H | |||
|colspan="2" | [[image:Yama98_njC.png|center]] | |||
| Upon falling back towards the ground from a full neutral jump, this is the preferred move to use as an air-to-ground attack. Also used as an air-to-air attack for opponents slightly below Yamazaki where Full Neutral Jump D won't reach. | |||
|- | |||
! [[image:snkd.gif]] | |||
|align="center"| 8/7 | |||
|align="center"| -/- | |||
|align="center"| - | |||
|align="center"| H | |||
|colspan="2" | [[image:Yama98_njD.png|center]] | |||
| Similar to Jumping B except it's a hard hitting move. Also a good move to keep an opponent out but it's not need that much since Yamazaki already has a strong enough ground game and air coverage from the hop space. Good to know about though. | |||
|- | |||
|colspan="8" align="center"| '''Command Normals''' | |||
|- | |||
! <br>f + [[image:snka.gif]]<br><br> | |||
|align="center"| 12/3(2)5/24 | |||
|align="center"| -9/-11 | |||
|align="center"| -/- | |||
|align="center"| H/H | |||
|rowspan="2" valign="bottom" style="border-right:0px;"| [[image:Yama98_fA1.png|center]] | |||
|rowspan="2" valign="bottom" style="border-left:0px;"| [[image:Yama98_fA2.png|center]] | |||
|rowspan="2"| '''Bussashi - f + A''' | |||
* A two-hit, overhead attack. Can be canceled out of if canceled into from a normal attack, much like many other command normals. Combos from Close C/D, but it will do one hit due to spacing. As an overhead, it's actually pretty fast and hard to respond to at times. Good to mix-up with occasionally. | |||
|- | |||
! f + [[image:snka.gif]] (cancel) | |||
|align="center"| -/-/- | |||
|align="center"| -/- | |||
|align="center"| -/C | |||
|align="center"| HL/HL | |||
|- | |||
|} | |||
===Normal Throws=== | |||
* '''Shime Age - b or f + C''' - Can't be Roll Recovered | |||
* '''Bun Nage - b or f + D''' - Can't be Roll Recovered | |||
D throw preferable cause back turned meaty attack. | |||
===Special Moves=== | |||
* | * '''Hebi Tsukai (Joudan) - qcb + A (hold A to delay)''' - A quick, far reaching arm strike that covers the area above about 50° from Yamazaki's shoulders. Great as an anti air and easy to react with. Opponents will be scared to jump because of this move and this move could be held and release on reaction as well as cancel when the opponent approaches on the ground. This move is fairly easy to punish on whiff due to the fact the opponent could close in on Yamazaki on the ground and be at the right range to step in to punish. | ||
''' | * '''Hebi Tsukai (Chuudan) - qcb + B (hold B to delay)''' - A quick, far reaching arm strike that covers a flat, horizontal plane from Yamazaki's shoulders. This move is what make opponents hesitant to approach on the ground and in the air since the opponents can't run through it, can't roll if this move is delayed and release as the opponent's roll is about to finish, can't be hopped since it covers that air space, and can't full jump from certain angles since this move will catch those jumps too. This move is fast enough to combo from light attacks and can combo on any character standing up. If Yamazaki does a jump-in attack on a crouching opponent and does light attack hit-confirms such as cr.B > cr.A, the Hebi Tsukai (Chuudan) may whiff on characters with small-height, crouching hitboxes. Otherwise, most of the cast could be forced to block this move on crouch due to medium and large heights on their crouching hitboxes. If an opponent guesses right and rolls through this move properly, this move is vulnerable to a combo on whiff. A close range, full jump could properly land on Yamazaki while avoiding the arm and punish this attack. This move is supplemented in these cases with the ability to delay and cancel the move if the situation is deemed unsafe. | ||
* '''Hebi Tsukai (Gedan) - qcb + C (hold C to delay)''' A quick, far reaching arm strike that covers the area below about 45° from Yamazaki's shoulders. It will reach that space that Hebi Tsukai (Chuudan) can't reach and force all crouching opponents to block. This move isn't as fast as the other two Hebi Tsuaki attacks and can't combo from light attacks (as this move could only combo from heavy attacks, a canceled Bussashi (f.A), and Suna Kake (dp + D). Isn't used as prolifically as the other two Hebi Tsukai. Doesn't have as much horizontal range as Hebi Tsukai (Chuudan). | |||
''' | * '''Hebi Damashi - Press D while delaying Hebi Tsukai''' - Pretty self-explanatory. The Hebi Tsukai series is almost like Makoto's Hayate series from Street Fighter 3: Third Strike in regards to feint canceling. In this version of KOF 98, doing a lot of instant, feinted Hebi Tsukai builds meter really fast. Due to this quick feinting, it makes Yamazaki's Crouching C really safe on whiff, block, and hit. If one is good enough, a player could confirm a Crouching C on hit on a ground opponent and combo into either Hebi Tsukai (Chuudan) and (Gedan) versions rather than just feint canceling. | ||
''' | * '''Sabaki no Aikuchi - (dp + P)''' - Yamazaki strikes multiple times with his dagger. Light version does 2 hits while heavy version does 4 hits. It generally isn't a safe move, especially the heavy version, and it doesn't do much for chip-damage or pressure due to the lack of frame advantage. Overall, it's not a good move. | ||
''' | * '''Yakiire - (dp + B)''' - Fast, two-hit, overhead "kick & stomp." It induces hard knockdown. The first hit isn't an overhead and a keen player should be able to react easily to this move. Somewhat safe on block. | ||
''' | * '''Suna Kake - (dp + D)''' - Not a particularly quick move nor does it have much horizontal range. This move is mainly used to combo from a heavy attack to knock a crouching opponent up to a standing position to set up for a Hebi Tsukai (Chuudan) (qcb + B). However, st.C > f.A > Hebi Tsukai (Gedan) (qcb + C) hits all characters so the Suna Kake is mainly used for style. Additionally, one could hit with Suna Kake, cancel into Hebi Damashi and run back to the opponent and continue the combo further. | ||
''' | * '''Bai Gaeshi (Kyuushuu) - (qcf + A)''' - This move is primarily used for nullifying projectiles. Its actual hitbox to hit an opponent is pretty slow as an anti-air and it doesn't combo from much nor does much damage. | ||
''' | * '''Bai Gaeshi (Dan Hassha) - (qcf + C)''' - Similar to Bai Gaeshi (Kyuushuu) but is much slower. In return, this move upon touching a projectile will send back Yamazaki's own deviantart colored projectile that moves quickly across the screen. This move is akin to a slower version of Kula's reflector in later games. | ||
''' | * '''Sadomazo - (hcf + K)''' - Yamazaki's counter move that is similar to Dudley's Cross Counter in Street Fighter 3: Third Strike. The difference is that Yamazaki doesn't take damage upon activation. It will beat out most moves except for projectiles, certain supers, and low-hitting attacks. In some cases it could be safe-jumped. | ||
''' | * '''Bakudan Pachiki - (hcb f + P)''' - A command throw in the same vein as Benimaru's Benimaru Collider (hcb f + P), as in it has almost instant active frames but lacks the range that other grapplers' command throws have. Due to Yamazaki's low and fast hop speed, this move is great to mix-up with from empty hops. Could use this move to finish combos against characters with low-height, crouching hitboxes that go under Hebi Tsukai (Chuudan) (qcb + B) | ||
===Desperation Moves=== | |||
''' | * '''Guillotine - (qcf qcf + P)''' - A great anti-air super. Pretty straight forward and it comes from Crouching B > Crouching A hit-confirms. Loses and trades against quite a number of meaties though on okizeme, thus not a reliable reversal. | ||
''' | * '''Drill - (hcb hcb + P)''' - An instant command grab super that has about the same range and Bakudan Pachiki (hcb f + P). Still a good reversal move if the opponent is dumb and tries to meaty/doesn't jump right beside Yamazaki on okizeme. The player could mash the punch button to get different aesthetic ender to this move. A fun move to try to land. Could combo from light attack hit-confirms but is difficult to buffer for most players due to overlapping attack motions. Drill enders are listed below. | ||
Punch Ranbu Tap P 0-4 times during DM Drill | |||
Kick Ranbu Tap P 5-8 times during DM Drill | |||
Rapid Pachiki Tap P 9-12 times during DM Drill | |||
Repeated Hebi Tsukai Tap P 13+ times during DM Drill | |||
Rapid Aikuchi Tap P 5-8 times during SDM Drill | |||
Rapid Stomps Tap P 0-4 times during SDM Drill | |||
Rapid Shime Age Tap P 9-12 times during SDM Drill | |||
Chou Repeated Hebi Tsukai Tap P 13+ times during SDM Drill | |||
Chouhatsu Tap any button after Drill ends''' | |||
== | == Fastest Attacks == | ||
* 0F: C throw; D throw; hcb f + P; (S)DM hcb hcb + P | |||
* 1F: - | |||
* 2F: '''cl.C''' | |||
* 3F: '''cl.A''' | |||
* 4F: '''cl.B'''; '''cr.C''' | |||
* 5F: '''cl.D'''; st.B; '''cr.A'''; cr.B | |||
* 6F: st.A | |||
* 7F: - | |||
* 8F: cr.D | |||
* 9F: st.D | |||
* 10F: - | |||
==Combos== | |||
* Best jump-ins: | |||
** j.D | |||
** j.A (j.A has to hit in really deep to combo into a light attack compared to j.B.) | |||
** j.B | |||
* cl.B / cr.B x 2, cr.A > Hebi Tsukai (Chuudan) (qcb + B) (Whiff on certain crouching characters.) | |||
Note that cl.B could be substituted with cr.B since cl.B's activation range is limited and doing two might not be feasible on certain characters. Could cut down the bnb to a single cl.B or cr.B if needed. cl.B is preferred at times due to the fact it comes out faster than cr.B and is easier to combo from j.A and j.B. | |||
* cr.B / cl.B, cr.A / cl.B > | |||
** (S)DM Drill (hcb hcb + P) (SDM/MAX use only one weak attack.) | |||
** (S)DM Guillotine (qcf qcf + P) | |||
** Bakudan Pachiki (hcb f + P) (MAX use only one weak attack.) | |||
** Hebi Tsukai (Chuudan) (qcb + B) (Whiff on certain crouching characters.) | |||
* cr.C / cl.C / cl. D (1 hit) > | |||
** (S)DM Drill (hcb hcb + P) | |||
** (S)DM Guillotine (qcf qcf + P) | |||
** Bakudan Pachiki (hcb f + P) | |||
** dp + C (Very close on MAX or will miss second hit.) | |||
** Suna Kake (dp + D) (Very close. Point blank on MAX and must cancel immediately.) | |||
*** qcb + A/B/C (hold) > D (Cancel), run, | |||
**** cr.C > qcb + B (Timming required.) | |||
**** cr.D (Timming required.) | |||
*** Hebi Tsukai (Gedan) (qcb + C) (Out of MAX.) | |||
*** Hebi Tsukai (Chuudan) (qcb + B) | |||
** dp + B | |||
** dp + A | |||
** f + A (1st hit will miss) > | |||
*** Hebi Tsukai (Gedan) (qcb + C) (Out of MAX.) | |||
*** Hebi Tsukai (Chuudan) (qcb + B) (Whiff on certain crouching characters.) | |||
Suna Kake (dp + D) > qcb + B will hit any crouching opponent, because dp + D stand up the crounching oppnent during hitstun and allows the opponent to be hit by a Hebi Tsukai (Chuudan). | |||
* Point blank: dp + D > qcb + A/B/C (hold) > D (Cancel), run, any combo. (Timming required.) | |||
* Simple buffers: | |||
** cl.B / cl.D (1 hit) > (S)DM qcf qcf + P | |||
*** qcf + B/D > qcf + P | |||
** cr.B, cl.A > (S)DM qcf qcf + P | |||
*** cr.B, qcf + A > qcf + P (As cr.B is not cancelable, qcf + A will chain into a normal attack.) | |||
** cl.D (1 hit) > (S)DM hcb hcb + P | |||
*** hcb + D > hcb + P | |||
** cr.B, cl.A / cl.B > (S)DM hcb hcb + P | |||
*** cr.B, hcb + A/B > hcb + P (As cr.B is not cancelable, hcb + A/B will chain into a normal attack.) | |||
{{StrategyCorner| | |||
* MAX: cl.C > {{hcb}} {{f}} + P | |||
deals considerable less damage (~ cl.C + 1/2 cl.A) than | |||
* cl.C > DM {{hcb}} {{hcb}} + P (Lv. 4) | |||
Keep this in mind, when you need to decide whether to trigger MAX or keep meter for a DM. | |||
}} | |||
{{ | == Links == | ||
{{Navbox-KOF98}} | |||
[[Category:The King of Fighters '98: The Slugfest]] | [[Category:The King of Fighters '98: The Slugfest]] | ||
[[Category:Ryuji Yamazaki]] | |||
Latest revision as of 17:46, 11 September 2022
Colors

|

|

|

|
Gameplay Overview
Yamazaki generally has two modes of play: Using his far reaching normal and specials to keep opponents out with his strong neutral game, and using his strong high/low/command throw mix-ups to relentlessly open up an opponent's defense. To be played optimally, he requires a good sense of zoning and spacing as well as having keen reaction times to punish certain approaches and attacks that one sets up with Yamazaki. Many players seem to exhibit a general game around Yamazaki's far Standing A as it's hard to get around as its reach is pretty long. Characters with short sweeps have a hard time getting around this move because once it whiffs and the opponent commits to a jump/hop or pushing a button outside of Yamazaki's close range, the opponent is susceptible to being hit by Hebi Tsukai (Joudan & Chuudan) (qcb + A/B respectively), a very far reaching sweep, Crouching C which is made safe by whiff canceling into a Hebi Tsukai move then feint canceled, another Standing A, an anti-air super called Guillotine (qcf qcf + P), or far reaching air-to-air attacks such as Jumping B, Jumping C, and Jumping CD. If an opponent recklessly tries to roll into Yamazaki's inner-space, the opponent will become susceptible to not only throws, command throws, and command throw supers that can't be Recovery Rolled but by full blown combos as well.
- An example would be a character such as Ryo trying to get on Yamazaki from mid-range. Yamazaki's far Standing A would typically hit Ryo out of most of his grounded attempts to approach Yamazaki and the only normals having a cancel of trying to control the area Ryo has are far Standing B and Standing CD. Ryo could try to attack outside of far Standing A range but Yamazaki will make sure that Ryo will remain in range of Hebi Tsukai (Chuudan) (qcb + B) so that Ryo will be forced to block or have something punished by it due to the speed, range, and quick recovery of the move. If Ryo tries to roll around it, Yamazaki is able to either just hold the move and release the Hebi Tsukai when Ryo is finished rolling so that Ryo would be hit or Yamazaki could just feint cancel the Hebi Tsukai by holding the move and pressing D, then go on and punish Ryo as he would like. Ryo could try jumping or hopping but there is a huge risk that he'll be hit by a far Standing A, Crouching C that is canceled, Guillotine, or Hebi Tsukai (Joudan & Chuudan). Now that jumping isn't much of an option nor rolling, Ryo could try to time his attacks such as Kou'ou Ken (qcf + P), Kohou (dp + P), far Standing B, or Standing CD to use their high priority hitboxes to catch one of Yamazaki's limbs during Hebi Tsukai or far Standing A; but Yamazaki's far Standing A is still fast and recovers quickly that it's hard to hit and Yamazaki could wait out for such attempt and use his long sweep to punish Ryo's attacks. It doesn't help either that Ryo's sweep only has moderate range and has difficulty trying to reach Yamazaki. Couple this example and Yamazaki's great jump-in attack, Jumping D, that functions as an instant overhead with huge hit & block stun, damaging, low-hitting, hitconfirm combos, and good command throws and throws that can't be Recovery Rolled, Yamazaki's mid-range and close game are extremely deadly.
Higher tiered characters, though, could circumvent his game and counter-pressure on the ground and rival Yamazaki in the air with better air-to-air attacks and air-to-ground attacks. Once characters such as Kyo gain the momentum and pressure Yamazaki, it's hard for Yamazaki to get out. Although Guillotine is pretty good for a KOF super in terms of being a reversal, it still trades way too many times against meaty jump-in attacks that aren't even safe jump attempts and Yamazaki's command throw and command throw super have limited range let alone still lose to safe jumps/hops. To play Yamazaki well, one requires to have good reaction and execution to set the pace for the beginning of the round and then work the opponent pragmatically into the corner then apply his great close game.
In-depth Analysis
Movelist
Normal Throws
- Shime Age - b or f + C - Can't be Roll Recovered
- Bun Nage - b or f + D - Can't be Roll Recovered
D throw preferable cause back turned meaty attack.
Special Moves
- Hebi Tsukai (Joudan) - qcb + A (hold A to delay) - A quick, far reaching arm strike that covers the area above about 50° from Yamazaki's shoulders. Great as an anti air and easy to react with. Opponents will be scared to jump because of this move and this move could be held and release on reaction as well as cancel when the opponent approaches on the ground. This move is fairly easy to punish on whiff due to the fact the opponent could close in on Yamazaki on the ground and be at the right range to step in to punish.
- Hebi Tsukai (Chuudan) - qcb + B (hold B to delay) - A quick, far reaching arm strike that covers a flat, horizontal plane from Yamazaki's shoulders. This move is what make opponents hesitant to approach on the ground and in the air since the opponents can't run through it, can't roll if this move is delayed and release as the opponent's roll is about to finish, can't be hopped since it covers that air space, and can't full jump from certain angles since this move will catch those jumps too. This move is fast enough to combo from light attacks and can combo on any character standing up. If Yamazaki does a jump-in attack on a crouching opponent and does light attack hit-confirms such as cr.B > cr.A, the Hebi Tsukai (Chuudan) may whiff on characters with small-height, crouching hitboxes. Otherwise, most of the cast could be forced to block this move on crouch due to medium and large heights on their crouching hitboxes. If an opponent guesses right and rolls through this move properly, this move is vulnerable to a combo on whiff. A close range, full jump could properly land on Yamazaki while avoiding the arm and punish this attack. This move is supplemented in these cases with the ability to delay and cancel the move if the situation is deemed unsafe.
- Hebi Tsukai (Gedan) - qcb + C (hold C to delay) A quick, far reaching arm strike that covers the area below about 45° from Yamazaki's shoulders. It will reach that space that Hebi Tsukai (Chuudan) can't reach and force all crouching opponents to block. This move isn't as fast as the other two Hebi Tsuaki attacks and can't combo from light attacks (as this move could only combo from heavy attacks, a canceled Bussashi (f.A), and Suna Kake (dp + D). Isn't used as prolifically as the other two Hebi Tsukai. Doesn't have as much horizontal range as Hebi Tsukai (Chuudan).
- Hebi Damashi - Press D while delaying Hebi Tsukai - Pretty self-explanatory. The Hebi Tsukai series is almost like Makoto's Hayate series from Street Fighter 3: Third Strike in regards to feint canceling. In this version of KOF 98, doing a lot of instant, feinted Hebi Tsukai builds meter really fast. Due to this quick feinting, it makes Yamazaki's Crouching C really safe on whiff, block, and hit. If one is good enough, a player could confirm a Crouching C on hit on a ground opponent and combo into either Hebi Tsukai (Chuudan) and (Gedan) versions rather than just feint canceling.
- Sabaki no Aikuchi - (dp + P) - Yamazaki strikes multiple times with his dagger. Light version does 2 hits while heavy version does 4 hits. It generally isn't a safe move, especially the heavy version, and it doesn't do much for chip-damage or pressure due to the lack of frame advantage. Overall, it's not a good move.
- Yakiire - (dp + B) - Fast, two-hit, overhead "kick & stomp." It induces hard knockdown. The first hit isn't an overhead and a keen player should be able to react easily to this move. Somewhat safe on block.
- Suna Kake - (dp + D) - Not a particularly quick move nor does it have much horizontal range. This move is mainly used to combo from a heavy attack to knock a crouching opponent up to a standing position to set up for a Hebi Tsukai (Chuudan) (qcb + B). However, st.C > f.A > Hebi Tsukai (Gedan) (qcb + C) hits all characters so the Suna Kake is mainly used for style. Additionally, one could hit with Suna Kake, cancel into Hebi Damashi and run back to the opponent and continue the combo further.
- Bai Gaeshi (Kyuushuu) - (qcf + A) - This move is primarily used for nullifying projectiles. Its actual hitbox to hit an opponent is pretty slow as an anti-air and it doesn't combo from much nor does much damage.
- Bai Gaeshi (Dan Hassha) - (qcf + C) - Similar to Bai Gaeshi (Kyuushuu) but is much slower. In return, this move upon touching a projectile will send back Yamazaki's own deviantart colored projectile that moves quickly across the screen. This move is akin to a slower version of Kula's reflector in later games.
- Sadomazo - (hcf + K) - Yamazaki's counter move that is similar to Dudley's Cross Counter in Street Fighter 3: Third Strike. The difference is that Yamazaki doesn't take damage upon activation. It will beat out most moves except for projectiles, certain supers, and low-hitting attacks. In some cases it could be safe-jumped.
- Bakudan Pachiki - (hcb f + P) - A command throw in the same vein as Benimaru's Benimaru Collider (hcb f + P), as in it has almost instant active frames but lacks the range that other grapplers' command throws have. Due to Yamazaki's low and fast hop speed, this move is great to mix-up with from empty hops. Could use this move to finish combos against characters with low-height, crouching hitboxes that go under Hebi Tsukai (Chuudan) (qcb + B)
Desperation Moves
- Guillotine - (qcf qcf + P) - A great anti-air super. Pretty straight forward and it comes from Crouching B > Crouching A hit-confirms. Loses and trades against quite a number of meaties though on okizeme, thus not a reliable reversal.
- Drill - (hcb hcb + P) - An instant command grab super that has about the same range and Bakudan Pachiki (hcb f + P). Still a good reversal move if the opponent is dumb and tries to meaty/doesn't jump right beside Yamazaki on okizeme. The player could mash the punch button to get different aesthetic ender to this move. A fun move to try to land. Could combo from light attack hit-confirms but is difficult to buffer for most players due to overlapping attack motions. Drill enders are listed below.
Punch Ranbu                    Tap P 0-4 times during DM Drill
Kick Ranbu                     Tap P 5-8 times during DM Drill
Rapid Pachiki                  Tap P 9-12 times during DM Drill
Repeated Hebi Tsukai           Tap P 13+ times during DM Drill
Rapid Aikuchi                  Tap P 5-8 times during SDM Drill
Rapid Stomps                   Tap P 0-4 times during SDM Drill
Rapid Shime Age                Tap P 9-12 times during SDM Drill
Chou Repeated Hebi Tsukai      Tap P 13+ times during SDM Drill
Chouhatsu                      Tap any button after Drill ends
Fastest Attacks
- 0F: C throw; D throw; hcb f + P; (S)DM hcb hcb + P
- 1F: -
- 2F: cl.C
- 3F: cl.A
- 4F: cl.B; cr.C
- 5F: cl.D; st.B; cr.A; cr.B
- 6F: st.A
- 7F: -
- 8F: cr.D
- 9F: st.D
- 10F: -
Combos
- Best jump-ins:
- j.D
- j.A (j.A has to hit in really deep to combo into a light attack compared to j.B.)
- j.B
- cl.B / cr.B x 2, cr.A > Hebi Tsukai (Chuudan) (qcb + B) (Whiff on certain crouching characters.)
Note that cl.B could be substituted with cr.B since cl.B's activation range is limited and doing two might not be feasible on certain characters. Could cut down the bnb to a single cl.B or cr.B if needed. cl.B is preferred at times due to the fact it comes out faster than cr.B and is easier to combo from j.A and j.B.
- cr.B / cl.B, cr.A / cl.B >
- (S)DM Drill (hcb hcb + P) (SDM/MAX use only one weak attack.)
- (S)DM Guillotine (qcf qcf + P)
- Bakudan Pachiki (hcb f + P) (MAX use only one weak attack.)
- Hebi Tsukai (Chuudan) (qcb + B) (Whiff on certain crouching characters.)
- cr.C / cl.C / cl. D (1 hit) >
- (S)DM Drill (hcb hcb + P)
- (S)DM Guillotine (qcf qcf + P)
- Bakudan Pachiki (hcb f + P)
- dp + C (Very close on MAX or will miss second hit.)
- Suna Kake (dp + D) (Very close. Point blank on MAX and must cancel immediately.)
- qcb + A/B/C (hold) > D (Cancel), run,
- cr.C > qcb + B (Timming required.)
- cr.D (Timming required.)
- Hebi Tsukai (Gedan) (qcb + C) (Out of MAX.)
- Hebi Tsukai (Chuudan) (qcb + B)
- qcb + A/B/C (hold) > D (Cancel), run,
- dp + B
- dp + A
- f + A (1st hit will miss) >
- Hebi Tsukai (Gedan) (qcb + C) (Out of MAX.)
- Hebi Tsukai (Chuudan) (qcb + B) (Whiff on certain crouching characters.)
Suna Kake (dp + D) > qcb + B will hit any crouching opponent, because dp + D stand up the crounching oppnent during hitstun and allows the opponent to be hit by a Hebi Tsukai (Chuudan).
- Point blank: dp + D > qcb + A/B/C (hold) > D (Cancel), run, any combo. (Timming required.)
- Simple buffers:
- cl.B / cl.D (1 hit) > (S)DM qcf qcf + P
- qcf + B/D > qcf + P
- cr.B, cl.A > (S)DM qcf qcf + P
- cr.B, qcf + A > qcf + P (As cr.B is not cancelable, qcf + A will chain into a normal attack.)
- cl.D (1 hit) > (S)DM hcb hcb + P
- hcb + D > hcb + P
- cr.B, cl.A / cl.B > (S)DM hcb hcb + P
- cr.B, hcb + A/B > hcb + P (As cr.B is not cancelable, hcb + A/B will chain into a normal attack.)
- cl.B / cl.D (1 hit) > (S)DM qcf qcf + P
Strategy Corner
- MAX: cl.C >

 + P
+ P
deals considerable less damage (~ cl.C + 1/2 cl.A) than
- cl.C > DM

 + P (Lv. 4)
Keep this in mind, when you need to decide whether to trigger MAX or keep meter for a DM.

