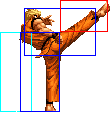
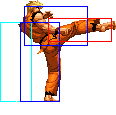
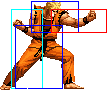
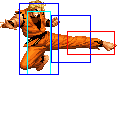
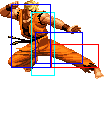
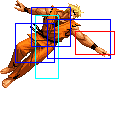
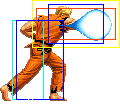
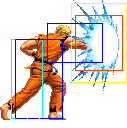
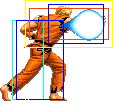
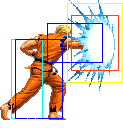
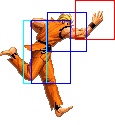
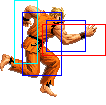
m (→Combos) |
m (→Movelist) |
||
| Line 271: | Line 271: | ||
|colspan="2" valign="bottom" style="border-left:0px;"| [[image:Ryo98_hcbK2.png|center]] | |colspan="2" valign="bottom" style="border-left:0px;"| [[image:Ryo98_hcbK2.png|center]] | ||
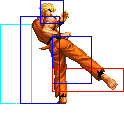
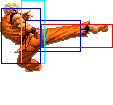
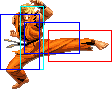
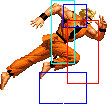
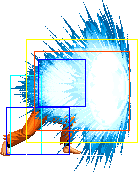
|rowspan="2" align="left"|'''Hien Shippuu Kyaku (hcb + K)''' | |rowspan="2" align="left"|'''Hien Shippuu Kyaku (hcb + K)''' | ||
* Both versions are unsafe and easily punishable when blocked, so use them mainly in combos. | * Both versions are unsafe and easily punishable when blocked, so use them mainly in combos. The B version can sometimes be useful to catch jumping enemies that are outside the range of your DP. Still, be careful when using it. | ||
|- | |- | ||
! hcb + [[image:snkd.gif]] | ! hcb + [[image:snkd.gif]] | ||
| Line 349: | Line 349: | ||
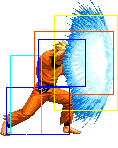
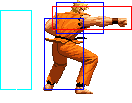
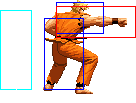
|rowspan="3" align="left"|'''Tenchi Haou Ken (qcf,qcf + P)'''<br> | |rowspan="3" align="left"|'''Tenchi Haou Ken (qcf,qcf + P)'''<br> | ||
DM version does little damage (roughly like a standing C) normally, but does around half a bar if you get a counter. Obviously, getting a counter with this move is quite difficult. You can try to trade it with any move you see coming with anticipation, but those situations will be rare.<br> | DM version does little damage (roughly like a standing C) normally, but does around half a bar if you get a counter. Obviously, getting a counter with this move is quite difficult. You can try to trade it with any move you see coming with anticipation, but those situations will be rare.<br> | ||
The SDM version is quite more interesting. It deals slightly more damage than the DM version (even if you get a counter hit), but instantly dizzies your opponent. You can do c.B, c.A/s.A, SDM Tenchi Haou Ken and then follow up with anything you want (j. | The SDM version is quite more interesting. It deals slightly more damage than the DM version (even if you get a counter hit), but instantly dizzies your opponent. You can do c.B, c.A/s.A, SDM Tenchi Haou Ken and then follow up with anything you want (j.C, cl.C > Kyokugen-ryuu Renbu Ken (hcf + P) / D Hien Shippuu Kyaku (hcb + D) if you have no stocks, j.D, cl.C > A DM Ryuuko Ranbu if you have one stock, or, if you have two, a SDM R. Ranbu or a combo into a second SDM Tenchi Haou Ken), which makes Ryo a very scary character when in MAX mode and with a stock. | ||
|- | |- | ||
! qcf qcf + [[image:snkc.gif]] | ! qcf qcf + [[image:snkc.gif]] | ||
Revision as of 21:35, 6 February 2019
Introduction
Ryo Sakazaki is an accomplished punchman and a master of kyokugenryu, the art of combat Lamaze. Although this allows him to punch very hard it sadly leaves him too relaxed to do combos.
Colors
Gameplay overview
Movelist
Fastest Attacks
- 0F: C throw; D throw
- 1F: cr.C
- 2F: cl.C; dp + A
- 3F: cl.A; cl.B; st.A; cr.A; cr.B
- 4F: cl.D; dp + C
- 5F: st.B
- 6F: hcb + B
- 7F: st.C; cr.D; hcf + P; SDM qcf qcf + P
- 8F: -
- 9F: CD; hcb + D; DM qcf qcf + A
- 10F: -
Combos
- Best jump-ins:
- j.C
- cr.A / cr.B x 2, st.A >
- SDM qcf qcf + P, any combo (As the opponent will be dizzed.)
- DM qcf qcf + A
- hcb + B
- cr.B, cr.A / cl.A >
- SDM qcf qcf + P, any combo (As the opponent will be dizzed.)
- hcf + P, [junggler] (Very close.)
- hcb + D (Very close. Whiffs on some crouchers.)
- DM qcf qcf + A
- hcb + B
- (cr.B, cr.C) / cl.C,
- SDM qcf qcf + P, any combo (As the opponent will be dizzed.)
- DM qcf hcb + P
- DM f hcf + A
- hcf + P, [junggler] (Very close.)
- hcb + D (Whiffs on some crouchers.)
- qcb + C > dp + C (Very close or dp + C may miss.)
- DM qcf qcf + P
- qcf + A
- f + A
- ... hcf + P,
- j.CD
- qcf + A (out of the corner)
- dp + A (corner)
- j.C (reset)
- Simple buffers:
- cr.B, st.A / cl.A / cl.B > (S)DM qcf qcf + A
- cr.B, qcf + A/B > qcf + A (As cr.B is not cancelable, qcf + A/B will chain into a normal attack.)
- cr.B, st.A / cl.A / cl.B > (S)DM qcf qcf + A
His SDM qcf qcf + P followed by a simple BnB combo (like j.C, cl.C > hcb + D) deals more damage than SDM qcf hcb + P.
His DM qcf qcf + P on counter does a little more damage than cl.C > DM qcf hcb + P, but less than j.C, cl.C > DM qcf hcb + P.
Ryo is the only character that may spend 5 bars in the same combo, like this one:
- cr.C / cl.C / cr.A / st.A / cl.A > SDM qcf qcf + P,
- MAX mode, j.C, cr.C / cl.C > SDM qcf qcf + P,
- j.C, cr.C / cl.C > qcf hcb + P
- MAX mode, j.C, cr.C / cl.C > SDM qcf qcf + P,
Strategy Corner
- MAX: cl.C > hcf + P, j.CD
deals ??? than
- cl.C > qcf hcb + P
Keep this in mind, when you need to decide whether to trigger MAX or keep meter for a DM.
