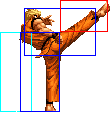
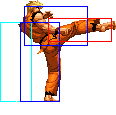
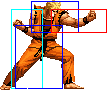
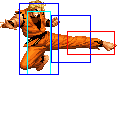
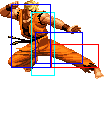
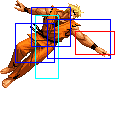
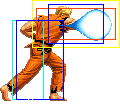
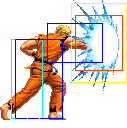
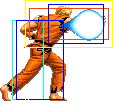
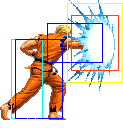
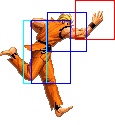
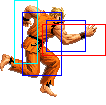
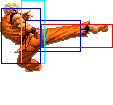
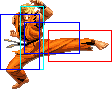
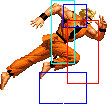
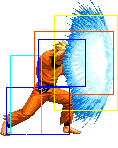
(→Combos) |
No edit summary |
||
| Line 127: | Line 127: | ||
|valign="bottom" style="border-right:0px;"| [[image:Ryo98_crC1.png|center]] | |valign="bottom" style="border-right:0px;"| [[image:Ryo98_crC1.png|center]] | ||
|colspan="2" valign="bottom" style="border-left:0px;"| [[image:Ryo98_crC2.png|center]] | |colspan="2" valign="bottom" style="border-left:0px;"| [[image:Ryo98_crC2.png|center]] | ||
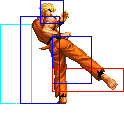
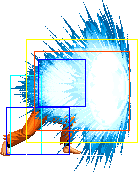
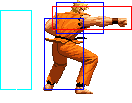
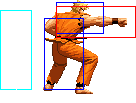
|align="left"|Extremely fast for ground-to-ground situations. A great pressure tool; you will be cancelling it into qcf+P a lot. Links from cr.B/cr.A. Works very well as an anti-air too. | |align="left"|Extremely fast for ground-to-ground situations. A great pressure tool; you will be cancelling it into qcf + P a lot. Links from cr.B / cr.A. Works very well as an anti-air too. | ||
|- | |- | ||
! [[image:snkd.gif]] | ! [[image:snkd.gif]] | ||
| Line 181: | Line 181: | ||
|colspan="9" align="center"| '''Command Normals''' | |colspan="9" align="center"| '''Command Normals''' | ||
|- | |- | ||
! f+[[image:snka.gif]] | ! f + [[image:snka.gif]] | ||
|align="center"| 17/9/11 | |align="center"| 17/9/11 | ||
|align="center"| -/- | |align="center"| -/- | ||
| Line 189: | Line 189: | ||
|rowspan="2" align="left"|Overhead, excellent used as a meaty attack. | |rowspan="2" align="left"|Overhead, excellent used as a meaty attack. | ||
|- | |- | ||
! f+[[image:snka.gif]]<br>(cancel) | ! f + [[image:snka.gif]]<br>(cancel) | ||
|align="center"| -/-/- | |align="center"| -/-/- | ||
|align="center"| -/- | |align="center"| -/- | ||
| Line 197: | Line 197: | ||
|colspan="9" align="center"| '''Special Moves''' | |colspan="9" align="center"| '''Special Moves''' | ||
|- | |- | ||
! <br>qcf+[[image:snka.gif]]<br><br> | ! <br>qcf + [[image:snka.gif]]<br><br> | ||
|align="center"| 13/3+6/27 | |align="center"| 13/3+6/27 | ||
| | | | ||
| Line 204: | Line 204: | ||
|valign="bottom" style="border-right:0px;"| [[image:Ryo98_qcfA1.png|center]] | |valign="bottom" style="border-right:0px;"| [[image:Ryo98_qcfA1.png|center]] | ||
|colspan="2" valign="bottom" style="border-left:0px;"| [[image:Ryo98_qcfA2.png|center]] | |colspan="2" valign="bottom" style="border-left:0px;"| [[image:Ryo98_qcfA2.png|center]] | ||
|rowspan="2" align="left"|'''Ko ou Ken (qcf+P)''' | |rowspan="2" align="left"|'''Ko ou Ken (qcf + P)''' | ||
|- | |- | ||
! qcf+[[image:snkc.gif]] | ! qcf + [[image:snkc.gif]] | ||
|align="center"| 19/3+6/29 | |align="center"| 19/3+6/29 | ||
| | | | ||
| Line 231: | Line 231: | ||
|colspan="2" valign="bottom" style="border-left:0px;"| [[image:Ryo98_dpC2.png|center]] | |colspan="2" valign="bottom" style="border-left:0px;"| [[image:Ryo98_dpC2.png|center]] | ||
|- | |- | ||
! <br>qcf+[[image:snkb.gif]]<br><br> | ! <br>qcf + [[image:snkb.gif]]<br><br> | ||
|align="center"| 25/6/17 | |align="center"| 25/6/17 | ||
|align="center"| KD/-4 | |align="center"| KD/-4 | ||
| Line 238: | Line 238: | ||
|rowspan="2" valign="bottom" style="border-right:0px;"| [[image:Ryo98_qcfK1.png|center]] | |rowspan="2" valign="bottom" style="border-right:0px;"| [[image:Ryo98_qcfK1.png|center]] | ||
|colspan="2" rowspan="2" valign="bottom" style="border-left:0px;"| [[image:Ryo98_qcfK2.png|center]] | |colspan="2" rowspan="2" valign="bottom" style="border-left:0px;"| [[image:Ryo98_qcfK2.png|center]] | ||
|rowspan="2" align="left"|'''Mouko Raijin Setsu (qcf+K)''' | |rowspan="2" align="left"|'''Mouko Raijin Setsu (qcf + K)''' | ||
|- | |- | ||
! qcf+[[image:snkd.gif]] | ! qcf + [[image:snkd.gif]] | ||
|align="center"| 27/6/21 | |align="center"| 27/6/21 | ||
|align="center"| KD/-6 | |align="center"| KD/-6 | ||
| Line 246: | Line 246: | ||
|align="center"| H | |align="center"| H | ||
|- | |- | ||
! <br>qcf+[[image:snka.gif]]<br><br> | ! <br>qcf + [[image:snka.gif]]<br><br> | ||
|align="center"| 12/2+6/32 | |align="center"| 12/2+6/32 | ||
|align="center"| -5/-7 | |align="center"| -5/-7 | ||
| Line 253: | Line 253: | ||
|valign="bottom" style="border-right:0px; border-bottom:0px;"| [[image:Ryo98_qcbP1.png|center]] | |valign="bottom" style="border-right:0px; border-bottom:0px;"| [[image:Ryo98_qcbP1.png|center]] | ||
|colspan="2" valign="bottom" style="border-left:0px; border-bottom:0px;"| [[image:Ryo98_qcbP2.png|center]] | |colspan="2" valign="bottom" style="border-left:0px; border-bottom:0px;"| [[image:Ryo98_qcbP2.png|center]] | ||
|rowspan="2" align="left"|'''Mouko Raijin Gou (qcb+P)''' | |rowspan="2" align="left"|'''Mouko Raijin Gou (qcb + P)''' | ||
|- | |- | ||
! qcf+[[image:snkc.gif]] | ! qcf + [[image:snkc.gif]] | ||
|align="center"| 16/3+6/35 | |align="center"| 16/3+6/35 | ||
| | | | ||
| Line 263: | Line 263: | ||
|colspan="2" valign="bottom" style="border-left:0px; border-top:0px;"| [[image:Ryo98_qcbP4.png|center]] | |colspan="2" valign="bottom" style="border-left:0px; border-top:0px;"| [[image:Ryo98_qcbP4.png|center]] | ||
|- | |- | ||
! hcb+[[image:snkb.gif]] | ! hcb + [[image:snkb.gif]] | ||
|align="center"| 6/3+6/30 | |align="center"| 6/3+6/30 | ||
| | | | ||
| Line 270: | Line 270: | ||
|valign="bottom" style="border-right:0px;"| [[image:Ryo98_hcbD3.png|center]] | |valign="bottom" style="border-right:0px;"| [[image:Ryo98_hcbD3.png|center]] | ||
|colspan="2" valign="bottom" style="border-left:0px;"| [[image:Ryo98_hcbK2.png|center]] | |colspan="2" valign="bottom" style="border-left:0px;"| [[image:Ryo98_hcbK2.png|center]] | ||
|rowspan="2" align="left"|'''Hien Shippuu Kyaku (hcb+K)''' | |rowspan="2" align="left"|'''Hien Shippuu Kyaku (hcb + K)''' | ||
* Both versions are unsafe and easily punishable when blocked, so use them mainly in combos. A version can sometimes be useful to catch jumping enemies that are outside the range of your DP. Still, be careful when using it. | * Both versions are unsafe and easily punishable when blocked, so use them mainly in combos. A version can sometimes be useful to catch jumping enemies that are outside the range of your DP. Still, be careful when using it. | ||
|- | |- | ||
! hcb+[[image:snkd.gif]] | ! hcb + [[image:snkd.gif]] | ||
|align="center"| 9/4+5+9+6/27 | |align="center"| 9/4+5+9+6/27 | ||
| | | | ||
| Line 282: | Line 282: | ||
|valign="bottom" style="border-left:0px;"| [[image:Ryo98_hcbD3a.png|center]] | |valign="bottom" style="border-left:0px;"| [[image:Ryo98_hcbD3a.png|center]] | ||
|- | |- | ||
! hcf+[[image:punch.gif]] | ! hcf + [[image:punch.gif]] | ||
|align="center"| 7/39/14 | |align="center"| 7/39/14 | ||
|align="center"| | |align="center"| | ||
| Line 288: | Line 288: | ||
|align="center"| - | |align="center"| - | ||
|colspan="3" | [[image:Ryo98_hcfP.png|center]] | |colspan="3" | [[image:Ryo98_hcfP.png|center]] | ||
| '''Kyokugen-ryuu Renbu Ken (hcf+P)''' | | '''Kyokugen-ryuu Renbu Ken (hcf + P)''' | ||
*proximity unblockable | *proximity unblockable | ||
|- | |- | ||
|colspan="9" align="center"| '''DMs''' | |colspan="9" align="center"| '''DMs''' | ||
|- | |- | ||
! qcf | ! qcf hcb + [[image:snka.gif]] | ||
|align="center"| 1+10/13/32 | |align="center"| 1+10/13/32 | ||
| | | | ||
| Line 304: | Line 304: | ||
* A version comes out faster and covers less distance, C version is the opposite. MAX version does more hits. | * A version comes out faster and covers less distance, C version is the opposite. MAX version does more hits. | ||
|- | |- | ||
! qcf | ! qcf hcb + [[image:snkc.gif]] | ||
|align="center"| 1+12/26/36 | |align="center"| 1+12/26/36 | ||
| | | | ||
| Line 310: | Line 310: | ||
|align="center"| HL | |align="center"| HL | ||
|- | |- | ||
! qcf | ! qcf hcb + [[image:punch.gif]]<br>(SDM) | ||
|align="left"| 1+14/13(or26)/38 | |align="left"| 1+14/13(or26)/38 | ||
| | | | ||
| Line 316: | Line 316: | ||
|align="center"| HL | |align="center"| HL | ||
|- | |- | ||
! f | ! f hcf + [[image:snka.gif]] | ||
|align="center"| 1+12/52 | |align="center"| 1+12/52 | ||
| | | | ||
| Line 328: | Line 328: | ||
* MAX versions are bigger and deal more damage / hits. The A version has the same speed as the C version. | * MAX versions are bigger and deal more damage / hits. The A version has the same speed as the C version. | ||
|- | |- | ||
! f | ! f hcf + [[image:snkc.gif]] | ||
|align="center"| 1+17/55 | |align="center"| 1+17/55 | ||
| | | | ||
| Line 334: | Line 334: | ||
|align="center"| HL | |align="center"| HL | ||
|- | |- | ||
! f | ! f hcf + [[image:punch.gif]]<br>(SDM) | ||
|align="center"| 1+17/57 | |align="center"| 1+17/57 | ||
| | | | ||
| Line 341: | Line 341: | ||
|colspan="3"| [[image:Ryo98_fhcfP_SDM.png|center]] | |colspan="3"| [[image:Ryo98_fhcfP_SDM.png|center]] | ||
|- | |- | ||
! | ! qcf qcf + [[image:snka.gif]] | ||
|align="center"| 1+8/9/34 | |align="center"| 1+8/9/34 | ||
| | | | ||
| Line 351: | Line 351: | ||
The SDM version is quite more interesting. It deals slightly more damage than the DM version (even if you get a counter hit), but instantly dizzies your opponent. You can do c.B, c.A/s.A, SDM Tenchi Haou Ken and then follow up with anything you want (j.D, cl.C, D Hien Shippuu Kyaku if you have no stocks, j.D, cl.C, A DM Ryuuko Ranbu if you have one stock, or a DM R. Ranbu if you have two), which makes Ryo a very scary character when in MAX mode and with a stock. | The SDM version is quite more interesting. It deals slightly more damage than the DM version (even if you get a counter hit), but instantly dizzies your opponent. You can do c.B, c.A/s.A, SDM Tenchi Haou Ken and then follow up with anything you want (j.D, cl.C, D Hien Shippuu Kyaku if you have no stocks, j.D, cl.C, A DM Ryuuko Ranbu if you have one stock, or a DM R. Ranbu if you have two), which makes Ryo a very scary character when in MAX mode and with a stock. | ||
|- | |- | ||
! | ! qcf qcf + [[image:snkc.gif]] | ||
|align="center"| 1+12/9/37 | |align="center"| 1+12/9/37 | ||
| | | | ||
| Line 357: | Line 357: | ||
|align="center"| HL | |align="center"| HL | ||
|- | |- | ||
! | ! qcf qcf + [[image:punch.gif]]<br>(SDM) | ||
|align="center"| 1+6/9/39 | |align="center"| 1+6/9/39 | ||
| | | | ||
Revision as of 22:50, 25 December 2018
Introduction
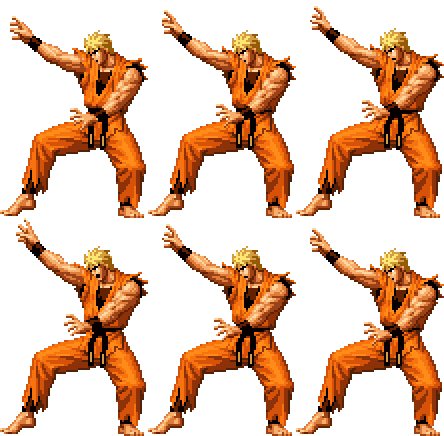
Ryo Sakazaki is an accomplished punchman and a master of kyokugenryu, the art of combat Lamaze. Although this allows him to punch very hard it sadly leaves him too relaxed to do combos.
Colors

|

|

|

|
Gameplay overview
Movelist
Fastest Attacks
- 0F: C throw; D throw
- 1F: cr.C
- 2F: cl.C; dp + A
- 3F: cl.A; cl.B; st.A; cr.A; cr.B
- 4F: cl.D; dp + C
- 5F: st.B
- 6F: hcb + B
- 7F: st.C; cr.D; hcf + P; qcf qcf + P (SDM)
- 8F: -
- 9F: CD; hcb + D; qcf qcf + A (DM)
- 10F: -
Combos
- cr.A / cr.B x 2, st.A >
- (S)DM qcf qcf + A
- hcb + B
- cr.B, cr.A/cl.A >
- (S)DM qcf qcf + A
- hcf + P, [junggler] (Very close.)
- hcb + D (Very close.)
- hcb + B
- (cr.B, cr.C) / cl.C,
- DM qcf hcb + P
- DM f hcf + A
- (S)DM qcf qcf + A
- hcf + P, [junggler]
- hcb + D
- qcf + A
- f + A
- ... hcf + P,
- j.CD
- qcf + A (out of the corner)
- dp + A (corner)
- j.C (reset)
Strategy Corner
- MAX: cl.C > hcf + P, j.CD
deals ??? than
- cl.C > qcf hcb + P
Keep this in mind, when you need to decide whether to trigger MAX or keep meter for a DM.
