| Line 47: | Line 47: | ||
|colspan="2" | [[image:Beni98_clA.png|center]] | |colspan="2" | [[image:Beni98_clA.png|center]] | ||
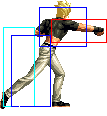
| Hits mid. Close C/D are better in the sense that these two moves are faster than Close A and are meatier as well as having a larger cancelable window than Close A. Doesn't really have much of a point. | | Hits mid. Close C/D are better in the sense that these two moves are faster than Close A and are meatier as well as having a larger cancelable window than Close A. Doesn't really have much of a point. | ||
Chain: repeatable | |||
|- | |- | ||
! [[image:snkb.gif]] | ! [[image:snkb.gif]] | ||
| Line 55: | Line 56: | ||
|colspan="2" | [[image:Beni98_clB.png|center]] | |colspan="2" | [[image:Beni98_clB.png|center]] | ||
| Similar to far Standing B but it hits mid. It can be canceled. | | Similar to far Standing B but it hits mid. It can be canceled. | ||
Chain: repeatable | |||
|- | |- | ||
! [[image:snkc.gif]] | ! [[image:snkc.gif]] | ||
| Line 82: | Line 84: | ||
|colspan="2" | [[image:Beni98_stA.png|center]] | |colspan="2" | [[image:Beni98_stA.png|center]] | ||
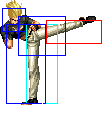
| Standard far Standing A anti-air. Usually far Standing B is the better anti-air against hops; and angles of jumps that far Standing B can't cover but far Standing A does is covered better by close Standing C/D or Super Inazuma Kick B Version. | | Standard far Standing A anti-air. Usually far Standing B is the better anti-air against hops; and angles of jumps that far Standing B can't cover but far Standing A does is covered better by close Standing C/D or Super Inazuma Kick B Version. | ||
Chain: repeatable | |||
|- | |- | ||
! [[image:snkb.gif]] | ! [[image:snkb.gif]] | ||
| Line 90: | Line 93: | ||
|colspan="2" | [[image:Beni98_stB.png|center]] | |colspan="2" | [[image:Beni98_stB.png|center]] | ||
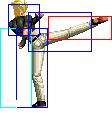
| Great anti-air normal. This move is quick and has little recovery so it's hard to punish with a sweep at times, especially when Benimaru follows up immediately with a far Standing D that goes over a lot of crouching attacks and is fast enough to counter poke the better sweeps before the said sweeps come out. An essential part of Benimaru's game. | | Great anti-air normal. This move is quick and has little recovery so it's hard to punish with a sweep at times, especially when Benimaru follows up immediately with a far Standing D that goes over a lot of crouching attacks and is fast enough to counter poke the better sweeps before the said sweeps come out. An essential part of Benimaru's game. | ||
Chain: ender | |||
|- | |- | ||
! [[image:snkc.gif]] | ! [[image:snkc.gif]] | ||
| Line 124: | Line 128: | ||
|colspan="2" | [[image:Beni98_crA.png|center]] | |colspan="2" | [[image:Beni98_crA.png|center]] | ||
| A fast cancelable normal. Doesn't have much of a point since Crouching B is about just as fast, and Crouching B has longer range while at the same time hitting low. | | A fast cancelable normal. Doesn't have much of a point since Crouching B is about just as fast, and Crouching B has longer range while at the same time hitting low. | ||
Chain: repeatable | |||
|- | |- | ||
! [[image:snkb.gif]] | ! [[image:snkb.gif]] | ||
| Line 132: | Line 137: | ||
|colspan="2" | [[image:Beni98_crB.png|center]] | |colspan="2" | [[image:Beni98_crB.png|center]] | ||
| Another one of Benimaru's great normals. Fast, cancelable, and mid ranged crouching attack that's great for pressuring and spacing Benimaru for setting up cross-up attempts. It's threatening because its ability to break alternate guarding attempts and confirms into decent damage with a knockdown. The opponent will rather try to block this most of the time rather than try to alternate guard against tick command throw attempts. A big part of Benimaru pressure. | | Another one of Benimaru's great normals. Fast, cancelable, and mid ranged crouching attack that's great for pressuring and spacing Benimaru for setting up cross-up attempts. It's threatening because its ability to break alternate guarding attempts and confirms into decent damage with a knockdown. The opponent will rather try to block this most of the time rather than try to alternate guard against tick command throw attempts. A big part of Benimaru pressure. | ||
Chain: repeatable | |||
|- | |- | ||
! [[image:snkc.gif]] | ! [[image:snkc.gif]] | ||
| Line 171: | Line 177: | ||
|align="center"| 6/3+7/- | |align="center"| 6/3+7/- | ||
|align="center"| -/- | |align="center"| -/- | ||
|align="center"| | |align="center"| - | ||
|align="center"| H | |align="center"| H | ||
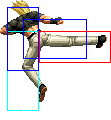
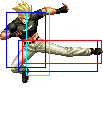
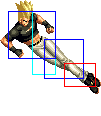
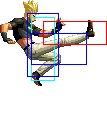
|valign="bottom" style="border-right:0px;"| [[image:Beni98_jC1.png|center]] | |valign="bottom" style="border-right:0px;"| [[image:Beni98_jC1.png|center]] | ||
Revision as of 20:34, 9 May 2018
Benimaru Nikaido
Jean Pierre Polnareff
In later games, Polnareff gets really lazy and uses his stand and has the gall to call it Genei Hurricane. Also appeared in an underrated Capcom fighter that also has rolls and hops. This man is extremely fabulous but ironically invigorated by the poon. He is also known as the Broom Handle. Like Guile from Street Fighter, Polnareff is one of the greatest kings of Sobats. Also much like Guile, Polnareff has really silly spoken English. In addition to being similar to Guile, Polnareff is also fond of doing flipping kicks to anti-air opponents.
In a nutshell
Benimaru is a great poking character that could be played in many different styles such as having a good turtle game, solid neutral game, and a strong offensive game. Generally though, Benimaru plays a better passive-aggressive offensive game due to the fact that his reversals aren't too strong and he should be in control of the match's momentum and force the opponent to make a mistake. Benimaru makes use of his good normals to make the opponent try to circumvent a particular normal and then punish the opponent for it.
- One such example is Benimaru controlling the space with a far Standing D attack in which most characters can't sweep or counter poke. The opponent could then try to hop over the far Standing D from further spacing but Benimaru could easily stuff the attempt with far Standing B. So while Benimaru controls that frontal space with far Standing B and D. The opponent could try to do a full/super jump over the far Standing D and far Standing B would be out of range to anti-air the trajectory of the jump. In this case, Benimaru could react with an anti-air, Super Inazuma Kick (dp+K) preferably "B" Version, special that is usually safe on whiff.
So essentially, Benimaru creates a good wall with just these parts of his overall moveset while including other various aspects of his game like running, Crouching B pressure that combos into itself and finishes with Super Inazuma Kick "D" Version for knockdown. Benimaru also could more easily tick throw into his command throw, Benimaru Collider, because the opponent will have difficulty trying to alternate guard when Benimaru's running, Crouching B pressure easily breaks alternate guarding, and Benimaru's anti-airs will easily stuff jumps and hops. Added to this is Benimaru's great chipping damage moves that are safe on block and great to frame trap with. Then Benimaru's Shinku Katategoma is not only good for chip but as well as baiting and beating out Guard Cancel CD moves. Because of all these tools yet having mediocre super moves, Benimaru doesn't necessarily need meter at all to play his game completely but his pokes and counter pokes become much scarier when he uses MAX mode to increase damage for his singular hits. In addition, Benimaru's cross-up, jump-in attacks and air-to-air attacks are great and are complemented by his unique hop and jump trajectories, especially when Benimaru sets up an ambiguous, cross-up attack after a successful Benimaru Collider (hcb,f+P) Benimaru is a really strong high tier character that is generally simple to play as a beginner player to KOF but requires a good sense of general KOF mechanics and footsies.
Colors

|

|

|

|
In-depth Analysis
Movelist
Normal Throws
Catch and Shoot - b or f + C - Opponent wakes up front turned
Front Suplex - b or f + D - Opponent wakes up back turned. Cannot be Roll Teched.
Spinning Knee Drop - b or f or d+C/D in air - Opponent wakes up front turned
Special Moves
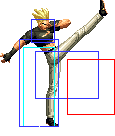
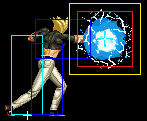
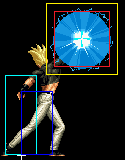
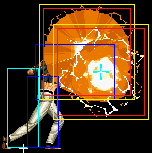
Raijin Ken - (qcf + A) - A good chip-damage, pressure attack. Could be used as a preemptive anti-air. A common way of chipping/frame-trapping an opponent is by doing one or two Crouching B attacks then canceling the last one into Raijin Ken. If the opponent is in the corner, knocked down, and is on the brink of losing the round, Benimaru could force a checkmate situation by chip-damage killing off the opponent by spacing the outer tangent of the Raijin Ken to touch the opponent. If the Opponent rolls forward on reversal, the opponent will roll into the opposite tangent and will get hit. Since the opponent is in the corner, the opponent will just roll backwards in the same spot and will still lose.
Taikuu Raijin Ken - (qcf + C) - Could be used as an anti-air but it isn't as good as other options and is really punishable on whiff. If used, it's mainly as a preemptive anti-air as it's too slow to use on reaction.
Kuuchuu Raijin Ken (In air, qcf + P) - Can't be done from a hop. It's good for finishing off an opponent with chip-damage and beating out most reversals on okizeme. The recovery on landing isn't too good so this move should be use sparingly. If one tries to do this move late and the opponent isn't knocked down, the opponent could go for an anti-air or air-to-air. If done early to try to hit out anti-air or air-to-air attack preemptively, the opponent could easily react to it and just let Benimaru whiff and punish on Benimaru's descent.
Shinku Katategoma - (qcb + P) - Another good chip-damage, pressure attack. In comparison to Raijin Ken, this move is slower so there are more chances of the opponent trying to escape it. In exchange, the normal move that Benimaru cancels into Shinku Katategoma becomes Guard Cancel CD'd by the Opponent, Shinku Katategoma goes through the Counter CD and hits the opponent. C version isn't generally safe at all and A version is prepared. This move is difficult to Guard Cancel Roll but the opponent could catch the tail end of the attack with one and punish Benimaru during the recovery of the move. If the opponent does it early, there is a chance that the opponent will be hit by the remaining hits. Word of warning, both versions of Shinku Katategoma could be punished on block by Robert's Far Standing D.
Iai Geri - (qcf + K) - Benimaru kicks as fast as an Iaido swordsman draws his blade. In actuality, this move isn't as fast as his other moves in terms of trying to anti-air an opponent, although this move causes the cool effect of causing knockdown slide on opponents that do get hit by this move as anti-air. This move could combo from Crouching B or Close D but there are better options in terms of damage output. This move, though, is easier to confirm into and is still safe on block for beginners. Doesn't cause knockdown upon hit on a grounded opponent.
Handou Sandan Geri - (hcb + K) - A three hit, kick attack that is greatly unsafe on block. This move does the best, meterless damage-output of the moves that could be canceled from Close D. It depends if the player wants to cancel into this move for the damage or Benimaru Collider for optimal spacing for okizeme mix-ups. Has lower-body invincibility and could go over sweeps and slides.
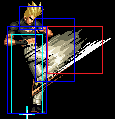
Super Inazuma Kick - (f,d,df + K) - B Version is a great anti-air while D Version is used for knocking down from a combo. Both moves lose to meaty low attacks and is easily beaten by Chris' slide. Coupled with the lack of ways to hop onto or hit Chris' slide, Benimaru's worst match up is easily Chris.
Benimaru Collider - (hcb,f + P) - A pretty decent command grab that sets up into ambiguous, cross-ups attacks and typical KOF grappler okizeme. Doesn't have the range like other grapplers have but still serves its purpose well. Difficult for the opponent to alternate guard. It's harder to do empty hop/jump into Benimaru Collider in comparison with other grappler due to the hop and jump arc being so high and it being easy for the opponent to option select Close C/D before Benimaru lands. Could also set up for an ambiguous roll cross-up.
Desperation Moves
Raikou Ken - (qcf,qcf + P) - A giant Raijin Ken. Isn't that fast to anti-air with or punish anything unless it's SDM version. Either version is very unsafe on block or whiff. Normal version can only combo from strong attacks while SDM version can combo from light attacks. Not that easy to confirm into and generally not worth trying to since Benimaru has better post-knockdown positions after his special moves.
Elec-Trigger - (hcb,hcb + P) - A command grab super. Isn't that good since it could be jumped out after the super flash. Just good for reversals against meaties without good recovery.
Combos
- cr.B x3 xx Super Inazuma Kick (dp+D) / Iai Geri (qcf+K)
- cr.A, st.D xx Shinku Katategoma (qcb+P) / Raijin Ken (qcf+A) / Handou Sandan Geri (hcb+K) / Iai Geri (qcf+K) / Super Inazuma Kick (dp+K)
- j.B/D, cr.B x2 xx Super Inazuma Kick (dp+D) / Iai Geri (qcf+K) *cr.b x3 if j.B/D is a cross-up
- j.B/D, st.C/D xx Shinku Katategoma (qcb+A) / Benimaru Collider (hcb,f+P)
- j.B/D, st.C/D xx Handou Sandan Giri (hcb+K)
- j.B/D, st.C/D/cr.C xx Raikou Ken (qcfx2+P)
- Jackknife Kick (f+B) xx Elec-Trigger (hcb,hcb+P) (Not that useful, but works on MAX Mode as well)
- MAX Mode - j.B/D, cr.b x2 xx SDM Raikouken (qcf x2+P)
