| Line 35: | Line 35: | ||
|- | |- | ||
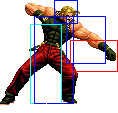
! [[image:snka.gif]] | ! [[image:snka.gif]] | ||
|align="center"| | |align="center"| 2/2+3/8 | ||
|align="center"| | |align="center"| | ||
|align="center"| | |align="center"| | ||
| Line 44: | Line 44: | ||
|- | |- | ||
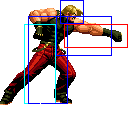
! [[image:snkb.gif]] | ! [[image:snkb.gif]] | ||
|align="center"| | |align="center"| 3/5/5 | ||
|align="center"| | |align="center"| | ||
|align="center"| | |align="center"| | ||
| Line 52: | Line 52: | ||
|- | |- | ||
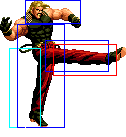
! [[image:snkc.gif]] | ! [[image:snkc.gif]] | ||
|align="center"| | |align="center"| 5/3+2/24 | ||
|align="center"| | |align="center"| | ||
|align="center"| | |align="center"| | ||
| Line 61: | Line 61: | ||
|- | |- | ||
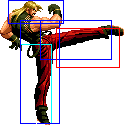
! [[image:snkd.gif]] | ! [[image:snkd.gif]] | ||
|align="center"| | |align="center"| 5/3+15+4/23 | ||
|align="center"| | |align="center"| | ||
|align="center"| | |align="center"| | ||
| Line 72: | Line 72: | ||
|- | |- | ||
! [[image:snka.gif]] | ! [[image:snka.gif]] | ||
|align="center"| | |align="center"| 5/4/11 | ||
|align="center"| | |align="center"| | ||
| | | | ||
| Line 80: | Line 80: | ||
|- | |- | ||
! [[image:snkb.gif]] | ! [[image:snkb.gif]] | ||
|align="center"| | |align="center"| 6/3/16 | ||
|align="center"| | |align="center"| | ||
| | | | ||
| Line 88: | Line 88: | ||
|- | |- | ||
! [[image:snkc.gif]] | ! [[image:snkc.gif]] | ||
|align="center"| | |align="center"| 16/3+3/30 | ||
|align="center"| | |align="center"| | ||
| | | | ||
| Line 97: | Line 97: | ||
|- | |- | ||
! [[image:snkd.gif]] | ! [[image:snkd.gif]] | ||
|align="center"| | |align="center"| 14/3+5/24 | ||
|align="center"| | |align="center"| | ||
| | | | ||
| Line 106: | Line 106: | ||
|- | |- | ||
! [[image:snkc.gif]]+[[image:snkd.gif]] | ! [[image:snkc.gif]]+[[image:snkd.gif]] | ||
|align="center"| | |align="center"| 11/4/27 | ||
|align="center"| KD/ | |align="center"| KD/ | ||
|align="center"| | |align="center"| | ||
| Line 116: | Line 116: | ||
|- | |- | ||
! [[image:snka.gif]] | ! [[image:snka.gif]] | ||
|align="center"| | |align="center"| 2/3/9 | ||
|align="center"| | |align="center"| | ||
|align="center"| | |align="center"| | ||
| Line 124: | Line 124: | ||
|- | |- | ||
! [[image:snkb.gif]] | ! [[image:snkb.gif]] | ||
|align="center"| | |align="center"| 3/4/6 | ||
|align="center"| | |align="center"| | ||
|align="center"| | |align="center"| | ||
| Line 132: | Line 132: | ||
|- | |- | ||
! [[image:snkc.gif]] | ! [[image:snkc.gif]] | ||
|align="center"| | |align="center"| 8/3+3/22 | ||
|align="center"| | |align="center"| | ||
|align="center"| | |align="center"| | ||
| Line 141: | Line 141: | ||
|- | |- | ||
! [[image:snkd.gif]] | ! [[image:snkd.gif]] | ||
|align="center"| | |align="center"| 11/4/25 | ||
|align="center"| | |align="center"| | ||
|align="center"| | |align="center"| | ||
| Line 151: | Line 151: | ||
|- | |- | ||
! [[image:snka.gif]] | ! [[image:snka.gif]] | ||
|align="center"| | |align="center"| 5/7 | ||
|align="center"| -/- | |align="center"| -/- | ||
| | | | ||
| Line 159: | Line 159: | ||
|- | |- | ||
! [[image:snkb.gif]] | ! [[image:snkb.gif]] | ||
|align="center"| | |align="center"| 5/6 | ||
|align="center"| -/- | |align="center"| -/- | ||
| | | | ||
| Line 167: | Line 167: | ||
|- | |- | ||
! [[image:snkc.gif]] | ! [[image:snkc.gif]] | ||
|align="center"| | |align="center"| 8/5 | ||
|align="center"| -/- | |align="center"| -/- | ||
| | | | ||
| Line 175: | Line 175: | ||
|- | |- | ||
! [[image:snkd.gif]] | ! [[image:snkd.gif]] | ||
|align="center"| | |align="center"| 6/4 | ||
|align="center"| -/- | |align="center"| -/- | ||
| | | | ||
| Line 183: | Line 183: | ||
|- | |- | ||
! [[image:snkc.gif]]+[[image:snkd.gif]] | ! [[image:snkc.gif]]+[[image:snkd.gif]] | ||
|align="center"| | |align="center"| 12/3 | ||
|align="center"| KD/- | |align="center"| KD/- | ||
| | | | ||
| Line 193: | Line 193: | ||
|- | |- | ||
! [[image:snka.gif]] | ! [[image:snka.gif]] | ||
|align="center"| | |align="center"| 5/7 | ||
|align="center"| -/- | |align="center"| -/- | ||
| | | | ||
| Line 201: | Line 201: | ||
|- | |- | ||
! [[image:snkb.gif]] | ! [[image:snkb.gif]] | ||
|align="center"| | |align="center"| 5/6 | ||
|align="center"| -/- | |align="center"| -/- | ||
| | | | ||
| Line 209: | Line 209: | ||
|- | |- | ||
! [[image:snkc.gif]] | ! [[image:snkc.gif]] | ||
|align="center"| | |align="center"| 8/5 | ||
|align="center"| -/- | |align="center"| -/- | ||
| | | | ||
| Line 217: | Line 217: | ||
|- | |- | ||
! [[image:snkd.gif]] | ! [[image:snkd.gif]] | ||
|align="center"| | |align="center"| 9/3+5 | ||
|align="center"| -/- | |align="center"| -/- | ||
| | | | ||
| Line 228: | Line 228: | ||
|- | |- | ||
! <br>f+[[image:snkb.gif]]<br><br> | ! <br>f+[[image:snkb.gif]]<br><br> | ||
|align="center"| | |align="center"| 6/3+16+4/24 | ||
|align="center"| | |align="center"| | ||
|align="center"| | |align="center"| | ||
Revision as of 07:19, 8 October 2016
Introduction
pick c color it's nice
Colors

|

|

|

|
Gameplay Overview
Returning from KoF95, Rugal has been toned down significantly from his Omega-self in that he no longer does stupid damage from every hit, so in 98 he is damned into the G-tier section along with other crap characters like Brian or Andy, but don't let that discourage you as Rugal is still a pretty cool guy! He requires moderate execution skills, mostly comboing into his super from his f+b command normal. He should be placed middle in the team as most of his damage comes from his Gigantic Pressure DM (and you'll probably want to have some better character as last anyway if you wanna win)
Combos
c.b, cl.a/b/c.a x f+b x God Press/Gigantic Pressure
(jump-in) cl.c [2 hits] x f+b x God Press/Gigantic Pressure
In-depth Analysis
Movelist
Normal Throws
b or f+C - Unbreakble, front knockdown, rollable.
b or f+D - Breakable, front knockdown, unrollable.
Both throws kind of stink, but D throw prefered in most cases, except if you have them cornered, as it's unrollable even though the wakeups are pretty much limited to C Reppuken, which isn't even meaty, unless you throw them into the corner. The C throw can't broken, but opponent can mash buttons to get out of it faster and reduce damage. Both throws send the opponent to the other side of the screen.
Special Moves
Reppuken (qcf+P) - A fireball. Fast to come out but bad recovery. A version goes slow, C version goes fast. Stick to the C version most of the time for blockstrings and such. Unlike in 95, you can't have this and a Kaiser Wave on the screen at the same time. You can setup an unblockable with this and his Dead End Screamer DM.
Kaiser Wave (f,hcf+P) - Another fireball, except it's bigger. Very slow and telegraphed startup, easily countered by opponents who are awake with invincible Ranbus, rolls, etc. A version goes slow, C version goes very fast. Chargeable to do more hits and damage, but just begs to be punished. Unlike in 95, you can't have this and a Reppuken on the screen at the same time.
Genocide Cutter (dp+K) - Rugal's signature move, although it's pretty bad in this game. You'd think it's your typical dragon punch type attack, except this one goes mostly straight up and neither version has no invincibility at all thus limiting it's use. B version is sort of good as a poke as it's hard to punish at the tip and it's fast, D version is mostly just to get you killed. Overall not that useful except with limited anti-air capabilities, but even then you need to anticipate a jump.
Dark Barrier (qcf+K) - Reflects fireballs back at their thrower, even some DM fireballs. It also has an attack hitbox that knocks down on hit, but unlike what you may remember from KoF95 this version does not give frame advantage on block.
God Press (hcb+P) - Rugal runs at the opponent and tries to grab them, if he's succesful he'll deliver them nicely all the way into the corner for a hard knockdown. Although it's a "grab" it can be blocked. A version goes about 60% of the screen while C goes full screen. You'll want to limit this move into comboes only as it's terrible on block and has no invincibility or anything nor a particulary fast startup.
Desperation Moves
Gigantic Pressure (qcf,hcb+P) - Rugal does a souped up version of his God Press special move with the exact same properties as the special. His main source of combo damage although buffering it from f+b can be tricky. MAX version does more damage and goes from corner to corner.
Dead End Screamer (qcf,qcf+K - The Rugal Spin! Rugal jumps at the opponent with a kick and if it hits he knocks them down on the floor and spins on them laughing and looking very silly. Unlike God Press and Gigantic Pressure this move is actually a grab in that it's unblockable, but it doesn't hit people in the air plus it's very slow to come out meaning it's useless and should only be done if you want to style on your opponent. It does, however, do a little bit more damage than Gigantic Pressure on it's own, but you can't combo into it. B version goes a shorter distance than D version. MAX version does more damage. One more useful use for this super is to setup an unblockable Reppuken.


