Updated version available!
You're reading the old version of this page. Click here to read the (in-progress) updated version!
Introduction
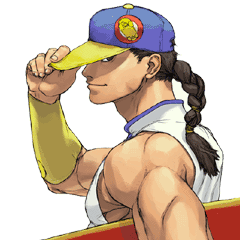
Yun is a setplay and combo powerhouse whos gameplan mostly hinges on his ability to gain his install super, Genei-Jin or his Super Art 3. He is a speedy, high execution character with a relatively unique moveset. He is somewhat of a mid-tier when not in Genei-Jin, but when he has it activated, he can do some of the most cruel things that the game has to offer, with demoralizing 80-90% combos off the right hits, and a super that can be retained only seconds after using it. If you like methodic rushdown, extensive combo arsenal and depth, some setplay and a unique moveset, Yun is the character for you.
| Strengths | Weaknesses |
|---|---|
|
|
Specific Character Information
- Stamina: 1080
- Stun Bar Length (dots): 64 (Normal)
- Stun Bar Recovery (frames it takes to recover 1 dot): 24
- Taunt:
- Unheld taunt (works for held too) - Increases damage for the next hit/combo by 6.4% for each taunt/hat twirl. Maximum 8 taunts/twirls, 50% bonus.
- Held taunt only - Increases damage for the next throw by 6.3% for the first extra twirl and 3.1% for every additional twirl. Maximum 7 extra twirls, 25% bonus.
- Best Kara-Throw: S.LK / Genenjin S.MP
- Standard Throw Range (pixels): 18
- Kara-Throw Range (pixels): 28
- Dash Forward (frames) / Moving Distance: 23 / 2
- Dash Backward (frames) / Moving Distance: 27 / 3
- Normal Wake up (frames): 60
- Quick Stand (frames): 41
Notable players
Japan
- SHO
- Issei
- Ushi?!
- Derun
- Yone
- Yakkun
- Mester
America
- Yuuki
- Shodokan
- AC-slayer
- Karapalm
- Btran
- Dankah
- Migeru
All Americans listed can be found on Fightcade
Moves List
Throws
| Hiza Geri | |
| Monkey Flip |
Command Moves
| Dakai | |
| Senpuu Kyaku | |
| Raigeki Shuu | Air |
Special Moves
| Zesshou Hohou | EX | |
| Kobokushi | SC | |
| Kobokushi-fake | ||
| Zenpou Tenshin | Close |
|
| Tetsuzan Kou | EX SC | |
| Nishou Kyaku | EX |
Super Arts
| I | You Hou | 120 Gauge Dots | 1 Stock | 3.0 EX Uses | |
| II | Sourai Rengeki | 88 Gauge Dots | 3 Stocks | 6.6 EX Uses | |
| III | Gen'ei Jin | 72 Gauge Dots | 1 Stock | 1.8 EX Uses |
Target Combos
| Air |
Target Combos
| Motion | Description |
|---|---|
| LP→LK→MP | Yun's most important target combo, used in many bread and butter combos and starts Genei Jin combos. |
| MP→HP→B+HP | N/A |
| jump LP→F+HP | Useful if you're doing air-to-air and your opponent parries your jab. |
| crouch MP→HP | N/A |
Special Moves
| Move Name | Motion | Nickname | Description |
|---|---|---|---|
| Zesshou Hohou | qcf+p (EX) | Lunge Punch | Yun moves forward a good portion of the screen while punching forward. Damage, distance, and startup is determined by punch button used. |
| Tetsu Zankou | dp+p (EX) | Shoulder | Yun twists and moves forward hitting with his shoulder. Damage, startup and distance is determined by punch button used. Has a small window on each version's startup where it can dodge projectiles. MP and HP versions cause knockdowns. |
| Nishou Kyaku | dp+k (EX) | Upkicks | Yun kicks up twice while launching himself upwards, then falling down to the ground helplessly. Distance and damage are determined by kick button used. |
| Kobokushi | qcb+p | Palm | Yun rears back and then pushes forward with his palms. Has a lot of startup. |
| Zenpou Tenshin | hcb+k | Command Grab | Yun grabs the opponent and flips over them. Doesn't do any damage, but gives you a small window of time to combo afterwards. |
Super Arts
| Super Art Name | Motion | Meter Size | Damage/Duration | EX Moves | Description |
|---|---|---|---|---|---|
| You Hou | qcf qcf+p | 1 large stock | 60 damage | 3 | An auto-combo that does a LOT of damage, although is surpassed by Genei Jin's potential. After the last hit, you can followup with Strong Shoulder into Fierce Lunge Punch for more damage. |
| Sourai Rengeki | qcf qcf+p | 3 medium stocks | 49 damage | ~6 | An auto-combo that is easy to hit confirm into, does a good damage. Good for beginners, and gives enough meter to use EX moves. |
| Genei Jin | qcf qcf+p | 1 small stock | ?? | ~1 | Yun's infamous super. Changes the properties of all his moves so that you can combo stuff that you cannot regularly. Has a really tiny bar that can be built up quickly, and leads to a bunch of mixups and damage. |
Move Analysis
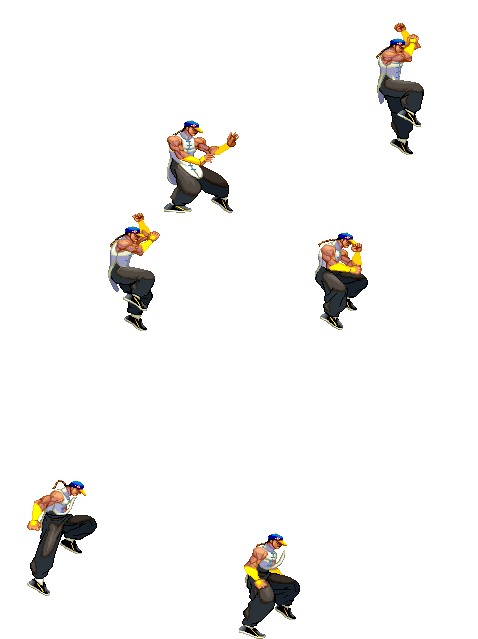
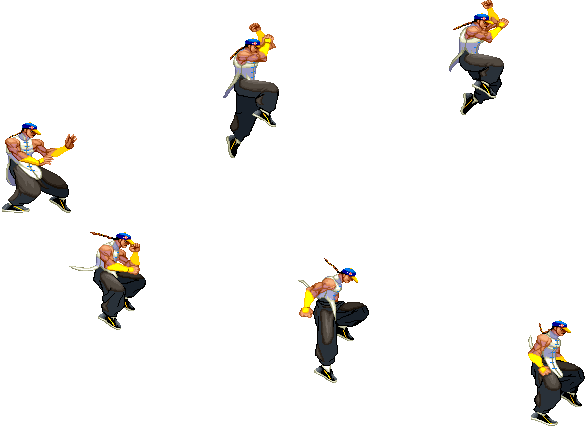
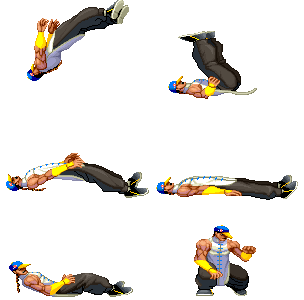
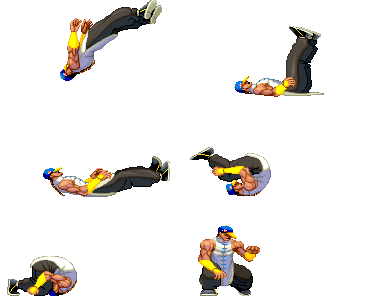
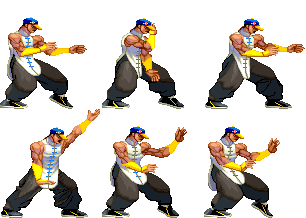
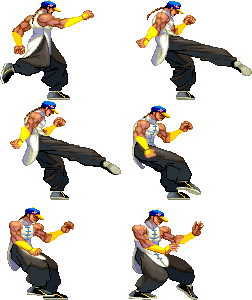
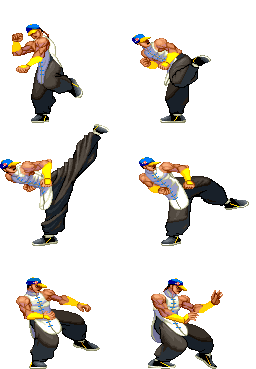
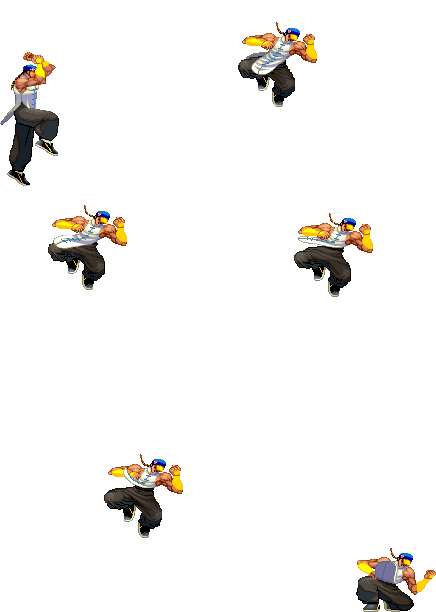
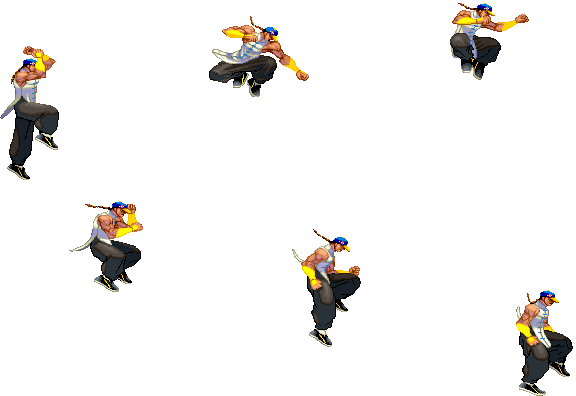
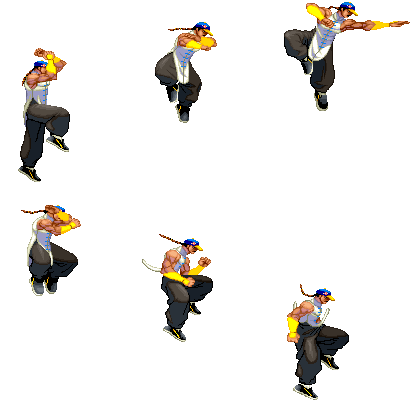
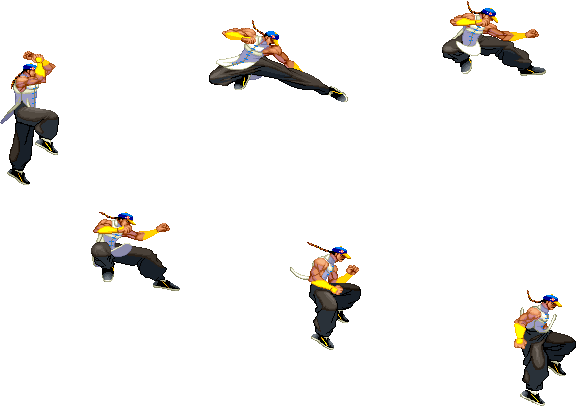
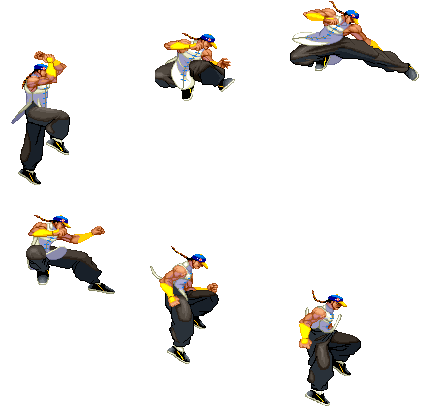
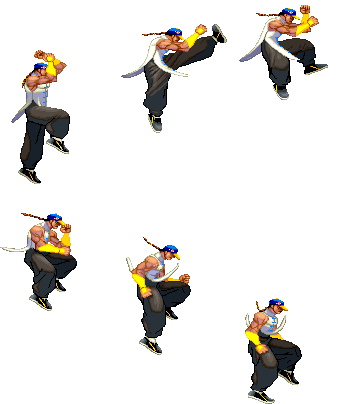
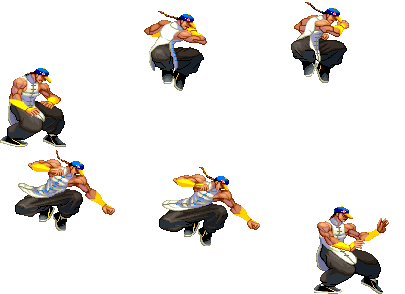
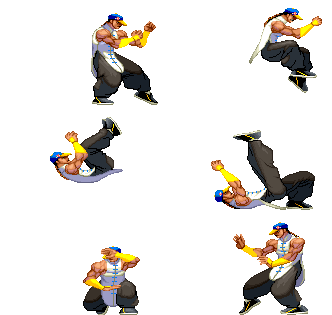
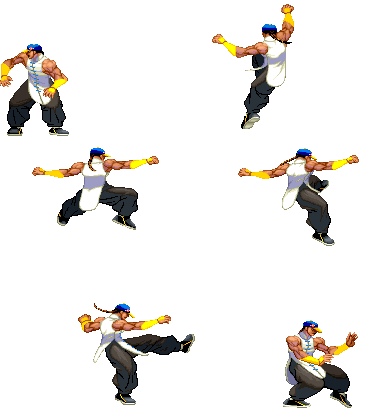
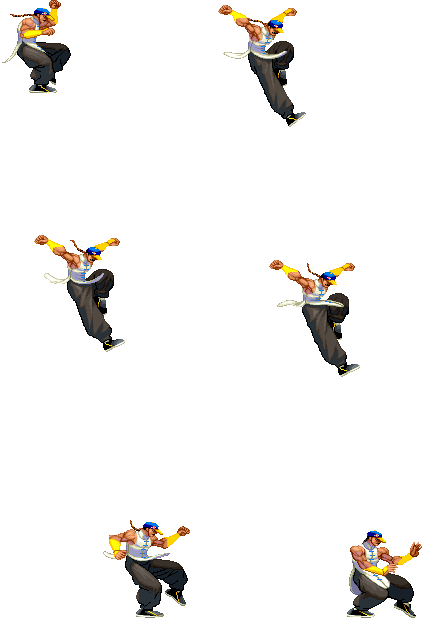
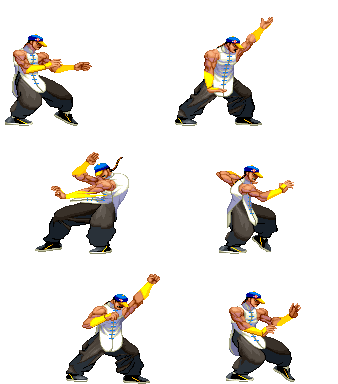
- All those sprites are taken from the site https://www.justnopoint.com/zweifuss/
- All Framedatas in "Move Analisys" section are taken from Game Restaurant , this means the Framedata isn't from the Dreamcast version like Karathrow site, it's from Arcade version.
Please note that the images show in this section are for the 1st frame it hits, so this means the opponent is taking the hit in the image shown on the move. I use the 1st frame of every move (except taunt, dash, jump, wakeup and 2nd throw image sprites) because you will see the maximum range of every attack (mostly of the attacks). Note also that those images are ACCURATE, they are exactly the first frame it hits, so enemy takes damage but they still dont make the "pain" frame.
General
- Move: Move name
- Motion: What you must do to execute the move
- Damage: Damage it does (in pixels)
- Stun Damage: Stun Damage it does (in pixels)
- Chains into itself: If you can combo into the same movement
- Special Cancel: If you can cancel the move into a Special Move
- Super Cancel: If you can cancel the move into a Super Art
- Throw Range: Range of the throw (in pixels)
- Num.: Super Art number
- Super Art: Super Art name
- Super Art Stock: Number of Gauge Bars the Super Art have, also the lenght of each bar (in pixels)
Frame Data
- Startup: Number of frames it takes to start the move
- Hit: Number of frames that can hit the opponent
- Recovery: Number of frames it takes to recover from the move
- Blocked Advantage: Number of frames you are in advantage/disadvantage after opponent have been blocked the hit
- Hit Advantage: Number of frames you are in advantage/disadvantage after opponent have been take the hit
- Crouching Hit Advantage: Number of frames you are in advantage/disadvantage after opponent have been take the hit while he's crouching
- + # : You have # frames of advantage
- - # : You have # frames of disadvantage
- # ~ # : Advantage/disadvantage can vary from # to #
- Down: Enemy gets knocked down
- Guard: How opponent must guard the move, High (H), Low (L) or both (HL)
- Parry: How opponent must parry the move, High (H), Low (L) or both (HL)
Gauge Increase
- Miss: Gauge you gain if you miss the move (in pixels)
- Blocked: Gauge you gain if the move gets blocked (in pixels)
- Hit: Gauge you gain if you hit the opponent with the move (in pixels)
- Parry: Gauge opponent gains when he parry the move (in pixels)
Basic Moves
| Move | Start-up frames | In ground frames | In air frames | Recovery frames | Total frames |
|---|---|---|---|---|---|
| Dash Forward | 2 | - | - | - | 23 |
Comments here
| Move | Start-up frames | In ground frames | In air frames | Recovery frames | Total frames |
|---|---|---|---|---|---|
| Dash Backwards | 3 | - | - | - | 27 |
Comments here
| Move | Motion | Startup Frames |
| Jump | BU or U or FU | 4 |
Comments here
| Move | Motion | Startup Frames |
| Super Jump | DBU or DU or DFU | 5 |
Comments here
| Move | Motion | Frames |
| Normal Wakeup | - | 60 |
Comments here
| Move | Motion | Frames |
| Quick Stand | Tap D when hitting the ground | 41 |
Comments here
| Move | Motion | Damage | Stun Damage | Chains into itself | Special Cancel | Super Cancel | Juggle Value |
| Taunt | HP+HK | 5 | 0 | No | No | No |
Frame Data
| Startup | Hit | Recovery | Blocked Advantage | Hit Advantage | Crouching Hit Advantage | Guard | Parry |
| 28 | 26 | 28 | ? | ? | ? | HL | HL |
Gauge Increase
| Miss | Blocked | Hit | Parry (Gauge for opponent) |
| 4(6) | ? | ? | 4 |
Comments here
| Move | Motion |
| Parry (High) | Tap F when about taking a hit |
| Parry (Low) | Tap D when about taking a hit |
| Parry (Air) | Tap F in air when about taking a hit |
Frame Data
| Move | Frames you're frozen | Frames opponent is frozen | Frame Advantage when parry is successful | Frames before you can try another parry |
| Parry (High) | 16 | 16 | +4(LP/LK) +3(MP/MK) +2(HP/HK) 0(Special/Super) -16(Fireball) | 24(19 when attack comes from the air)*,** |
| Parry (Low) | 16 | 16 | +4(LP/LK) +3(MP/MK) +2(HP/HK) 0(Special/Super) -16(Fireball) | 24(19 when attack comes from the air)*,** |
| Parry (Air) | 16 | 16 | +4(LP/LK) +3(MP/MK) +2(HP/HK) 0(Special/Super) -16(Fireball) | 21(19 when attack comes from the air)*,** |
| * (If a parry attempt is successful, the 19/21/24 frame restriction is taken away and you can attempt another parry immediately) |
| ** (If another attack connects within 2 frames of your parry, it will automatically be parried) |
Gauge Increase
| Move | Gauge Increase |
| Parry (High) | 4*** |
| Parry (Low) | 4*** |
| Parry (Air) | 4*** |
| *** (You gain 4 of gauge for whatever attack parried, and for whatever hit you parry during multihit attack) |
You can buffer any motion during High or Low parry, but NOT during Air parry, also parry resets the juggle count (and thus resets all scaling).
- Parry information is taken from Shoryuken Forums, more exactly, from user JinraiPVC. Thanks for this information dude
Normal Moves
Standing Normals
| Move | Motion | Damage | Stun Damage | Chains into itself | Special Cancel | Super Cancel | Juggle Value |
| Far Jab | LP | 15(3 life points) | 3 | Yes | Yes | Yes |
Frame Data
| Startup | Hit | Recovery | Blocked Advantage | Hit Advantage | Crouching Hit Advantage | Guard | Parry |
| 4 | 2 | 9 | +1 | +1 | +1 | HL | HL |
Gauge Increase
| Miss | Blocked | Hit | Parry (Gauge for opponent) |
| 0 | 1 | 2 | 4 |
Decent range and speed, but can't be confirmed on reaction and rarely gets to chain into itself. Sometimes used to force proximity guard in Genei-Jin pressure.
| Move | Motion | Damage | Stun Damage | Chains into itself | Special Cancel | Super Cancel | Juggle Value |
| Far Strong | MP | 50(8 life points) | 5 | No | Yes | No |
Frame Data
| Startup | Hit | Recovery | Blocked Advantage | Hit Advantage | Crouching Hit Advantage | Guard | Parry |
| 5 | 4 | 12 | -3 | -2 | -1 | HL | H |
Gauge Increase
| Miss | Blocked | Hit | Parry (Gauge for opponent) |
| 2 | 5 | 10 | 4 |
Very good range and startup, cancels into a Target Combo which leads to decent damage off Super activation in the corner or a knockdown and subsequent oki. Decent Anti-air due to the vertical offset on the hitbox. Target combo can whiff on some characters like crouching chun.
| Move | Motion | Damage | Stun Damage | Chains into itself | Special Cancel | Super Cancel | Juggle Value |
| Far Fierce | HP | 130(23 life points) | 15 | No | No | No |
Frame Data
| Startup | Hit | Recovery | Blocked Advantage | Hit Advantage | Crouching Hit Advantage | Guard | Parry |
| 9 | 2 | 23 | -5 | -3 | -1 | HL | H |
Gauge Increase
| Miss | Blocked | Hit | Parry (Gauge for opponent) |
| 3 | 9 | 18 | 4 |
Very good range and quick startup for a HP, often used in Genei-Jin finishers or to keep opponents in the corner from a safe distance.
| Move | Motion | Damage | Stun Damage | Chains into itself | Special Cancel | Super Cancel | Juggle Value |
| Close Jab | (Close to opponent) LP | 15(3 life points) | 3 | No | No | No |
Frame Data
| Startup | Hit | Recovery | Blocked Advantage | Hit Advantage | Crouching Hit Advantage | Guard | Parry |
| 3 | 2 | 6 | +4 | +4 | +4 | HL | HL |
Gauge Increase
| Miss | Blocked | Hit | Parry (Gauge for opponent) |
| 0 | 1 | 2 | 4 |
Very reliable Tool to attain frame advantage from Target Combo, or start a Genei-Jin combo on hit. Combos into LP Shoulder in case your meter is almost full after the TC. Without Meter it combos into HP Dash Punch on all characters and MK/HK upkicks on taller characters. Against some characters like Chun, a delayed cancel into upkicks may be necessary.
| Move | Motion | Damage | Stun Damage | Chains into itself | Special Cancel | Super Cancel | Juggle Value |
| Close Strong | (Close to opponent) MP | 60(10 life points) | 14(7+7) | No | Yes | Yes |
Frame Data
| Startup | Hit | Recovery | Blocked Advantage | Hit Advantage | Crouching Hit Advantage | Guard | Parry |
| 4 | 3 | 7 | +6 | +7 | +8 | HL | H |
Gauge Increase
| Miss | Blocked | Hit | Parry (Gauge for opponent) |
| 2 | 5 | 10 | 4 |
Good move on oki and after air-resets. Forces a high-parry and is easily confirmable with clMP -> LK -> LP Dash punch. (This is not a target combo or cancel, this move just has lots of frame advantage.)
| Move | Motion | Damage | Stun Damage | Chains into itself | Special Cancel | Super Cancel | Juggle Value |
| Close Fierce | (Close to opponent) HP | 110(40+60)(17 life points) | 14(7+7) | No | Yes | No |
Frame Data
| Startup | Hit | Recovery | Blocked Advantage | Hit Advantage | Crouching Hit Advantage | Guard | Parry |
| 6 | 3 | 13 | -2 | -1 | 0 | HL | H |
Gauge Increase
| Miss | Blocked | Hit | Parry (Gauge for opponent) |
| 3 | 8 | 17 | 8(4+4) |
First hit cancels into specials, though this is seldom used. Somewhat useful as a tool to mix up parries, especially in Genei-Jin resets.
| Move | Motion | Damage | Stun Damage | Chains into itself | Special Cancel | Super Cancel | Juggle Value |
| Short | LK | 35(6 life points) | 3 | No | Yes | Yes |
Frame Data
| Startup | Hit | Recovery | Blocked Advantage | Hit Advantage | Crouching Hit Advantage | Guard | Parry |
| 3 | 3 | 6 | +2 | +2 | +2 | HL | HL |
Gauge Increase
| Miss | Blocked | Hit | Parry (Gauge for opponent) |
| 0 | 1 | 2 | 4 |
Good range, but not confirmable and doesn't lead to any links. Extremely essential to yun's kara-grab game, as it extends his range massively. For this, input LK on frame 1 and LK+LP on frame 2.
| Move | Motion | Damage | Stun Damage | Chains into itself | Special Cancel | Super Cancel | Juggle Value |
| Forward | MK | 80(14 life points) | 9 | No | No | No |
Frame Data
| Startup | Hit | Recovery | Blocked Advantage | Hit Advantage | Crouching Hit Advantage | Guard | Parry |
| 9 | 3 | 15 | -4 | -3 | -2 | HL | H |
Gauge Increase
| Miss | Blocked | Hit | Parry (Gauge for opponent) |
| 2 | 5 | 10 | 4 |
Good poke and keepout tool, useful against grapplers.
| Move | Motion | Damage | Stun Damage | Chains into itself | Special Cancel | Super Cancel | Juggle Value |
| Roundhouse | HK | 100(17 life points) | 11 | No | No | No |
Frame Data
| Startup | Hit | Recovery | Blocked Advantage | Hit Advantage | Crouching Hit Advantage | Guard | Parry |
| 14 | 4 | 22 | -5 | Down | Down | HL | H |
Gauge Increase
| Miss | Blocked | Hit | Parry (Gauge for opponent) |
| 3 | 9 | 18 | 4 |
Mostly overshadowed by MK, has some niche uses in neutral.
| Move | Motion | Damage | Stun Damage | Chains into itself | Special Cancel | Super Cancel | Juggle Value |
| Close Forward | (Close to opponent) MK | 30(14 life points) | 9 | No | Yes | Yes |
Frame Data
| Startup | Hit | Recovery | Blocked Advantage | Hit Advantage | Crouching Hit Advantage | Guard | Parry |
| 5 | 9 | 1 | -2 | Down | Down | HL | H |
Gauge Increase
| Miss | Blocked | Hit | Parry (Gauge for opponent) |
| 2 | 5 | 10 | 4 |
Yun's best Genei-Jin and meterless combo starter, and a decent anti-air. Midscreen, it combos into HP dash punch. In the corner, it combos into f.HP -> kara-LP Dash punch against most medium-large characters. If super is available, it can be confirmed on reaction with LP-shoulder xx Genei-Jin -> lk upkicks. As a punish, it can be superjump cancelled into super, which is the lowest possible damage scaling. Activation on block is also decent, as this move is very safe on block. Against some characters such as chun and makoto, it can be immediately combo'd out of command grab, leading to air reset mixups.
Jumping Normals
| Move | Motion | Damage | Stun Damage | Chains into itself | Special Cancel | Super Cancel | Juggle Value |
| Jump Jab | (Air) LP | 40(60 if neutral jump)(7 life points) | 7 | No | No | No |
Frame Data
| Startup | Hit | Recovery | Blocked Advantage | Hit Advantage | Crouching Hit Advantage | Guard | Parry |
| 2 | Until landing | - | -4~+7 | -4~+7 | +2~+7 | H | H |
Gauge Increase
| Miss | Blocked | Hit | Parry (Gauge for opponent) |
| 0 | 1 | 2 | 4 |
Comments here
| Move | Motion | Damage | Stun Damage | Chains into itself | Special Cancel | Super Cancel | Juggle Value |
| Jump Strong | (Air) MP | 80(14 life points) | 9 | No | No | No |
Frame Data
| Startup | Hit | Recovery | Blocked Advantage | Hit Advantage | Crouching Hit Advantage | Guard | Parry |
| 3 | 6(7 if neutral jump) | - | -2/-3~+10 | -2/-3~+10 | +6~+10 | H | H |
Gauge Increase
| Miss | Blocked | Hit | Parry (Gauge for opponent) |
| 2 | 3 | 7 | 4 |
Comments here
| Move | Motion | Damage | Stun Damage | Chains into itself | Special Cancel | Super Cancel | Juggle Value |
| Jump Fierce | (Air) HP | 100(120 if neutral jump)(17 life points) | 13(15 if neutral jump) | No | No | No |
Frame Data
| Startup | Hit | Recovery | Blocked Advantage | Hit Advantage | Crouching Hit Advantage | Guard | Parry |
| 5 | 4 | - | -4~+10 | -4~+10 | +5~+10 | H | H |
Gauge Increase
| Miss | Blocked | Hit | Parry (Gauge for opponent) |
| 3 | 5 | 13 | 4 |
Comments here
| Move | Motion | Damage | Stun Damage | Chains into itself | Special Cancel | Super Cancel | Juggle Value |
| Neutral Jump Fierce | (Air) HP | 120(21 life points) | 15 | No | No | No |
Frame Data
| Startup | Hit | Recovery | Blocked Advantage | Hit Advantage | Crouching Hit Advantage | Guard | Parry |
| 8 | 5 | - | +4~+10 | +4~+10 | +9~+10 | H | H |
Gauge Increase
| Miss | Blocked | Hit | Parry (Gauge for opponent) |
| 3 | 5 | 13 | 4 |
Comments here
| Move | Motion | Damage | Stun Damage | Chains into itself | Special Cancel | Super Cancel | Juggle Value |
| Jump Short | (Air) LK | 40(7 life points) | 5 | No | No | No |
Frame Data
| Startup | Hit | Recovery | Blocked Advantage | Hit Advantage | Crouching Hit Advantage | Guard | Parry |
| 3(4 if neutral jump) | 12 | - | +1~+7 | +1~+7 | +6~+7/+7 | H | H |
Gauge Increase
| Miss | Blocked | Hit | Parry (Gauge for opponent) |
| 0 | 1 | 2 | 4 |
Comments here
| Move | Motion | Damage | Stun Damage | Chains into itself | Special Cancel | Super Cancel | Juggle Value |
| Jump Forward | (Air) MK | 70(12 life points) | 9 | No | No | No |
Frame Data
| Startup | Hit | Recovery | Blocked Advantage | Hit Advantage | Crouching Hit Advantage | Guard | Parry |
| 6 | 7 | - | -3~+10 | -3~+10 | +5~+10 | H | H |
Gauge Increase
| Miss | Blocked | Hit | Parry (Gauge for opponent) |
| 2 | 3 | 7 | 4 |
Comments here
| Move | Motion | Damage | Stun Damage | Chains into itself | Special Cancel | Super Cancel | Juggle Value |
| Jump Roundhouse | (Air) HK | 110(19 life points) | 13 | No | No | No |
Frame Data
| Startup | Hit | Recovery | Blocked Advantage | Hit Advantage | Crouching Hit Advantage | Guard | Parry |
| 5 | 5 | - | 0~+10 | 0~+10 | +5~+10 | H | H |
Gauge Increase
| Miss | Blocked | Hit | Parry (Gauge for opponent) |
| 3 | 5 | 13 | 4 |
Comments here
| Move | Motion | Damage | Stun Damage | Chains into itself | Special Cancel | Super Cancel | Juggle Value |
| Neutral Jump Roundhouse | (Air) HK | 110(19 life points) | 13 | No | No | No |
Frame Data
| Startup | Hit | Recovery | Blocked Advantage | Hit Advantage | Crouching Hit Advantage | Guard | Parry |
| 5 | 5 | - | -1~+10 | -1~+10 | +4~+10 | H | H |
Gauge Increase
| Miss | Blocked | Hit | Parry (Gauge for opponent) |
| 3 | 5 | 13 | 4 |
Comments here
| Move | Motion | Damage | Stun Damage | Chains into itself | Special Cancel | Super Cancel | Juggle Value |
| Universal Overhead | MP+MK | 40(7 life points) | 3 | No | No | No |
Frame Data
| Startup | Hit | Recovery | Blocked Advantage | Hit Advantage | Crouching Hit Advantage | Guard | Parry |
| 15 | 9 | 6 | -5~+2 | 0~+8 | +1~+9 | H | H |
Gauge Increase
| Miss | Blocked | Hit | Parry (Gauge for opponent) |
| 0 | 1 | 2 | 4 |
Comments here
Throws
| Move | Motion | Damage | Stun Damage | Throw Range | Kara-Throw | Kara-Throw Range |
| Hiza Geri | LP+LK | 160(40x6)(27 life points) | 18(3x6) | 18 | S.LK / F.MK /S.MP(Genei-Jin) | 28 / 26 / 26 |
Frame Data
| Startup | Hit | Recovery | Blocked Advantage | Hit Advantage | Crouching Hit Advantage | Guard | Parry |
| 2 | 1 | 21 | - | - | - | LP+LK | - |
Gauge Increase
| Miss | Blocked | Hit |
| 0 | 7 (for the player who blocked) | 12(6x2) |
Comments here
| Move | Motion | Damage | Stun Damage | Throw Range | Kara-Throw | Kara-Throw Range |
| Monkey Flip | B/F+LP+LK | 120(21 life points) | 9 | 18 | S.LK / F.MK /S.MP(Genei-Jin) | 28 / 26 / 26 |
Frame Data
| Startup | Hit | Recovery | Blocked Advantage | Hit Advantage | Crouching Hit Advantage | Guard | Parry |
| 2 | 1 | 21 | - | - | - | B/F+LP+LK | - |
Gauge Increase
| Miss | Blocked | Hit |
| 0 | 8 (for the player who blocked) | 8 |
Comments here
Crouching Normals
| Move | Motion | Damage | Stun Damage | Chains into itself | Special Cancel | Super Cancel | Juggle Value |
| Crouch Jab | D+LP | 20(3 life points) | 3 | Yes | Yes | Yes |
Frame Data
| Startup | Hit | Recovery | Blocked Advantage | Hit Advantage | Crouching Hit Advantage | Guard | Parry |
| 2 | 2 | 1 | +4 | +4 | +4 | HL | HL |
Gauge Increase
| Miss | Blocked | Hit | Parry (Gauge for opponent) |
| 0 | 1 | 2 | 4 |
Mostly used to feign cr.MP in neutral, which can beat some super punishes like Chun's SA2 attempting to hit your whiff.
| Move | Motion | Damage | Stun Damage | Chains into itself | Special Cancel | Super Cancel | Juggle Value |
| Crouch Strong | D+MP | 40(12 life points) | 5 | No | Yes | Yes |
Frame Data
| Startup | Hit | Recovery | Blocked Advantage | Hit Advantage | Crouching Hit Advantage | Guard | Parry |
| 3 | 2 | 1 | +5 | +6 | +7 | HL | HL |
Gauge Increase
| Miss | Blocked | Hit | Parry (Gauge for opponent) |
| 2 | 5 | 10 | 4 |
Builds meter very quickly, forcing opponents to approach. Also very plus on block, yielding similar or better combos when compared to cl.MP, and links into itself. When activating on hit, there is a 1-frame-window to hit the opponent with cr.LK or cr.LP, this is consistent when both buttons are plinked.
| Move | Motion | Damage | Stun Damage | Chains into itself | Special Cancel | Super Cancel | Juggle Value |
| Crouch Fierce | D+HP | 90(50+40)(17 life points) | 8(3+5) | No | No | No |
Frame Data
| Startup | Hit | Recovery | Blocked Advantage | Hit Advantage | Crouching Hit Advantage | Guard | Parry |
| 3・10 | 1・2 | 1 | +1 | +3 | +5 | HL | HL |
Gauge Increase
| Miss | Blocked | Hit | Parry (Gauge for opponent) |
| 3 | 8 | 17 | 8 |
Comments here
| Move | Motion | Damage | Stun Damage | Chains into itself | Special Cancel | Super Cancel | Juggle Value |
| Crouch Short | D+LK | 20(5 life points) | 3 | No | Yes | Yes |
Frame Data
| Startup | Hit | Recovery | Blocked Advantage | Hit Advantage | Crouching Hit Advantage | Guard | Parry |
| 4 | 2 | 1 | +2 | +2 | +2 | L | L |
Gauge Increase
| Miss | Blocked | Hit | Parry (Gauge for opponent) |
| 0 | 1 | 2 | 4 |
Can recovery cancel on frames 14~15 with another cr.lk, will combo despite frame data suggesting otherwise. Combos into LP dash punch.
| Move | Motion | Damage | Stun Damage | Chains into itself | Special Cancel | Super Cancel | Juggle Value |
| Crouch Forward | D+MK | 30(8 life points) | 3 | No | Yes | Yes |
Frame Data
| Startup | Hit | Recovery | Blocked Advantage | Hit Advantage | Crouching Hit Advantage | Guard | Parry |
| 7 | 3 | 12 | -1 | 0 | +1 | L | L |
Gauge Increase
| Miss | Blocked | Hit | Parry (Gauge for opponent) |
| 2 | 5 | 10 | 4 |
Standard hit-confirming tool, combos into LP/MP Dash punch with the same cancel window as Ken's cr.MK. Good activation tool on block, with same frame advantage on hit as cr.MP.
| Move | Motion | Damage | Stun Damage | Chains into itself | Special Cancel | Super Cancel | Juggle Value |
| Crouch Roundhouse | D+HK | 50(16 life points) | 3 | No | No | No |
Frame Data
| Startup | Hit | Recovery | Blocked Advantage | Hit Advantage | Crouching Hit Advantage | Guard | Parry |
| 15 | 2 | 19 | -5 | Down | Down | L | L |
Gauge Increase
| Miss | Blocked | Hit | Parry (Gauge for opponent) |
| 3 | 9 | 18 | 4 |
Very unsafe sweep, seldom used in Neutral or oki situations due to its slow startup. Used in some combo enders to yield more meter and frame advantage, due to the cr.HK -> HK target combo.
Command Normals
| Move | Motion | Damage | Stun Damage | Chains into itself | Special Cancel | Super Cancel | Juggle Value |
| Senpuu Kyaku | F+MK | 80(14 life points) | 11 | No | No | No |
Frame Data
| Startup | Hit | Recovery | Blocked Advantage | Hit Advantage | Crouching Hit Advantage | Guard | Parry |
| 19 | 6 | 18 | -1 | 0 | +1 | H | H |
Gauge Increase
| Miss | Blocked | Hit | Parry (Gauge for opponent) |
| 2 | 5 | 10 | 4 |
Comments here
| Move | Motion | Damage | Stun Damage | Chains into itself | Special Cancel | Super Cancel | Juggle Value |
| Dakai | F+HP | 140(24 life points) | 17 | No | No | No |
Frame Data
| Startup | Hit | Recovery | Blocked Advantage | Hit Advantage | Crouching Hit Advantage | Guard | Parry |
| 17 | 5 | 19 | -7 | Down | Down | H | H/H |
Gauge Increase
| Miss | Blocked | Hit | Parry (Gauge for opponent) |
| 3 | 9 | 18 | 4 |
Slow startup, but high damage and good combo potential in the corner. Central to almost every Genei-Jin ender.
| Move | Motion | Damage | Stun Damage | Chains into itself | Special Cancel | Super Cancel | Juggle Value |
| Raigeki Shuu | (Air) D+MK | 70(12 life points) | 7 | No | No | No |
Frame Data
| Startup | Hit | Recovery | Blocked Advantage | Hit Advantage | Crouching Hit Advantage | Guard | Parry |
| 6/6/8 | Landing | - | -3~+10 | -3~+10 | -3~+10 | H | H |
Gauge Increase
| Miss | Blocked | Hit | Parry (Gauge for opponent) |
| 2 | 5 | 10 | 4 |
Comments here
Target Combo
| Move | Motion | Damage | Stun Damage | Chains into itself | Special Cancel | Super Cancel | Juggle Value |
| Target Combo | Close LP -> Close LK -> Close MP | 20+20+50 | 3+3+5 | No | Yes/Yes/Yes | Yes/Yes/Yes |
Frame Data
| Startup | Hit | Recovery | Blocked Advantage | Hit Advantage | Crouching Hit Advantage | Guard | Parry |
| 4 | - | - | +3/-5 | 3 | +1 | HL/HL | H/HL/H |
Gauge Increase
| Miss | Blocked | Hit | Parry (Gauge for opponent) |
| +3/-5 | 3 | +1 | 4 |
Comments here
| Move | Motion | Damage | Stun Damage | Chains into itself | Special Cancel | Super Cancel | Juggle Value |
| Target Combo | Close MP -> Close HP -> B+HP | Close 60+50+60/Far 50+50+60 | 5+5+7 | No | Yes/Yes | Yes/Yes |
Frame Data
| Startup | Hit | Recovery | Blocked Advantage | Hit Advantage | Crouching Hit Advantage | Guard | Parry |
| 4 | - | - | +2/+4 | +4/Down | +6/Down | HL | HL/HL/H |
Gauge Increase
| Miss | Blocked | Hit | Parry (Gauge for opponent) |
| 2+? | 4+1 | 8+1 | 8(4+4) |
Comments here
| Move | Motion | Damage | Stun Damage | Chains into itself | Special Cancel | Super Cancel | Juggle Value |
| Target Combo | Crouch MP -> Crouch HP | 70/20+70 | 5/3+3 | No | Yes/No | Yes/No |
Frame Data
| Startup | Hit | Recovery | Blocked Advantage | Hit Advantage | Crouching Hit Advantage | Guard | Parry |
| 4 | - | - | 0 | +2 | +4 | LH/LH | LH/LH |
Gauge Increase
| Miss | Blocked | Hit | Parry (Gauge for opponent) |
| 2+? | 4+1 | 8+1 | 8(4+4) |
Comments here
| Move | Motion | Damage | Stun Damage | Chains into itself | Special Cancel | Super Cancel | Juggle Value |
| Target Combo | Crouch HK -> Close HK | 90+60 | 3+9 | No | Yes/Yes | Yes/Yes |
Frame Data
| Startup | Hit | Recovery | Blocked Advantage | Hit Advantage | Crouching Hit Advantage | Guard | Parry |
| 4 | - | - | -11 | Down | Down | L/H | L/H |
Gauge Increase
| Miss | Blocked | Hit | Parry (Gauge for opponent) |
| 2+? | 4+1 | 8+1 | 8(4+4) |
Comments here
| Move | Motion | Damage | Stun Damage | Chains into itself | Special Cancel | Super Cancel | Juggle Value |
| Target Combo | Jump LP -> Jump F+HP | 100+60 | 7+5 | No | Yes/Yes | Yes/Yes |
Frame Data
| Startup | Hit | Recovery | Blocked Advantage | Hit Advantage | Crouching Hit Advantage | Guard | Parry |
| 4 | - | - | -2 | 0 | +2 | HL/HL | H/H |
Gauge Increase
| Miss | Blocked | Hit | Parry (Gauge for opponent) |
| 2+? | 4+1 | 8+1 | 8(4+4) |
Comments here
Special Moves
Please note that in this section you will see mainly 3 images for the special moves, this means the image on the left its done with LP (or LK), the image on the center its done with MP (or MK), and the image on the right its done with HP (or HK). Also its the same "rule" as the sections above, its the 1rst frame it hits for every of the moves.
| Move | Motion | Damage | Blocked Damage | Stun Damage | Super Cancel | Juggle Value |
| Zesshou Hohou (Jab) | QCF+LP | 100(17 life points) | 13 | 9 | No | |
| Zesshou Hohou (Strong) | QCF+MP | 110(19 life points) | 14 | 9 | No | |
| Zesshou Hohou (Fierce) | QCF+HP | 120(21 life points) | 15 | 9 | No |
Frame Data
| Move | Startup | Hit | Recovery | Blocked Advantage | Hit Advantage | Crouching Hit Advantage | Guard | Parry |
| Zesshou Hohou (Jab) | 7 | 5 | 22 | -11 | Down | Down | HL | HL |
| Zesshou Hohou (Strong) | 10 | 11 | 16 | -11 | Down | Down | HL | HL |
| Zesshou Hohou (Fierce) | 13 | 15 | 12 | -11 | Down | Down | HL | HL |
Gauge Increase
| Move | Miss | Blocked | Hit | Parry (Gauge for opponent) |
| Zesshou Hohou (Jab) | - | - | - | 8(4+4) |
| Zesshou Hohou (Strong) | - | - | - | 8(4+4) |
| Zesshou Hohou (Fierce) | - | - | - | 8(4+4) |
LP versions combo from all cancellable normals, MP versions combo from all Medium and Heavy cancels. HP version only combos from target combo or launchers.
| Move | Motion | Damage | Blocked Damage | Stun Damage | Super Cancel | Juggle Value |
| Tetsu Zankou (Jab) | F, D, DF+LP | 100(19 life points) | 7 | 9 | Yes | |
| Tetsu Zankou (Strong) | F, D, DF+MP | 125(22 life points) | 8 | 9 | Yes | |
| Tetsu Zankou (Fierce) | F, D, DF+HP | 140(24 life points) | 9 | 9 | No |
Frame Data
| Move | Startup | Hit | Recovery | Blocked Advantage | Hit Advantage | Crouching Hit Advantage | Guard | Parry |
| Tetsu Zankou (Jab) | 7 | 6 | 13 | -1 | +1 | +3 | HLx2 | HLx2 |
| Tetsu Zankou (Strong) | 8 | 6 | 15 | -3 | Down | Down | HLx2 | HLx2 |
| Tetsu Zankou (Fierce) | 10 | 6 | 17 | -5 | Down | Down | HLx2 | HLx2 |
Gauge Increase
| Move | Miss | Blocked | Hit | Parry (Gauge for opponent) |
| Tetsu Zankou (Jab) | 3 | 7 | 12 | 4 |
| Tetsu Zankou (Strong) | 3 | 7 | 12 | 4 |
| Tetsu Zankou (Fierce) | 3 | 7 | 12 | 4 |
Goes under fireballs and cancels into super. Very risky to activate from, as all shoulders are blue parries, and good players will always hit the red parry on Target combo -> LP shoulder. MP shoulder combos into HP Dash punch and offers good punish damage. LP and MP shoulder are also used in most enders.
| Move | Motion | Damage | Blocked Damage | Stun Damage | Super Cancel | Juggle Value |
| Nishou Kyaku (Short) | F, D, DF+LK | 130(80+50)(22 life points) | 33(20+13) | 12(7+5) | No/No | |
| Nishou Kyaku (Forward) | F, D, DF+MK | 140(80+60)(24 life points) | 35(20+15) | 12(7+5) | No/No | |
| Nishou Kyaku (Roundhouse) | F, D, DF+HK | 150(80+70)(25 life points) | 38(20+18) | 12(7+5) | No/No |
Frame Data
| Move | Startup | Hit | Recovery | Blocked Advantage | Hit Advantage | Crouching Hit Advantage | Guard | Parry |
| Nishou Kyaku (Short) | 4・13 | 2・4 | 25 | -25 | Down | Down | HL/HL | H/H |
| Nishou Kyaku (Forward) | 6・15 | 2・4 | 26 | -26 | Down | Down | HL/HL | H/H |
| Nishou Kyaku (Roundhouse) | 8・17 | 2・4 | 28 | -28 | Down | Down | HL/HL | H/H |
Gauge Increase
| Move | Miss | Blocked | Hit | Parry (Gauge for opponent) |
| Nishou Kyaku (Short) | 3 | 10(9+1) | 16(15+1) | 8(4+4) |
| Nishou Kyaku (Forward) | 3 | 10(9+1) | 16(15+1) | 8(4+4) |
| Nishou Kyaku (Roundhouse) | 3 | 10(9+1) | 16(15+1) | 8(4+4) |
Deceivingly bad at anti-airing, useful in combos out of command grab. HK version combos from all Mediums, LK/MK combo from all cancels. Whiffs against all crouching and many standing characters when used from Target combo.
| Move | Motion | Damage | Blocked Damage | Stun Damage | Super Cancel | Juggle Value |
| Kobokushi | QCB+P | 180(32 life points) | 23(18) | 23(17) | Yes |
Frame Data
| Move | Startup | Hit | Recovery | Blocked Advantage | Hit Advantage | Crouching Hit Advantage | Guard | Parry |
| Kobokushi | 24 | 10 | 4 | 0 | Down | Down | HL | H |
Gauge Increase
| Move | Miss | Blocked | Hit | Parry (Gauge for opponent) |
| Kobokushi | 3 | 7 | 15 | 4 |
Comments here
| Move | Motion | Damage | Blocked Damage | Stun Damage | Throw Range | Super Cancel | Juggle Value |
| Zenpou-Tenshin | HCB+K | - | - | - | 31 | No |
Frame Data
| Move | Startup | Hit | Recovery | Blocked Advantage | Hit Advantage | Crouching Hit Advantage | Guard | Parry |
| Zenpou-Tenshin | 5 | 2 | 26 | - | +16 | +16 | Impossible | Impossible |
Gauge Increase
| Move | Miss | Blocked | Hit | Parry (Gauge for opponent) |
| Zenpou-Tenshin | 0 | - | 0 | - |
Yields good damage, meter and a knockdown or reset against all characters.
EX Moves
| Move | Motion | Gauge Needed | Damage | Blocked Damage | Stun Damage | Super Cancel | Juggle Value |
| Zesshou Hohou (EX) | QCF+PP | 40 | 160(60+100)(27 life points) | 21(8+13) | 12(7+5) | No |
Frame Data
| Move | Startup | Hit | Recovery | Blocked Advantage | Hit Advantage | Crouching Hit Advantage | Guard | Parry |
| Zesshou Hohou (EX) | 13・22 | 9・6 | 12 | -2 | Down | Down | HLx2 | Hx2 |
Gauge Increase
| Move | Miss | Blocked | Hit | Parry (Gauge for opponent) |
| Zesshou Hohou (EX) | - | - | - | 8(4+4) |
Somewhat safe on block, but like all EX moves, very counter productive to yun's general gameplan. Can sometimes be used for chip-outs due to the startup and multi-hits.
| Move | Motion | Gauge Needed | Damage | Blocked Damage | Stun Damage | Super Cancel | Juggle Value |
| Nishou Kyaku (EX) | F, D, DF+KK | 40 | 170(80+90)(29 life points) | 43(20+23) | 14(9+5) | No |
Frame Data
| Move | Startup | Hit | Recovery | Blocked Advantage | Hit Advantage | Crouching Hit Advantage | Guard | Parry |
| Nishou Kyaku (EX) | 4・12 | 2・4 | 29(26) | -28 | Down | Down | HLx2 | HLx2 |
Gauge Increase
| Move | Miss | Blocked | Hit | Parry (Gauge for opponent) |
| Nishou Kyaku (EX) | 3 | 10 | 16 | 8(4+4) |
Can be used to finish rounds with a cancel or command grab as combo starters, yielding more damage due to setting up for a dash punch or HK upkicks.
| Move | Motion | Gauge Needed | Damage | Blocked Damage | Stun Damage | Super Cancel | Juggle Value |
| Tetsu Zankou (EX) | F, D, DF+PP | 40 | 160(80+60)(27 life points) | 10(5+5) | 14(9+5) | Yes/Yes |
Frame Data
| Move | Startup | Hit | Recovery | Blocked Advantage | Hit Advantage | Crouching Hit Advantage | Guard | Parry |
| Tetsu Zankou (EX) | 10・17 | 7・6 | 19 | -7 | Down | Down | HLx2 | Hx2 |
Gauge Increase
| Move | Miss | Blocked | Hit | Parry (Gauge for opponent) |
| Tetsu Zankou (EX) | - | - | - | 8(4+4) |
Don't use this, unless it'll win you the round immediately.
Super Arts
| Super Art | Super Art Name | Super Art Stock | Motion | Damage | Blocked Damage | Stun Damage | Damage/Gauge |
| I | You Hou | 1 bar (120) | QCF QCF+P | 410*(64 life points) | 103** | 18*** | 3,41 |
| * 60+120+230 Damage is when all hits connect. |
| ** 15+30+58 Damage is when all hits connect. |
| *** 7+9+9 is when all hits connect. |
Frame Data
| Startup | Hit | Recovery | Blocked Advantage | Hit Advantage | Crouching Hit Advantage | Guard | Parry |
| 1+10+45 | 9+2+2 | 36 | -27 | Down | Down | Hx3 | Hx3 |
Comments here
| Super Art | Super Art Name | Super Art Stock | Motion | Damage | Blocked Damage | Stun Damage | Damage/Gauge |
| II | Sourai Rengeki | 3 bar (88 each bar) | QCF QCF+P | 320*(54 life points) | 48** | 8*** | 3,63 (x3) |
| * 70+70+50+50+40+100 Damage is when all hits connect. |
| ** 9+9+6+6+5+13 Damage is when all hits connect. |
| *** 3+0+5+0+3+3 is when all hits connect. |
Frame Data
| Startup | Hit | Recovery | Blocked Advantage | Hit Advantage | Crouching Hit Advantage | Guard | Parry |
| 4・20・34・47・66・78 | 3・2・3・3・4・2 | 33 | -27 | Down | Down | HLx3~5 | HLx3~5 |
Comments here
| Super Art | Super Art Name | Super Art Stock | Motion | Damage | Blocked Damage | Stun Damage | Damage/Gauge |
| III | Genei Jin | 1 bar (72 bar) | QCF QCF+P | 0 | 0 | 0 | - |
Frame Data
| Startup | Hit | Recovery | Blocked Advantage | Hit Advantage | Crouching Hit Advantage | Guard | Parry |
| 10 | 0 | 0 | 0 | 0 | 0 | 0 | 0 |
270 frames lenght (like 4.5 seconds)
Gen Ei Jin Frame Data
Standing Normals
| Move | Motion | Damage | Stun Damage | Chains into itself | Special Cancel | Super Cancel |
| Far Jab | LP | 20(3 life points) | 3 | Yes | Yes | Yes |
Frame Data
| Startup | Hit | Recovery | Blocked Advantage | Hit Advantage | Crouching Hit Advantage | Guard | Parry |
| 3 | 1 | 2 | +9 | +9 | +9 | HL | HL |
Gauge Increase
| Miss | Blocked | Hit | Parry (Gauge for opponent) |
| 0 | 1 | 2 | 4 |
Comments here
| Move | Motion | Damage | Stun Damage | Chains into itself | Special Cancel | Super Cancel |
| Far Strong | MP | 40(7 life points) | 5 | No | Yes | No |
Frame Data
| Startup | Hit | Recovery | Blocked Advantage | Hit Advantage | Crouching Hit Advantage | Guard | Parry |
| 3 | 3 | 2 | +12 | +13 | +14 | HL | H |
Gauge Increase
| Miss | Blocked | Hit | Parry (Gauge for opponent) |
| 2 | 5 | 10 | 4 |
Comments here
| Move | Motion | Damage | Stun Damage | Chains into itself | Special Cancel | Super Cancel |
| Far Fierce | HP | 60(10 life points) | 15 | No | No | No |
Frame Data
| Startup | Hit | Recovery | Blocked Advantage | Hit Advantage | Crouching Hit Advantage | Guard | Parry |
| 6 | 2 | 4 | +14 | +15 | +16 | HL | H |
Gauge Increase
| Miss | Blocked | Hit | Parry (Gauge for opponent) |
| 3 | 9 | 18 | 4 |
Links into itself by walk-cancelling it and kara-cancelling st.MP into itself in Genei-Jin, yielding more damage than standard combos on crouching characters, and even when standing if 10+ reps are done. Very difficult vs some characters like makoto.
| Move | Motion | Damage | Stun Damage | Chains into itself | Special Cancel | Super Cancel |
| Close Jab | (Close to opponent) LP(3 life points) | 20 | 3 | No | No | No |
Frame Data
| Startup | Hit | Recovery | Blocked Advantage | Hit Advantage | Crouching Hit Advantage | Guard | Parry |
| 2 | 1 | 2 | +9 | +9 | +9 | HL | HL |
Gauge Increase
| Miss | Blocked | Hit | Parry (Gauge for opponent) |
| 0 | 1 | 2 | 4 |
Comments here
| Move | Motion | Damage | Stun Damage | Chains into itself | Special Cancel | Super Cancel |
| Close Strong | (Close to opponent) MP | 40(7 life points) | 14(7+7) | No | Yes | Yes |
Frame Data
| Startup | Hit | Recovery | Blocked Advantage | Hit Advantage | Crouching Hit Advantage | Guard | Parry |
| 3 | 2 | 4 | +4 | +4 | +4 | HL | H |
Gauge Increase
| Miss | Blocked | Hit | Parry (Gauge for opponent) |
| 2 | 5 | 10 | 4 |
Comments here
| Move | Motion | Damage | Stun Damage | Chains into itself | Special Cancel | Super Cancel |
| Close Fierce | (Close to opponent) HP | 80(40+40)(13 life points) | 14(7+7) | No | Yes | No |
Frame Data
| Startup | Hit | Recovery | Blocked Advantage | Hit Advantage | Crouching Hit Advantage | Guard | Parry |
| 6・8 | 2・2 | 1 | -2 | -1 | 0 | HL | H |
Gauge Increase
| Miss | Blocked | Hit | Parry (Gauge for opponent) |
| 3 | 8 | 17 | 8(4+4) |
Comments here
| Move | Motion | Damage | Stun Damage | Chains into itself | Special Cancel | Super Cancel |
| Short | LK | 30(5 life points) | 3 | No | Yes | Yes |
Frame Data
| Startup | Hit | Recovery | Blocked Advantage | Hit Advantage | Crouching Hit Advantage | Guard | Parry |
| 3 | 2 | 1 | +9 | +9 | +9 | HL | HL |
Gauge Increase
| Miss | Blocked | Hit | Parry (Gauge for opponent) |
| 0 | 1 | 2 | 4 |
Comments here
| Move | Motion | Damage | Stun Damage | Chains into itself | Special Cancel | Super Cancel |
| Forward | MK | 40(7 life points) | 9 | No | No | No |
Frame Data
| Startup | Hit | Recovery | Blocked Advantage | Hit Advantage | Crouching Hit Advantage | Guard | Parry |
| 6 | 2 | 7 | +5 | +6 | +7 | HL | H |
Gauge Increase
| Miss | Blocked | Hit | Parry (Gauge for opponent) |
| 2 | 5 | 10 | 4 |
Comments here
| Move | Motion | Damage | Stun Damage | Chains into itself | Special Cancel | Super Cancel |
| Roundhouse | HK | 50(8 life points) | 11 | No | No | No |
Frame Data
| Startup | Hit | Recovery | Blocked Advantage | Hit Advantage | Crouching Hit Advantage | Guard | Parry |
| 8 | 6 | 5 | +7 | Down | Down | HL | H |
Gauge Increase
| Miss | Blocked | Hit | Parry (Gauge for opponent) |
| 3 | 9 | 18 | 4 |
Comments here
| Move | Motion | Damage | Stun Damage | Chains into itself | Special Cancel | Super Cancel |
| Close Forward | (Close to opponent) MK | 30(5 life points) | 9 | No | Yes | Yes |
Frame Data
| Startup | Hit | Recovery | Blocked Advantage | Hit Advantage | Crouching Hit Advantage | Guard | Parry |
| 5 | 9 | 1 | -2 | Down | Down | HL | H |
Gauge Increase
| Miss | Blocked | Hit | Parry (Gauge for opponent) |
| 2 | 5 | 10 | 4 |
Great setup for meter-building if your meter is just about to run out, combo-ing into every single move including non-GJ palm.
Jumping Normals
| Move | Motion | Damage | Stun Damage | Chains into itself | Special Cancel | Super Cancel |
| Jump Jab | (Air) LP | 40(60 if neutral jump)(7 life points) | 7 | No | No | No |
Frame Data
| Startup | Hit | Recovery | Blocked Advantage | Hit Advantage | Crouching Hit Advantage | Guard | Parry |
| 2 | Until landing | - | -4~+7 | -4~+7 | +2~+7 | H | H |
Gauge Increase
| Miss | Blocked | Hit | Parry (Gauge for opponent) |
| 0 | 1 | 2 | 4 |
Comments here
| Move | Motion | Damage | Stun Damage | Chains into itself | Special Cancel | Super Cancel |
| Jump Strong | (Air) MP | 80(14 life points) | 9 | No | No | No |
Frame Data
| Startup | Hit | Recovery | Blocked Advantage | Hit Advantage | Crouching Hit Advantage | Guard | Parry |
| 3 | 6(7 if neutral jump) | - | -2/-3~+10 | -2/-3~+10 | +6~+10 | H | H |
Gauge Increase
| Miss | Blocked | Hit | Parry (Gauge for opponent) |
| 2 | 3 | 7 | 4 |
Comments here
| Move | Motion | Damage | Stun Damage | Chains into itself | Special Cancel | Super Cancel |
| Jump Fierce | (Air) HP | 100(120 if neutral jump)(17 life points) | 13(15 if neutral jump) | No | No | No |
Frame Data
| Startup | Hit | Recovery | Blocked Advantage | Hit Advantage | Crouching Hit Advantage | Guard | Parry |
| 5 | 4 | - | -4~+10 | -4~+10 | +5~+10 | H | H |
Gauge Increase
| Miss | Blocked | Hit | Parry (Gauge for opponent) |
| 3 | 5 | 13 | 4 |
Comments here
| Move | Motion | Damage | Stun Damage | Chains into itself | Special Cancel | Super Cancel |
| Neutral Jump Fierce | (Air) HP | 120(21 life points) | 15 | No | No | No |
Frame Data
| Startup | Hit | Recovery | Blocked Advantage | Hit Advantage | Crouching Hit Advantage | Guard | Parry |
| 8 | 5 | - | +4~+10 | +4~+10 | +9~+10 | H | H |
Gauge Increase
| Miss | Blocked | Hit | Parry (Gauge for opponent) |
| 3 | 5 | 13 | 4 |
Comments here
| Move | Motion | Damage | Stun Damage | Chains into itself | Special Cancel | Super Cancel |
| Jump Short | (Air) LK | 40(7 life points) | 5 | No | No | No |
Frame Data
| Startup | Hit | Recovery | Blocked Advantage | Hit Advantage | Crouching Hit Advantage | Guard | Parry |
| 3(4 if neutral jump) | 12 | - | +1~+7 | +1~+7 | +6~+7/+7 | H | H |
Gauge Increase
| Miss | Blocked | Hit | Parry (Gauge for opponent) |
| 0 | 1 | 2 | 4 |
Comments here
| Move | Motion | Damage | Stun Damage | Chains into itself | Special Cancel | Super Cancel |
| Jump Forward | (Air) MK | 70 (12 life points) | 9 | No | No | No |
Frame Data
| Startup | Hit | Recovery | Blocked Advantage | Hit Advantage | Crouching Hit Advantage | Guard | Parry |
| 6 | 7 | - | -3~+10 | -3~+10 | +5~+10 | H | H |
Gauge Increase
| Miss | Blocked | Hit | Parry (Gauge for opponent) |
| 2 | 3 | 7 | 4 |
Comments here
| Move | Motion | Damage | Stun Damage | Chains into itself | Special Cancel | Super Cancel |
| Jump Forward | (Air) MK | 70(12 life points) | 9 | No | No | No |
Frame Data
| Startup | Hit | Recovery | Blocked Advantage | Hit Advantage | Crouching Hit Advantage | Guard | Parry |
| 6 | 7 | - | -3~+10 | -3~+10 | +5~+10 | H | H |
Gauge Increase
| Miss | Blocked | Hit | Parry (Gauge for opponent) |
| 2 | 3 | 7 | 4 |
Comments here
| Move | Motion | Damage | Stun Damage | Chains into itself | Special Cancel | Super Cancel |
| Jump Roundhouse | (Air) HK | 110(16 life points) | 13 | No | No | No |
Frame Data
| Startup | Hit | Recovery | Blocked Advantage | Hit Advantage | Crouching Hit Advantage | Guard | Parry |
| 5 | 5 | - | 0~+10 | 0~+10 | +5~+10 | H | H |
Gauge Increase
| Miss | Blocked | Hit | Parry (Gauge for opponent) |
| 3 | 5 | 13 | 4 |
Comments here
| Move | Motion | Damage | Stun Damage | Chains into itself | Special Cancel | Super Cancel |
| Neutral Jump Roundhouse | (Air) HK | 110(16 life points) | 13 | No | No | No |
Frame Data
| Startup | Hit | Recovery | Blocked Advantage | Hit Advantage | Crouching Hit Advantage | Guard | Parry |
| 5 | 5 | - | -1~+10 | -1~+10 | +4~+10 | H | H |
Gauge Increase
| Miss | Blocked | Hit | Parry (Gauge for opponent) |
| 3 | 5 | 13 | 4 |
Comments here
| Move | Motion | Damage | Stun Damage | Chains into itself | Special Cancel | Super Cancel |
| Universal Overhead | MP+MK | 40(7 life points) | 3 | No | No | No |
Frame Data
| Startup | Hit | Recovery | Blocked Advantage | Hit Advantage | Crouching Hit Advantage | Guard | Parry |
| 13 | 9 | 8 | -5~+2 | 0~+8 | +1~+9 | H | H |
Gauge Increase
| Miss | Blocked | Hit | Parry (Gauge for opponent) |
| 0 | 1 | 2 | 4 |
Comments here
Throws
| Move | Motion | Damage | Stun Damage | Throw Range | Kara-Throw | Kara-Throw Range |
| Hiza Geri | LP+LK | 160(40x6)(35 life points) | 18(3x6) | 18 | S.LK / F.MK /S.MP(Genei-Jin) | 28 / 26 / 26 |
Frame Data
| Startup | Hit | Recovery | Blocked Advantage | Hit Advantage | Crouching Hit Advantage | Guard | Parry |
| 2 | 1 | 21 | - | - | - | LP+LK | - |
Gauge Increase
| Miss | Blocked | Hit |
| 0 | 7 (for the player who blocked) | 12(6x2) |
Comments here
| Move | Motion | Damage | Stun Damage | Throw Range | Kara-Throw | Kara-Throw Range |
| Monkey Flip | B/F+LP+LK | 120(21 life points) | 9 | 18 | S.LK / F.MK /S.MP(Genei-Jin) | 28 / 26 / 26 |
Frame Data
| Startup | Hit | Recovery | Blocked Advantage | Hit Advantage | Crouching Hit Advantage | Guard | Parry |
| 2 | 1 | 21 | - | - | - | B/F+LP+LK | - |
Gauge Increase
| Miss | Blocked | Hit |
| 0 | 8 (for the player who blocked) | 8 |
Comments here
Crouching Normals
| Move | Motion | Damage | Stun Damage | Chains into itself | Special Cancel | Super Cancel |
| Crouch Jab | D+LP | 15(3 life points) | 3 | Yes | Yes | Yes |
Frame Data
| Startup | Hit | Recovery | Blocked Advantage | Hit Advantage | Crouching Hit Advantage | Guard | Parry |
| 2 | 2 | 1 | +12 | +14 | +14 | HL | HL |
Gauge Increase
| Miss | Blocked | Hit | Parry (Gauge for opponent) |
| - | - | - | 4 |
Comments here
| Move | Motion | Damage | Stun Damage | Chains into itself | Special Cancel | Super Cancel |
| Crouch Strong | D+MP | 40(7 life points) | 5 | No | Yes | Yes |
Frame Data
| Startup | Hit | Recovery | Blocked Advantage | Hit Advantage | Crouching Hit Advantage | Guard | Parry |
| 3 | 2 | 1 | +11 | +12 | +13 | HL | HL |
Gauge Increase
| Miss | Blocked | Hit | Parry (Gauge for opponent) |
| - | - | - | 4 |
Comments here
| Move | Motion | Damage | Stun Damage | Chains into itself | Special Cancel | Super Cancel |
| Crouch Fierce | D+HP | 90(50+40)(14 life points) | 8(3+5) | No | No | No |
Frame Data
| Startup | Hit | Recovery | Blocked Advantage | Hit Advantage | Crouching Hit Advantage | Guard | Parry |
| 3・10 | 1・2 | 1 | +12 | +13 | +14 | HL | HL |
Gauge Increase
| Miss | Blocked | Hit | Parry (Gauge for opponent) |
| - | - | - | 4・4 |
Comments here
| Move | Motion | Damage | Stun Damage | Chains into itself | Special Cancel | Super Cancel |
| Crouch Short | D+LK | 30(3 life points) | 3 | Yes | Yes | Yes |
Frame Data
| Startup | Hit | Recovery | Blocked Advantage | Hit Advantage | Crouching Hit Advantage | Guard | Parry |
| 2 | 2 | 1 | +12 | +13 | +14 | L | L |
Gauge Increase
| Miss | Blocked | Hit | Parry (Gauge for opponent) |
| - | - | - | 4 |
Comments here
| Move | Motion | Damage | Stun Damage | Chains into itself | Special Cancel | Super Cancel |
| Crouch Forward | D+MK | 50(5 life points) | 3 | No | Yes | Yes |
Frame Data
| Startup | Hit | Recovery | Blocked Advantage | Hit Advantage | Crouching Hit Advantage | Guard | Parry |
| 3 | 2 | 4 | +8 | +8 | +9 | L | L |
Gauge Increase
| Miss | Blocked | Hit | Parry (Gauge for opponent) |
| - | - | - | 4 |
Comments here
| Move | Motion | Damage | Stun Damage | Chains into itself | Special Cancel | Super Cancel |
| Crouch Roundhouse | D+HK | 90(8 life points) | 3 | No | No | No |
Frame Data
| Startup | Hit | Recovery | Blocked Advantage | Hit Advantage | Crouching Hit Advantage | Guard | Parry |
| 8 | 2 | 9 | +5 | Down | Down | L | L |
Gauge Increase
| Miss | Blocked | Hit | Parry (Gauge for opponent) |
| - | - | - | 4 |
Comments here
Command Normals
| Move | Motion | Damage | Stun Damage | Chains into itself | Special Cancel | Super Cancel |
| Senpuu Kyaku | F+MK | 80(14 life points) | 11 | No | No | No |
Frame Data
| Startup | Hit | Recovery | Blocked Advantage | Hit Advantage | Crouching Hit Advantage | Guard | Parry |
| 13 | 9 | 8 | -4 | -3 | -2 | H | H |
Gauge Increase
| Miss | Blocked | Hit | Parry (Gauge for opponent) |
| 2 | 5 | 10 | 4 |
Comments here
| Move | Motion | Damage | Stun Damage | Chains into itself | Special Cancel | Super Cancel |
| Dakai | F+HP | 60(10 life points) | 17 | No | No | No |
Frame Data
| Startup | Hit | Recovery | Blocked Advantage | Hit Advantage | Crouching Hit Advantage | Guard | Parry |
| 9 | 3 | 8 | +6 | Down | Down | H | H/H |
Gauge Increase
| Miss | Blocked | Hit | Parry (Gauge for opponent) |
| 3 | 9 | 18 | 4 |
Comments here
| Move | Motion | Damage | Stun Damage | Chains into itself | Special Cancel | Super Cancel |
| Raigeki Shuu | (Air) D+MK | 70(10 life points) | 7 | No | No | No |
Frame Data
| Startup | Hit | Recovery | Blocked Advantage | Hit Advantage | Crouching Hit Advantage | Guard | Parry |
| 6 | Landing | - | -3~+10 | -3~+10 | -3~+10 | H | H |
Gauge Increase
| Miss | Blocked | Hit | Parry (Gauge for opponent) |
| 2 | 5 | 10 | 4 |
Comments here
Target Combo
| Move | Motion | Damage | Stun Damage | Chains into itself | Special Cancel | Super Cancel |
| Target Combo | Close LP -> Close LK -> Close MP | 20+20+50 | 3+3+5 | No | Yes/Yes/Yes | Yes/Yes/Yes |
Frame Data
| Startup | Hit | Recovery | Blocked Advantage | Hit Advantage | Crouching Hit Advantage | Guard | Parry |
| 4 | - | - | +3/-5 | 3 | +1 | HL/HL | H/HL/H |
Gauge Increase
| Miss | Blocked | Hit | Parry (Gauge for opponent) |
| +3/-5 | 3 | +1 | 4 |
Comments here
| Move | Motion | Damage | Stun Damage | Chains into itself | Special Cancel | Super Cancel |
| Target Combo | Close MP -> Close HP -> B+HP | Close 60+50+60/Far 50+50+60 | 5+5+7 | No | Yes/Yes | Yes/Yes |
Frame Data
| Startup | Hit | Recovery | Blocked Advantage | Hit Advantage | Crouching Hit Advantage | Guard | Parry |
| 4 | - | - | +2/+4 | +4/Down | +6/Down | HL | HL/HL/H |
Gauge Increase
| Miss | Blocked | Hit | Parry (Gauge for opponent) |
| 2+? | 4+1 | 8+1 | 8(4+4) |
Comments here
| Move | Motion | Damage | Stun Damage | Chains into itself | Special Cancel | Super Cancel |
| Target Combo | Crouch MP -> Crouch MP | 70/20+70 | 5/3+3 | No | Yes/No | Yes/No |
Frame Data
| Startup | Hit | Recovery | Blocked Advantage | Hit Advantage | Crouching Hit Advantage | Guard | Parry |
| 4 | - | - | 0 | +2 | Down | LH/LH | LH/KH |
Gauge Increase
| Miss | Blocked | Hit | Parry (Gauge for opponent) |
| 2+? | 4+1 | 8+1 | 8(4+4) |
Comments here
| Move | Motion | Damage | Stun Damage | Chains into itself | Special Cancel | Super Cancel |
| Target Combo | Crouch HK -> Close HK | 90+60 | 3+9 | No | Yes/Yes | Yes/Yes |
Frame Data
| Startup | Hit | Recovery | Blocked Advantage | Hit Advantage | Crouching Hit Advantage | Guard | Parry |
| 4 | - | - | -11 | Down | Down | L/H | L/H |
Gauge Increase
| Miss | Blocked | Hit | Parry (Gauge for opponent) |
| 2+? | 4+1 | 8+1 | 8(4+4) |
Comments here
| Move | Motion | Damage | Stun Damage | Chains into itself | Special Cancel | Super Cancel |
| Target Combo | Jump LP -> Jump F+HP | 100+60 | 7+5 | No | Yes/Yes | Yes/Yes |
Frame Data
| Startup | Hit | Recovery | Blocked Advantage | Hit Advantage | Crouching Hit Advantage | Guard | Parry |
| 4 | - | - | -2 | 0 | +2 | HL/HL | H/H |
Gauge Increase
| Miss | Blocked | Hit | Parry (Gauge for opponent) |
| 2+? | 4+1 | 8+1 | 8(4+4) |
Comments here
Special Moves
Please note that in this section you will see mainly 3 images for the special moves, this means the image on the left its done with LP (or LK), the image on the center its done with MP (or MK), and the image on the right its done with HP (or HK). Also its the same "rule" as the sections above, its the 1rst frame it hits for every of the moves.
| Move | Motion | Damage | Blocked Damage | Stun Damage | Super Cancel |
| Zesshou Hohou (Jab) | QCF+LP | 100(16 life points) | 13 | 9(5) | No |
| Zesshou Hohou (Strong) | QCF+MP | 110(17 life points) | 14 | 9(5) | No |
| Zesshou Hohou (Fierce) | QCF+HP | 120(18 life points) | 15 | 9(5) | No |
Frame Data
| Move | Startup | Hit | Recovery | Blocked Advantage | Hit Advantage | Crouching Hit Advantage | Guard | Parry |
| Zesshou Hohou (Jab) | 7 | 5 | 22 | -11 | Down | Down | HL | HL |
| Zesshou Hohou (Strong) | 10 | 11 | 16 | -11 | Down | Down | HL | HL |
| Zesshou Hohou (Fierce) | 13 | 15 | 12 | -11 | Down | Down | HL | HL |
Gauge Increase
| Move | Miss | Blocked | Hit | Parry (Gauge for opponent) |
| Zesshou Hohou (Jab) | 3 | 11 | 17 | 4 |
| Zesshou Hohou (Strong) | 3 | 11 | 17 | 4 |
| Zesshou Hohou (Fierce) | 3 | 11 | 17 | 4 |
Comments here
| Move | Motion | Damage | Blocked Damage | Stun Damage | Super Cancel |
| Tetsu Zankou (Jab) | F, D, DF+LP | 110(13 life points) | 7 | 9 | Yes |
| Tetsu Zankou (Strong) | F, D, DF+MP | 125(17 life points) | 8 | 9 | Yes/Yes |
| Tetsu Zankou (Fierce) | F, D, DF+HP | 140(17 life points) | 9 | 9 | Yes/Yes |
Frame Data
| Move | Startup | Hit | Recovery | Blocked Advantage | Hit Advantage | Crouching Hit Advantage | Guard | Parry |
| Tetsu Zankou (Jab) | 14 | 6 | 13 | -1 | +1 | +3 | HL | HL |
| Tetsu Zankou (Strong) | 18 | 6 | 15 | -3 | Down | Down | HL/HL | HL/HL |
| Tetsu Zankou (Fierce) | 22 | 6 | 17 | -5 | Down | Down | HL/HL/HL | HL/HL/HL |
Gauge Increase
| Move | Miss | Blocked | Hit | Parry (Gauge for opponent) |
| Tetsu Zankou (Jab) | 3 | 7 | 12 | 4 |
| Tetsu Zankou (Strong) | 3 | 7 | 12 | 4 |
| Tetsu Zankou (Fierce) | 3 | 7 | 12 | 4 |
Comments here
| Move | Motion | Damage | Blocked Damage | Stun Damage | Super Cancel |
| Nishou Kyaku (Short) | F, D, DF+LK | 130(80+50)(13 life points) | 33(20+13) | 12(7+5) | No/No |
| Nishou Kyaku (Forward) | F, D, DF+MK | 140(80+60)(13 life points) | 35(20+15) | 12(7+5) | No/No |
| Nishou Kyaku (Roundhouse) | F, D, DF+HK | 150(80+70)(13 life points) | 38(20+18) | 12(7+5) | No/No |
Frame Data
| Move | Startup | Hit | Recovery | Blocked Advantage | Hit Advantage | Crouching Hit Advantage | Guard | Parry |
| Nishou Kyaku (Short) | 4・13 | 2・4 | 25(22) | -25 | Down | Down | HL/HL | H/H |
| Nishou Kyaku (Forward) | 6・15 | 2・4 | 26(23) | -26 | Down | Down | HL/HL | H/H |
| Nishou Kyaku (Roundhouse) | 8・17 | 2・4 | 28(25) | -28 | Down | Down | HL/HL | H/H |
Gauge Increase
| Move | Miss | Blocked | Hit | Parry (Gauge for opponent) |
| Nishou Kyaku (Short) | 3 | 10(9+1) | 16(15+1) | 8(4+4) |
| Nishou Kyaku (Forward) | 3 | 10(9+1) | 16(15+1) | 8(4+4) |
| Nishou Kyaku (Roundhouse) | 3 | 10(9+1) | 16(15+1) | 8(4+4) |
Comments here
| Move | Motion | Damage | Blocked Damage | Stun Damage | Super Cancel |
| Kobokushi | QCB+P | 180(100)(21 life points) | 23(18) | 23(17) | Yes |
Frame Data
| Move | Startup | Hit | Recovery | Blocked Advantage | Hit Advantage | Crouching Hit Advantage | Guard | Parry |
| Kobokushi | 24 | 10 | 4 | 0 | Down | Down | HL | H |
Gauge Increase
| Move | Miss | Blocked | Hit | Parry (Gauge for opponent) |
| Kobokushi | 3 | 7 | 15 | 4 |
Comments here
| Move | Motion | Damage | Blocked Damage | Stun Damage | Throw Range | Super Cancel |
| Zenpou-Tenshin | HCB+K | - | - | - | 31 | No |
Frame Data
| Move | Startup | Hit | Recovery | Blocked Advantage | Hit Advantage | Crouching Hit Advantage | Guard | Parry |
| Zenpou-Tenshin | 7 | 2 | 26 | - | +16 | +16 | Impossible | Impossible |
Gauge Increase
| Move | Miss | Blocked | Hit | Parry (Gauge for opponent) |
| Zenpou-Tenshin | 0 | - | 0 | - |
Comments here
Combos
Bread and Butter Combos
Taken from True_Tech's post on the forums: http://forums.shoryuken.com/discussion/42625/basic-yun-combos
- cl.LP > LK > MP >
- Fierce Lunge (qcf + HP) (26 damage, works on everyone) - A simple combo every Yun player should know.
- Roundhouse Upkicks (dp + HK) (29 damage, works on everyone but Oro, Ibuki, the twins, Chun, and Dudley) - Gives better damage than Fierce Lunge.
- (slight delay) Forward Upkicks (dp + MK) (30 damage, Remy only)
- cl.MP > HP > b + HP (23 damage, works on everyone) Easy chain combo after a divekick.
- cr.MK > Strong Lunge (qcf + MP) (22 damage, works on everyone)
- cr.MP > Strong Lunge (qcf + MP) (25 damage, works on everyone)
- cl.MP, s.LK > LP Lunge (qcf + LP) (28 damage, works on everyone) - Requires a bit of timing for the cl.MP to s.LK.
- Strong/Fierce Shoulder (dp + MP/HP), Any Lunge (qcf + P) (34 to 40 damage)
- cr.LK x 2 > LP Lunge (qcf + LP) (22 damage) - Harder to land on some characters.
SA1 You Hou
very fast super, naturally meaning it can be comboed into easily. It deals high damage and allows for juggle followups afterwards, allowing for better positioning and damage as well as building some of the meter back. It's main weaknesses are in that it's range is limited (so it may drop at the further ranges of cr.mk) and that it offers a single, long bar having you committing to building the super and limiting use of ex moves. It's a very fun super to use, but that good
- cl.LP > LK > MP > qcf qcf + P, dp + MP, qcf + HP
Jab, Short, Strong, You Hou, follow up with strong shoulder (Tetsu Zankou), fierce lunge (Zesshou Hohou)
77 damage 8 hits
your punisher combo deals great damage which can be a big bonus due to yun's low defense
- cl.LP > LK > MP > dp + LP > qcf qcf + P, dp + MP, qcf + HP
Jab, Short, Strong, Jab shoulder(Tetsu Zankou) You Hou,follow up with strong shoulder (Tetsu Zankou), fierce lunge (Zesshou Hohou)
75 damage 9 hits
same as above but there are only 2 reasons to do this one.
1.You cant' do the jab short strong cancel in which case stop reading this and go learn it its a valuable asset
2.That last jab shoulder will give you the bar needed to perform the combo
- cl.MP > HP > b + HP > qcf qcf + P, dp + MP, qcf + HP
Strong, Fierce, b + Fierce, You Hou, follow up with strong shoulder (Tetsu Zankou), fierce lunge (Zesshou Hohou)
67 damage 9 hits
basic combo works anywhere on the screen use this when your cl.jab won't reach to do the jab short strong
- air df + K, cl.MP > HP > b + HP > qcf qcf + P, dp + MP, qcf + HP
Divekick, Strong, Fierce, b + Fierce, You Hou, follow up with strong shoulder (Tetsu Zankou), fierce lunge (Zesshou Hohou)
72 damage 10 hits
easy combo off a divekick, use it when you land a divekick and combo into strong, fierce, b + fierce
- cl.MK , dp+mp > You Hou (qcf qcf + P), dp + MP, qcf + HP
80 damage 6 hits
most damaging combo not guarenteed unless you parry into it. In order to super jump cancel into the super you must tigerknee it, I personally do qcf,tigerknee to do it.
- neutral grab, You Hou, dp + MP, qcf+ HP
Thats right - you can combo into You Hou from your neutral grab! it deals pretty good damage as well. the link is tight, but pianoing helps quite a bit. However, this doesn't work on everyone: it only functions vs. the shotos, the twins, dudley, elena and ibuki.
SA2 Sourai Rengeki
The sad part thing about this super is that if genei jin wasn't as strong, this would have probably probably been yun's recommended super - 3 shortish bars allows liberate access to supers and ex moves, it has great range meaning you can combo consistently and use to punish whiffs from midscreen, good corner carry and allows for oki afterwards. it's only real weakness is that it deals small damage compared to other supers.
- cl.LP > LK > MP > dp + LP > qcf qcf + P
Jab, Short, Strong, jab shoulder (Tetsu Zankou), Sourai Rengeki
55 damage 10 hits
your basic punisher however in this combo adding the shoulder does more damage then without
- cr.MP > Sourai Rengeki (qcf qcf + P)
49 damage 7 hits
to far away to do a cl.jab to start your combo this is what to go for, you can hit confirm it
- cr.MK > Sourai Rengeki (qcf qcf + P)
46 damage 7 hits
use this when you're to far away to hit a cl.jab, or a cr.strong, it is possible to hit confirm the super
SA3 Genei Jin
If you want to play Yun optimally, that's the super to use. Fills very quickly, allows for versitile and strong combos with great corner carry and positioning afterwards, can be easily confirmed into, lasts for quite a bit, speeds up all of yun's moves and give his normals Super properties (higher priorities,
Jab Short Strong xx Genei Jin
learn it. know it. love it. use it.
Jab Short Strong Jab Shoulder(Tetsu Zankou) xx Genei Jin
ONLY AND I MEAN ONLY use this one when the shoulder will give you enough bar to activate as it does take away from the damage of the overall combo
Cl.St.Foward Super Jump Cancel xx Genei Jin
most damaging combo into Genei Jin the most damaging combo you can do is Cl.St.Foward xx gj,kara palm x n
(note: due to the juggle limit. from this set up...you will only get 3 palms and then they will fall through. so to reset the juggle counter do something like Cl.St.Foward xx gj, t Forward(hop kick), palm, kara palm * 4, ender. or Cl.St.Foward xx gj, palm, hop kick, kara palm * 4, ender. the second is more damaging then the first but only by 1 pixel.)
Genei Jin Combos
NOTE: While these combos are generally useful, for more character-specific info refer to these spreadhseets: https://docs.google.com/spreadsheets/d/1lq0X5c-fG5APoC0ohMTO0IPrerWxV0G2YZAinY82aU0/edit#gid=0 This includes all screen positions, characters and starters.
Note:even if not put in the combo all combos done after a landed jab,short,strong xx genei jin chain
Midscreen Combo
- 1.Jab,Short,Strong xx Genei jin, cr.strong,st.fierce , strong shoulder(Tetsu Zankou),Fierce shoulder(Tetsu Zankou) x N to corner
Your midscreen to corner carry option
Corner Combos
- 1.Jab,Short,Strong xx Genei jin, st.strong, f.fierce,hop kick (f.forward) x2, Palm(Kobokushi), hop kick (f.foward)x2, Palm(Kobokushi), DP Roundhouse(Nishou Kyaku), Jab shoulder(Tetsu Zankou), Jab or kara Lunge punch (Tetsu Zankou)
To kara the lunge punch press qcf short and quickly as possible press jab and it will cancel the st.short into the lunge punch adding alittle extra range
This combo seen HERE works on:shotos, urien, necro, alex, q, chun, makoto, twelve, elena,and hugo
- 2. Jab,Short,Strong xx Genei jin, st.strong, f.fierce,hop kick (f.forward) x2,st.fierce,hop kick (f.forward) x3,st.fierce canceled quickly into DP Roundhouse(Nishou Kyaku),Strong Shoulder(Tetsu Zankou), walk up a bit Cr.strong canceled into DP Short(Nishou Kyaku)
This combo seen HERE works on: dudley, ibuki, remy,yun, and yang
- 3.Jab,Short,Strong xx Genei jin, st.strong,xx fierce shoulder till the corner then strong shoulder till the meter runs out f.fierce,kara lunge
This combo seen HERE works on everyone and is the standard mid/full screen combo
KO's Variation vs. Urien - st. strong, F Fierce, F MK x2,palm, f mkx2, palm, DP RH, jab shoulder, * walk up c. strong into short upkicks(both hits connect) Then gives you time to taunt to power up without Urien doing anything to you even if he safe falls.
Another Urien Variation
- Most damaging
St. strong, F fierce, F mk x2, Palm, F MK x2, Palm, MP Dash Punch, Jab shoulder(Side Switch), F Fierce(Another Side Switch), walk up c. strong into short upkicks
Invented by Grahf Swe
Here's a full/midscreen combo, yun vs almost any character:
- jab short strong xx genei-jin,st strong x strong shoulder tackle,dash,st strong, hop kick, hop kick, and juggle them to the corner accordingly.
By adding the dash you can connect normal moves which do more damage in the genei-jin than shoulder-only mid/fullscreen combos.
- Hugo and Alex as taken from post by Pyrolee
Hugo - Ok. I swear I switch between like 3 combos vs him. I do whatever I feel at the moment. None of the 3 I can get consistently.
Note: Put st. strong, F fierce in the begining of all of them
- 1 (Most damaging one by like 4 points) - f mk x2, palm, f mk , WALK up palm, walk up again st. fierce into dp fierce(or MP), dp mp, f fierce, kara dash punch
- 2 (Easiest IMO)- f mk x2, palm, f mk x2, Palm, Fierce dash punch, st. mk, F fierce, kara jab dash punch
- 3 - F mk x2, palm, f mk x2, Palm, fierce dash punch(or mp depending on his fall), wait a milisec, jab shoulder(Side switch), F fierce(another side switch), kara jab dash punch
Alex - Ok vs him I do these 2 which both do the same damage. I find the first one a lot more easier.
- 1 - St. strong, st. rh, palm, F mk, walk up st. rh, palm, f mk, walk up st. rh palm, mp dash punch (or fierce), jab shoulder side switch, f fierce(another side switch), c. rh st rh chain.
I get this almost 100% for some reason its very easy for me and it does hella damage.
- 2 - st. strong, st. rh, palm, then walk up st. rh palm x3, mp dash punch (or FP),
2 enders - jab shoulder(side switch), f fierce(another side switch), c. rh st. rh or walk up a bit c. fwd into short upkicks(1 hit)
st. rh, c. fwd into short upkicks (this ender does less damage)
K.O Finisher
Finisher- st.mk, early palm, lp shoulder, f-HP, KARA lp dash punch (TIMING IS CRUCIAL...if timing is even the slightest off the finisher can fail)
This combo was created by Japan's top player K.O , hence the name, the basic purpose of this finisher is to regain a genei-jin bar after one has been depleted
There are many variations to this combo..specifically ones that deal with resets which is what makes the this combo the most useful The most important part it to be order to get the reset fully then execute a jab, short, strong, lp shoulder combo which should be enough to build the super bar back to full
on a side note if you have about 1/4 of a meter left during genei jin and you perform a cr.lk, palm, mp dash punch, (immediate) st.mk you can be able to perform the finisher and with good damage i might add and a good amount of super bar
1,2,3- (lp,lk,mp) starter
Now onto a few combos
- 1,2,3 XX GJ st.mp, f-hp, 2x f-mk, palm, f-mk, far hp, mp dash punch, (immediately) st.mk, palm, lp shoulder, f-hp, kara dash punch (MUST be Kara)
- 1,2,3 XX GJ st.mp, f-hp, 2x f-mk, palm, st.hp, hp shoulder, jump mk (Reset), st.mk, palm, lp shoulder, f-hp, kara dash punch
- 1,2,3 XX GJ st.mp, f-hp, 2x f-mk, palm, 2x f-mk, st.mp, walk up (a little) st.mk, palm, lp shoulder, f-hp, kara dash punch
PLEASE note that for the characters listed...the full finisher might not work 100%...you will have to omit the lp shoulder in order to connect with these characters
Finisher- st.mk, early palm, f-hp, kara dash punch
Different K.O Finisher will work on the following:
Chun-Li, Makoto, Q, Elena, Necro, Twelve, Urien, Ibuki
K.O Finsher works perfectly on shotos
may not work at all on the folowing:
Hugo, Remy, Yun , Yang, Alex, Oro, Dudley
Have fun learning this...should take a while to master but here is a playlist for reference on some variations
http://www.youtube.com/view_play_list?p=02A1767687056B45
Good Luck!!
-Nica K.O
Command Grab Combos
with almost full bar
command grab,mk kicks,mp shoulder,jab shoulder,strong shoulder,strong shoulder,f.fierce,lunge
command grab mk kicks,mp shoulder hop kick hop kick,palm,dp rh,jab shoulder,f.fierce jab lunge
againt chun,mak,q
command grab,st.mk,dash,palm or mk depending on meter,ender
bar ending right after kicks: command,mk kicks,strong shoulder,c.mp,dp lk
Command Grab combo i stole from sako: command,mk kicks,st.shoulder,walk up a bit palm,lunge,ender depending on how much bar you have
Example sorry for those that can't view putfile vids i'm gonna put the vids on youtube from now on
note:doesn't work on small people twins/ibuki/oro
Strategies
Overview
Basics
Super Art Selection
Kara-Techniques
Yun’s short kick will make him move a bit forward, if you can get the timing down *its pretty easy* you can gain extra range on the dash punch and palm.. Kara-Dash punch: qcf, lk~p Kara-Palm: qcb, lk~p Kara-Kara-Palm: mp, qcb, lk~p *make the qcb movement while doing the mp*
KARA COMMAND THROW forward, down forward [roundhouse], down, down back, back [any other kick button] (Not that much more range)
cr.mp, upkicks works on everyone, it just depends on the setup beforehand. Standard, most common way to connect it is: rh.upkicks(GJ ends), lp/mp.shoulder, cr.mp, upkicks. But you can connect rh.upkicks, cr.mp, upkicks against shotos if rh.upkicks is outside of GJ. Otherwise, the lp/mp.shoulder knocks them too far away to connect the cr.mp.
kara palms
the pyrolee method: This is the true kara-palm during GJ:
Press strong punch while moving the stick half-circle backwards, when you get about 4/5 of the way done you then press short then an IMMEDIATE punch button (usually jab but fierce works too) and then finish moving the stick to back so the punch button causes the palm to come out. It must be done VERY quickly because remember with each button press you are cancelling a very quick move, the 4/5 way motion is done so you do not get a crouching animation, you want every move to be done standing.
Keep in mind when the strong button is being pressed in the stick should be 4/5 of the way done then you kara-cancel the strong by pressing short -> punch button. To give you an idea of where your fingers should be, place your middle finger over strong press it while moving the stick back, then do an immediate throw, let your thumb hit the short first though and your index finger hit the jab, then finish the half circle back motion and release the jab.
In reality this is almost like a double kara move, you must first kara-cancel the strong with the short but at the same time u press the jab (or fierce) to kara-cancel the short as well. The reason this works better than the strong-short(or jab) method is because first the strong comes out which is canceled by the short. However the short is actually cancelled before you can see it by the palmstrike. This eliminates the additional move animation frames compared to the slow “strong then jab then palm” method. With the extra speed of this method you can do palm strikes faster and move in quicker which was a problem with the other way which would eventually drop the character after about 2-3 reps.
While in japan I saw only 2 yun players use the kara-palm, neither KO nor nitto did it. I guess it's too risky to use in tournament play so don't be too frustrated if you can't get it down it is pretty hard to do.
the c-royd method: strong,qcb lk~strong (he says always kara palm with strong so if you mess up you still continue the juggle with strong using pyro's method you get a grab whiff animation
for example: C-Royd Kara Juggle note: The reason why Ryu is jumping is because i wanted to simulate ryu getting launched by a stand MK xx genei cheap (just to show that it could be palmed after a stand MK) However, I started complaining to myself that if i did that, we wouldnt see how much damage all the palms really do...so i just made him jumping...you can easily land 6 palms on a standing ryu.
(in response to a question about timing) dont really know what to tell ya aside from what is in the video. after the first palm, you wait a split second before pusing MP. If you kara palm too early, your opponent wont be low enough for the palm to hit.
make sure you're cancelling the MP into the LK, and cancelling the LK into the palm. If you push MP, let it recover, and then push LK and let it recover, you'll notice that yun doesnt move forward at all. But if you repeatedly tap MP, LK, MP, LK, MP,LK, yun will move forward. This is because you're cancelling the moves.
To make kara palms easier, use strong punch. Or fierce punch. Never use jab.
in response to another question: The kara palm has to be executed pretty fast. The LK is cancelled really early and therefore you wont be able to see it in my videos because of the lowered frame rate. If you were to perform it on your own you'd see the LK just barely.
The LK cancelled into the palm is pushed at the same speed that you'd perform a kara throw.
remember. Don't use LP to kara palm.
Zoning
Mixups
Additional Notes
- Personal Action: Attack up. (Throws get a minor increase)
Match-ups
Serious Advantage Match-ups
- Necro
- Twelve
- Sean
Advantage Match-ups
- Makoto
- Dudley
- Yang
- Akuma
- Urien
- Ryu
- Oro
- Ibuki
- Elena
- Alex
- Remy
- Q
- Hugo
Fair Match-ups
- Yun
- Ken
Disadvantage Match-ups
- Chun-Li
Serious Disadvantage Match-ups
Yun has no match-ups where he is at a serious disadvantage
