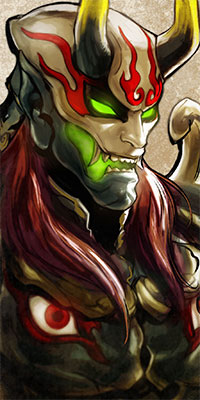
Soulcalibur VI/Yoshimitsu

From SuperCombo Wiki

Introduction

Yoshimitsu's strange ninja tactics bring a lot of unpredictability to the table. His absurd stances give him a lot of pressure and mixup options on top of a solid kit that can impose a solid mid/low mixup game. He has a unique relationship with meter: he can spend meter to access some more powerful versions of his strings and moves, and he often steals meter from the enemy. He also has a suite of lethal hits that punish the opponent for being at full meter, or for allowing him to steal too much of it.

Strengths Weaknesses
  • Strong okizeme tools and easy knockdowns
  • Scary wall pressure and damage
  • Great ring out game
  • Unique stances provide mixups, pressure and evasion
  • Fast startup on many moves, including an i10 AA
  • Very short range
  • Mediocre frame advantage on hit
  • Risky offensive tools can get you heavily punished
  • Reliant on highs to catch step
  • Slow CE with few ways to take advantage of it

Unique Mechanics

Brave Edge

Yoshimitsu has the ability to burn meter on certain strings, allowing for extra pressure followups or devastating hit-confirm combos.

Soul Stealing

Some of Yoshimitsu's attacks will cause a brief attack throw animation on hit where he conjures orbs from his opponent and absorbs them. This signifies him stealing their Soul Gauge to fill his own, dictating his opponent's meter usage while fueling his own meter-burning techniques.

Yoshimitsu
#SCVI_YOS
SCVI Yoshimitsu Face.jpg
In Japan's warring states period, the ninja Manji Clan's name stood out, despite—or perhaps because of—their impartiality. However, in times of such violence, it was dangerous not to pick a side, and the Manji Clan would suffer for their stance... One lord wished to recruit the clan, but when they refused, he torched their village to the ground, killing all but one: their most skilled warrior, Yoshimitsu. All alone, he honed his ninja skills, and slowly fought back against the lord, despite being overwhelmingly outnumbered. During his desperate fight, the ninja's desire for revenge grew stronger and stronger, until he felt the need to obtain a weapon without equal... Soul Edge.

Key Moves

A

Splinter Gale Lightning Blade
AA
Sc A.pngSc A.png AA - Attack Level: Sc H.pngSc H.png
Impact Damage Block Hit Counter Guard Burst
10 10,8 -8 -4 -4 3%
Normal Hit Combo
BE Sc A.pngSc A.pngSc A.pngSc +.pngSc B.png AAA+B - Attack Level: Sc H.pngSc M.pngSc M.png
Impact Damage Block Hit Counter Guard Burst
10 10,8,10,15 2 8 8 12%
Counter Hit Combo. BA

High damaging CH confirm from an i10 AA. Can also wall splat for incredibly high damage.


Golden Bar
3A
Sc 3.pngSc A.png 3A - Attack Level: Sc M.png
Impact Damage Block Hit Counter Guard Burst
14 12 -6 -4 6 1%
Sc 3.pngSc A.pngSc A.png 3AA - Attack Level: Sc M.pngSc H.png
Impact Damage Block Hit Counter Guard Burst
14 12,12 -4 4 KND 3%
Normal Hit Combo. Tech Crouch[5-8]. Trasfers to hit-throw on CH for 30 more damage.

Safe string ender. Second hit can be ducked if opponent blocks the first hit but 3AA recovers very quickly making for a difficult punish even if the opponent ducks.

Sc 3.pngSc A.pngSc B.png 3AB - Attack Level: Sc M.png
Impact Damage Block Hit Counter Guard Burst
14 12,24 -18 6 KND 4%
Normal Hit Combo. Tech Crouch[?-RC]

Unsafe mid option that can be counter hit confirmed. More damaging than 3AA so it is better used for punishes. Can also be used to catch opponents looking to duck 3AA


Manji Carve Fist
2aB
Sc 2.pngSc a.pngSc B.png 2aB - Attack Level: Sc SL.png
Impact Damage Block Hit Counter Guard Burst
12 10 -6 2 16 2%
Tech Crouch[8-RC]


Slap U Silly
BE 4AA+B
BE Sc 4.pngSc A.pngSc A.pngSc +.pngSc B.png 4AA+B - Attack Level: Sc H.pngSc H.pngSc H.pngSc H.pngSc H.pngSc H.pngSc H.png
Impact Damage Block Hit Counter Guard Burst
14 15,4,4,4,4,8,2 8 18 18 9%
Counter Hit Combo. Sc BA.png

Very rewarding run counter tool.


Exorcism Fist
WR AA+B
WR Sc A.pngSc A.pngSc +.pngSc B.png AA+B - Attack Level: Sc M.pngSc M.png
Impact Damage Block Hit Counter Guard Burst
16 16,14 6 LNC LNC 8%
Normal Hit Combo. Tech Jump. Sc SS.png into DGF

Very damaging mid horizontal launcher. Useful to counter hit opponent options after hitting 2A or as a mid option to mix with FC 3K.

B

Yomi Gake
bA
Sc b.pngSc A.png bA - Attack Level: Sc M.png
Impact Damage Block Hit Counter Guard Burst
14 12 -12 -4 KND 9%
Fastest input has further range. Tech Crouch[10-13]. 40 dmg on CH

Long range CH tool. Very useful for approaching the opponent.


Door Knocker
6BBBB
Sc 6.pngSc B.pngSc B.pngSc B.pngSc B.png 6BBBB - Attack Level: Sc M.pngSc H.pngSc H.pngSc M.png
Impact Damage Block Hit Counter Guard Burst
14 14,6,8,19 -12 KND KND 11%
Sc GC.png

Very high damage counter hit starter from an i14 mid starter. 2nd and 3rd hit is a high and can be ducked by a prepared opponent.

Sc 6.pngSc B.pngSc B.pngSc B.png 6BBB - Attack Level: Sc M.pngSc H.pngSc H.png
Impact Damage Block Hit Counter Guard Burst
14 14,6,8 -12 KND KND 6%
Counter Hit Combo

Very high damage counter hit starter from an i14 mid starter. 2nd hit is a high and can be ducked by a prepared opponent.


Submission Slash
3B
Sc 3.pngSc B.png 3B - Attack Level: Sc M.pngSc M.pngSc M.png
Impact Damage Block Hit Counter Guard Burst
18 22,4,10 -16 LNC LNC 6%

Above average in speed 3B. Very strong at catching opponents rolling on the ground. Several string option followups make punishes very ambiguous for the defender.

Sc 3.pngSc BB.png 3(B) - Attack Level: Sc M.pngSc M.pngSc M.png
Impact Damage Block Hit Counter Guard Burst
18 22,4,10 -10 LNC LNC 6%
Sc SS.png into DGF
Sc 3.pngSc B.pngSc B.png 3BB - Attack Level: Sc M.pngSc M.pngSc M.pngSc M.png
Impact Damage Block Hit Counter Guard Burst
18 22,4,10,13 -10 KND KND 15%
Normal Hit Combo. 25 dmg if all previous hits were blocked/whiffed. Sc GC.png


Shrine
22B
Sc 22.pngSc 5.pngSc 88.pngSc B.png (2)_(8)B - Attack Level: Sc M.png
Impact Damage Block Hit Counter Guard Burst
16 15 -12 LNC LNC 2%
Tech Crouch[4-15]

Very fast whiff punish tool with strong evasive properties. Very good reverse RO range. Opponents should always second guessing pressuring a Yoshi that has their back to the edge.


K

Mid Kick
3K
Sc 3.pngSc K.png 3K - Attack Level: Sc M.png
Impact Damage Block Hit Counter Guard Burst
14 16 -6 2 2 1%

Above average 3K in terms of range and also being a horizontal.


Nozuchi Fumi
1K
Sc 1.pngSc K.png 1K - Attack Level: Sc L.png
Impact Damage Block Hit Counter Guard Burst
18 20 -14 0 0 9%

Fast low that is nuetral on hit. Does not hit grounded.


Knee Cap
FC 3K
FC Sc 3.pngSc K.png 3K - Attack Level: Sc L.png
Impact Damage Block Hit Counter Guard Burst
20 18 -20 KND KND 4%
Tech Crouch[?-RC]

Very strong knockdown horizontal low with good range and guaranteed followups. Can be punished heavily if blocked.


Avoiding the Puddle
9K
Sc 9.pngSc K.png 9K - Attack Level: Sc M.png
Impact Damage Block Hit Counter Guard Burst
20 20 -8 KND/-2 KND/-2 4%
Tech Jump[9-31]

Very strong jumping attack. Quite fast and it knocks down. Can be stepped on one side.

Multi

Digging Cyclone
6A+B
Sc 6.pngSc A.pngSc +.pngSc B.png 6A+B - Attack Level: Sc M.png
Impact Damage Block Hit Counter Guard Burst
22 16 7 STN STN 9%
Sc SS.png into FLE

Yoshi's main pressure tool. Is advantageous on block into FLE. Combos on normal hit into FLE B. It is possible to CH confirm into FLE [B] with practice.

Flea Stance

Rolling Spark (?)
FLE 6A
FLE Sc 6.pngSc A.png 6A - Attack Level: Sc H.png
Impact Damage Block Hit Counter Guard Burst
18 18 8 STN STN 4%
Sc SS.png into DGF

Yoshi's main horizontal option from FLE. Leads into an advantageous DGF transition. Guaranteed followups on hit.

Skull Splitter
FLE B
FLE Sc B.png B - Attack Level: Sc M.png
Impact Damage Block Hit Counter Guard Burst
14 20 -8 LNC LNC 9%

Powerful tech crouching launcher. Performing FLE B raw from neutral can frequently be a viable option for jumping lows and 2As.


Indian Stance

Tobi Ushikawa
IND A
IND Sc K.png K - Attack Level: Sc M.pngSc M.png
Impact Damage Block Hit Counter Guard Burst
16 14,10 8 16 34 3%
Sc SS.png into DGF. +16 oC only is 2nd kick is cH (not 1st)

Colloquially known as "Med K." Strong approaching horizontal mid. Advantageous on block into DGF.


Manji Dragonfly

Akitsu Mandala
DGF A
DGF Sc A.png A - Attack Level: Sc M.pngSc M.pngSc M.png
Impact Damage Block Hit Counter Guard Burst
18 12,12,12 -12 KND KND 6%
Tech Jump[1-?]

Dragonfly's main mid option.


Dragonfly Sweep
DGF K
DGF Sc K.png K - Attack Level: Sc L.png
Impact Damage Block Hit Counter Guard Burst
20 26 -16 8 8 4%
Tech Crouch[19-34]. Tech Jump[1-17]

Strong horizontal low option that hits grounded.

SCVI Navigation

General
Controls & Notation
HUD
Glossary
System
Stages
Resources
Characters
2B
Amy
Astaroth
Azwel
Cassandra
Cervantes
Geralt
Groh
Haohmaru
Hilde
Hwang
Ivy
Kilik
Maxi
Mitsurugi
Nightmare
Raphael
Seong Mi-na
Setsuka
Siegfried
Sophitia
Taki
Talim
Tira
Voldo
Xianghua
Yoshimitsu
Zasalamel
Inferno