Introduction
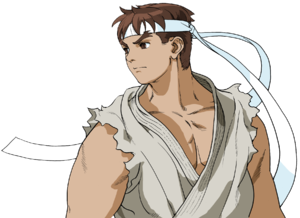
The "star" of the Street Fighter series and arguably Capcom's mascot. Ryu is always recognized by his trademark white gi and is likely the most well-known character in the world of fighting games. He is the master of the Hadoken and Shoryuken. His training partner, rival, and best friend is Ken Masters. Ryu has a burning desire to fight the strongest fighters in the world. He cares not for glory or wealth, but always lives for his next match and tours the world in solitude looking for opponents. He is winner of the first Street Fighter tournament and defeated Sagat there. He was the one who scarred Sagat's chest and Sagat has had a vengeful rivalry with Ryu since. Akuma killed Ryu and Ken's master (who was Akuma's brother) Gouken while Ryu was away at the tournament. In Street Fighter Alpha 3, he is being hunted by M. Bison and his forces to be used as a new host for Bison's mind.
| Pros | Cons |
|
|
Color Options
| X-Ism | A-Ism | V-Ism | |||
 |
 |
 |
 |
 |

|
| Punch | Kick | Punch | Kick | Punch | Kick |
Moves List
Ground Normals
- Close Standing Jab:
| Damage | 6 | 
|
| Stun | 2 | |
| Chain Cancel | Yes | |
| Special Cancel | Yes | |
| Super Cancel | Yes | |
| Meter on whiff/hit | 0/1 | |
| Frame Count | 3/4/7 | |
| Block Stun | +3 | |
| Hit Stun/Counter Hit | +4/+9 |
- Far Standing Jab:
| Damage | 6 | 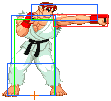
|
| Stun | 2 | |
| Chain Cancel | Yes | |
| Special Cancel | Yes | |
| Super Cancel | Yes | |
| Meter on whiff/hit | 0/1 | |
| Frame Count | 3/4/7 | |
| Block Stun | +3 | |
| Hit Stun/Counter Hit | +4/+9 |
| Damage | 14 | 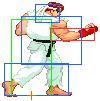
|
| Stun | 4 | |
| Chain Cancel | No | |
| Special Cancel | Yes | |
| Super Cancel | Yes | |
| Meter on whiff/hit | 1/3(A)4(V) | |
| Frame Count | 5/6/21 | |
| Block Stun | -8 | |
| Hit Stun/Counter Hit | -7/-3 |
| Damage | 12 | 
|
| Stun | 4 | |
| Chain Cancel | No | |
| Special Cancel | Yes | |
| Super Cancel | Yes | |
| Meter on whiff/hit | 1/4 | |
| Frame Count | 5/3/19 | |
| Block Stun | -3 | |
| Hit Stun/Counter Hit | -2/+2 |
- Far Standing Strong:
| Damage | 14 | 
|
| Stun | 4 | |
| Chain Cancel | No | |
| Special Cancel | No | |
| Super Cancel | No | |
| Meter on whiff/hit | 1/3(A)4(XV) | |
| Frame Count | 5/6/20 | |
| Block Stun | -7 | |
| Hit Stun/Counter Hit | -6/-2 |
- Close Standing Fierce:
| Damage | 17,13 |  |

|
| Stun | 8 | ||
| Chain Cancel | No | ||
| Special Cancel | Yes | ||
| Super Cancel | Yes | ||
| Meter on whiff/hit | 1/4(A)6(XV) | ||
| Frame Count | 4/5/26 | ||
| Block Stun | -8 | ||
| Hit Stun/Counter Hit | -7/Launch |
Note: 2nd active part cannot be canceled into specials in A&X-ISM, but can in V-ISM.
| Damage | 17 | 
|
| Stun | 8 | |
| Chain Cancel | No | |
| Special Cancel | No | |
| Super Cancel | No | |
| Meter on whiff/hit | 1/4(A)6(V) | |
| Frame Count | 6/3/30 | |
| Block Stun | -10 | |
| Hit Stun/Counter Hit | -9/Launch |
| Damage | 16 | 
|
| Stun | 8 | |
| Chain Cancel | No | |
| Special Cancel | No | |
| Super Cancel | No | |
| Meter on whiff/hit | 1/9 | |
| Frame Count | 6/4/26 | |
| Block Stun | -7 | |
| Hit Stun/Counter Hit | -6/Launch |
- Standing Short:
| Damage | 7 | 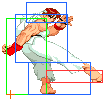
|
| Stun | 2 | |
| Chain Cancel | No | |
| Special Cancel | No | |
| Super Cancel | No | |
| Meter on whiff/hit | 0/1 | |
| Frame Count | 5/4/12 | |
| Block Stun | -2 | |
| Hit Stun/Counter Hit | -1/+4 |
- Standing Forward:
| Damage | 13 | 
|
| Stun | 4 | |
| Chain Cancel | No | |
| Special Cancel | No | |
| Super Cancel | No | |
| Meter on whiff/hit | 1/3(A)4(XV) | |
| Frame Count | 6/3/20 | |
| Block Stun | -4 | |
| Hit Stun/Counter Hit | -3/+1 |
| Damage | 10+8 | 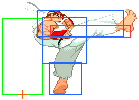 |

|
| Stun | 5+3 | ||
| Chain Cancel | No | ||
| Special Cancel | No | ||
| Super Cancel | No | ||
| Meter on whiff/hit | 1/3+1(A)4+1(V) | ||
| Frame Count | 6/3,3/26 | ||
| Block Stun | -6 | ||
| Hit Stun/Counter Hit | -5/Launch |
| Damage | 8+10 |  |
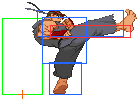
|
| Stun | 8+5 | ||
| Chain Cancel | No | ||
| Special Cancel | No | ||
| Super Cancel | No | ||
| Meter on whiff/hit | 1/1+4 | ||
| Frame Count | 6/2,3/30 | ||
| Block Stun | -10 | ||
| Hit Stun/Counter Hit | -9/Launch |
- Far Standing Roundhouse:
| Damage | 16 | 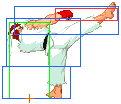
|
| Stun | 8 | |
| Chain Cancel | No | |
| Special Cancel | No | |
| Super Cancel | No | |
| Meter on whiff/hit | 1/4(A)6(XV) | |
| Frame Count | 10/3/20 | |
| Block Stun | 0 | |
| Hit Stun/Counter Hit | +1/Launch |
- Crouching Jab:
| Damage | 5 | 
|
| Stun | 2 | |
| Chain Cancel | Yes | |
| Special Cancel | Yes | |
| Super Cancel | Yes | |
| Meter on whiff/hit | 0/1 | |
| Frame Count | 3/4/7 | |
| Block Stun | +3 | |
| Hit Stun/Counter Hit | +4/+9 |
- Crouching Strong:
| Damage | 12 | 
|
| Stun | 4 | |
| Chain Cancel | No | |
| Special Cancel | Yes | |
| Super Cancel | Yes | |
| Meter on whiff/hit | 1/3(A)4(XV) | |
| Frame Count | 4/4/12 | |
| Block Stun | +3 | |
| Hit Stun/Counter Hit | +4/+8 |
- Crouching Fierce:
| Damage | 16,14 |  |

|
| Stun | 8 | ||
| Chain Cancel | No | ||
| Special Cancel | Yes | ||
| Super Cancel | Yes | ||
| Meter on whiff/hit | 1/4(A)6(XV) | ||
| Frame Count | 6/2/28 | ||
| Block Stun | -7 | ||
| Hit Stun/Counter Hit | -6/Launch |
Note: 2nd active part cannot be canceled into specials in A&X-ISM, but can in V-ISM.
- Crouching Short:
| Damage | 4 | 
|
| Stun | 2 | |
| Chain Cancel | Yes | |
| Special Cancel | Yes | |
| Super Cancel | Yes | |
| Meter on whiff/hit | 0/1 | |
| Frame Count | 3/4/8 | |
| Block Stun | +2 | |
| Hit Stun/Counter Hit | +3/+8 |
- Crouching Forward:
| Damage | 11 | 
|
| Stun | 4 | |
| Chain Cancel | No | |
| Special Cancel | Yes | |
| Super Cancel | Yes | |
| Meter on whiff/hit | 1/3(A)4(XV) | |
| Frame Count | 4/3/15 | |
| Block Stun | +1 | |
| Hit Stun/Counter Hit | +2/+6 |
- Crouching Roundhouse:
| Damage | 18 | 
|
| Stun | 6 | |
| Chain Cancel | No | |
| Special Cancel | No | |
| Super Cancel | No | |
| Meter on whiff/hit | 1/4(A)6(XV) | |
| Frame Count | 5/6/31 | |
| Block Stun | -14 | |
| Hit Stun/Counter Hit | - |
Air Normals
- Neutral Jump jab:
| Damage | 8 | 
|
| Stun | 2 | |
| Meter on whiff/hit | 0/1 | |
| Frame Count | 3/10/6 |
- Diagonal Jump jab:
| Damage | 8 | 
|
| Stun | 2 | |
| Meter on whiff/hit | 0/1 | |
| Frame Count | 5/10/6 |
- Neutral Jump Strong:
| Damage | 12 | 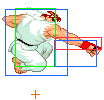
|
| Stun | 4 | |
| Meter on whiff/hit | 1/3(A)4(XV) | |
| Frame Count | 4/8/2 |
- Diagonal Jump Strong:
| Damage | 8+5 | 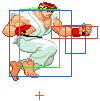 |

|
| Stun | 2x2 | ||
| Meter on whiff/hit | 1/1x2 | ||
| Frame Count | 9/3,8/11 |
- Neutral Jump Fierce:
| Damage | 16 | 
|
| Stun | 8 | |
| Meter on whiff/hit | 1/4(A)6(XV) | |
| Frame Count | 6/6/2 |
- Diagonal Jump Fierce:
| Damage | 16 | 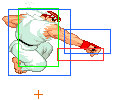
|
| Stun | 8 | |
| Meter on whiff/hit | 1/4(A)6(XV) | |
| Frame Count | 5/6/2 |
- Neutral Jump Short:
| Damage | 7 | 
|
| Stun | 2 | |
| Meter on whiff/hit | 0/1 | |
| Frame Count | 4/10/10 |
- Forward Jump Short:
| Damage | 7 | 
|
| Stun | 2 | |
| Meter on whiff/hit | 0/1 | |
| Frame Count | 7/10/2 |
- Neutral Jump Forward:
| Damage | 12 | 
|
| Stun | 4 | |
| Meter on whiff/hit | 1/3(A)4(XV) | |
| Frame Count | 4/6/12 |
- Diagonal Jump Forward:
| Damage | 11 | 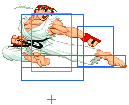
|
| Stun | 4 | |
| Meter on whiff/hit | 1/3(A)4(XV) | |
| Frame Count | 7/8/8 |
- Neutral Jump Roundhouse:
| Damage | 17 | 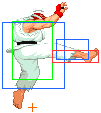
|
| Stun | 8 | |
| Meter on whiff/hit | 1/4(A)6(XV) | |
| Frame Count | 12/6/11 |
- Diagonal Jump Roundhouse:
| Damage | 15 | 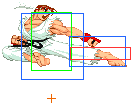
|
| Stun | 8 | |
| Meter on whiff/hit | 1/4(A)6(XV) | |
| Frame Count | 10/4/10 |
Command Normals
| Damage | 8+6 |  |

|
| Stun | 2x2 | ||
| Chain Cancel | No | ||
| Special Cancel | No | ||
| Super Cancel | No | ||
| Meter on whiff/hit | 1/1x2 | ||
| Frame Count | 20/3,3/20 | ||
| Block Stun | -4 | ||
| Hit Stun/Counter Hit | -3/? |
| Damage | 10+6 |  |

|
| Stun | 2x2 | ||
| Chain Cancel | No | ||
| Special Cancel | No | ||
| Super Cancel | No | ||
| Meter on whiff/hit | 1/6+1 | ||
| Frame Count | 12/2,4/15 | ||
| Block Stun | +4 | ||
| Hit Stun/Counter Hit | +5/Launch |
| Damage | 13 | 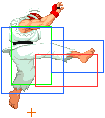
|
| Stun | 4 | |
| Chain Cancel | No | |
| Special Cancel | Yes | |
| Super Cancel | Yes | |
| Meter on whiff/hit | 1/3(A)4(V) | |
| Frame Count | 19/4/15 | |
| Block Stun | 0 | |
| Hit Stun/Counter Hit | -4/+1 |
Throws
Seoi Nage:
| Damage | 20 | 
|
| Stun | 2 | |
| Range | 24 | |
| Meter on whiff/hit | 1 | |
| Frame Count | 5/1/18 |
Tomoe Nage:
| Damage | 20 | 
|
| Stun | 2 | |
| Range | 24 | |
| Meter on whiff/hit | 1 | |
| Frame Count | 5/1/18 |
Kuuchuu Seoi Nage:
| Damage | 20 | 
|
| Stun | 2 | |
| Range | 32 | |
| Meter on whiff/hit | 1(A)3(XV) | |
| Frame Count | 1/1/1(before landing) |
Alpha Counter
During Blockstun ![]() +
+![]() +
+![]() of same strength
of same strength
- A-ISM:
| Damage | 4 |  |
 |

|
| Frame Count | 24/22/39 | |||
| Invincibility | 0-24 |
- V-ISM:
| Damage | 4 | 
|
| Frame Count | 25/6/30 | |
| Invincibility | 0-25 |
Special Moves
- Startup:
 |
 |
 |

| |
| Frame Count | 12 | |||
- Active:
- Jab Version:
| Damage | 12~1 |  |
 |
 |
 |

| |
| Stun | 4 | ||||||
| Meter on whiff/hit | 1(A)3(XV)/3(A)4(XV) | ||||||
| Block Stun | -10 | ||||||
| Hit Stun/Counter Hit | -9 | ||||||
| Frame Count | 45 | ||||||
- Strong Version:
| Damage | 12~1 |  |
 |
 |
 |

| |
| Stun | 4 | ||||||
| Meter on whiff/hit | 3(A)4(XV) | ||||||
| Block Stun | -11 | ||||||
| Hit Stun/Counter Hit | -10 | ||||||
| Frame Count | 46 | ||||||
- Fierce Version:
| Damage | 12~1 |  |
 |
 |
 |

| |
| Stun | 4 | ||||||
| Meter on whiff/hit | 3(A)4(XV) | ||||||
| Block Stun | -12 | ||||||
| Hit Stun/Counter Hit | -11 | ||||||
| Frame Count | 47 | ||||||
Ryu throws a blue fireball that travels horizontally across the screen. The stronger the Punch button used, the faster the projectile goes.
- Startup:
 |
 |
 |

| |
| Frame Count (Jab/Strong) | 12 | |||
| Frame Count (Fierce) | 15 | |||
- Active:
- Jab Version:
| Damage | 12~1 |  |
 |
 |
 |

| |
| Stun | 4 | ||||||
| Meter on whiff/hit | 1(A)3(XV)/3(A)4(XV) | ||||||
| Block Stun | -11 | ||||||
| Hit Stun/Counter Hit | - | ||||||
| Frame Count | 46 | ||||||
- Strong Version:
| Damage | 12~1 |  |
 |
 |
 |

| |
| Stun | 4 | ||||||
| Meter on whiff/hit | 3(A)4(XV) | ||||||
| Block Stun | -12 | ||||||
| Hit Stun/Counter Hit | - | ||||||
| Frame Count | 47 | ||||||
- Fierce Version:
| Damage | 12~1 |  |
 |
 |
 |

| |
| Stun | 4 | ||||||
| Meter on whiff/hit | 3(A)4(XV) | ||||||
| Block Stun | -11 | ||||||
| Hit Stun/Counter Hit | - | ||||||
| Frame Count | 46 | ||||||
Ryu throws a red fireball similar to the Hadoken, like in past games it will cause a knockdown if it hits during its earlier frames. The stronger the Punch button used, the faster the projectile goes.
- Jab Version:
| Damage | 18,12,4 |  |
 |
 |
 |
 |
 |
 |
 |

|
| Stun | 8,4,4 | |||||||||
| Meter on whiff/hit | 4(A)7(XV)/1(A)3(XV) | |||||||||
| Block Stun | -21 | |||||||||
| Invincibility | 0-4 | |||||||||
| Frame Count | 4 | 14 | 30 | |||||||
Will lose or trade with lows so it's best used only as an anti air, one thing to note is it's airborne hurtbox is higher up when he first leaves the ground so most projectiles can be evaded with it if timed well.
- Strong/Fierce Version:
| Strong | Fierce |  |
 |
 |
 |
 |
 |
 |
 |

| |
| Damage | 19,13,4 | 20,14,4 | |||||||||
| Stun | 8,4,4 | ||||||||||
| Meter on whiff/hit | 6(A)9(XV)/1(A)3(XV) | ||||||||||
| Block Stun | -32 | -42 | |||||||||
| Invincibility | 0-8 | ||||||||||
| Frame Count(Strong) | 4 | 18 | 37 | ||||||||
| Frame Count(Fierce) | 4 | 22 | 43 | ||||||||
Ryu will rise into the air with an uppercut. The stronger the Punch button used, the higher and faster Ryu will punch.
- Startup
 |
 |

| |
| Frame Count | 11 | ||
- Active:
- Short Version: This happens only once.
- Forward Version: This happens twice.
- Roundhouse Version: This happens 3 times.
| Short | Forward | Roundhouse | 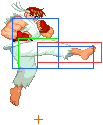 |
 |
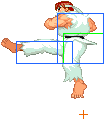 |

| |
| Damage | 14 | 7x2 | 5x3 | ||||
| Stun | 8 | 8x2 | 8x3 | ||||
| Meter on whiff/hit | 3(A)4(XV) | 4(A)6(XV)/3x2(A)4x2(XV) | 4(A)6(XV)/3x3(A)4x3(XV)} | ||||
| Block Stun | -5 | ||||||
| Frame Count | 3 | 3 | 3 | 3 | |||
- Recovery:
 |
 |
 |
 |

| |
| Frame Count | 25 | ||||
Tatsumaki Senpukyaku [ Air ] ![]()
![]()
![]() :
:
![]() +
+ ![]()
- Startup:

| |
| Frame Count | 6 |
- Active:
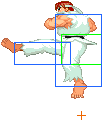
- All versions spin twice: Button strength only affects trajectory.
| Damage | 7x2 |  |
 |
 |

|
| Stun | 8x2 | ||||
| Meter on whiff/hit | 4(A)6(XV)/3x2(A)4x2(XV) | ||||
| Frame Count | 3 | 3 | 3 | 3 | |
- recovery:
 |
 |
 |
 |
 |

| |
| Frame Count | ∞ | 4 | ||||
Ryu will spin forward with a kick. If performed in the air, the kick will arc up or down according to the time performed during his jump. The stronger the Kick button used, the more times Ryu will spin and hit.
Super Moves
- Startup:
- Level 1:
| Invincibility | 0-7 |  |
 |

| |
| Frame Count | 9 | ||||
- Level 2:
| Invincibility | 0-9 |  |
 |

| |
| Frame Count | 9 | ||||
- Level 3:
| Invincibility | 0-11 |  |

| |
| Frame Count | 9 | |||
- Active:
- Level 1:
| Damage | 12~1x3 |  |
 |
 |
 |

| |
| Block Stun | -7 | ||||||
| Frame Count | 48 | ||||||
- Level 2:
| Damage | 14~1x4 |  |
 |
 |
 |

| |
| Block Stun | -5 | ||||||
| Frame Count | 46 | ||||||
- Level 3:
| Damage | 16~1x5 |  |
 |
 |
 |

| |
| Block Stun | +3 | ||||||
| Frame Count | 44 | ||||||
A more powerful version of the Hadoken, Ryu tosses a multi-hitting fireball across the screen. This can be used to cancel an oncoming projectile, removing one hit from the total. Level 1: 3 Hits Level 2: 4 Hits Level 3: 5 Hits
Shinku Tatsumaki Senpukyaku ![]() :
:
![]()
![]() +
+ ![]()
- Startup:
| LVL.1 | LVL.2 | LVL.3 |  |
 |
 |
 |

| |
| Invincibility | 0-16 | 0-20 | 0-24 | |||||
| Frame Count | 16 | |||||||
- Active:
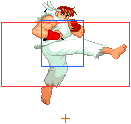
- Level 1: Spins 3 times, final spin covers both sides.
| Damage | 10x5 | 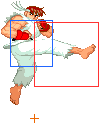 |
 |
 |
 |
|
| Block Stun | -3 | |||||
| Frame Count | 3 | 4 | 3 | 4 | *3 | |
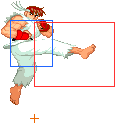
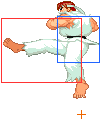
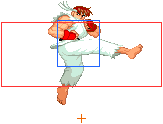
- Level 2: Spins 5 times, final spin covers both sides.
| Damage | 9x9 | 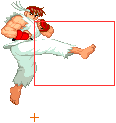 |
 |
 |
 |
 |
|
| Block Stun | 0 | ||||||
| Frame Count | 3 | 3 | 4 | 3 | 4 | *3 | |
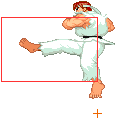
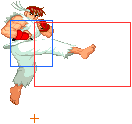
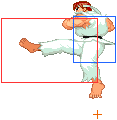
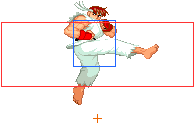
- Level 3: Spins 7 times, final spin covers both sides.
| Damage | 9x13 | 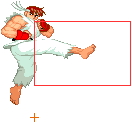 |
 |
 |
 |
 |
 |
 |
|
| Block Stun | -10 | ||||||||
| Frame Count | 3 | 4 | 3 | 3 | 4 | 3 | 4 | *3 | |
- recovery:
 |
 |
 |

| |
| Frame Count(LVL.1) | 20 | |||
| Frame Count(LVL.2) | 20 | |||
| Frame Count(LVL.3) | 17 | |||
A more powerful version of the Tatsumaki Senpukyaku, Ryu will do a spinning kick in place which can hit opponents rapidly or juggle them in the air. Level 1: 5 Hits Level 2: 9 Hits Level 3: 13 Hits
| Damage(Elbow) | 6,8,12,16,20,24,32,48 |  |
 |
 |
 |
 |
 |

|
| Damage(Ender) | 12+16 or 12x3(ShinShoryuken) | |||||||
| Invincibility | 0-11 | |||||||
| Frame Count | 11 | 8 | 34 | |||||
A more powerful version of the Shoryuken, Ryu slides forward with a Seichu Nidan Tsuki elbow strike. If he hits his opponent, he will perform a two-hit Shoryuken or the 3 hit Shin Shoryuken. Each individual active frame of this move the damage varies, the later the active frame the more damage it does, the final active frame of this move triggers the "Shin Shoryuken" which does the most damage.
Miscellaneous
 |
 |
 |

| |
| Frame Count | 36 | |||
- Idle, Crouching, Airborne:
 |
 |

|
The Basics
QCF+P... then DP!
Some VCs...Both of these are in the corner. Activate with VC1-Fierce Hadoken times infinity. There's many variations to this. You can do Fierce into Hadoken, and then Hop Kick back in when you get pushed out to continue. You can also Hurricane Kick at the end.
Activate with VC1...Jab DP, Stand Fierce or Roundhouse, whiff Hadoken, repeat.
Which Ism?
As is the case with most characters, V. Ryu has good setups into cc infinites, as well as unblockable setups, and decent fireball trap in the corner with activation.
- A-ISM:
Some of the best, safest supers in the game. Can use DP option-selects to blow up activates. Not better than V-ISM by any stretch, but surprisingly strong even within the V-ISM meta.
- V-ISM:
Best version. Gets access to one of the scariest corner guard/mix-up strings in the game along with one of the easiest infinites to keep going. DP allows him to blow up counter activates. Gains b. RH, which is great for strings/guard crush.
- X-ISM:
Slightly improved fireball, and gains f. FP (ala V-ISM) but loses access to hopkick. Generally not worth for most match-ups.
Combos
- Basic Combos:
- V-ISM Combos:
Advanced Strategy
Match-ups
Notable Players
Japan
Agito (A-Ryu)
Akira (A-Ryu)
Chin (V-Ryu)
Daigo Umehara (A/V-Ryu)
Fuchi (V-Ryu)
Fujigo (V-Ryu)
Fuku Kaichou (A-Ryu)
Gure (V-Ryu)
Harakiri (V-Ryu)
Hige (V-Ryu)
Hiro T (A-Ryu)
H1TB0X (A-Ryu)
Huchi (V-Ryu)
Igari (V-Ryu)
Ikari (V-Ryu)
Jyuso (A-Ryu)
Kaichou (V/A-Ryu)
Kashiwazaki (V-Ryu)
Kojima (V-Ryu)
Kou (V-Ryu)
Kuma (V-Ryu)
Makoto (V-Ryu)
Masumi (V/A-Ryu)
Mattsun (A-Ryu)
Morikawa (A/V-Ryu)
Oyaji (A-Ryu)
PonsaMiruzu (V-Ryu)
Ry (V-Ryu)
Sarada (V-Ryu)
Tabatake (X-Ryu)
Tara (A-Ryu)
Takizawa (A-Ryu)
Tenn (A/V-Ryu)
The Chef (V/X-Ryu)
Totsuka (V-Ryu)
VER (V-Ryu)
Yano (V-Ryu)
Yon (V-Ryu)
ZM (V-Ryu)
North America
Alex Valle (A/V-Ryu)
Haqq (A-Ryu)
John Choi (A/V-Ryu)
Kyokuji (V-Ryu)
Ryu1999 (A/V-Ryu)
Smoothcat (V-Ryu)
Europe
Alioune (A-Ryu)
vhd (V-Ryu)
V-Ryu (V-Ryu)
Latin America
ShinRockman1 (A/V-Ryu)
Vash (A-Ryu)
