Introduction
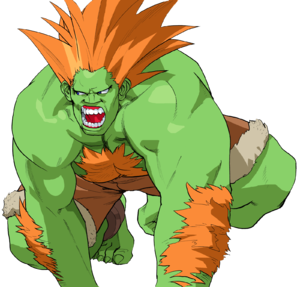
One day long ago, a young boy named Jimmy was aboard a plane, along with some government officials, on his way to visit his uncle. Unfortunately these officials were the targets of an assaination attempt by the Shadoloo, and the plane was crashed into the Brazilian Jungle. However Jimmy survived the crash, and began to live amongst the animals in the jungle. One day, he unwittingly hitched a ride on a poacher's car. Curious and excited, Blanka began to venture into the outside world. It was probably during this time that he met Dan as well as Dan's 'student', Sakura, before he went back to the jungle. He later resurfaced again to compete in the World Warrior tournament, where his mother happened to be a spectator. There is a tearful reunion as mother and son were finally reunited. Blanka probably now lives a happy (ab)normal life with his mother.
| Pros | Cons |
|
|
Color Options
| X-Ism | A-Ism | V-Ism | |||
 |
 |
 |
 |
 |

|
| Punch | Kick | Punch | Kick | Punch | Kick |
Moves List
Ground Normals
- Close Standing Jab:
| Damage | 6 | 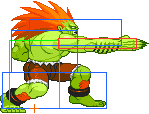
|
| Stun | 2 | |
| Chain Cancel | No | |
| Special Cancel | Yes | |
| Super Cancel | Yes | |
| Meter on whiff/hit | 0/1 | |
| Frame Count | 4/3/18 | |
| Block Stun | -7 | |
| Hit Stun/Counter Hit | -6/-1 |
- Far Standing Jab:
| Damage | 6 | 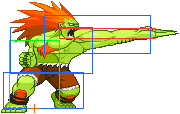
|
| Stun | 2 | |
| Chain Cancel | No | |
| Special Cancel | Yes | |
| Super Cancel | Yes | |
| Meter on whiff/hit | 0/1 | |
| Frame Count | 4/4/14 | |
| Block Stun | -4 | |
| Hit Stun/Counter Hit | -3/+2 |
- Close/Far Standing Strong:
| Damage | 12 | 
|
| Stun | 4 | |
| Chain Cancel | No | |
| Special Cancel | Yes | |
| Super Cancel | Yes | |
| Meter on whiff/hit | 1/1 | |
| Frame Count | 7/3/16 | |
| Block Stun | -5 | |
| Hit Stun/Counter Hit | -4/+0 |
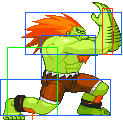
- Close/Far Standing Fierce:
| Damage | 17/16 | 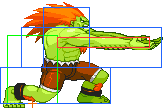 |
|
| Stun | 8 | ||
| Chain Cancel | No | ||
| Special Cancel | No | ||
| Super Cancel | No | ||
| Meter on whiff/hit | 1/A4/XV6 | ||
| Frame Count | 6/5/28 | ||
| Block Stun | -10 | ||
| Hit Stun/Counter Hit | -9/Launch |
- Close Standing Short:
| Damage | 7 | 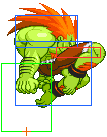
|
| Stun | 2 | |
| Chain Cancel | No | |
| Special Cancel | No | |
| Super Cancel | No | |
| Meter on whiff/hit | 0/1 | |
| Frame Count | 6/2/24 | |
| Block Stun | -12 | |
| Hit Stun/Counter Hit | -11/-6 |
- Far Standing Short:
| Damage | 12 | 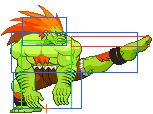
|
| Stun | 4 | |
| Chain Cancel | No | |
| Special Cancel | No | |
| Super Cancel | No | |
| Meter on whiff/hit | 0/A3/XV4 | |
| Frame Count | 6/2/14 | |
| Block Stun | -2 | |
| Hit Stun/Counter Hit | -1/+4 |
- Close Standing Forward:
| Damage | 7+6 |  |

|
| Stun | 4x2 | ||
| Chain Cancel | No | ||
| Special Cancel | No | ||
| Super Cancel | No | ||
| Meter on whiff/hit | 1/1x2 | ||
| Frame Count | 6/2/2/29 | ||
| Block Stun | -12 | ||
| Hit Stun/Counter Hit | -11/-7 |
- Far Standing Forward:
| Damage | 12 | 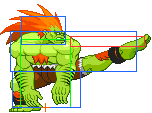
|
| Stun | 4 | |
| Chain Cancel | No | |
| Special Cancel | No | |
| Super Cancel | No | |
| Meter on whiff/hit | 1/A3/XV4 | |
| Frame Count | 7/2/17 | |
| Block Stun | +0 | |
| Hit Stun/Counter Hit | +1/+5 |
- Close/Far Standing Roundhouse:
| Damage | 15 | 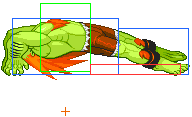 |
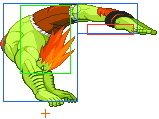
|
| Stun | 8 | ||
| Chain Cancel | No | ||
| Special Cancel | No | ||
| Super Cancel | No | ||
| Meter on whiff/hit | 1/A4/XV6 | ||
| Frame Count | 9/2/27 | ||
| Block Stun | -6 | ||
| Hit Stun/Counter Hit | -5/Launch |
- Crouching Jab:
| Damage | 6 | 
|
| Stun | 2 | |
| Chain Cancel | No | |
| Special Cancel | Yes | |
| Super Cancel | Yes | |
| Meter on whiff/hit | 0/1 | |
| Frame Count | 5/4/14 | |
| Block Stun | -4 | |
| Hit Stun/Counter Hit | -3/+2 |
- Crouching Strong:
| Damage | 11 | 
|
| Stun | 4 | |
| Chain Cancel | No | |
| Special Cancel | No | |
| Super Cancel | No | |
| Meter on whiff/hit | 1/A3/XV4 | |
| Frame Count | 7/1/27 | |
| Block Stun | -9 | |
| Hit Stun/Counter Hit | -8/-4 |
- Crouching Fierce:
| Damage | 9/15 |  |

|
| Stun | 2/8 | ||
| Chain Cancel | No | ||
| Special Cancel | No | ||
| Super Cancel | No | ||
| Meter on whiff/hit | 1/A1,4/V1,6 | ||
| Frame Count | 7/3/32 | ||
| Block Stun | -12 | ||
| Hit Stun/Counter Hit | -11/Launch |
- Crouching Short:
| Damage | 5 | 
|
| Stun | 2 | |
| Chain Cancel | No | |
| Special Cancel | Yes | |
| Super Cancel | Yes | |
| Meter on whiff/hit | 0/1 | |
| Frame Count | 5/3/12 | |
| Block Stun | -1 | |
| Hit Stun/Counter Hit | +0/+5 |
- Crouching Forward:
| Damage | 12 | 
|
| Stun | 4 | |
| Chain Cancel | No | |
| Special Cancel | Yes | |
| Super Cancel | Yes | |
| Meter on whiff/hit | 1/A3/XV4 | |
| Frame Count | 6/3/18 | |
| Block Stun | -2 | |
| Hit Stun/Counter Hit | -1/+3 |
- Crouching Roundhouse:
| Damage | 16 | 
|
| Stun | 8 | |
| Chain Cancel | No | |
| Special Cancel | No | |
| Super Cancel | No | |
| Meter on whiff/hit | 1/A4/XV6 | |
| Frame Count | 9/3/27 | |
| Block Stun | -7 | |
| Hit Stun/Counter Hit | Knockdown/Launch |
Air Normals
- Neutral Jumping Jab:
| Damage | 6 | 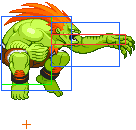
|
| Stun | 2 | |
| Meter on whiff/hit | 0/1 | |
| Frame Count | 4/6/15 |
- Diagonal Jumping Jab:
| Damage | 6 | 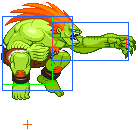
|
| Stun | 2 | |
| Meter on whiff/hit | 0/1 | |
| Frame Count | 4/6/7 |
- Neutral Jumping Strong:
| Damage | 10 | 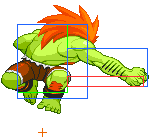
|
| Stun | 4 | |
| Meter on whiff/hit | 1/A3/XV4 | |
| Frame Count | 5/4/12 |
- Diagonal Jumping Strong:
| Damage | 11 | 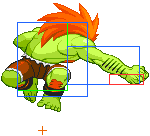
|
| Stun | 4 | |
| Meter on whiff/hit | 1/A3/XV4 | |
| Frame Count | 7/6/10 |
- Neutral Jumping Fierce:
| Damage | 16 | 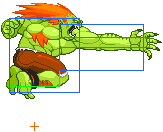
|
| Stun | 8 | |
| Meter on whiff/hit | 1/A4/XV6 | |
| Frame Count | 2/4/28 |
- Diagonal Jumping Fierce:
| Damage | 16/15 | 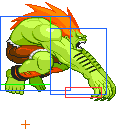 |
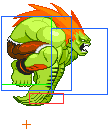
|
| Stun | 8 | ||
| Meter on whiff/hit | 1/A4/XV6 | ||
| Frame Count | 6/5/10 |
- Neutral/Diagonal Jumping Short:
| Damage | 6 | 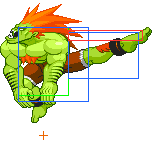
|
| Stun | 2 | |
| Meter on whiff/hit | 0/1 | |
| Frame Count | 4/8/11 |
- Neutral Jumping Forward:
| Damage | 12 | 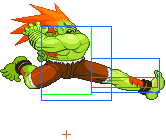
|
| Stun | 4 | |
| Meter on whiff/hit | 1/A3/XV4 | |
| Frame Count | 7/4/14 |
- Diagonal Jumping Forward:
| Damage | 12 | 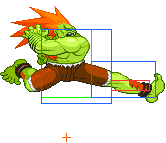
|
| Stun | 4 | |
| Meter on whiff/hit | 1/A3/XV4 | |
| Frame Count | 7/4/12 |
- Neutral Jumping Roundhouse:
| Damage | 16 | 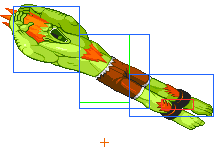
|
| Stun | 8 | |
| Meter on whiff/hit | 1/A4/XV6 | |
| Frame Count | 8/4/17 |
- Diagonal Jumping Roundhouse:
| Damage | 16 | 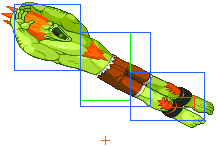
|
| Stun | 8 | |
| Meter on whiff/hit | 1/A4/XV6 | |
| Frame Count | 8/4/17 |
Command Normals
You have to be close to perform this in X/A, V can use it at any range, and only with back+MP.
| Damage | 16 | 
|
| Stun | 4 | |
| Chain Cancel | No | |
| Special Cancel | No | |
| Super Cancel | No | |
| Meter on whiff/hit | 1/A4/XV6 | |
| Frame Count | 9/8/32 | |
| Block Stun | -17 | |
| Hit Stun/Counter Hit | Knockdown/Launch |
Throws
Wild Fang:
| Damage | 5x(2~12) | 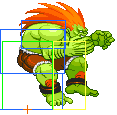
|
| Stun | 0 | |
| Meter Gain | 1(A)3(XV) | |
| Frame Count | 6/1/30 |
Jungle Slam:
| Damage | 20 | 
|
| Stun | 0 | |
| Meter Gain | 0 | |
| Frame Count | 1/1/1(before landing) |
Wild Shoot:
| Damage | 20 | 
|
| Stun | 0 | |
| Meter Gain | 0 | |
| Frame Count | 1/1/1(before landing) |
Alpha Counter
During Blockstun ![]() +
+![]() +
+![]() of same strength
of same strength
- A-ISM:
| Damage | 4 | 
|
| Frame Count | 24/19/50 | |
| Invincibility | 0-24 |
- V-ISM:
| Damage | 4 | 
|
| Frame Count | 25/5/23 | |
| Invincibility | 0-25 |
Special Moves
Electric Thunder
- Press Punch rapidly
Rolling Attack
- Charge Back, Forward + Punch
Backstep Rolling
- Charge Back, Forward + Kick
Vertical Rolling
- Charge Down, Up + Kick
Surprise Forward
- All three Kicks, or Forward + All three Kicks
Surprise Back
- Back + all three Kicks
Super Combos
Ground Shave Rolling(X/A Ism)
- Charge Back, Forward, Back, Forward + Punch
- Hold down punch after landing at the start to delay the roll.
Tropical Hazard(A Ism)
- Charge Down-Back, Up-Forward, Down-Back, Up-Forward + Kick
- Mash buttons to make more fruit fall of the trees.
The Basics
Which Ism?
A-Ism
The most popular version, but generally less versatile/safe than V-Blanka due to his super being situational at best.
V-Ism
Recommended due to the strength of his air game giving him more opportunities to land big CC juggles or even an infinite. Makes jumping in general a lot safer, which is important for his gameplan.
X-Ism
Makes his single hit damage really scary, but not recommended due to losing air block with a character who tends to be in the air a lot.
Combos
A-ISM combos
V-ISM combos
BnB Combos
- 2MK > HP Rolling Attack : Basic punish
- J.HP > 2MK > HP Rolling Attack : Jump-in combo
Advanced Strategy
Punishing blocked Rolling Attacks
Ryu
- Level 3/X-ism Shinkuu-Hadouken - strict timing
Ken
- Forward + Roundhouse
Charlie
- timing strict Forward + Roundhouse
Chun Li
- Senretsu Kyaku - X-ism/Level 3 for sure, even if Chun is hit;
- timing-strict walk-up crouching Forward
Adon
- Level 3 JVA
Birdie
- Level 3 The Birdie
- Level 3 Bull Revenger
- Strong Bull Head if Blanka performed the RA from a close distance -- and near the corner.
Rose
- Far Standing Roundhouse
- X-ism/Level 3 Aura Soul Throw
- Level 2 Aura Soul Spark
Guy
- crouching Roundhouse - timing varies, but it's by no means guaranteed
- Walk up far mk
- Bushin Gourai Kyaku
Sagat
- Reversal Level 3 Tiger Cannon
Sodom
- Fierce Jigoku Scrape (VC available)
Dan
- None
M.Bison/Dictator
- Psycho Crusher
- Knee Press Nightmare
- timing & distance dependent, crouching Roundhouse
Akuma
- none
Sakura
- timing-strict Fierce Shou Ken (VC available)
Rolento
- Jab Patriot Circle (VC available), even if hit
- X-ism/Level 3 Take No Prisoner
Zangief
- Kattobi VC
Gen
- X-ism/Level 3 Zan'ei (even if hit)
Blanka
- Fierce Rolling Attack (even if hit)
E.Honda
- Fierce Super Zutsuki
- X-ism/Level 3 Oni Musou
Dhalsim
- Standing Fierce (even if hit)
- Standing Roundhouse (even if hit)
Vega/Claw
- Crouching Roundhouse
Balrog/Boxer
- Jab dashing Straight
- Crazy Buffalo (even if hit)
R.Mika
- Walk forward, Crouching Roundhouse (very tight)
Karin
- timing strict walk-up crouching Forward
Cody
- none
Cammy
- Roundhouse Spiral Arrow (VC available)
- X-ism/Level 3 Spin Drive Smasher
Juni
- Roundhouse Spiral Arrow (VC available)
- Psycho Streak
Juli
- Level 3 Spin Drive Smasher
Match-ups
Notable Players
Japan
Harahi (A-Blanka)
Kayaman (A/V-Blanka)
North America
Kyokuji (V-Blanka)
Sparatik (A-Blanka)
Europe
Latin America
GanFleim! (A-Blanka)
Marcola_do_PCC/MC0011 (X-Blanka)
Discussion
Sakura, Guy, Sodom, Cammy and others who can easily punish rolls and jumps are problem match-ups
