Introduction
Braixen looks like a very standard and straightforward zoner. However, she’s anything but. Braixen boasts amazing options at all ranges, and her unique interactions with Support Pokemon make for an incredibly expressive character. Braixen’s flexible playstyle allows her to adjust her game plan on the fly, giving her strong adaptive potential.
Braixen also has the ability to enhance her special attacks with Sunny Day for added benefits. Two Sunny Day enhances back to back gives her a temporary attack buff, further increasing her damage potential. In burst, Braixen's special attacks are always enhanced and she gains access to a near full screen super which makes her burst mode one of the more oppressive burst modes in the game.
Braixen is a very flexible character with many strengths; any perceived weaknesses can be patched up simply by choosing a different support. She rewards those that are able to quickly think on their feet and adapt to the situation presented to them.
In addition to the standard filling of her Support Gauge over time, Braixen also gains a bit of Support Gauge whenever she uses an attack, granting her more frequent access to Support Pokemon than other characters. Braixen cannot, however, use Supports with a usage limit more times than that limit allows.
Braixen's enhanced ability to gain Support Gauge is complimented by how dangerous she is once she has access to a Support. Her nY, fY, Homing Attack 2, bX, 5Y, 8Y, 2Y, 5X, 4X, and 2X can be canceled into a Support Call on hit or block, in the same way that other characters can cancel some of their normals into Pokemon Moves. This gives Supports additional utility unique to Braixen's kit, encouraging more freeform use in combos and setups and allowing her to make herself safe or steal her turn back on block.
| Strengths | Weaknesses |
|---|---|
| ✓ Can cancel many attacks into a support call ✓ Every attack charges Support Gauge ✓ Supports enhance different play styles ✓ Powerful Burst Mode |
✖ Difficult to master |
| Braixen #PTDX_BRX | |
|---|---|
 | |
| Vitals | |
| HP | 540 HP |
| Shield Health | 600 SH (Normal) |
| Synergy Gauge | 150 CC |
| Burst Mode Duration | 840F (14 sec) |
| Movement | |
| Back Dash | 33F, 1-8F Strike/Throw Invuln, Cancelable on Frame FP 25 / DP 21 |
| Side Dash | 41F, 5-14F Projectile Invuln, Cancelable on Frame 25 |
| Forward Dash | 25F, Cancelable on Frame 17 |
| Unique Movement Options | Midair Dash |
| Stances | |
| High Stance | Charges Support Gauge. |
| Low Stance | High Invuln. on Frame 1 |
General Moves

Burst Mode
| Attack Type | Damage | PSP | Height | Priority | Impact | Total Frames | Hit Adv. | Block | Properties |
| Strike (projectile) | 0 | -12 | Mid | BA*(projectile) | i18 | 48 | +8 | 0 | 1-48F Total Invuln, Pierce |
In Burst Mode, Braixen's Pokemon moves are always enhanced. On Burst Exhaust, Braixen will lose any stored Sunny Day charge she had during or before Burst Mode. |

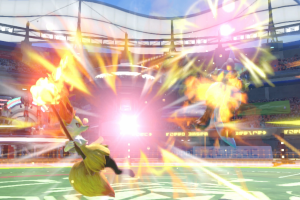
Burst Attack: Psyfirecracker
| Attack Type | Damage | PSP | Height | Priority | Impact | Total Frames | Hit Adv | Block | Properties |
| Normal (Projectile) | 167 (25) | 12 | Mid Low | S+ | i19 | 73 | Knockdown | -8 | 9-42F Total Invuln, Pierce, Increases Support Gauge to max on cinematic end |
Braixen fires a long-ranged beam straight forward. If only the last hit connects and it forces a shift, Braixen is granted 50% of her support meter. |
j.R Midair Dash
| Recovery | Properties |
| Until landing FP +27 / DP +13 | Air Actionable on Frame 21 |
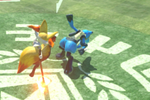
Braixen flies in the air with a broomstick fashion. In Field Phase, Braixen can airdash forwards, backwards, left, or right. In Duel Phase, Braixen can airdash forwards or backwards. |

Y+B Grab Attack
| Attack Type | Damage | PSP | Height | Priority | Impact | Total Frames | Hit Adv |
| Grab | FP 80 / DP 90 | 12 | Ground Only | 1 | i11 | 49 | FP Shift (0) / DP Shift (Knockdown) |
Landing a Grab increases Braixen's Support Gauge and performs an automatic Sunny Day. |
Braixen's Duel Phase grab is unique in that it doesn't follow the same rules as any other grab during a time out. Normally if a character lands a grab by the wall, the wall splat damage is calculated before a timeout is called by the game. With Braixen's Duel Phase grab, the wall splat damage isn't calculated before that happens. Due to this, grabbing an opponent in that situation at the wall has less of a reward than it would for any other character. |

X+A Counter Attack
| Version | Attack Type | Damage | PSP | Height | Priority | Impact | Total Frames | Hit Adv | Block | Properties |
| X+A Counter Attack | Counter (strike) | 50 | 3 | Mid Low | 4 | i27 | 61 | FP Shift (+8) / DP +8 | -8 | 1-20F Counter Armor, Destroys Projectiles while active, Crumple on Crit, Forward/Side Dash Cancelable on Frame 9, Back Dash Cancelable on Frame 17 |
| [X+A] Charged Counter Attack | Counter (strike) | 80 | 3 | Mid Low | 6 | i47 | 81 | FP Shift (Knockdown) / DP Crumple | +4 | 1-40F Counter Armor, Destroys Projectiles while active, Pierce, Forward/Side Dash Cancelable on Frame 9, Back Dash Cancelable on Frame 17 |
Field Phase Attacks

nY
| Attack Type | Damage | Scaling | Height | Priority | Impact | Throw Crush Frame | Total Frames | Hit Adv | Block | Properties |
| Normal (Projectile) | 10~27 | 10% per hit | Special Mid | 5 | i15 | 5 | 56 | -5 | -16 | Special Cancelable from Frame 16 |
Fires three fireballs that travel in a straight path. |
sY
| Attack Type | Damage | Scaling | Height | Priority | Impact | Throw Crush Frame | Total Frames | Hit Adv | Block | Properties |
| Normal (Projectile) | 10 each | 10% each | Special Mid | 5 | i19 | 5 | 78 | +4 | -12 | Each fireball can be special/support canceled |
Braixen walks to the side and fires five fireballs. |

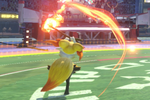
fY
| Attack Type | Damage | Scaling | Height | Priority | Impact | Throw Crush Frame | Total Frames | Hit Adv | Block | Properties |
| Normal (Strike) | 80* (10 per hit; 20 final hit) | 0 | Special Mid | BA (strike) | i19 | 9 | 73 | Shift (+4)** | -8 | Destroys Projectiles while active |
Braixen throws out Its stick like a boomerang. The Field Phase version of this move ignores the light hitstun resistance from Burst Mode or the Extra Battle Hitstun Resist powerup. *Max damage is 80 but it is inconsistent **If fY hits at max range, it crumples the opponent. |

bY
| Version | Attack Type | Damage | Scaling | Height | Priority | Impact | Throw Crush Frame | Total Frames | Hit Adv | Block |
| bY | Normal (Strike) / Normal (Projectile) | 60 / 58 | 15% (per hit) (Fireball Only) | Mid | 5 / 7 | i19 / i23 | 9 | 56 | Shift (Launch)* | -8 |
| Charged - b[Y] | Normal (Strike) / Normal (Projectile) | 80 / 78 | 15% (per hit) (Fireball only) | Mid | 5 / 7 | i39 (Stick) / i43 (Projectile) | 9 | 76 | Shift (Launch)* | -8 |
Braixen goes into a golf swing stance and lobs a fireball. Can be charged to increase in damage, size, and distance. *Only the physical hit of the move Phase Shifts. |
j.Y
| Attack Type | Damage | Scaling | Height | Priority | Impact | Throw Crush Frame | Recovery | Hit Adv | Block | Properties |
| Normal (Projectile) | 10 each | 10% each | Mid | 5 | i16 | 5 | Until landing +27 | -12 | -16 | Midair Dash/Special Cancelable on Frame 31 |
Braixen fires four fireballs midair from different heights. |


Homing Attack
| Version | Attack Type | Damage | Scaling | Height | Priority | Impact | Throw Crush Frame | Total Frames | Hit Adv | Block | Properties |
| X Homing Attack 1 | Normal (Strike) | 20 | 0 | Mid | 3 | i21 | 1 | 59 | +4 | -4 | Throw Blast, Airborne on Frame 19, Block/Jump Cancelable on Frame 1 |
| XX Homing Attack 2 | Normal (Strike) | 20 | 0 | Mid | 3 | i53 | N/A | 79 | +8 | -4 | Support Cancelable on Frame 56 |
| XXX Homing Attack 3 | Normal (Strike) | 40 | 0 | Mid | 4 | i85 | N/A | 117 | Shift (+8) | -8 | N/A |
| XX[X] Charged Homing Attack 3 | Normal (Strike) | 80 | 0 | Mid | 5 | i105 | N/A | 137 | +8 | Guard Break (+28) | Guard Break, Pierce |
Braixen homes in on the opponent, and kicks them. Braixen's Homing Attack 2 can be support canceled on whiff. This is the only move she has with that property. If Homing Attack 2 was blocked, there is a 28 Frame window to punish a charged Homing Attack 3. |
bX
| Attack Type | Damage | Scaling | Height | Priority | Impact | Throw Crush Frame | Total Frames | Hit Adv | Block | Properties |
| Normal (Strike) | 60 | 60% | Mid Low | 4 | i31 | 1 | 69 | Crumple | -16 | Throw Blast, 1-8F Strike/Throw Invuln, Support Cancelable on Frame 34 |
Braixen leans back, then lunges forward with Its stick. |
j.X
| Version | Attack Type | Damage | Scaling | Height | Priority | Impact | Throw Crush Frame | Total Frames | Hit Adv | Block | Properties |
| j.X | Normal (Strike) | 80 | 0 | Mid High, Mid (landing) | 4 | i21 | 9 | Until landing + 30 | Shift (Knockdown) | -4 | Destroys Projectiles while active (Landing) |
| Charged - j.[X] | Normal (Strike) | 110 | 0 | Mid High, Mid (landing) | 5 | i41 | 9 | Until landing + 31 | Shift (Launch) | +12 | Destroys Projectiles while active (Landing) |
Braixen slams the ground with Its stick and creates a pillar of fire. Charging gives the move additional hits as well as making it safer on block. Landing hitbox deletes projectiles |
Duel Phase Weak Attacks


5Y
| Version | Attack Type | Damage | Scaling | PSP | Height | Priority | Impact | Throw Crush Frame | Total Frames | Hit Adv | Block | Properties |
| 5Y | Normal (Strike) | 20 | 20% | 0 | Mid Low | 3 | i15 | 5 | 37 | +4 | -8 | Support/Special Cancelable on Frame 17 |
| 5YY | Normal (Strike) | 20 | 10% | 0 | Mid Low | 3 | i32 | N/A | 58 | 0 | -8 | Support/Special Cancelable on Frame 34 |
| 5YYY | Normal (Strike) | 60 | 10% | 3 | Mid Low | 3 | i57 | N/A | 87 | +8 | -8 | Support/Special Cancelable on Frame 60 |
Repeatedly pokes with the stick. Not a true blockstring. |

6Y
| Attack Type | Damage | Scaling | PSP | Height | Priority | Impact | Throw Crush Frame | Total Frames | Hit Adv | Block | Properties |
| Normal (Strike) | 80 (10 per hit; 20 final hit) | 20%* | 3 | Special Mid | BA (strike) | i19 | 9 | 71 | +8** | -4 | Destroys Projectiles while active |
Braixen throws out Its stick like a boomerang. *Only the last hit of 6Y has scaling, all hits before it have 0 **If 6Y hits at max range, it crumples the opponent. |

4Y
| Version | Attack Type | Damage (Stick) | Damage (Fireball) | Damage (Total) | Scaling | PSP | Height | Priority | Impact | Throw Crush Frame | Total Frames | Hit Adv | Block |
| 4Y | Normal (strike) / Normal (projectile) | 60 | 14 | 74 | 20% / 10% | 3 / 1 | Mid | 5 | i19 / i21 | 9 | 53 | Soft Launch (Stick) | -12 |
| Charged - 4[Y] | Normal (Strike) / Normal (Projectile) | 60 | 76 | 126 | 0 / 40% | 4 / 0 | Mid | 7 | i19 | 9 | 53 | Soft Launch / Tumble | -8 |
Braixen goes into a golf swing stance and lobs a fireball. Can be charged to increase in damage, size, and distance. |
8Y
| Attack Type | Damage | Scaling | PSP | Height | Priority | Impact | Throw Crush Frame | Total Frames | Hit Adv | Block | Properties |
| Normal (Strike) | 60 | 20%* | 3 | Mid | 3 | i19 | 9 | 51 | Hard Launch | -8 | 5-20F High/Mid High Invuln, Support Cancelable on Frame 24 |
Braixen swipes Its stick upwards. *The first hit of Braixen's 8Y has 0 scaling |

2Y
| Attack Type | Damage | Scaling | PSP | Height | Priority | Impact | Throw Crush Frame | Total Frames | Hit Adv | Block | Properties |
| Normal (Strike) | 20 | 30% | 0 | Low | 3 | i11 | 1 | 33 | +4 | -4 | Throw Blast, High Invuln. on Frame 1, Special/Support Cancelable on Frame 14 |
A quick leg poke. |
j.Y
| Attack Type | Damage | Scaling | PSP | Height | Priority | Impact | Throw Crush Frame | Recovery | Hit Adv | Block | Properties |
| Normal (Projectile) | 10 each | 10% each | 1 each | Mid | 3 | i16 | 5 | Until landing +21 | -8 | -12 | Special/Air Dash Cancelable on Frame 31 (Burst) |
Braixen fires four fireballs midair from different heights. |
j.8Y
| Attack Type | Damage | Scaling | PSP | Height | Priority | Impact | Throw Crush Frame | Total Frames | Hit Adv | Block | Properties |
| Normal (Strike) | 20 each | 10% per hit | 0 | Mid High | 3 | i15 | 5 | Until landing +13 | +18 | +4 | N/A |
Braixen twirls its stick three times in the air. |
Duel Phase Strong Attacks


5X
| Version | Attack Type | Damage | Scaling | PSP | Height | Priority | Impact | Throw Crush Frame | Total Frames | Hit Adv | Block | Properties |
| 5X | Normal (Strike) | 40 | 0% | 0 | Mid Low | 4 | i15 | 5 | 43 | Soft Launch | -8 | Support Cancelable on frame 18 |
| 5XX | Normal (Strike) | 80 | 30% | 4 | Mid Low | 4 | i37 | N/A | 69 | Knockdown (if airborne) / Hard Launch (if grounded) | -4 | Support Cancelable on frame 40 |
An upwards stick swing followed by a downwards one. |
4X
| Attack Type | Damage | Scaling | PSP | Height | Priority | Impact | Throw Crush Frame | Total Frames | Hit Adv | Block | Properties |
| Normal (Strike) | 60 | 60% | 4 | Mid Low | 4 | i31 | 1 | 62 | Crumple | -16 | Throw Blast, 1-8F Strike/Throw Invuln, Support Cancelable on Frame 34 |
Braixen leans back, then lunges forward with its stick. |
8X
| Attack Type | Damage | Scaling | PSP | Height | Priority | Impact | Throw Crush Frame | Total Frames | Hit Adv | Block | Properties |
| Normal (Strike) | 90 | 30% (Last hit only) | 3 | Mid High | 4 | i19 | 1 | 62 | Hard Launch | -16 | Throw Blast, Low Invuln. on Frame 5, Midair Dash/Special Cancelable on Frame 31 |
Braixen hops forward and twirls Its stick in the air. It's possible to special cancel late enough into 8X's animation that you land on the ground with no recovery. This is what's known as a Flame Charge Cancel(FCC). It's only possible to do on hit or if making contact with red armor. This will not work on block or on counter armor. An example with audio cues and inputs can be found here. |

2X
| Attack Type | Damage | Scaling | PSP | Height | Priority | Impact | Throw Crush Frame | Total Frames | Hit Adv | Block | Properties |
| Normal (Strike) | 60 | 10% | 3 | Low | 4 | i15 | 5 | 49 | Knockdown | -12 | Support Cancelable on Frame 18, High Invuln. on Frame 5 |
Braixen slides and sweeps with Its stick. If 2X hits at max range it becomes -9. |
j.X
| Version | Attack Type | Damage | Scaling | PSP | Height | Priority | Impact | Throw Crush Frame | Total Frames | Hit Adv | Block |
| j.X | Normal (Strike) | 80 | 20% | 3 | Mid High, Mid (landing) | 4 | i21 | 9 | Until landing + 30 | +16 | -4 |
| Charged - j.[X] | Normal (Strike) | 110 | 20% | 3 | Mid High, Mid (landing) | 5 | i41 | 9 | Until landing + 31 | Hard Launch | +12 |
Braixen slams the ground with Its stick and creates a pillar of fire. Charging gives the move additional hits, launches, and makes it plus on block. |
Pokemon Moves


5A Psybeam
| Version | Attack Type | Damage | Scaling | PSP | Height | Priority | Impact | Throw Crush Frame | Total Frames | Hit Adv | Block | Properties |
| 5A Psybeam | Normal (Projectile) | 50 | 20% | 3 | Special Mid | 7 | i23 | 6 | 65 (FP) / 61 (DP) | FP Shift (-8) / DP 0 | FP -16 / DP -12 | FP sA: [ 5-14F Projectile Invuln.] |
| EN5A Psybeam (Enhanced) | Normal (Projectile) | 80 | 0, 20% | 0, 3 | Low, Special Mid | 8 | i23 | 9 | 65 (FP) / 61 (DP) | FP Shift (0) / DP +8 | FP -8 / DP -4 | FP ENsA: [ 5-14F Projectile Invuln.] |
| 5[A] Psybeam: Setup | Normal (Projectile) | 50 | 20% | 0 | Special Mid | 8 | i57 | 9 | 59 | +27 | +22 | FP s[A]: [ 5-28F Projectile Invuln.] |
| EN5[A] Psybeam: Setup (Enhanced) | Normal (Projectile) | 80 | 0%, 20% | 0 | Special Mid | 8 | i57 | 9 | 59 | +26 | +22 | FP ENs[A]: [ 5-28F Projectile Invuln.] |
Braixen fires a projectile of psychic energy in a straight line. When held, Braixen twirls around and preps a Psybeam projectile from above. When enhanced, Braixen fires/sets up two projectiles. In Field Phase, inputting left or right causes Braixen to roll to the side before firing. |

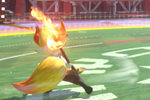
6A Fire Spin
| Version | Attack Type | Damage | Scaling | PSP | Height | Priority | Impact | Throw Crush Frame | Total Frames | Hit Adv | Block |
| 6A Fire Spin | Normal (Projectile) | 74 | 5% per hit | 1 per hit | Mid Low | S | i35 | 9 | 78 | -4 | -8 |
| EN6A Fire Spin (Enhanced) | Normal (Projectile) | 103 | 5% per hit | 1 per hit | Mid Low | S | i35 | 9 | 78 | Hard Launch | -4 |
| 6[A] Charged Fire Spin | Normal (Projectile) | 102 | 5% per hit | 0.5 per hit | Mid | S | i67 | 9 | 110 | +12 | +8 |
| EN6[A] Charged Fire Spin (Enhanced) | Normal (Projectile) | 118 | 5% per hit | 0.5 per hit | Mid | S | i67 | 9 | 110 | Hard Launch | +8 |
Braixen creates a pillar of flames that slowly travels forward and can be charged to increase in size and damage. Can place either left or right in Field Phase. When enhanced, Fire Spin launches and increases in damage. Yes, you're reading that right. Fire Spin is 5% scaling per hit. |
4A Fire Blast
| Version | Attack Type | Damage | Scaling | PSP | Height | Priority | Impact | Throw Crush Frame | Total Frames | Hit Adv | Block | Properties |
| 4A Fire Blast (Fireball) | Normal (Projectile) | 57 | 10% per hit | 2 per hit | Mid Low | 6 | i31 | 9 | 86 | Stun | -20 | Low Invuln. on Frame 9, Sunny Day Cancelable on Frame 72 |
| 4A Fire Blast (Blast) | Normal (Projectile) | 95 | 30% per hit | 1 per hit | Mid | 9 | i61 | 9 | 86 | Knockdown | -20 | N/A |
| EN4A Fire Blast (Enhanced) (Fireball) | Normal (Projectile) | 135 (Including Blast) | 10% per hit | 2 per hit | Mid Low | 9 | i31 | 9 | 86 | Knockdown | -20 | Low Invuln. on Frame 9, Sunny Day Cancelable on Frame 72
Hitting a lower-priority projectile instantly transitions to Blast; Hitting a player does not cancel the projectile. |
| EN4A Fire Blast (Enhanced) (Blast) | Normal (Projectile) | 114 | 30% per hit | 1 per hit | Mid | 9 | i51 | 9 | 86 | Knockdown | 0 | N/A |
Braixen hops in the air a fires a large fireball that slowly travels forward. After a short amount of time, the fireball explodes into a kanji-shaped wall of fire. When enhanced, the fireball increases in damage and turns into the blast portion faster. The long-range blast also becomes safer on block. Pressing B after using Fire Blast performs a Sunny Day. |
8A Flamethrower
| Version | Attack Type | Damage | Scaling | PSP | Height | Priority | Impact | Throw Crush Frame | Total Frames | Hit Adv | Block | Properties |
| 8A Flamethrower | Normal (Projectile) | 120 | 80% (Last Hit Only) | 4 | High | S+ | i19 | 9 | 61 | Soft Launch (Air Hit) | -8 | 5-18F High Invuln, Sunny Day Cancelable on Frame 36 |
| EN8A Flamethrower (Enhanced) | Normal (Projectile) | 160 | 80% (Last Hit Only) | 4 | High | S+ | i19 | 9 | 61 | Soft Launch | -8 | 5-18F High Invuln, Sunny Day Cancelable on Frame 36 |
Braixen points upwards with Its stick and shoots a stream of flames. When enhanced, Flamethrower receives additional hits and becomes safer on block. Pressing B after using Flamethrower performs a Sunny Day. |

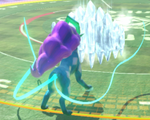
2A Light Screen
| Version | Attack Type | Damage | Scaling | PSP | Height | Priority | Impact | Throw Crush Frame | Total Frames | Hit Adv | Block | Properties |
| 2A Light Screen | Counter (Strike) | 20 | 30% | 2 | Mid Low | 3 | i11 | 11* | 35 | Soft Launch / Stun on Crit (30F) | -12** | 1-35F Projectile Counter Armor, 11-35F Destroys Projectiles, Sunny Day Cancelable on Frame 16 |
| EN2A Light Screen (Enhanced) | Counter (Strike) | 40 | 30% | 2 | Mid Low | 5 | i11 | 11* | 35 | Soft Launch / Stun on Crit (45F) | -12** | 1-35F Projectile Counter Armor, 11-35F Destroys Projectiles, Sunny Day Cancelable on Frame 16 |
Braixen conjures a mirror that erases incoming projectiles. When enhanced, Light Screen's damage, range, and shield pushback increases. Pressing B after the attack appears cancels into Sunny Day. *In a same-frame interaction with an i11 throw, Light Screen's strike hitbox will have priority over the throw. Light Screen has no actual ability to tech or crush throws, however. **Despite being -12, Light Screen's high shield pushback makes Unenhanced Light Screen unpunishable by a majority of the cast, and Enhanced is unpunishable. Everything Braixen can armor or destroy using Light Screen. Including Supports. (video) |
j.A Flame Charge
| Version | Attack Type | Damage | Scaling | PSP | Height | Priority | Impact | Throw Crush Frame | Total Frames | Hit Adv | Block |
| j.A Flame Charge | Normal (Strike) | 80 | 50% | 3 | Mid High | 4 | i19 | 9 | N/A | Soft Launch | FP -22 / DP -20 |
| ENj.A Flame Charge (Enhanced) | Normal (Strike) | 104 | 50% / 0% (Fireworks) | 3 | Mid High, Mid (Fireworks) | 5 | i19 | 9 | N/A | Hard Launch | FP -3 / DP 0* |
Braixen broom rides ahead at full speed. When enhanced, Flame Charge creates fireworks on hit/block. *Enhanced Flame Charge is 0 on block at midscreen. In the corner Enhanced Flame Charge is +8 on block. |

]A[ Sunny Day
| Total Frames | Properties |
| 51 | Charge Time: 90F, Attack Up (self) for 300F when enhanced |
Braixen strikes a pose and increases Its Support Gauge. The next Pokemon move Braixen performs will be enhanced. Using Sunny Day when already enhanced grants Braixen an Attack buff. The Attack buff lasts for 5 seconds. Attack buff timer is cumulative. |
Strategy
Ignore these, I'm just messing with stuff and getting prepped
Field Phase Strategy
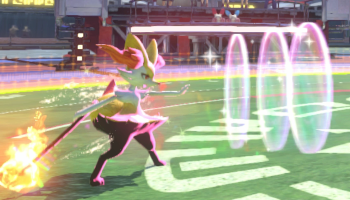
nY

sY

bY

Boomerang (fY)
Homing Attack

Psybeam
[Click each image to be taken to the move's information]
Take a solid look at the core moves above and get comfortable using them as they'll be your main tools to winning field phase. How much you're able to use each move and what you get out of them will vary by matchup. In some matches you can use a lot of projectiles and in some you're bound to just b.Y and Homing. When and where you'll use them will be expanded upon further in each matchup guide, this section will be to give you a general outline of how Braixen's field is played.
At round start, you can check most opponents with either n.Y, b.Y, or Psybeam with n.Y being the least committal option of the three. The projectiles from n.Y are slower than the other two options but it's made up by the fact that it's both special and support cancellable, affording you more options than you'd have with the other two. b.Y has the benefit of better tracking and a much larger hitbox, especially when fully charged. Since the projectile from b.Y flies in an arc it also has a very solid chance of catching opponents that pick the unorthodox option of jumping immediately. Psybeam, delayed or not is the most committal of the three and is a bit of a gamble due to its mediocre durability. However it does a very good job of netting you an instant phase shift if you guess correctly. It's more of a call out on attack supports like Frogadier at round start or to prevent characters like Darkrai from getting their field phase started.
After your initial gambit s.Y, f.Y, and Homing come into play if a phase shift didn't occur. Like the rest, when and how you use them are matchup dependent but out of the three, Homing is a universal option due to Braixen's ability to support cancel the second hit in DX. Boomerang (f.Y) and s.Y are very committal options at mid range and if used too often can lead to you being heavily punished so use them sparingly and at odd timings/places. Despite their high commitment however they both have amazing rewards. s.Y can be support cancelled at any point which can make it much less of a commitment if you have support up and depending on which support you run can lead to some serious damage and a potential shift.
Boomerang (f.Y) has the highest potential reward out of any of Braixen's moves and can cut through a majority of projectiles, allowing you to punish opponents that may try to approach you behind a projectile of their own. At the proper spacing, the last bit of f.Y won't connect and leave the opponent in a crumpled state allowing you to follow up with a longer combo. Recognizing this is the key to dealing out massive damage in Field as the hits of f.Y that crumple have no scaling allowing you to breach 200+ damage if you have support or are enhanced. All of this does come at a cost however, if the opponent reads you throwing it out most characters can CA through the entire thing for a punish and some command counters like Lucario's b.Y will hit you before the return hitbox of Boomerang can return the favor. If it's jumped you're just as vulnerable as if it was countered and if it's blocked the opponent is pulled towards you and you're left in a situation where you're guessing with them at an advantage.
However, don't let the high commitment of your best options force you into playing safe. Play towards your sense of risk/reward and make adjustments accordingly depending on the matchup and/or player you're facing. Keeping your opponent guessing your next option is one of the key things you'll have to learn if you want to win Field often as Braixen!
Duel Phase Strategy
Just like with Field Phase, Braixen's Duel Phase and how you'd play it varies widely depending on the matchup but her core moves are universal against the cast. Which moves can be used are dependent on range and the general strategy for such will be broken down here.
Long Range

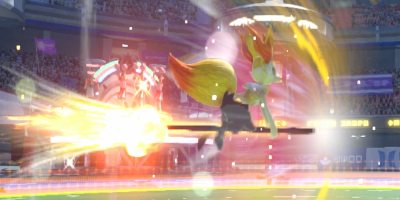
j.Y
![4[Y]](/images/thumb/9/92/Pokken_Braixen_4Y.png/150px-Pokken_Braixen_4Y.png)
4[Y]

Fire Spin
Psybeam

Enhanced Delayed Psybeam
[Click each image to be taken to the move's information]
At this distance, Braixen's threats boil down to their projectiles. j.Y, 4Y, and Psybeam become your best friends as j.Y and 4Y are good at setting up CADC traps with a follow up Psybeam and Fire Spin is great for halting grounded movement from the opponent. An understated threat Braixen has is this range however is the ability to build support gauge with Sunny Day and the potential to stack attack buffs before your next interaction. Your ability to do so and how efficient you're able to be depends on the matchup but it's an ever present option.
One major thing to look out for however is your positioning relative to the wall. It's very easy to lose track of how quickly you're approaching it and before you know it you could have your back against it, eating mixups from the opponent. Make sure that while you're retreating you're moving into closer ranges to threaten the opponent and potentially create space through your close quarters attacks. Supports are also extremely useful for creating that space but, again, if you're already at the wall it can only do so much.
Mid Range

Boomerang (6Y)

4Y

2X
Psybeam
[Click each image to be taken to the move's information]
Mid Range for Braixen is best visualized as the maximum range Boomerang travels. This range has the most polarity depending on who you're fighting but the options Braixen have are still potent nonetheless. 6Y is the most common option you'll probably rely on as it can crumple at the right spacing and if the last hit connects you're able to force your opponent to guess again. Psybeam is as much of an option here as it is at long range with the added bonus of it being harder to react to close up. 2X is a bit of an unexpected tool at this range but when used and spaced properly it's safe on block and grants a hard knockdown on hit. With certain attack supports you can get a full combo or a strong oki situation at the very least.
All of these attacks share the same weakness however: jumps. If the opponent gets a read, jumping or using a low crushing move to beat 2X will allow them to dodge and get a punish against you. That's where 4Y and 8A come in though! 4Y is very much a preemptive button to stuff those kinds of hard reads from your opponent and Flamethrower (8A) can be used either reactively or proactively. A full connection of 8A does nearly as much as a combo when Braixen is unenhanced for only 4 PSP, making it an extremely strong anti-air. And if you only graze the opponent, that's fine too, Flamethrower's PSP is only on the last hit so you get free damage! 4Y can also combo into Flamethrower as long as the opponent isn't too high up. Getting a full Flamethrower to connect in this situation is difficult but being able to do a decent amount of damage from an anti-air for only 1 PSP is worth it.
Close Range

8Y

5Y
5X

8X

Light Screen (2A)
[Click each image to be taken to the move's information]
Close Range is where a lot of newer Braixen players tend to struggle. Most of Braixen's normals have very little range and with the versatility and power of 8X, a lot of her grounded buttons can be easily undersold. Where Braixen's close range power comes from is the ability to support cancel every normal besides 6Y, 8X, and 4Y. With a support stocked any button that connects with the opponent, be it on hit or block, can be a potential support call for more pressure or damage. When you combine that with the ability to special cancel her 5Y string it leaves you with a ton of opportunities to mix your opponent. 8Y, while being a strong anti-air, is extremely powerful up close as it's a true mid that's only -8 on block with the ability to also be support cancelled. Braixen's 2Y, despite it's short range, is one of your safest pokes. It comes out on frame 11, is special cancellable, support cancellable, -4 on block, and safe against all but the fastest CAs. It may not be the absolute best choice for pressure but it's really good at quickly checking an opponent.
A lot of your close pressure at midscreen will make good use of those buttons as they're versatile and allow you to cover many situations without support. 5X is very good combo starter when you do have support as it has 0 scaling and is even more potent at the wall. It doesn't have the benefit of being special cancellable which means you have to use it a little more sparingly than the others. 5XX is a great staggered button and combo ender, it will also ground bounce a standing opponent and open up a few limited combo routes.
8X and Light Screen (2A) are arguably Braixen's best moves in Duel Phase, having an extreme amount of reward for moderate to no risk. 8X tends to be the button most Braixen's rely on. Although it's unsafe, the threat you're under comes down to how prepared your opponent is and if they're aware of their options. Braixen is able to air dash or use Flame Charge (j.A) after 8X turning the button into mixup. Having such an option allows you to keep the opponent guessing and will let you get away with more. Be careful to not overly rely on it however as you aren't able to support cancel this button, CAs are an extremely strong universal answer to it.
As for Light Screen, the only time you're at risk is when an opponent calls it out with a grab or quick armored attack. Light Screen is tied with 2Y, becoming active on frame 11 but it also has considerably more pushback on both hit and block. It also recovers very quickly allowing you to block a majority of CAs if hit in neutral and all CAs if done meaty. Where Light Screen shines on pressure is that it stuns the opponent if it Crits, allowing you to perform a full combo to max out on damage or grab them to gain spacing and support meter. When Enhanced it gains range, pushes back even further on block, and stuns for even longer on crit. It's hands down one of Braixen's best tools for pressure as there's more benefits to using it that any other button.
Defensive Tools

4X
Light Screen (2A)

Counter Attack
2Y
[Click each image to be taken to the move's information]
With Braixen, a solid offense is your best defense. Your ability to use Braixen's movement and supports to put yourself in favorable positions is key to survival and proper utilization will allow you to keep the upper hand. However, mistakes will be made and if you find yourself knocked down or in the corner it's good to know what options you have.
4X is by far one of your best wakeup options. It has both strike and throw invulnerability on frame 1 and pulls Braixen back a large distance before launching a counterattack. On hit it causes the opponent to crumple and is support cancellable. Despite its strengths though it's easily blown up by attacks with an long, active hitbox and projectiles. It's also quite unsafe without the ability to support cancel so you'll have to pick your spots wisely when you choose to use this move.
Light Screen, much like on offense, is quite powerful on defense as well. With it being tied in speed with 2Y and having projectile armor, it's your single best tool for blowing through meaty projectile setups on wakeup. Light screen destroys things like Suicune's 5X, Mewtwo's Focus Blast (j.A), and Gengar's Shadow Ball causing the opponent to use them differently, or not at all, against Braixen which allows you to wake up with more unconventional options like 5Y or 8X if you know they'll second guess their oki. Light Screen does have it's weaknesses however, with it having counter armor you open yourself up to a critical hit if the opponent goes for a meaty grab. It only having projectile armor hurts too as any meaty physical attack will hit you all the same. You're gambling a bit when you throw this out but the rewards are well worth the risk.
The alternative to Light Screen would be Braixen's 2Y. While being one of your shortest buttons it's still one of the fastest you have while being a dedicated grab break. 2Y also has the added benefit of being special cancelable (which 4X and 2A can't do) and support cancelable allowing you a bit more freedom in how you would escape a given situation. While the damage you'd get off of 2Y isn't great without specific supports available you're still able to grant yourself a decent amount of range by canceling into Psybeam or Flamethrower. If you choose not to cancel into anything you're plus enough for a strike/throw mixup on hit and if the opponent blocks or does CA you're safe as long as their CA isn't in the fastest tier (21 frames).
Outside of those specific attacks your use of universal options can take you far and do well to get you out of the corner. Braixen's CA is one of the fastest to activate and crumples on hit allowing you to jump out of the corner or force a shift if you choose to. Back dashing gives you a set amount of invulnerability, similar to 4X, and gives you more options to counter with since you aren't locked into an attack. Although back dashing is a bit difficult as people can change their meaty timings to catch it if they expect it. In addition to those there's also jumping out of the corner, or away from the opponent if you're midscreen. Jumping is probably the biggest gamble out of all of the previous options but it's the one people expect the least. With Braixen's jump being as floaty as it is you aren't going to get a lot of opportunities to punish your opponent if you jump over them but reversing the situation is extremely valuable.
A lesser thought of defensive tool at your disposal is PSP itself! It takes some experience and getting used to in order to learn how much PSP each individual combo an opponent performs on you takes but once you understand how much PSP is left before a shift you can use it to your advantage. The lower your PSP the more likely it is for your opponent to go for specific attacks to maximize their damage before the shift.
Using Lucario as an example, let's say they perform this combo: '6[X] > 6AA > 6AA > 5YY W!'.
That combo on its own does 11 PSP and leaves you at the wall and Lucario with one last potential mixup before a shift. Lucario only has a number of options they can pick from to maximize damage. 5YY > 4A or a grab. Many of Lucario's other attacks will force a shift which, while still leaving you at a disadvantage, will leave you taking far less damage than you would've taken otherwise. Knowing how PSP limits the potential damage you can take and how it affects the decisions of your opponent will allow you to make more informed decisions on wakeup! [If you're a beginner, come back to this advice later. Focus on learning whether or not Braixen fits what you want to do before tackling something like this]
Matchups
Suicune

Suggested Supports

Farfetch'd: An extremely solid support for the matchup. Farfetch'd allows Braixen to favorably trade against Suicune's attacks in Field Phase and is a solid "pause button" support, giving you time to see what Suicune is doing before you react. Whether it be on hit or on block, Farfetch'd allows you to control what Suicune does and puts them where you want them to be. Most calls of Farfetch'd that hit also lead to some serious damage, allowing you to extend a health lead or make a comeback.


Snivy: An overall good support for any matchup, Snivy allows you to take Suicune out of the air at close range which is an area Braixen has trouble contesting reliably. With Snivy's armor and large hitbox, any jump Suicune makes at close range should usually land you a solid anti-air combo and if not it'll give you a solid amount of pressure on Suicune.
Field Phase Strategy

f.Y
b.Y
Homing Attack

Air Homing Attack
Mirror Coat

Icy Wind
Golf Swing (b.Y)
Boomerang
Homing Attack
UNDER NO CIRCUMSTANCE SHOULD YOU EVER START THE ROUND WITH SIDE-Y. THAT'S ASKING TO EAT A MIRROR COAT. Same thing with using it in neutral before Suicune has committed to anything. sY, nY, and Psybeam are best used as meaties after you've won Duel Phase or after you've forced Suicune to block something else. However, Braixen can use s[A] to dodge a Mirror Coat activation on reaction, at best it'll be a return to neutral and at worst you eat Hydro Pump, it's best used as a way to save yourself rather than a consistent answer. It does take a little time to get used to doing however since it's less useful at further ranges due to the recovery sY has. At round start, bY is a solid opener but is susceptible to being sniped by Aurora Beam, use it sparingly or Suicune will catch on. Suicune may also start with bY, their ice wall, at round start. Suicune bY will nullify the fireball from Braixen's bY and nearly all projectiles Braixen has aside from Fire Blast, Fire Spin, and EX Psybeams during its duration.
At long range, your best bet is to wait for Suicune to act and then react accordingly. Whenever Suicune throws out an Aurora Beam or any slow projectile you can choose to move out of the way and Sunny Day or advance towards them. Each have their own merits as constantly using Sunny Day forces Suicune to come to you if they want to deny you the support gain and attack buff, but it does leave you open to potentially being sniped if you misstep. Icy Wind being the exception as Suicune can charge it for longer to give it more hits. Icy Wind also tracks fairly well so you'll be forced to answer with a dash, sA, or CA, all of which can be sniped out by Suicune if that's what they're looking for. Blocking it also gives Suicune time to close the gap while retaining an advantage, be very careful when dealing with this move.
Advancing to mid-range against Suicune means that their biggest threat, Mirror Coat, isn't as big of an option as fY will catch them out of numerous attacks and has a tendency to blow through their CA. At close range it's a bit more even between the two of you, however Suicune's Homing Attack has more priority than Braixen's. On the bright side, Suicune's Homing 3 is very easily reacted to with b.X leading to a consistent punish that gives you a knockdown. Suicune's air homing is also extremely fast and does a very good job of avoiding Braixen's Homing, bY will be your secondary option for physical attacks against them. bY also has the luxury of being safe against Suicune's CAY at certain ranges and even more so when done meaty after a shift from Duel Phase. Otherwise, your time spent close range against Suicune will be a giant game of chicken until one of you guesses wrong.
Duel Phase Strategy
5X

Blizzard
Icy Wind

jY

2X

8Y

Counter Attack

Delayed Psybeam
Boomerang (6Y)
5Y
Light Screen
8Y

Flamethrower
Duel Phase against Suicune is very much decided by whether or not you're able to keep your cool under pressure. Suicune has a lot of cancel options to mixup their attack pattern and when they get momentum it can be very hard to decide what you should do next. Above are some of the more common moves you'll see Suicune use in Duel Phase, all but the last few can be countered with Light Screen. Yet, those are some of the most dangerous buttons Suicune has. Proper navigation of the ranges both you and Suicune occupy will be key to winning Duel Phase and keeping momentum.
At both long and mid range, there's very little Suicune can do to threaten Braixen as long as you stand still and throw out Light Screen. Suicune's chance to deal damage at this range comes from trying to snipe Braixen's movement while they're trying to close distance or create space. Close range is where this matchup is played and it's by far the most dangerous place to be. Suicune can consistently put out a solid amount of damage from any solid hit, namely from: 6Y, jX, and 8Y. Suicune's 8Y is a fairly quick anti-air that's safe on block and launches on crit. Despite it being invulnerable to mid-highs on frame 5, because of how far Suicune's hurtbox pulls back it's extremely good at catching out Braixen's 8X. Also because of this attack and 4Y, grabbing Suicune is best saved for when you have them scared enough to not mash on your pressure. 6Y is a lunging attack with a follow up. Both hits are punishable on block with either Light Screen or 2X, however, there is potential to eat the second hit if you try to punish the first hit too soon. Be very careful when dealing with this attack. Suicune's CA is a really important thing you'll have to learn to deal with. As long as you're not at the maximum distance for Braixen's boomerang (6Y), Suicune should not be able to armor through it and punish, getting into that space makes throwing it a bit more of a risk.
5Y is extremely good on oki and against Suicune's CA especially as at any point during the string you can either support or special cancel. Canceling into Flamethrower (8A) is a good call out to a CA.Y from Suicune but depending on your timing it may whiff. Whiffing isn't all bad though as the worst that can happen is a change in positioning. Braixen can also cancel into Light Screen (2A) to prevent being crit by Suicune's CA. Sometimes it may even hit Suicune out of CA or catch them in a CADC. If hit you will most likely end up knocked down but preventing the crit can give you another chance to make a comeback, should you survive.
While Delayed Psybeam is an extremely good oki tool overall it's also *very* good at baiting Mirror Coats out of Suicunes that believe that you'll continue throwing things out. When enhanced, Delayed Psybeam travels nearly full screen and at that range you have more than enough time to assess the situation before Suicune commits to Mirror Coat. If you have a read that they may go for Mirror Coat, jumping forward and air dashing at them will net you a punish with j.8Y and a combo into a knockdown or shift. There's potential to get a punish with j.X but that's a little bit tighter and requires you to have jumped well before Mirror Coat activates.
Fighting Suicune in burst is quite different from fighting most other characters. Since they have Mirror Coat, using the usual projectile pressure is much more risky. Trying to force your way in with EX Flame Charge is also equally risky. Suicune's 8A is high invulnerable extremely quickly, does a lot of damage, and hits extremely far. Their 8Y is very similar and has the unfortunate ability of being able to hit far above and behind him. These options being risky do not mean they they're useless though. Proper use of them, like on oki or in between up close pressure strings, will be the key to making the most out of your burst mode. However, Delayed Psybeam continues to be your friend. If they Mirror Coat or CA it at any point, Braixen's Burst Attack activates fast enough and reaches far enough that it can punish from nearly full screen.
Defense
With the amount of options Suicune has on offense, it can feel very overwhelming when they have pressure. Yet Braixen has many tools on wakeup that force Suicune to rethink their approach on how they commit to Oki
All of Suicune's most common okis: 5X, Hail, and Icy Wind are all projectiles and are equally susceptible to wake up Light Screen. If Suicune is able to and commits to a non-armored attack to continue pressure it will result in them being crit by Light Screen. Suicune does have fake outs in 5X and Icy Wind cancels though and can land a meaty grab after, so be very careful to not overuse Light Screen in these situations.
The rest of Suicune's options however: j.X, 5Y, and 8X all present their own situations and each have their own answers. Depending on how high j.X hits your shield determines how much of an advantage Suicune has against you. The lower Suicune is to the ground when it connects, the more risk there is to trying to force your way out and take a turn. It's not plus enough that you can't fight your way out with a move like 2Y or Light Screen, but if Suicune goes for a 2Y or 4Y of their own, you will usually lose that interaction.
5Y has a lot of hits and active frames and if Suicune decides to follow up with 5YY it can potentially catch CA if you let it go early or possibly catch you trying to mash your way out. They can also special cancel it into Mirror Coat to save themselves from a crit if you let go of CA early. On block 5Y is about -X, giving you the chance to fight your way out with something like 5Y or 5X. If you have your support up, it's the perfect chance to support cancel and force your turn even if it's on their CA.
Support Breakdowns
Emolga/Fennekin

| Strengths | Weaknesses |
|---|---|
| ✓ Speed Debuff is quite powerful ✓ Safe on most support cancels ✓ Pierces armor |
✖ Potential weird axis interactions in Duel Phase ✖ Special Mid ✖ Somewhat Lackluster in Field Phase |
Function: Speed Control
Charge (Recharge) Time: 20s (30s)
Damage: 50
Scaling: 60%
Properties: Pierce, 15s Speed Debuff
Emolga is the first of six beginner friendly supports for Braixen allowing you to continue pressure, steal a turn, or force a shift should you combo into it. The speed debuff that comes with Emolga is also very useful in controlling the pace of your opponent and if all of the hits connect it will last about as long as it takes to fully charge the gauge again.
Emolga isn't the most hard hitting support but what it lacks in damage it makes up for in a heavy speed debuff and the ability to pierce armored attacks. On hit Emolga launches and at most ranges Braixen can get some sort of follow up from one of their long reaching attacks like 5A or 6Y. If no follow up is chosen or you're not in range, the opponent is put into a hard knockdown state allowing you to potentially setup oki or position yourself where you'd like. If combo'd into you have the option to either do a full combo into a shift or get a solid carry to the wall if you choose. The speed debuff does not affect jump speed or special movement options like Scizor's Hover Dash, Garchomp's Run Stance, or Empoleon's Slide so be wary of that. For those that don't have special movement options, the speed debuff tends to make opponents jump more or use air dashes to interact with it as little as possible. This makes it easier to read what they're going to do next and react accordingly so that you can force them to play against it, instead of around it.
It does have a few weaknesses however. Calling it in neutral has varying levels of success depending on the opponent. Most characters have ways to either neutralize or avoid Emolga entirely at most, if not all, ranges either through their 8Ys or specials they may have. The same goes for calling it against an opponent in Burst Mode. If their Burst Attack becomes invulnerable quickly or is an advancing attack, calling it becomes a massive risk. Emolga also has travel time; even against Burst Attacks that become invulnerable later, with enough range it can still be risky. Against Burst the best way times to call it is when support canceling off of 4X, 5XX, or 2X.
There are also a few intricacies that come with Emolga. Since Emolga appears to the right of Braixen, the projectiles it fires come out at a slight angle. At close range in field, the opponent can angle their homing attacks to their right and punish and at further ranges, simply walking/dashing to the side allows them to dodge. In Duel Phase this can lead to weird interactions at the wall, causing both the camera and the opponent to shift slightly and alter your combos. It should also be noted that the speed debuff is only 20 seconds if all hits connect. Each hit adds 2 seconds, making it easy to determine how long the debuff will last by multiplying the number of hits by 2.

| Strengths | Weaknesses |
|---|---|
| ✓ Frame 1 Invulnerability ✓ Grants a ton of space ✓ Extremely active hitbox |
✖ Slow startup makes it susceptible to being punished ✖ Countered by other supports |
Function: "Get Off Me" / "Give Me Space"
Charge (Recharge) Time: 30s (40s)
Damage: 80
Scaling: 60%
Properties: 1~65f Invulnerability, Pierce
Fennekin is the second beginner friendly support out of the sets available, giving Braixen an invincible support that grants a lot of space whether it hits or is blocked.
Fennekin is what you see on the tin, an invincible support with the main focus of creating space and alleviating pressure. It has quite the surprise factor when used on the offensive however. It may have a slow startup, but when used on a support cancel you're usually at a range where a majority of characters have no options to avoid it outside of an invincible support or well timed invincible option. When combined with the amount of pushback Fennekin offers, it becomes somewhat easier to push the opponent into the corner if you want to be the one on a constant offensive. Fennekin is also +4 on block so once your opponent is in the corner it makes for an effective knowledge check; if they try to mash out you can check them with Light Screen (2A).
As a "get off me" support however it is a bit lackluster at the higher levels compared to Umbreon and Ninetales. Its hitbox comes out painfully slow and it doesn't have an added debuff on hit like the other two do. It also doesn't have the same amount of passive pressure as those two do. Fennekin is also much easier to punish than the other two are. Because its hitbox comes out so slow and the invulnerability runs out just as the hitbox becomes active any opponent in Burst Mode gets a free punish with their Burst Attack with the exception of Empoleon (they can punish with BA but it's extremely difficult). If the opponent is very mobile, has a long ranged attack or non-disjointed projectile, they can punish Fennekin if you're baited into using it.
Snivy/Lapras
| Strengths | Weaknesses |
|---|---|
| ✓ Has Counter Armor ✓ Tracks opponent ✓ Plus on block ✓ Tall Anti-Air |
✖ Hits weirdly sometimes ✖ Gives a ton of Synergy Meter if CA'd |
Function: Anti-Air tornado that covers a tall vertical space that Braixen can't
Charge (Recharge) Time: 20s
Damage: 63
Scaling: 40%
Properties: 1~65F Counter Armor, Destroys Projectiles while active
Snivy is the third of our beginner friendly supports, one primarily used for anti-airing. Its a large vertical hitbox that consistently hits a space that Braixen's 8Y and 8A have trouble with: Directly above her. While anti-airing is its primary goal, Snivy makes for a decent reversal and pressure tool. Support canceling into it is a lot like if you were able to cancel any of Braixen's grounded normals into a CA with a forced knockdown on hit. Snivy is also +16 on block giving Braixen a decent amount of advantage should you wish to continue pressure. Another use for Snivy that tends to be overlooked is using it as a reversal against Burst Activations. Simply calling it once they activate Burst Mode forces them to respond to it and unless they have a Burst Attack with Counter Armor their only options will be to use their own CA, which can be grabbed, or block it. Either option drains a solid amount of their burst gauge meaning you'll have to deal with it less than you'd usually have to.
The weaknesses of Snivy are very few and far between with the most prominent one being that it can be grabbed in neutral if you call it without a cancel. However, only characters with an 11f grab can do so and it has a particular timing. If your opponent doesn't know this timing it's a much more viable option. Depending on the opponent and how Snivy hits there can be some weird interactions with how they're launched into the air or hit on the ground. This isn't so much of a weakness as it is a peculiarity. It'll take some practice to learn how to confirm from these stray hit situations but even if it doesn't lead to a full combo it will always lead to a knockdown and oki. As a multi-hit attack, Snivy also gives a ton of Synergy Meter should the opponent happen to CA it. Braixen does have ways to dissuade an opponent from doing so but most of them depend on the CADC of the opposing character and the option you choose. Against characters with slow dashes, 6Y or 8X are good options but you will have to call out when they dash cancel. Characters with slower dashes usually have much longer CAs to compensate and the hitstop from Snivy tends to extend those armor frames.

| Strengths | Weaknesses |
|---|---|
| ✓ Destroys Projectiles once active ✓ Hard to avoid in Field ✓ Hits very hard ✓ Pierces Armor |
✖ Limited Combo Routes |
Function: Powerful Combo/Pressure Tool
Charge (Recharge) Time: 40s (30s)
Damage: 141
Scaling: 45%
Properties: Pierce, Destroys Projectiles while active
Lapras, the fourth of the beginner friendly supports, is also one of the hardest hitting out of the 6. Lapras as a support cancel option is extremely powerful as it pierces armor, is +10 on block, and is very hard to avoid for most characters at close range. While it has a longer recovery than the other supports in this group of six, its large lingering hitbox more than makes up for it. At most ranges Braixen is able to position and cover an opponent's attempt to jump out, which can lead to a punish and the potential to regain a lot of support meter for another call of Lapras. In Field Phase it is immensely valuable due to its ability to nullify most non-beam projectiles from the moment the hitbox becomes active. It still retains its large hitbox and had a solid amount of tracking as well making it even more difficult to avoid for slower characters, especially when combined with the various projectiles Braixen can throw out.
The only immediate weakness Lapras has is that comboing into or confirming off of it is quite awkward depending on various factors. Namely the character you're fighting, how Lapras hit, and how high the opponent was. Despite that, a full combo isn't necessary to make use of it as it does up to 141 damage on its own and grants a hard knockdown that allows you to set up oki. However, Psybeam tends to hit most characters in most situations so if in doubt or if you're close to shifting it's a solid option to go for.
Frogadier/Eevee

| Strengths | Weaknesses |
|---|---|
| ✓ Easy to combo from ✓ Allows for decent chip damage setups ✓ Staggered attacks make CAing it more of a risk |
✖ Less threatening the further away you are ✖ Braixen not having a pierce outside of [CA] means pressuring is somewhat of a risk at range ✖ Gives the opponent a good amount of Synergy if CA'd |
Function: Staggered Pressure / Guard Pressure
Charge (Recharge) Time: 20s
Damage: 20 per hit
Scaling: 10% per hit
Properties: N/A
Heading off the last two of the beginner supports, using Frogadier as Braixen results in a slightly higher skill ceiling than the rest. With Braixen lacking a piercing option outside of charged CA you're forced to get a little creative with your pressure if you want to make the most use out of Frogadier. When support cancelled, Frogadier leaves Braixen plus on block. Even if the attack isn't a true block string into Frogadier's attacks. After the first volley however, you're left with a mixup opportunity as there is a large enough gap for the opponent to act. In most cases, they may go for something armored due to Braixen's lack of piercing options and because Frogadier gives a ton of Synergy meter when armored. In those situations it's up to you to decide to go for the grab or to catch the vulnerable frames of the armor. If they choose to take the pressure itself, depending on whether or not you're enhanced you can lay down some serious chip and shield damage to the opponent's shield.
On hit, Braixen is given a bevy of potential combo options in both field and duel. Most of which can potentially end in Braixen regaining a large chunk of Frogadier back in the process, if not fully regaining it entirely. Whether it be for damage, corner carry or for timing someone out entirely, the options you have for combo routes with Frogadier are as varied as you the many ways you can confirm off of it.

| Strengths | Weaknesses |
|---|---|
| ✓ Attack Buff timer stacks with Braixen's ✓ Heals 70 Recoverable HP |
✖ None |
Function: Near Persistent Attack Buff with heals on the side
Charge (Recharge) Time: 20s (40s)
Damage: N/A
Scaling: N/A
Properties: Heal 70 Recoverable HP, 10s Attack Buff
Rounding out the last of the beginner supports we have Eevee! Eevee allows Braixen to keep an attack buff for extended periods of time. In combination with Braixen's own attack buff from stacking Sunny Days, you can maintain it for a long period of time potentially doubling or tripling the amount of time it usually lasts.
As with all enhance supports the recovery on Eevee is very low, making buttons like 5XX, 2X, and 4X plus on block and making all others safe and making it a good "pause button" to gauge what's going on. Having an Attack Buff also allows you to break right through Burst Armor with all of your attacks and any solid combo can result in draining a ton of time from their gauge. The added 20% in damage does wonders to increase the potency of Braixen's combos, allowing you to deal an above average amount of damage from anywhere on screen.
Cubone/Diglett

| Strengths | Weaknesses |
|---|---|
| ✓ Large hitbox in Field ✓ Second hit pulls opponent towards you ✓ Deletes Projectiles |
✖ Less effective at longer ranges |
Function: Punishing/Trading tool against projectiles
Charge (Recharge) Time: 20s (30s)
Damage: 30 per hit
Scaling: 10% per hit
Properties: N/A
Cubone may seem like an unappealing support choice from looks alone but it's a solid choice for anyone that's willing to use their health as a resource against those that are willing to play keep away. Although not a particularly damaging support Cubone charges surprisingly fast and it's projectile is equally speedy. Once called it deletes most non-beam projectiles and on both hit, and block, pulls the opponent towards you (In field it pulls the opponent towards the direction you're facing so be aware of that). When used against beam projectiles or physical that have a low amount of hitstun you're able to trade a little bit of health for a potentially larger reward in damage against the opponent and at the very least, a much better position. However, with all of these upsides it's ideal range is mid-range. It can lead to a decent mixup if it hits up close but since it doesn't pierce it's a guess you have to be confident in and at longer ranges Braixen's left with limited options to cash out on damage.

| Strengths | Weaknesses |
|---|---|
| ✓ Easy to confirm from ✓ Near full screen/field tracking |
✖ High scaling ✖ Long recovery after use |
Function: Field and Duel Phase pressure that has to be answered in some fashion
Charge (Recharge) Time: 30s (20s)
Damage: 92 (Field), 83 (Duel)
Scaling: 70&
Properties: N/A
Diglett is a support that's a bit hard to get a read on at first glance but for those who like to keep pressure and always have a support up for it, Diglett is that choice. While the initial charge time is 30 seconds every subsequent charge is only 20 and with Braixen's Sunny Day shaving off a flat 10% (15% for EX) from the timer, a fast and aggressive play style will allow you to keep Diglett up for nearly every interaction you need it for. As another selling point, for every time Diglett is called it forces a response from the opponent in both phases. Since Diglett tracks and goes for quite a long time it gives you time to also chase behind it to force something from your opponent. As this support leans towards more offensive playstyles, the best times to call it are normally after a knockdown or a shift from Duel to Field.
A potentially fatal issue with this support though is that it's an extremely poor support cancel option, with all support cancel options being grab punishable by even i15 grabs unless properly spaced. Your defense as a player will need to be quite solid to make up for the lack of safety Diglett gives you. As
Jirachi/Whimsicott

| Strengths | Weaknesses |
|---|---|
| ✓ Increases ATK/DEF while in Burst Mode ✓ Atk increase stacks with Synergy buff ✓ Allows for more Burst activations than usual |
✖ Buff is only useful in Burst Mode ✖ Putting all your eggs into the Burst basket |
Function: Overwhelming burst damage and pressure
Charge (Recharge) Time: 40s
Damage: N/A
Scaling: N/A
Properties: Gain 30cc of Synergy, 12s Synergy Burst Buff
Jirachi has a bit of a reputation for making Burst, an already momentum swinging mechanic, even more of a momentum swinger and in some cases a round closer off of a single interaction. On Braixen that's no exception, especially when combined with the ability to be granted attack buffs through multiple Sunny Days. When combined Braixen can dish out damage in one move that could take her an entire combo to do otherwise. When Rage is added into the equation with Jirachi alone, that's a solid 40% boost to damage and 50% boost to defense allowing Braixen the ability to take more damage before being knocked out while also giving the first attack she lands a massive extra kick! These offensive bonuses also apply to Braixen's chip and shield damage as well allowing you to break an opponent's guard much faster than normal and force a reaction from them if they want to keep themselves from having their guard broken and losing valuable synergy.
The big downside to running this kind of strategy however is that it's very one dimensional. Your end game will, in most cases, be to overwhelm the opponent with burst mode while using this support. This makes it easy to play around and sometimes outright deny. Characters that can apply their own debuff can compound on top of that and run a support like Emolga or Umbreon, two supports that can apply a second debuff to overwrite your Synergy buff, and in the case of the latter, also steal some of your Synergy gauge. There's also the case of them forcing it to Field Phase, where Braixen's burst mode is a lot less potent and much easier to stall out. If you're looking to quickly overwhelm and 2-0 your opponent before they even know how to adjust, this is your support but at higher levels it takes a lot more nuance.

| Strengths | Weaknesses |
|---|---|
| ✓ Has Counter Armor ✓ Deletes Projectiles ✓ Heals 60 Recoverable HP |
✖ Braixen has Light Screen in Duel Phase ✖ Braixen has movement speed and options in Field |
Function: You're having trouble getting around certain projectiles in field
Charge (Recharge) Time: 30s
Damage: N/A
Scaling: N/A
Properties: 1~15F Counter Armor, Heals 60 Recoverable HP, Destroys Priority 1 ~ S Proojectiles for 5 seconds
Whimiscott doesn't particularly help in any matchup Braixen has currently. It can be used against Weavile as a way to ignore his space control in field but Braixen has projectiles that accomplish the same feat without putting you at that much risk. If anything this support is much better as a way to feel out how projectile interactions work as Braixen and as an extra safety net until you're comfortable with the options Braixen provides in avoiding and nullifying projectiles. As it's own standalone support there's nothing it does that another support couldn't do for you and then some.
Croagunk/Sylveon

| Strengths | Weaknesses |
|---|---|
| ✓ Area Denial ✓ 11 Second Defense Debuff ✓ Quick Initial Charge |
✖ Hard to apply debuff without a setup ✖ Does not apply debuff through Counter Armor |
Function: No-Go Zone for time outs or to soften up your opponent
Charge (Recharge) Time: 20s (30s)
Damage: 40
Scaling: 0% (20% if opponent is already debuffed)
Properties: 11s Defense Debuff on hit/block
Croagunk is a support that's somewhat difficult to use well if you intend to use it for its debuff. The attack comes out fairly slow, and the debuff can't be applied through counter armor. When combined with Braixen's lack of counter piercing options, it's a bit difficult to force an opponent to block it. However, that doesn't mean it's impossible. Charged Fire Spin oki usually gets the opponent to think twice about waking up with CA and grants you the defense debuff you're looking for. The debuff itself is quite powerful too, as it decreases your opponent's shield health and causes them to take more chip damage. When combined with Braixen's attack buff, any solid hit or chip setup will do 40% more damage and will most likely put a shield within range of breaking (Against strong shields like Scizor and Empoleon it'll take a bit more effort).
Aside from it's debuffing capabilities Croagunk is amazing for zone control as if the opponent steps into Croagunk's radius, its attack is launched. It makes for a very effective stalling tool as options around it are very limited in some matchups. As a support cancel on block it's quite a viable option as well. It's not the most advantageous but it does keep you safe and force the opponent into another mixup on most buttons outside of Braixen's 5Y string. On hit however it's fairly bad outside of getting a wall splat, a crumple from 4X, or crit Light Screen.

| Strengths | Weaknesses |
|---|---|
| ✓ Grants Braixen a higher HP pool ✓ Quick Initial Charge ✓ Makes Braixen much harder to kill |
✖ Recharge is on the slower end |
Function: Gives Braixen much more leniency in making mistakes
Charge (Recharge) Time: 20s (40s)
Damage: N/A
Scaling: N/A
Properties: Heals 70 Recoverable HP, 12s Defense Debuff
Sylveon is your Eevee for making mistakes. Granting Braixen a 20% defense boost and healing 70 HP it gives Braixen a much higher HP pool than many characters in the game. As a support cancel it's the same as all of the other enhance supports in regards to frame data. The bonus it has is that if you cancel onto an armored move that would hit you, you'll take less damage than you would normally. When combined with both Rage and Burst, Braixen is granted a large 60% reduction in damage which in most cases gives you another chance or two to mount a comeback in what could be a round ending situation.
Pachirisu/Magikarp

| Strengths | Weaknesses |
|---|---|
| ✓ Deletes many projectile supports ✓ Deletes many projectiles ✓ Quick Charge Time |
✖ Falls into the same category as Whimsicott but it does delete many supports that Whimsi can't |
Function: Anti-Support Support
Charge (Recharge) Time: 20s
Damage: N/A
Scaling: N/A
Properties: 1~15F Projectile Invul, Destroys Projectiles Priority 1 ~ S for 3 seconds
Pachirisu is quite similar to Whimsicott in its purpose but the projectiles it's able to protect you from are somewhat more versatile. While it does delete a much larger variety of projectiles, Pachi doesn't do so instantly and at point blank ranges you can still be open to attack. Beams are still a factor as well and while Whimsicott is able to block an attack like Suicune's Aurora Beam, Pachirisu is unable to.
However, an underrated strength Pachirisu has is as a support counter. Pachirisu is able to completely nullify supports like Emolga and Dragonite. Even fully invincible supports like Fennekin and Umbreon are made trivial to punish. While Pachi is up, it's an ever present counter call to some of the most common supports and in some cases can net you a solid punish. On support cancel it acts similarly to enchance supports, making some attacks plus on block while leaving others safe.

| Strengths | Weaknesses |
|---|---|
| ✓ Saves you from combos ✓ Effectively a 10 second pause ✓ 14 Second Speed Debuff on hit |
✖ Long Initial Charge |
Function: Pressure support that also forces the opponent to act somewhat predictably
Charge (Recharge) Time: 50s (30s)
Damage: 19
Scaling: 20%
Properties: Pierce, 15s Speed Debuff
Magikarp is a 3-for-1 of combo breaking potential, a rushdown aide, or as a way to slow down the pace. Although it has a slow initial charge time, once it's active the options your opponent have to combat it are limited. Magikarp comes down onto the opponent the instant you take damage whether or not it causes hitstun and applies a speed debuff to them, with the exception being grabs. With that in mind the most common counterplay to it outside of supports are armored attacks and grabs.
Since Braixen lacks armor piercing attacks you'll have to smartly structure your offense and play around those options. If you take a trade, depending on if you were launched or crumpled you'll usually be even or slightly negative once you and your opponent wake up. Magikarp is also one of the few supports that benefit from Braixen's trait of building support meter on hit. Even while Magikarp is active a solid hit can give Braixen a 10% headstart on the next call and that's before factoring in potential Sunny Days. After a Phase Shift, Magikarp can be anywhere between 35-50% recharged allowing for it to be up in time for your next interaction.
Mismagius/Ninetales

| Strengths | Weaknesses |
|---|---|
| ✓ Grants Attack Buff for 5 Seconds ✓ Slow Moving, Piercing Attack ✓ Has Unblockable Setups |
✖ Long Recovery On Call ✖ Awful Support Cancel |
Function: A slow moving attack that grants pressure and various setups on knockdown
Charge (Recharge) Time: 30s
Damage: 46
Scaling: 10% per hit
Properties: Pierce, 6s Attack Buff
Mismagius is one of the tougher supports to get used to but one that grants a lot of reward for the effort spent. Mismagius is a slow-moving, piercing attack that allows Braixen to apply a lot of physical or projectile pressure with relative safety.
The attack buff it grants is nothing to write home about compared to the other supports that grant it but it lasts as long as it needs to, which is just long enough to get value out of the next interaction. Whether it be solid chip/shield damage, pressure, or an unblockable the attack buff is enough to be meaningful. Speaking of unblockables, with the proper spacing and practice Mismagius can be used to guarantee a close to a round on fairly common knockdowns.
--Setups will be added later!--

| Strengths | Weaknesses |
|---|---|
| ✓ Frame-1 Invulnerability on Call ✓ Has Unblockable Setups ✓ 20 Second Attack Debuff if it fully connects ✓ Hard to jump over |
✖ Exploitable with Perfect Blocks ✖ 40 Second Charge Time |
Function: A hard to pass wall that's useful for both offense and defense
Charge (Recharge) Time: 40s
Damage: 69
Scaling: 60%
Properties: 1~65F Invulnerability, Pierce (Shockwave Only), 20s Attack Debuff (3s per hit)
On its face, Ninetales looks much like other reversal supports but it doubles as a very potent offensive tool. Ninetales creates a large wall between you and the opponent that is hard to jump over and can only be avoided by very specific means. With this being the case its application as a huge stop sign or as a jail for your opponent makes it a valuable tool.
Ninetales is one of the only supports that begins to recharge the moment it's called meaning that with the right interaction, Ninetales can be back up in a matter of moments. With that in mind, Ninetales has consistent unblockable potential at the wall. The spacing for it is character specific and it takes some practice to get used to but the ability to checkmate opponents is well worth it. If the opponent does decide to get hit by the wall it allows Braixen to gain even more meter before following through, allowing Ninetales to be that much closer to being called again.
Keep in mind that Ninetales isn’t a fully safe panic button in all scenarios. Characters with long-ranged, fast Burst Attacks like Pikachu can perfect block Ninetales’ shockwave in Field Phase and hit a free Burst punish during your recovery frames, and Weavile can use Agility and Taunt to armor/invuln through all of Ninetales’ hits to remove the wall early and debuff your synergy burst in the process.
Rotom/Togekiss

| Strengths | Weaknesses |
|---|---|
| ✓ Solid Anti-Air ✓ Applies Powerful Speed Debuff |
✖ Has Aerial Counterplay ✖ Awful Cancel on Block |
Function: Piercing Anti-Air that doubles as a strong offensive tool
Charge (Recharge) Time: 20s (30s)
Damage: 40
Scaling: 40%
Properties: Pierce, 13s Speed Debuff
Despite its primary use as an anti-air support, Rotom is equally capable as a combo tool or as a way to deny your opponent the option to jump. Although Rotom heavily scales any follow ups by half, the amount of options Braixen has to set up more pressure is vast and potential wall damage with it is extremely high, leading to upwards of 200+ and a solid chunk of support gauge.
Rotom is not without its weaknesses though. Characters with high aerial mobility or invulnerability, like Croagunk and Gengar respectively have easy ways to avoid Rotom should you call it in neutral. A majority of characters with air dashes or a jX that brings them immediately to the ground can be used to either land and block before Rotom activates or to purposefully take the hit and Debuff while avoiding the stun that comes with being hit out of the air. It will take some practice to make the most out of Rotom but it's well worth it for the control it can give.

| Strengths | Weaknesses |
|---|---|
| ✓ Improved Move/Dash Speed ✓ Recovers 70 HP |
✖ Speed Buff takes getting used to |
Function: Improved Movement in both Field and Duel Phase
Charge (Recharge) Time: 20s (40s)
Damage: N/A
Scaling: N/A
Properties: Heal 70 Recoverable HP, 10s Speed Buff
There's not much to add say about Togekiss that hasn't been said about the other enhance supports, however the reward you gain from it is what you make of it. The speed buff it provides is extremely potent and makes Braixen extremely fast, fast enough to open new combo and punish routes. In Burst Mode, Braixen becomes one of the fastest characters in the game which takes some getting used to if you're not used to the speed buff. And on support cancel, like all other enhance supports, all of Braixen's buttons become safe on block and 5XX becomes plus.
Farfetch'd/Electrode
| Strengths | Weaknesses |
|---|---|
| ✓ Staggered Pressure ✓ Low Scaling and Recovery ✓ Strong Field Tracking |
✖ Staggered Pressure ✖ Weird Routing On Certain Characters |
Function: All-Around Pressure/Combo Support
Charge (Recharge) Time: 30s
Damage: 36
Scaling: 20% (Second Hit Only)
Properties: N/A
Farfetch'd is quite possibly one of the most versatile pressure tools for Braixen. It has an average charge time so you'll get at least 1 call of it, even if things are going poorly. In Field it has an amazing amount of tracking and goes about 2/3rds of its length and about half screen in Duel. Each of its 3 hits are staggered and while that means opponents can CA in between, it opens up a wealth of mixups from grabs to setups to blow through CA armor. It can also lead to a solid amount of chip damage on block and an amazing amount of damage on hit.
Farfetch'd only has scaling on the second hit, allowing Braixen to put out a large amount of damage on any hit and damage near the 300 HP range at the wall. On Support Cancel it's similar to enhance supports in terms of recovery but it's much more positive due to it being an attack support. This also makes it a very potent option if trading with certain CAs or for blowing through them entirely.
| Strengths | Weaknesses |
|---|---|
| ✓ Massive Chip/Shield Damage ✓ Massive Damage on Hit ✓ Frame 1 Counter Armor |
✖ Most Players Know How To Play Around It |
Function: Massive chip/shield damage and a disincentive to haphazardly thrown out attacks
Charge (Recharge) Time: 30s
Damage: 160
Scaling: 80%
Properties: Pierce, 1~65F Counter Armor
Electrode as a support is an extremely good deterrent to players who like to casually throw out attacks. While being a decent tool for anti-zoning it is susceptible to being armor pierced or baited and is something that you'll need to look out for while using it.
Once activated Electrode approaches the opponent at high speed and explodes, dealing massive damage on hit or block and a decent amount of shield damage as well. While it can be avoided, it can only be done by specific characters if not avoided by an invincible support or burst activation. If it is avoided by either burst or a support call, the trade in resources is well worth it as you'll most likely be able to regain Electrode before they're able to regain either of those resources. If the opponent is already in burst however Electrode, even on activation, is vulnerable to many, if not all, burst attacks so using it is heavily based on your confidence to make it work out in whatever potential situation you may be in. Regardless of these instances, Electrode is still a powerful counter tool against those that refuse to respect it.
Dragonite/Victini

| Strengths | Weaknesses |
|---|---|
| ✓ Strong Shield Damage ✓ Strong Chip Damage ✓ Nearly Full Screen in Duel |
✖ Long Recovery ✖ Susceptible to Pachi ✖ Raw calls are risky |
Function: Chip & Shield Damage with a high potential for shield breaks
Charge (Recharge) Time: 40s
Damage: 168
Scaling: 80%
Properties: N/A
Dragonite is one of the best supports you could possibly have on Braixen. It commands an immense amount of space, deals a ton of chip and guard damage, and boasts potent unblockable and guard break setups. Its difficulty lies within a learning curve on proper usage.
Braixen's ability to get away with calling Dragonite depends on two main factors: The character matchup and their support choice. Characters that have moves with long invulnerability frames (ie. Chandelure's Minimize or Darkrai's Nasty Plot) have ways to avoid and potentially punish Dragonite from a number of ranges. At point blank, a raw call can be grabbed by every character and Sceptile is able to grab it from anywhere due to Giga Drain. Supports with a lot of armor or invulnerability also do well against Dragonite as Snivy, Pachi, and Electrode are fairly common counters.
Despite that, Dragonite's offensive setups are extremely powerful and a successful call will always have value. Either through a full screen reset, pure chip damage, or a potential shield break there's rarely a moment where calling Dragonite doesn't benefit you in some way. When combined with Burst or enhance, you're able to put out nearly an entire combo's worth of damage in chip allowing you to make the next interaction a potential game winner. Against weak shield characters like Chandelure however, Dragonite is practically a death sentence against players that don't, or refuse, to play around it.

| Strengths | Weaknesses |
|---|---|
| ✓ Gives Guaranteed Crit Buff ✓ Gives Synergy ✓ Has Hitbox For Cheeky Setups |
✖ Long Recovery For An Enhance |
Function: Gives Braixen guaranteed crits for extra damage and synergy gain
Charge (Recharge) Time: 40s
Damage: 204
Scaling: 70%
Properties: Gives 'Criticals Only' Buff, Heals 60HP, Pierce (Victini Hitbox)
Victini is a solid support for those that want to gain synergy meter very quickly. As a consistent supplier of the Critical Buff, it gives all of Braixen's attacks much more of a punch, especially when combined with Braixen's own attack buff. In addition to making Braixen's attacks deal more damage, critical hits also build a significant amount of synergy meter allowing each hit to matter that much more in gaining a resource advantage.
Much like Eevee, Victini's crit buff allows you blow past Burst Armor and the extra damage gained allows Braixen to drain even more of the opponent's gauge with the right hit. Something that it does have over Eevee however is its own hitbox. With specific setups Braixen can create a decent mix-up by pushing the opponent into Victini. It's a bit of a gimmick but those who get caught in Victini's V-Create take nearly a combo's worth of damage for 0 PSP. A fun quirk of Victini and the buff it gives is that, during combos, it applies to the next hit Braixen connects. Meaning that during support cancel combos you're able to nullify a bit of the scaling and increase your overall damage while also gaining extra meter.
Espeon/Umbreon

| Strengths | Weaknesses |
|---|---|
| ✓ Removes All Debuffs ✓ Increased Healing The Longer The Match Goes |
✖ None |
Function: Debuff Removal And Powerful Healing
Charge (Recharge) Time: 20s (30s)
Damage: N/A
Scaling: N/A
Properties: Removes all debuffs, Heals 70~120HP depending on time
There's not too much to say about Espeon besides it removing any and all debuffs you may have. It's healing potential is one of the best as the longer the match goes on the more it heals, allowing you to clutch a last second health lead in the event of a time-out. Aside from that it operates just like any other enhance support with the exception of Victini.

| Strengths | Weaknesses |
|---|---|
| ✓ Invulnerable and Pierces ✓ i11 Activation ✓ Gives "No Crits" Debuff ✓ Drains Synergy From Opponent |
✖ Susceptible to Pachi ✖ Debuff is only applied on the first two hits |
Function: Synergy And Crit Control On An Invulnerable Support
Charge (Recharge) Time: 40s
Damage: 55
Scaling: 100% (10% per hit)
Properties: Pierce, Applies "No Crit" Debuff for X seconds, Invulnerable, Steals Synergy and adds it to your own
Umbreon is an extremely powerful all-around support for Braixen. Whether it be on offense or defense, Umbreon commands respect and its ability to steal synergy while applying a powerful debuff will give you some flexibility in how you play.
While most may not see Umbreon as a potent offensive option, for Braixen it's comparable to Snivy in its use. It hits quite high so it's able to anti-air semi-consistently, activates quite fast, and is very hard to punish for most characters unless they've specifically baited out that response. Using it in combos is a little bit tricky as Umbreon hits 11 times. Depending on the situation you may have to decide whether cashing out on damage or guaranteeing the opponent doesn't have burst for the comeback is more important to you.
On defense, Umbreon isn't too much different than a support like Ninetales or Fennekin other than the fact that Umbreon activates much quicker than either of them. Because of that however, Umbreon as a support is much more commonly used and that means more players know what needs to be done to exploit it. Against Sceptile for instance, they can back dash on your wakeup and it'll put them just far enough to punish with Giga Drain or even Leaf Blade. And like the other reversal options, using it on defense against someone in Burst is always a risky option as Burst Attack can punish.
There's also an increased abundance of mind games that comes with using Umbreon. In situations where the opponent may be expecting you to use Umbreon, you can potentially get away with a wakeup option they weren't expecting. It can come back to bite you sometimes but a lack of willingness to play around common situations will lead Umbreon to feel lackluster. One thing of note however, is that it's -4 on block and doesn't push that far back. So you're still in a situation where you have to guess if you're using it from the corner.
Reshiram/Cresselia

| Strengths | Weaknesses |
|---|---|
| ✓ Resets To Full Screen In Hit | ✖ Can Only Be Used Once ✖ Easily Dodged In Field ✖ Susceptible To Perfect Blocks In Field ✖ Don't Use This, There Are Better Options |
Function: A Strong Full Screen Reset
Charge (Recharge) Time: 40s
Damage: 160
Scaling: 80%
Properties: Gives 10s Attack Down Debuff, Pierce
No, seriously. This set sucks for Braixen. Don't use either Reshiram or Cress in DX. Reshiram had their peak in WiiU when it was multi use but Braixen got it nerfed to the point where it's a bad choice. Only use this if you really want to disrespect someone.

| Strengths | Weaknesses |
|---|---|
| ✓ Heals 120 HP ✓ Removes Debuffs ✓ Gives Synergy |
✖ Can Only Be Used Once ✖ Other Supports Do Its Job Better |
Function: Espeon With A Hint Of Victini But Not as Good As Either
Charge (Recharge) Time: 40s
Damage: N/A
Scaling: N/A
Properties: Heals 120HP, Removes Debuffs, Gives 20cc Synergy
Just like Reshiram but Shadow Mewtwo and Blaziken players got it nerfed. Even in WiiU it wasn't a solid option for Braixen but even now it's not a support you'd ever want to use.
Magneton/Quagsire

| Strengths | Weaknesses |
|---|---|
| ✓ High Damage Anti-Air ✓ Powerful Combination of Debuffs ✓ Braixen has Combos that End with Mag |
✖ Too Slow to Use Reactively ✖ Air-Only Hitbox ✖ Armored Activation is Even Harder to Connect |
Function: Strong Debuffing Anti-Air/Combo Ender; Situational Reversal
Charge (Recharge) Time: 30s
Damage: 104/156 (On Armor Activation)
Scaling: 80%
Properties: Armor Pierce, 1~45F Counter Armor, Speed + Synergy Burst Down in Field for 9s, Attack + Synergy Burst Down in Duel for 9s
Magneton is a very difficult support to use compared to other anti-air supports in the game but when used as combo material or with a specific style of play, it can be quite a potent option. Magneton is not an anti-air support in the sense that it's meant to be used reactively but in the sense that it's meant to punish those that jump a lot or those that you've conditioned to jump. The activation on Magneton's attack is quite slow which makes it very difficult to anti-air an opponent on reaction to their jump. Doubly so if they have some sort of aerial movement option or a quick way back to the ground. And while the hitbox becomes larger and activates faster if the counter armor is activated, the opponent will be well out of the way of the attack under most circumstances. This does lead to a somewhat silly interaction though, as Empoleon's level 3 Aqua Jet will usually get caught by the powered up version of Magneton's laser. It's not something that can be relied on however.
On offense Magneton is equally difficult to use. Since it's an awful cancel option, confidence in your decisions is extremely important as Magneton won't usually be able to save you. However, in combos it's quite potent as 8Y, EX Fire Spin, and the ground bounce of 5XX all allow for support cancel combos into Magneton in Duel. In Field you're much more limited to just EX Flame Charge and EX Fire Spin but those are quite common to clip someone with as long as you aren't too obvious about it. What Magneton brings to the table though is its fairly high damage and duality of debuffs. Assuming you choose to shift phases after a successful hit the resulting attack or speed debuff makes the next interaction all the more weighted in your favor. The Synergy Burst Down debuff is also very valuable as it's one of only two supports that have it.
One of the more niche aspects of Magneton is the frame-1 blue armor you activate when calling them. As Braixen, you have the ability to cancel moves into Magneton for this on-demand blue armor. Oftentimes, this is highly committal and frankly not worth it, as any move you cancel will have just as much if not more endlag with Magneton's involvement, but it can act as a knowledge check against opponents not anticipating the easily-accessible and instant blue armor. Cancelling a move into Magneton against an opponent's CA can be effective if they don't fully charge it, allowing you to possibly land a reversal without Magneton needing to hit at all. Like most other blue armor, Magneton's armor can be extended, allowing you to get away with some frankly ridiculous stuff if they extend your armor past the normal endlag of Magneton, since you're not committing to any action after calling Magneton. While obviously niche, Mag can serve as a "diet Electrode" in the right situations, either by directly countering an opponent's ground-leaving move, or by armoring through a committal option and quickly following up.
Some matchups where Magneton can get good value are:
- Chandelure: Magneton can attack even when hit by a counter pierce. This allows you to bypass Chandelure's aerial lasers by trading a few hits for one giant, move-interrupting burst of damage with a free hard launch. Braixen has a lot of projectile spam that can make a Chandelure attempt a committal air option, leading to a good window to punish with Magneton.
- Sceptile: Several of Sceptile's moves put him in the air, and Magneton can delete certain traps like Field j.Y. Mag can also be used after hitting Detect for a free armored activation on a guaranteed-airborne Sceptile, or on Bullet Seed due to the enhanced startup speed on armor hit.
- Blaziken: Like Chandelure, Magneton can make favorable trades against some of Blaziken's options like EX Flare Blitz with good anticipation or baiting. While not quite as effective due to Blaziken's better mobility in the air allowing him to bait Magneton pretty effectively, it can prove helpful in the matchup.
- Shadow Mewtwo: In Field Phase, Magneton can be support cancelled out of Braixen's sY in order to bait a j.Y from Shadow Mewtwo, allowing for a Field Phase enhance hit. Magneton can also be used reactively against all of Shadow Mewtwo's j.A options due to the air stall. Magneton also completely invalidates Vortex (and is usable as a reaction) for a frame and damage-positive trade, as well as crippling Shadow Mewtwo's effectiveness in Burst.

| Strengths | Weaknesses |
|---|---|
| ✓ Potentially 120 Damage in Undeniable Chip ✓ Large Amount of Ground Control ✓ Armored |
✖ Moderate Recovery Length ✖ Slow Initial Hit |
Function: Ground Control And Undeniable Chip On Oki
Charge (Recharge) Time: 30s
Damage: 120
Scaling: 10%
Properties: 1~45F Counter Armor
As a compliment to Magneton, and much easier to use, is a support that can net Braixen a ton of chip damage: Quagsire! What makes Quagsire a potent support is both the area denial it's capable of 'and' the damage it can do. Quagsire's damage is unaffected by scaling and does the same amount on hit or on block and when combined with Braixen's oki, it allows you to get upwards of 120+ damage on the opponent solely in chip.
Due to how much of a delay there is between each hit there are chances for opponent to jump and avoid it, should you be using this for area control instead of chip. That does however leave the opponent vulnerable to Flamethrower, which is Braixen's most potent anti-air. One thing to keep in mind when using Quagsire on oki however is proper staggering of your pressure. Certain multi-hit specials like EX Flame Charge or Fire Blast have a tendency to overwrite the chip damage Quagsire can do and lead you to losing out on its full potential.
Yveltal/Latios

| Strengths | Weaknesses |
|---|---|
| ✓ Locks Opponent's Syngery Gauge ✓ Stops Opponent From Using Burst |
✖ Can Only Be Used Once |
Function: One-Time Ability To Prevent Oppenent From Using Burst
Charge (Recharge) Time: 40s
Damage: 135
Scaling: 70%
Properties: Pierce (First Hit Only), Seals Synergy for 9 seconds
Much like Reshiram, WiiU Braixen got this support turned into another one call support. Yveltal sports a lot of damage and it's debuff is extremely potent as it's able to lock an opponent out of activating Burst Mode and even from using their Burst Attack. It's also safe on all cancel options except 2Y. That's where its praises end though. As it's now a one call support it's not as useful to Braixen as it once was.

| Strengths | Weaknesses |
|---|---|
| ✓ Pillars Apply Defense Down ✓ Hard To Escape In Field |
✖ Can Only Be Used Once |
Function: A Powerful Jail That Can Be Used To Close Out Rounds
Charge (Recharge) Time: 20s
Damage: 92
Scaling: 20% per hit
Properties: 5s Defense Debuff on initial hit, adds 3 additional seconds for subsequent hits
Latios has always been a one call support and despite the buffs it got in DX it's still a bit of a gimmick option for Braixen. Its debuff is powerful if it lands but most opponents would much rather take the grab which can lead to some nice checkmate situations. However, Ninetales fills that niche perfectly while also being a multi-use support that Braixen can abuse.
Litten/Popplio

| Strengths | Weaknesses |
|---|---|
| ✓ Becomes Stronger The Less Health You Have ✓ Extremely Plus In Rage ✓ Can Be Combo'd In To/Out Of At Level 2+ |
✖ Level 1 Is Underwhelming On Block ✖ No Tracking In Field ✖ Reduced Distance In Duel |
Function: A Higher Damage Alternative To Farfetch'd
Charge (Recharge) Time: 20s (30s)
Damage: Lv 1: 110, Lv 2: 119, Rage: 185
Scaling: Lv 1 & 2: 60%, Rage: 80%
Properties: Armor Pierce, Becomes stronger the less health you have
Level 1: 100% HP - 75% HP
Level 2: 74% HP - 25% HP
Level 3 (Rage): 24% HP - 1% HP
Litten is the stronger, armor piercing alternative to Farfetch'd that only gets better the less health you have. While Litten lacks the field tracking and staggered pressure Farfetch'd does it moves much faster in field and the majority of trades from Lv 2 onwards will be in your favor, even if it doesn't shift. At Level 1, Litten is a bit underwhelming but is still extremely potent for setting up or maintaining pressure on hit or block.
Combos from a grounded hit are limited to i11 attacks and that's only if you're in range to do so. More often than not, you'll have to settle for the knockdown and the pressure that comes with it. Level 2 is where Litten starts to show its strength. While it's speed and distance doesn't change the amount of hitstun it has is increased, allowing Braixen to further cash out on damage as well as it being more advantageous on block. There are very few differences regarding combos where Litten hits an airborne opponent. Level 2 has a more active hitbox however so that can help for some more situational instances.
Level 3, when you're in Rage, is where Litten shines. At this point, every trade is in your favor as long as it doesn't force a shift. Even trades that would leave you knocked down are ones you can capitalize from with a full combo. Level 3 Litten is extremely active and launches the opponent high into the air and exploding, launching them even further upwards. Even if you choose to go for pressure instead of maximizing damage, Litten by itself does as much as a regular midscreen combo from Braixen for 0 PSP making it a solid option.

| Strengths | Weaknesses |
|---|---|
| ✓ Gives Attack + Double Jump Buff ✓ Overwrites Double Debuff |
✖ Double Jump Is A Bit Of A Gimmick For Braixen |
Function: Opens Up A Lot Of Fun Gimmick Options
Charge (Recharge) Time: 30s
Damage: N/A
Scaling: N/A
Properties: Grants Double Jump Buff for 15s, Grants Attack Buff for 8s
Popplio is a fun support for Braixen but it's a lot of gimmicks for a varying amount of reward. However, that doesn't mean it doesn't have uses. Since Popplio sports two buffs it will overwrite any and all debuffs your opponent may have applied to you. Its attack buff, like Eevee, is additive to Braixen's own, allowing you to extend it for longer periods of time.
As for the aforementioned gimmicks, many of them stem from the air dash follow up from 8X or from being in Burst. Access to both at the same time opens up some of the cheesier options but they're equally potent if the opponent is unprepared. One of Popplio's gimmicks is allowing Braixen to land from jY after 8X with very little recovery. It requires you to jump in a direction after the air dash but after the inputs are made you'll be left with a considerable amount of advantage. The most potent check Popplio Braixen has comes while you're in Burst as you're able to combine Popplio's extra jump with EX Flame Charge to make Flame Charge so advantageous that i15 moves and faster become a true block string. As well as making it safe against all non-i11 reversals. This check can be countered with invincible options however so be very mindful on when and who you use it against.
Mega Rayquaza/Mimikyu

| Strengths | Weaknesses |
|---|---|
| ✓ Very High Damage | ✖ Can Only Be Used Once ✖ Costs Synergy To Use |
Function: An Excellent Whiff Punish Tool
Charge (Recharge) Time: 10s
Damage: 171
Scaling: 70%
Properties: Pierce, Spends 30cc of Synergy when called
Mega Rayquaza sits at the same table the rest of the single use supports do. Braixen can use it but the value you get out of it is vastly undercut by the fact that you can only use it once. M-Ray deals a ton of damage on hit, charges in 10 seconds, and moves extremely fast which allows it to whiff punish or trade with a ton of moves. M-Ray being up is enough of a threat itself to make most opponents play differently but, again, a lot of other supports do the same while also having the benefit of being able to be called multiple times. M-Ray's other downside, which isn't too much of one for Braixen, is that it also takes a small amount of Synergy upon use. As a 150cc character, that's not as much of a blow as long as you aren't being absolutely ran over and if you're in Burst Mode it costs nothing.

| Strengths | Weaknesses |
|---|---|
| ✓ ✓ ✓ |
✖ ✖ ✖ |
Function:
Charge (Recharge) Time: 30s (40s)
Damage: 57
Scaling: 100%
Properties: Gives 1s Attack + Synergy Debuffs per hit (Total of 12s), 1~15F Counter Armor, Grants Attack Buff for 12s if Counter Armor is activated
Mew/Celebi

| Strengths | Weaknesses |
|---|---|
| ✓ Can Grant Attack And/Or Crit Buff ✓ Gives Synergy |
✖ Buffs Are Based On Chance ✖ Potential To Not Get A Buff |
Function: Synergy Granting Support For Those That Want To Roll The Dice On Buffs
Charge (Recharge) Time: 20s (30s)
Damage: N/A
Scaling: N/A
Properties: 10% chance to receive no buffs. 20% chance to receive both buffs. 35% chance to receive an Attack or a Critical Hit buff. Each buff lasts 8s
Mew is what you'd get if you took Eevee and Victini, took away the healing, and then made the buffs given random. Mew is a very potent support when you have momentum, being able to extend your attack buff, add a crit buff, or even both after an interaction allows Braixen to keep her pressure strong and damage high.
Much like most other enhance supports support cancels with Mew leave Braixen at advantage in most cases or safe at the very worst. The drawback to Mew however is that the buffs aren't consistent and there's a 10% chance that you'll get no buffs at all. For Braixen, that 10% chance can be very quickly offset by their ability to quickly charge another call. Mew is unable to heal like Eevee though so if pure damage is what you're going for, Eevee is still a better choice.

| Strengths | Weaknesses |
|---|---|
| ✓ Excellent At Keeping Momentum ✓ Grants Synergy Bonus From A Phase Shift |
✖ Extremely Slow To Activate ✖ Somewhat Ineffective When Called Raw |
Function: Force Phase Shifts To Keep Momentum And Control Of Synergy
Charge (Recharge) Time: 40s (50s)
Damage: N/A
Scaling: N/A
Properties: Unblockable, Pierces, Forces Phase Shift, 1~65F Counter Armor, Grants Phase Shift Bonus on hit
Celebi, much like Mew, is excellent at allowing you to keep momentum and pressure against a good portion of the cast. It forces a phase shift on hit and gives you the Synergy bonus for "winning" the phase. As a raw call it's not quite that good as the activation takes a long time, allowing characters with high mobility or ranged grabs to get out of the way or punish you. Celebi also sports a fair amount of counter armor which makes it effective against ranged attacks and some of the most committal physical ones. Sadly, there is no armor activation bonus for Celebi like there is for Magneton or Mimikyu so be very mindful of when you use it.
Where Celebi shows its strength is on Braixen's oki. Any and every hit Braixen gets can lead to a phase shift should you choose to use it. The easiest setup is with a simple charged Fire Spin as the opponent is in block stun long enough for Celebi to activate. Even an Unenhanced Delayed Psybeam is enough as long as it's spaced well but using it is more matchup specific. Once momentum is on your side you're able to use Celebi to force the match to stay in the phase that's best for you. After winning a phase you can force it right back into that same phase, preventing the opponent from mounting their own comeback or gaining any synergy.
Combos
Google Sheet created by Serena
Almost all support combos have linked videos and some also have attached images and notes detailing who they work on and what adjustments should be made for certain characters.
Many of the blue highlighted combos can be found in this 21 Hits video created by Zyflair and Serena
Notable Players
- A Wild Gallade (NA): Twitter
- Judy (JP): Twitter
- kon (JP): Twitter
- Serena (NA): Twitter
- Shippo (NA): Twitter
- Tonosama (JP)
- Sunny Dayluxe (NA)
- Auradiance (EU)
- Virtigris (NA)
External Resources
Contains damage breakdown for all of Braixen's moves and support gain for each move. Support gain will be added to this wiki soon. -Double
Frame Data: Braixen
Support Damage and Scaling Breakdown
Pokken Arena: Braixen


