No edit summary |
(General maintenance galore.) |
||
| Line 1: | Line 1: | ||
===Colors=== | ===Colors=== | ||
{| | {| | ||
| Line 12: | Line 11: | ||
| [[image:Rugal98_colorD.png]] | | [[image:Rugal98_colorD.png]] | ||
|} | |} | ||
Pick C color. It's nice. | |||
=Gameplay Overview= | =Gameplay Overview= | ||
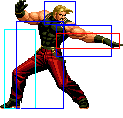
Returning from | Returning from [[The_King_of_Fighters_'95/Omega_Rugal|King of Fighters 95]], Rugal has been toned down significantly from his Omega form so he can no longer do stupid damage from every hit, doesn't have incredible priority, can't link his light normals for days and just spam Genocide Cutter. Thusly in KOF98 he's damned into the G-tier section along with other crap characters like Brian or Andy. But don't let that discourage you as Rugal is still a pretty cool guy! He requires moderate execution skills, mostly in comboing into his Gigantic Pressure DM from his F+[[image:snkb.gif]] command normal. He should be placed middle in the team as most of his damage comes from his Gigantic Pressure DM (and you'll probably want to have some better character last anyway if you wanna win). | ||
=In-depth Analysis= | =In-depth Analysis= | ||
== | |||
==Normal Moves== | |||
{|border="1" | {|border="1" | ||
!width="8%"| | !width="8%"| | ||
| Line 35: | Line 37: | ||
|valign="bottom" style="border-right:0px;"| [[image:Rugal98_clA1.png|center]] | |valign="bottom" style="border-right:0px;"| [[image:Rugal98_clA1.png|center]] | ||
|valign="bottom" style="border-left:0px;"| [[image:Rugal98_clA2.png|center]] | |valign="bottom" style="border-left:0px;"| [[image:Rugal98_clA2.png|center]] | ||
| Typical close A, used as combo filler/pressure | | Typical close A, used as combo filler/pressure. Also his best anti air normal. | ||
|- | |- | ||
! [[image:snkb.gif]] | ! [[image:snkb.gif]] | ||
| Line 43: | Line 45: | ||
|align="center"| HL | |align="center"| HL | ||
|colspan="2" | [[image:Rugal98_closeB.png|center]] | |colspan="2" | [[image:Rugal98_closeB.png|center]] | ||
| Typical close B, used as combo filler/pressure | | Typical close B, used as combo filler/pressure. | ||
|- | |- | ||
! [[image:snkc.gif]] | ! [[image:snkc.gif]] | ||
| Line 52: | Line 54: | ||
|valign="bottom" style="border-right:0px;"| [[image:Rugal98_clC1.png|center]] | |valign="bottom" style="border-right:0px;"| [[image:Rugal98_clC1.png|center]] | ||
|valign="bottom" style="border-left:0px;"| [[image:Rugal98_clC2.png|center]] | |valign="bottom" style="border-left:0px;"| [[image:Rugal98_clC2.png|center]] | ||
| Rugal's main punishing | | Rugal's main punishing and combo normal. | ||
|- | |- | ||
! [[image:snkd.gif]] | ! [[image:snkd.gif]] | ||
| Line 61: | Line 63: | ||
|valign="bottom" style="border-right:0px;"| [[image:Rugal98_clD1.png|center]] | |valign="bottom" style="border-right:0px;"| [[image:Rugal98_clD1.png|center]] | ||
|valign="bottom" style="border-left:0px;"| [[image:Rugal98_clD2.png|center]] | |valign="bottom" style="border-left:0px;"| [[image:Rugal98_clD2.png|center]] | ||
| | | First hit has same startup as cl.C, but the second isn't cancelable so it's overall just shittier. | ||
|- | |- | ||
|colspan="8" align="center"| '''Standing Far''' | |colspan="8" align="center"| '''Standing Far''' | ||
| Line 71: | Line 73: | ||
|align="center"| HL | |align="center"| HL | ||
|colspan="2" | [[image:Rugal98_stA.png|center]] | |colspan="2" | [[image:Rugal98_stA.png|center]] | ||
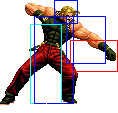
| Good poke. Great range, fast, | | Good poke. Great range, fast and hits all crouching characters. Wish it was cancelable, but can't have it all. | ||
|- | |- | ||
! [[image:snkb.gif]] | ! [[image:snkb.gif]] | ||
| Line 79: | Line 81: | ||
|align="center"| L | |align="center"| L | ||
|colspan="2" | [[image:Rugal98_stB.png|center]] | |colspan="2" | [[image:Rugal98_stB.png|center]] | ||
| OK poke. | | OK poke. Actually hits low, good for footsies at range. | ||
|- | |- | ||
! [[image:snkc.gif]] | ! [[image:snkc.gif]] | ||
| Line 88: | Line 90: | ||
|valign="bottom" style="border-right:0px;"| [[image:Rugal98_stC1.png|center]] | |valign="bottom" style="border-right:0px;"| [[image:Rugal98_stC1.png|center]] | ||
|valign="bottom" style="border-left:0px;"| [[image:Rugal98_stC2.png|center]] | |valign="bottom" style="border-left:0px;"| [[image:Rugal98_stC2.png|center]] | ||
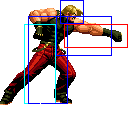
| Good range but very slow, bad recovery | | Good range but very slow, bad recovery and not cancelable. Use sparingly. | ||
|- | |- | ||
! [[image:snkd.gif]] | ! [[image:snkd.gif]] | ||
| Line 97: | Line 99: | ||
|valign="bottom" style="border-right:0px;"| [[image:Rugal98_stD1.png|center]] | |valign="bottom" style="border-right:0px;"| [[image:Rugal98_stD1.png|center]] | ||
|valign="bottom" style="border-left:0px;"| [[image:Rugal98_stD2.png|center]] | |valign="bottom" style="border-left:0px;"| [[image:Rugal98_stD2.png|center]] | ||
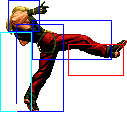
| | | Slighty lesser range than C and a little faster too, but otherwise kind of eh. Okay to throw out sometimes, it can check late jumpers during it's later active frames, but watch the long recovery. | ||
|- | |- | ||
! [[image:snkc.gif]]+[[image:snkd.gif]] | ! [[image:snkc.gif]]+[[image:snkd.gif]] | ||
| Line 105: | Line 107: | ||
|align="center"| HL | |align="center"| HL | ||
|colspan="2"| [[image:Rugal98_stCD.png|center]] | |colspan="2"| [[image:Rugal98_stCD.png|center]] | ||
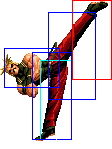
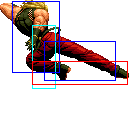
| Very lacking range and | | Very lacking range and sluggish startup, attacks mostly vertically but not that useful as an anti-air. Basically don't bother unless you are absolutely sure you'll crush their guard next hit. Shares it's animation with his C+D guard cancel. | ||
|- | |- | ||
|colspan="8" align="center"| '''Crouching''' | |colspan="8" align="center"| '''Crouching''' | ||
| Line 115: | Line 117: | ||
|align="center"| HL | |align="center"| HL | ||
|colspan="2" | [[image:Rugal98_crA.png|center]] | |colspan="2" | [[image:Rugal98_crA.png|center]] | ||
| Good | | Good, fast cancelable poke. Range seems lacking at first, but up close you can chain 3 of these against normal sized and fat characters and still be able to cancel into f+B and get a combo. | ||
|- | |- | ||
! [[image:snkb.gif]] | ! [[image:snkb.gif]] | ||
| Line 123: | Line 125: | ||
|align="center"| L | |align="center"| L | ||
|colspan="2" | [[image:Rugal98_crB.png|center]] | |colspan="2" | [[image:Rugal98_crB.png|center]] | ||
| Typical low hitting | | Typical low hitting cr.B. Your main low combo starter, chain into cr.A or cl.A. | ||
|- | |- | ||
! [[image:snkc.gif]] | ! [[image:snkc.gif]] | ||
| Line 132: | Line 134: | ||
|valign="bottom" style="border-right:0px;"| [[image:Rugal98_crC1.png|center]] | |valign="bottom" style="border-right:0px;"| [[image:Rugal98_crC1.png|center]] | ||
|valign="bottom" style="border-left:0px;"| [[image:Rugal98_crC2.png|center]] | |valign="bottom" style="border-left:0px;"| [[image:Rugal98_crC2.png|center]] | ||
| Not | | Not that useful. Pitiful range, not that great of a hit box and recovery leaves something to be desired. | ||
|- | |- | ||
! [[image:snkd.gif]] | ! [[image:snkd.gif]] | ||
| Line 140: | Line 142: | ||
|align="center"| L | |align="center"| L | ||
|colspan="2" | [[image:Rugal98_crD.png|center]] | |colspan="2" | [[image:Rugal98_crD.png|center]] | ||
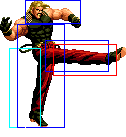
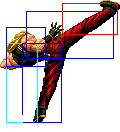
| Long range cancelable sweep | | Long range '''cancelable''' sweep! Slowish start-up but definitely worth using every now and then. | ||
|- | |- | ||
|colspan="8" align="center"| '''Jump''' | |colspan="8" align="center"| '''Jump''' | ||
| Line 150: | Line 152: | ||
|align="center"| H | |align="center"| H | ||
|colspan="2" | [[image:Rugal98_jA.png|center]] | |colspan="2" | [[image:Rugal98_jA.png|center]] | ||
| | | Not that useful? | ||
|- | |- | ||
! [[image:snkb.gif]] | ! [[image:snkb.gif]] | ||
| Line 158: | Line 160: | ||
|align="center"| H | |align="center"| H | ||
|colspan="2" | [[image:Rugal98_jB.png|center]] | |colspan="2" | [[image:Rugal98_jB.png|center]] | ||
| Good as a crossup | | Good as a hyper hop crossup. | ||
|- | |- | ||
! [[image:snkc.gif]] | ! [[image:snkc.gif]] | ||
| Line 174: | Line 176: | ||
|align="center"| H | |align="center"| H | ||
|colspan="2"| [[image:Rugal98_jD.png|center]] | |colspan="2"| [[image:Rugal98_jD.png|center]] | ||
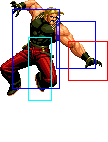
| Rugal's main jump-in | | Rugal's main normal jump-in as well as crossup jump-in. Pretty beefy hit box coming down, but can lose to better anti-airs. | ||
|- | |- | ||
! [[image:snkc.gif]]+[[image:snkd.gif]] | ! [[image:snkc.gif]]+[[image:snkd.gif]] | ||
| Line 182: | Line 184: | ||
|align="center"| HL | |align="center"| HL | ||
|colspan="2"| [[image:Rugal98_jCD.png|center]] | |colspan="2"| [[image:Rugal98_jCD.png|center]] | ||
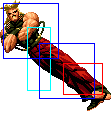
| Pretty bad | | Pretty bad. Bad hitbox, doesn't hit even normal sized crouchers sometimes and definitely whiffs against Choi if done too early from a hop or jump as well as slow to come out. Avoid. | ||
|- | |- | ||
|colspan="8" align="center"| '''Neutral Jump''' | |colspan="8" align="center"| '''Neutral Jump''' | ||
| Line 192: | Line 194: | ||
|align="center"| H | |align="center"| H | ||
|colspan="2" | [[image:Rugal98_njA.png|center]] | |colspan="2" | [[image:Rugal98_njA.png|center]] | ||
| | | Not too hot. | ||
|- | |- | ||
! [[image:snkb.gif]] | ! [[image:snkb.gif]] | ||
| Line 200: | Line 202: | ||
|align="center"| H | |align="center"| H | ||
|colspan="2" | [[image:Rugal98_njB.png|center]] | |colspan="2" | [[image:Rugal98_njB.png|center]] | ||
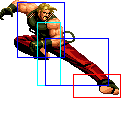
| | | Can instant overhead normal sized and tall crouching characters! | ||
|- | |- | ||
! [[image:snkc.gif]] | ! [[image:snkc.gif]] | ||
| Line 208: | Line 210: | ||
|align="center"| H | |align="center"| H | ||
|colspan="2" | [[image:Rugal98_njC.png|center]] | |colspan="2" | [[image:Rugal98_njC.png|center]] | ||
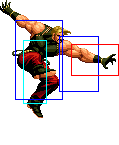
| | | Can work as an air-to-air button. | ||
|- | |- | ||
! [[image:snkd.gif]] | ! [[image:snkd.gif]] | ||
| Line 217: | Line 219: | ||
|valign="bottom" style="border-right:0px;"| [[image:Rugal98_njD1.png|center]] | |valign="bottom" style="border-right:0px;"| [[image:Rugal98_njD1.png|center]] | ||
|valign="bottom" style="border-left:0px;"| [[image:Rugal98_njD2.png|center]] | |valign="bottom" style="border-left:0px;"| [[image:Rugal98_njD2.png|center]] | ||
| | | Pretty meaty hitboxes, can be used to cause hesitation by varying the timing of doing only one or both hits. | ||
|- | |- | ||
|colspan="8" align="center"| '''Command Normals''' | |colspan="8" align="center"| '''Command Normals''' | ||
| Line 228: | Line 230: | ||
|valign="bottom" style="border-right:0px;"| [[image:Rugal98_fB1.png|center]] | |valign="bottom" style="border-right:0px;"| [[image:Rugal98_fB1.png|center]] | ||
|valign="bottom" style="border-left:0px;"| [[image:Rugal98_fB2.png|center]] | |valign="bottom" style="border-left:0px;"| [[image:Rugal98_fB2.png|center]] | ||
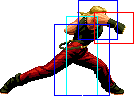
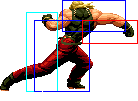
| Rugal's most important move. Fast, good range, chains from any cancelable normal | | Rugal's most important move. Fast, good range, chains into from any cancelable normal. Hits 2 times of which the first is always cancelable and the second is an overhead, but you'll want to avoid using the overhead part since it's pretty minus even on hit. Alright to use the first hit as a poke by itself but of course the main usage is to cancel into it from Rugal's normals and then cancel the first hit into a special/DM. Just watch for Guard Cancel roll/C+D if you failed to cancel the first hit. | ||
|- | |- | ||
|} | |} | ||
| Line 235: | Line 237: | ||
* '''b or f + C''' - Unbreakble, | * '''b or f + C''' - Unbreakble, but opponent can mash to reduce damage. Front knockdown, rollable. | ||
* '''b or f + D''' - Breakable | * '''b or f + D''' - Breakable. Front knockdown, unrollable. | ||
Both throws kind of stink, but D throw prefered in most cases | Both throws kind of stink, but D throw prefered in most cases as it's unrollable even though at mid screen wakeups are pretty much limited to C Reppuken (which isn't even meaty), but if you throw them into the corner you'll get better wakeups. C throw is unbreakable, but the opponent can mash buttons reduce it's damage. Both throws send the opponent to the other side of the screen. | ||
==Special Moves== | ==Special Moves== | ||
* '''Reppuken (qcf + P)''' - A fireball. Fast to come out but | * '''Reppuken (qcf + P)''' - A fireball. Fast to come out but long recovery. A version goes slow, C version goes fast. Stick to the C version in blockstrings as the A version can have gaps which can be exploited with fast, invincible moves. Unlike in KOF95, you can't have this and a Kaiser Wave on the screen at the same time. You can setup an unblockable with this combined with a Dead End Screamer DM if you face an opponent who doesn't know how to tech roll for some reason. | ||
* '''Kaiser Wave (f hcf + P)''' - Another fireball, except it's bigger. Very slow | * '''Kaiser Wave (f hcf + P)''' - Another fireball, except it's bigger. Very slow startup, easily countered by opponents who are awake with invincible Ranbus, rolls, etc., but you can try play a simple mindgame with it by holding the move and thus changing the startup. A version goes slow, C version goes very fast. Chargeable to do more hits and damage, but just begs to be punished if you get predictable with it. As mentioned before, you can't have this and a Reppuken on the screen at the same time like in KOF95. | ||
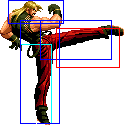
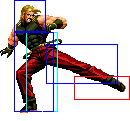
* '''Genocide Cutter (dp + K)''' - Rugal's signature move, although it's pretty bad in this game. | * '''Genocide Cutter (dp + K)''' - Rugal's signature move, although it's pretty bad in this game. At first glance you'd think it's your typical Dragon Punch type attack, but this one goes only straight up vertically and neither version has no invincibility at all thus limiting it's use as a real DP. B version is sort of good as a poke as it's fast and if blocked it's hard to punish at the tip combined with the pushback. The D version is best left to be canceled into from close A or B hits, if it's blocked you will simply cease to live. | ||
* '''Dark Barrier (qcf + K)''' - Reflects fireballs back at their thrower, even some DM fireballs. It also has an attack hitbox that knocks down on hit, but unlike what you may remember from | * '''Dark Barrier (qcf + K)''' - Reflects fireballs back at their thrower, even some DM fireballs. It also has an attack hitbox that knocks down on hit, but unlike what you may remember from KOF95 this version does not give frame advantage on block. | ||
* '''God Press (hcb + P)''' - Rugal runs at the opponent and tries to grab them, if he's succesful he'll deliver them nicely all the way into the corner for a hard knockdown. | * '''God Press (hcb + P)''' - Rugal runs at the opponent and tries to grab them, if he's succesful he'll deliver them nicely all the way into the corner for a hard knockdown. Not a real command throw as the initial hit can be blocked. A version goes about 60% of the screen while C goes full screen. You'll want to limit this move into combos only as it's terrible on block nor does it have any invincibility. | ||
==Desperation Moves== | ==Desperation Moves== | ||
* '''Gigantic Pressure (qcf hcb + P)''' - Rugal does a souped up version of his God Press special move with the exact same properties as the special. His main source of combo damage although buffering it from f + B can be tricky. MAX version does more damage and goes from corner to corner. It has a pretty | * '''Gigantic Pressure (qcf hcb + P)''' - Rugal does a souped up version of his God Press special move with the exact same properties as the special. His main source of combo damage although buffering it from f + B can be tricky. MAX version does more damage and goes from corner to corner. It has a pretty good hitbox for catching hoppers with if you want to try some hard reads, and the MAX version's startup invincibility helps with this. | ||
* '''Dead End Screamer (qcf qcf + K)''' - The infamous Rugal Spin! Rugal jumps at the opponent with a kick and if it connects he knocks them down on the floor and spins on them while laughing and looking very silly. B version doesn't go that far, D version goes a bit farther than half screen. Unlike God Press and Gigantic Pressure this move is actually a grab in that it's unblockable, but it doesn't hit people in the air. Main usage for this DM is to catch sloppy fireballs, which can be a bit iffy as the regural version has no invincibility, or just to generally humiliate your opponent. The MAX version does more damage and has startup invincibility along with 8 frames of invincibility when his feet are off the ground so it can be used to jump over some DM fireballs. It can also be used to set up an unblockable Reppuken, but this can be hard due to lack of hard knockdowns. | |||
== Fastest Attacks == | == Fastest Attacks == | ||
| Line 327: | Line 328: | ||
* MAX: cl.C (2 hits) > {{f}} + B (1 hit) > {{hcb}} + C | * MAX: cl.C (2 hits) > {{f}} + B (1 hit) > {{hcb}} + C | ||
deals ??? than | deals ??? more damage than | ||
* cl.C (2 hits) > {{f}} + B (1 hit) > {{qcf}} {{hcb}} + P | * cl.C (2 hits) > {{f}} + B (1 hit) > {{qcf}} {{hcb}} + P | ||
Keep this in mind | Keep this in mind when you need to decide whether to trigger MAX or keep meter for a DM. | ||
}} | }} | ||
=Advanced Strategy= | =Advanced Strategy= | ||
D | Some trickery about his D Genocide Cutter: If you somehow manage to trade the first hit with the opponent as a CH and without you getting knocked down, you can actually get a free juggle on them while they're in the air! Things like s.C+D, another D Genocide Cutter or even Gigantic Pressure will juggle them for a combo. Think of it as your Cross Counter type of move. | ||
Revision as of 23:00, 5 October 2024
Colors

|

|

|

|
Pick C color. It's nice.
Gameplay Overview
Returning from King of Fighters 95, Rugal has been toned down significantly from his Omega form so he can no longer do stupid damage from every hit, doesn't have incredible priority, can't link his light normals for days and just spam Genocide Cutter. Thusly in KOF98 he's damned into the G-tier section along with other crap characters like Brian or Andy. But don't let that discourage you as Rugal is still a pretty cool guy! He requires moderate execution skills, mostly in comboing into his Gigantic Pressure DM from his F+![]() command normal. He should be placed middle in the team as most of his damage comes from his Gigantic Pressure DM (and you'll probably want to have some better character last anyway if you wanna win).
command normal. He should be placed middle in the team as most of his damage comes from his Gigantic Pressure DM (and you'll probably want to have some better character last anyway if you wanna win).
In-depth Analysis
Normal Moves
Normal Throws
- b or f + C - Unbreakble, but opponent can mash to reduce damage. Front knockdown, rollable.
- b or f + D - Breakable. Front knockdown, unrollable.
Both throws kind of stink, but D throw prefered in most cases as it's unrollable even though at mid screen wakeups are pretty much limited to C Reppuken (which isn't even meaty), but if you throw them into the corner you'll get better wakeups. C throw is unbreakable, but the opponent can mash buttons reduce it's damage. Both throws send the opponent to the other side of the screen.
Special Moves
- Reppuken (qcf + P) - A fireball. Fast to come out but long recovery. A version goes slow, C version goes fast. Stick to the C version in blockstrings as the A version can have gaps which can be exploited with fast, invincible moves. Unlike in KOF95, you can't have this and a Kaiser Wave on the screen at the same time. You can setup an unblockable with this combined with a Dead End Screamer DM if you face an opponent who doesn't know how to tech roll for some reason.
- Kaiser Wave (f hcf + P) - Another fireball, except it's bigger. Very slow startup, easily countered by opponents who are awake with invincible Ranbus, rolls, etc., but you can try play a simple mindgame with it by holding the move and thus changing the startup. A version goes slow, C version goes very fast. Chargeable to do more hits and damage, but just begs to be punished if you get predictable with it. As mentioned before, you can't have this and a Reppuken on the screen at the same time like in KOF95.
- Genocide Cutter (dp + K) - Rugal's signature move, although it's pretty bad in this game. At first glance you'd think it's your typical Dragon Punch type attack, but this one goes only straight up vertically and neither version has no invincibility at all thus limiting it's use as a real DP. B version is sort of good as a poke as it's fast and if blocked it's hard to punish at the tip combined with the pushback. The D version is best left to be canceled into from close A or B hits, if it's blocked you will simply cease to live.
- Dark Barrier (qcf + K) - Reflects fireballs back at their thrower, even some DM fireballs. It also has an attack hitbox that knocks down on hit, but unlike what you may remember from KOF95 this version does not give frame advantage on block.
- God Press (hcb + P) - Rugal runs at the opponent and tries to grab them, if he's succesful he'll deliver them nicely all the way into the corner for a hard knockdown. Not a real command throw as the initial hit can be blocked. A version goes about 60% of the screen while C goes full screen. You'll want to limit this move into combos only as it's terrible on block nor does it have any invincibility.
Desperation Moves
- Gigantic Pressure (qcf hcb + P) - Rugal does a souped up version of his God Press special move with the exact same properties as the special. His main source of combo damage although buffering it from f + B can be tricky. MAX version does more damage and goes from corner to corner. It has a pretty good hitbox for catching hoppers with if you want to try some hard reads, and the MAX version's startup invincibility helps with this.
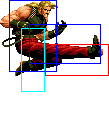
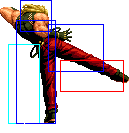
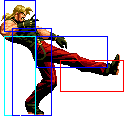
- Dead End Screamer (qcf qcf + K) - The infamous Rugal Spin! Rugal jumps at the opponent with a kick and if it connects he knocks them down on the floor and spins on them while laughing and looking very silly. B version doesn't go that far, D version goes a bit farther than half screen. Unlike God Press and Gigantic Pressure this move is actually a grab in that it's unblockable, but it doesn't hit people in the air. Main usage for this DM is to catch sloppy fireballs, which can be a bit iffy as the regural version has no invincibility, or just to generally humiliate your opponent. The MAX version does more damage and has startup invincibility along with 8 frames of invincibility when his feet are off the ground so it can be used to jump over some DM fireballs. It can also be used to set up an unblockable Reppuken, but this can be hard due to lack of hard knockdowns.
Fastest Attacks
- 0F: C throw; D throw
- 1F: -
- 2F: cl.A; cr.A
- 3F: cl.B; cr.B
- 4F: -
- 5F: cl.C; cl.D; st.A
- 6F: st.B; f + B
- 7F: -
- 8F: cr.C
- 9F: -
- 10F: -
Combos
- Best jump-ins:
- j.D (Can crossup.)
- j.B (Can crossup.)
- cl.C (2 hit) > f + B (1 hit) (optional) >
- (S)DM qcf hcb + P
- hcb + C
- dp + D (Close.)
- qcf + P (No knockdown.)
- qcf + D
- (cr.B/cr.A, cr.A, cr.A) / (cr.B, cl.B) > f + B (1 hit) >
- (S)DM qcf hcb + P
- hcb + C
- dp + D (Close.)
- qcf + P (No knockdown.)
- qcf + D
- cr.B, cr.A / cl.B >
- (S)DM qcf hcb + P
- dp + D (Close.)
- cr.A / cl.B > hcb + C (Point blank.)
- Simple buffers:
- cr.B, cl.A / cl.B > (S)DM qcf hcb + P
- cr.B, qcf + A/B > hcb + P (As cr.B is not cancelable, qcf + A/B will chain into a normal attack.)
- cr.B, cl.A / cl.B > (S)DM qcf hcb + P
Strategy Corner
- MAX: cl.C (2 hits) >
 + B (1 hit) >
  + C
+ C
deals ??? more damage than
- cl.C (2 hits) >
 + B (1 hit) >
 + P
+ P
Keep this in mind when you need to decide whether to trigger MAX or keep meter for a DM.
Advanced Strategy
Some trickery about his D Genocide Cutter: If you somehow manage to trade the first hit with the opponent as a CH and without you getting knocked down, you can actually get a free juggle on them while they're in the air! Things like s.C+D, another D Genocide Cutter or even Gigantic Pressure will juggle them for a combo. Think of it as your Cross Counter type of move.


