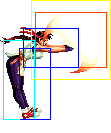
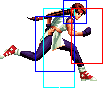
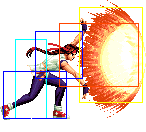
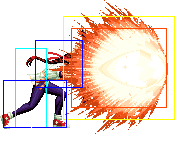
TheLoudCat (talk | contribs) No edit summary |
TheLoudCat (talk | contribs) No edit summary |
||
| Line 131: | Line 131: | ||
|valign="bottom" style="border-right:0px;"| [[image:Yuri98_crC1.png|center]] | |valign="bottom" style="border-right:0px;"| [[image:Yuri98_crC1.png|center]] | ||
|valign="bottom" style="border-left:0px;"| [[image:Yuri98_crC2.png|center]] | |valign="bottom" style="border-left:0px;"| [[image:Yuri98_crC2.png|center]] | ||
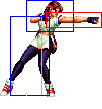
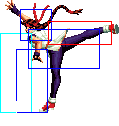
| | |Good as an anti-air. First part of this move is cancelable. Good priority. | ||
|- | |- | ||
! [[image:snkd.gif]] | ! [[image:snkd.gif]] | ||
| Line 139: | Line 139: | ||
|align="center"| L | |align="center"| L | ||
|colspan="2" | [[image:Yuri98_crD.png|center]] | |colspan="2" | [[image:Yuri98_crD.png|center]] | ||
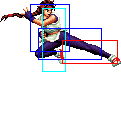
| | |Sweep move. Cancelable. | ||
|- | |- | ||
|colspan="8" align="center"| '''Jump''' | |colspan="8" align="center"| '''Jump''' | ||
| Line 157: | Line 157: | ||
|align="center"| H | |align="center"| H | ||
|colspan="2" | [[image:Yuri98_jB.png|center]] | |colspan="2" | [[image:Yuri98_jB.png|center]] | ||
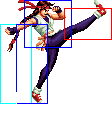
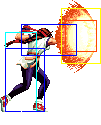
| | |Air-to-air move. | ||
|- | |- | ||
! [[image:snkc.gif]] | ! [[image:snkc.gif]] | ||
| Line 165: | Line 165: | ||
|align="center"| H | |align="center"| H | ||
|colspan="2" | [[image:Yuri98_jC.png|center]] | |colspan="2" | [[image:Yuri98_jC.png|center]] | ||
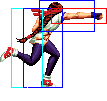
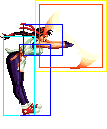
| | |Yuri's main jump-in. | ||
|- | |- | ||
! [[image:snkd.gif]] | ! [[image:snkd.gif]] | ||
| Line 173: | Line 173: | ||
|align="center"| H | |align="center"| H | ||
|colspan="2" | [[image:Yuri98_jD.png|center]] | |colspan="2" | [[image:Yuri98_jD.png|center]] | ||
| | |Yuri's cross-up. air-to ground move. | ||
|- | |- | ||
! [[image:snkc.gif]]+[[image:snkd.gif]] | ! [[image:snkc.gif]]+[[image:snkd.gif]] | ||
| Line 199: | Line 199: | ||
|align="center"| H | |align="center"| H | ||
|colspan="2" | [[image:Yuri98_juB.png|center]] | |colspan="2" | [[image:Yuri98_juB.png|center]] | ||
| | |Instant overhead. | ||
|- | |- | ||
! [[image:snkc.gif]] | ! [[image:snkc.gif]] | ||
| Line 215: | Line 215: | ||
|align="center"| H | |align="center"| H | ||
|colspan="2" | [[image:Yuri98_juD.png|center]] | |colspan="2" | [[image:Yuri98_juD.png|center]] | ||
| | |Air-to-air move. | ||
|- | |- | ||
|colspan="8" align="center"| '''Command Normals''' | |colspan="8" align="center"| '''Command Normals''' | ||
| Line 236: | Line 236: | ||
|rowspan="2" colspan="2" | [[image:ExYuri98_qcfP.png|center]] | |rowspan="2" colspan="2" | [[image:ExYuri98_qcfP.png|center]] | ||
|rowspan="2"|'''Ko'ou Ken - qcf + P''' | |rowspan="2"|'''Ko'ou Ken - qcf + P''' | ||
Your main zoning tool and good combo ender. | |||
|- | |- | ||
! qcf + [[image:snkc.gif]] | ! qcf + [[image:snkc.gif]] | ||
| Line 250: | Line 251: | ||
|rowspan="2" colspan="2" | [[image:ExYuri98_qcfK.png|center]] | |rowspan="2" colspan="2" | [[image:ExYuri98_qcfK.png|center]] | ||
|rowspan="2"|'''Raiou Ken - qcf + K''' | |rowspan="2"|'''Raiou Ken - qcf + K''' | ||
B sucks, the jump is too small to avoid projectiles. | |||
Use D to punish projectile spammers. | |||
|- | |- | ||
! qcf + [[image:snkd.gif]] | ! qcf + [[image:snkd.gif]] | ||
| Line 264: | Line 267: | ||
|colspan="2" | [[image:ExYuri98_qcbA.png|center]] | |colspan="2" | [[image:ExYuri98_qcbA.png|center]] | ||
|rowspan="2"|'''Saiha - qcb + P''' | |rowspan="2"|'''Saiha - qcb + P''' | ||
Deals good damage. A is a decent anti-air, C has a slower | |||
startup but bigger hitbox. Use C as a very close combo ender, | |||
doesn't combo in jump-ins. | |||
|- | |- | ||
! qcb + [[image:snkc.gif]] | ! qcb + [[image:snkc.gif]] | ||
| Line 279: | Line 285: | ||
|colspan="2" rowspan="2"| [[image:ExYuri98_hcbK.png|center]] | |colspan="2" rowspan="2"| [[image:ExYuri98_hcbK.png|center]] | ||
|rowspan="2"|'''Hyakuretsu Binta - hcb + K''' | |rowspan="2"|'''Hyakuretsu Binta - hcb + K''' | ||
Yuri runs up to the enemy, grabbing them and slaps them | |||
silly. B and D control the distance she runs, use it | |||
sparingly. | |||
|- | |- | ||
! hcb + [[image:snkd.gif]] | ! hcb + [[image:snkd.gif]] | ||
| Line 295: | Line 304: | ||
|colspan="2" rowspan="3"| [[image:Yuri98_qcfhcbK.png|center]] | |colspan="2" rowspan="3"| [[image:Yuri98_qcfhcbK.png|center]] | ||
|rowspan="3"|'''Hien Hou'ou Kyaku - qcf hcb + K''' | |rowspan="3"|'''Hien Hou'ou Kyaku - qcf hcb + K''' | ||
Deals great damage. A good meter combo ender. | |||
|- | |- | ||
! qcf hcb + [[image:snkd.gif]] | ! qcf hcb + [[image:snkd.gif]] | ||
| Line 316: | Line 326: | ||
|rowspan="3" valign="bottom" style="border-left:0px;"| [[image:ExYuri98_qcfx2P2.png|center]] | |rowspan="3" valign="bottom" style="border-left:0px;"| [[image:ExYuri98_qcfx2P2.png|center]] | ||
|rowspan="3"|'''Shin! Yuri Chou Upper - qcf qcf + P''' | |rowspan="3"|'''Shin! Yuri Chou Upper - qcf qcf + P''' | ||
Very short ranged, but it deals HUGE damage to compensate. | |||
Has invincibility. | |||
|- | |- | ||
! qcf qcf + [[image:snkc.gif]] | ! qcf qcf + [[image:snkc.gif]] | ||
| Line 336: | Line 348: | ||
|colspan="2" rowspan="2"| [[image:exYuri98_fhcfP.png|center]] | |colspan="2" rowspan="2"| [[image:exYuri98_fhcfP.png|center]] | ||
|rowspan="3"|'''Haou Shoukou Ken - f hcf + P''' | |rowspan="3"|'''Haou Shoukou Ken - f hcf + P''' | ||
A projectile super, a good punish option. | |||
|- | |- | ||
! f hcf + [[image:snkc.gif]] | ! f hcf + [[image:snkc.gif]] | ||
Revision as of 05:14, 22 March 2022
Introduction
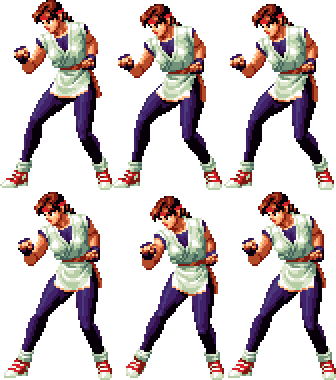
The KOF 94/AoF 2 version of Yuri Sakazaki is a zoning focused version of the KoF98 Yuri with th Choupa and Slap attack
Colors

|

|

|

|
Gameplay Overview
In-depth Analysis
Movelist
Normal Throws
- b or f + C -
- b or f + D -
- In air, b / d / f + C / D -
Combos
- cr.B, cr.A >
- (S)DM qcf qcf + A
- (S)DM qcf hcb + K
- (cr.B (optional), cr.C) / cl.D / cl.C >
- (S)DM qcf qcf + A (Very close.)
- (S)DM qcf hcb + K
- qcb + P
- qcf + P
Strategy Corner
- MAX: cl.D >
 + P
+ P
deals ??? than
- cl.D >

 + K
+ K
Keep this in mind, when you need to decide whether to trigger MAX or keep meter for a DM.
