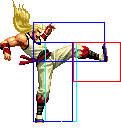
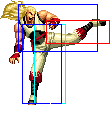
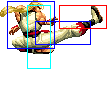
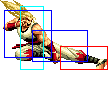
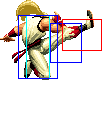
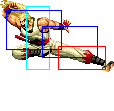
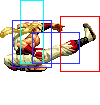
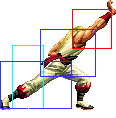
mNo edit summary |
mNo edit summary |
||
| Line 36: | Line 36: | ||
|align="center"| HL | |align="center"| HL | ||
|colspan="2" | [[image:Andy98_clA.png|center]] | |colspan="2" | [[image:Andy98_clA.png|center]] | ||
| | |Fast enough that it can be confirmed into itself. | ||
|- | |- | ||
! [[image:snkb.gif]] | ! [[image:snkb.gif]] | ||
| Line 61: | Line 61: | ||
|align="center"| HL | |align="center"| HL | ||
|colspan="2" | [[image:Andy98_clD.png|center]] | |colspan="2" | [[image:Andy98_clD.png|center]] | ||
| | |Please don't get caught dead hitting standing D as Andrew, beggin' you. | ||
|- | |- | ||
|colspan="8" align="center"| '''Standing Far''' | |colspan="8" align="center"| '''Standing Far''' | ||
| Line 71: | Line 71: | ||
|align="center"| HL | |align="center"| HL | ||
|colspan="2" | [[image:Andy98_stA.png|center]] | |colspan="2" | [[image:Andy98_stA.png|center]] | ||
| | |Typical 98 standing jab, decent enough, does the job of stuffing empty hops that any respectable standing jab in this game should. | ||
|- | |- | ||
! [[image:snkb.gif]] | ! [[image:snkb.gif]] | ||
| Line 87: | Line 87: | ||
|align="center"| HL | |align="center"| HL | ||
|colspan="2"| [[image:Andy98_stC.png|center]] | |colspan="2"| [[image:Andy98_stC.png|center]] | ||
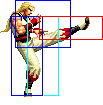
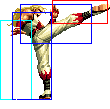
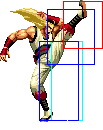
| | |Kinda decent long range poke. | ||
|- | |- | ||
! [[image:snkd.gif]] | ! [[image:snkd.gif]] | ||
| Line 96: | Line 96: | ||
|valign="bottom" style="border-right:0px;"| [[image:Andy98_stD1.png|center]] | |valign="bottom" style="border-right:0px;"| [[image:Andy98_stD1.png|center]] | ||
|valign="bottom" style="border-left:0px;"| [[image:Andy98_stD2.png|center]] | |valign="bottom" style="border-left:0px;"| [[image:Andy98_stD2.png|center]] | ||
| | |Would be funny if this was an overhead, tragically SNK doesn't have a sense of humor. Not the worst, but there are almost always better buttons you could be probably be pressing for a given situation than this one. | ||
|- | |- | ||
! [[image:snkc.gif]]+[[image:snkd.gif]] | ! [[image:snkc.gif]]+[[image:snkd.gif]] | ||
| Line 104: | Line 104: | ||
|align="center"| HL | |align="center"| HL | ||
|colspan="2"| [[image:Andy98_stCD.png|center]] | |colspan="2"| [[image:Andy98_stCD.png|center]] | ||
| | |Has the bad CD curse of having an absurd windup before the CD actually comes out, in this case Andrew getting ready to twirl like a beyblade beforehand. Does the usual CD things that CDs do on hit. | ||
|- | |- | ||
|colspan="8" align="center"| '''Crouching''' | |colspan="8" align="center"| '''Crouching''' | ||
| Line 138: | Line 138: | ||
|align="center"| L | |align="center"| L | ||
|colspan="2" | [[image:Andy98_crD.png|center]] | |colspan="2" | [[image:Andy98_crD.png|center]] | ||
| | | Has similar range to the funny Iori sweep, much like the funny Iori sweep you will probably eat a tremendous amount of pain if you get caught whiffing this like a buffoon. | ||
|- | |- | ||
|colspan="8" align="center"| '''Jump''' | |colspan="8" align="center"| '''Jump''' | ||
| Line 148: | Line 148: | ||
|align="center"| H | |align="center"| H | ||
|colspan="2" | [[image:Andy98_jA.png|center]] | |colspan="2" | [[image:Andy98_jA.png|center]] | ||
| | |Decent air poke, has a higher success rate if you trick your opponent beforehand by telling them that you're just trying to pet their head with this. | ||
|- | |- | ||
! [[image:snkb.gif]] | ! [[image:snkb.gif]] | ||
| Line 156: | Line 156: | ||
|align="center"| H | |align="center"| H | ||
|colspan="2" | [[image:Andy98_jB.png|center]] | |colspan="2" | [[image:Andy98_jB.png|center]] | ||
| | |Better air to air normal than his j. A, use this instead if you don't immediately need a button out within a millisecond. | ||
|- | |- | ||
! [[image:snkc.gif]] | ! [[image:snkc.gif]] | ||
| Line 164: | Line 164: | ||
|align="center"| H | |align="center"| H | ||
|colspan="2" | [[image:Andy98_jC.png|center]] | |colspan="2" | [[image:Andy98_jC.png|center]] | ||
| | |Decent air normal for jump ins. | ||
|- | |- | ||
! [[image:snkd.gif]] | ! [[image:snkd.gif]] | ||
| Line 172: | Line 172: | ||
|align="center"| H | |align="center"| H | ||
|colspan="2"| [[image:Andy98_jD.png|center]] | |colspan="2"| [[image:Andy98_jD.png|center]] | ||
| | |Also a decent air normal for jump ins, works better than j.C if you're further away horizontally than vertically. | ||
|- | |- | ||
! [[image:snkc.gif]]+[[image:snkd.gif]] | ! [[image:snkc.gif]]+[[image:snkd.gif]] | ||
| Line 180: | Line 180: | ||
|align="center"| HL | |align="center"| HL | ||
|colspan="2"| [[image:Andy98_jCD.png|center]] | |colspan="2"| [[image:Andy98_jCD.png|center]] | ||
| | |Andrew Bogard does a whimsical pose, just to make sure you don't forget he's a down to earth guy before his leg connects with someone's skull and gives them a concussion. Does soft knockdown on hit like all CDs do. | ||
|- | |- | ||
|colspan="8" align="center"| '''Neutral Jump''' | |colspan="8" align="center"| '''Neutral Jump''' | ||
| Line 190: | Line 190: | ||
|align="center"| H | |align="center"| H | ||
|colspan="2" | [[image:Andy98_njB.png|center]] | |colspan="2" | [[image:Andy98_njB.png|center]] | ||
| | |Andrew just wants you to know that the SA1 Sonic pose is cool (Also a half decent aerial but nothing too special) | ||
|- | |- | ||
! [[image:snkd.gif]] | ! [[image:snkd.gif]] | ||
| Line 198: | Line 198: | ||
|align="center"| H | |align="center"| H | ||
|colspan="2"| [[image:Andy98_njD.png|center]] | |colspan="2"| [[image:Andy98_njD.png|center]] | ||
| | |Not the worst aerial normal to throw out but don't bet your housing on it. | ||
|- | |- | ||
|colspan="8" align="center"| '''Command Normals''' | |colspan="8" align="center"| '''Command Normals''' | ||
| Line 209: | Line 209: | ||
|rowspan="2" valign="bottom" style="border-right:0px;"| [[image:Andy98_fB1.png|center]] | |rowspan="2" valign="bottom" style="border-right:0px;"| [[image:Andy98_fB1.png|center]] | ||
|rowspan="2" valign="bottom" style="border-left:0px;"| [[image:Andy98_fB2.png|center]] | |rowspan="2" valign="bottom" style="border-left:0px;"| [[image:Andy98_fB2.png|center]] | ||
|rowspan="2"| | |rowspan="2"| Funny overhead that lifts him enough off the ground that most lows will probably whiff, punishable enough by anyone who sees it coming otherwise. Andrew will also do this as the K followup to Gen'ei Shiranui (the divekick thing). | ||
|- | |- | ||
!<br>f + [[image:snkb.gif]]<br>(cancel)<br> | !<br>f + [[image:snkb.gif]]<br>(cancel)<br> | ||
Revision as of 02:07, 24 February 2021
Introduction
Andrew Bogard, adopted son of Jeffrey Bogard, dreamed as a child of being a decent-ish character in some sort of combat based video game. Unfortunately, SNK hates orphans, and so decided to smash his kneecaps in, so his dreams wouldn't come true for at least another year.
Colors

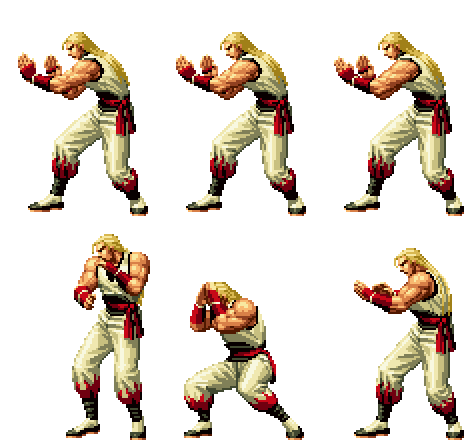
|

|

|

|
Gameplay Overview
In-depth Analysis
Movelist
Special Moves
- Hishou Ken (qcb + P) - Andy shoots some energy from his palm, short range.
- Zan'ei Ken (db f + P) - Andy performs a dashing attack forward. The db f + A comes out faster than db f + C. The db f + A goes less than half screen distance, while db f + C goes full screen. An alternate motion for this move is to just do hcf + P, if you are not in throw range or opponent is not is a throwable state, this move will come out instead of the hcf + P proximity unblockable. On whiff, this move recovers extremely fast, though it is very punishable if it hits or is blocked, can be followed up with qcf + P on hit or block.
- Gadan Kou (Zan'ei Ken hits/block, then qcf + P - This is a Zan-ei Ken finisher, and is a must for safety reasons. The moves comes from RB2 Fatal Fury, although the motion is different, and he even performs it better!
- Shouryuu Dan (dp + P) - Andy performs a rising uppercut attack with good startup priority, dp + A doesn't rise as high and has much better recovery than dp + C, though technically both are punishable
- Kuuha Dan (hcf + K) - Andy performs a very high priority spiraling kick that travels in a parabolic motion. The arc on hcf + D is bigger than hcf + B, only sometimes punishable on block by throws or fast normals but can be rolled behind and punished easily. It is also possible for the move to go over the opponent, allowing them to just run behind and combo you in the back.
- Gekiheki Haisui Shou (close hcf + P) - a proximity unblockable attack that only comes out if Andy is in throw range and opponent is not in blockstun. Otherwise, a Zan'ei Ken (db f + P) comes out instead.
Last hit knocks the opponent into the air where they can be juggled
- Gen'ei Shiranui (air qcf + K > P / K) - Andy performs a diagonal "dive" downwards which has a very large hitbox
- P follow up - Andy performs a crouching punch that comes out fairly quick and has good recovery if blocked.
- K follow up - Andy does a hop kick that comes out fairly quick though not as fast as the P followup, has horrible recovery time if blocked, so it's a risk to use it. It's an overhead.
Desperation Moves
- Chou Reppa Dan (qcb db f + K) - A powered up version of the Kuuha Dan, the DM version its useful only on midscreen, but the SDM version its a nice corner combo ender from a Gekiheki Haisui Shou and cheap damage maker, in mid screen use both version as an anti air, but it have a bad recovery.
- Hishou Ryuusei Ken (qcf qcf + P) - Andy does a series of chops and then a power palm (Hisho Ken) in his opponent's chest, its a better combo ender for midscreen.
Fastest Attacks
- 0F: C throw; D throw
- 1F: -
- 2F: cl.C
- 3F: cl.A; cl.B; cr.A
- 4F: cr.B
- 5F: st.A; st.B; cr.C
- 6F: -
- 7F: st.C; df + A
- 8F: cl.D
- 9F: cr.D
- 10F: -
Combos
- Best jump-ins:
- j.D
- cr.A / cr.B x 2 > df + A (2 hits) >
- db f + C > qcf + P (Close. Cancel immediately.)
- db f + A > qcf + P
- qcb + A
- cl.B / cr.A / cr.B > hcb + P, [junggler]
- cr.C / df + A (2 hits) / cl.C (1 hit) >
- (S)DM qcf qcf + P (From cr.C or df +A (2 hits) only very close.)
- hcf + P, [junggler] (From cr.C or df +A (2 hits) only very close.)
- f + B > air qcf + K > P, cl.C (Corner)
- db f + C > qcf + P (Close. Cancel immediately.)
- db f + A > qcf + P
- qcb + A
- (cl.C (1 hit) / cr.C > df + A (2 hits)) / cl.C (2 hit) >
- db f + C > qcf + P (Close. Cancel immediately.)
- db f + A > qcf + P
- qcb + A
- ... hcf + P,
- air qcf + K (miss) > P, dp + P, j.CD / j.C (Corner) (MAX only) (Timming required)
- SDM qcb hcf + K (Timming required. Out of corner use immediately. In the corner wait just a little. If done too early or too late may do just a few hits and will do very little damage.)
- DM qcb hcf + K (Corner. Timming required, harder than SDM. Delay a little to hit on the way up. If done too early or too late may do just a few hits and will do very little damage. Out of the corner it always does few hits so don't use it.)
- run, df + A (2 hits),
- sj.CD (Timming required.)
- j.C (Reset. Timming required.)
- hcf + D (Must cancel from previous move.)
- run, dp + C (Hit close and in a low heigth for max hit/damage.)
- j.CD
- vertical jump C (Corner. Reset. Does a tittle more damage than diagonal jump.)
- hcf + D
- j.C (Reset.)
- qcb + C
You may cancel j.CD into air qcf + K just to gain a little meter.
- Simple buffers:
- cl.C (1 hit) > (S)DM qcf qcf + P
- qcf + C > qcf + P
- cl.C (1 hit) > (S)DM qcf qcf + P
Strategy Corner
- MAX: cl.C (1 hit) >
 + P,
+ P,  + A, j.CD
deals just a tiny more damage (~ cl.A) than
- cr.C >

 + P
+ P
Keep this in mind, when you need to decide whether to trigger MAX or keep meter for a DM.
