Lichmassacre (talk | contribs) m (Removed outdated Navbox for modern Navbox.) |
|||
| Line 1,287: | Line 1,287: | ||
</div> | </div> | ||
{{ | {{Navbox-SFA2}} | ||
[[Category:Street Fighter Alpha Series]] | [[Category:Street Fighter Alpha Series]] | ||
[[Category:Street Fighter Alpha 2]] | [[Category:Street Fighter Alpha 2]] | ||
Revision as of 03:54, 2 January 2021

Introduction
Street Fighter Alpha 2, known as Street Fighter Zero 2 in Japan, Asia, South America, and Spain, is a 1996 fighting game originally released for the CPS II arcade hardware by Capcom. The game is a sequel to Street Fighter Alpha: Warriors' Dreams, which is itself a prequel to the Street Fighter II series in terms of plot and setting.
The game featured a number of improvements over the original, such as new endings, stages, sound, animations moves and gameplay systems. Some character's endings were retconned from the original, overwriting their prior story (i.e. Akuma's), or tweaked.
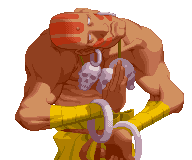
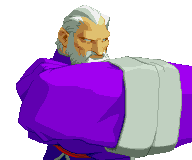
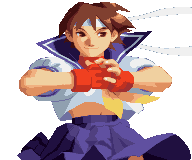
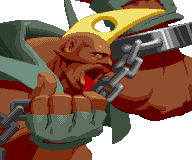
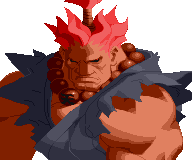
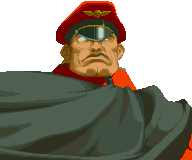
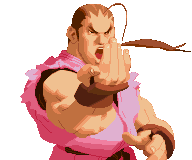
All thirteen characters from the original Alpha return, with previously secret characters M. Bison, Akuma, and Dan now part of the immediate roster. Five additional characters are featured, extending the selectable roster to 18. The new characters include Zangief and Dhalsim from Street Fighter II; Gen from the original Street Fighter; Rolento from Final Fight; and Sakura, a new character who is a schoolgirl that idolizes Ryu and emulates his fighting techniques.
Street Fighter Alpha 2 also features an alternate version of Chun-Li in her Street Fighter II outfit as a hidden character, as well as Shin Akuma, a more powerful version of Akuma who appears as a secret computer-controlled opponent in the single-player mode. The North American version of the arcade game also features three additional hidden characters who were not in the Japanese version: Evil Ryu, an alternate version of Ryu who uses the same power as Akuma; as well as extra versions of Zangief and Dhalsim who play like their counterparts from Street Fighter II: Champion Edition, including the omission of gameplay features such as super moves and air blocking.
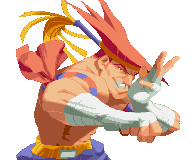
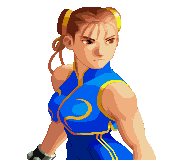
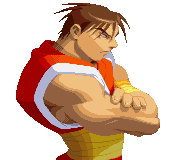
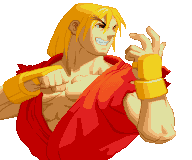
The Characters
                   |
To do: Matchups and better resolution for certain hitboxes.
Notations
Inputs and special commands
Expressed in the form: Notation - Move - Symbol
| Single inputs | Multiple inputs and special commands |
|---|---|
|
|
Combos, state modifiers and other notations
|
|
Glossary
These are common terminologies used in Alpha 2 and other games. Specific terminology and mechanics will be explained below.
Normal, unique normals, special and super moves
- Normals: Moves are moves you can input together with directions.
- Unique normals: Special commands, usually with a special function, such as Rose's slide
 +
+  , Ryu's overhead
  +
+  , and Chun's neck kick +
  .
. - Special moves: A sequence that must be done fast and precisely enough to be executed. Example:
 +
+  is the "hadouken."
 - Super moves: Very damaging attacks that cost meter. Example: , + in the Shinkuu Hadouken. They are done in 1, 2 or 3 levels, or doable only with 3 stocks.
- Press 1, 2 or 3 punches or kicks to use 1, 2 or 3 stocks of your meter, respectively. Other moves such as Akuma's Raging Demon require 3 stocks to be executed.
Frames, startup, duration and recovery
- Frame: One image in a movie roll as in the old days. Alpha 2 runs at 60 frames per second. That means 60 images will be shown in 1 second, although the game is capturing inputs at a higher frequency. Whatever you do now will show up right on the screen on the next 1/60 of a second. Therefore, in games, we count the duration of things in frames.
- Startup: The start of a move, before it hits.
- Duration: The portion of a move that can hit. Light attacks usually lasts of 1 or 2 frames, harder and special attacks last longe. For instance, a fireball duration lasts for as long as it exists.
- Recovery: At the expense of trying to attack, there is a period of time where you are recovering from that move, and your guard will be open, unless you cancel the previous attack into a new one.
Blockstun and hitstun
"Stuns" are pauses in the animation. During a hit or block, the game freezes both characters for 8 frames (or 7 for hit according to the note below). This notion will be very important when discussing alpha counter denial/reversal. Apparently, for alpha 2 there is an important change in frame data: for all grounded normals, hitstun is 1 frame faster (7f) than blockstun (8f).
This concept will be very important for a bit of information in the advanced section.
Counter hit
A move attempt that takes a "counter hit" during its start or recovery animation by another move will cause a counter hit. It gives 10% additional damage and 2 extra frames of hitstun (10f), allowing bigger combos and hit confirmations. Two frames are not too much too see, but you may try a follow up even if you don't see if it worked.
Combos
Combos allow you to attack in sequence. Once hit, your opponent cannot block it. The sequence of hits are usually executed by cancelling moves into specials or supers. You can also link normal moves.
Negative edge & piano
In alpha 2, you can execute special moves by releasing (negative) instead of pushing it, to give you extra leniency against execution mistakes. This concept is important later on in advanced tactics.
A piano input is just rolling your fingers in an arcade stick as in piano keys, increasing your chance of getting a move right.
Other terminology
Specific terminology that pertains to some advanced gameplay, such as juggle, will be explained when required.
--Raf (talk) 22:33, 9 November 2019 (MSK)
Basic Game Mechanics
These are basic mechanics, which are rules of the game.
Video: Basic game mechanics
Combos
As explained in the glossary, combos are sequences. There are a few types and differences between them.
Combos, cancels and links
- Combos: Combos allow you to attack in sequence. Once hit, your opponent cannot block it. The sequence of hits are usually executed by cancelling moves into specials or supers. You can also link normal moves.
- Cancels: Some normal moves can be cancelled into special moves on hit or block. When a move is cancelled, the recovery animation is switched to a new animation.
Note: Not all moves are cancelable. For instance, Ryu can cancel his c.HK, but not Chun-li. This balances the game and creates a character's individuality. Pay attention to these to understand how each character is supposed to be played. If it is there, it is because it has an important function. See each character for details.
- Links: Links are normals comboed into normals. Some are easy, such as Rose's c.lp, c.lk, c.mp, and some are hard, such as Chun's c.mp, c.mp.
Chain combos
Chain combos are a special mechanic introduced in the Alpha series, but it is character specific in Alpha 2. Gen and Guy can do much easier links as the buttons can be pressed much sooner with a larger room for error, cancelling the end of the current animation into the next move in sequence. Those are called chain combos. As these sequences are specific, visit these characters sections for more information.
Meaty attacks
- Meaty: Meaties are not combos, but "fat" attacks, in a sense of a longer duration that can be used for link combos. They are attacks of more than 1 frame duration on the active part, executed on a downed or landing opponent. Since all attacks will leave the opponent in a hitstun animation of fixed duration, hitting your opponent on your last active frame can create new combo opportunities, otherwise not doable if it hits on the first active frame, or just facilitate to combo a harder link.
Damage scaling
Since combos can be too powerful, every new move in sequence will have its total damage progressively reduced by 10% from the third hit and on. Examples supposing 100 damage for each hit.
- 2 hits: No scaling, 200 damage.
- 3 hits: 3rd hit is scaled to 90% damage, total = 100 + 100 + 90 = 290 (instead of 300).
- 4 hits: 3rd hit is scaled to 90%, 4th hit is scaled to 80%, total = 100 + 100 + 90 + 80 = 370 (instead of 400).
Do not confuse a move with hits. Some moves have multiple hits, such as Rolento's c. Mp. It still counts as 1 move, but each hit is scaled. I.e.: A 4 hit move where each hits does 25 to a total of 100 would do 90 if scaled at 90%.
Note: This was assumed from a general Capcom rule since ST or so. Must confirm in a consolized version.
--Raf (talk) 20:36, 29 October 2019 (MSK)
Throws and tech-throws
Throws
Press ![]() or
or ![]() +
+ ![]() /
/![]() /
/![]() /
/![]() to throw an opponent who is blocking. Not all characters can throw with these buttons. For example Rose and Sagat only have
to throw an opponent who is blocking. Not all characters can throw with these buttons. For example Rose and Sagat only have ![]() and
and ![]() throws.
throws.
Some throws juggle and can be followed up. See the "juggles" section.
Tech-throws, a.k.a. throw escape
Basically, when thrown, you have a short window to escape and avoid most damage. Press any forward or back direction + any medium or strong P or K. Some throws do no damage at all when teched, for example, Rolento's ![]() throw (Dan too, but because of a glitch). Some throws are "mash type" throws, and you can get more damage from them by repeatedly press the button.
throw (Dan too, but because of a glitch). Some throws are "mash type" throws, and you can get more damage from them by repeatedly press the button.
A softened throw does very little damage except for vs. mash type throws. Mash type throw takes the entire damage of the first hit, but avoid the remaining ones. Example: Sagat.
Notes:
- Despite not being able to throw with any medium or strong buttons, any character can escape with these four buttons.
- If you play Super SF2 Turbo, there is something called "throw for the win" (TFW) because the damage for a throw is calculated before the game checks if there was an escape or not. This does not occur in the Alpha series.
- Some throws have such a long animation that they are punishable when softened/teched. More on it later.
List of punishable throws when teched
- In progress - to be populated.
Pre round charge
You can charge special moves before a round begins. This works for supers sonic booms, Birdie's Bull horn headbutt and Gen's stance/style switch. You can execute these moves immediately after the round starts.
Super Moves and super meter
The meter in alpha 2 has 3 levels and is of paramount importance due to alpha counter, CC, and supers.
Supers (super moves) are very damaging attacks that cost meter. They are usually the special move done 2x. Example: ![]() +
+ ![]() is the Hadouken, but
is the Hadouken, but ![]() ,
, ![]() +
+ ![]() is the Shinkuu Hadouken.
is the Shinkuu Hadouken.
Supers can done in 1, 2 or 3 levels. Some or doable only with 3 stocks, like Akuma's Raging Demon.
- Press 1, 2 or 3 punches or kicks to use 1, 2 or 3 stocks of your meter, respectively.
Super levels have different properties and animations, and therefore, usages, depending on the level.
For instance, Rose's ![]() ,
, ![]() +
+ ![]() level 1 is an anti-air, but levels 2 and 3 must be used on the ground, although the final portion of it can be used as anti-air, and the same goes for her
level 1 is an anti-air, but levels 2 and 3 must be used on the ground, although the final portion of it can be used as anti-air, and the same goes for her ![]() ,
, ![]() +
+ ![]() , which is just a fireball, but level 3 is also a counter fireball that rebounds an incoming fireball at a super-fast speed, guaranteeing that all your hits will connect against a fireballer, indicating that she has been designated to counter fireball characters.
, which is just a fireball, but level 3 is also a counter fireball that rebounds an incoming fireball at a super-fast speed, guaranteeing that all your hits will connect against a fireballer, indicating that she has been designated to counter fireball characters.
Similarly, different levels will impart different invincibility durations. It goes from barely any invincibility on level 1 to very long invincibility on level 3.
The damage follows more or less this order (on a normal health character like Ryu):
- Level 1: 25% damage
- Level 2: 35% damage
- Level 3: 40% damage
- Level 2: 35% damage
So, naturally, connecting three level 1 supers will do more damage than a level 3, and besides, meter management is important, but if you want to finish a match or use the added invincibility or effects, go ahead and do it.
Air block
In the alpha series, you can block things in the air, but there are some rules and exceptions.
- You can block fireballs in the air, but not super fireballs.
- You can block air-to-air attacks, whether special or normals, such as air tatsumakis, and air-to-air normals, even if they are to hit multiple times, such as diagonal j. HK (2 hits).
- You cannot block grounded normals when you are in the air (the opponent is grounded).
- You cannot block specials for the part they are grounded. Although they may look grounded, they may be actually air-to-air. Examples: Akuma's and Ken's mp and HP dragon punch are 3 hits special moves. They grounded during the first hit, which you cannot block, but you can block the final 2 hits because they are aired, which falls into the air-to-air category. That is why some anti-air moves must be done very late and may seem hard to hit at first, because they have a long startup and a short duration of the grounded portion, such as Charlie's HK flash kick.
- Special throws only work against aired opponents such as Zangief's slam dunk, Dhalsim AA super, Rose's Soul throw. They are not escapable unless you can time a CC activation that leaves you invincible, but their bodies you also push you up a bit.
IMPORTANT: If you block something in the air, you can land with a tech roll.
Tech rolls a.k.a. quick stand
They are not really "also known as" quick stand in alpha 2, but it is an equivalent of that from other games, like KOF.
Immediately after a knockdown, do ![]() ,
, ![]() ,
, ![]() +
+![]() , or
, or ![]() , or
, or ![]() . This will roll you towards your opponent depending on strength used, with
. This will roll you towards your opponent depending on strength used, with ![]() getting up in place and
getting up in place and ![]() rolling far. These are punishable by any LOW enough hit as the hurtboxes are quite small during roll, so be careful when using. You can also use it after blocking air attacks or after some juggles.
rolling far. These are punishable by any LOW enough hit as the hurtboxes are quite small during roll, so be careful when using. You can also use it after blocking air attacks or after some juggles.
Tech roll distances
There are three distances available for the roll:
![]() ; an on-the-spot tumble - useful for when you want to be on your feet as quick as possible.
; an on-the-spot tumble - useful for when you want to be on your feet as quick as possible.
![]() ; travels a few characters spaces forward, enough to cross to the other side at point-blank (like in Vampire Savior). Used when you want to avoid rush-down and need a bit of breathing room.
; travels a few characters spaces forward, enough to cross to the other side at point-blank (like in Vampire Savior). Used when you want to avoid rush-down and need a bit of breathing room.
![]() ; the heavy punch version travels farther, almost two medium distances, or about half-screen. Good against opponents who throw a projectile immediately after you’ve been floored. It allows you to get right back in their faces. Somewhat useful for grapplers.
; the heavy punch version travels farther, almost two medium distances, or about half-screen. Good against opponents who throw a projectile immediately after you’ve been floored. It allows you to get right back in their faces. Somewhat useful for grapplers.
Keyword: mix it up.
Air block and juggles tech roll
After blocking an air attack, like a fireball, execute it slightly before you land. It is useful in a fireball battle.
Rolling can also be used to alter your falling trajectory and thus escape specific juggles. Ryu’s air ![]() -> j
-> j ![]() and Gen’s kiryu (
and Gen’s kiryu (![]() style) cr.
style) cr.![]() xx Jakouha are two examples. The most common use is escaping Akuma's Tatsu into shoryuken combo.
xx Jakouha are two examples. The most common use is escaping Akuma's Tatsu into shoryuken combo.
Tech rolls exceptions
You cannot tech roll in three situations. After being hit by:
- 1- a Throw
- 2- Alpha counter
- 3- A super of any level, regardless of how it hit you
Alpha counter(AC)
Execute the inputs during the blockstun animation to do an alpha counter at the cost of 1 meter. The blocking animation is cancelled into a pre-determined attack, which has some invincibility and temporarily creates a freeze effect (about 16 frames, the same duration of a parry freeze in 3s, to be confirmed).
Knockdowns from ACs have a special animation and cannot be tech rolled except, by Sodom's Tengu Walking. Therefore, some ACs take you from a defensive position to an opportunity to turn the tables with cross ups and additional pressure options. Check the strategy sections for more information.
INPUT: ![]() ,
, ![]() +
+![]() or
or ![]() .
.
AC input leniency
AC has little to none input leniency. You cannot AC from:
 to
to  , or
, or to , or
- [[ to .
You can do ![]() ,
, ![]() ,
, ![]() + P or K, as long as you don't go all the way to
+ P or K, as long as you don't go all the way to ![]() .
.
This is the reason why some people find it difficult to execute an AC, especially from low attacks. Use piano and negative edge your buttons for the best results (more below).
AC Usages
The animation, usefulness and effects vary per character. Some just leat you escape pressure and do some damage, while are very strong. Examples:
- ROSE: AC allows damaging combos and great pushback with a fireball, while she switches sides with the opponent. If cornered, she will reverse the corner situation and may drain your health with a soul illusion set up even if you block, and she has unblockables. Plus, she regains meter during the combo she does afterwards.
- Ken/Sagat:
 AC hits at middle height, being fast enough to work as both high and low ACs, and are far-reaching. As those are fireball characters, the strong fireball game makes these AC even more powerful.
 - Sodom: AC Very far-reaching and knocks down close to you, so you can follow up with a damaging ambiguous cross up.
Juggles
Some moves have juggle properties. Some start a juggle state while some will hit someone in a juggle state and function as juggle follow-ups. Usually, juggles are pre-programmed moves to work as the developers imagined, but a few moves seem to be accidentally left there, such as Adon's grounded normal.
Juggles list
Juggle and juggle follow-ups list (some are follow-ups only):
- Ryu: j.mp
- Akuma: Tatsumaki, mp and HP shoryuken, air fireball.
- Ken: mp and HP shoryuken.
- Adon: s.lp, s.mp vs. aired opponents (useless, seems accidentally left there), rising Jaguar DP. Example: s.lp/mp into rising Jaguar as anti-air. Useless due to how bad the hitxboes of s. lp and s. mp are, but can be used if you cross under a jumping opponent.
- Rose: C.HP (first active hitbox) xx Soul Throw super (DP super).
- Sagat's Tiger Uppercut
- Guy: QCF+P throw, QCFx2 + P in corner. Tatsumaki is also technically a juggle but cannot be used as a follow-up.
- Chun-li: Upkicks, super upkicks, super puffball, + in the air, + - follow up with super puffball or upkicks, charge ,,+ super - follow up with upkicks.
- Dan: Tatsumaki, Kouryuu rekka super (qcfx2 + k).
- All fireball supers*
Notes:
- Fireball supers only juggle for 3 hits, so, best if used only lvl 1. Ex.: Ryu's air-to-air mp, land, lvl 1 Shinkuu Hadouken.
- DP follow-ups will only hit twice for those hits that are aired, for instance, Akuma and Ken mp and HP dps, which normally hit 3 times against grounded opponents, will do 2 hits only at the right height, including during custom combos.
Tech rolls from juggles
- After being hit by Akuma's
 hurricane you can execute a tech roll motion (b, d/b, d + P) in the air and Akuma's follow-up DP will miss. Any juggle that is not a real combo can be escaped.
Throw juggles
Some throws leave the opponent in a juggle state and can be juggled by follow-ups. Dan, Gen, Guy, Sodom, Akuma and Zangief (A2 Gold only) have them.
Buttons Priority & Special Move priority
When two buttons are pressed together, the system prioritizes light attacks before heavy, and punches before kicks. That priority will be sustained for special moves, and supers.
It is important to understand button priority to take advantage of it in matches, as they provide you with some of the best outcomes automatically. For instance, this knowledge is very useful to escape tick throw attempts or for combos. It also means that if you do not "piano" right but end up pressing two buttons at the same time, the weaker button will have priority and may come off accidentally.
Button Priority Rules
When you press more than a button or do more than a thing, the game defines a priority of what action will occur. The priority of normal attacks in A2 DOES NOT FOLLOW A ZIG-ZAG pattern on an arcade stick as it is with other Capcom games. Don't ask me why.
PRIORITY ORDER: ![]() >
> ![]() >
> ![]() >
> ![]() >
> ![]() >
> ![]() .
.
- Special attacks take this order: super moves > special moves > normals.
- Buttons have priority over unique normals, so
 +
+ +
+ with Ryu will give you a light punch instead of the overhead.
 - Throws are special hitboxes. If it appears and the opponent is grounded and within range, it will throw no matter what, as it has priority over normals, with a few exceptions, discussed later.
SPECIAL/UNIQUE NORMALS & THROWS
As mentioned, special normals, also known as unique normals or unique attacks, such as Ryu's ![]() +
+![]() will not have the priority over the normal moves. In this game, they are just normal moves.
Throws are just a hitbox that shows up early a d briefly during the startup of some medium and hard buttons, so with Ryu,
will not have the priority over the normal moves. In this game, they are just normal moves.
Throws are just a hitbox that shows up early a d briefly during the startup of some medium and hard buttons, so with Ryu, ![]() +
+![]() in the right distance will get a throw, not an overhead. The overhead animations starts, but is then switched to a throw.
Finally if Ryu press
in the right distance will get a throw, not an overhead. The overhead animations starts, but is then switched to a throw.
Finally if Ryu press ![]() +
+![]() +
+![]() at throw range, the
at throw range, the ![]() will come out, and not a throw, because, again, the
will come out, and not a throw, because, again, the ![]() throw is a hitbox of the
throw is a hitbox of the ![]() . It must be executed to actually exist.
There is no "Kara
. It must be executed to actually exist.
There is no "Kara ![]() throw" or "Kara priority." If the moves are not executed perfectly together, whatever came first will be executed.
throw" or "Kara priority." If the moves are not executed perfectly together, whatever came first will be executed.
SPECIAL MOVES
Some moves have priority over other moves and may require strict timing or off accidentally. Shoryukens have the priority over fireballs.
Example: Ryu tries to walk forward, cr.![]() xx hadouken, but accidentally gets a shoryuken instead, as the game accepts
xx hadouken, but accidentally gets a shoryuken instead, as the game accepts ![]() ,
,![]() +
+![]() as a dragon punch.
The solution is waiting a bit before pressing the button so that the first "forward" inputted is out of a watched a list of stored inputs the game keeps for a period to define whether or not a special move was executed.
as a dragon punch.
The solution is waiting a bit before pressing the button so that the first "forward" inputted is out of a watched a list of stored inputs the game keeps for a period to define whether or not a special move was executed.
SUPER MOVES
Obviously, when you do two circle motions and punch, the game will accept and prioritize the two circular motions instead of the last one, provided it is done within a time limit. Even if there are some wrong directions in-between, the super will be executed. E.g., ![]() ,
, ![]() ,
, ![]() ,
, ![]() ,
, ![]() ,
, ![]() ,
, ![]() - A super such as shinkuu hadouken will be executed because the two qcf required are withing this window, and the game has some leniency for when you press the button at before the end of motion, which is also executed when released.
- A super such as shinkuu hadouken will be executed because the two qcf required are withing this window, and the game has some leniency for when you press the button at before the end of motion, which is also executed when released.
THROWS VS. THROWS
There is no priority in throws vs. throws. When you both throw at the same time, the result of who wins is apparently random, with a guaranteed throw softening. Since can escape/soften throws by inputting any medium or hard button with a ![]() or
or ![]() direction, but the throw escape will occur even if you press it with another button.
direction, but the throw escape will occur even if you press it with another button.
Importance of button priority and examples
Button priority are important but are diverse and character-specific. Here are some examples.
- THROW ESCAPE: Mash c.lk+HK to poke your opponent while blocking to escape a tick throw or poke. If you are thrown, you will escape. If you mash c.lk+HP, HP will come out instead, as HP has priority over lk. You will not hit your opponent before you are thrown.
- AUTO-CONFIRM: An easy combo with Chun-li: J.mk -start pressing c.mp+mk (c.mp has priority over mk) xx mk legs (specials have priority over normals). Not a very useful combo, but an example of the system priority.
- AVOID MISTAKES: Sagat j.HK, c.mp xx HK tiger shot. If you do not release c.mp fast enough, you get a high tiger shot accidentally when you release mp (negative edge). Holding mp in this case would prevent this. The high tiger shot will cost you the match. In A2, since there is no zig-zag priority on buttons, you cannot get around overlapping moves with say, qcf+mp+HK. Mp will always beat the kicks.
- AUTO-CONFIRM AFTER AMBIGUOUS CROSS-UPS: In ambiguous deep cross ups, not all characters can hit confirm,.but you can risk safe moves.
With Ryu, after a knockdown: Deep j.mk, c.hp, qcf (or qcb, you are not sure which side you landed) + HP+HK. Since you do a qcf w/ P+K, you finish the combo with a Tatsumaki or a Hadouken. You don't need to know which side you landed or whether it hit or not during the j.mk or c.HP part. You just have to finish the sequence with a move that is whether safe on block or hard to punish. The game does not care about your initial intention, only the final result. Tatsumakis are pretty safe and abusable.
Notice how useful the priority of buttons is when special moves do not overlap (Ryu) vs. how bad it is when it overlaps for characters that cannot confirm hits into damaging combos (Sagat). Therefore, knowing this it is also useful for reversals.
--Raf (talk) 08:26, 29 October 2019 (MSK)
Custom Combo (CC)
Known in Japan by Oricom, as in "Original Combo," CC plays a huge part in the game. It allows you to do multiple normal or special moves in a row, cancelling its recovery animation. The higher the level, the longer invincibility and duration you get. Generally for a normal-sized character, at levels 2 and 3 you can go through a fireball. You cannot block, jump or walk back in CC state.
CC is a "super state," invincible at the initial frames after the freeze animation that automatically moves your character forward, non-stop, with a faster-than-normal walk speed.
ACTIVATION INPUT
- Press at least 2 punches and 1 kick (++) or 2 kicks and 1 punch (++) when you have at least 1 super meter stock.
The game has very little leniency for buttons to be pressed together, so press 3P+K, or PP+KK if you are using an arcade stick. On emulators, Fightcade and GGPO, you can bind PPP+KKK to one button, but currently (2019), all main tournaments that are kept by aficionados of the fighting game community (props to you, heros!) are played on CPS2 original boards, so there is no easy CC and you may miss some activations, so try to practice it as it will be on real tournaments. Also, remember the button priorities as a safeguard to use custom as a free out of jail card during block strings, to get a c.lp/s.lp/CC/throw escape "option select" since you can escape a throw by inputting a CC. Home versions and emulators accept 8 buttons, so you can bind PPP to one button and KKK to the other and become an absolute monster with Zangief.
Blowout CC
When around point-blank to your opponent, when cc is activated and the opponent did any normal attack or was not blocking, they go into a stun animation and are dragged closer to you. This allows you to hit them with pretty much anything for free.
Blowout CC stun glitch
If you stun an opponent and use the CC after his wake-up animation, instead of a blowout you will end the stun animation. You can still hit your opponent after that, but for around about 8 frames (unknown, this is how it feels like), so make sure you use a fast move or you can blow the CC a bit sooner, or after a jump-in attack.
CC Rules
Damage and scaling
In CC, the programmers' intention was that you would use a normal move to cancel into several special moves. Therefore, the damage scaling is slightly altered.
- The first normal move does 100% of its damage. From there on, it will be scaled normally (100%, 90%, 80%...).
- Special moves follow the normal scaling rule, therefore, use a damaging special move as soon as possible.
- Special moves on block barely do any damage.
This general rule, instead of careful tailoring, allowed Rolento's attacks during his super jump to do an absurd amount of damage, up to 90% or so on level 3, with just a few hits. It is pretty much like hitting one normal, then 9-12 shoryukens in a row.
CC resets the stun
After you hit with a CC, the stun counter is immediately reset. Also, moves that hit during CC deals no stun damage AT ALL. So if you have an opponent ready to be stunned, consider not using a CC and stun him first. To-Do: Add video link.
Broken game rules
Custom combos temporarily break some rules of the game, while itself is especially limited by a 28f special rule (maybe a glitch, more on it later). The direction lock may cause some oddities, such as forcing you to block using the wrong direction. If you don't learn about it, it may cost you dearly. The two main glitches it causes is the block inversion (bad to who activated) and the high knockdown ("HKD", good to who activated). Some other situations will also force you to block or reversal inverted. More on it later.
Four important rules CC changes:
- 1) how fast you need to press repeated attacks of the same strength is alleviated, allowing you to easily start HK legs with Chun-li, and,
- 2) Charge time for everything is disregarded, so you can do standing flash kicks and sonic booms moving forward,
- 3) Exclusively to Birdie, "turn-around" headbutt charge time is lowered to an unknown amount allowing you to "Final, Final, Final, Final..." headbutts for massive damage,
- 4) Block stun and hit stun into command throws are allowed, allowing Zangief to end combos or block strings with inescapable SPDs.
CC Invincibility duration
- Level 1: 3 frames
- Level 2: 5 frames
- Level 3: 9 frames (i.e., huge).
- Aired: If you execute no action, until the landing frames.
CC invincibility works against throws. This is very important to know when playing against Sodom and Zangief. The activation of a CC occurs on the next frame after you start it, vs jumping away from a throw, which takes 4 frames on the pre-jumping frames, making it a better option to escape throws.
--Raf (talk) 20:36, 29 October 2019 (MSK)
CC applications
INVINCIBILITY APPLICATIONS
Invincibility on CC can be used to:
- Blow through tick throws
- Blow through fireballs
- Pass through fireballs on blockstrings
- Avoid anti-airs, especially useful against characters with no good anti-airs, so you can jump a lot and be random against them, and they will never know when to block a string, AC, or anti-air, or block a confusing high/whiff/low CC activation.
- Save yourself from chip death from super
- Throw escapes - your hitboxes disappear entirely
- Anti-air when grounded
- Air-to-air disputes
- Counter CC - a CC activated immediately after your opponent activates a CC.
Other CC applications
- Run away, move faster and take positional advantage (Zangief), chase someone (e.g: a runaway air tatsumaki or a runaway CC)
- Fill the screen with fireballs for some chip damage (barely does any damage, except for Akuma's Shakunetsu, but it does)
- Use a fireball and move faster behind it to get closer
- Punish whiffs in the absence of faster moves
- Maximize damage from a good opportunity at a maximum distance (i.e., Valle CC)
Basically, having one meter stored allows you to take better control of the match. At a high level, it may considerably change footsies.
Due to its importance, CC will have a session dedicated to it.
CC 28 frames denial glitch
For some reason, you cannot wake up and activate a custom combo in situations relating to throws for 28 frames, and this count starts differently for both players depending on the animation. This is half a second or a bit more than a strong button (HP or HK). If you try a custom combo during this period, a normal move obeying the button priority will come out. These are the situations:
- After throws
- After you tech/soften throws
- After Guy's qcf+P command throw
- For command throws, supers and special moves, only who was thrown is affected.
Command throws/special moves:
Command throws are different. Who executed the throw is not affected, but who got thrown is affected. Example:
- Zangief's command throws (360+P or K)
- If you are Zangief, you can activate CC right after the animation.
- If you are the defender, you cannot activate CC and have to count 28f after you get up.
- Guy: Guy is an exception. He still have to wait (i.e., not a command throw).
Super throws:
Super throws like Zangief's Final Atomic Buster, or even Anti-air supers such as Rose's Soul Throw follow the same rule as the command throws. The one who used the super is not affected.
Not affected:
- Anything not related to throws.
- Despite throws also denying tech rolls, other tech roll affecting situations such as Alpha counter and hit-type supers.were tested, but they do not cause any CC limitation.
Note on rapid fire (Guy, Ryu):
If you mash CC in this period you will NOT activate the CC, but instead, the mashing will initiate the rapid fire state and CC cannot be activated in between. Avoid light attacks around this 28f area.
All characters can be negatively affected.
This greatly limits the wake-up options of some characters, especially those who lack good reversals or depend on the super meter, like Dhalsim, Bison, Birdie, Rose, and so on. Use that to your advantage.
Video - 28 frames CC denial glitch.
--Raf (talk) 21:05, 29 October 2019 (MSK)
CC specific notes
Credit goes to Bunnyconda on the A2 discord for the following findings
- If you activate CC and you BOTH are on the ground, and your opponent is not in hitstun, they are frozen for 10 frames (11 if blown out) and cannot do anything during that time
- If you activate CC and your opponent is in the air, they are not frozen and can immediately counter CC
- If you activate mid-air, you are completely invincible until you land or do a move
--SpryteMix 16:23, 15 October 2019 (EST)
Character Specific Data
Stun Counter
The higher the stun, the harder it is to stun the character.
Zangief: 50
Birdie: 48
Sodom: 46
Everyone Else: 40
Akuma / Evil Ryu: 34
Regular Throw Ranges
This is pretty self-explanatory. The bigger the number, the longer the character has to grab at certain distances.
Sodom / Sagat: 22
Shotos, Dhalsim, and Bison: 20
Zangief / Rose: 19
Adon / Sakura: 17
Guy / Charlie Nash: 16
Chun-Li / Gen: 14
Birdie: 8
Rolento: 7
Wake Up Timing
This is off a regular non-tech knockdown from the very first recovery frame until the character is in their neutral stance. The shorter the frames are numerically, the faster the character gets up. This is crucial if you're going for crossup combos, or if you're expecting the opponent to use a wakeup tactic such as a Shoryuken, Flash Kick, a super, CC activation, etc.
12 frames (Birdie)
14 frames (Bison)
15 frames (Sodom)
18 frames (Gen, Charlie, Rose, Dan)
20 frames (Ken, Ryu)
21 frames (Guy, Adon, Dhalsim, Chun-Li, Rolento, Gief, Sagat, Akuma)
24 frames (Sakura)
Tech Roll Speed
While not as varied like in Capcom vs SNK, it still is good reference material against certain characters. For ![]() and
and ![]() roll, the speed is universal with the exception of Zangief, Sodom, and Birdie being slower.
roll, the speed is universal with the exception of Zangief, Sodom, and Birdie being slower.
Strategies
These are the basic, intermediate and advanced strategies you should use in Alpha 2.
Basic Strategies
As in any other game, you have to think understand how developers intended the game to be played, what tools they designed to be strong, and what balance approaches they took. To excel at footsies, you have to know hitboxes and frame data. Since we do not have a good source of frame data, stick to what is simple: How fast you feel like the moves are.
Develop your game plan from it after you pick a character that you like. Although there is a tier list and some bad matchups, generally, A2 is very balanced and you can do well specializing with only one character.
How should I play Alpha 2?
-"FOOTSIES BY DESIGN" "Footsies" means taking little steps back and forward and correctly spacing your normal attacks to gain an advantage over your opponent.
A2 is heavily relying on footsies, so, stay on the ground. The game was designed with fast jumps which allow you jump and punish strong attacks executed on the ground and moves not executed at a proper distance to hit (like a hadouken) or be blocked, and therefore cannot be cancelled into a second attack that would make it safe, but usually, medium and light moves will allow the grounded character to recover and anti-air you with a fast anti-air, so it is a good idea to stay on the ground and play the footsies. During footsies, prefer using light attacks and patiently just wait. Because of the alpha counter, blocking is a very good option. However, all characters have a good walk speed, and can bait your block by jumping with an empty or move done too early, to then activate a custom combo you cannot block low.
A2 vs A3
Alpha 2 nothing like alpha 3. If you play A3, play A2 more like ST. As a start, never use standing or crouching lights as anti-airs, and anti-air uppercuts work really well in A2. Also, blockstring pressure are not as effective as in A3 and the pushback on light buttons are much higher, as well as the blockstun and frame advantage for many moves are much lower, so no cross-up, c.lpx3, cross-up again.
A2 vs ST
If you play ST, this section is for you. You may have a special interest in this commentary if you thought about playing A2.
Basically, alpha 2 tried to approach itself to the SSF2 Turbo (ST) gameplay. However, it clearly intended to make the match last longer while keeping the same "turbo" feel and reduce pressure and ambiguous situations after a knockdown, leaving it to a higher risk/reward vs. meter management situation. The introduction of tech rolls to wake up quickly, along with games from the same era, like Vampire Savior, indicated Capcom's intention to alleviate post-knockdown pressure (sometimes referred to as "yomi").
To get a perfect blender/vortex setup, you have to manage your meter and get a knockdown at the cost of one AC. Since AC knockdowns they cannot be tech rolled, you may have to decide trading 1 super stock for an ambiguous cross-up, so if you do, make that count. In other words, you will not see Daigo doing 2 Tatsumaki's in Afrolenged's Boxer neck ending and the match (LINK: Afrolegends vs Daigo video).
Although some Alpha Counters (AC) leaves you perfectly positioned for cross-ups, it looks like cross-ups were generally nerfed. For instance, Chun j. mk is super small. At the same time, Sakura's diagonal j. mk has a specific, larger, made-for-cross-up hitbox that only lasts for 2 frames (cannot remember of only 1 or 2f actually). Unfortunately, in Sakura's case, it made it terribly worse. To know if you will be crossed-up you have to basically watch when she presses the button or at what height she is in relation to you when you are standing, which is quite hard and there are too many variables. Mostly you have to watch where and when she jumps from, then guess. It doesn't matter what I say or write, you will eat a lot of that, so let's just move on.
Hitboxes
You must know the character's hitboxes. Hitboxes are squares of where you hit, usually represented in red. Hurtboxes are where you get hit, usually represented in blue. There are also throw hitboxes, representing a throw range, which show up 2 or 3 frames after you press forward plus a throw button, fireball hitboxes, and the push hitbox, which is the center of your character so two characters don't go over each other and occupy the same space, so they push each other. Examples:
|
|
|


See them in each character's section and also here: https://sfz2.wordpress.com/hitbox-data/
Hitboxes Jigsaw
Alpha 2 was designed by people passionate about Street Fighter. Hitboxes and moves in Alpha 2 were carefully designed for an "if this, then that" situation. For instance, if Rolento does s.lp, answer with Chun c.mk, but if Rolento does c.lp, Chun must answer with s.lk. Those hit and hurt boxes fit each other like jigsaw pieces.
Also, what you see is what you get and you can pick it up and play. There is no weird character with weird hitboxes, something that seems to hit high but hit low. If you think Sodom's slide was designed to go under fireballs, you are correct. If you think Rose's slide is also designed to go under fireball, you are also correct, but she can do it for only 8 frames, as her head hitbox disappears. Learn your character hitboxes. Whatever the feeling you have about a hitbox and how to use a move, in alpha 2, you are probably correct, so learn while you play. But have a look at the hitboxes section to get started with it.
SUMMARY - Play A2 like this
- Learn how to play footsies
- Don't be predictable. If something isn't working, don't keep on repeating it. If you uppercut once, don't try to uppercut five more times. Of course, there's the mind game where they might not expect it but that's more advanced.
- Mix things up but DON'T BE RANDOM. That's one of the worst things you can do.
- Use the air-to-ground vulnerability to set up damaging combos for people who like to empty jump in a lot. For those that don't know what that means: There's a point between when you come from the air and landing where your character is vulnerable to attacks (mainly low) whereas even if you try to land to crouch block if your opponent hits you at the right time you'll get hit every time you try to empty jump in. I suggest finding this point put the training dummy on "ALL GUARD" to either jump at you or jump straight up. Once you've hit your opponent at that point they'll think twice about empty jumping again.
- Don't jump a lot. It's a bad habit you should get rid of.
VIDEO - Street Fighter Alpha 2 Basic Tutorial
--Scanman (talk) 10:20, 20 February 2019 (MSK)
Intermediate strategies
Intermediate strategies are all about putting the basic gameplay to work. Now that you know the basic gameplay, if you want to win more you should read this.
If you are familiar with fighting games, there is nothing too much new to you here.
Fight your opponent's mind, not his character
Since winning in fighting games is more about attitude and getting to understand what your opponent is thinking, don't be a whining scrub. That is, don't say people are "CHEAP" for any reason. Learn how to appreciate the techniques used by your opponent to incorporate them into your arsenal.
If you do not know how to get out of a certain situation, remember how the game was designed, and remember the AC, and keep your cool in situations such as Guy's and Ken's string corner blockstring pressure. Wait until you can AC and remember throws do not do too much damage. Once again, when you do this, you are thinking about how developers designed the game to be. Guy was designed to be like that, and even under that immense pressure, the damage output is not so high. Learn, therefore, how to appreciate this carefully designed Street Fighter game.
Characters matter too and are part of the basics. Keep in mind how different it is fighting, for instance, Charlie/Nash, from other characters. If you know how the character was designed to be, i.e., to be defensive and win fireball battles or move behind his Sonic Boom, you will also understand why his alpha counters are so slow, as they were made to be used against fireballs and reach the opponent during this animation. Or for instance, you are always safe from far away when using fireballs, but Guy and Akuma can approach you anticipating the fireball. Another example is, you are totally safe against Birdie by annoying him with slow fireballs, unless he has supers, then he can get around it. Birdie can do that with his qcfx2+K, which can be done in response to a fireball, If you don't know that, then you don't know the game yet. As soon as you know it, you know you cannot fight in autopilot and do fireball all the time at maximum distance mode without considering all variables such as if the opponent has a meter or not. You are not a computer. By doing so, you can also jump away and pretend you intend to use a fireball against an opponent who plays like a computer and use that super every time you do a QCF motion without completing it. You can also condition him to think that you are going to fireball every time from the maximum distance. Understand the characters you are fighting with and against, then move on to fighting a thinking player.
If you are losing
A character can only do a certain number of moves designed for predetermined situations, and you have to respect that. For instance, Rose is designed to reflect fireballs, so if your gameplan with Sagat is throw a lot of fireballs against Rose, that will have to change now. However, a player can do much more than what a character does. In a fighting game, you are fighting against brains controlling characters. Remember that.
If you are overwhelmed:
1) Stop and learn the basics of the game, such as the characters and the game mechanics, to get out of these situations. I mean, remember alpha counter and other mechanics you are forgetting.
2) Next, move on to think one step ahead of your opponent, such as "he can do this because of that" and "if I do this, he will respond with that" so you can actually make your opponent move the way you want him to move. By this I mean, you may prefer forcing your opponent to use an alpha counter as a defensive option than having that one stock that could save his life or kill you.
Counter hit/Throw Mixups
The basic idea behind a counter hit/throw mixup game is to have the opponent make a choice to defend one of these options and followup.
Let's say you have Rolento and you start doing standing jabs in front of the opponent. What you want to do is either have the opponent attack, giving you the option to do a counter hit jab into cr.![]() xx patriot circle combo, or have the opponent block so that you can throw them.
xx patriot circle combo, or have the opponent block so that you can throw them.
Counter hits do more damage and give more frame advantage than a normal hit.
Post knockdown strategies
After you are knocked down or knock someone down, they can tech roll or not. Some players tend to follow the same pattern all the time and also are aggressive and try to do an LP roll and activate their custom. In this case you can just block. However, if they do not roll, they are open to some safe jump-ins, tick throws, cross-ups and high/low and throw mixups. (the reason why you fight,
Safe Jump-ins
A safe jump-in is when you jump-in with an attack and the opponents only options are to either block, or take the hit; If the opponent wakes up with a reversal uppercut/super/other invincible moves, since they have a certain start up, mostly 3 to 4 frames, if you land during these frames, you'll still be able to land and block in time. If your jump-in connects, you can hitconfirm into the combo of your choice, or set up mixups.
Upon executing a jump attack, you have 2 frames of recovery time upon landing (zero in an empty jump). A safe jump-in is set up so that your jump attack hits on the very last frame of your jump before you land, basically a meaty attack. If the opponent successfully wakes up with a reversal invincible move, by the time said move's start-up has an active hitbox, you're on the ground and blocking already.
This applies to every invincible move/super. Safe jump-ins are character-specific and differ based on character WAKE UP SPEED (see glitches).
--Scanman (talk) 10:20, 20 February 2019 (MSK)
Tick throws
Tick throw is when you poke your opponent with a light move and use your frame advantage to walk and grab him or walk and reapeat, or walk and do a more damaging move when he tries to counter poke-you or escape a throw.
Cross ups
Crossing up is jumping on your opponent and hitting with a move that hits both in front or in the back. Some can be very ambiguous, so you don't know which way to block, and they allow longer and more damaging combos since the move will push the opponent in the direction you are jumping to, leaving him closer to you.
Corner cross-ups
You cannot cross up someone in the corner.
The game has a "body pushbox" that, when touching the corner, will not allow you to switch sides unless it projects the attacker outside the screen and only works on the 2P/right corner. The only move I know of that can cause this effect is Chun's df+HK, which aligns the body perfectly in line with the downed character body push box, so the hitbox will be aligned behind the hurtbox of an opponent standing up, and push him to the left. However, as this does not work on the 1P corner. It suggests that there is a "move x+1 when this situation occurs" somewhere in the code, always moving you to the right, the reason why this happens on the P2 corner and not the P1 corner.
--Raf (talk) 21:34, 30 October 2019 (MSK)
However, watch when you have someone not really cornered and can be crossed-up. This may be really hard to know during the fast pace of the match, so you can just go for a cross-up attempt. See an example here on this video
--Scanman (talk) 10:20, 20 February 2019 (MSK)
Overheads and High/Low mixups
During the safe jump-ins and cross-ups mindgame, there is always a high/low mixup. You can hit your opponent very deep or whiff a move on purpose to force him to block high and hit him low.
Some character have "overheads," generally f+mp or mk, which you have to block high. They are usually slow enough to be blocked, but are good for an extra free damage and cannot be followed up (Sakura can if done early as meaty), so overheads are good round finishers, but you can also use them to condition your opponent to block high and hit low. You will also see in the Valle CC section that there is an unblockable CC, so you can whiff an overhead and start an unblockable CC right away.
Finally, since you conditioned your opponent to block high or low, you can simply walk back and forth and throw them, or do that and be close enough to pop a CC right when they try to preemptively hit you, or use the tick throw.
Final notes on intermediate strategies
It may not seem much, but those intermediate strategies will get you ready to win. As said, if you are familiarized with fighting games, there is nothing new to you here. If you are, it is always good to give it a quick read, but you may be interested in the more specific and advanced strategies.
Advanced Strategies
Some of these strategies are character-specific, but are listed here so you can have an idea of what they are.
Unblockables
Rose: Soul Illusion
After a knockdown, you can perform an unblockable combo if you activate soul illusion and time any move so that it will whiff, but only her images/shadow hits.
Example (probably, mk is the only mova that works): ![]() +
+ ![]() , c.
, c. ![]() xx
xx ![]() SOUL DRILL (or fireball super to maximize damage).
SOUL DRILL (or fireball super to maximize damage).
This is not a glitch. It occurs because only the main "Rose" has a "proximity block hitbox." This is a special hitbox that if the enemy press a button close enough to you and you press back, you will start a blocking animation right away if you were doing nothing any other action that takes priority over blocking, and this how "blocking" was invented in fighting games. The proximity hitbox only stays there for the duration of the move. In ST, for instance, when you jump over E. Honda's sumo headbutt, and now on the other side you want to walk back for whatever reason, you can't, as you will get stuck into a blocking animation instead, even though you are not in front of the attack. There was much improvement from ST to A2, but unfortunately, the best way to fix that would be extending the duration of the attacks during soul illusion, as if they added proximity block to the shadow, you would likely be stuck in blocking animation for the entire duration of it and would be forced to take too much chip damage from her specials, or you could end up Alpha Countering the shadow, and not Rose.
Therefore, without the proximity block hitbox, you cannot block the shadows when only the shadow hits.
Valle CC
Discussed in its own section.
Hard to block setups
These are not real unblockables, but one may think so if not understanding how they work. They are ambiguous or hard to block.
Ambiguous Cross-ups
- Sakura
Sakura is a special case because her j.mk has specific frames where it crosses up or when it does not cross up. Besides being too hard to block, you may have to invert the blocking direction, as she may land behind you, depending on where you are during your standing animation, and whether you roll or not.
- Sodom
As Sakura, Sodom may hit front and land behind you, or hit and land behind you with j. lk. You always inverted the blocking direction of the second hit, but you have to guess the direction of the first hit.
- Charlie/Nash
Quite similar to Sakura and Sodom.
Zangief: Do a 360+K in the corner. Jump towards your opponent to get a free SPD as a follow-up. You just have to time it to hit exactly when you land. You have 4 frames to do that. The opponent cannot escape with a jump, and have to reversal. Some characters, like Rolent, cannot escape.
Inverted block glitch:
Inverted blocking directions that occur due to a glitch are not unblockables, but they are hard really to block. There is a specific section for that glitch.
Custom combo strategies
Custom combo is invincible for 3, 5 and 9 frames on level 1, 2 and 3 respectively. You can use it to cause damage, go through fireballs, escape damage or for specific situations. See the custom combo section for some examples. There are too many situations to be discussed, and basically, CC follows a natural gameplan that you should adopt. This section will focus, instead, on some killer techniques where you can use CC that are not so obvious.
Valle CC
Valle CC is a low, unblockable custom combo.
A bit of history: Valle CC got this name because of the historical B3 (Battle By the Bay) tournament that later became the Evolution series. Alex Valle won the B3 in the finals against John Choi (Ryu vs Ken, then Sagat vs Ken), taking advantage of this CC many times during the tournament. The players and organizers (John Choi, Tom Canon, Jeff Schaeffer) later partnered with Capcom to release a magazine with a series of tips and tricks for SF Alpha 2. This was a huge milestone for fighting games in the Americas, and one important step for the fighting games as esports. GGPO later started in it's alpha stage with SF alpha 2, which was, again, the introduction of a rollback-based net code that once more changed the future of fighting games.
HOW IT WORKS
- If the opponent is standing, when you activate a custom combo, the opponent cannot block low for a few frames (8-10, see below). This means it is 100% unblockable into any low move (crouching kicks) CC you want, provided it is faster than this window and you time it right.
- It is especially useful for Ryu, Ken, Akuma, Zangief and Rose that have far-reaching tripping c. HK (c. roundhouse).
Notice how this change footsies considerably. From a maximum distance, you are forced to block low constantly and cannot move forward, as you risk taking too much damage, and then have to submit to the fireball game, where the list of characters above excel at. Notice also that they can risk it and be safe if it fails.
- Some say this occurs because you cannot change blocking direction for as long as 8-10 frames (needs confirmation) after a CC is popped. If true, this means that, in theory, there are unblockables for jump-ins as well.
Video: John Choi vs Alex Valle - B3 - 1996
Counter CC
When your opponent does a cc, you can CC right back. This isn't easy but not impossible, allowing you to counter Valle ccs and blowouts.
Advanced Alpha counter strategies
The alpha counter plays a big role in SFA2. You must use it and also avoid it.
Alpha counter reversal
Easier said than done because it involves risks. And easier seen than explained, so watch the video.
Delay the follow up or cancel of any safe normal into an invincible move, and it will beat an alpha counter. As you delayed it, your second move will not come out unless the normal was Alpha Countered. The timing is hard to master and you may accidentally execute the move too soon or too late, so you better buffer the move and wait for the freeze.
By a "safe normal" we mean the move must have its animation ended or about to end before the AC hits you. Ex.: Bison's d+HK slide has a very long recovery, so it is not safe.
The rationale is that, since AC freezes the game for 16 frames, you cannot cancel a move into a special during the normal timing unless you do it before the AC, and if so, the AC will probably beat your move. If done slightly delayed, your inputs will be eaten by the AC freeze when it is done because this is the way designers found it would make the AC beat your move. The idea was to throw you off from your regular cancel timing a bit, so you miss the cancel. Just in case you cancel your move super quickly during the hit stop and before the AC, they also made the AC invincible for a few frames.
This way, AC was made good, but without making it too powerful. A very clever solution.
IN A FEW WORDS: To go around that, execute your move after your regular cancel window timing is up. That is it.
If the opponent ACs, your invincible move will come out after his AC starts, and you will beat it. It must be an invincible move to be invincible when the AC would hit you. Some AC's, like Charlie's Punch AC, have a very long startup on purpose (was designed to counter close fireballs), so you may need to watch that, or you may trade hits. Sagat's Tiger Blow has a very long duration and invincibility, and may be active and you will trade hits. Remember that AC will not let you tech roll, so this trade is usually to their advantage.
The timeline of events that allows that to happen is like this: Situation A: No AC reversal.
- You hit, they block
- You have 8 frames of hit stop + your recovery frames to cancel your move they blocked.
- They AC, adding 16 frames of freeze for both of you.
- Your move may come out a bit early or not come out because the AC messed up with your timing. Freeze animation stops, AC animation starts, and it is invincible. They hit you, beating either the move you cancelled too early or the normal move that did not recover on time.
- They AC, adding 16 frames of freeze for both of you.
- You have 8 frames of hit stop + your recovery frames to cancel your move they blocked.
Situation B: With AC reversal.
- You hit, they block.
- They AC, adding 16 frames of freeze. You start buffering your move.
- Your move animation/cancel window ends or was extended for 16 frames. Execute the move around the end of this freeze (ideally on the 17th frame).
- AC animation starts and you finish the previous move safely and starts a new move or you late cancel the previous move into a new invincible special move. You win.
- Your move animation/cancel window ends or was extended for 16 frames. Execute the move around the end of this freeze (ideally on the 17th frame).
- They AC, adding 16 frames of freeze. You start buffering your move.
Examples:
- Ryu/Ken/Akuma - c.fp, s.mp, c.mp, or c.mk, cancelled late into DP. Any of these are easy and probably the most basic and most seen AC reversals. In Akuma’s case you can AC-reversal with teleport and be really safe while baiting their AC in the process.
- Adon - Only really has c.mp into RH DP
- Chun - s.mp, c.mp, c.mk into qcb + k overhead special. Overhead has a good bit of invincibility so it beats a lot of ACs but not everything.
- Guy - A bit iffy. I’d just use c.mp or really late c.mk (2nd hit) into MK hurricane but it can lose to a lot of things. If you wanna burn meter c.mp/c.mk into qcf + P x2 Super should beat most ACs.
- Dhalsim - Can bait with teleport just like Akuma, other than that not too much. Wouldn’t even use a super to AC reversal, better off saving the meter.
- Gen - Probably the only character I don’t have much experience with AC reversals. I’d assume c.mp, c.mk into RH DP would work fine.
- Sakura - Not a lot she can do since her shoryuken is too slow startup. You either have to AC reversal with a super or just eat the AC. Use s.mp or c.mp.
- Rolento - Mainly c.mk into qcb + jab. Doesn’t escape everything but it’s pretty nice.
- Gief - C.lk or d/b c.mk into KKK lariat. Will beat pretty much anything :party:
- Birdie - c.mp into turn punch? (And cancel into super, but not worth it)
- Rose- c.fp to super fireball or lvl 3 grab
- Sodom - s.mp, s.mk, c.fp into qcf + p x2 super
- Sagat - Mainly just c.mp into fierce DP. use s.mp for late cancel if they can’t duck it
- Bison - c.mk or c.mp into teleport.
- Dan - c.mp, c.mk, or c.fp into a white DP, or just a super.
- Dhalsim - b+mp or fp to super or teleport, but best save the meter unless you have a big lead or it will kill them.
- Gen- pretty much anything, but best it s.fp to dp or dizzy super/lvl 2 rush. Lk dp is really good and safe.
- Charlie- c.mp to mk FK
- Bison- anything to immediate teleport
VIDEO:
Negative edge AC
Have you ever had that feeling that an AC came out for you when you did not do anything? That is probably because it was done when you released a button.
Since you have to input it fast and finish with DOWN, which is not a defensive position, an AC is somehow risky, much more than a 3rd strike parry that is active for 10 frames. Therefore, if you hold any P and K, you can execute low-risk AC attempts in negative edge (releasing the button) instead of preemptively press a button and release your defense.
Examples:
- Hold several P and K after a knockdown to wakeup doing an AC with low risk. Pres b,d/b, and finish the command with d/b if you need.
- During footsies, hold the kicks button held down, walk forward, execute a d, d/b, d motion and release the button, or press it again to counter a whiff poke attempt.
- You can also do a far empty jump ending with b, d/b, d + P/K to AC a trip guard attempt.
Also, remember the BUTTON PRIORITY. You can input c. 3K during footsies to get a c. lk animation, then release the buttons during an AC motion in piano sequence to increase the chances of getting an AC by 3x against fast counter pokes (say lk vs lk). This is especially useful if your opponent has low enough health to bother with being hit by a c. lk and have to take higher risks, while you keep safe with fast poke attempts that allow you to anti-air or take other actions during footsies. This way, you do not need to rely on fireballs or other risky tools for chip damage, where you could eat a jump in or an alpha counter from Ken.
Negative edge is very useful to Ken, Sagat, Sodom, Rose's far-reaching kick ACs. Also, Rolento and Bison teleports towards the opponent, cannot be AC denied/reversed, and you can safely end the match using those ACs. Although it is confusing to be worried about releasing, instead of pressing buttons during the match, just hold the buttons and let the game rules automatically work for your benefit.
This is also explained in the video below!
https://twitter.com/SpryteMix/status/1282554069463314432?s=20
--SpryteMix
Kara-cancel and quick meter building
Canceling any normal quickly before the hit frames come out. For example: ![]() +
+![]() xx raging demon or cr.
xx raging demon or cr.![]() xx fireball.
xx fireball.
Some characters can build meter very fast, ex.: c.fp kara into lp backroll with Rolento, or c.fp kara into a fireball with all the shotos.
Kara-cancels for meter: Chun- c.HP/s.HK xx kikoken or overhead Rolento- c.fp xx lp back roll Birdie- c.fp xx 360+lp Shotos- c.fp or c.rh xx hadouken, lk hurricane, or lp shoryuken Sodom- c.fp xx lp jitte scrape Zangief- c.fp xx lp glove Guy- c.mk xx lk hurricane Rose- c.fp xx mp or hp reflect Charlie- c.mp xx sonic boom
Kara cancels for other uses has a minuscule role in A2 but it does have its use.
High Knock Down Juggle Glitch
- This is best explain by an old post from Endy 22, so I'm gonna copy and paste. Basically it is a knock down that pops your opponent WAY up in the air, allowing juggles. If you are too lazy just know easiest way to set it up is after a cc, ex Sagat does his cc, opponent tech rolls when Sagat is done, Sagat does c.rh which creates a HDK, juggles with HP tiger uppercut.
- Awhile back I posted an article about how special juggle combos could be done after knocking someone down with a CC(i.e. with Sagat; couching Roundhouse, juggle with Fierce Tiger Uppercut). Since then I've learned a lot more about how the high knockdown trick works as well as a bunch of combos that can be done using it. For those who missed the original article or have yet to see someone use the trick, I'll explain how it's done...
- Basically, when you're in CC mode and you do a move that knocks down, the opponent is knocked higher than they usually are when you are out of CC mode. For instance, when you activate a CC and then do a crouching Roundhouse, your opponent is knocked up in the air higher than a normal sweep would, so it's easier to follow up with another attack during the CC(this is one reason why the Valle CC is so devastating). The interesting thing is, you can still get the benefit of a high knockdown(HKD for short) _after_ a CC ends (meaning your CC meter has completely run out, and your opponent is getting up from the knockdown your CC caused). In order to get a HKD, you must first hit your opponent with any kind of CC that ends in a knockdown. Then, as your opponent is getting up or _right_ after, if you connect with a move that knocks down(a sweep for instance) they will be knocked high in the air(much higher than they normally should) allowing you to hit them with a juggling move before they land. note: You can only follow up a HKD with a move that juggles, like Akuma's DP or Guy's HK, all non-juggling moves will whiff.
- An interesting thing about HKD's is that you can normally only juggle an opponent knocked in the air on the way up or at the apex, as soon\ they start to fall you can no longer juggle. However, with a high knockdown, just like in CC mode, you can juggle an opponent no matter how high they are off the ground. This means, if you do a crouching Roundhouse that results in a high knockdown, you can wait till just before the opponent lands and still juggle them. Also, you aren't limited to initiating a HKD with a sweep, certain special moves that knock down will work, too. Another cool thing about HKD's is that they can be initiated with combos, as well. So, with E. Ryu as the opponent is getting up, you could do crouching Jab, crouching Short, Fierce Red Fireball(HKD), juggle with a Fierce Dragon Punch. It's also possible to do repeated high knockdowns. For instance, with Sagat I could do a crouching Roundhouse as their getting up(HKD), juggle with a Fierce Tiger Uppercut. Then as they're getting up from the TU, I could do another crouching Roundhouse(HKD), Fierce TU, crouching Roundhouse(HKD), Fierce TU, etc. As long as you keep getting consecutive HKD's it can be repeated.
- Now, landing a CC and then hitting your opponent with a knockdown move or combo as they're getting up _will not automatically_ result in a HKD. Whether you get the high knockdown or not is _completely_determined by what your opponent does after getting knocked down by the CC. Obviously, if they just block as they're getting up, there is no way you can hit them, so there's no chance for a HKD. So, you can only get a HKD in certain circumstances(most of which involve your opponent doing a particular action as they're getting up). Those circumstances include:
- 1. The opponent rolls after the CC - This is the easiest and most common way to land a HKD in a match. If your opponent rolls right after getting hit by a CC, simply hit them out of it with a knockdown move or combo and you will get a high knockdown, FOR FREE. note: This will only work in regular SFA2, since you can't roll after a CC in A2Gold(and I'm assuming, Z2A).
- 2. The opponent whiffs a Reversal Attack("Reversal" _has_ to appear) - This means if they do any kind of Reversal Attack(including Supers), and it misses, you can hit them during the recovery with a knockdown move or combo and get a HKD. i.e. Ryu does a Reversal DP and it whiffs, if you do a knockdown move as he lands it will result in a HKD.
- 3. You stuff their Reversal Attack - Just like #2, except if you knock them out of the Reversal Attack with a knockdown move you will get a HKD.
- 4. You do an AC reversal - If you stick out an attack as the opponent is getting up which they AC and you reverse it, you will get a HKD. So with Sagat, you could do a crouching Strong(they AC), 2in1 Jab Tiger Uppercut(knocks them out of their AC and results in a HKD), then juggle with a Fierce Tiger Uppercut.
- 5. The opponent is holding 'back' - Meaning, if they're simply holding straight back on the stick while they're getting up and you hit them with a knockdown move or combo, you will get a HKD. I have_no_ idea why this works, especially since holding in any other direction won't result in a HKD. note: While experimenting, this happens to be the easiest way to get a HKD, and is a great way for doing repeated high knockdowns.
- 6. You dizzy them with a HKD move or combo - If you dizzy your opponent with repeated HKD's, then hit them while they're dizzy with a knockdown move or combo, it will result in another HKD. i.e. With Sagat, you do crouching Roundhouse(HKD), Fierce TU, repeatedly till your opponent gets dizzy. While they're dizzy you could do a combo like Jumping Roundhouse, crouching Roundhouse(HKD), Fierce Tiger Uppercut. note: This is only really useful while practicing, since landing repeated HKD's on someone in a real match is just about impossible.
- 7. You counter them as they're getting up - This one is kinda hard to explain, since I'm not exactly sure why this sometimes works, and sometimes doesn't. When I originally posted about the HKD trick, I believed that all you had to do was counter your opponent with a knockdown move as they're getting up and it would result in a HKD. Meaning, that if your opponent is entering any kind of joystick command(besides blocking) or button command, as they're getting up and you hit them with a knockdown move, you'd get a HKD. I soon found out that is not always the case. It works a lot of times when your opponent is going for a Reversal and miss-times it, and your knockdown move hits them, but not always. I guess it's something specific that they're doing that makes a HKD possible, but I'm not exactly sure what it is yet. note: This makes jump-in or crossup HKD combos possible.
- 8. You AC their Reversal Attack - AFAIK, this one is worthless. If you rebuild your meter through repeated HKD's then have your opponent do a Reversal and you do an AC that knocks down, the AC will result in a HKD. Unfortunately, you can't follow-up the HKD because your opponent will have that 'spinning' animation and apparently can't be hit. I only mention this one, because I haven't bothered to try it with all the different AC's, so I'm not 100% sure that none of them can be followed-up.
- 9. You link a knockdown move at the end of a non-knockdown CC - This is a special circumstance where you don't actually have to knock your opponent down with the CC before getting a HKD. Basically, if you do a CC consisting of all non-knockdown moves(like a bunch of standing normals or stream of fireballs) you can link a knockdown move at the end of the CC, and get a HKD. So, with Sakura you could activate a CC, do a bunch of standing normals(lame, I know), then just as your meter runs completely out, link a normal crouching Roundhouse while they're still in hit stun(results in a HKD), and then juggle with a Strong DP.
- Here's a list of moves for each character that will cause a HKD after a CC ends.
- Ken: Crouching Roundhouse
- Ryu/E.Ryu: Crouching Roundhouse/Crouching Roundhouse, Fierce Red Fireball
- Chun Li: Crouching Roundhouse(close)
- Rose: Crouching Roundhouse, Soul Spiral
- Zangief: Crouching Roundhouse, df+Roundhouse
- Sakura: Crouching Roundhouse
- Akuma: Crouching Roundhouse, Fireball(close), Red Fireball(1,2 or 3 hit), d,db,f,uf+Punch move
- Sagat: Crouching Roundhouse, Jab Tiger Uppercut
- Charlie: Crouching Roundhouse
- Rolento: Has no moves that will HKD
- Dhalsim: db+Roundhouse, Strong/Fierce Yoga Fire, Yoga Flame
- Guy: Crouching Forward, df+Roundhouse
- Adon: Crouching Roundhouse
- M. Bison: Crouching Roundhouse(slide)
- Sodom: Crouching Roundhouse(slide)
- Gen: Has no moves in either style that will HKD
- Dan: Crouching Roundhouse
- Birdie: Crouching Roundhouse
- Ok, now there are two basic types of combos that can done using the HKD trick...
- Normal HKD combos:
- Combos that can be done by characters who have specials that juggle(Akuma, Chun Li, Guy, E. Ryu, Sakura, Adon, Sagat) and can be done after any CC that knocks down(every other character has to rebuild meter so they can juggle with a SC). Examples:
- Adon - Jumping Fierce, crouching Roundhouse(HKD), Roundhouse Jaguar Kick
- E. Ryu - Crouching Jab, crouching Short, Fierce Red Fireball(HKD), Short HK, Fierce DP. (vs. Zangief, corner only)
- Chun Li - Jumping Roundhouse, crouching Roundhouse(HKD), Triple Up-Kick
- Sagat - Crossup Short, crouching Strong, Jab Tiger Uppercut, Fierce Tiger Uppercut
- Combos that can be done by characters who have specials that juggle(Akuma, Chun Li, Guy, E. Ryu, Sakura, Adon, Sagat) and can be done after any CC that knocks down(every other character has to rebuild meter so they can juggle with a SC). Examples:
- Normal HKD combos:
- After Rebuilding Meter:
- Combos that are only possible after you rebuild your meter through doing repeated HKD's. Basically, there is no way you'd ever, EVER get this type of combo off in a real match, but do indeed work with some setting up. Examples:
- Charlie - Jumping Roundhouse, crouching Roundhouse(HKD), Level 3 Somersault Justice (corner)
- Guy - Jumping Roundhouse, crouching Forward(HKD), Level 3 Air Punch Super
- Ken - Jumping Fierce, crouching Roundhouse(HKD), 2in1 Short Roll, Level 3 Shinryuken
- Rose - Jumping Roundhouse, crouching Jab, crouching Short, crouching Strong, Short Drill(HKD), Level 2 Aura Soul Catch (corner)
- Akuma - Jumping Fierce, crouching Roundhouse(HKD), Short HK, Short HK, jump towards Level 3 Air Super Fireball or Level 3 DP
- Dhalsim - b+Fierce(headbutt), Jab Yoga Flame(HKD), Level 3 Yoga Inferno (corner)
- Zangief - Crossup d+Fierce, bd+Roundhouse, Level 3 Air Catch Super(A2Gold, Z2A only)
- Combos that are only possible after you rebuild your meter through doing repeated HKD's. Basically, there is no way you'd ever, EVER get this type of combo off in a real match, but do indeed work with some setting up. Examples:
- After Rebuilding Meter:
There's a bunch of other combos that can done using the trick, but the examples should give you the idea. Also, it's possible to juggle with a CC after a HKD when you rebuild your meter.
Well, that's about all I have to report on the high knockdown trick. I hesitated to post all this, since A2 is such an old game, but figured someone may find it of interest. There's also another little CC trick I found that I was thinking of posting in the future, but this should be enough for now =).
--Jeff 22:17, 4 September 2008 (UTC)
Tier List
| 1996 USA | 1996 Japan | 2018 - Debatable Modern Tier List |
|---|---|---|
|
1) Ken
|
1) Chun-Li
|
Top Tier Bottom Tier
|
Community Links
- Keiko SFA2 Blog :Keiko's SFA2 Blog Lots of useful SFA2 stuff, combos, custom combos, articles, guides, etc.
- RedGGPO : RedGGPO An FBN GGPO based online platform with automated matchmaking, where people can find matches and discuss strategy.
- FightCade : https://www.fightcade.com An online platform for arcade gaming, where people gather to play online and chat about the game.
- Discord Alpha 2 Group : https://discord.gg/QFA5gekDJq A Discord group useful for finding people to discuss A2/play games with.
- Online Monthly Organizer (Alpha Aggression) : https://twitter.com/SpryteMix
- Facebook Group :https://www.facebook.com/groups/StreetFighterAlpha2/about/ The facebook group for Street Fighter Alpha 2.
- SRK A2 Thread : https://forums.shoryuken.com/t/sfa2-hitboxes-now-available/46303 A thread on SRK with a lot of good info.
- Advanced A2 Discussion :https://forums.shoryuken.com/t/advanced-a2-discussion/247 Similar to the above. Many of your possible questions are already answered on this thread.
- A2 Quick Reference Thread : https://forums.shoryuken.com/t/alpha-2-quick-reference-thread/166573 Short guides for most characters.
- SNES Game Manual : https://www.retrogames.cz/manualy/SNES/Street_Fighter_Alpha_2_-_SNES_-_Manual.pdf The game manual for the SNES version.
Miscellaneous
Speed Selection
If you're playing the USA board (960306), Turbo 2 is the default setting. If you're playing on the Euro board (960229), Asia, World, etc., Free Select 2 will be the default option, where "Turbo On" within the character select screen is the same speed as the USA Turbo 2 setting in the Service Menu. This also applies to the Zero 2 Japan board (960430), where Free Select 2 (フリ-セレクト2) is the same as the aforementioned Euro, Asia, World boards.
Game Versions
- Arcade
- PC - 30th Anniversary Collection
- Playstation
- Playstation 2
- Sega Saturn
- Super Nintendo
- Nintendo Switch
- Playstation 4
- Xbox One
Besides Arcade, the second best version is a tie between 30th and the PS2 port. Both are arcade perfect, 30th you have to add in some input lag for modern TVs, and there is no way to play the game online unless you use FightCade, RedGGPO, or a recent mod (link will be below). PS2 you have Training Mode, Survival Mode, Dramatic Battle, and some quality of life features added in such as the ability to map 3p or 3k buttons. PS1/Saturn has load times (less on Saturn), an arranged soundtrack, some interesting combos only on the Saturn port,(https://www.youtube.com/watch?v=YUwpp1qpwdE) and missing animations from bigger characters. Avoid the SNES version at all costs, it's mostly just for shits and giggles.
https://bit.ly/2TRzKe7 (Keep in mind that this patch will ONLY work with Windows 10)
-SpryteMix 19:15, 17 June 2020 (EST)
Stage lag and stage selection
The following Stages have stage lag, and stage selection is recommended to avoid it.
| SEVERE LAG | MODERATE LAG | ACCEPTABLE LAG | LOW or NO LAG |
|---|---|---|---|
|
|
|
|
Stage selection
To select a stage, one person must choose their character in single player, followed by the opponent pressing start. Once that occurs, hold start for about 1-2 seconds on the character's portrait before you select your character.
Special stages
Hold start and continue to hold until you pick your character:
- Bison (grass)
- Sagat (waterfall)
Click here for a video description
Other miscellaneous
- For the Japan/Euro version, the default setting for the timer is "Normal" making the overall time per round similar to ST (around a minute real time per round)
- In the USA version, the default is "Slow", which clocks in about a minute and 15 seconds real time per round from 99 to 00.
Japanese TV ad for Sega Saturn
Click here
How to beat Shin Akuma (Alpha 2 Gold)
Click here
Glitches & oddities
Auto-Roll glitches
Some super moves cause a forced roll animation, which caused some glitches because the hurtboxes were maintained.
Corner combo glitch - Dhalsim only
Juggle glitches
Juggle glitch - Dhalsim only
Explanation: https://sfz2.wordpress.com/documentation/
Air super CC glitch
As a curiosity, when in CC mode, as long as you have the meter, you can perform your air super if in the air. Akuma can super fireball kara-cancelled from a ![]() +
+![]() , which is very impractical, but it exists.
, which is very impractical, but it exists.
Inverted directions glitch & pseudo unblockables
During CC you start moving towards left or right non-stop, and if you are hit in the air during CC state, or the few landing frame, your "CC directions" will briefly remain that way after you wake up, or when you land if you are not knocked down. If a move that leaves you airborne started while the timer was active (shoryuken), it can be glitched as it counts as a CC action.
Everything you do is must obey that direction, including blocking, which can be inverted, resulting in a pseudo-unblockable.
Here is a video.
Street Fighter Alpha 2 Inverted block glitch | SFA2 | SFZ2 with combos and setups
Raf (talk) 07:52, 17 December 2019 (MSK)