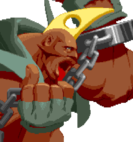
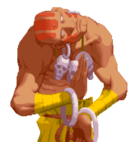
| Sodom | |
|---|---|

| |
| Health: | 144 |
| Defensive Rating: | +1 |
| Stun: | 46 |
| Walk Speed Forward: | 300 |
| Walk Speed Backward: | 200 |
| Jump Backward: | 44f (5+39+0) |
| Neutral Backward: | 44f (5+39+0) |
| Jump Forward: | 44f (5+39+0) |
| Wake-Up: | 41f |
| Quick Rise: | 26f |
| Throw Range: | 22 |
| Colors | ||
|---|---|---|
| Punch | 2 Punches | Punch(Auto) |

|

|

|

|

|

|
| Kick | 2 Kicks | Kick(Auto) |
Sodom (Katana in the SNES English version) is a self-proclaimed student of Japan and its culture. A former henchman of the Mad Gear Gang, Sodom aims to revive the crime ring and is consumed with revenge toward Guy.
Players to watch: shanebadoo, xQj(aka zoo & yw10)
|
| |
| Strengths | Weaknesses |
|---|---|
|
|
Normal Moves
| SFA2 Framedata Glossary | |
|---|---|
| Damage |
Units of base damage inflicted by the move (100% life bar = 144 units of health). Most moves have a damage range; the number inside the square brackets indicates which Random Damage Table the move uses to look up any additional damage and the % chance of doing so. |
| Stun |
Units of stun inflicted by the move. |
| Startup |
The frame the move hits on (1st active frame). Super moves with a screen freeze will separate pre- and post-screen freeze startup frames by a '+' (Ex: 5+0). |
| Active |
The portion of a move that can hit. How many frames a move remains active for. ()=Inactive frames in-between active frames. [xN]=Repeated sequences. |
| Frame Adv |
The frame advantage values when the attack is blocked. (Add +1 frame to all OnBlockAdv values for the move's OnHitAdv value; Ex: +2oB/+3oH, -4oB/-3oH) |
| Meter |
The units of meter gained on whiff/block/hit. (48, 96, and 144 units of meter are required for 1, 2, and 3 bars of meter respectively) |
| Block |
Low attacks must be blocked crouching. High attacks must be blocked standing. Mid attacks can be blocked either way. |
| Properties |
|
| Frames |
All framedata collected with the game speed set to normal, where the game tickrate and framerate are the same(60fps). |
| Speed |
All framedata collected with the game speed set to normal. |
| Hitboxes |
All hitbox images have the character standing/jumping in the exact same position, so hitbox distances can be easily compared.
|
| Credit | Damage, stun, framedata, meter, and updated hitboxes collected by |
Standing
st.![]()

| Damage | Stun | Startup | Active | Frame Adv | Meter | Block | Properties |
|---|---|---|---|---|---|---|---|
| 8[0] | 3 | 7 | 6 | 0 | 0/1/2 |
st.![]()

| Damage | Stun | Startup | Active | Frame Adv | Meter | Block | Properties |
|---|---|---|---|---|---|---|---|
| 11[1] | 6 | 10 | 5 | +5 | 1/3/6 | - |
This is a decent normal, mainly because it gives frame advantage. Can link into cr.![]() xx
xx ![]() scrape.
scrape.
st.![]()

| Damage | Stun | Startup | Active | Frame Adv | Meter | Block | Properties |
|---|---|---|---|---|---|---|---|
| 18[2] | 8 | 16 | 4 | +7 | 2/5/9 | - |
Stabs high with both weapons, good damage. Whiffs against most crouching characters, but very helpful to zone characters that can't duck it (Zangief and Sagat). Good to hit fireballs too.
st.![]()

| Damage | Stun | Startup | Active | Frame Adv | Meter | Block | Properties |
|---|---|---|---|---|---|---|---|
| 7[0] | 1 | 4 | 6 | +2 | 0/1/2 |
Kick to the shin, can walk up and repeatedly do these, but not too much if they have meter.
st.![]()

| Damage | Stun | Startup | Active | Frame Adv | Meter | Block | Properties |
|---|---|---|---|---|---|---|---|
| 10[1] | 4 | 8 | 5 | +3 | 1/3/6 |
Straight kick, good poke, decent range, cancellable too. Best whiff punisher, ![]() xx
xx ![]() scrape. It is also his best meaty simply, and if you mess up, you are safe. If hit super meaty, you can link into cr.
scrape. It is also his best meaty simply, and if you mess up, you are safe. If hit super meaty, you can link into cr.![]() into combo finisher of choice:
into combo finisher of choice: ![]() +
+![]() (safe on block), or cr.
(safe on block), or cr.![]() xx
xx ![]() +
+![]() .
.
st.![]()

| Damage | Stun | Startup | Active | Frame Adv | Meter | Block | Properties |
|---|---|---|---|---|---|---|---|
| 12[2] | 6 | 12 | 6 | -7 | 2/5/9 | - |
Decent poke, good range, but slow. You -will- be CC'd if you whiff. Kick straight out while moving forward slightly. Can be used as a meaty, but you get pushed too far away to link anything.
Taunt
(Start)

| Damage | Stun | Startup | Active | Frame Adv | Meter | Block | Properties |
|---|---|---|---|---|---|---|---|
| 1[0] | 0 | 17 | 16 | -11 | 0/0/0 | - |
- Punishable on hit.
Crouching
cr.![]()

| Damage | Stun | Startup | Active | Frame Adv | Meter | Block | Properties |
|---|---|---|---|---|---|---|---|
| 8[0] | 3 | 5 | 6 | +3 | 0/1/2 |
cr.![]()

| Damage | Stun | Startup | Active | Frame Adv | Meter | Block | Properties |
|---|---|---|---|---|---|---|---|
| 12[1] | 6 | 9 | 6 | -3 | 1/3/6 | - |
This is move is actually really bad. It's only useful for going under tatsu.
cr.![]()


| Damage | Stun | Startup | Active | Frame Adv | Meter | Block | Properties |
|---|---|---|---|---|---|---|---|
| 11[2], 9[0] | 8, 6 | 6 | 2(3)5 | -11, -6 | 2/5+3/9 |
- Hits 1 time.
- First hit is cancelable.
- Punishable on hit.
Uppercut. Decent anti-air, but not the greatest, will get beat by early jump-ins or Chun-Li.
cr.![]()

| Damage | Stun | Startup | Active | Frame Adv | Meter | Block | Properties |
|---|---|---|---|---|---|---|---|
| 7[0] | 3 | 5 | 6 | -2 | 0/1/2 |
OK range. Can be used to combo after a meaty st.![]() .
.
cr.![]()

| Damage | Stun | Startup | Active | Frame Adv | Meter | Block | Properties |
|---|---|---|---|---|---|---|---|
| 12[1] | 6 | 10 | 6 | 0 | 1/3/6 | - |
Slow, can't cancel. Decent meaty because it hits low, but all you can get off is cr.![]() xx
xx ![]() scrape. The link is relatively difficult.
scrape. The link is relatively difficult.
cr.![]()


| Damage | Stun | Startup | Active | Frame Adv | Meter | Block | Properties |
|---|---|---|---|---|---|---|---|
| 14[2], 11[0] | 8 ,8 | 10 | 11(0)2 | -19 at worst -7 at best |
2/5/9 |
- Hits 1 time.
- First hit is a soft knockdown.
If used wrong, this move will get you killed. Straight up free CC, sweep, etc. if not used right. This move is safe when use as anti-air, though a lot of times it gets blocked, but you are safe. Goes under fireballs, which is its best use. Use with caution, is a good move though.
Neutral Jumping
nj.![]()

| Damage | Stun | Startup | Active | Frame Adv | Meter | Block | Properties |
|---|---|---|---|---|---|---|---|
| 9[0] | 3 | 9 | 10 | - | 0/1/2 | - |
Seems to have a good disjointed hitbox on the blade, but there doesn't seem to be a good use for the move.
nj.![]()

| Damage | Stun | Startup | Active | Frame Adv | Meter | Block | Properties |
|---|---|---|---|---|---|---|---|
| 11[1] | 6 | 9 | 6 | - | 1/3/6 | - |
Same as nj.![]() but with more damage and stun.
but with more damage and stun.
nj.![]()

| Damage | Stun | Startup | Active | Frame Adv | Meter | Block | Properties |
|---|---|---|---|---|---|---|---|
| 15[2] | 8 | 9 | 4 | - | 2/5/9 | - |
Slashes downward with both weapons, big wall of a hitbox. Great move and air-to-air. Best Neutral jump combo starter.
nj.![]()

| Damage | Stun | Startup | Active | Frame Adv | Meter | Block | Properties |
|---|---|---|---|---|---|---|---|
| 9[0] | 3 | 6 | 10 | - | 0/1/2 | - |
Poor hitbox and no real use for the move. Best to avoid.
nj.![]()

| Damage | Stun | Startup | Active | Frame Adv | Meter | Block | Properties |
|---|---|---|---|---|---|---|---|
| 11[1] | 6 | 7 | 8 | - | 1/3/6 | - |
Same as nj.![]() but with better damage and stun. Best to avoid.
but with better damage and stun. Best to avoid.
nj.![]()

| Damage | Stun | Startup | Active | Frame Adv | Meter | Block | Properties |
|---|---|---|---|---|---|---|---|
| 14[2] | 8 | 7 | 4 | - | 2/5/9 | - |
Dropkick. Good air-to-air and good hitbox, overall a good move.
Diagonal Jumping
dj.![]()

| Damage | Stun | Startup | Active | Frame Adv | Meter | Block | Properties |
|---|---|---|---|---|---|---|---|
| 9[0] | 3 | 9 | 10 | - | 0/1/2 | - |
Hitbox is nowhere near as good as the neutral jump version, no real use since dj.![]() and dj.
and dj.![]() have much better hitboxes on them, while dj.
have much better hitboxes on them, while dj.![]() and dj.
and dj.![]() do better damage and stun. Best to avoid.
do better damage and stun. Best to avoid.
dj.![]()

| Damage | Stun | Startup | Active | Frame Adv | Meter | Block | Properties |
|---|---|---|---|---|---|---|---|
| 12[1] | 6 | 9 | 6 | - | 1/3/6 | - |
Same as dj.![]() but with slightly more damage and stun.
but with slightly more damage and stun.
dj.![]()

| Damage | Stun | Startup | Active | Frame Adv | Meter | Block | Properties |
|---|---|---|---|---|---|---|---|
| 14[2] | 8 | 7 | 2 | - | 2/5/9 | - |
Slashes downward with both weapons, good air-to-air, good to hit fireballers.
dj.![]()

| Damage | Stun | Startup | Active | Frame Adv | Meter | Block | Properties |
|---|---|---|---|---|---|---|---|
| 9[0] | 3 | 6 | 10 | - | 0/1/2 | Cross-up |
Good vertical range and hitbox. One of the best cross-ups in the game. Hard to block on wake up as it's very ambiguous. Leads to cr.![]() xx
xx ![]() scrape or throw for another knockdown and cross-up. Loop it.
scrape or throw for another knockdown and cross-up. Loop it.
dj.![]()

| Damage | Stun | Startup | Active | Frame Adv | Meter | Block | Properties |
|---|---|---|---|---|---|---|---|
| 11[1] | 6 | 7 | 8 | - | 1/3/6 | - |
Looks similar to dj.![]() , but with more damage and stun. The hitbox extends further in front of him compared with dj.
, but with more damage and stun. The hitbox extends further in front of him compared with dj.![]() , so it's a better jump-in if you know you won't cross-up.
, so it's a better jump-in if you know you won't cross-up.
dj.![]()

| Damage | Stun | Startup | Active | Frame Adv | Meter | Block | Properties |
|---|---|---|---|---|---|---|---|
| 13[2] | 8 | 7 | 4 | - | 2/5/9 | - |
Dropkick. Good air-to-air and good hitbox, overall a good move. If you use it to punish a fireball, you might get hit in the head by the fireball.
Normal Throws
Shogun Throw (Long)
Punch Throw![]() /
/![]() +
+ ![]() /
/![]()


| Damage | Stun | Startup | Active | Frame Adv | Meter | Block | Properties |
|---|---|---|---|---|---|---|---|
| 19[0] | 0 | 1 | N/A | N/A | -/-/3 | N/A |
- Deals 9 damage when opponent tech throws.
- Sodom has the best throw range in the game (Alpha2ThrowRanges).
Tosses the opponent way up and away, follow up with ![]() scrape to get close if not teched or walk up for a dj.
scrape to get close if not teched or walk up for a dj.![]() cross-up.
cross-up.
Shogun Throw (Short)
Kick Throw![]() /
/![]() +
+ ![]() /
/![]()
| Damage | Stun | Startup | Active | Frame Adv | Meter | Block | Properties |
|---|---|---|---|---|---|---|---|
| 3[0] | 0 | 1 | N/A | N/A | -/-/3 | N/A |
- Deals 1 damage when opponent tech throws.
- Sodom has the best throw range in the game (Alpha2ThrowRanges).
Tosses the opponent low. Can juggle with any level scrape super, but stick to level 1. You miss a lot of hits at higher levels and it's a waste of meter. Good use of meter for the kill. Level 1 juggle for two hits, all on some characters (Bison).
Alpha Counters
Punch Alpha Counter
(while in blockstun)![]() +
+ ![]()

| Damage | Stun | Startup | Active | Frame Adv | Meter | Block | Properties |
|---|---|---|---|---|---|---|---|
| 15[1] | 8 | 4 | 4 | +1 | 0/0/0 |
It's basically his ![]() slash. Use only against jump-ins and fireballs, good AC.
slash. Use only against jump-ins and fireballs, good AC.
Kick Alpha Counter
(while in blockstun)![]() +
+ ![]()

| Damage | Stun | Startup | Active | Frame Adv | Meter | Block | Properties |
|---|---|---|---|---|---|---|---|
| 14[1] | 8 | 4 | 13 | -2 | 0/0/0 |
His sweep, good for grounded moves and fireballs. Use to setup his ambiguous dj.![]() cross-up.
cross-up.
Special Moves
Jigoku Scrape
Scrape![]() +
+ ![]()


| Version | Damage | Stun | Startup | Active | Frame Adv | Meter | Block | Properties |
|---|---|---|---|---|---|---|---|---|
| 11[7] | 8 | 15 | 8 | -4 at worst +3 at best |
7/8/9 | - | ||
| 14[8] | 10 | 15 | 8 | -7 at worst 0 at best |
7/8/9 | - | ||
| 16[9], 10[9] | 9, 6 | 11 | 4(0)8 | -9 at worst -2 at best |
7/8+1/9 |
![]() - [Hitboxes pictured 1st]
- [Hitboxes pictured 1st]
- Combos from st.
 or cr.
Sodom slashes forward with his jitte. Used right, this move will annoy your opponent. No one can crouch under it and it is safe on block at any distance. Hell, if you do this move at point blank and block, they can't punish you with a CC. When spaced right, you can land a sweep afterward if they try anything. Due to this move being safe on block you can try a number of things afterward and test how your opponent reacts. You can make the opponent scared to hit you with another Jigoku Slash, and once they're conditioned to block you can even go for a grab super (if in range), which is only escapable by DP/CC since this game allows you to grab pre-jump frames.
![]() - [Hitboxes pictured 2nd]
- [Hitboxes pictured 2nd]
- Combos from st. or cr.
Sodom slashes upward with his jitte. Use this move when you think they'll jump. It's a rather risky anti-air though because most characters can crouch under it. You should be safe if it's blocked, but if done point blank you can be punished by a CC. Zangief and Sagat can't crouch under this move.
![]() - [Hitboxes pictured 3rd & 4th]
- [Hitboxes pictured 3rd & 4th]
- Hits 1 time.
- Combos from cr.
 or cr.
This move is good in far combos because it knocks down. Always follow up with sweep, in case they tech roll. Beware: if blocked, free CC or combo. The move is safe if you only hit with the 2nd hit at range, but if the opponent blocks both hits the move is punishable.
Butsumetsu Buster![]() /
/![]() +
+ ![]()


| Version | Damage | Stun | Startup | Active | Frame Adv | Meter | Block | Properties |
|---|---|---|---|---|---|---|---|---|
| 19[0] | 0 | 26 | 1 | N/A | 5/-/20 | N/A | ||
| 22[0] | 0 | 26 | 1 | N/A | 5/-/20 | N/A | ||
| 25[0] | 0 | 26 | 1 | N/A | 5/-/20 | N/A |
- Unscaled damage in CC.
Cancels and grabs from st.![]() at any range in corner. Midscreen, point blank st.
at any range in corner. Midscreen, point blank st.![]() , cr.
, cr.![]() xx
xx ![]() +
+ ![]() will grab.
will grab.
![]() - [Hitboxes pictured top]
- [Hitboxes pictured top]
Has the farthest grab range.
![]() - [Hitboxes pictured middle]
- [Hitboxes pictured middle]
![]() - [Hitboxes pictured bottom]
- [Hitboxes pictured bottom]
Has the shortest grab range.
Daikyo Burning![]() /
/![]() +
+ ![]()

| Version | Damage | Stun | Startup | Active | Frame Adv | Meter | Block | Properties |
|---|---|---|---|---|---|---|---|---|
| 6[8]+4[0]x3+5[0] | 1, 0x4 | 18 | 27 | -35 at worst -12 at best |
8/14/20 | |||
| 6[8]+4[0]x4+5[0] | 1, 0x5 | 18 | 35 | -49 at worst -18 at best |
8/14/20 | |||
| 6[8]+4[0]x5+5[0] | 1, 0x6 | 18 | 43 | -63 at worst -25 at best |
8/14/20 |
- Will side switch if initial hit is close enough to the corner. The corner is just off screen at max range of the side switch.
- Unscaled damage in CC.
This is what you want to combo into, because it hurts, a lot, and corner carries. Crazy priority, will grab any limb, even Dhalsim's from fullscreen. Combos only off a cr.![]() midscreen and st.
midscreen and st.![]() in the corner. This is his CC ender. If blocked, you are in trouble because it's very punishable.
in the corner. This is his CC ender. If blocked, you are in trouble because it's very punishable.
dj.![]() , cr.
, cr.![]() CC
CC ![]() +
+ ![]() is the only combo you should be doing if the opponent is dizzy.
is the only combo you should be doing if the opponent is dizzy.
![]()
- Travels about 1/2 screen.
![]()
- Travels about 3/4 screen.
![]()
- Travels full-screen.
Shiraha Catch
Counter![]() +
+ ![]()

| Version | Damage | Stun | Startup | Active | Frame Adv | Meter | Block | Properties |
|---|---|---|---|---|---|---|---|---|
| 11[4] | 0 | 7 | 24 | N/A | 4/-/10 | N/A | ||
| 12[4] | 0 | 8 | 26 | N/A | 4/-/10 | N/A | ||
| 13[4] | 0 | 9 | 28 | N/A | 4/-/10 | N/A |
- Big Counterbox: only counters grounded overheads if the opponent's hitbox hits it, no matter the distance.
- Small Counterbox: counters air attacks if the opponent's hitbox hits it and their pushbox is within range horizontally of it.
- Receives 150% damage when counter hit.
Also known as the move you use to get kicked in the face. Don't use it. Just don't.
![]()
![]()
![]()
Tengu Walking
(while falling from a knockdown)![]() +
+ ![]()


| Version | Damage | Stun | Startup | Active | Frame Adv | Meter | Block | Properties |
|---|---|---|---|---|---|---|---|---|
| 6[5]x3 | 5x3 | 36 | 4(8)4(8)3 | 0 | 7/7/7+1 per hit | - |
An alternative to tech rolling. Can be done even when tech rolling can't, like after a throw. Good to use from time to time, but can be thrown.
Kouten Okiagari
Backward Tech Roll
(while falling from a knockdown)![]() +
+ ![]()


| Version | Damage | Stun | Startup | Active | Frame Adv | Meter | Block | Properties |
|---|---|---|---|---|---|---|---|---|
| N/A | N/A | N/A | N/A | N/A | 0/-/- | N/A | - |
- Distance is not based on the strength of
 used like normal forward tech rolling.
 - Distance at the start of the round defaults to
 tech roll.
 - Distance is then based on the most recent forward tech roll (Tengu Walking counts as
 tech roll).
A backwards tech roll.
Super Moves
Startup Invulnerability Notes:
- At the end of a super screen freeze, projectiles will start moving before the opponent's character is unfrozen, giving the supers more projectile invul. frames than hit invul. frames.
Meido no Miyage
Scrape Super![]()
![]() +
+ ![]()


| Version | Damage | Stun | Startup | Active | Frame Adv | Meter | Block | Properties |
|---|---|---|---|---|---|---|---|---|
| Level 1 |
13[13], 11[13], 8[13] | 1x3 | 5+0 | 16(8)16(8)16 | -29(2nd hit), -7(3rd hit) |
0/0/0 | ||
| Level 2 |
11[13], 8[13], 9[13], 5[13], 5[13], 4[13] | 0x3, 1x3 | 5+0 | 4(0)12(8)4(0)12(10)4(0)12 | -29(5th hit), -3(6th hit) |
0/0/0 | ||
| Level 3 |
13[13], 10[13], 11[13], 5[13], 5[13], 4[13], 14[13] | 0x4, 1x3 | 5+0 | 4(0)12(8)4(0)12(10)4(0)12(32)4 | -38(6th hit), -4(7th hit) |
0/0/0 |
Combos at all levels from any cancellable normal. Not the greatest super but can combo off of a cross-up dj.![]() , cr.
, cr.![]() xx
xx ![]()
![]() +
+ ![]() because it gets all hits. Safe if blocked, but comboed from a distance isn't too wise cause the last hit usually misses.
because it gets all hits. Safe if blocked, but comboed from a distance isn't too wise cause the last hit usually misses.
Level 1 - [Hitboxes pictured]
- 5 frames of startup hit invul.; 0 of which while active.
- 7 frames of startup projectile invul.
- Hits 3 times.
- 3rd hit is a hard knockdown.
Level 2
- 5 frames of startup hit invul.; 1 of which while active.
- 8 frames of startup projectile invul.
- Hits 6 times.
- 6th hit is a hard knockdown.
Level 3
- 5 frames of startup hit invul.; 1 of which while active.
- 9 frames of startup projectile invul.
- Hits 7 times.
- 6th & 7th hits are a hard knockdown.
- Last hit can be air-blocked.
Opponent has time in between the 6th and 7th hit to punish with an anti-air. Typically a poor use of meter.
Tenchu Satsu
720![]()
![]() /
/![]()
![]() +
+ ![]()

| Version | Damage | Stun | Startup | Active | Frame Adv | Meter | Block | Properties |
|---|---|---|---|---|---|---|---|---|
| Level 1 |
16[0]+20[0] = 36 | 0 | 1+4 | 1 | N/A | 0/-/0 | N/A | |
| Level 2 |
20[0]+28[0] = 48 | 0 | 1+4 | 1 | N/A | 0/-/0 | N/A | |
| Level 3 |
20[0]+28[0]+28[0] = 76 | 0 | 1+4 | 1 | N/A | 0/-/0 | N/A |
- A full 720 isn't required. Required inputs:


 + starting with any direction.
 - All versions travel the same distance.
- 0 frames of startup hit invul.; 0 of which while active.
- 3 frames of projectile invul.
- Characters with 3 pre-jump frames can hold up during the screen freeze for a 50% chance to escape the grab.
Best bet is dj.![]() then super, or st.
then super, or st.![]() then super, but it's escapable by CC/DP and 50% chance for characters with a fast jump. This connects from max range st.
then super, but it's escapable by CC/DP and 50% chance for characters with a fast jump. This connects from max range st.![]() or
or ![]() scrape. Against Zangief you can start the match with it.
scrape. Against Zangief you can start the match with it.
The Basics
Sodoms ![]() Jigoku Scrape is unpunishable from max range, so you can use it as a safe poke from that distance to cover the ground and air. Your opponent is well outside of their attack range from this distance so this will make it very hard to get in.
When you perform a max range
Jigoku Scrape is unpunishable from max range, so you can use it as a safe poke from that distance to cover the ground and air. Your opponent is well outside of their attack range from this distance so this will make it very hard to get in.
When you perform a max range ![]() Scrape, you can follow up with another
Scrape, you can follow up with another ![]() Scrape, or a
Scrape, or a ![]() Scrape an early jump attempt or hesitate before throwing the 2nd
Scrape an early jump attempt or hesitate before throwing the 2nd ![]() Scrape. This allows you to bait reversal attempts and Alpha Counters once your opponent gets used to the timing.
Scrape. This allows you to bait reversal attempts and Alpha Counters once your opponent gets used to the timing.
Another solid option is his cr.![]() slide, which has amazing range. Its useful for whiff punishing at mid range or catching opponents walking backwards. The catch is, you must do this move from max range as well to prevent punishment on block.
slide, which has amazing range. Its useful for whiff punishing at mid range or catching opponents walking backwards. The catch is, you must do this move from max range as well to prevent punishment on block.
Once you land cr.![]() or any Jigoku Scrape lands on an airborne opponent, follow them with a
or any Jigoku Scrape lands on an airborne opponent, follow them with a ![]() Scrape. This will move Sodom into attack range while covering the possibility of a recovery roll from the opponent. Be aware that you will barely recover before they stand so it will be hard to perform some of his slower attack options on your opponents wakeup ( eg. st.
Scrape. This will move Sodom into attack range while covering the possibility of a recovery roll from the opponent. Be aware that you will barely recover before they stand so it will be hard to perform some of his slower attack options on your opponents wakeup ( eg. st.![]() ).
).
Basic Offense
Sodom's Butsumetsu Buster has absolutely massive range, enabling you to grab your opponent from unexpected distances. Also, the slow start up time enables it to be cancelled into from light or medium attacks, in which case it grabs your opponent just as they recover from blockstun. This makes it fairly easy to setup tick Butsumetsus without having to agonize over timing too much.
When the opponent is hesitant to recovery roll after cr.![]() (because of the possiblity of the
(because of the possiblity of the ![]() Scrape follow-up), go for the cross-up dj.
Scrape follow-up), go for the cross-up dj.![]() . Perform the dj.
. Perform the dj.![]() at different points during the jump-in to dictate whether it hits the enemy from the front or back ( before you pass over the enemies head to hit from the front, or after you pass for behind). If the cross-up hits, link st.
at different points during the jump-in to dictate whether it hits the enemy from the front or back ( before you pass over the enemies head to hit from the front, or after you pass for behind). If the cross-up hits, link st.![]() xx
xx ![]() Jigoku Scrape.
Jigoku Scrape.
Close st.![]() is a strong attack opening if you have enough time to do it against a standing enemy. If it hits it's possible to link cr.
is a strong attack opening if you have enough time to do it against a standing enemy. If it hits it's possible to link cr.![]() xx
xx ![]() Jigoku Scrape afterwards. If it doesn't hit use the frame advantage to follow up.
Jigoku Scrape afterwards. If it doesn't hit use the frame advantage to follow up.
Defensive Notes
One of Sodom's biggest weaknesses is his lack of a consistent anti-air. Most times you can rely on cr.![]() but its slow and unreliable against good jump in attacks. when you are having difficulty dealling with certain jump attacks the only other options are to CC or use his Punch Alpha Counter.
but its slow and unreliable against good jump in attacks. when you are having difficulty dealling with certain jump attacks the only other options are to CC or use his Punch Alpha Counter.
360 powerbomb set ups
SETUPS
Corner:
- Meaty st., cr. xx
 +
+ - st., st. xx +
- walking st.s, xx into +
- jump up, nj. xx +
Midscreen:
- Any tick into 360,
 + to get close, grab on wake-up with +
 - Any tick into 360, + to get close, st. xx +
You can mix it up however you want, just make sure they don't see the grab coming. Also if meaty st.![]() hits, link cr.
hits, link cr.![]() xx
xx ![]() +
+![]() .
.
LP Scrape
This is his best move, with good priority. The move sets up his ac and supers perfectly. There are alot of things he can do after this is hit or blocked.
1. Wait to see it they jump, then ![]() scrape AA
scrape AA
2. Slide if expecting a fireball
3. 720 grab super, make sure they have no meter cause this can be CC'd
4. Scrape super to punish jumpers for 2-3 hits juggle, and safe on block
5. Another ![]() scrape
scrape
6. Jump in ![]()
7. Block then Alpha couter anything they do
Advanced Strategy
-Knock'em down, keep'em down-
That's the rule of thumb, Sodom has a hard time getting to people, so when you got them down keep'em there. Sodom is good vs a cornered opponent.
Several thing you can do after a knockdown:
-Meaty into 360 tick (stated above in 360 section)
- Throw
-Jump up, do nothing, throw
-Go for a meaty combo ex. s.mk, c.lk xx hp slash
-Jump up come down with fp, tick into super/360
-Jump up, come down with hp, 360+lp
-Walking lks into hp throw
-Meaty s.mk, s.mk xx 360+lp
-Walking lks, s.mk xx 360+lp
-meaty s.mk, walk up throw
-block if you think they will cc
You will stay in the corner after a 360 ticks, then mix up again with the above options.
Walking lks, s.mk xx qcf+lp which leads to:
1. Another qcf+lp
2. If you have opponent hesitant to attack 360/720 (if in distance)
3. qcf+mp if you think they will jump, (knocks down, refer to knockdowns)
4. jump in fp
5. Super if the chip/trade will kill them
6. c.rh if in c.rh sweet spot
7. do nothing to bait cc, AC
Combos
Anytime you get a opening you want to use ![]()
![]() to get the knockdown and keep up pressure, for big opening use
to get the knockdown and keep up pressure, for big opening use ![]() +
+![]() .
.
![]() xx
xx ![]() +
+ ![]()
cr.![]() xx
xx ![]() +
+ ![]()
cr.![]() xx
xx ![]() +
+![]()
cr.![]() xx
xx ![]() +
+![]()
meaty ![]() , cr.
, cr.![]() xx
xx ![]() +
+![]()
meaty ![]() , cr.
, cr.![]() xx
xx ![]() +
+![]()
meaty ![]() , cr.
, cr.![]() xx
xx ![]() +
+![]()
![]() , cr.
, cr.![]() xx
xx ![]() +
+![]()
cr.![]() xx
xx ![]()
![]() +
+![]()
cr.![]() xx
xx ![]()
![]() +
+![]()
![]() xx
xx ![]()
![]() +
+![]()
Custom Combos
Unfortunately, his good cc is if they are standing, so blow out ccs are great. Crouching opponents suck. gotta be precise.
- Standing
Lvl 1 c.mk xx qcf++mp x2, c.hp xx 360+hk
This cc does about 45%, which is awesome for a lvl one. Higher lvls just add more qcf+mps, end with c.hp xx 360+hk for max damage. I think lvl 3 you can get 7 slashes.
- Crouching
c.mk, qcf+lp, qcf+lp, 360+hk
Actually i been messing around a bit and for most cases you can just qcf+lp, end with 360+hk. No c.hp though, you will be too far. You CAN combo into his 360+p grab, but it does less than the combos above.
.....but at higher levels (depending on distance) you get pushed away, so you have to trip and juggle with hp slash, which sucks, or you can mash random shit, then 360+hk to end. I usually have them standing, so idk lol.
- AA CC
activate, c.hp, then start juggling with qcf+mp or hp.
Ive had limited success with s.lp into mp scrapes
I'll add more as time goes on, this is just basic shit.
- Taunt CC
End any CC with qcf+hp, and then hit taunt.
Ex. lvl 1 activate c.mk xxqcf+hp xx taunt
Sodom: any lvl standing or on anyone who cant duck mp scrape: c.mk xx mp scrape xN, c.fp xx 360+hk
On anyone who can duck it use lp scrape but dont use c.fp, go straight into 360+hk
Match-ups
This match up is mainly footsie and normals. Adon has no safe moves unless perfectly distanced and/or when Sodom has no meter. Any jaguar kick should be punished with custom combo or cr.![]() xx
xx ![]() scrape. Any jaguar tooth just jump up and come down with a jump attack, if you have meter it is a free custom from anywhere on the screen. If a Jaguar Tooth does manage to slip by and force you to block you can simply alpha counter. Punish Rising Jaguar as you would any reversal type dp.
scrape. Any jaguar tooth just jump up and come down with a jump attack, if you have meter it is a free custom from anywhere on the screen. If a Jaguar Tooth does manage to slip by and force you to block you can simply alpha counter. Punish Rising Jaguar as you would any reversal type dp.
[Loading match-up info...]
[Loading match-up info...]
[Loading match-up info...]
Against jumping chun : chunli can either stick her legs out early or late when she jumps. Sodom can counter in 5 ways :
Jumping back roundhouse - this is just on reaction/prediction. Sodom has an above average air to air roundhouse. Crouching fierce : against chunli who sticks leg out late Throw : against chunli for sticks leg out early Alpha counter : against chunli who sticks leg out early His air catchy thingie : for fun :slight_smile: Against crouching forward chun, try sticking out standing short and fierce at max range. You can also throw in a jab 360 every now and then and it WILL hit Chun from that range. If you have a level 2 or above meter jump straight up. From there you get multiple options
If Chun walks forward you do jumping forward. If Chun tries to crouch forward + roundhouse you can 720 or do rush super. If Chun jumps you block, then throw her ass when you both land. Sodom’s effective range IMO is about 1 to 2 characters outside Chun’s crouching forward range. Mainly you have to use standing fierce and jab jitte scrap to keep her there. Build up that meter and AC anything she throws at you. Chunli can’t CC you from that range.
Another important thing to remember about Sodom is that he can recover roll BACKWARDS. Always always roll backwards whenever you hit the floor. This puts you in your ideal range and Chun has to work her way back in.
Sodom has a solid ground game, but Chun’s j.lk is just insane. Although like you said, positioning is paramount. Sodom CAN counter it although you end up using many flimsy anti-airs depending on the situation. I end up just saving meter for the AC and just trying to stay out of the way of her jump.
Sodom’s C.RH is great. It accents his ground game very well, and is his best mid-range move, IMO. Learn the range on it. His Standing strong and standing forward are also good, and you can cancel the forward into a jab Jitte Slash, then possibly follow it up with a Slide. His crouching short is also important, and every so often I buffer it into his 360+P. This is effective but should be done no more than like, twice a match because it is not a tick and you can be jabbed out of it on reaction. Sometimes I’ll use a standing strong after a crouching short, because it will whack people jumping away expecting the 360. More later.
[Loading match-up info...]
Pretty tough match up if Sim is good. Good thing in this match up is fp scrape and 360+lk score knockdownson his limbs. 360+lk is to be used from full screen when Sim can only slightly punish. Use to grab a limb from fullscreen and score a knockdown, but only as a last resort (the sim is really keeping you out and you desperately need in).
[Loading match-up info...]
[Loading match-up info...]
[Loading match-up info...]
Against Ken’s alpna counter, he can 720k back even though he gets HIT by the counter (must be on the ground of course). He ticks very well and his c.SP and c.FP has very good range and priority. His counter has very long range and his slide is excellent as well.
[Loading match-up info...]
[Loading match-up info...]
[Loading match-up info...]
[Loading match-up info...]
[Loading match-up info...]
[Loading match-up info...]
[Loading match-up info...]
Heavily in Sodom's favor due to the insane range of s.fp and mp scrape. This is the most difficult match up for Zangief and easiest for Sodom when played right. Abuse mp scrape and s.fp. Mp scrape and s.fp beat anything Zangief does except df+rh and df+mk. S.fp will lose to PPP, but mp scrape beats PPP and KKK. If Zangief is spamming df+hk you can get free jump ins. You should save all meter for alpha counters only, when Zangief does get in simply alpha counter (which is mp scrape) and you are back to zoning. If you get knocked down or grabbed with no meter Gief can win the match fairly quick, so don't let Gief get in. Keep in mind that Sodom cannot anti air Gief and cannot contest command throws.
Miscellaneous
Tengu Walk Glitch
If Sodom does his Tengu Walk (412+K) while falling, it gives him his throwbox back on the way down and he can be air thrown before hitting the ground.
--Veri7as September 2021