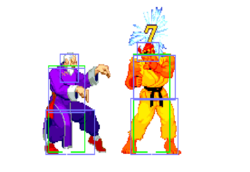
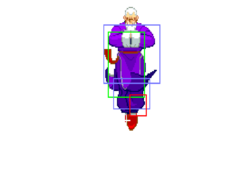
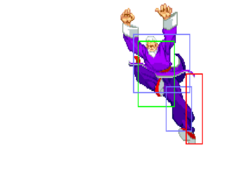
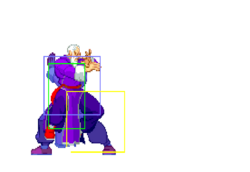
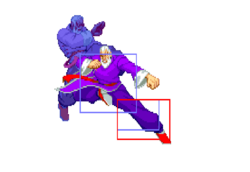
| Gen | |
|---|---|
| |
| Health: | 144 |
| Defensive Rating: | -1 |
| Stun: | 40 |
| Walk Speed Forward: | 300[So-Ryu] 350[Ki-Ryu] |
| Walk Speed Backward: | 250[So-Ryu] 300[Ki-Ryu] |
| Jump Backward: | 48f (3+45+0)[So-Ryu] 47f (3+44+0)[Ki-Ryu] |
| Neutral Backward: | 48f (3+45+0)[So-Ryu] 47f (3+44+0)[Ki-Ryu] |
| Jump Forward: | 48f (3+45+0)[So-Ryu] 47f (3+44+0)[Ki-Ryu] |
| Wake-Up: | 47f |
| Quick Rise: | 20f |
| Throw Range: | 14 |
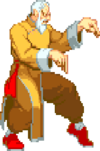
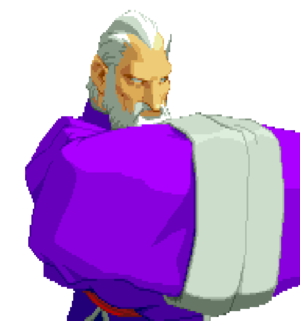
Gen is legendary for defeating opponents with his bare hands. Day and night, youths seek Gen for a chance at fame. He shrugs them off in disgust. Gen seeks only true warriors, and does not fear the fight.
Players to watch:
bunnyconda, Leonhard_Mage
| SFA2 Framedata Glossary | |
|---|---|
| Damage |
Units of base damage inflicted by the move (100% life bar = 144 units of health). Most moves have a damage range; the number inside the square brackets indicates which Random Damage Table the move uses to look up any additional damage and the % chance of doing so. |
| Stun |
Units of stun inflicted by the move. |
| Startup |
The frame the move hits on (1st active frame). Super moves with a screen freeze will separate pre- and post-screen freeze startup frames by a '+' (Ex: 5+0). |
| Active |
The portion of a move that can hit. How many frames a move remains active for. ()=Inactive frames in-between active frames. [xN]=Repeated sequences. |
| Frame Adv |
The frame advantage values when the attack is blocked. (Add +1 frame to all OnBlockAdv values for the move's OnHitAdv value; Ex: +2oB/+3oH, -4oB/-3oH) |
| Meter |
The units of meter gained on whiff/block/hit. (48, 96, and 144 units of meter are required for 1, 2, and 3 bars of meter respectively) |
| Block |
Low attacks must be blocked crouching. High attacks must be blocked standing. Mid attacks can be blocked either way. |
| Properties |
|
| Frames |
All framedata collected with the game speed set to normal, where the game tickrate and framerate are the same(60fps). |
| Speed |
All framedata collected with the game speed set to normal. |
| Hitboxes |
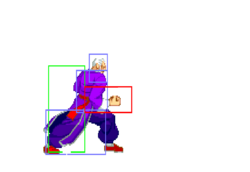
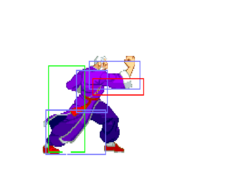
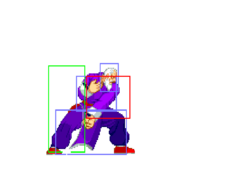
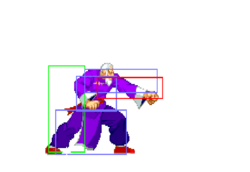
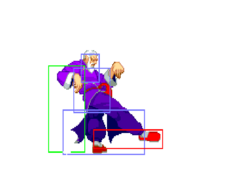
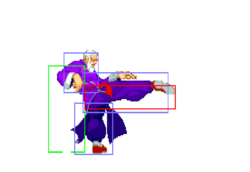
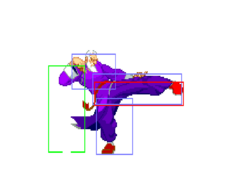
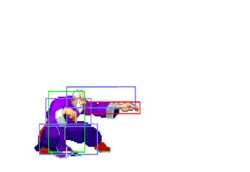
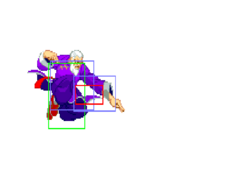
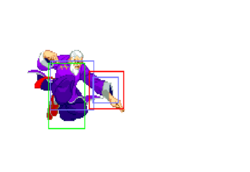
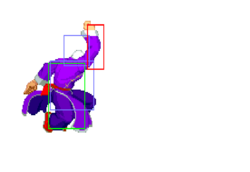
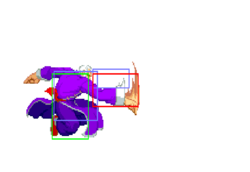
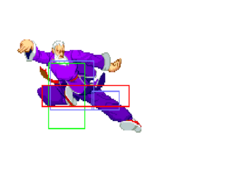
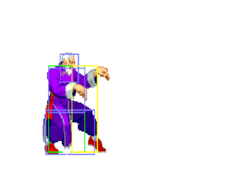
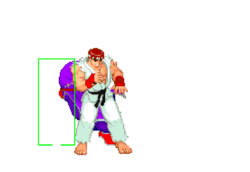
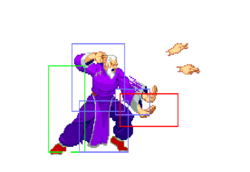
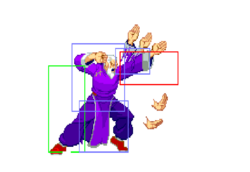
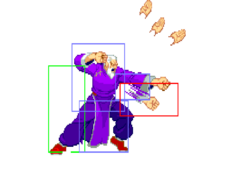
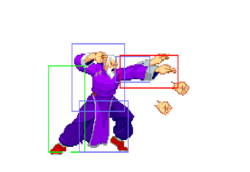
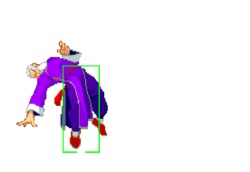
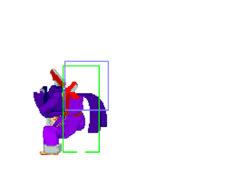
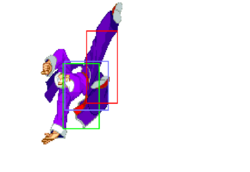
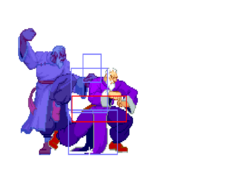
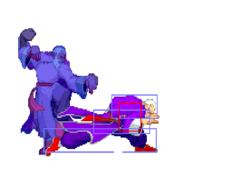
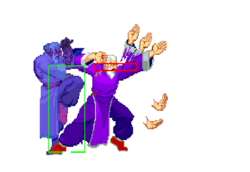
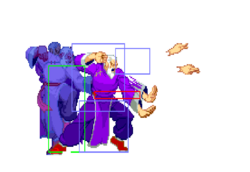
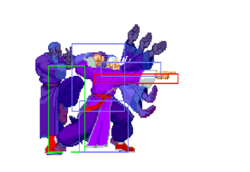
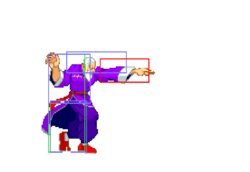
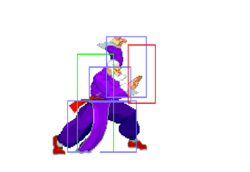
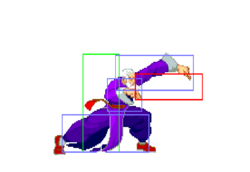
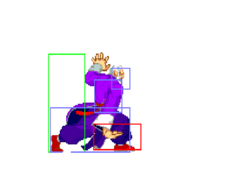
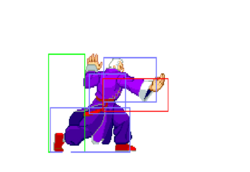
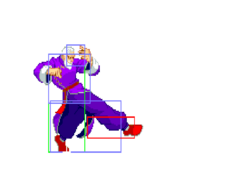
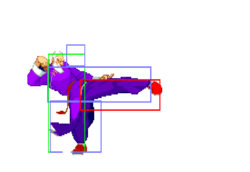
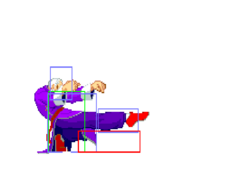
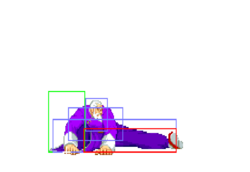
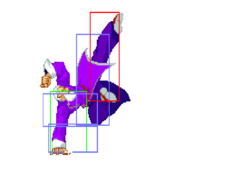
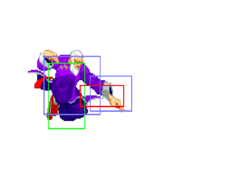
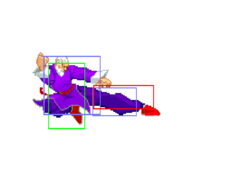
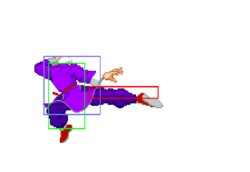
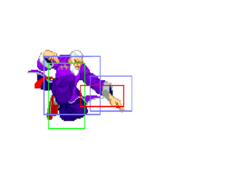
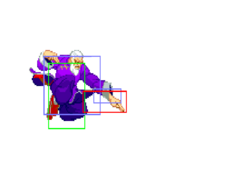
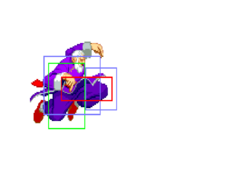
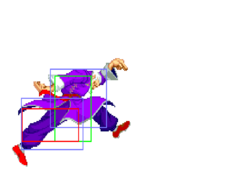
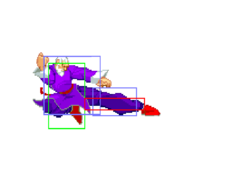
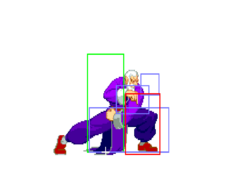
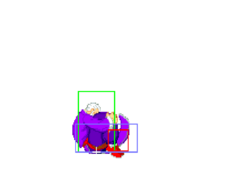
All hitbox images have the character standing/jumping in the exact same position, so hitbox distances can be easily compared.
|
| Credit | Damage, stun, framedata, meter, and updated hitboxes collected by |
Stance Change
| Damage | Stun | Startup | Active | Frame Adv | Meter | Block | Properties |
|---|---|---|---|---|---|---|---|
| N/A | N/A | N/A | N/A | N/A | 0/-/- | N/A | - |
| Damage | Stun | Startup | Active | Frame Adv | Meter | Block | Properties |
|---|---|---|---|---|---|---|---|
| N/A | N/A | N/A | N/A | N/A | 0/-/- | N/A | - |
So-Ryu (Mantis Stance) Moves List
Normal Moves
Standing
Crouching
Neutral Jumping
Diagonal Jumping
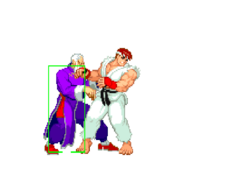
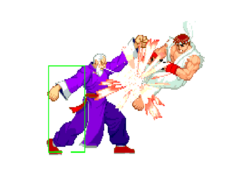
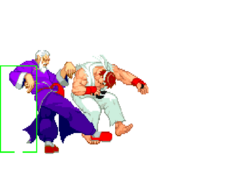
Normal Throws
| Damage | Stun | Startup | Active | Frame Adv | Meter | Block | Properties |
|---|---|---|---|---|---|---|---|
| 10[0]+9[0] = 19 | 0 | 1 | N/A | N/A | -/-/3 | N/A |
- Deals 10 damage when opponent tech throws.
- Gen has the 3rd worst throw range in the game (Alpha2ThrowRanges).
| Damage | Stun | Startup | Active | Frame Adv | Meter | Block | Properties |
|---|---|---|---|---|---|---|---|
| 17[0] | 0 | 1 | N/A | N/A | -/-/3 | N/A |
- Deals 8 damage when opponent tech throws.
- Gen has the 3rd worst throw range in the game (Alpha2ThrowRanges).
Alpha Counters
Punch Alpha Counter
(while in blockstun)![]() +
+ ![]()
Kick Alpha Counter
(while in blockstun)![]() +
+ ![]()
Special Moves
![]()
- Requires 5
 presses within 16 frames of each other.
 - Pushed out of range after 3 hits.
![]()
- Requires 5
 presses within 13 frames of each other.
 - Pushed out of range after 4 hits.
![]()
- Requires 5
 presses within 9 frames of each other.
 - Pushed out of range after 5 hits.
^Base damage is technically 0 but the game has a minimum damage of 1.
- Unscaled damage in CC.
- Follow up
 s must be of the same strength as the one used to preform the initial attack.
 - Follow up attacks only occur on block or hit.
- Follow up hits can have positive frame advantage if done low enough.
- 24 frame window to press
 for the second hit.
 - Subsequent hits have a window of: frame # the previous
 was press within it's window - 1. (Example: If the second
  was pressed on frame 15 of its 24 frame window, the third hit will have a 14 frame window...and so on.)
The trick to getting every hit is to wait as long as you can to preform each ![]() , giving the next
, giving the next ![]() as big of a window as possible.
as big of a window as possible.
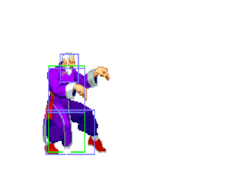
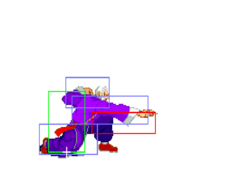
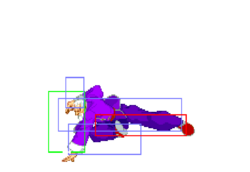
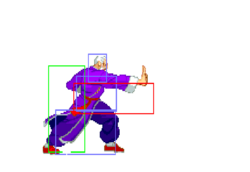
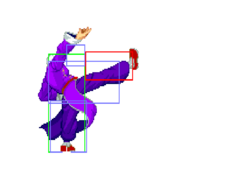
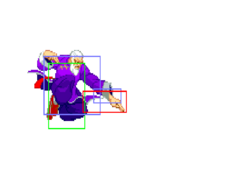
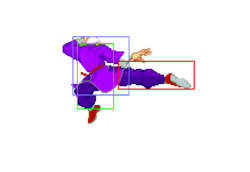
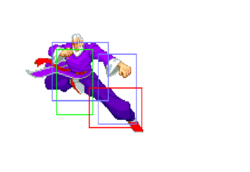
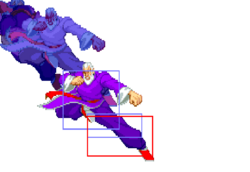
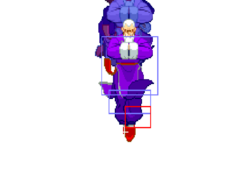
![]() - [Hitboxes pictured]
- [Hitboxes pictured]
- 5 frames of startup invul.
- Hits 6 times.
If you need meter, use his LK version over and over, and watch how fast a level 3 is built!
![]()
- 4 frames of startup invul.
- Hits 7 times.
![]()
- 3 frames of startup invul.
- Hits 8 times.
Super Moves
Startup Invulnerability Notes:
- At the end of a super screen freeze, projectiles will start moving before the opponent's character is unfrozen, giving the supers more projectile invul. frames than hit invul. frames.
- Both hitboxes result in the same damage.
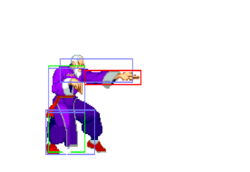
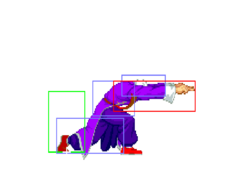
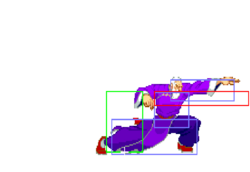
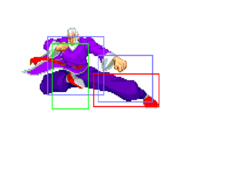
Level 1 - [Hitboxes pictured]
- 4 frames of startup hit invul.; 0 of which while active.
- 8 frames of startup projectile invul.
Level 2
- 5 frames of startup hit invul.; 1 of which while active.
- 10 frames of startup projectile invul.
Level 3
- 5 frames of startup hit invul.; 1 of which while active.
- 12 frames of startup projectile invul.
- Last hit causes a countdown from 10-0.
- Each count is 60 frames long and deals damage.
- If the opponent hits Gen during the countdown, the countdown will stop.
- If the countdown reaches 0, the opponent will be dizzied.
- If the opponent already has a countdown on them and is hit with another Shitenshu, each count will last 10 fewer frames. This reduction can stack.
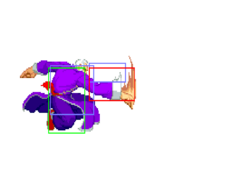
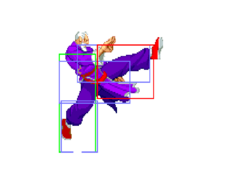
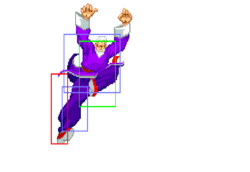
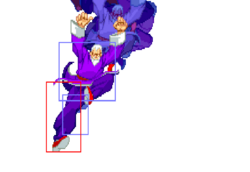
Level 1 - [Hitboxes pictured]
- 5 frames of startup hit invul.; 1 of which while active.
- 8 frames of startup projectile invul.
- The first 2 hits occur before the super screen freeze ends.
- Hits 3 times.
Level 2
- 5 frames of startup hit invul.; 1 of which while active.
- 12 frames of startup projectile invul.
- The first 2 hits occur before the super screen freeze ends.
- Hits 5 times.
Level 3
- 6 frames of startup hit invul.; 2 of which while active.
- 16 frames of startup projectile invul.
- The first 4 hits occur before the super screen freeze ends.
- Hits 7 times.
Ki-Ryu (Crane Stance) Moves List
Normal Moves
Standing
Crouching
| Damage | Stun | Startup | Active | Frame Adv | Meter | Block | Properties |
|---|---|---|---|---|---|---|---|
| 18[2] | 8 | 23 | 6 | +3 | 2/5/9 |
- Receives & deals 200% damage when counter hit.
It’s really not worth using seeing how slow it is on startup.
Neutral Jumping
Diagonal Jumping
Normal Throws
- Same normal throws as So-Ryu (Mantis Stance).
Alpha Counters
Punch Alpha Counter
(while in blockstun)![]() +
+ ![]()
Kick Alpha Counter
(while in blockstun)![]() +
+ ![]()
Special Moves
- Receives 125% damage when counter hit.
- Punishable on hit.
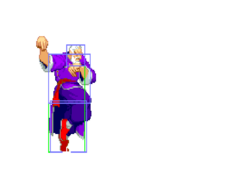
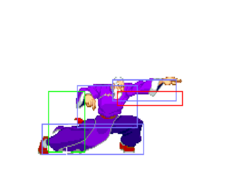
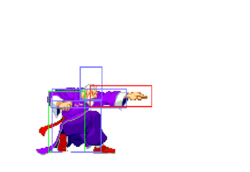
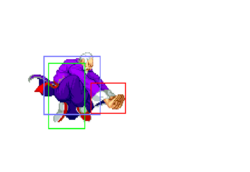
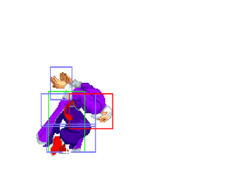
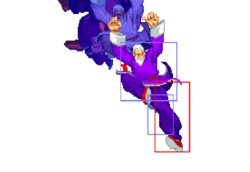
![]() - [Hitboxes pictured]
- [Hitboxes pictured]
- Hits 3 times.
![]()
- Hits 4 times.
![]()
- Hits 5 times.
- Strength of
 determines the speed at which Gen travels to the wall.
  the slowest,
  the fastest.
 - Unscaled damage in CC.
![]() /
/![]()
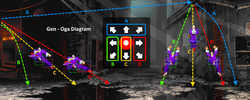
- Travels to the wall behind Gen.
![]()
- Travels to the wall in front of Gen.
(from wall)![]() /
/![]()
- Drops to floor without attacking.
(from wall)![]() /
/![]() /
/![]()
- Flys to ceiling directly above opponent.
(from wall)![]() /
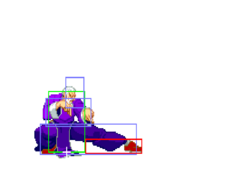
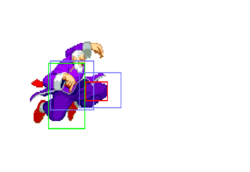
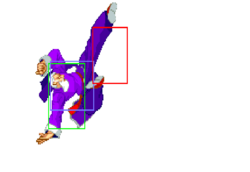
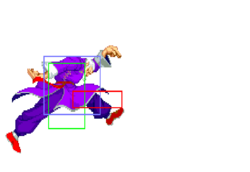
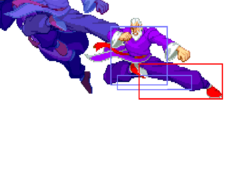
/![]() - [Hitboxes pictured 1st]
- [Hitboxes pictured 1st]
- Attacks at 50 degree angle from the wall.
(from wall)![]() /
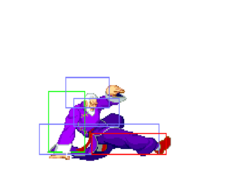
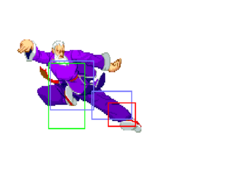
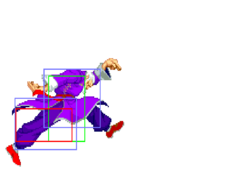
/![]() - [Hitboxes pictured 2nd]
- [Hitboxes pictured 2nd]
- Attacks at 60 degree angle from the wall.
(from ceiling)![]() /
/![]() /
/![]()
- Drops to floor without attacking on the opposite side of the opponent from the wall Gen started on.
(from ceiling)![]() /
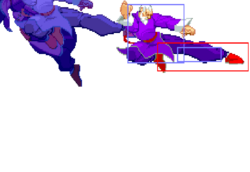
/![]() - [Hitboxes pictured 3rd]
- [Hitboxes pictured 3rd]
- Attacks at 20 degree angle from the ceiling to the left.
(from ceiling)![]() /
/![]() - [Hitboxes pictured 4th]
- [Hitboxes pictured 4th]
- Attacks straight down from the ceiling.
(from ceiling)![]() /
/![]() - [Hitboxes pictured 5th]
- [Hitboxes pictured 5th]
- Attacks at 20 degree angle from the ceiling to the right.
Super Moves
Startup Invulnerability Notes:
- At the end of a super screen freeze, projectiles will start moving before the opponent's character is unfrozen, giving the supers more projectile invul. frames than hit invul. frames.
| Version | Damage | Stun | Startup | Active | Frame Adv | Meter | Block | Properties |
|---|---|---|---|---|---|---|---|---|
| Level 1 |
32[0] | 0 | 5+0 | 21 | N/A | 0/-/0 | N/A | |
| Level 2 |
32[0] | 0 | 5+0 | 22 | N/A | 0/-/0 | N/A | |
| Level 3 |
32[0]+32[0] = 64 | 0+0 | 5+0 | 24 | N/A | 0/-/0 | N/A |
- A full 2 quarter-circles isn't required. Required inputs:


 +
+ 
Level 1
- 4 frames of startup hit invul.; 0 of which while active.
- 4 frames of startup projectile invul.
- Travels less than 1/4 screen.
Level 2
- 4 frames of startup hit invul.; 0 of which while active.
- 4 frames of startup projectile invul.
- Travels a little less than 1/2 screen.
Does the same damage as level 1 but travels a bit farther. Doesn't seem worth the extra meter.
Level 3
- 4 frames of startup hit invul.; 0 of which while active.
- 4 frames of startup projectile invul.
- Travels a little more than 1/2 screen.
- On the way up: minimum height of 16 pixels; 2nd frame in the air.
- On the way down: minimum height of 36 pixels; 8 frames before landing.
- Can be air blocked.
- Only the last hit causes a knockdown.
- Damage is the same for the first and subsequent hits no matter which attack is used.
Level 1
- 5 frames of startup hit invul.; 0 of which while active.
- 5 frames of startup projectile invul.
Level 2
- 6 frames of startup hit invul.; 0 of which while active.
- 6 frames of startup projectile invul.
Level 3
- 7 frames of startup hit invul.; 1 of which while active.
- 7 frames of startup projectile invul.
(from ground)
 : Flys to left wall.
 : Flys to ceiling directly above opponent.
 : Flys to right wall.
(from left wall)
 : Attacks at 40 degree angle. - [Hitboxes pictured 2nd]
 : Attacks at 60 degree angle. - [Hitboxes pictured 3rd]
 : Attacks at 75 degree angle. - [Hitboxes pictured 4th]
(from ceiling)
 : Attacks at 20 degree angle to the left. - [Hitboxes pictured 5th]
 : Attacks straight down. - [Hitboxes pictured 6th]
 : Attacks at 20 degree angle to the right. - [Hitboxes pictured 7th]
(from right wall)
 : Attacks at 75 degree angle.
 : Attacks at 60 degree angle.
 : Attacks at 40 degree angle.
The Basics
So-Ryu: This is the stance you’ll be in the majority of the time once you have meter. Both of Gen’s supers are able to be comboed into from this stance. A simple cr.lk x2 can lead to a damaging level 2 combo and can set up the perfect distance to a crossup jump mk afterwards. Gen is also able to chain light attacks into heavy attacks in this stance making this more of the attacking stance of the two. The main objective is to land a super once you get a level 2 or level 3. Poke with cr.hp or cr.mk with some added tick throws then go for a crossup jumping mk for big damage!
Ki-Ryu: Ki-Ryu’s supers are not good enough to warrant the use of at all. Koga is generally not worth using because it doesn’t have any startup invincibility and is fairly easy to get hit out of on reaction or by alpha counters. Jakoha can only juggle from the corner off a cr.lk. So this stance is useful when you don’t have meter or are trying to build meter. Gen can be pretty mobile in Ki-Ryu due to Oga. He can run away fairly well to get meter. Lp Jyasen is a quick attack that will most likely hit your opponent many times during the course of the match. If you must use meter, use kick alpha counters to beat projectiles and mid-ranged attacks. Otherwise, save all your meter for So-Ryu.
Advanced Strategy
Gen can combo his rush ppp super from a throw. You want to always chian inot lvl 2 super, unless a lvl 3 will kill (damage between lvl 2 and 3 is very little). In the corner you do lvl 2 rush, switch stance, then lvl 1 grab juggle. Gen builds meter extremely quickly with whiffed dps. You have to make use of both stances while playing him, constantly switching. KKK stance can land a lvl 3 grab super as easy as PPP stance can land rush super. I constantly switch stances, I try not to stay in one stance too much unless it is better to do so (like vs Gief). KKK has nice normals, c.rh is AA, c.mk goes under fbs, c.fp on counter hit does x3 damage, c.lk knocks them up for juggle. J.fp and rh are great air to air, j.mk crosses up any one. Rolling special goes under fireballs and off the wall kicks can lead to lvl 3 air grab juggle. -RSX
Combos
(So) cr.lk x3, cr.hp (So) cr.lk x2, cr.mk, cr.hp (So) cr.lk x2, cr.mk, level 2 or 3 Zan’ei
(So) cr.LK x2,cr.MK,cr.HP or Lvl 2-3 Zanei
(Ki) Corner Punch Throw, Lv2-3 Jakoha
(So) cr.MK,Lvl 3 Shinetsu
(Ki)Corner j.HKx2, s.LPx2.cr.LK,Lvl 2-3 Jakoha
Custom Combos
any lvl- c.rh xx lk dp xN
Match-ups
The following information comes from the book "All About Mage's GEN: Alpha 2" from long time Japanese player, Leonhard_Mage. His book that contains more helpful information on Gen can be found here. Keep in mind of some minor changes to the text below from the source material.
You want to counterattack the Jaguar Kick properly, but you'll be a little frustrated because it's surprisingly difficult to do since you're sitting so low and you don't have as good a counterattack as you thought. The other side's airspeed makes it impossible to drop Crane Style's JHP with anything other than a jutting kick, so you'll have to keep your distance and hit him hard to put pressure on him and keep him on the edge. On the ground, Adon's 2HP and HK are strong to begin with, and he only has 2MK, 2MP, and other strong normal moves, so you're at a disadvantage in terms of damage.
If you want to win, you have to be thorough with AC and CC. There is almost no other way to pass damage against opponents of the same level or higher. Due to the nature of Gen's jumps, the expectation from jumping in is not that high.
You want to eliminate those minor mistakes because the damage difference when you get mixed up at close range is unbelievable, but since you're a stance character, it hurts even more. If the opponent is only thinking about 2HP in anti-air or close range return, cross-up with Crane Style is effective. If your opponent uses a variety of moves, or even jumps in and out of them, be aware of what they're aiming for. It's a good idea to be aware of what your opponent is trying to do, even if it's just hitting each other. As a side note, almost all of Birdie's main moves have CC as a counterattack. If you really want to win the game first and make him tremble, you can counterattack with CC to end the game.
You can't get close to him, and even if you do, there's no way to break him, and you can't push him. The only way to beat him is to try to get him to shoot Sonic Boom. The only way to counter Sonic Boom is with a CC or a normal move, so the only way to avoid CC is to use Crane Style's jump to distract him, or use a JHP or JHK with a good jumping position. You can also use level 3 Zan-ei after seeing Sonic Boom, but the timing becomes more severe the further away you are, so don't be overconfident. If you know what you're doing, you'll be able to think of Sonic Boom and shoot him to prevent him from doing it, so just pretend to aim for him because that will give him a point of hesitation and make it easier to jump in.
With the fireball and multiple anti airs, you have to force your way through her at key points. There's no particular way to overcome this, so you'll have to match your opponent and push forward. Of course, have meter handy.
Be careful if they try to confuse you at close range, if they have good anti-air CC, or if they use LK and MK properly. In the mid-range, you have a big advantage in reach due to your 2HK, and because of that, they tend to be reluctant to use it, so you should use it as an illusion to close the distance between you and them.
He is much harder to deal with at close range than at long range, but there is nothing in particular to watch out for. *You have to pay attention to everything.* There is almost nothing to do at long range, except to take out Mantis Style 2HP when 6HK is about to come, because it is almost impossible to win in a technique fight. Gekirou will only get a painful counterattack if the opponent is watching, so if you want to do it, you have to scatter your timing. If you want to play Gekirou, you'll have to spread out your timing. On the other hand, there are no effective moves at close range, so you'll basically have to use Crane Style and 2LP or LPJyasen from 2MP. If your opponent has a gauge, you won't be able to do this either, so you'll want to deal with them by launching your moves first.
If you have a good anti-air CC, that's all you need to do. If you feel like you're getting beaten up, it's because they've figured out your habits or you're thinking too slowly, so it's better to look at their habits.
Mantis Style's 2MP and Crane Style's 2MK work super well against sliding and medium whirlwind legs, respectively. Against MKs with super reach, Crane Style's 2MP and LP. So, don't worry about sliding, use Crane Style to defend and attack. Other than that, you don't need to think about anything more than basic actions, so stick to the basics. If you can match sliding with Kohga, you can assume that you have seen through all of his moves.
Note that his Hadouken doesn't work as well as Ryu's, but it's still violently strong. It's quite difficult to deal with, because all you have to do is KAC and counter-attack as you attack. If you don't let yourself think about it, you'll just end up getting hit with a sideways push and a careful anti-air. If you don't let them think about it, they'll just end up doing side pushes and careful anti-air. Against Ken, who uses Shinryuuken to counter cross-ups, you can just pretend to cross-up. You can use Kohga in the same place as Ryu, so you can be aware of it if you want to stay above mid-range.
You can hit anti-air with JHP, but the situation after that is bad because you need altitude. It's a bit tricky because the opponent jumps in fast, so you're basically forced to deal with them regardless of distance, and it's hard to counter-attack. MP is the key to aerial combat. If you're not careful, you'll have enough time to switch between schools and input a Psycho Shot when you see it, so make sure you have Zan-ei at level 3.
In addition to the fact that they are generally incompatible with each other, they have no chance of winning due to their mobility, which allows them to escape for 99 seconds. In addition, the destructive power of CC is so great that you can't even go for it. In a nutshell, he's a boring opponent, but it's easy to hit him with JHK or JHP for anti-air CC, and once you get a crossup, you can finish him off at once. The opponent's high jumps can be dealt with by placing Crane Style's vertical JHK, so if the opponent is unprepared, you can easily push him back. However, there's nothing much to do after you've cornered him, so you can only make it difficult for him to move by hitting him with Jyasen's attacks.
Since there is no way to win against her, we have to attack her in the most basic way. Rose's 2MP is stronger than almost all of our actions, and even if we corner her, she will counterattack with AC and corner us. Don't miss the sting of the 2LK. Sliding is a very important counterattack point because anything can get in if you intentionally step forward and let it sink in. If you know what you're doing, Rose won't do it, so if you're not sure if you can counterattack, you can keep guarding and be on the lookout for super combos. Experience will help you in this area.
HP Hadouken is the big problem. Ryu can use it, 2MP, 2MK for short to medium range, and MK or 2HP for anti-air, so there's nothing you can do at close range. There is no advantage for Ryu to use Hadoken at long range, either. I'm not sure how much of an advantage it is, but I'm sure it's worth it. Ryu is the one who can move fast, so you can either try to beat him without letting him think about it, or you can push him with Crane Style KAC and then touch him. This information also applies to Evil Ryu except keep in mind of his slightly higher damage and combo potential, as well as having access to a teleport, which can easily be punished if ERyu doesn't have meter to spend.
There is nothing you can do against Sagat, who is more responsive than you think, so you have to take the lead in the first half to prevent him from responding. You can't jump in when he has a gauge, because you'll fall prey to a painful CC. If you don't have the gauge, you can jump in with Crane Style HP to knock off the blows, so that's the basic approach. You may be tempted to fly on the ground because bullets are troublesome, but they want you to fly, so you can't lure them too much. You'll want to make sure to drop the jump, but be careful when you have a gauge, because you might be aiming for CC. It's not a forward jump, so it's difficult to dive into the air. It's also necessary to cut back jump attacks with AC and collect gauge from the top of the guard.
Cross-up from a throw is almost always guarded in the forward direction, so you want to guard it calmly. The cross-up from a Shouoken is a bit confusing, so be careful. You don't have to go along with your opponent's 2MK spacing. Dealing with HP and HK is also a hassle, but there's not much you can do with these moves except match 2HK, so you have to try not to fight at their distance.
I'd like to jump in with Crane Style's HP, but it's too easy to get thrown after guarding, so I have to use HK to avoid getting counterattacked. It's also hard to counterattack Hyakurenkou in a melee, and you're at a huge disadvantage in terms of damage when you're fighting at a distance, so it's basically useless. You want to use cross-up to distract your opponent's concentration before moving. If you're a fan of the game, you'll be happy to know that the game has a lot to offer.
If you push him completely to the edge of the screen, you won't be able to insert Jakouha from Zan-ei, making him a very boring opponent. If you use Crane Style, it's hard to drop him if he jumps between 2 MKs, so it's better to attack with a lot of moves and use Gekirou to counter. You can also use HKHK in Crane Style to jump in and attack with a vertical jump. You can also use Mantis Style's HP to jump in as if you're going to put it on your head, but it takes some getting used to because the timing is different from a normal jump attack to hit a double lariat.
