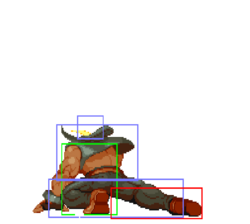
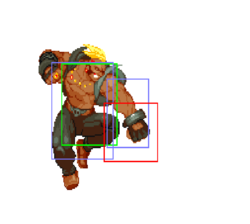
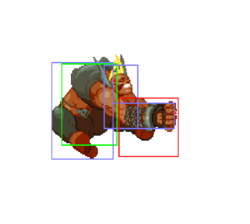
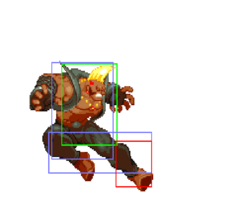
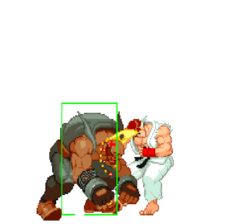
| Birdie | |
|---|---|
| |
| Health: | 144 |
| Defensive Rating: | +2 |
| Stun: | 48 |
| Walk Speed Forward: | 206.25 |
| Walk Speed Backward: | 225 |
| Jump Backward: | 41f (5+36+0) |
| Neutral Backward: | 43f (3+40+0) |
| Jump Forward: | 39f (3+36+0) |
| Wake-Up: | 37f |
| Quick Rise: | 29f |
| Throw Range: | 8 |
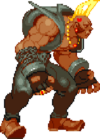
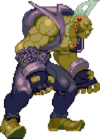
Influenced by life on the European back streets, Birdie has become familiar with the workings of Shadowloo as a bouncer in many punk clubs. He yearns for a part of the action. Using his strength and style to avoid the law, Birdie knows he must fight his way into the infamous crime organization.
Players to watch: SlamTown
Is Birdie really that bad?
Yes! ...No! Alpha 2 is a tremendously well balanced game, and Birdie isn't so bad as he is polarizing. If you aren't building meter for his win condition CC, you're likely losing. Players familiar with the matchup wont hesitate to defuse Birdie's offense. If you're scared, Birdie wins- Quite a simple concept.
Essentially, Birdie gets one chance per round to run his sh*t. A perfect tournament character.
Loads of pokes and specials end Birdie's turn. Like Sagat, some of his bigger normals are punishable on hit. Unlike Sagat Birdie needs charge for his special cancels, limiting their utility.
Normal Moves
| SFA2 Framedata Glossary | |
|---|---|
| Damage |
Units of base damage inflicted by the move (100% life bar = 144 units of health). Most moves have a damage range; the number inside the square brackets indicates which Random Damage Table the move uses to look up any additional damage and the % chance of doing so. |
| Stun |
Units of stun inflicted by the move. |
| Startup |
The frame the move hits on (1st active frame). Super moves with a screen freeze will separate pre- and post-screen freeze startup frames by a '+' (Ex: 5+0). |
| Active |
The portion of a move that can hit. How many frames a move remains active for. ()=Inactive frames in-between active frames. [xN]=Repeated sequences. |
| Frame Adv |
The frame advantage values when the attack is blocked. (Add +1 frame to all OnBlockAdv values for the move's OnHitAdv value; Ex: +2oB/+3oH, -4oB/-3oH) |
| Meter |
The units of meter gained on whiff/block/hit. (48, 96, and 144 units of meter are required for 1, 2, and 3 bars of meter respectively) |
| Block |
Low attacks must be blocked crouching. High attacks must be blocked standing. Mid attacks can be blocked either way. |
| Properties |
|
| Frames |
All framedata collected with the game speed set to normal, where the game tickrate and framerate are the same(60fps). |
| Speed |
All framedata collected with the game speed set to normal. |
| Hitboxes |
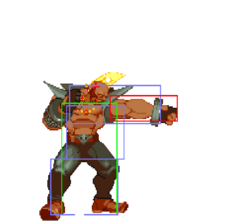
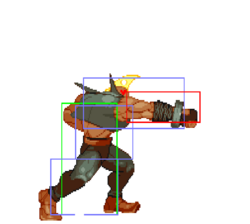
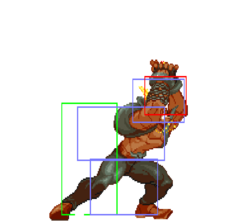
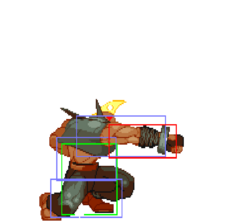
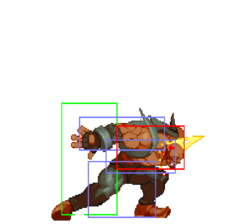
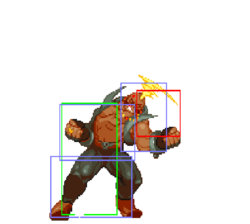
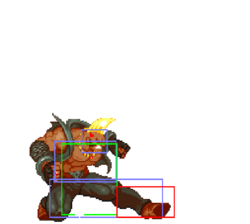
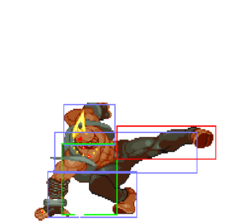
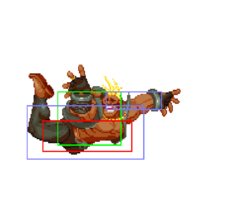
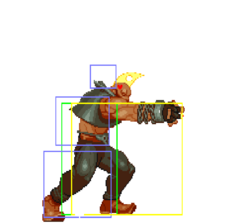
All hitbox images have the character standing/jumping in the exact same position, so hitbox distances can be easily compared.
|
| Credit | Damage, stun, framedata, meter, and updated hitboxes collected by |
Standing
Taunt
(Start)
Crouching
| Damage | Stun | Startup | Active | Frame Adv | Meter | Block | Properties |
|---|---|---|---|---|---|---|---|
| 11[2], 10[0] | 8, 8 | 5 | 3(0)5 | -11, -8 | 2/3+1/5+3 |
- First hit is cancellable.
- Hits 2 times.
- Punishable on hit.
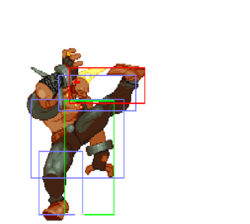
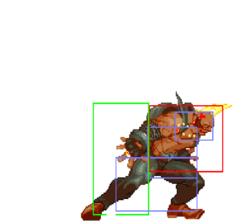
The anti-poke/anti-air. This is the main normal to be used when close due to high priority and good speed, but don't whiff it. 2nd hit does not connect with many crouching opponents.
Neutral Jumping
Diagonal Jumping
Command Normals
Normal Throws
| Damage | Stun | Startup | Active | Frame Adv | Meter | Block | Properties |
|---|---|---|---|---|---|---|---|
| 12[0]+3[0]xN+1[0] = 16-28 | 0 | 1 | N/A | N/A | -/-/3 | N/A |
- Mashable throw from both sides to add or reduce the number of hits. With a min of 1 and a max of 5 hits.
- Does not side switch.
- Deals 13 damage when opponent tech throws.
- Birdie has the 2nd worst throw range in the game (Alpha2ThrowRanges).
| Damage | Stun | Startup | Active | Frame Adv | Meter | Block | Properties |
|---|---|---|---|---|---|---|---|
| 20[0] | 0 | 1 | N/A | N/A | -/-/3 | N/A |
- Always switches sides.
- Deals 10 damage when opponent tech throws.
- Birdie has the 2nd worst throw range in the game (Alpha2ThrowRanges).
Alpha Counters
Punch Alpha Counter
(while in blockstun)![]() +
+ ![]()
Kick Alpha Counter
(while in blockstun)![]() +
+ ![]()
Special Moves
| Version | Damage | Stun | Startup | Active | Frame Adv | Meter | Block | Properties |
|---|---|---|---|---|---|---|---|---|
| 13[0]+13[0] | 0 | 7 | 1 | N/A | 5/-/25 | N/A | ||
| 14[0]+14[0] | 0 | 7 | 1 | N/A | 5/-/25 | N/A | ||
| 15[0]+15[0] | 0 | 7 | 1 | N/A | 5/-/25 | N/A |
- A full 360 isn't required. Required inputs:


 +
+  starting with any direction.
 - Unscaled damage in CC.
These grabs are damaging but can be jumped from or CC'd easier than Zangief, use at your own risk.
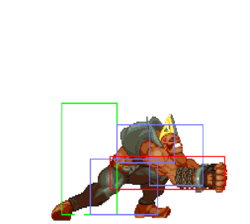
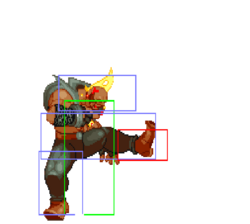
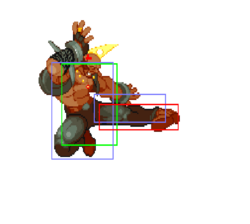
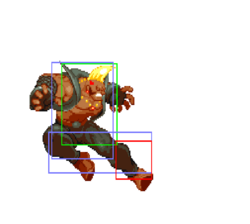
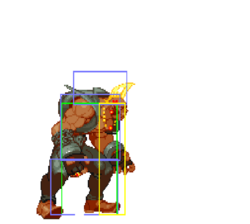
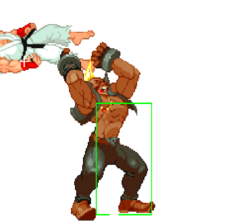
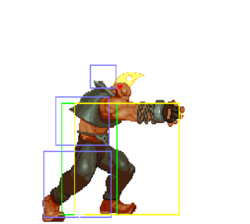
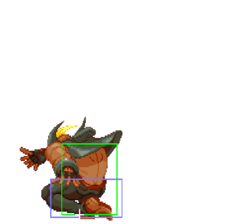
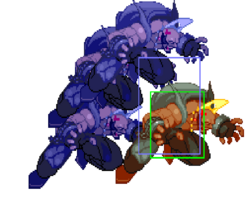
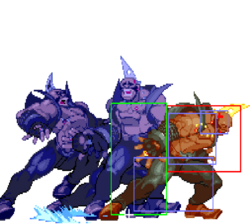
![]() - [Hitboxes pictured top]
- [Hitboxes pictured top]
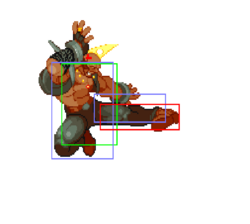
Has the farthest grab range.
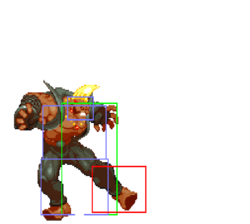
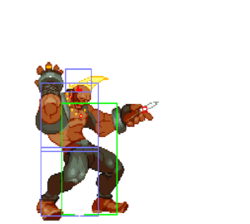
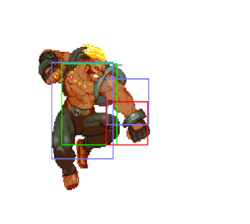
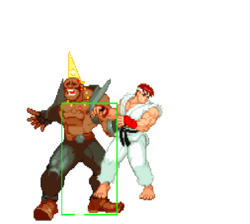
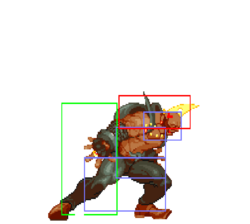
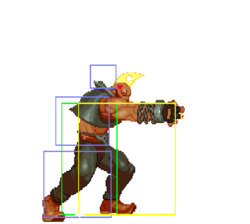
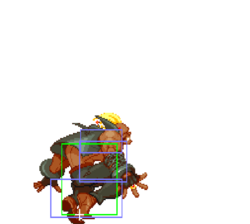
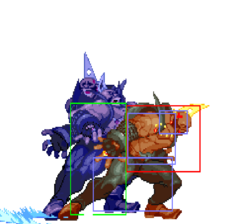
![]() - [Hitboxes pictured middle]
- [Hitboxes pictured middle]
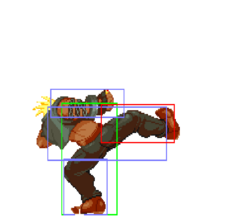
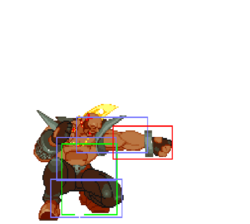
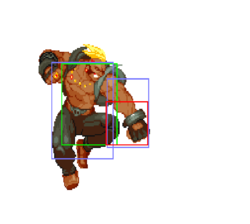
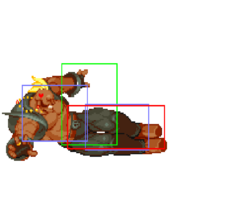
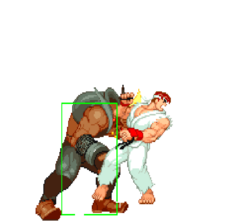
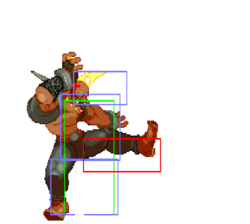
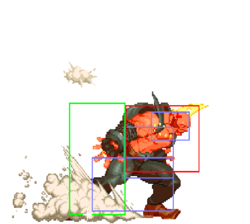
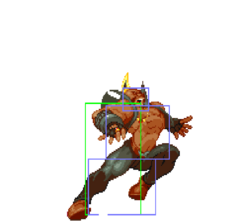
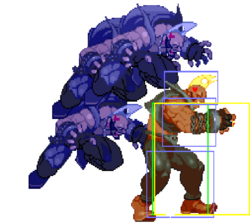
![]() - [Hitboxes pictured bottom]
- [Hitboxes pictured bottom]
Has the shortest grab range.
| Version | Damage | Stun | Startup | Active | Frame Adv | Meter | Block | Properties |
|---|---|---|---|---|---|---|---|---|
| 22[0] | 0 | 7 | 1 | N/A | 5/-/20 | N/A | ||
| 13[0]+13[0] | 0 | 7 | 1 | N/A | 5/-/20 | N/A | ||
| 10[0]x3 | 0 | 7 | 1 | N/A | 5/-/20 | N/A |
- A full 360 isn't required. Required inputs:


 +
+  starting with any direction.
 - Unscaled damage in CC.
These grabs are damaging but can be jumped from or CC'd easier than Zangief, use at your own risk.
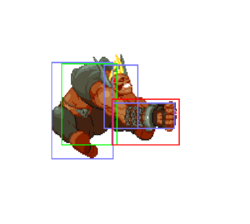
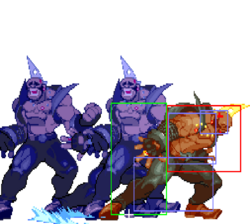
![]() - [Hitboxes pictured top]
- [Hitboxes pictured top]
Has the farthest grab range.
![]() - [Hitboxes pictured middle]
- [Hitboxes pictured middle]
![]() - [Hitboxes pictured bottom]
- [Hitboxes pictured bottom]
Has the shortest grab range.
This moves is very useful when used correctly. Stick only to the ![]() version, as all other ones are easier to punish. When done from the right range it is safe because of the pushback but only if they don't have meter. It will be a free CC for them. When done right you will be out of range from attacks and can do another one, and another, and another. You can even whiff punish with this.
version, as all other ones are easier to punish. When done from the right range it is safe because of the pushback but only if they don't have meter. It will be a free CC for them. When done right you will be out of range from attacks and can do another one, and another, and another. You can even whiff punish with this.
![]()
![]()
![]()
Bull Horn
(hold)![]()
![]() /
/![]()
![]() (then release)
(then release)
- 7 frames of startup invul.; followed by 16 frames of upper body invul.
- Unscaled damage in CC.
Charge times:
- Level 1 = 32 frames (~1/2 second)
- Level 2 = 121 frames (~2 seconds)
- Level 3 = 241 frames (~4 seconds)
- Level 4 = 481 frames (~8 seconds)
- FINAL = 961 frames (~16 seconds)
The attack will do more damage the longer you hold the buttons. Very useful. You can have up to 4 of these when all buttons are held down. It can be punished by CC on block if poorly spaced but even then it's a 1 frame punish. This move has virtually no lag and can be used to get close after a knockdown or set up grabs or super. It even anti-airs when released right. If you have this move charged and the opponent does a CC, release all buttons to make them whiff, then the headbutt will hit.
![]()
![]() /
/![]()
![]()
- Travels about 1/2 screen.
![]()
![]() /
/![]()
![]()
- Travels about 2/3 screen.
![]()
![]() /
/![]()
![]()
- Travels about 3/4 screen.
![]() /
/![]()
- Travels full-screen.
Super Moves
Startup Invulnerability Notes:
- At the end of a super screen freeze, projectiles will start moving before the opponent's character is unfrozen, giving the supers more projectile invul. frames than hit invul. frames.
- A full 2 quarter-circles isn't required. Required inputs:


 +
+  /
/
- 16 frames of startup hit invul.; 0 of which while active.
- 26 frames of startup projectile invul.
Very useful against fireballs. Never use a level 2 or 3 unless it will kill or you really need to close the gap, cause you really want to land that CC.
![]()
- Travels about 1/2 screen.
![]()
- Travels full-screen.
This super can be combo'd into. Level 3 version can be mashed out of if the opponent gets lucky with a short stun.
Level 1
- 5 frames of startup hit invul.; 0 of which while active.
- 12 frames of startup projectile invul.
- Hits 3 times.
Level 2
- 8 frames of startup hit invul.; 0-6 of which while active.
- 18 frames of startup projectile invul.
- Hits 4 times.
Level 3
- 15 frames of startup hit invul.; 0-6 of which while active.
- 25 frames of startup projectile invul.
- Hits 5 times. The last 2 hits only happen if the 3rd hit stuns the opponent.
The Basics
Your main focus is to land your custom. Bottom line, it is a round winner. When the opponent is running away, whiff ![]() grab for meter. Once you get that lvl 3, look for a opening to land it. Until then you have some tricks to work with.
grab for meter. Once you get that lvl 3, look for a opening to land it. Until then you have some tricks to work with.
360 fun! (use light versions)
![]() (hit or blocked), 360 cr.
(hit or blocked), 360 cr.![]() , st.
, st.![]() , 360 j.
, 360 j.![]() or j.
or j.![]() , 360 on their wake up.
, 360 on their wake up.
After a grab, follow up with ![]() , time it to hit, or not to not and 360 or CC. It is going to take alot of patience to win, but its worth it.
, time it to hit, or not to not and 360 or CC. It is going to take alot of patience to win, but its worth it.
Advanced Strategy
Use crouching ![]() to bait out turns and punish them with light bullhead.
to bait out turns and punish them with light bullhead.
Use your tick setups such as light kicks to force 50/50's or bait out CC's.
If they somehow get hit by a final at the end of a blocked CC, you may continue the combo post cc with crouching heavy punch and light bullhead.
Bullhorn is a true reversal for a few frames so it can be used to counter specific ac's (Rose punch ac for example), pokes, and command throws.
Punish AC happy opponents with command grab or empty jump or walk in CC.
Kick AC leaves the opponent standing so after a close kick AC you can try to follow up with a Valle CC if they are still standing.
Combos
cr.![]() into light bullhead
into light bullhead
cr.![]() xx
xx ![]() or
or ![]() bullhead (2 hits)
bullhead (2 hits)
overhead st.![]() , cr.
, cr.![]() or cr.
or cr.![]() (2 hits)
(2 hits)
Custom Combos
Any lvl- cr.![]() , st.
, st.![]() xN xx 360+
xN xx 360+![]() (40-50%)
(40-50%)
This is your starter combo until you can do his touch of death, and yes its better than reapeated red headbutts, which is...
lvl 1- cr.![]() xx final, final
xx final, final
lvl 2- cr.![]() xx final, final, final
xx final, final, final
lvl 3- cr.![]() xx final, final, final, final, red headbutt (gl with that last hit) (80%)
xx final, final, final, final, red headbutt (gl with that last hit) (80%)
And for those defensive opponents:
st.![]() (overhead) xx cr.
(overhead) xx cr.![]() xx final xN
xx final xN
AA CC
cr.![]() xx Final xN
xx Final xN
How to do his custom to activate with ![]() ,
, ![]() ,
, ![]() , and
, and ![]() , and HOLD THEM ALL DOWN. Sweep, RELEASE
, and HOLD THEM ALL DOWN. Sweep, RELEASE ![]() and press
and press ![]() again BEFORE THE FINAL HITS, then as they hit, release
again BEFORE THE FINAL HITS, then as they hit, release ![]() , release
, release ![]() , release
, release ![]() . Final charges fast in CC mode.
. Final charges fast in CC mode.
Match-ups
This match is basically just building meter and trying to outpoke each other, then land the CC. Adon's normals are better than Birdies in most cases, and he has a bunch of AA's from different distances.
Remember Jaguar Kick is almost always unsafe and a free CC if he spaces it poorly. You can also AA CC jaguar tooth on reaction. Adon has no safe special to end blockstrings with.
Extreme zoning and high priority buttons make this matchup very hard but the hardest thing about this matchup is Sims teleport. It completely removes Birdies sweep starter final custom and allows him out corners and continue zoning, Sims very slow and high jump arc is also extremely hard to reach him or air to air him due to birdies very low jump arc, Sims back medium punch is also a hard button for Birdie to handle. Winning this requires a careful get in and good use of supers as your custom is not nearly as powerful or useful in this matchup, and good usage of light bullhead to challenge his fullscreen pokes.
You are playing Samurai Shodown Street Fighter. Both characters cant really do that much without CC so much of this matchup will be siting back building meter and trying to find a opening for CC (it's the same for Gen). You can hurt Gen a bit for building meter fullscreen with his dp with your medium bullhead but he will most likely get it either way as Gen builds meter MUCH faster then you do but you still build it somewhat fast with jump back splash. Once you both have meter it really is just a game of patience, you can throw out a couple of safer pokes with cr.![]() and cr.
and cr.![]() but overall its both of you trying to catch each other standing for a Valle CC for massive damage on either side.
but overall its both of you trying to catch each other standing for a Valle CC for massive damage on either side.
Extremely uphill due to the knifes and the sheer amount of zoning he can do with him bouncing around the screen. Risk and reward is never in your favor as Rolento's custom is on par with Birdie's. Close and far Bull Revengers and extremely risky long range bullheads are required to win this, standing and crouching ![]() are used to punch out the knifes but jumping
are used to punch out the knifes but jumping ![]() and jumping
and jumping ![]() can be used at very specific angles. Standing back to build some meter during the zoning is also advised as your going to need as much as you can get.
can be used at very specific angles. Standing back to build some meter during the zoning is also advised as your going to need as much as you can get.
This one can be hard but it is still very winnable. You have to play more slow and reactionary against Rose, try to snipe out the recovery of her st.![]() with CC and catch mashed cr.
with CC and catch mashed cr.![]() with Bull Revenger. Punish normal drills on block with CC and install drills in the corner with lvl 2 or lvl 3 The Birdie super (a punish not many characters have). Her fireballs have very slow recovery making it an easy Bull Revenger punish or a good jump in window. You can fight her good and far range sweep with some of your own crouching buttons such as cr.
with Bull Revenger. Punish normal drills on block with CC and install drills in the corner with lvl 2 or lvl 3 The Birdie super (a punish not many characters have). Her fireballs have very slow recovery making it an easy Bull Revenger punish or a good jump in window. You can fight her good and far range sweep with some of your own crouching buttons such as cr.![]() and cr.
and cr.![]() . Birdie can also counter her infamous Punch AC with his Bullhorn and can fight Rose players looking for it too much easily with just his command throw. Your best jump in attack is dj.
. Birdie can also counter her infamous Punch AC with his Bullhorn and can fight Rose players looking for it too much easily with just his command throw. Your best jump in attack is dj.![]() but jumping in without meter is not advised as dj.
but jumping in without meter is not advised as dj.![]() is not 100% consistent against her cr.
is not 100% consistent against her cr.![]() and for her cr.
and for her cr.![]() into her anti-air throw can hurt alot it's best to mostly jump in with meter so the situation is more scary for her.
into her anti-air throw can hurt alot it's best to mostly jump in with meter so the situation is more scary for her.
You can punish a fireball meter building Sakura player during the fireball with Bull Punisher because it does not reach full-screen, and the recovery is of course punishable. After Sakura's punch throw, if Sakura jumps forward in oki attempt, Birdie can just jump backward to avoid the dj.![]() altogether. As an alternative to the dj.
altogether. As an alternative to the dj.![]() setup, walk up and punish with cr.
setup, walk up and punish with cr.![]() if they jump after the throw. The reason why Birdie loses is due to Sakura's tools against your jump-ins. Her st.
if they jump after the throw. The reason why Birdie loses is due to Sakura's tools against your jump-ins. Her st.![]() is also a good poke against your 360s.
is also a good poke against your 360s.
Pretty wacky matchup here. Both characters have top tier level air buttons but Birdie will usually win out in the air-to-air game with his neutral jump buttons and just in general jumping heavy and light punch. Now when it comes to fighting his magic throw and tic throws you have Bullhorn (Zangief can counter this with a ballsy 360k) as well as your CC. ALWAYS BE CHARGING BULLHORN, at very close ranges it can be punished on hit with a 360 but there are plenty of times where it will knock him back too far and with a held final even if it is punished with 360 its a net gain in your favor not to mention that if he is anywhere near stun it will stun him. When you land a jump in and go for the throw/CC mixup. Zangief has a consistent way to get out of that with lariat, many Zangiefs and trigger happy with this just wait for it and punish with CC or Bullhead. Due to his slow jump in and fat hurtbox AA CC is also a much easier technique in this matchup.
