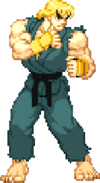
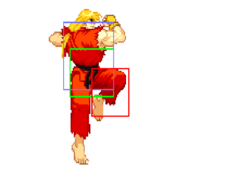
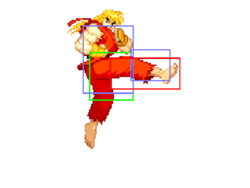
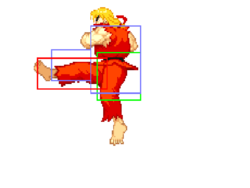
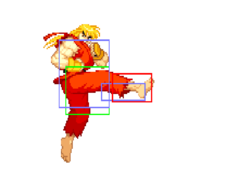
| Ken | |
|---|---|
| |
| Health: | 144 |
| Defensive Rating: | 0 |
| Stun: | 40 |
| Walk Speed Forward: | 300 |
| Walk Speed Backward: | 200 |
| Jump Backward: | 51f (3+48+0) |
| Neutral Backward: | 50f (3+47+0) |
| Jump Forward: | 49f (3+46+0) |
| Wake-Up: | 51f |
| Quick Rise: | 20f |
| Throw Range: | 20 |
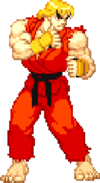
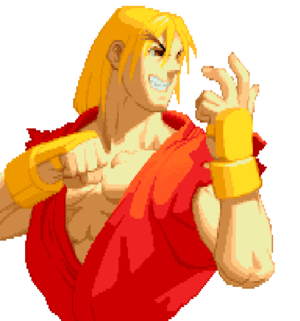
A disciple of the Shotokan school of karate and past training partner of Ryu, Ken has an amazing fighting spirit, but an even larger ego. Convinced he is the best fighter, Ken seeks a confrontation with his long-time rival.
Players to watch:
John Choi, YoungLegend
Normal Moves
| SFA2 Framedata Glossary | |
|---|---|
| Damage |
Units of base damage inflicted by the move (100% life bar = 144 units of health). Most moves have a damage range; the number inside the square brackets indicates which Random Damage Table the move uses to look up any additional damage and the % chance of doing so. |
| Stun |
Units of stun inflicted by the move. |
| Startup |
The frame the move hits on (1st active frame). Super moves with a screen freeze will separate pre- and post-screen freeze startup frames by a '+' (Ex: 5+0). |
| Active |
The portion of a move that can hit. How many frames a move remains active for. ()=Inactive frames in-between active frames. [xN]=Repeated sequences. |
| Frame Adv |
The frame advantage values when the attack is blocked. (Add +1 frame to all OnBlockAdv values for the move's OnHitAdv value; Ex: +2oB/+3oH, -4oB/-3oH) |
| Meter |
The units of meter gained on whiff/block/hit. (48, 96, and 144 units of meter are required for 1, 2, and 3 bars of meter respectively) |
| Block |
Low attacks must be blocked crouching. High attacks must be blocked standing. Mid attacks can be blocked either way. |
| Properties |
|
| Frames |
All framedata collected with the game speed set to normal, where the game tickrate and framerate are the same(60fps). |
| Speed |
All framedata collected with the game speed set to normal. |
| Hitboxes |
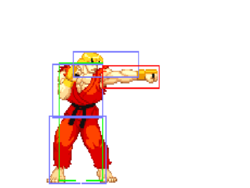
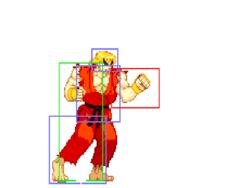
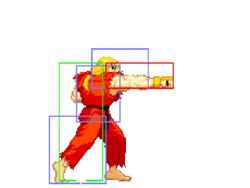
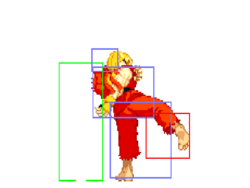
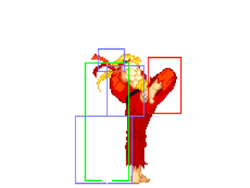
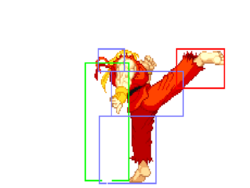
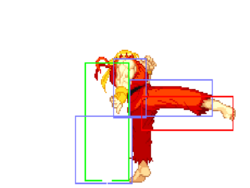
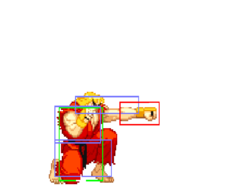
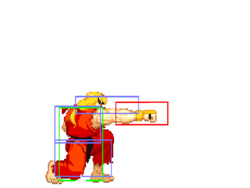
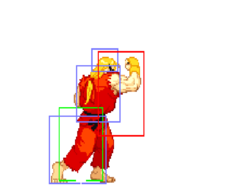
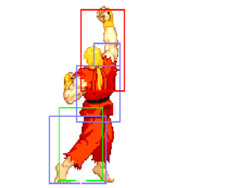
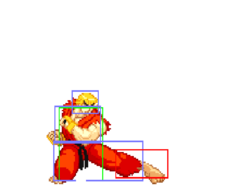
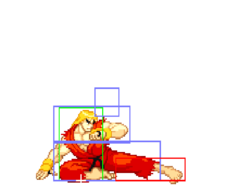
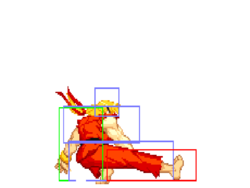
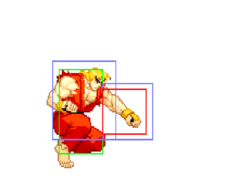
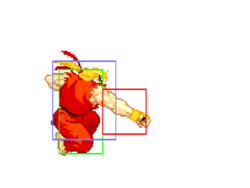
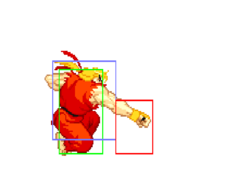
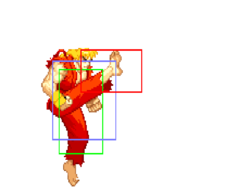
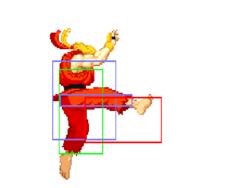
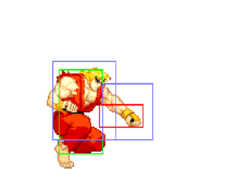
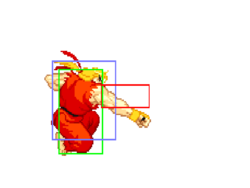
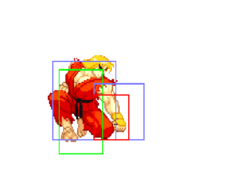
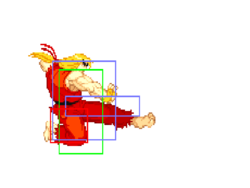
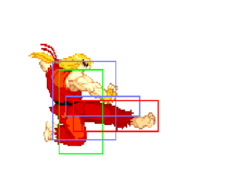
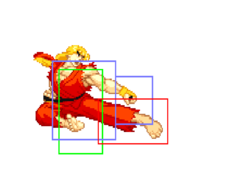
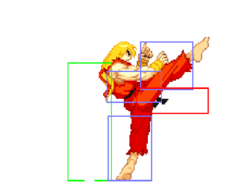
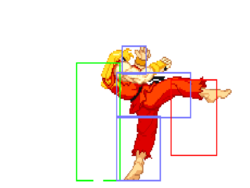
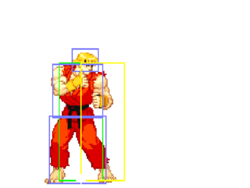
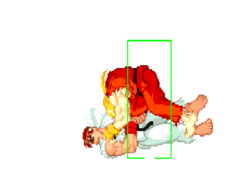
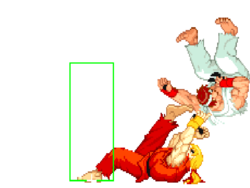
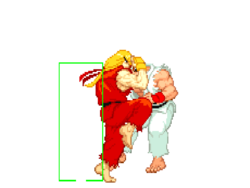
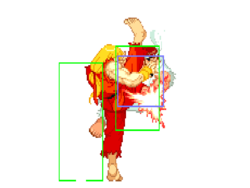
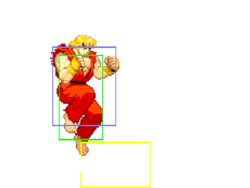
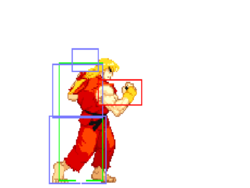
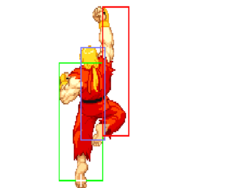
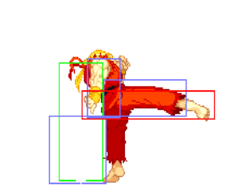
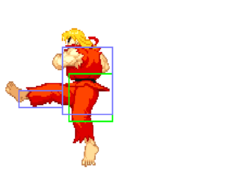
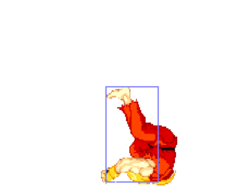
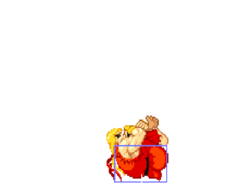
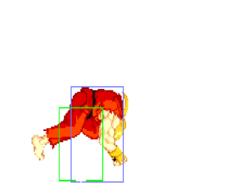
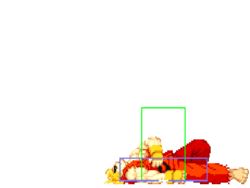
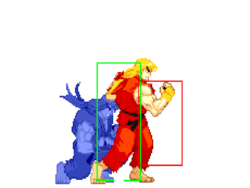
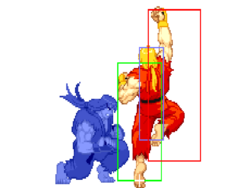
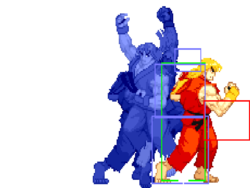
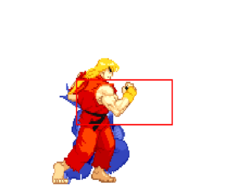
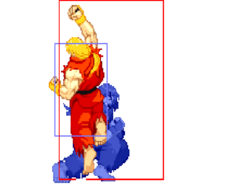
All hitbox images have the character standing/jumping in the exact same position, so hitbox distances can be easily compared.
|
| Credit | Damage, stun, framedata, meter, and updated hitboxes collected by |
Standing
| Damage | Stun | Startup | Active | Frame Adv | Meter | Block | Properties |
|---|---|---|---|---|---|---|---|
| 5[0] | 3 | 4 | 4 | +4 | 0/1/2 |
- Can rapid fire into itself or chain cancelled into: st.
 , cr.
, cr. & cr.
& cr. .
.
Quick jab, with frame advantage, you can walk and do these on any opponent that can't crouch them. Not great to mash with as it can be crouched under, but you can anti-air with it at times, though this is inconsistent.
| Damage | Stun | Startup | Active | Frame Adv | Meter | Block | Properties |
|---|---|---|---|---|---|---|---|
| 10[1], 6[0] | 6, 6 | 4 | 3(0)6 | -4 | 1/3/6 |
- Hits 1 time.
- Both hits are cancelable.
A quick one-arm uppercut. Great hitbox for anti-airs, and is much faster than your other normals. This is actually one of Ken's fastest normals in general, making it a solid tool for mashing or linking. It also special cancels, so it's a solid tool to get a quick punish into a Hadoken or Shoryuken depending on distance.
| Damage | Stun | Startup | Active | Frame Adv | Meter | Block | Properties |
|---|---|---|---|---|---|---|---|
| 5[0] | 3 | 7 | 6 | -4 | 0/1/2 |
A slightly disjointed shin kick. Pretty long range for a light normal, and the disjoint at Ken's foot helps it to snipe extended hurtboxes. It can cancel, but from max range there isn't much to combo without extremely risky buffers. Low risk, medium reward poke.
| Damage | Stun | Startup | Active | Frame Adv | Meter | Block | Properties |
|---|---|---|---|---|---|---|---|
| 11[1], 5[0] | 4, 2 | 7 | 2(0)7 | -10 | 1/1+1 per hit/4+2 |
- Hits 2 times.
- First hit is special and super cancelable.
- Second hit is only super cancelable.
- Punishable on hit.
A two hit upward angled kick. This is very good at keeping characters that cant duck it pinned down, and a quick anti-air either preemptively or on reaction. The first hit can be cancelled into specials, and both the first and second hit can cancel to supers. This gives it great use in punishes, as Ken can use the forward movement of the first hit to ensure a heavy Shoryuken connects, or use both hits to confirm a super easily.
| Damage | Stun | Startup | Active | Frame Adv | Meter | Block | Properties |
|---|---|---|---|---|---|---|---|
| 15[2] | 8 | 14 | 4 | -7 | 2/5/9 | - |
- Punishable on hit.
A long ranged poke, with good priority. You'll throw this out on occassion to control a ton of space, but it does have quite a lot of startup and a long total duration, so be careful when pressing it.
Crouching
| Damage | Stun | Startup | Active | Frame Adv | Meter | Block | Properties |
|---|---|---|---|---|---|---|---|
| 14[2], 13[0] | 8, 8 | 5 | 3(0)7 | -1 | 2/5/9 |
- Hits 1 time.
- Both hits are cancellable.
Uppercut, probably one of the best normal anti-airs in the game. Can be done pretty late and usually still wins, trading at worst. You don't wanna rely on this as a replacement for DP however, as it isn't invincible and doesn't knock down or do as much damage. You can cancel this on hit as an anti-air into Hadoken to make them fall into a fireball, or Roll to gain some space. This is also notably your only cancellable meaty, making it useful in punish situations where you can combo it to supers or Shoryuken.
| Damage | Stun | Startup | Active | Frame Adv | Meter | Block | Properties |
|---|---|---|---|---|---|---|---|
| 5[0] | 3 | 5 | 4 | +2 | 0/1/2 |
- Can rapid fire into itself or chain cancelled into: st.
 , st.
, st. & cr.
& cr. .
.
A fast low kick. One frame slower than 2LP, but it hits low in exchange. This is one of your primary normals on offense to set up frametraps, tick throws, or confirms. It also isn't bad as a low risk poke to catch forward movement up close, and on opponents who block a lot, you can walk in and do these repeatedly to threaten constant throws.
| Damage | Stun | Startup | Active | Frame Adv | Meter | Block | Properties |
|---|---|---|---|---|---|---|---|
| 10[1] | 6 | 6 | 6 | +3 | 1/3/6 |
A premiere normal in the shoto kit. 2MK is a super far reaching low kick that can be cancelled into specials. It's extremely active, and plus on block as well, giving it some use in offense as a meaty or a frametrap normal. You will be throwing these out a lot, and buffering Hadoken, Tatsu, or Roll behind them the whole time.
| Damage | Stun | Startup | Active | Frame Adv | Meter | Block | Properties |
|---|---|---|---|---|---|---|---|
| 14[2] | 8 | 7 | 6 | -9 | 2/5/9 |
A really good sweep with good range, usually a poke or a blockstring ender. Great to swing with in neutral, as you can cancel to safety on block while scoring a knockdown on hit. Do be careful: if this is blocked, the opponent can punish from very far away using CC, which can also go through a cancel to Hadoken at level 3.
Neutral Jumping
Diagonal Jumping
Command Normals
| Damage | Stun | Startup | Active | Frame Adv | Meter | Block | Properties |
|---|---|---|---|---|---|---|---|
| 13[1], 5[0] | 3, 3 | 33 | 4(0)4 | -1, +3 | 1/1+1 per hit/4+2 | - |
- Hits 2 times.
- 2nd slowest overhead in the game. (Alpha2Overheads).
An overhead with very good range.
Normal Throws
| Damage | Stun | Startup | Active | Frame Adv | Meter | Block | Properties |
|---|---|---|---|---|---|---|---|
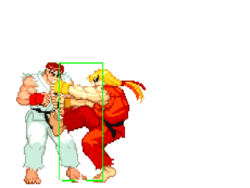
| 19[0] | 0 | 1 | N/A | N/A | -/-/3 | N/A |
- Deals 9 damage when opponent tech throws.
- Ken has the 2rd best throw range in the game (Alpha2ThrowRanges).
| Damage | Stun | Startup | Active | Frame Adv | Meter | Block | Properties |
|---|---|---|---|---|---|---|---|
| 10[0]+1[0]xN = 14-20 | 0 | 1 | N/A | N/A | -/-/3 | N/A |
- Mashable throw from both sides to add or reduce the number of hits. With a min of 4 and a max of 10 hits.
- Deals 15 damage when opponent tech throws.
- Ken has the 2rd best throw range in the game (Alpha2ThrowRanges).
Jigoku Fusha
Air Throw
(in air)![]() /
/![]() +
+ ![]() /
/![]()
Alpha Counters
Punch Alpha Counter
(while in blockstun)![]() +
+ ![]()
| Damage | Stun | Startup | Active | Frame Adv | Meter | Block | Properties |
|---|---|---|---|---|---|---|---|
| 19[0], 17[0], 4[0] | 6x3 | 4 | 4(0)22(0)4 | -42 | 0/0/0 |
- Hits 1 time.
- Can't be air-blocked until frame 26.
This AC is good for punishing jump-ins you are having trouble reacting to with your normal anti-air tools. Be careful though, because it can't be used against jump attacks that are timed late since your opponent will likely have time to block it.
Kick Alpha Counter
(while in blockstun)![]() +
+ ![]()
| Damage | Stun | Startup | Active | Frame Adv | Meter | Block | Properties |
|---|---|---|---|---|---|---|---|
| 22[2] | 8 | 4 | 4 | -7 | 0/0/0 |
- Punishable on hit.
A very dominant move at mid range, combining great range with respectable damage. It is possible to counter pretty much any poke with this move, including projectiles. This move is highly abusable in the footsie game, so be sure to use it whenever needed. Arguably the best Kick AC in the game. Can be punished by CC, supers and long reaching normals even on hit.
Special Moves
| Version | Damage | Stun | Startup | Active | Frame Adv | Meter | Block | Properties |
|---|---|---|---|---|---|---|---|---|
| 14[7], 10[6] | 8, 8 | 14 | 3(0)inf | -9 | 4/6/9 | |||
| 15[8], 11[7] | 10, 10 | 14 | 3(0)inf | -10 | 4/6/9 | |||
| 17[11], 13[10] | 12, 12 | 14 | 3(0)inf | -11 | 4/6/9 |
- Punishable on hit.
Essential to Ken's overall strategy. Slower start up than Ryu's.
![]()
- Speed: 300 pixels per 100 frames; slowest fireball in the game (Alpha2Fireballs).
![]()
- Speed: 375 pixels per 100 frames (Alpha2Fireballs).
![]()
- Speed: 450 pixels per 100 frames; 4th fastest fireball in the game (Alpha2Fireballs).
Shoryuken
Dragon Punch, Uppercut![]() +
+ ![]()
Ken's signature special move.
- Unscaled damage in CC.
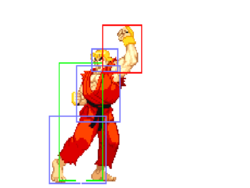
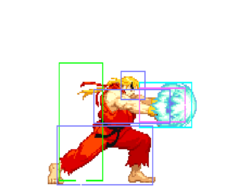
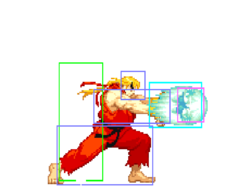
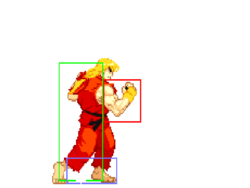
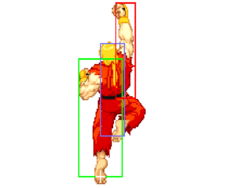
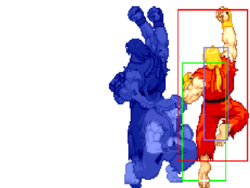
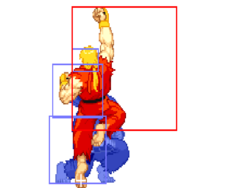
![]() - [Hitboxes pictured]
- [Hitboxes pictured]
- 4 frames of startup invul; 0 of which while active.
- Can't be air-blocked until frame 20.
- Hits 1 time max.
Best used as an invincible anti-air. Not a great reversal because of the lower hurtbox during the first hit; it will trade with low attacks. Amazing way to build meter from full-screen when kara-canceled with cr.hk (11 units).
![]()
- 8 frames of startup invul; 4 of which while active.
- Can't be air-blocked until frame 10.
- Hits 1 time max.
MP DP does the most chip damage and is a better reversal than HP DP because it only hits once. Not the best version to anit-air with because it's not invincible after the first hit.
![]()
- 8 frames of startup invul; 6 of which while active.
- Can't be air-blocked until frame 10.
- Hits 3 times max on grounded opponent.
- Hits 1 time max on airbourne opponent.
Not the best reversal because it hits more than once and can possibly not combo. Not the best version to anit-air with because it's not invincible after the first few hits and does much less damage as an AA. Check out "Defensive Notes" for more info.
Tatsumaki Senpukyaku
Hurricane Kick, Tatsu![]() +
+ ![]()
First hit of all tatsus will hit crouching opponents, all other hits will not. Can be combo'd into or it can be used to go over projectiles.
![]()
- Hits 3 times.
LK Tatsu will not combo if the first hit lands, and is -13 if it does.
![]()
- Hits 4 times.
![]()
- Hits 5 times.
(air)Tatsumaki Senpukyaku
(air)Hurricane Kick, (air)Tatsu
(in air)![]() +
+ ![]()
- Hits 1 time max on an airbourne opponent.
- Hits 2 times max on a grounded opponent.
All versions can lead to combo when hit on a grounded opponent.
| Version | Damage | Stun | Startup | Active | Frame Adv | Meter | Block | Properties |
|---|---|---|---|---|---|---|---|---|
| N/A | N/A | N/A | N/A | N/A | 0/-/- | N/A | ||
| N/A | N/A | N/A | N/A | N/A | 0/-/- | N/A | ||
| N/A | N/A | N/A | N/A | N/A | 0/-/- | N/A |
- Receives 125% damage when counter hit.
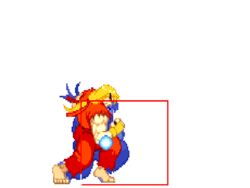
Ken rolls forward towards the opponent, with each punch strength determining the distance of it (lp for shortest, hp for farthest). This move is great for mixing up combos and throwing off a defensive player. Will low profile under fireballs and go through opponents to side switch.
Zento
Fake Roll![]() + Taunt (Start)
+ Taunt (Start)
| Damage | Stun | Startup | Active | Frame Adv | Meter | Block | Properties |
|---|---|---|---|---|---|---|---|
| N/A | N/A | N/A | N/A | N/A | 0/-/- | N/A |
- Receives 125% damage when counter hit.
Ken fakes his shoto roll and does a forward flip which causes him to lay on the ground. Really no use for this move due to its poor recovery and overall uselessness.
Super Moves
Startup Invulnerability Notes:
- At the end of a super screen freeze, projectiles will start moving before the opponent's character is unfrozen, giving the supers more projectile invul. frames than hit invul. frames.
- A full 2 quarter-circles isn't required. Required inputs:


 +
+ 
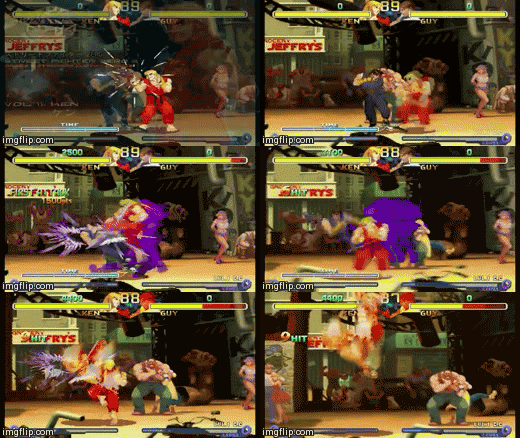
Ken will link 2 DPs (three times for level 3) as a super combo. Much better chance of hitting someone with it after super cancelling due to the horizontal movement.
Level 1
- 5 frames of startup hit invul.; 1 of which while active.
- 12 frames of startup projectile invul.
- Hits 4 times.
- The first two hits occur before the super screen freeze ends.
Level 2
- 5 frames of startup hit invul.; 1 of which while active.
- 16 frames of startup projectile invul.
- Hits 6 times.
- The first three hits occur before the super screen freeze ends.
Level 3
- 5 frames of startup hit invul.; 1 of which while active.
- 20 frames of startup projectile invul.
- Hits 7 times.
- Note: The first two hits occur before the super screen freeze ends.
- The first three hits occur before the super screen freeze ends.
- A full 2 quarter-circles isn't required. Required inputs:


 +
+ 
Ken will do a spinning DP move vertically. A great wake up option as well as chip damage due to its massive hitbox. This super is much more negative on block when the opponent blocks crouching.
Level 1
- 5 frames of startup hit invul.; 1 of which while active.
- 12 frames of startup projectile invul.
- Hits 6 times max.
- Mashable to add 1-2 more chip damage, but doesn't add damage on hit.
Level 2
- 6 frames of startup hit invul.; 2 of which while active.
- 16 frames of startup projectile invul.
- Hits 7-10 times.
- Mashable super for more hits and damage.
Level 3
- 9 frames of startup hit invul.; 5 of which while active.
- 19 frames of startup projectile invul.
- Hits 8-14 times.
- Mashable super for more hits and damage.
The Basics
What does Ken want?
If Ryu is the scalpel, Ken is the sledgehammer.
Ken's roll pressure, huge buttons, and amazing Alpha Counters run Alpha 2- And it makes him the more popular Shoto among intermediate players. In this players opinion, he's just better.
Where Ryu controls the midrange with his fireballs, Ken contests that space with pokes. Ken wants to secure knockdowns and kickstart a strike/throw game that's hard to stop. With meter, Ken is never dead: A clean Custom Combo activation can deal upwards of 70% and often gives him a mixup afterward. 2HK xx Roll is very annoying, and immediately puts Ken in his opponent's face. Overhead is slow, but grants frame advantage.
Alpha Counters put Ken over the top. Kick AC borrows animations and properties from Ken's normals in SFA1, another game where he was decidedly top tier. Kick AC is huge, does big damage, and can neutralize just about any poke in the game.
Notes
Ken's Hadouken and Tatsus aren't as good as Ryu's but he has more than enough tools to hold his own. He has a well rounded arsenal of normals applicable to a lot of situations, namely cr.MK, st.LK and cr.HK. Kens Kick AC is a dominant midrange tool that also does solid damage and is able to punish long reaching normals and projectiles when meter is available. Zenpo Tenshin ( forward roll ) is another important tool in Kens arsenal, giving him the ability to apply mixup pressure off of a knockdown. Additionally, cancelling the LP version of the roll from cr.LK leaves Ken at range to punish recovery roll, making any recovery rolls unsafe against an aware Ken player.
Basic Offense
Firstly close range is usually established by landing cr.HK from max range. If you believe cr.HK will hit, cancel into LP Zenpo Tenshin to punish recovery roll if they attempt one. In order to effectively counter without sacrificing positioning for a wake up attack, immediately perform cr.MK xx HP Hadouken. If they roll the combo will come out for a 2 hit and if not only cr.MK will come out. You'll still be able to gameplan on wakeup if they don't roll so be sure to establish this.
When you dont have meter available, cr.MP serves as your best attack starter. It links right into cr.MK xx HP Hadouken for decent damage. If the cr.MP doesn't hit then you can walk forward for a throw or immediately perform cr.HK xx Zenpo Tenshin if you think they will attempt to counter your throw. When Ken has meter, cr.LK x2 will provide opportunities for safe damage. cr.LK x2 can be chained into st.LK which can be cancelled to any level Shoryu Reppa for really good damage. If cr.LK x2 is blocked, you have a few options to continue your offense, the first of which is walk-up Tsukami Nage. This is most useful when you have the opponent in a defensive posture. Number 2, walk-up and perform cr.LK>st.LK xx Shoryu Reppa (any level). This is most useful when your opponent is looking to counter your throw attempts. Finally there is cr.HK xx LP Zenpo Tenshin. This is useful for beating early attempts by your opponent to attack out of blockstun. This will keep you close to your opponent and give you an opportunity to attempt Tsukami Nage or cr.MK xx HP Hadouken.
Defensive Notes
Use the LP version of Shoryuken to counter jump-ins. The MP Shoryu is useful as a wakeup reversal, or as a risky option to catch an opponents extended limbs in the footsie game.
st.MK, cr.HP and st.MP all work well as anti air options.
If you have meter, Shinryuken can punish jumps for solid damage and a crossup opportunity.
Advanced Strategy
Learn the spacing game and utilize your AA tools (DP, ACs, etc.) depending on the jump in. Also utilize the shoto roll if you prefer a more annoying, yet super aggressive style. As the mixup in rolls can open up the opponent to multiple ways of losing a ton of life.
Throw OS
Ken's Roll is one of his strongest tools in Alpha 2. It's fast, low, and lets him extend pressure in ways the other Shotos can't. It's a great cancel from sweep, and can enable an utterly evil throw sequence in the corner.
"2HK xx 214LP, 6MP" / Sweep canceled to Roll, delay 6MP.
On block and in the corner, a cancel to roll is safe: Ken is left nearly even and in throw range (At worst it's probably -2, -1 on a frameskip). 6MP will often throw an opponent out of their abare's startup. If they read the throw and jump, 6MP will anti air instead, keeping the opponent cornered. Loop until death.
To escape this setup the opponent either needs to spend bar on a blowout custom while minus, Alpha Counter the sweep, mash a throw of their own, or have a fast enough normal to crouch tech the sequence. AC loses to 2HK xx 623MP, CC can lose to a spaced sweep or 2MK xx Empty Roll, and abare is just risky.
Super mean, super effective.
Combos
cr.MP>cr.MK xx HP Hadouken
Cr.LK x2>s.LK xx Shoryu Reppa
j.HP,cr.HP xx HP Shoryu
j.HP>st.MK(2hits)xx Shoryu Reppa
Cr HP xx Heavy DP
St MP xx Heavy DP
Jump HP/HK xx Cr MP/MK xx Heavy Fireball/DP
Crossup Jump MK xx Cr HP xx Heavy DP
Crossup Jump MK xx St MP xx Heavy DP
Cr LK x3 xx Heavy DP/Shoryureppa
Jump HP xx St MK xx Shoryureppa
St MK xx Shoryureppa
Custom Combos
any lvl- c.rh xx lp dp xN, hp dp ender (if not close enough you can use hk hurricane after c.rh instead of the first lp dp)
aa cc- s.mp xx lp dp xN, hp dp
Level One Activation
cr.HK xx qcb+HK, HP SRK
c.hk (close) xx fp dp, fp dp
Level Three Activation
- Crouching HK, HK Tatsumaki Senpuu Kyaku, LP Shoryuken x2, HP Shoryuken
Match-ups
This is a match-up that should be played patiently by Ken. Off of a blocked L or M Jaguar Kick, Ken can consistently cancel cr.MP into Hadouken for a punish. If he blocks Adon's H Jaguar Kick, he can easily use his Punch Alpha Counter against it. Resist the urge to Rushdown needlessly as Adon has some beefy CC's to punish when Ken makes a mistake. If he uses Jaguar Tooth, be sure to counter with a Punch AC or CC.
From mid-range and beyond, throw Hadoukens but be careful of his Tatsus. If he misreads your Hadouken timing, hit him with cr.HP to Hadouken. Ken can really limit Akuma's options by forcing him into the corner. If Akuma jumps in the corner, use st.MK or a Shoryuken. Careful anti-airing Akuma's dive kick with Shoryukens because it can hit you out of the move at certain angles. after blocking Akumas dive kick you have the option to AC. You should be able to also cc his dive kick when hes close to the ground. You can counter his Zankuu ( air ) Hadoukens by walking under and shoryuken'ing him, instant air HK before the fireball actually comes out, block then AC or CC him to pass through and go for a juggle.
This MU depends on what Charlie does within the first few seconds of the round start. If he throws a Sonic Boom right out the gate, you can punish him with a jump in and follow up with a BnB. If he walks back and start turtling, you want to play more patient and play the fireball war, but slowly edge yourself foward and play solid footsies. While you do this, you are slowly building meter which will come in handy. Once you're in a good distance, you can punish Sonic Boom or one of his normals with Kick AC. Once you score the AC, the Charlie player will either jump after getting hit, or throw another Boom if your meter is fully depleted. Lastly, if you play defensively, make meter build your number one priority with fireballs or whiff some normals. The tables can be easily turned once you have full meter and you have ACs, CCs, and supers at your disposal.
Much easier than ryu because you have some normals that compete with her range. Again s.lk is good and stuffs her low fwd when timed right and if she wiffs low fwd, s.rh with ken is guaranteed I believe. Establish the same type of FB game as you would with ryu but try to play from half screen. If she tries to empty jump or jump out of your dp ranges, s.mk will eat her up most of the time as an easy counter.
A big advantage that ken has over Chun in this fight is kens ac+K. It lets ken compete on the same footsie level with her to an extent. Esepcially when you have bar. She’ll be less likely to abuse footsie. Which gives you time to break her down. However, I have encountered players that know how to AC reversal so its vital that you AC on moves that she can’t cancel from or catch her during awkward footsie battles where a cancel would be impossible or very hard to pull off.
Try to win the first around to force her to dump her bar the 2nd round so you can have the cc advantage the 3rd just like ryu. This actually can be used against any character that has powerful cc’s like rolento or sagat. Its a universal strats thats not directly applied to one character but towards the characters that have great cc’s.
One day I was playing maxstah and he kept CCing through my lp DP. After he was done raping me, he told me that mp dp makes it much harder to CC through his AA. It hits twice @ 2 different points and cc invincibility only lasts for so long. Its not impossible to cc through it but its like 10x harder to cc through it compared to LP which is easier by comparison.
chun is really dominanting from mid screen. She controls it but she has to fight out of the corner in which case AC’s come into play and overheads with tick throw mixups. One of kens best features is that his damn mp throw will pratically throw them into corner and it can lead to winning around or good solid life to establish a life lead. So Mp throw is quite a good tool in this fight.
and from personal EXP, its almost impossible to cross her up. She already has a small enough sprite box. Then to add to the fact that she has incredible walk speed. Its almost impossible to catch someone who knows what they’re doing with kens crossup. You might land it once or maybe even twice, but never consistently. It still can be used but don’t count on it as your gameplan.
