| Ryu | |
|---|---|
| |
| Health: | 144 |
| Defensive Rating: | 0 |
| Stun: | 40 |
| Walk Speed Forward: | 300 |
| Walk Speed Backward: | 200 |
| Jump Backward: | 51f (3+48+0) |
| Neutral Backward: | 50f (3+47+0) |
| Jump Forward: | 49f (3+46+0) |
| Wake-Up: | 51f |
| Quick Rise: | 20f |
| Throw Range: | 20 |
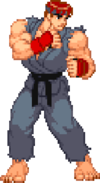
A student of the Shotokan school of karate, Ryu has devoted his entire life to perfecting the true way of the warrior through mastery of the fireball. Now Ryu must stand tall against revitalized rivals.
Players to watch:
Shanebadoo
Normal Moves
| SFA2 Framedata Glossary | |
|---|---|
| Damage |
Units of base damage inflicted by the move (100% life bar = 144 units of health). Most moves have a damage range; the number inside the square brackets indicates which Random Damage Table the move uses to look up any additional damage and the % chance of doing so. |
| Stun |
Units of stun inflicted by the move. |
| Startup |
The frame the move hits on (1st active frame). Super moves with a screen freeze will separate pre- and post-screen freeze startup frames by a '+' (Ex: 5+0). |
| Active |
The portion of a move that can hit. How many frames a move remains active for. ()=Inactive frames in-between active frames. [xN]=Repeated sequences. |
| Frame Adv |
The frame advantage values when the attack is blocked. (Add +1 frame to all OnBlockAdv values for the move's OnHitAdv value; Ex: +2oB/+3oH, -4oB/-3oH) |
| Meter |
The units of meter gained on whiff/block/hit. (48, 96, and 144 units of meter are required for 1, 2, and 3 bars of meter respectively) |
| Block |
Low attacks must be blocked crouching. High attacks must be blocked standing. Mid attacks can be blocked either way. |
| Properties |
|
| Frames |
All framedata collected with the game speed set to normal, where the game tickrate and framerate are the same(60fps). |
| Speed |
All framedata collected with the game speed set to normal. |
| Hitboxes |
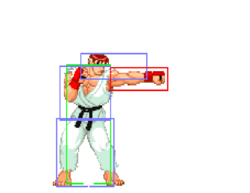
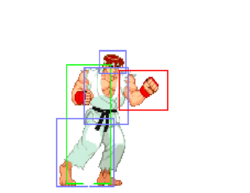
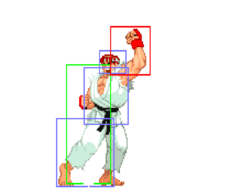
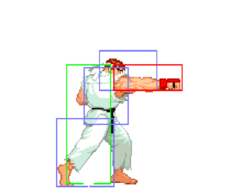
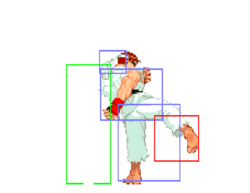
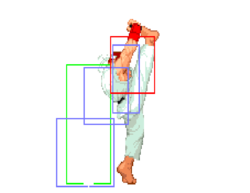
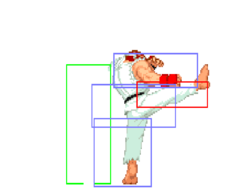
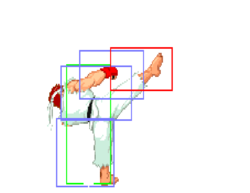
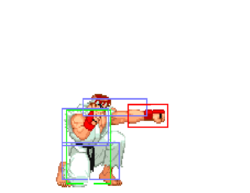
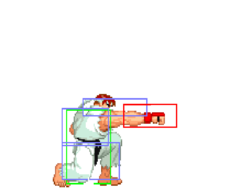
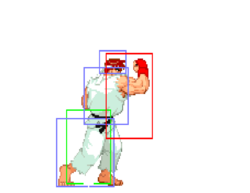
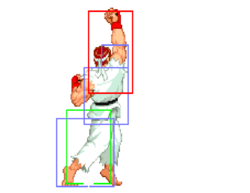
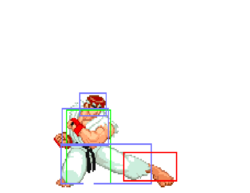
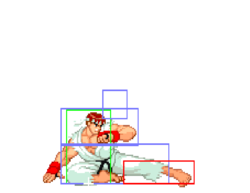
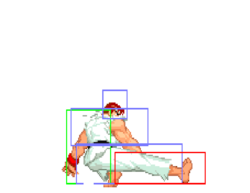
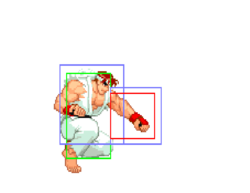
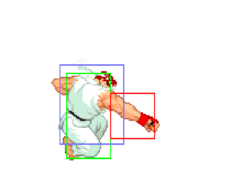
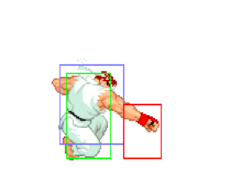
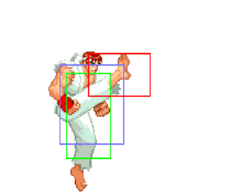
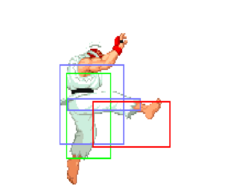
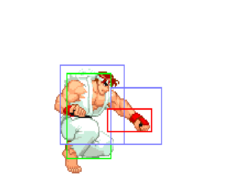
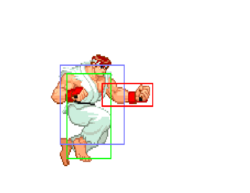
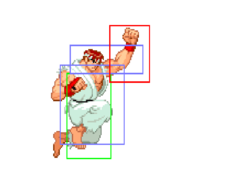
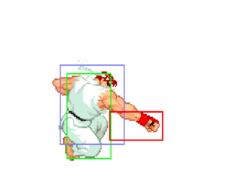
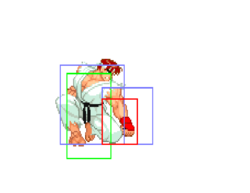
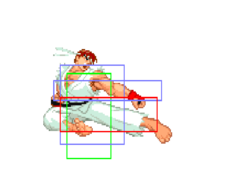
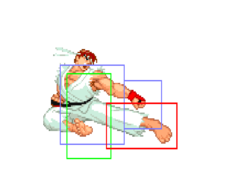
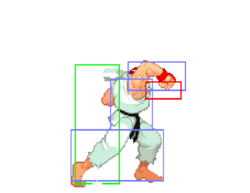
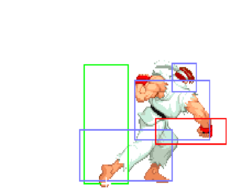
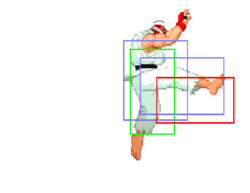
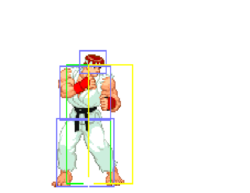
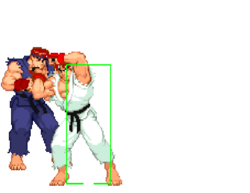
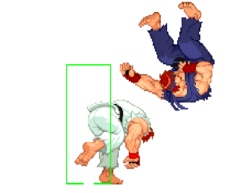
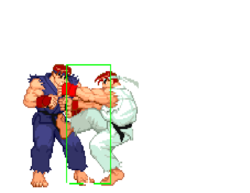
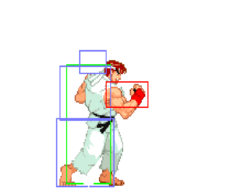
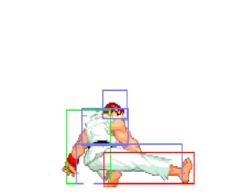
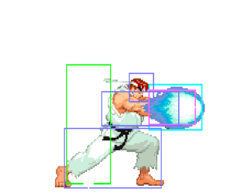
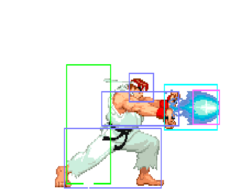
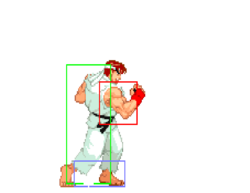
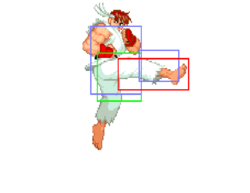
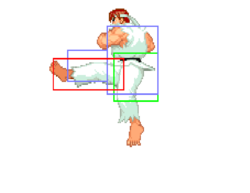
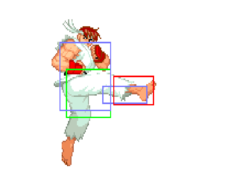
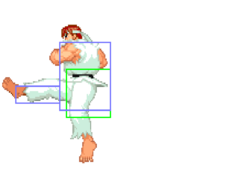
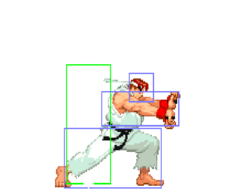
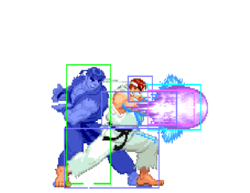
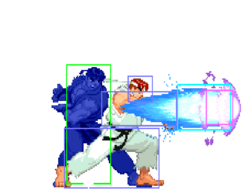
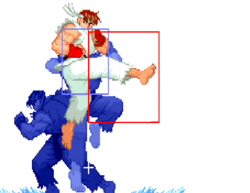
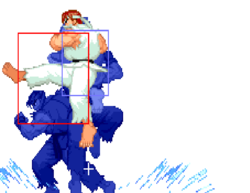
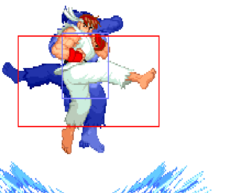
All hitbox images have the character standing/jumping in the exact same position, so hitbox distances can be easily compared.
|
| Credit | Damage, stun, framedata, meter, and updated hitboxes collected by |
Standing
Crouching
Neutral Jumping
Diagonal Jumping
Command Normals
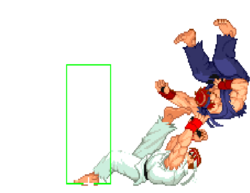
Sakatsu Wari
Overhead, Collarbone Breaker![]() +
+ ![]()
| Damage | Stun | Startup | Active | Frame Adv | Meter | Block | Properties |
|---|---|---|---|---|---|---|---|
| 5[1], 14[0] | 6, 2 | 23 | 4(0)4 | -7 | 1/1+1 per hit/4+2 | - |
- Hits 2 times.
- Unsafe; can be punished by CC and fast normals. Use as a meaty to remain safe.
- Punishable on hit.
- Tied for 2nd fastest overhead in the game. (Alpha2Overheads).
A overhead with very good range.
| Damage | Stun | Startup | Active | Frame Adv | Meter | Block | Properties |
|---|---|---|---|---|---|---|---|
| 11[1] | 6 | 20 | 4 | -5 | 1/3/6 |
- Punishable on hit.
- Unsafe; can be punished by CC and fast normals. Use as a meaty to remain safe.
Good for maintaining corner pressure, or to move in closer due to recovering faster than a LK Tatsu. It's also a Low Crush, but its frame disadvantage makes it very dangerous to just toss out during strings.
Normal Throws
| Damage | Stun | Startup | Active | Frame Adv | Meter | Block | Properties |
|---|---|---|---|---|---|---|---|
| 19[0] | 0 | 1 | N/A | N/A | -/-/3 | N/A |
- Deals 9 damage when opponent tech throws.
- Ryu's Throw Range is 20 pixels, tied for the second furthest in the game. (Alpha2ThrowRanges).
| Damage | Stun | Startup | Active | Frame Adv | Meter | Block | Properties |
|---|---|---|---|---|---|---|---|
| 19[0] | 0 | 1 | N/A | N/A | -/-/3 | N/A |
- Deals 9 damage when opponent tech throws.
- Ryu's Throw Range is 20 pixels, tied for the second furthest in the game. (Alpha2ThrowRanges).
Alpha Counters
Punch Alpha Counter
(while in blockstun)![]() +
+ ![]()
Kick Alpha Counter
(while in blockstun)![]() +
+ ![]()
Special Moves
| Version | Damage | Stun | Startup | Active | Frame Adv | Meter | Block | Properties |
|---|---|---|---|---|---|---|---|---|
| 15[5], 11[5] | 8, 8 | 12 | 3(0)inf | -11 | 4/5/7 | |||
| 16[6], 12[6] | 10, 10 | 12 | 3(0)inf | -12 | 4/5/7 | |||
| 18[9], 14[6] | 12, 12 | 12 | 4(0)inf | -13 | 4/5/7 |
- Punishable on hit.
A fireball. His best poke, good release speed and damage. Throw a hell of alot of these but be smart with it. Throwing smart fireballs will annoy your opponent, just tossing them out will get you killed.
![]()
- Speed: 300 pixels per 100 frames; slowest fireball in the game (Alpha2Fireballs).
![]()
- Speed: 375 pixels per 100 frames (Alpha2Fireballs).
![]() Shakunetsu Hadoken aka Red Fireball
Shakunetsu Hadoken aka Red Fireball
- Soft Knockdown when hit within the first 4 frames.
- Speed: 450 pixels per 100 frames; 4th fastest fireball in the game (Alpha2Fireballs).
Shoryuken
Dragon Punch, Uppercut![]() +
+ ![]()
- Unscaled damage in CC.
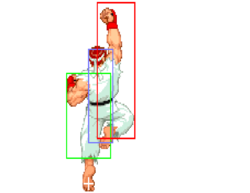
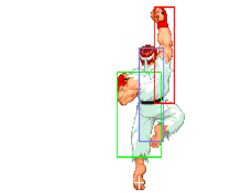
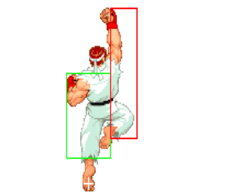
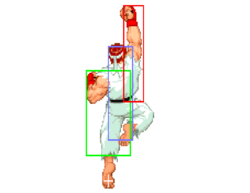
![]() - [Hitboxes pictured]
- [Hitboxes pictured]
- 3 frames of startup invul; 0 of which while active; followed by 4 frames of upper invul.; followed by 8 frames of full invul.
- Can't be air-blocked until frame 17.
- Hits 1 time max.
Best used as an invincible anti-air. Will also anti-air jump-in CCs. Not a great reversal because of the lower hurtbox during the first hit; it will trade with low attacks. Amazing way to build meter from full-screen when kara-canceled with cr.![]() (11 units).
(11 units).
![]()
- 7 frames of startup invul; 4 of which while active.
- Can't be air-blocked until frame 9.
- Hits 1 time max.
Best used as a reversal. Not the best version to anit-air with because it's not invincible after the first hit.
![]()
- 7 frames of startup invul; 4 of which while active.
- Can't be air-blocked until frame 9.
- Hits 1 time max.
Hp dp is best used as a reversal. Not the best version to anit-air with because it's not invincible after the first hit. By performing a close light, medium, or heavy DP towards the other person while they're blocking will hit them twice instead of once, which does more chip damage.
Tatsumaki Senpukyaku
Hurricane Kick, Tatsu![]() +
+ ![]()
| Version | Damage | Stun | Startup | Active | Frame Adv | Meter | Block | Properties |
|---|---|---|---|---|---|---|---|---|
| 17[0], 17[0] | 8, 8 | 12 | 3(3)3 | -5 | 6/7/8 | |||
| 19[1]x4 | 10x4 | 12 | 3[(3)3x3] | -5 | 6/6+1 per hit/8 | |||
| 21[4]x6 | 12x6 | 12 | 3[(3)3x5] | -5 | 6/6+1 per hit/8 |
- Hits 1 time max.
All hits will whiff on crouching opponents. Used for mobility and to punish fireballs, use ![]() version to pass fireballs when you cant use
version to pass fireballs when you cant use ![]() version to hit opponent.
version to hit opponent.
(air)Tatsumaki Senpukyaku
(air)Hurricane Kick, (air)Tatsu
(in air)![]() +
+ ![]()
| Version | Damage | Stun | Startup | Active | Frame Adv | Meter | Block | Properties |
|---|---|---|---|---|---|---|---|---|
| 11[4] | 6 | 7 | 3 | - | 6/7/8 | |||
| 12[4], 12[4] | 8, 8 | 7 | 3(15)3 | - | 6/6+1 per hit/8 | |||
| 13[4]x3 | 10x3 | 7 | 3(9)3(9)3 | - | 6/6+1 per hit/8 |
- Hits 1 time max.
Has annoyingly great priority, also if connected against a grounded opponent allows for a juggle with dj.![]() or supers.
or supers.
Hado no Kamae
Fake Fireball![]() + Taunt (Start)
+ Taunt (Start)
| Damage | Stun | Startup | Active | Frame Adv | Meter | Block | Properties |
|---|---|---|---|---|---|---|---|
| N/A | N/A | N/A | N/A | N/A | 0/-/- | N/A |
- Receives 125% damage when counter hit.
Ryu will use his fireball animation where nothing comes out, but it has very fast recovery and can catch foes off-guard during a fireball war. Not used often due to the placement of the start button can vary depending on your controller setup, and a inputting it incorrectly will give you a regular taunt instead, which can be dangerous.
Super Moves
Startup Invulnerability Notes:
- At the end of a super screen freeze, projectiles will start moving before the opponent's character is unfrozen, giving the supers more projectile invul. frames than hit invul. frames.
Shinku Hadoken
Fireball Super![]()
![]() +
+ ![]()
Only real use is to blow through fireballs, sucks as an Anti-Air at any level other than 1, and you have better choices anyway. Can combo off light attacks. Level 1 does not knock down, and if the opponent is close you can punished on be hit. Can juggle lvl 1 Shinkuu Hadouken in the corner, best after a lvl 1 version.
- Cannot be air blocked.
Level 1
- 4 frames of startup hit invul.; 0 of which while active.
- 6 frames of startup projectile invul.
- Hits 3 times.
- Punishable on hit.
Level 2
- 4 frames of startup hit invul.; 0 of which while active.
- 6 frames of startup projectile invul.
- Hits 4 times.
Level 3
- 4 frames of startup hit invul.; 0 of which while active.
- 6 frames of startup projectile invul.
- Hits 5 times.
Shinku Tatsumaki Senpukyaku
Hurricane Kick Super![]()
![]() +
+ ![]()
Probably the best wake-up super in the game, best used defensively than offensively. Completely safe on block and great damage. It's a good anti-cross up when you're knocked down. Ryu's pushbox is removed throughout the duration of the super. It makes for a decent chip damage option against opponents with poor Alpha Counters or zero stocks of meter.
- A full 2 quarter-circles isn't required. Required inputs:


 +
+ 
Level 1
- 5 frames of startup hit invul.; 0 of which while active.
- 15 frames of startup projectile invul.
- Hits 5 times.
Level 2
- 6 frames of startup hit invul.; 1 of which while active.
- 16 frames of startup projectile invul.
- Hits 9 times.
Level 3
- 7 frames of startup hit invul.; 2 of which while active.
- 17 frames of startup projectile invul.
- Hits 13 times.
The Basics
What does Ryu want?
As the compatibility character, Ryu wants to abuse his flexibility. With broad, strong tools and no appreciable weaknesses- Taking games comes down to making smart choices according to the matchup. Ryu doesn't have a concrete win condition, but he's consistent.
Notes
I like to zone with Ryu; Throw lots of fireballs, all while building meter that's easy to use. Ryu is scary cause its hard to lock him down when he has meter, after a few reversal CCs, ACs, or a wakeup Shinku Tatsumaki your opponent might just back off. This is in your favor since his fireball is so good. A simple Ryu gameplan is to forcing the opponent to make mistakes by zoning with fireballs, then anti-airing if they jump- Ideally with a DP. HP Fireball knocks down and comes out faster than it really should. It's an excellent poke if your opponent likes to whiff lots of buttons in neutral.
Advanced Strategy
Well if within or a little outside sweep range go for his cc:
c.rh xx lk hurricane xN, fp dp
UPDATED: Better Customs at lvl 3
- c.rh xx lk hurricane x3, fp dp x2
- c.rh xx lk hurricane x2, lp dp, lp dp, hp dp
- c.rh xx lk hurricane x3, hp fireball x4, hp dp
- c.rh xx hp dp, hp dp, lp dp, hp dp.
Note in CC mode E. Ryu’s specials are like regular Ryu’s.
Tired of people jumping on you, well then just anti-air cc. Shoto’s have probably the best AA ccs. If no cc is available, used c.fp or s.mp (cancel into hurricane to move close or hadouken to push back). S.mk works as a anti-cross up.
Activate, s.mp xx lk hurricane xN, fp dp
Now if they jump from afar…
Activate, s.fp xx rh hurricane, fp dp
Congrats! You just made you opponent think twice about jumping on you which leads to more hadouken and cc mix-up fun! This is just a quick overview if you have any in depth question feel free to ask.
Also vs fireballers, if you hit a air hurricane kick…
immediately jump activate, j.mp xx hurricane, land, continue hurricane kick juggle, end with fp dp.
Red Fireball Setups
Ryu’s Red Fireball travels a lot faster than it should (It’s the 4th fastest in the game). When you chuck one at midrange, plenty of players will just walk right into it. You trade a slower average startup (12 Frames) for an attack with good damage, infinite priority, and a knockdown up close. A poke can’t get much better than that.
After a c.mk xx fireball knockdown, hold uf, j.lk at the last second. Its a safe jump in and a pressure starter. If it hits go into c.lk x2 fireball. If your opponent doesn't respect it and mashes throw or a fast normal, they'll be counter hit by c.lk x2 xx HP Fireball. This grants another knockdown into the same situation. Repeat til j.lk and c.lk is blocked or they tech roll in place.
From blocked c.lk, go for throw, or c.mk xx HP Fireball if you think they're reading your throw attempt. If they jump at you when you have meter, cc them with s.mp/c.mp xx lk hurricanes xN, end with hp dp. If they jump from afar, activate, s.fp xx hk hurricane into lk hurricanes, end with dp.
C.fp is one of the best meaties and if it hits you can link a c.mk or sweep, if blocked walk forward and throw, or go for a counter hit. S.mk is a really good anti cross up, hitting instantly above Ryu's head.
Knockdowns
To take Ryu to the next level, you need to understand the knockdown metagame in Alpha 2:
- Any knockdown outside of Throws, Alpha Counters, or Supers can be teched.
- Tech Rolls are not invincible, knockdowns are generally a mixup/scramble situation favoring the player on offense.
"Why would an opponent use tech roll at all if they're punishable?"
The hurtbox for rolls are quite low. It'll cleanly travel under fireballs and some high pokes. Aggressive players love teching towards their opponent to steal a turn with CC, or even cross them up with a properly spaced roll. Tech Rolls can take lots of knockdown setups off the table, and were likely implemented by Capcom to curb setplay.
- Depending on distance,
 Tech Rolls can often be safe.
To beat rolls, you can react to the opponent's tumble animation and hit them out of it. I like to use sweep, but low forward air resets the opponent and prevents them from teching again. Reading your opponent's rolling tendencies can force them into tough knockdowns where they're scared to commit to any option. Then, with Ryu's throws and overhead you can apply some potent mixups.
Option Selects
HP Roll Crosscut DP
Lorem Ipsum
Crouch Teching
2LKMKHK or 2LKMK
Throws are very strong in Alpha 2 despite being "techable." The throw soften window is four frames. You might find youself getting thrown even when you know one is coming. To remedy this, we can abuse the game's input priority system to soften normal throws and challenge pressure with a fast attack in one action.
Throws in Alpha 2 can only be performed standing with the appropriate button and direction (Sagat and Rose lack kick throws), but throw techs break all those rules. While crouching, we can press a button to throw tech and a button for abare. The game will prioritize the fast light normal with the properties of the heavy one: e.g. a throw tech.
If you're thrown, you'll tech- If your opponent doesn't throw, you'll get the poke.
Tiger Knee Throw OS
(Blocked second hit) 4MP xx 236HP
Sagat's Tiger Knee is a tremendously dangerous mid. It's fast as hell, 0 on stand block, and -5 at worst on crouchers.
In situations where you aren't confident in netting a clean punish on a blocked knee, 4MP will OS a backthrow, a throw tech, and a cancellable anti-air normal. Sagat can beat this by spacing his knee so only the first hit lands.
Combos
cr.![]() , cr.
, cr.![]() , st.
, st.![]() xx
xx ![]() Fireball or Fireball Super
Fireball or Fireball Super
cr.![]() , cr.
, cr.![]() , cr.
, cr.![]() (One-Frame Link) xx
(One-Frame Link) xx ![]() Fireball
Fireball
cr.![]() xx
xx ![]() DP
DP
cr.![]() xx
xx ![]() Fireball or Fireball Super
Fireball or Fireball Super
j.![]() , cr.
, cr.![]() xx
xx ![]() Fireball
Fireball
j.![]() , cr.
, cr.![]() , cr.
, cr.![]() (One-Frame Link) xx
(One-Frame Link) xx ![]() Tatsu
Tatsu
st.![]() , cr.
, cr.![]() (One-Frame Link) - Ryu's least relevant link, here for completeness. Unfortunately st.
(One-Frame Link) - Ryu's least relevant link, here for completeness. Unfortunately st.![]() 's startup is too slow to consistently combo from jump-ins, even the deepest ones.
's startup is too slow to consistently combo from jump-ins, even the deepest ones.
Standing Chars Only
j.![]() , cr.
, cr.![]() xx
xx ![]() Hadouken OR Shinkuu Hadou
Hadouken OR Shinkuu Hadou
Corner Only
j.![]() , cr.
, cr.![]() xx Lvl 1 Tatus Super, Lvl 1 Fireball Super
xx Lvl 1 Tatus Super, Lvl 1 Fireball Super
j.![]() , cr.
, cr.![]() , cr.
, cr.![]() xx
xx ![]() Tatsu
Tatsu
j.![]() , cr.
, cr.![]() , st.
, st.![]() xx
xx ![]() Fireball
Fireball
Custom Combos
Lv1:
cr.![]() ,
, ![]() Fireball x4,
Fireball x4, ![]() DP
DP
cr.![]() ,
, ![]() Tatsus x2,
Tatsus x2, ![]() DP
DP
Lv3:
cr.![]() ,
, ![]() Tatus x6,
Tatus x6, ![]() DP
DP
cr.![]() ,
, ![]() DP x2,
DP x2, ![]() DP x2
DP x2
st.![]() ,
, ![]() Fireball xN, c.
Fireball xN, c.![]() ,
, ![]() DP
DP
Ryu:
any lvl- cr.![]() xx
xx ![]() Tatus xN,
Tatus xN, ![]() DP
DP
aa cc- st.![]() /cr.
/cr.![]() into above cc
into above cc
Match-ups
While Adon is a weaker character, don't underestimate his simple, effective mix. Adon uses "shallow" Jaguar Tooths to bait Uppercuts and "Deep" JTs to punish fireballs on reads. Once he's dictated the pace of the match, Adon can set up Strike/Throw. Jaguar Kick is punishable on hit outside of fringe cases.
Meterless Reversals
Rising Jaguar!
Birdie has a very threatening jump arc and potent aerial normals. He's going to jump at you, full stop.
Respect Biridie's meter. Even with one bar he has access to a dangerous anti-fireball super (Bull Revenger). BR can travel fullscreen and can give Birdie the hard knockdown he needs for his win condition. Once your opponent has built a bar, bait a bad super with whiffed normals or adjust to a closer unreactable fireball range. If Birdie makes a bad read and swings when you haven't done anything, hold up during the Super Flash to safely escape.
Most Birdies build their strategy around his high damage Custom Combo. Birdie can "safely" get meter from fullscreen using his higher priority air normals. Keep your cool and keep him out at any cost. This character essentially gets one chance per round to run their most threatening offense.
Ryu vs. "Guile" is a Street Fighter institution. Alpha 2 throws more variables into the mix, but the core of the matchup is still the same. Nash is a zoning god. His Fireballs have fast recovery, and he has no shortage of high priority anti-airs (st.![]() , st.
, st.![]() , st.
, st.![]() ,
, ![]() Somersault).
Somersault).
On the ground, Nash pokes with cr.![]() and can challenge pressure with cr.
and can challenge pressure with cr.![]() or cr.
or cr.![]() . Both of the latter are special cancelable. Like Guile, Nash wants to bait Ryu into bad jumps and Tatsus with clever zoning. Unlike SF2 Guile, however, jumps aren't a linear interaction in Alpha 2. If you activate Custom Combo in the air and don't attack, you'll be completely invincible until you land (Strike AND Throw). This is great against anybody with consistent anti-airs.
. Both of the latter are special cancelable. Like Guile, Nash wants to bait Ryu into bad jumps and Tatsus with clever zoning. Unlike SF2 Guile, however, jumps aren't a linear interaction in Alpha 2. If you activate Custom Combo in the air and don't attack, you'll be completely invincible until you land (Strike AND Throw). This is great against anybody with consistent anti-airs.
- Jump Sobat (Forward/Back+
 ) is CC punishable on hit. Some Nash players will use this during their own blocked Custom Combo as a mixup.
Punishing Sonic Booms
By design, Sonic Booms are not punishable by jump-in attacks or Tatsus on reaction. If you think something is coming, you can use one of those options pre-emptively to pass over the projectile and punish whoever threw it.
- Tatsu is NOT projectile invincible, Ryu's hurtboxes simply travel high enough on the screen to avoid them. During Tatsu's startup and recovery, you're vulnerable.
- I've found
 and
and  to be the most consistent, thanks to their longer active frames.
  Tatsu can pass over projectiles as well, but its shorter travel distance makes it easier to mess up. Expect to get tagged out of the startup animation on all of these specials a lot until you get it down.
Sonic Booms in Alpha 2 have strange proximity block quirks. Once Nash's projectile is on screen, you can't walk backwards and have to respect it. Even when jumped, the Sonic Boom will keep you blocking until it leaves the screen. Jab Fireball is especially annoying, and no other projectile behaves like this in Alpha 2. If you Tatsu through Nash's fireball and somehow don't knock him down, you'll be locked in place and could be vulnerable to throws.
Meterless Reversals
- Nash's
 and
and  Somersault are invincible reversals.
  has a lingering hurtbox at his feet that can be meatied by every Shoto's cr.
 or cr.
 .
. - Light Somersault's Hitbox is terrible against grounded opponents. On top of getting tagged by lows, multiple Shoto pokes will low profile the Flash Kick.
Crossups
Crossup buttons in A2 are nerfed across the board from Super Turbo. Nash is a rare exception. dj.![]() isn't just huge, it's downright ambiguous.
isn't just huge, it's downright ambiguous.
quite tricky. S.lk beats out chuns low fwd and I think this is applied to ryu\ken\akuma. Not quite sure about dan\sakura. You read the opponent for low fwd patterns and interupt her with s.lk, KD FB.
ryus hcf+fp is KD @ perfect ranges to counter chuns normal game. Its really effective because KD’s give you time to set her up for something.
if someone is getting fireball happy w\in the proper FB range, you pacman her FB with a shinku. She’ll stop zoning less with fb’s and you can work yours.
for the most part, ryu can’t really out footsie chun. However, his fwd+mk will go over low fwd which counts for something but its not safe from certain ranges. I’ve noticed that if you decide to turtle it up, shell walk in and out of her low fwd range to bait you to do something. Most players have patterns when they start doing this and you can time when they walk fwd and catch them with c.mk, FB. Its not great life but it is footsie and you can catch her frequently with this till they stop walking around. Chuns walk speed is too good and seems to be a staple point of her footsie mind game.
I’ve noticed that once chun has established her dominant footsie game, she’ll get in close so she can force easy pressure with her normals. This is the only time when you can try to out footsie her and get her with something. c.lk x2 super, low fwd into KD FB etc…
and the best strategy is to just use the fucking clock. Take off time. See if the other guy can actually maintain the proper moves through out the entire course of the match. I’ve noticed that some chun players are really gimmicky and when you use the clock, you’ll be able to see that gimmick more and more and you’ll eventually think of a counter. Even when you use the clock vs a smart chun, you establish the mental game and you’ll be able to work options to land hits.
a big problem with chun isn’t her normals but rather her damn CC. Its chunky life and from what i’ve seen, it can be done with 1 button lol. Its important to win the first round. Its crucial. When the 2nd round comes up, try to gain the life lead and force the chun player to burn up his CC so when the 3rd round comes aroud, you have bar, she doesn’t and you can pick her off with your CC then fight it out. Thats probably the best strat i’ve managed to come up with so far.
Dan sucks.
Being the joke character, Dan has to find clever uses for his weaker shoto normals and set up a strike/throw game. Beware j. LK. It can beat some normal anti-airs and is an easy tick throw setup. If you never meaningfully let him in (Which is easier than you'd think) or stall with a life lead, Dan crumbles.
Most of Dan's pokes are utterly terrible. Anyone playing the character seriously quickly pulls the best from the junk pile: 2LK, 2MK, 2LP, 2MP, 2HP... Everything else is etiher stubby, minus, or both. This makes Dan easier to contest in footsies, especially with Ryu's HP Fireball. Since using anything outside of Dan's best pokes is suicide, an apt Ryu player can play just outside of Dan's poke range and harass him with projectiles and canceled sweeps. If Dan jumps to break a stalemate, Shoryu utterly guts him.
Super Turbo Dhalsim was a little overtuned, some may say dominant. So Alpha 2 knocks him down a peg.
Most of Sim's long pokes in neutral leave him minus, and he needs very specific pressure routes to maintain plus frames up close. 5LK, his primary bully button, is a mid and -1 at best. Opt to poke with Red Fireballs to catch his stretchy limbs for a knockdown, then rotate your meaty options to keep the opponent guessing. Don't be afraid to stagger your pressure for frame traps or just throw 'em to death- Dhalsim has very few worthwhile defensive options.
j. LP and j. HP are instant overheads. Dhalsim also has a charged overhead in 4LP, but its startup is glacial: 41 Frames!
You can think of Defense in this matchup as a supercharged game of Strike/Throw.
Guy can use his command dash to get in your face and run his offense- Be weary of him canceling normals on block into dash up throw. Before he closes in, however, he might try to bait Anti Air attempts with j.![]() +
+![]() .
.
If you find your opponent is running away with the round, knock Guy back to fullscreen with an Alpha Counter and apply some light zoning. At midscreen, I advise using Ryu's Red Fireball (Close qcf ![]() ) for its knockdown properties. Fear of getting clipped by a Hadouken and being Safe-Jumped might dissuade Guy from pressing buttons in neutral, but only if you effectively "set the tone of the match."
) for its knockdown properties. Fear of getting clipped by a Hadouken and being Safe-Jumped might dissuade Guy from pressing buttons in neutral, but only if you effectively "set the tone of the match."
Much like a Grappler, Guy feeds off of opponents who hesitate. Through your buttons, you can make your opponent believe that you don't fear their strongest options:
 or
or  make this matchup far easier, in my opinion. Having solid anti-airs that are often safe to whiff and double as excellent pokes make the Shotos in Alpha 2 strong.
Knockdowns from Guy can be scary because of dash's speed and instant startup. Before you know it, he's on top of you! Guy can convert into wakeup games off of most stray hits, and his normals can catch careless tech rolls with ease.
Here are some common options from Guy on knockdowns, taken from his section:
- cr.
 (If they don’t block, they get knocked down again)
 - f+
 (Overhead)
 - Tick with
 or
or  , then throw. (Another knockdown)
 - Delay throw.
- Do a crouching
 or
or  , and if you think they’re going to try to Throw Reversal, activate CC instead.
 - Bait risky options with block.
This matchup might actually be more homogenized in Alpha 2 than it was in Super Turbo, for many reasons. Notably, Ken loses his utterly brutal Kneebash mixup in A2. With that being said, Ken's roll and larger average Custom Combo damage make him play significantly more aggressive than Ryu.
Ryu's midrange Fireball Game might not be effective against certain Ken players. Kick AC is just so good, and can quickly let Ken take control of the ground game for just one bar of meter.
Meterless Reversals
DP is beefy, regardless of strength.
 has a lingering hurtbox on Ken's feet, certain low pokes will trade.
 is seen as the best reversal.
 is a multi hit move, but the opponent could drop out at certain ranges.
Crossups
dj.![]() has two active hitboxes. The earlier and more potent crossup only stays out for 2 frames, while the other is active for 10.
has two active hitboxes. The earlier and more potent crossup only stays out for 2 frames, while the other is active for 10.
Shinryuken Knowledge Check
Perhaps unintentionally, Ken's Kick Super has strange recovery properties and causes a sideswitch. The Level 1 version is only -6, and it's -10 to -12 if the defender is crouch blocking.
On block, Ryu's punish options are limited. I generally go for a throw or 2MK.
Dictator is the lord of Strike/Throw in Alpha 2. He doesn't do combos, supers , or have much of a high-low game. But he's always plus, is stupidly fast for his size, and won't hesitate to throw loop you in the corner. This chart may say 6-4, but go in unprepared and Ryu/Dictator might as well be 1-9.
Dictator has an unblockable Alpha Counter.
All three of his useful specials (Psycho Shot, Head Press, Devil's Reverse) immediately put opponents on the defensive. The latter two are infamously hard to anti-air: Dictator can always land short and punish reactive players. Sometimes, the best outcome is a trade. Dictator's buttons are just better.
To survive, you need a knockdown. Dictator without resources is easily mixable, so make the most of your turn when he's empty. Be very weary of ACs and hail mary Supers if you've locked him down with a bar. I've found delay throw and overheads to be the most consistent oki.
All of Ryu's normals hit Dictator crouching. Meaty 2LK, 2LK, 5HP is a brutal frametrap when he's in the corner without meter to AC-- It'll check Reversal Scissorkicks and trade with slide.
You gotta respect Stinger.
- Rolento is slippery. Expect to see lots of Kara-Canceled Rolls for meter and "random" Custom Combo activations into 90%.
Beyond confirms into rekka and his CC, very little of Rolento's offense is combo oriented. A typical Rolento setup is multiple safe pokes canceled into a Stinger of an appropriate angle. All of Rolento's worthwhile pokes either grant frame advantage, can be canceled while minus, or are 0 on block. (Of note: LP, 2LP, 2MK, and 2HP)
Understanding where the gaps are in Rolento's pressure will let you walk him down. Similarly to Akuma's air fireball, DP can beat badly spaced or raw Stingers. The knife is never minus, so your only direct counter is a DP or taking a big risk and activating.
- Rolento can easily dispense pressure, but lacks the defense to infight for very long; Tick throw him to death! (Unless he has meter, be very weary of when you press against a Rolento with full resources)
Player Phase; Enemy Phase.
Be very afraid of Rose's Soul Illusion Super when she has meter. It rarely trades in your favor, so sometimes you just have to take the Chip Damage. Rose has no meterless reversals, making her very weak on defense initially.
Without resources, you can consider Rose to be half a character. Sure, her 2MP is probably the best normal in the game, but Ryu has an infinite priority poke of his own in Red Fireball, which will outright beat a Rose mashing at that range and put her into a strike/throw mix-up.
Sagat has to work so hard in Street Fighter Alpha 2. Despite being a favorite pocket pick for some of the game's best players- He can really struggle against a Ryu that plays at the right range.
In short, think of A2 Sagat as the prototype for a modern Street Fighter character: He has to fight for plus frames. Nearly all of his normals are minus, and the worst of them can be punished are on hit. To keep from being Reversal CC'd, Sagat needs to back off and aim his pokes. With Sagat at 3/4 Screen, Ryu can toss very dangerous Red Fireballs. HP FB will trade at worst with Sagat's pokes, grant a soft knockdown, and snowballs into mixups.
Like Rolento, understanding what buttons Sagat can be punished for pressing is the key to cracking this matchup at a higher level. To start, look to counter 5MK, 2MK, and 5LK. All three have extended hurtboxes and are canned punishes.
Tiger Knee can get annoying. Despite being a mid, it grants different frame advantage if stand or crouch blocked. If standing, all three versions of Tiger Knee are 0 on block. On crouch, all three are -5. This makes punishing Tiger Knee very risky. Sagat can frame trap/abare into a CC Activation, HP DP, or another Tiger Knee.
Sakura lacks a Meterless Reversal, but her normals and raw offensive power make up for whatever weaknesses she possesses on defense. In my opinion, beating Sakura is all about contesting her at her strongest ranges, maintaining a life lead as long as possible, and never letting her land a throw. One MP/HP Throw into a crossup loop can end the round, and strong Sakuras wont hesitate to walk right through gaps in your strings for a grab.
If you find control in neutral slipping away, get the hell out of there! Tiger Knee Tatsu or a simple backjump work well. Losing screen space is preferable to dying to unblockables, and Sakura can't apply her most potent left/right mixup when the opponent is cornered.
Common Buttons
- cr. LK - 3f Startup, and grants ridiculous advantage (+3/+4). It sets up Tick Throws, chains into a knockdown, and is very hard to beat; S Tier Normal.
- HK - "Vicki's Sledgehammer." Huge Range, and it will never trade. I wish Ryu had this button.
- cr. HP/ HP - Sakura's DP is weak, but her Anti-Air game isn't! Both of these normals beat jumpers effortlessly. Grounded both are minus, but can be Special Canceled.
Don't let the numbers above fool you, Ryu/Zangief can spiral out of control very fast.
- Zangief hits hard, and his normals are all huge.
- A select few of his jumping attacks have incredible hitboxes, and Zangief can tick throw you out of any of them.
- Lariat is a consistent, easy to execute anti-air. Kick Lariat is full body invincible on startup, and beats lots of grounded pokes.
- Incredible sweep range lends itself well to Long Range Valle CC Shenanigans. Zangief can clip you out of tons of stuff, get corner carry from his CC, and threaten with an unjumpable SPD- The "Magic Grab."
Zangief isn't without weaknesses, but he's definitely a tough grappler to beat. By design, all of his grounded normals leave him at disadvantage. Thanks to pushback and their sheer range, few are unsafe, but this can give Ryu a free reversal with a projectile on block. Zoning Zangief is one of Ryu's only safe options, so this is appreciated.
Anti-airing Zangief in Alpha 2 is hard. Kneedrop has great priority and can beat all of Ryu's grounded normals. DP is practically required to keep Zangief out. Even worse, Zangief can tech roll your strongest anti-air and wake up with SPD or a CC, putting you back on the defensive.
You can't autopilot against this character, keep cool and keep him out.
Miscellaneous
Max Range for Ryu's Red Fireball
