No edit summary |
No edit summary |
||
| (29 intermediate revisions by 5 users not shown) | |||
| Line 19: | Line 19: | ||
==In-Depth Analysis== | ==In-Depth Analysis== | ||
===[[ | ===[[The King of Fighters 2002/Normals Guide|Movelist]]=== | ||
{|border="1" | {|border="1" | ||
!width="6%"| | !width="6%"| | ||
| Line 33: | Line 33: | ||
! [[image:snka.gif]] | ! [[image:snka.gif]] | ||
|align="center"| 3/4/4 | |align="center"| 3/4/4 | ||
|align="center"| | |align="center"| -/- | ||
|align="center"| | |align="center"| C | ||
|align="center"| HL | |align="center"| HL | ||
|colspan="2" | [[image:Takuma98_clA.png|center]] | |colspan="2" | [[image:Takuma98_clA.png|center]] | ||
| Line 41: | Line 41: | ||
! [[image:snkb.gif]] | ! [[image:snkb.gif]] | ||
|align="center"| 4/4/9 | |align="center"| 4/4/9 | ||
|align="center"| | |align="center"| -/- | ||
|align="center"| | |align="center"| C | ||
|align="center"| HL | |align="center"| HL | ||
|colspan="2" | [[image:Takuma98_clB.png|center]] | |colspan="2" | [[image:Takuma98_clB.png|center]] | ||
| Line 49: | Line 49: | ||
! [[image:snkc.gif]] | ! [[image:snkc.gif]] | ||
|align="center"| 3/4/17 | |align="center"| 3/4/17 | ||
|align="center"| | |align="center"| -/- | ||
|align="center"| | |align="center"| C | ||
|align="center"| HL | |align="center"| HL | ||
|colspan="2" | [[image:Takuma98_clC.png|center|I'M ANGRY ABOUT PUNCHING]] | |colspan="2" | [[image:Takuma98_clC.png|center|I'M ANGRY ABOUT PUNCHING]] | ||
| Line 57: | Line 57: | ||
! [[image:snkd.gif]] | ! [[image:snkd.gif]] | ||
|align="center"| 7/4/17 | |align="center"| 7/4/17 | ||
|align="center"| | |align="center"| -/- | ||
|align="center"| | |align="center"| - | ||
|align="center"| HL | |align="center"| HL | ||
|colspan="2" | [[image:Takuma98_clD.png|center]] | |colspan="2" | [[image:Takuma98_clD.png|center]] | ||
| Line 67: | Line 67: | ||
! [[image:snka.gif]] | ! [[image:snka.gif]] | ||
|align="center"| 3/4/6 | |align="center"| 3/4/6 | ||
|align="center"| | |align="center"| -/- | ||
| | |align="center"| - | ||
|align="center"| HL | |align="center"| HL | ||
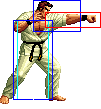
|colspan="2" | [[image:Takuma98_stA.png|center]] | |colspan="2" | [[image:Takuma98_stA.png|center]] | ||
| Line 75: | Line 75: | ||
! [[image:snkb.gif]] | ! [[image:snkb.gif]] | ||
|align="center"| 4/3/13 | |align="center"| 4/3/13 | ||
|align="center"| | |align="center"| -/- | ||
| | |align="center"| - | ||
|align="center"| HL | |align="center"| HL | ||
|colspan="2" | [[image:Takuma98_stB.png|center]] | |colspan="2" | [[image:Takuma98_stB.png|center]] | ||
| Line 83: | Line 83: | ||
! [[image:snkc.gif]] | ! [[image:snkc.gif]] | ||
|align="center"| 8/4/18 | |align="center"| 8/4/18 | ||
|align="center"| | |align="center"| -/- | ||
| | |align="center"| - | ||
|align="center"| HL | |align="center"| HL | ||
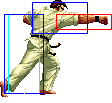
|colspan="2" | [[image:Takuma98_stC.png|center]] | |colspan="2" | [[image:Takuma98_stC.png|center]] | ||
| Line 91: | Line 91: | ||
! [[image:snkd.gif]] | ! [[image:snkd.gif]] | ||
|align="center"| 14/4/19 | |align="center"| 14/4/19 | ||
|align="center"| | |align="center"| -/- | ||
| | |align="center"| - | ||
|align="center"| HL | |align="center"| HL | ||
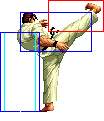
|colspan="2"| [[image:Takuma98_stD.png|center]] | |colspan="2"| [[image:Takuma98_stD.png|center]] | ||
| Line 99: | Line 99: | ||
! [[image:snkc.gif]]+[[image:snkd.gif]] | ! [[image:snkc.gif]]+[[image:snkd.gif]] | ||
|align="center"| 11/5/23 | |align="center"| 11/5/23 | ||
|align="center"| | |align="center"| -/- | ||
|align="center"| | |align="center"| S | ||
|align="center"| HL | |align="center"| HL | ||
|colspan="2"| [[image:Takuma98_stCD.png|center]] | |colspan="2"| [[image:Takuma98_stCD.png|center]] | ||
| Line 109: | Line 109: | ||
! [[image:snka.gif]] | ! [[image:snka.gif]] | ||
|align="center"| 3/3/9 | |align="center"| 3/3/9 | ||
|align="center"| | |align="center"| -/+ | ||
|align="center"| | |align="center"| C | ||
|align="center"| HL | |align="center"| HL | ||
|colspan="2" | [[image:Takuma98_crA.png|center]] | |colspan="2" | [[image:Takuma98_crA.png|center]] | ||
| Line 117: | Line 117: | ||
! [[image:snkb.gif]] | ! [[image:snkb.gif]] | ||
|align="center"| 3/4/6 | |align="center"| 3/4/6 | ||
|align="center"| | |align="center"| -/+ | ||
| | |align="center"| C | ||
|align="center"| L | |align="center"| L | ||
|colspan="2" | [[image:Takuma98_crB.png|center]] | |colspan="2" | [[image:Takuma98_crB.png|center]] | ||
| Line 125: | Line 125: | ||
! [[image:snkc.gif]] | ! [[image:snkc.gif]] | ||
|align="center"| 3/2+4/25 | |align="center"| 3/2+4/25 | ||
|align="center"| | |align="center"| -/- | ||
|align="center"| | |align="center"| C | ||
|align="center"| HL | |align="center"| HL | ||
|valign="bottom" style="border-right:0px;"| [[image:Takuma98_crC1.png|center]] | |valign="bottom" style="border-right:0px;"| [[image:Takuma98_crC1.png|center]] | ||
| Line 134: | Line 134: | ||
! [[image:snkd.gif]] | ! [[image:snkd.gif]] | ||
|align="center"| 7/4/21 | |align="center"| 7/4/21 | ||
|align="center"| | |align="center"| -/- | ||
| | |align="center"| C | ||
|align="center"| L | |align="center"| L | ||
|colspan="2" | [[image:Takuma98_crD.png|center]] | |colspan="2" | [[image:Takuma98_crD.png|center]] | ||
| Line 145: | Line 145: | ||
|align="center"| 3/11 | |align="center"| 3/11 | ||
|align="center"| -/- | |align="center"| -/- | ||
| | |align="center"| - | ||
|align="center"| H | |align="center"| H | ||
|colspan="2" | [[image:Takuma98_jA.png|center]] | |colspan="2" | [[image:Takuma98_jA.png|center]] | ||
| Line 153: | Line 153: | ||
|align="center"| 3/9 | |align="center"| 3/9 | ||
|align="center"| -/- | |align="center"| -/- | ||
| | |align="center"| - | ||
|align="center"| H | |align="center"| H | ||
|colspan="2" | [[image:Takuma98_jB.png|center]] | |colspan="2" | [[image:Takuma98_jB.png|center]] | ||
| Line 161: | Line 161: | ||
|align="center"| 7/4 | |align="center"| 7/4 | ||
|align="center"| -/- | |align="center"| -/- | ||
| | |align="center"| - | ||
|align="center"| H | |align="center"| H | ||
|colspan="2" | [[image:Takuma98_jC.png|center]] | |colspan="2" | [[image:Takuma98_jC.png|center]] | ||
| Line 169: | Line 169: | ||
|align="center"| 8/4 | |align="center"| 8/4 | ||
|align="center"| -/- | |align="center"| -/- | ||
| | |align="center"| - | ||
|align="center"| H | |align="center"| H | ||
|colspan="2"| [[image:Takuma98_jD.png|center]] | |colspan="2"| [[image:Takuma98_jD.png|center]] | ||
| Line 177: | Line 177: | ||
|align="center"| 12/4 | |align="center"| 12/4 | ||
|align="center"| KD/- | |align="center"| KD/- | ||
| | |align="center"| - | ||
|align="center"| HL | |align="center"| HL | ||
|colspan="2"| [[image:Takuma98_jCD.png|center]] | |colspan="2"| [[image:Takuma98_jCD.png|center]] | ||
| Line 187: | Line 187: | ||
|align="center"| 6/9 | |align="center"| 6/9 | ||
|align="center"| -/- | |align="center"| -/- | ||
| | |align="center"| - | ||
|align="center"| H | |align="center"| H | ||
|colspan="2" | [[image:Takuma98_njB.png|center]] | |colspan="2" | [[image:Takuma98_njB.png|center]] | ||
| Line 194: | Line 194: | ||
|colspan="8" align="center"| '''Command Normals''' | |colspan="8" align="center"| '''Command Normals''' | ||
|- | |- | ||
! <br>f+[[image:snka.gif]]<br><br> | ! <br>f + [[image:snka.gif]]<br><br> | ||
|align="center"| 7/2/26 | |align="center"| 7/2/26 | ||
|align="center"| KD/-10 | |align="center"| KD/-10 | ||
|align="center"| S | |align="center"| S | ||
|align="center"| HL | |align="center"| HL | ||
|rowspan="2" colspan="2" | [[image:Takuma98_fA.png|center]] | |rowspan="2" colspan="2" | [[image:Takuma98_fA.png|center]] | ||
|rowspan="2"| Knocks down when done alone, doesn't when chained. Always cancelable. Better Range than f+B for combos. | |rowspan="2"| Knocks down when done alone, doesn't when chained. Always cancelable. Better Range than f + B for combos. | ||
|- | |- | ||
! f+[[image:snka.gif]] (cancel) | ! f + [[image:snka.gif]] (cancel) | ||
|align="center"| 7/2/26 | |align="center"| 7/2/26 | ||
|align="center"| -8/-10 | |align="center"| -8/-10 | ||
|align="center"| S | |align="center"| S | ||
|align="center"| HL | |align="center"| HL | ||
|- | |- | ||
! <br>f+[[image:snkb.gif]]<br><br> | ! <br>f + [[image:snkb.gif]]<br><br> | ||
|align="center"| 15/3+4/19 | |align="center"| 15/3+4/19 | ||
|align="center"| | |align="center"| -/- | ||
| | |align="center"| - | ||
|align="center"| H | |align="center"| H | ||
|rowspan="2" valign="bottom" style="border-right:0px;"| [[image:Takuma98_fB1.png|center]] | |rowspan="2" valign="bottom" style="border-right:0px;"| [[image:Takuma98_fB1.png|center]] | ||
| Line 217: | Line 217: | ||
|rowspan="2"| Slow uncancelable overhead alone, faster non-overhead and cancelable when chained. Not bad and actually very easy to slow chain off a cr.B or something. | |rowspan="2"| Slow uncancelable overhead alone, faster non-overhead and cancelable when chained. Not bad and actually very easy to slow chain off a cr.B or something. | ||
|- | |- | ||
! f+[[image:snkb.gif]] (cancel) | ! f + [[image:snkb.gif]] (cancel) | ||
|align="center"| 9/3+4/19 | |align="center"| 9/3+4/19 | ||
|align="center"| | |align="center"| -/- | ||
|align="center"| S | |align="center"| S | ||
|align="center"| HL | |align="center"| HL | ||
|- | |- | ||
|colspan="8" align="center"| '''Special Moves''' | |colspan="8" align="center"| '''Special Moves''' | ||
|- | |- | ||
! qcf+[[image:snka.gif]] | ! qcf + [[image:snka.gif]] | ||
|align="center"| | |align="center"| 12/34 | ||
|align="center"| | |align="center"| | ||
| | | | ||
|align="center"| HL | |align="center"| HL | ||
|colspan="2" | [[image:Takuma98_qcfA.png|center]] | |colspan="2" | [[image:Takuma98_qcfA.png|center]] | ||
|rowspan="2"|'''Fireball (qcf+P)'''<br> | |rowspan="2"|'''Fireball (qcf + P)'''<br> | ||
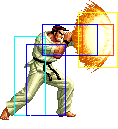
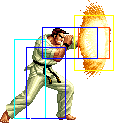
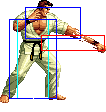
Guess what this is? It's a fireball. Like I mentioned before, it's of the high type in KOF98 (O.Ryo/O.Robert/O.Yuri all share this fireball), which means Leona, Heidern, and most worryingly Chris can just run under it and combo you. Iori can super under it. Still good as a meaty wakeup if you are in the position to do so against those characters, just be aware of how much advantage you need to use it. Against other characters that don't have such easy way around it, it's height actually helps, making it a bitch to get past sometimes. Learn the distances where you can bait a roll/jump and tag them with a Ranbu or even a Rungrab. | Guess what this is? It's a fireball. Like I mentioned before, it's of the high type in KOF98 (O.Ryo/O.Robert/O.Yuri all share this fireball), which means Leona, Heidern, and most worryingly Chris can just run under it and combo you. Iori can super under it. Still good as a meaty wakeup if you are in the position to do so against those characters, just be aware of how much advantage you need to use it. Against other characters that don't have such easy way around it, it's height actually helps, making it a bitch to get past sometimes. Learn the distances where you can bait a roll/jump and tag them with a Ranbu or even a Rungrab. | ||
|- | |- | ||
! qcf+[[image:snkc.gif]] | ! qcf + [[image:snkc.gif]] | ||
|align="center"| | |align="center"| 14/37 | ||
|align="center"| | |align="center"| | ||
| | | | ||
| Line 241: | Line 241: | ||
|colspan="2" | [[image:Takuma98_qcfC.png|center]] | |colspan="2" | [[image:Takuma98_qcfC.png|center]] | ||
|- | |- | ||
! f | ! f hcf + [[image:snka.gif]] | ||
|align="center"| | |align="center"| 21+9+21+1~84+9/40 | ||
|align="center"| | |align="center"| | ||
| | | | ||
|align="center"| HL | |align="center"| HL | ||
|colspan="2" rowspan="2"| [[image:Takuma98_fhcfP.png|center]] | |colspan="2" rowspan="2"| [[image:Takuma98_fhcfP.png|center]] | ||
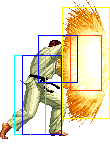
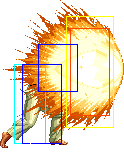
|rowspan="4"|'''Haoh Shikouken (f | |rowspan="4"|'''Haoh Shikouken (f hcf + P)'''<br> | ||
Big slow ass super fireball. You can charge it to make it look cooler. Way too slow to be really useful. | Big slow ass super fireball. You can charge it to make it look cooler. Way too slow to be really useful. | ||
|- | |- | ||
! f | ! f hcf + [[image:snkc.gif]] | ||
|align="center"| | |align="center"| 23+9+18+1~84+9/44 | ||
|align="center"| | |align="center"| | ||
| | | | ||
|align="center"| HL | |align="center"| HL | ||
|- | |- | ||
! f | ! f hcf + [[image:snka.gif]]<br>(full charge) | ||
|align="center"| | |align="center"| 21+9+21+85+9/40 | ||
|align="center"| | |align="center"| | ||
| | | | ||
| Line 263: | Line 263: | ||
|colspan="2" rowspan="2"| [[image:Takuma98_fhcfP_charged.png|center]] | |colspan="2" rowspan="2"| [[image:Takuma98_fhcfP_charged.png|center]] | ||
|- | |- | ||
! f | ! f hcf + [[image:snkc.gif]]<br>(full charge) | ||
|align="center"| | |align="center"| 23+9+18+85+9/44 | ||
|align="center"| | |align="center"| | ||
| | | | ||
|align="center"| HL | |align="center"| HL | ||
|- | |- | ||
! <br>qcb+[[image:snka.gif]]<br><br> | ! <br>qcb + [[image:snka.gif]]<br><br> | ||
|align="center"| | |align="center"| 10/1+3+5/32 | ||
|align="center"| | |align="center"| | ||
| | | | ||
| Line 276: | Line 276: | ||
|valign="bottom" style="border-right:0px; border-bottom:0px;"| [[image:Takuma98_qcbP1.png|center]] | |valign="bottom" style="border-right:0px; border-bottom:0px;"| [[image:Takuma98_qcbP1.png|center]] | ||
|valign="bottom" style="border-left:0px; border-bottom:0px;"| [[image:Takuma98_qcbP2.png|center]] | |valign="bottom" style="border-left:0px; border-bottom:0px;"| [[image:Takuma98_qcbP2.png|center]] | ||
|rowspan="2"| '''O.L.D. Punch (qcb+P)'''<br> | |rowspan="2"| '''O.L.D. Punch (qcb + P)'''<br> | ||
This is what you get when you mess up the super motion. Has auto-guard at the beginning, decent anti-air if you don't have any meter. Punishable. Kinda sucks. | This is what you get when you mess up the super motion. Has auto-guard at the beginning, decent anti-air if you don't have any meter. Punishable. Kinda sucks. | ||
|- | |- | ||
! qcb+[[image:snkc.gif]] | ! qcb + [[image:snkc.gif]] | ||
|align="center"| | |align="center"| 16/1+3+5/34 | ||
|align="center"| | |align="center"| | ||
| | | | ||
| Line 286: | Line 286: | ||
|colspan="2" style="border-top:0px;"| [[image:Takuma98_qcbP3.png|center]] | |colspan="2" style="border-top:0px;"| [[image:Takuma98_qcbP3.png|center]] | ||
|- | |- | ||
! <br>f | ! <br>f b f + [[image:snka.gif]]<br><br> | ||
|align="center"| | |align="center"| 11/44/21 | ||
|align="center"| | |align="center"| | ||
| | | | ||
| Line 293: | Line 293: | ||
|valign="bottom" style="border-right:0px; border-bottom:0px;"| [[image:Takuma98_fbfP1.png|center]] | |valign="bottom" style="border-right:0px; border-bottom:0px;"| [[image:Takuma98_fbfP1.png|center]] | ||
|valign="bottom" style="border-left:0px; border-bottom:0px;"| [[image:Takuma98_fbfP2.png|center]] | |valign="bottom" style="border-left:0px; border-bottom:0px;"| [[image:Takuma98_fbfP2.png|center]] | ||
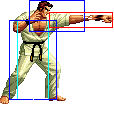
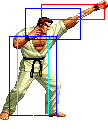
|rowspan="2"| '''Rapid Punches (f | |rowspan="2"| '''Rapid Punches (f b f + P)'''<br> | ||
Most guaranteed damaging ender after a D Flying Kick. Sucks some stuff in as an anti-air or otherwise, but I wouldn't recommend using it outside of that one combo. | Most guaranteed damaging ender after a D Flying Kick. Sucks some stuff in as an anti-air or otherwise, but I wouldn't recommend using it outside of that one combo. | ||
|- | |- | ||
! f | ! f b f + [[image:snkc.gif]] | ||
|align="center"| | |align="center"| 17/92/21 | ||
|align="center"| | |align="center"| | ||
| | | | ||
| Line 303: | Line 303: | ||
|colspan="2" style="border-top:0px;"| [[image:Takuma98_fbfP3.png|center]] | |colspan="2" style="border-top:0px;"| [[image:Takuma98_fbfP3.png|center]] | ||
|- | |- | ||
! | ! (db) f + [[image:snkb.gif]] | ||
|align="center"| | |align="center"| 13/13/19 | ||
|align="center"| | |align="center"| | ||
| | | | ||
|align="center"| HL | |align="center"| HL | ||
|colspan="2" | [[image:Takuma98_dbfB.png|center]] | |colspan="2" | [[image:Takuma98_dbfB.png|center]] | ||
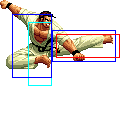
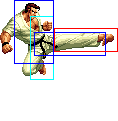
|rowspan="2"|'''Flying Kick ( | |rowspan="2"|'''Flying Kick ((db) f + K)'''<br> | ||
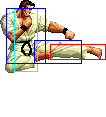
B version does 1 hit and is unsafe, D version does 2 hits and is unsafe. Which one to use?! So many choices. Use off a crossup j.D, cr.C only and make sure you hit-check it. | B version does 1 hit and is unsafe, D version does 2 hits and is unsafe. Which one to use?! So many choices. Use off a crossup j.D, cr.C only and make sure you hit-check it. | ||
|- | |- | ||
! | ! (db) f + [[image:snkd.gif]] | ||
|align="center"| | |align="center"| 15/18/24(whiff) | ||
|align="center"| | |align="center"| | ||
| | | | ||
| Line 323: | Line 323: | ||
===Normal Throws=== | ===Normal Throws=== | ||
'''b or f+D''' - Breakable, front knockdown, back turned, un-rollable. | * '''b or f + C''' - Breakable, front knockdown, face forward, un-rollable. | ||
* '''b or f + D''' - Breakable, front knockdown, back turned, un-rollable. | |||
D throw preferred, but they are both un-rollable so just use whichever one you need for positioning or preference. | D throw preferred, but they are both un-rollable so just use whichever one you need for positioning or preference. | ||
| Line 331: | Line 334: | ||
===Special Moves=== | ===Special Moves=== | ||
'''Running Kneebash Grab (hcb+K)''' - D version runs further. You can use this if you get a really meaty fireball on top of them to make it unblockable. Catch | |||
* qcf + P | |||
See description on Movelist section. | |||
* qcb + P | |||
See description on Movelist section. | |||
* f b f + P | |||
See description on Movelist section. | |||
* f hcf + P | |||
May charge. | |||
See description on Movelist section. | |||
* '''Running Kneebash Grab (hcb + K)''' - D version runs further. You can use this if you get a really meaty fireball on top of them to make it unblockable. Catch people trying to roll through fireballs. You might be able to tick into one (note you have to so it after a light hit, not cancel it) if you get someone scared enough, but it's pretty risky. Has invincibility to lows near the end. | |||
* (db) f + K | |||
See description on Movelist section. | |||
===Desperation Moves=== | ===Desperation Moves=== | ||
'''Super O.L.D. Punch (qcf | * '''Ryuuko Ranbu (qcf hcb + P)''' - A version is extremely fast and safe on block from 99% of everything, but it is possible to trade with attacks that are already out. C version is completely invincible on startup, but he freezes for a bit longer. Can go through fireballs, too. One of the scariest supers in the game. Use it as anti-air, anti-roll, etc. If your opponent doesn't tech roll after this, you can go for a qcf + A, hcb + B unblockable fireball setup. Fun fact: the C version can be thrown on reaction. So if you think someone will wakeup with it, you can be a dick and throw them out of it. No real point to that, since that one is punishable anyway. Max version is totally invincible and punishable. | ||
* '''Super O.L.D. Punch (qcf qcf + P)''' - Proximity unblockable. A version is faster, C version can be thrown on reaction. It's kind of hard to land with Takuma since he doesn't have the setups that some other characters have. Not necessarily a bad super, they just gave it to the wrong character. Still, empty short hop into this, etc. can work. Experiment and read your opponent! | |||
== Fastest Attacks == | |||
* 0F: C throw; D throw | |||
* 1F: - | |||
* 2F: - | |||
* 3F: '''cl.A'''; '''cl.C'''; st.A; '''cr.A'''; '''cr.B'''; '''cr.C''' | |||
* 4F: '''cl.B'''; st.B | |||
* 5F: - | |||
* 6F: - | |||
* 7F: cl.D; '''cr.D'''; '''f + A''' | |||
* 8F: st.C | |||
* 9F: - | |||
* 10F: qcb + A | |||
==Combos== | ==Combos== | ||
| Line 343: | Line 386: | ||
Takuma has a few different variations that lead into super, so experiment and find the one you're most comfortable with. | Takuma has a few different variations that lead into super, so experiment and find the one you're most comfortable with. | ||
*cr.A/ | * Best jump-ins: | ||
** j.D (Can crossup.) | |||
* cr.A / cr B x 2 > f + A > C Fireball (qcf + C) | |||
* cr.A / cr.B x 3+ > | |||
** f + A > (S)DM A Ryuuko Ranbu (qcf hcb + A) | |||
** (S)DM A Ryuuko Ranbu (qcf hcb + A) | |||
** f + A (Late cancel.) (Hard knockdown and more damage than normal cancel - the same damage of qcf + C.) | |||
* cr.A / cr.B x 2 > f + b (optional) > (S)DM A Ryuuko Ranbu (qcf hcb + A) | |||
* cr.A / cr.B > (S)DM qcf qcf + A | |||
Less damage and range then qcf hcf + A super, but works as an automatic hit confirm as the qcf qcf + A super will not trigger if opponent is blocking or out of range (the qcf + A will trigger instead). | |||
* Point blank: cr.A / cr.B > | |||
** f + B > qcf + C | |||
** qcb + A | |||
* cl.C > f + A / f + B > (S)DM qcf hcb + A | |||
Use f + B only if very close | |||
* cl.C > | |||
** f + A > qcf + C (Very close.) | |||
** f + A (Late cancel.) (Hard knockdown and more damage than normal cancel - the same damage of qcf + C.) | |||
** qcf + C | |||
* cr.C > D Flying Kick ((db) f + D), | |||
** Rapid Punches (f b f + P) | |||
** st.CD > A Fireball (qcf + A), B Running Kneebash Grab (hcb + B) (unblockable fireball setup if they roll) | |||
* Simple buffers: | |||
** f + B > (S)DM qcf hcb + A | |||
*** qcf + B > hcb + A | |||
Always use cr.B to start, then switch to cr.A if you want for the last light hit, but you can also just use cr.B for all the hits. Remember to use the hold buffering method if you use f + A (ie hold down B and use qcf + A for f + A input, then hcb + A to super). That way you won't get a fireball. Using f + B won't require this, but it has less range. Personally I just use cr.B x 3 > qcf hcf + A. | |||
{{StrategyCorner| | |||
* MAX: cr.B x 2 > {{f}} + A > {{qcf}} + C | |||
deals ??? than | |||
*cr. | * cr.B x 2 > {{f}} + A > {{qcf}} {{hcb}} + A | ||
Keep this in mind, when you need to decide whether to trigger MAX or keep meter for a DM. | |||
}} | |||
{{ | == Links == | ||
{{Navbox-KOF98}} | |||
[[Category:The King of Fighters '98: The Slugfest]] | [[Category:The King of Fighters '98: The Slugfest]] | ||
[[Category:Takuma/Mr. Karate]] | |||
Latest revision as of 22:12, 29 January 2021
Introduction
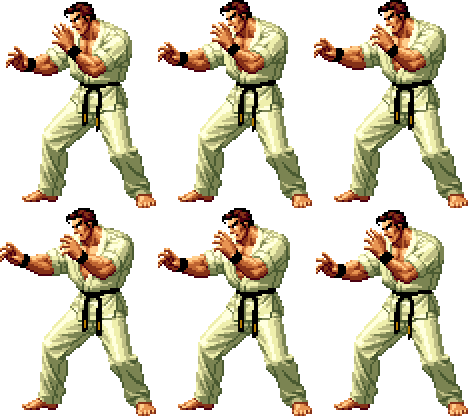
He's old. That's why he's on the team with all the other old guys.
Colors

|

|

|

|
Gameplay Overview
Takuma is a poking/zoning character with some very nice combo/mixup options as well. His Ranbu is one of the better sups in the game property-wise, and allows him to catch jumps/rolls on reaction as well as get great combo damage. His fireballs are of the highest traveling type, which means Leona/Heidern/Chris can run under them, and Iori can super under them, among other things. He still remains high-mid in the tier list, because he has a good variety of tools other than his fireballs and basic zoning.
In-Depth Analysis
Movelist
Normal Throws
- b or f + C - Breakable, front knockdown, face forward, un-rollable.
- b or f + D - Breakable, front knockdown, back turned, un-rollable.
D throw preferred, but they are both un-rollable so just use whichever one you need for positioning or preference.
Special Moves
- qcf + P
See description on Movelist section.
- qcb + P
See description on Movelist section.
- f b f + P
See description on Movelist section.
- f hcf + P
May charge. See description on Movelist section.
- Running Kneebash Grab (hcb + K) - D version runs further. You can use this if you get a really meaty fireball on top of them to make it unblockable. Catch people trying to roll through fireballs. You might be able to tick into one (note you have to so it after a light hit, not cancel it) if you get someone scared enough, but it's pretty risky. Has invincibility to lows near the end.
- (db) f + K
See description on Movelist section.
Desperation Moves
- Ryuuko Ranbu (qcf hcb + P) - A version is extremely fast and safe on block from 99% of everything, but it is possible to trade with attacks that are already out. C version is completely invincible on startup, but he freezes for a bit longer. Can go through fireballs, too. One of the scariest supers in the game. Use it as anti-air, anti-roll, etc. If your opponent doesn't tech roll after this, you can go for a qcf + A, hcb + B unblockable fireball setup. Fun fact: the C version can be thrown on reaction. So if you think someone will wakeup with it, you can be a dick and throw them out of it. No real point to that, since that one is punishable anyway. Max version is totally invincible and punishable.
- Super O.L.D. Punch (qcf qcf + P) - Proximity unblockable. A version is faster, C version can be thrown on reaction. It's kind of hard to land with Takuma since he doesn't have the setups that some other characters have. Not necessarily a bad super, they just gave it to the wrong character. Still, empty short hop into this, etc. can work. Experiment and read your opponent!
Fastest Attacks
- 0F: C throw; D throw
- 1F: -
- 2F: -
- 3F: cl.A; cl.C; st.A; cr.A; cr.B; cr.C
- 4F: cl.B; st.B
- 5F: -
- 6F: -
- 7F: cl.D; cr.D; f + A
- 8F: st.C
- 9F: -
- 10F: qcb + A
Combos
Takuma has a few different variations that lead into super, so experiment and find the one you're most comfortable with.
- Best jump-ins:
- j.D (Can crossup.)
- cr.A / cr B x 2 > f + A > C Fireball (qcf + C)
- cr.A / cr.B x 3+ >
- f + A > (S)DM A Ryuuko Ranbu (qcf hcb + A)
- (S)DM A Ryuuko Ranbu (qcf hcb + A)
- f + A (Late cancel.) (Hard knockdown and more damage than normal cancel - the same damage of qcf + C.)
- cr.A / cr.B x 2 > f + b (optional) > (S)DM A Ryuuko Ranbu (qcf hcb + A)
- cr.A / cr.B > (S)DM qcf qcf + A
Less damage and range then qcf hcf + A super, but works as an automatic hit confirm as the qcf qcf + A super will not trigger if opponent is blocking or out of range (the qcf + A will trigger instead).
- Point blank: cr.A / cr.B >
- f + B > qcf + C
- qcb + A
- cl.C > f + A / f + B > (S)DM qcf hcb + A
Use f + B only if very close
- cl.C >
- f + A > qcf + C (Very close.)
- f + A (Late cancel.) (Hard knockdown and more damage than normal cancel - the same damage of qcf + C.)
- qcf + C
- cr.C > D Flying Kick ((db) f + D),
- Rapid Punches (f b f + P)
- st.CD > A Fireball (qcf + A), B Running Kneebash Grab (hcb + B) (unblockable fireball setup if they roll)
- Simple buffers:
- f + B > (S)DM qcf hcb + A
- qcf + B > hcb + A
- f + B > (S)DM qcf hcb + A
Always use cr.B to start, then switch to cr.A if you want for the last light hit, but you can also just use cr.B for all the hits. Remember to use the hold buffering method if you use f + A (ie hold down B and use qcf + A for f + A input, then hcb + A to super). That way you won't get a fireball. Using f + B won't require this, but it has less range. Personally I just use cr.B x 3 > qcf hcf + A.
Strategy Corner
- MAX: cr.B x 2 >
 + A >
+ A >  + C
+ C
deals ??? than
- cr.B x 2 >
 + A >
+ A > 
 + A
+ A
Keep this in mind, when you need to decide whether to trigger MAX or keep meter for a DM.
