No edit summary |
|||
| (37 intermediate revisions by 8 users not shown) | |||
| Line 1: | Line 1: | ||
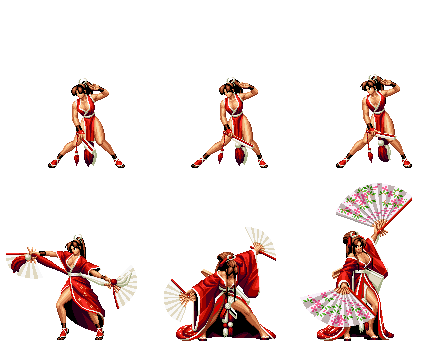
[[image:Mai-robe.gif|right]] | |||
==Introduction== | ==Introduction== | ||
Mai is one of the lead members in the Japanese hentai doujin mafia. | |||
===Colors=== | ===Colors=== | ||
{| | {| | ||
| Line 16: | Line 17: | ||
==Gameplay Overview== | ==Gameplay Overview== | ||
Mai is a very solid zoning/poking/runaway-based character. Her fast but higher than average jump and air dive lets her control the air a bit different from most characters. Her Ryuu Enbu, along with her Fan Toss and pokes allow her to zone and keep advantage on the ground quite effectively. While she falls mid to low-mid on most tier lists, it is misleading because she doesn't suffer matchups vs the top tier as bad as a lot of other characters that are usually ranked above her. She requires good execution/reflexes for hit-checking cr. | Mai is a very solid zoning/poking/runaway-based character. Her fast but higher than average jump and air dive lets her control the air a bit different from most characters. Her Ryuu Enbu, along with her Fan Toss and pokes allow her to zone and keep advantage on the ground quite effectively. While she falls mid to low-mid on most tier lists, it is misleading because she doesn't suffer matchups vs the top tier as bad as a lot of other characters that are usually ranked above her. She requires good execution/reflexes for hit-checking cr.[[File:Snkc.gif]], but aside from that she is pretty average on execution. A good character for a beginner. | ||
==In-depth analysis== | ==In-depth analysis== | ||
| Line 34: | Line 35: | ||
|align="center"| 4/2+2/8 | |align="center"| 4/2+2/8 | ||
|align="center"| 0/-2 | |align="center"| 0/-2 | ||
|align="center"| | |align="center"| C | ||
|align="center"| HL | |align="center"| HL | ||
|valign="bottom" style="border-right:0px;"| [[image:Mai98_clA1.png|center]] | |valign="bottom" style="border-right:0px;"| [[image:Mai98_clA1.png|center]] | ||
|valign="bottom" style="border-left:0px;"| [[image:Mai98_clA2.png|center]] | |valign="bottom" style="border-left:0px;"| [[image:Mai98_clA2.png|center]] | ||
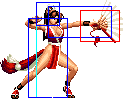
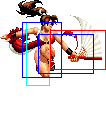
| | | Her best cancelable light attack (only other is cl.[[File:Snkb.gif]] and it sucks). | ||
|- | |- | ||
! [[image:snkb.gif]] | ! [[image:snkb.gif]] | ||
|align="center"| 5/3/7 | |align="center"| 5/3/7 | ||
|align="center"| +2/0 | |align="center"| +2/0 | ||
|align="center"| | |align="center"| C | ||
|align="center"| HL | |align="center"| HL | ||
|colspan="2" | [[image:Mai98_clB.png|center]] | |colspan="2" | [[image:Mai98_clB.png|center]] | ||
| | | It can cancel, but it's not great. Does have slightly better frame advantage than Cl.[[image:snka.gif]] | ||
|- | |- | ||
! [[image:snkc.gif]] | ! [[image:snkc.gif]] | ||
|align="center"| 3/3/20 | |align="center"| 3/3/20 | ||
|align="center"| -3/-5 | |align="center"| -3/-5 | ||
|align="center"| | |align="center"| C | ||
|align="center"| HL | |align="center"| HL | ||
|colspan="2" | [[image:Mai98_clC.png|center]] | |colspan="2" | [[image:Mai98_clC.png|center]] | ||
| | | Good anti-air when they are at a close/high angle. Fast, cancelable. | ||
|- | |- | ||
! [[image:snkd.gif]] | ! [[image:snkd.gif]] | ||
|align="center"| 5/6/22 | |align="center"| 5/6/22 | ||
|align="center"| -8/-10 | |align="center"| -8/-10 | ||
|align="center"| | |align="center"| C | ||
|align="center"| HL | |align="center"| HL | ||
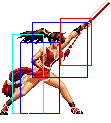
|colspan="2" | [[image:Mai98_clD.png|center]] | |colspan="2" | [[image:Mai98_clD.png|center]] | ||
| | | Kind of like cl.[[File:Snkc.gif]], but it doesn't activate from as far, so stick with cl.[[File:Snkc.gif]]. | ||
|- | |- | ||
|colspan="8" align="center"| '''Standing Far''' | |colspan="8" align="center"| '''Standing Far''' | ||
| Line 69: | Line 70: | ||
|align="center"| 3/3/11 | |align="center"| 3/3/11 | ||
|align="center"| -2/-4 | |align="center"| -2/-4 | ||
| | |align="center"| - | ||
|align="center"| HL | |align="center"| HL | ||
|colspan="2" | [[image:Mai98_stA.png|center]] | |colspan="2" | [[image:Mai98_stA.png|center]] | ||
| | | Nice fast poke, just a little short-ranged. Good followup after a meaty [[File:Qcb.png]] + [[image:snka.gif]] in the corner. | ||
|- | |- | ||
! [[image:snkb.gif]] | ! [[image:snkb.gif]] | ||
|align="center"| 5/6/10 | |align="center"| 5/6/10 | ||
|align="center"| -4/-6 | |align="center"| -4/-6 | ||
| | |align="center"| - | ||
|align="center"| HL | |align="center"| HL | ||
|colspan="2" | [[image:Mai98_stB.png|center]] | |colspan="2" | [[image:Mai98_stB.png|center]] | ||
| | | Fast, great as a short hop anti-air. Whiffs on crouchers, but the recovery is quick. | ||
|- | |- | ||
! [[image:snkc.gif]] | ! [[image:snkc.gif]] | ||
|align="center"| 7/4+5/16 | |align="center"| 7/4+5/16 | ||
|align="center"| -5/-7 | |align="center"| -5/-7 | ||
| | |align="center"| - | ||
|align="center"| HL | |align="center"| HL | ||
|valign="bottom" style="border-right:0px;"| [[image:Mai98_stC1.png|center]] | |valign="bottom" style="border-right:0px;"| [[image:Mai98_stC1.png|center]] | ||
|valign="bottom" style="border-left:0px;"| [[image:Mai98_stC2.png|center]] | |valign="bottom" style="border-left:0px;"| [[image:Mai98_stC2.png|center]] | ||
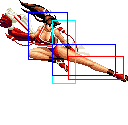
| | | This is a reasonably good short hop anti-air, and sometimes hits moves in poke wars. | ||
|- | |- | ||
! [[image:snkd.gif]] | ! [[image:snkd.gif]] | ||
|align="center"| 8/5/15 | |align="center"| 8/5/15 | ||
|align="center"| 0/-2 | |align="center"| 0/-2 | ||
| | |align="center"| - | ||
|align="center"| HL | |align="center"| HL | ||
|colspan="2"| [[image:Mai98_stD.png|center]] | |colspan="2"| [[image:Mai98_stD.png|center]] | ||
| | | Only noteworthy feature is that it can go over lows. | ||
|- | |- | ||
! [[image:snkc.gif]]+[[image:snkd.gif]] | ! [[image:snkc.gif]]+[[image:snkd.gif]] | ||
|align="center"| 17/5/24 | |align="center"| 17/5/24 | ||
|align="center"| KD/-7 | |align="center"| KD/-7 | ||
|align="center"| S | |align="center"| S | ||
|align="center"| HL | |align="center"| HL | ||
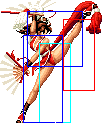
|colspan="2"| [[image:Mai98_stCD.png|center]] | |colspan="2"| [[image:Mai98_stCD.png|center]] | ||
| | | Standard [[image:snkc.gif]]+[[image:snkd.gif]]. | ||
|- | |- | ||
|colspan="8" align="center"| '''Crouching''' | |colspan="8" align="center"| '''Crouching''' | ||
| Line 112: | Line 113: | ||
|align="center"| 5/3/9 | |align="center"| 5/3/9 | ||
|align="center"| 0/-2 | |align="center"| 0/-2 | ||
|align="center"| | |align="center"| - | ||
|align="center"| HL | |align="center"| HL | ||
|colspan="2" | [[image:Mai98_crA.png|center]] | |colspan="2" | [[image:Mai98_crA.png|center]] | ||
| | | Pretty good range but otherwise un-remarkable, as it can't cancel. | ||
|- | |- | ||
! [[image:snkb.gif]] | ! [[image:snkb.gif]] | ||
|align="center"| 5/4/7 | |align="center"| 5/4/7 | ||
|align="center"| +1/-1 | |align="center"| +1/-1 | ||
|align="center"| | |align="center"| - | ||
|align="center"| L | |align="center"| L | ||
|colspan="2" | [[image:Mai98_crB.png|center]] | |colspan="2" | [[image:Mai98_crB.png|center]] | ||
| | | It's very slow and crappy for a cr.[[File:Snkb.gif]], but it's her only combo-able low attack. | ||
|- | |- | ||
! [[image:snkc.gif]] | ! [[image:snkc.gif]] | ||
|align="center"| 3/7/15 | |align="center"| 3/7/15 | ||
|align="center"| -2/-4 | |align="center"| -2/-4 | ||
|align="center"| | |align="center"| C | ||
|align="center"| HL | |align="center"| HL | ||
|colspan="2" | [[image:Mai98_crC.png|center]] | |colspan="2" | [[image:Mai98_crC.png|center]] | ||
| | | The main combo/meaty normal. Lots of time to hit-confirm into [[File:Hcf.png]] + [[File:K.png]] or [[File:Qcb.png]] [[File:Hcf.png]] + [[File:K.png]] off a normal hit, if it's meaty if course you'll have less time depending on how early you do it. | ||
|- | |- | ||
! [[image:snkd.gif]] | ! [[image:snkd.gif]] | ||
|align="center"| 7/7/20 | |align="center"| 7/7/20 | ||
|align="center"| KD/-9 | |align="center"| KD/-9 | ||
|align="center"| | |align="center"| C | ||
|align="center"| L | |align="center"| L | ||
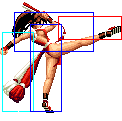
|colspan="2" | [[image:Mai98_crD.png|center]] | |colspan="2" | [[image:Mai98_crD.png|center]] | ||
| | | Sweep, pretty meaty but otherwise insignificant. Cancelable. | ||
|- | |- | ||
|colspan="8" align="center"| '''Jump''' | |colspan="8" align="center"| '''Jump''' | ||
| Line 146: | Line 147: | ||
|align="center"| 6/7 | |align="center"| 6/7 | ||
|align="center"| -/- | |align="center"| -/- | ||
| | |align="center"| C | ||
|align="center"| H | |align="center"| H | ||
|colspan="2" | [[image:Mai98_jA.png|center]] | |colspan="2" | [[image:Mai98_jA.png|center]] | ||
| | | Cancelable, otherwise not great. | ||
|- | |- | ||
! [[image:snkb.gif]] | ! [[image:snkb.gif]] | ||
|align="center"| 4/11 | |align="center"| 4/11 | ||
|align="center"| -/- | |align="center"| -/- | ||
| | |align="center"| - | ||
|align="center"| H | |align="center"| H | ||
|colspan="2" | [[image:Mai98_jB.png|center]] | |colspan="2" | [[image:Mai98_jB.png|center]] | ||
| | | Very nice hitbox/high priority, can cross-up. | ||
|- | |- | ||
! [[image:snkc.gif]] | ! [[image:snkc.gif]] | ||
|align="center"| 5/8 | |align="center"| 5/8 | ||
|align="center"| -/- | |align="center"| -/- | ||
| | |align="center"| C | ||
|align="center"| H | |align="center"| H | ||
|colspan="2" | [[image:Mai98_jC.png|center]] | |colspan="2" | [[image:Mai98_jC.png|center]] | ||
| | | Fast, actually pretty good for air-to-air or as a jump-in. Like Chizuru's jumping [[File:Snkc.gif]], it has less hit-freeze than most jump attacks, so you have to perform your ground followup from a jump-in very quickly. Cancelable. | ||
|- | |- | ||
! [[image:snkd.gif]] | ! [[image:snkd.gif]] | ||
|align="center"| 4/9 | |align="center"| 4/9 | ||
|align="center"| -/- | |align="center"| -/- | ||
| | |align="center"| - | ||
|align="center"| H | |align="center"| H | ||
|colspan="2"| [[image:Mai98_jD.png|center]] | |colspan="2"| [[image:Mai98_jD.png|center]] | ||
| | | Nice long-range jump-in, pretty fast too. Usually the jump-in of choice, and good jumping back air-to-air. Cancelable. | ||
|- | |- | ||
! [[image:snkc.gif]]+[[image:snkd.gif]] | ! [[image:snkc.gif]]+[[image:snkd.gif]] | ||
|align="center"| 13/4 | |align="center"| 13/4 | ||
|align="center"| KD/- | |align="center"| KD/- | ||
| | |align="center"| S | ||
|align="center"| HL | |align="center"| HL | ||
|colspan="2"| [[image:Mai98_jCD.png|center]] | |colspan="2"| [[image:Mai98_jCD.png|center]] | ||
| | | Not bad, though the hitbox leaves a bit to be desired for an air [[File:Snkc.gif]]+[[File:Snkd.gif]] in my opinion. I think it's her jump speed/angle that makes it not as good as it could be. Still, there it is, and it's cancelable. | ||
|- | |- | ||
|colspan="8" align="center"| '''Neutral Jump''' | |colspan="8" align="center"| '''Neutral Jump''' | ||
| Line 188: | Line 189: | ||
|align="center"| 6/7 | |align="center"| 6/7 | ||
|align="center"| -/- | |align="center"| -/- | ||
| | |align="center"| - | ||
|align="center"| H | |align="center"| H | ||
|colspan="2" | [[image:Mai98_njA.png|center]] | |colspan="2" | [[image:Mai98_njA.png|center]] | ||
| | | Not a good move, avoid. | ||
|- | |- | ||
! [[image:snkb.gif]] | ! [[image:snkb.gif]] | ||
|align="center"| 4/10 | |align="center"| 4/10 | ||
|align="center"| -/- | |align="center"| -/- | ||
| | |align="center"| - | ||
|align="center"| H | |align="center"| H | ||
|colspan="2" | [[image:Mai98_njB.png|center]] | |colspan="2" | [[image:Mai98_njB.png|center]] | ||
| | | Not a good move, avoid. | ||
|- | |- | ||
! [[image:snkc.gif]] | ! [[image:snkc.gif]] | ||
|align="center"| 4/9 | |align="center"| 4/9 | ||
|align="center"| -/- | |align="center"| -/- | ||
| | |align="center"| - | ||
|align="center"| H | |align="center"| H | ||
|colspan="2" | [[image:Mai98_njC.png|center]] | |colspan="2" | [[image:Mai98_njC.png|center]] | ||
| | | Might be good to hit above you in the air, but Mai has other options. | ||
|- | |- | ||
! [[image:snkd.gif]] | ! [[image:snkd.gif]] | ||
|align="center"| 6/9 | |align="center"| 6/9 | ||
|align="center"| -/- | |align="center"| -/- | ||
| | |align="center"| - | ||
|align="center"| H | |align="center"| H | ||
|colspan="2"| [[image:Mai98_njD.png|center]] | |colspan="2"| [[image:Mai98_njD.png|center]] | ||
| | | Probably her best NJ tool, hits far from Mai. As a combo tool, [[File:D.png]]+[[image:snka.gif]] is much better. | ||
|- | |- | ||
|colspan="8" align="center"| '''Command Normals''' | |colspan="8" align="center"| '''Command Normals''' | ||
|- | |- | ||
! <br> | ! <br>[[File:F.png]] + [[image:snkb.gif]]<br><br> | ||
|align="center"| 28/5/9 | |align="center"| 28/5/9 | ||
|align="center"| +6/+4 | |align="center"| +6/+4 | ||
|align="center"| | |align="center"| - | ||
|align="center"| H | |align="center"| H | ||
|colspan="2"| [[image:Mai98_fB.png|center]] | |colspan="2" rowspan="2"| [[image:Mai98_fB.png|center]] | ||
| | |rowspan="2"| Slow overhead, causes enough hitstun to combo a cr.[[File:Snkc.gif]] afterward. Advantage on block. When chained, is still really slow and not overhead, and cancelable (into air [[File:Qcb.png]] + [[File:P.png]]). You can slow cancel it, but remember it's REALLY slow. Can be used as a meaty. | ||
|- | |- | ||
! <br>df+[[image:snkb.gif]]<br><br> | ! <br>[[File:F.png]] + [[image:snkb.gif]]<br>(cancel)<br> | ||
|align="center"| 28/5/9 | |||
|align="center"| +6/+4 | |||
|align="center"| S (air moves) | |||
|align="center"| HL | |||
|- | |||
! <br>[[File:df.png]] + [[image:snkb.gif]]<br><br> | |||
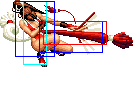
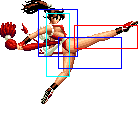
|align="center"| 7/9(7)4/32 | |align="center"| 7/9(7)4/32 | ||
|align="center"| -16/-18 | |align="center"| -16/-18 | ||
|align="center"| | |align="center"| - | ||
|align="center"| L,HL | |align="center"| L,HL | ||
|valign="bottom" style="border-right:0px;"| [[image:Mai98_dfB1.png|center]] | |valign="bottom" style="border-right:0px;"| [[image:Mai98_dfB1.png|center]] | ||
|valign="bottom" style="border-left:0px;"| [[image:Mai98_dfB2.png|center]] | |valign="bottom" style="border-left:0px;"| [[image:Mai98_dfB2.png|center]] | ||
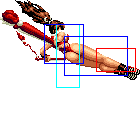
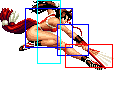
| | | Combos from any chainable attack, but it has really bad recovery. You can go under the highest fireballs with it (EX Ryo/EX Robert/EX Yuri/Takuma). | ||
|- | |- | ||
! | ! air [[File:D.png]] + [[image:snka.gif]] | ||
|align="center"| 8/4 | |align="center"| 8/4 | ||
|align="center"| -/- | |align="center"| -/- | ||
|align="center"| | |align="center"| - | ||
|align="center"| HL | |align="center"| HL | ||
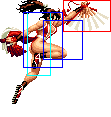
|colspan="2"| [[image:Mai98_jdA.png|center]] | |colspan="2"| [[image:Mai98_jdA.png|center]] | ||
| | | More hitstun/blockstun than a normal jumping attack, like Kyo's jumping [[File:D.png]] + [[File:Snkc.gif]]. Cancelable, slams on an air-to-air hit. Can crossup if you hit them right on the head. | ||
|} | |} | ||
===Normal Throws=== | ===Normal Throws=== | ||
''' | * '''[[File:B.png]]/[[File:F.png]] + [[File:Snkc.gif]]''' - Breakable, forward knockdown, face forward, rollable. | ||
* '''[[File:B.png]]/[[File:F.png]] + [[File:Snkd.gif]]''' - Breakable, reverse knockdown, back turned, un-rollable. | |||
''' | * '''[[File:B.png]]/[[File:F.png]]/[[File:D.png]] + [[File:Snkc.gif]]/[[File:Snkd.gif]] in air''' - Unbreakable air throw, front knockdown, face forward, un-rollable | ||
''' | [[File:Snkd.gif]] throw is preferred, since the startup doesn't have the blue grab 'effect', making it a bit harder to break on reaction. | ||
===Other Normal Moves=== | |||
''' | * Jump: Mai is able to jump off of the wall by pressing forward when her back is to the wall. | ||
===Special Moves=== | |||
* '''Kachosen ([[File:Qcf.png]] + [[File:P.png]])''' - Similar properties to Athena/Kensou fireballs (same things go under them ie some slides and Iori's super). Decent to zone with from long range. Not really to use at mid range, since she has [[File:Qcb.png]] + [[File:Snka.gif]]. Average recovery, etc. What more is there to say, it's a fireball! | |||
''' | * '''Ryuu Enbu ([[File:Qcb.png]] + [[File:P.png]])''' - [[File:Snka.gif]] version is a single hit, better recovery. [[File:Snkc.gif]] version has an extra hit when she starts to turn, which lets it combo from a light hit, and has a bit more recovery. This is your #1 move, use it and abuse it. Stays out for a long time, great as an anti-air especially from a distance, at least trades (in your favor) with any jump-in from the appropriate angle. Does a shit ton of stun damage (dizzies quickly). Great as a meaty. | ||
''' | * '''Hakuro no Mai ([[File:Dp.png]] + [[File:P.png]])''' - This move sucks. You can use it for chip damage at the end of a round. | ||
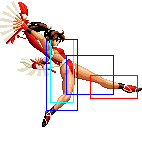
''' | * '''Chijou Musasabi no Mai (charge ([[File:D.png]] > [[File:ub.png]]/[[File:U.png]]/[[File:uf.png]] + [[File:P.png]] - hold [[File:P.png]])''' - (Wall dive) You an choose the direction you fly with [[File:ub.png]] or [[File:uf.png]]. Hold [[File:P.png]] to attack when you reach the wall. [[File:Snka.gif]] dives at a steeper angle than [[File:Snkc.gif]]. Not only is it good for runaway, but it builds meter, too. Mixup not attacking and attacking if they try to follow you in. | ||
* '''Hissatsu Shinobibachi ([[File:Hcf.png]] + [[File:K.png]])''' - [[File:Snkb.gif]] version is faster, combos from light hits. Both are punishable. Use as a max combo damage ender when you don't have meter, and always hit-confirm it if you aren't punishing something. Good to use by itself as an easy punisher to some things that require a long range, fast attack. | |||
''' | * '''Hisho Ryu En Jin ([[File:Dp.png]] + [[File:K.png]])''' - (Flame Strike) [[File:Snkb.gif]] version is not invincible, [[File:Snkd.gif]] version is invincible up to the hit (ie it will trade with meaties at best as a reversal). An okay uppercut. The first hit doesn't knock down, and the second hit commonly whiffs at longer ranges, so be careful. A good idea to only use as anti-air or at point-blank range. | ||
* '''Kuuchuu Musasabi no Mai ([[File:Qcb.png]] + [[File:P.png]])''' - [[File:Snka.gif]] version travels at a steeper angle, [[File:Snkc.gif]] version goes further. Safe if blocked from max distance. Use to punish things while jumping back, or cancel air attacks into it as a blockstring/hit a mash. Another tool to control the air with. | |||
===Desperation Moves=== | |||
''' | * '''Cho Hissatsu Shinobibachi ([[File:Qcb.png]] [[File:Hcf.png]] + [[File:K.png]])''' - Super unsafe, not invincible, pretty fast. Combos off of stuff, so...use it in a combo. MAX version is invincible up to the hit (can trade with active attacks) and does more damage. | ||
''' | * '''Sui Chou no Mai ([[File:Qcf.png]] [[File:Qcf.png]] + [[File:P.png]])''' - [[File:Snka.gif]]/[[File:Snkc.gif]] control the speed. Okay for stalling/chip damage at full-screen to end a round, but you can guard cancel roll or just roll through the 3rd fan in some situations. You can't slide/super under this like you can her normal Fan Toss. MAX version does more damage. | ||
''' | * '''Houou no Mai ([[File:Qcb.png]] [[File:Qcb.png]] + [[File:P.png]])''' - [[File:Snka.gif]]/[[File:Snkc.gif]] control the angle (steep/shallow respectively). Can cross-up, punishable. Good for shenanigans as an ambiguous crossup, but anyone good will just roll away. If the MAX version hits in the air (and it won't because it's not invincible as she jumps), it will do like a billion hits and damage, especially if it hits on counter. | ||
== | == Fastest Attacks == | ||
''' | * 0F: [[File:Snkc.gif]] throw; [[File:Snkd.gif]] throw | ||
* 1F: - | |||
* 2F: - | |||
* 3F: '''cl.[[File:Snkc.gif]]'''; st.[[File:Snka.gif]]; '''cr.[[File:Snkc.gif]]''' | |||
* 4F: '''cl.[[File:Snka.gif]]''' | |||
* 5F: '''cl.[[File:Snkb.gif]]'''; '''cl.[[File:Snkd.gif]]'''; st.[[File:Snkb.gif]]; cr.[[File:Snka.gif]]; cr.[[File:Snka.gif]] | |||
* 6F: - | |||
* 7F: st.[[File:Snkc.gif]]; '''cr.[[File:Snkd.gif]]'''; [[File:df.png]] + [[File:Snkb.gif]] | |||
* 8F: st.[[File:Snkd.gif]] | |||
* 9F: - | |||
* 10F: - | |||
==Combos== | ==Combos== | ||
*cr. | * Best jump-ins: | ||
** j.[[File:Snkd.gif]] | |||
* cr.[[File:Snkc.gif]] / cl.[[File:Snkc.gif]] > | |||
** (S)DM [[File:Qcb.png]] [[File:Qcb.png]] + [[File:P.png]], [[File:Dp.png]] + [[File:Snkd.gif]] (Corner. Point blank. Standing. Tall character.) | |||
** (S)DM Super Killing Ninja Strike ([[File:Qcb.png]] [[File:Hcf.png]] + [[File:K.png]]) | |||
** (S)DM [[File:Qcf.png]] [[File:Qcf.png]] + [[File:P.png]] (Corner. Out of corner the last hit is blockable.) | |||
** Killing Ninja Strike ([[File:Hcf.png]] + [[File:Snkd.gif]]) | |||
** [[File:Snkc.gif]] Ryuu Enbu ([[File:Qcb.png]] + [[File:Snkc.gif]]) | |||
** [[File:Snka.gif]] Ryuu Enbu ([[File:Qcb.png]] + [[File:Snka.gif]]) | |||
* cr.[[File:Snkb.gif]], cl.[[File:Snka.gif]] > | |||
** (S)DM Super Killing Ninja Strike ([[File:Qcb.png]] [[File:Hcf.png]] + [[File:K.png]]) | |||
** [[File:Snkb.gif]] Killing Ninja Strike ([[File:Hcf.png]] + [[File:Snkb.gif]]) | |||
** [[File:Snkc.gif]] Ryuu Enbu ([[File:Qcb.png]] + [[File:Snkc.gif]]) | |||
* [[File:F.png]] + [[File:Snkb.gif]], cr.[[File:Snkc.gif]] > | |||
** (S)DM Super Killing Ninja Strike ([[File:Qcb.png]] [[File:Hcf.png]] + [[File:K.png]] | |||
** (S)DM [[File:Qcf.png]] [[File:Qcf.png]] + [[File:P.png]] (Corner. Out of corner the last hit is blockable.) | |||
** Killing Ninja Strike ([[File:Hcf.png]] + [[File:Snkd.gif]]) | |||
** [[File:Snkc.gif]] Ryuu Enbu ([[File:Qcb.png]] + [[File:Snkc.gif]]) | |||
** [[File:Snka.gif]]Ryuu Enbu ([[File:Qcb.png]] + [[File:Snka.gif]]) | |||
* Corner only & meaty: [[File:Snka.gif]] Ryuu Enbu ([[File:Qcb.png]] + [[File:Snka.gif]]), | |||
** cr.[[File:Snkc.gif]] > | |||
*** (S)DM Super Killing Ninja Strike ([[File:Qcb.png]] [[File:Hcf.png]] + [[File:K.png]]) | |||
*** (S)DM [[File:Qcf.png]] [[File:Qcf.png]] + [[File:P.png]] (Corner. Out of corner last hit is blockable.) | |||
*** Killing Ninja Strike ([[File:Hcf.png]] + [[File:Snkd.gif]]) | |||
*** [[File:Snkc.gif]] Ryuu Enbu ([[File:Qcb.png]] + [[File:Snkc.gif]]) | |||
*** [[File:Snka.gif]] Ryuu Enbu ([[File:Qcb.png]] + [[File:Snka.gif]]) | |||
** (S)DM Super Killing Ninja Strike ([[File:Qcb.png]] [[File:Hcf.png]] + [[File:K.png]]) | |||
** [[File:Snkb.gif]] Killing Ninja Strike ([[File:Hcf.png]] + [[File:Snkb.gif]]) | |||
** [[File:Snkc.gif]] Ryuu Enbu ([[File:Qcb.png]] + [[File:Snkc.gif]]) | |||
** st.[[File:Snka.gif]] / st.[[File:Snkb.gif]] | |||
* Simple buffers: | |||
** cr.[[File:Snkb.gif]], cl.[[File:Snka.gif]] > (S)DM [[File:Qcb.png]] [[File:Hcf.png]] + [[File:K.png]] | |||
*** cr.[[File:Snkb.gif]], [[File:Qcb.png]] + [[File:Snka.gif]] > hcf + [[File:K.png]] (As cr.[[File:Snkb.gif]] is not cancelable, [[File:Qcb.png]] + [[File:Snka.gif]] will chain into a normal attack.) | |||
** cl.[[File:Snkd.gif]] / cl.[[File:Snkb.gif]] > (S)DM [[File:Qcb.png]] [[File:Hcf.png]] + [[File:K.png]] | |||
*** [[File:Qcb.png]] + [[File:Snkd.gif]]/[[File:Snkb.gif]] > [[File:Hcf.png]] + [[File:K.png]] | |||
** cl.[[File:Snkd.gif]] > (S)DM [[File:Qcf.png]] [[File:Qcf.png]] + [[File:P.png]] | |||
*** [[File:Qcf.png]] + [[File:Snkd.gif]] > [[File:Qcf.png]] + [[File:P.png]] | |||
Note that cr.[[File:Snkc.gif]] is hit-confirmable, so never do [[File:Hcf.png]] + [[File:K.png]] or (S)DM [[File:Qcb.png]] [[File:Hcf.png]] + [[File:K.png]] on block obviously. | |||
The qcb + [[File:Snkc.gif]] will hit only once from distance, in this case it will do a tiny less damage than [[File:Qcb.png]] + [[File:Snka.gif]], but as [[File:Qcb.png]] + [[File:Snka.gif]] has less range, it is very specific the range where [[File:Qcb.png]] + [[File:Snka.gif]] will still hit and [[File:Qcb.png]] + [[File:Snkc.gif]] will do only one hit. | |||
* | {{StrategyCorner| | ||
* MAX: cr.[[File:Snkc.gif]] > [[File:Hcf.png]] + [[File:Snkd.gif]] | |||
deals a little less than | |||
* | * cr.[[File:Snkc.gif]] > [[File:Qcb.png]] [[File:Hcf.png]] + [[File:K.png]] | ||
Keep this in mind, when you need to decide whether to trigger MAX or keep meter for a DM. | |||
}} | |||
{{ | == Links == | ||
{{Navbox-KOF98}} | |||
[[Category:The King of Fighters '98: The Slugfest]] | [[Category:The King of Fighters '98: The Slugfest]] | ||
Latest revision as of 06:08, 10 January 2022
Introduction
Mai is one of the lead members in the Japanese hentai doujin mafia.
Colors

|

|

|

|
Gameplay Overview
Mai is a very solid zoning/poking/runaway-based character. Her fast but higher than average jump and air dive lets her control the air a bit different from most characters. Her Ryuu Enbu, along with her Fan Toss and pokes allow her to zone and keep advantage on the ground quite effectively. While she falls mid to low-mid on most tier lists, it is misleading because she doesn't suffer matchups vs the top tier as bad as a lot of other characters that are usually ranked above her. She requires good execution/reflexes for hit-checking cr.![]() , but aside from that she is pretty average on execution. A good character for a beginner.
, but aside from that she is pretty average on execution. A good character for a beginner.
In-depth analysis
Movelist
Normal Throws
![]() throw is preferred, since the startup doesn't have the blue grab 'effect', making it a bit harder to break on reaction.
throw is preferred, since the startup doesn't have the blue grab 'effect', making it a bit harder to break on reaction.
Other Normal Moves
- Jump: Mai is able to jump off of the wall by pressing forward when her back is to the wall.
Special Moves
- Kachosen (
 +
+  ) - Similar properties to Athena/Kensou fireballs (same things go under them ie some slides and Iori's super). Decent to zone with from long range. Not really to use at mid range, since she has
  +
+  . Average recovery, etc. What more is there to say, it's a fireball!
- Ryuu Enbu (
 +
+  ) -
) -  version is a single hit, better recovery.
  version has an extra hit when she starts to turn, which lets it combo from a light hit, and has a bit more recovery. This is your #1 move, use it and abuse it. Stays out for a long time, great as an anti-air especially from a distance, at least trades (in your favor) with any jump-in from the appropriate angle. Does a shit ton of stun damage (dizzies quickly). Great as a meaty.
- Chijou Musasabi no Mai (charge (
 >
>  /
/ /
/ +
+  - hold
  ) - (Wall dive) You an choose the direction you fly with
  or
or  . Hold
  to attack when you reach the wall.
  dives at a steeper angle than
  . Not only is it good for runaway, but it builds meter, too. Mixup not attacking and attacking if they try to follow you in.
- Hissatsu Shinobibachi (
 +
+  ) -
) -  version is faster, combos from light hits. Both are punishable. Use as a max combo damage ender when you don't have meter, and always hit-confirm it if you aren't punishing something. Good to use by itself as an easy punisher to some things that require a long range, fast attack.
- Hisho Ryu En Jin (
 +
+  ) - (Flame Strike)
  version is not invincible,
  version is invincible up to the hit (ie it will trade with meaties at best as a reversal). An okay uppercut. The first hit doesn't knock down, and the second hit commonly whiffs at longer ranges, so be careful. A good idea to only use as anti-air or at point-blank range.
- Kuuchuu Musasabi no Mai (
 +
+  ) -
) -  version travels at a steeper angle,
  version goes further. Safe if blocked from max distance. Use to punish things while jumping back, or cancel air attacks into it as a blockstring/hit a mash. Another tool to control the air with.
Desperation Moves
- Cho Hissatsu Shinobibachi (

 +
+  ) - Super unsafe, not invincible, pretty fast. Combos off of stuff, so...use it in a combo. MAX version is invincible up to the hit (can trade with active attacks) and does more damage.
- Sui Chou no Mai (

 +
+  ) -
) -  /
/ control the speed. Okay for stalling/chip damage at full-screen to end a round, but you can guard cancel roll or just roll through the 3rd fan in some situations. You can't slide/super under this like you can her normal Fan Toss. MAX version does more damage.
- Houou no Mai (

 +
+  ) -
) -  /
/ control the angle (steep/shallow respectively). Can cross-up, punishable. Good for shenanigans as an ambiguous crossup, but anyone good will just roll away. If the MAX version hits in the air (and it won't because it's not invincible as she jumps), it will do like a billion hits and damage, especially if it hits on counter.
Fastest Attacks
- 0F:
 throw;
  throw
throw - 1F: -
- 2F: -
- 3F: cl.
 ; st.
; st. ; cr.
; cr.
- 4F: cl.

- 5F: cl.
 ; cl.
; cl. ; st.
; st. ; cr.
; cr. ; cr.
; cr.
- 6F: -
- 7F: st.
 ; cr.
; cr. ;
;  +
+ 
- 8F: st.

- 9F: -
- 10F: -
Combos
- Simple buffers:
Note that cr.![]() is hit-confirmable, so never do
is hit-confirmable, so never do ![]() +
+ ![]() or (S)DM
or (S)DM ![]()
![]() +
+ ![]() on block obviously.
on block obviously.
The qcb + ![]() will hit only once from distance, in this case it will do a tiny less damage than
will hit only once from distance, in this case it will do a tiny less damage than ![]() +
+ ![]() , but as
, but as ![]() +
+ ![]() has less range, it is very specific the range where
has less range, it is very specific the range where ![]() +
+ ![]() will still hit and
will still hit and ![]() +
+ ![]() will do only one hit.
will do only one hit.
