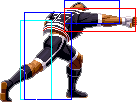
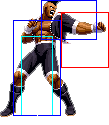
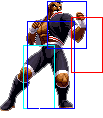
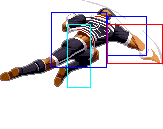
(→Combos) |
No edit summary |
||
| (62 intermediate revisions by 12 users not shown) | |||
| Line 1: | Line 1: | ||
= | [[image:HeavyD98_stance.gif|right]] | ||
Heavy D! | == Heavy D! == | ||
{{KOF98CharacterBox| KOF98_heavyd_small.png}} | |||
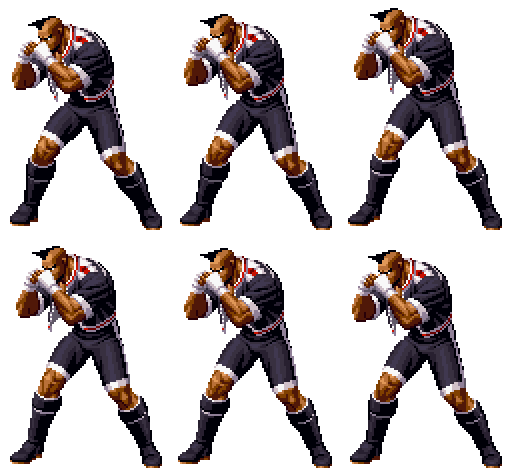
Heavy D! is a black boxer/actor/rap artist from the U.S.A. The D in his name is a mystery. | |||
{{Nutshell| | |||
Heavy D! | Heavy D! is a combo/poking/mixup-based character with some decent mid-range pokes and the fastest backdash in the game. He is a low-mid tier character, but he still has all the tools to win and is only really lacking a good reversal. He is not such a good character for beginners, since nothing he has is really abusable; playing Heavy D requires fast execution and good knowledge of matchups and his normal's properties to make him shine. | ||
}} | |||
===Colors=== | |||
{| | |||
! [[image:snka.gif]] | |||
! [[image:snkb.gif]] | |||
! [[image:snkc.gif]] | |||
! [[image:snkd.gif]] | |||
|- | |||
| [[image:HeavyD98_colorA.png]] | |||
| [[image:HeavyD98_colorB.png]] | |||
| [[image:HeavyD98_colorC.png]] | |||
| [[image:HeavyD98_colorD.png]] | |||
|} | |||
= | =In-depth Analysis= | ||
==[[The King of Fighters 2002/Normals Guide|Movelist]]== | |||
{|border="1" | |||
! | |||
! Frames | |||
! Advantage | |||
! Cancel | |||
! Block | |||
!colspan="2"| Hitbox | |||
! Notes | |||
|- | |||
|colspan="8" align="center"| '''Standing Close''' | |||
|- | |||
! [[image:snka.gif]] | |||
|align="center"| 2/5/8 | |||
|align="center"| +1/-1 | |||
|align="center"| C | |||
|align="center"| HL | |||
|colspan="2" | [[image:HeavyD98_clA.png|center]] | |||
| | |||
|- | |||
! [[image:snkb.gif]] | |||
|align="center"| 4/4/6 | |||
|align="center"| +2/0 | |||
|align="center"| C | |||
|align="center"| HL | |||
|colspan="2" | [[image:HeavyD98_clB.png|center]] | |||
| | |||
|- | |||
! [[image:snkc.gif]] | |||
|align="center"| 5/8/9 | |||
|align="center"| +3/+1 | |||
|align="center"| C | |||
|align="center"| HL | |||
|colspan="2" | [[image:HeavyD98_clC.png|center]] | |||
| | |||
|- | |||
! [[image:snkd.gif]] | |||
|align="center"| 4/3*3/21 | |||
|align="center"| -4/-6 | |||
|align="center"| -/C | |||
|align="center"| HL/HL | |||
|valign="bottom" style="border-right:0px;"| [[image:HeavyD98_clD1.png|center]] | |||
|valign="bottom" style="border-left:0px;"| [[image:HeavyD98_clD2.png|center]] | |||
| Decently fast and cancelable on 2nd hit, so it makes for easy comboing/hit-confirms. | |||
|- | |||
|colspan="8" align="center"| '''Standing Far''' | |||
|- | |||
! [[image:snka.gif]] | |||
|align="center"| 3/3/8 | |||
|align="center"| +1/-1 | |||
|align="center"| C | |||
|align="center"| HL | |||
|colspan="2" | [[image:HeavyD98_stA.png|center]] | |||
| Great anti-air vs short hop. | |||
|- | |||
! [[image:snkb.gif]] | |||
|align="center"| 4/4/9 | |||
|align="center"| -4/-6 | |||
|align="center"| C | |||
|align="center"| HL | |||
|colspan="2" | [[image:HeavyD98_stB.png|center]] | |||
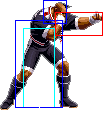
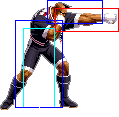
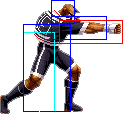
| Slower than A, but connects on crouching opponents and is cancelable. You can use this to substitute cr.A in combos or block strings. | |||
|- | |||
! [[image:snkc.gif]] | |||
|align="center"| 9/4/19 | |||
|align="center"| -4/-6 | |||
|align="center"| - | |||
|align="center"| HL | |||
|colspan="2"| [[image:HeavyD98_stC.png|center]] | |||
| Decent speed/reach mid poke. | |||
|- | |||
! [[image:snkd.gif]] | |||
|align="center"| 8/2+3/13 | |||
|align="center"| +2/0 | |||
|align="center"| - | |||
|align="center"| HL | |||
|valign="bottom" style="border-right:0px;"| [[image:HeavyD98_stD1.png|center]] | |||
|valign="bottom" style="border-left:0px;"| [[image:HeavyD98_stD2.png|center]] | |||
| | |||
|- | |||
! [[image:snkc.gif]]+[[image:snkd.gif]] | |||
|align="center"| 18/4/17 | |||
|align="center"| KD/+1 | |||
|align="center"| S | |||
|align="center"| HL | |||
|colspan="2"| [[image:HeavyD98_stCD.png|center]] | |||
| | |||
|- | |||
|colspan="8" align="center"| '''Crouching''' | |||
|- | |||
! [[image:snka.gif]] | |||
|align="center"| 3/4/5 | |||
|align="center"| +2/0 | |||
|align="center"| C | |||
|align="center"| HL | |||
|colspan="2" | [[image:HeavyD98_crA.png|center]] | |||
| Very long range for a standard cr.A. You can hit-confirm his super from a couple of these from a pretty good range, or even whiff-punish with a single cr.A into super. | |||
|- | |||
! [[image:snkb.gif]] | |||
|align="center"| 3/2/6 | |||
|align="center"| +2/0 | |||
|align="center"| - | |||
|align="center"| L | |||
|colspan="2" | [[image:HeavyD98_crB.png|center]] | |||
| Your fastest low, of course. Chainable into itself, cr.A, st.A, or st.B. Links into cr.C. | |||
|- | |||
! [[image:snkc.gif]] | |||
|align="center"| 3/2+4/22 | |||
|align="center"| -9/-11 | |||
|align="center"| C | |||
|align="center"| HL | |||
|valign="bottom" style="border-right:0px;"| [[image:HeavyD98_crC1.png|center]] | |||
|valign="bottom" style="border-left:0px;"| [[image:HeavyD98_crC2.png|center]] | |||
| Very fast and high priority move for anti-air as well as on the ground. It has bad horizontal range/recovery, but you can cancel this into a special on hit or on whiff with the same timing. Learn to do this so you don't ever whiff it raw. | |||
|- | |||
! [[image:snkd.gif]] | |||
|align="center"| 7/4/16 | |||
|align="center"| 0/-2 | |||
|align="center"| C | |||
|align="center"| L | |||
|colspan="2" | [[image:HeavyD98_crD.png|center]] | |||
| | |||
|- | |||
|colspan="8" align="center"| '''Jump''' | |||
|- | |||
! [[image:snka.gif]] | |||
|align="center"| 5/12 | |||
|align="center"| -/- | |||
|align="center"| - | |||
|align="center"| H | |||
|colspan="2" | [[image:HeavyD98_jA.png|center]] | |||
| Awesome jump-in. Similar to Kyo's j.B or Yashiro's j.A. | |||
|- | |||
! [[image:snkb.gif]] | |||
|align="center"| 5/12 | |||
|align="center"| -/- | |||
|align="center"| - | |||
|align="center"| H | |||
|colspan="2" | [[image:HeavyD98_jB.png|center]] | |||
| Awesome cross-up. Hits mostly behind him, but can hit from the front as well. | |||
|- | |||
! [[image:snkc.gif]] | |||
|align="center"| 6/2*(3)*7/- | |||
|align="center"| -/- | |||
|align="center"| -/- | |||
|align="center"| H/H | |||
|valign="bottom" style="border-right:0px;"| [[image:HeavyD98_jC1.png|center]] | |||
|valign="bottom" style="border-left:0px;"| [[image:HeavyD98_jC2.png|center]] | |||
| 2-hit jump-in move. You can time it like a normal just-in and just use the 1st hit, which looks the same as his jumping A. If you use both hits, depending on when they stand up it can change the timing for comboing because the 1st hit might whiff, but it is possible to hit most crouchers with both hits. The extra hit can help with a guard break. | |||
|- | |||
! [[image:snkd.gif]] | |||
|align="center"| 7/5 | |||
|align="center"| -/- | |||
|align="center"| - | |||
|align="center"| H | |||
|colspan="2"| [[image:HeavyD98_jD.png|center]] | |||
| | |||
|- | |||
! [[image:snkc.gif]]+[[image:snkd.gif]] | |||
|align="center"| 16/4 | |||
|align="center"| KD/- | |||
|align="center"| - | |||
|align="center"| HL | |||
|colspan="2"| [[image:HeavyD98_jCD.png|center]] | |||
| Decent speed, long reach. Good for air-to-air or air-to-ground. Try using it off a hyper hop where the tip of his fist will barely reach the opponent. | |||
|- | |||
|colspan="8" align="center"| '''Neutral Jump''' | |||
|- | |||
! [[image:snkb.gif]] | |||
|align="center"| 5/12 | |||
|align="center"| -/- | |||
|align="center"| - | |||
|align="center"| H | |||
|colspan="2" | [[image:HeavyD98_njB.png|center]] | |||
| Pretty good air-to-air. | |||
|- | |||
|colspan="8" align="center"| '''Command Normals''' | |||
|- | |||
! <br>f + [[image:snka.gif]]<br><br> | |||
|align="center"| 15/5/16 | |||
|align="center"| -1/-3 | |||
|align="center"| - | |||
|align="center"| H | |||
|rowspan="2" colspan="2"| [[image:HeavyD98_fA.png|center]] | |||
|rowspan="2"| Fast overhead when done alone, faster cancelable non-overhead when chained. Good for late-canceling from cr.A/C (ie chaining the f + A a little late to have it retain it's non-chained properties). | |||
|- | |||
! f + [[image:snka.gif]] (cancel) | |||
|align="center"| 9/5/16 | |||
|align="center"| -2/-4 | |||
|align="center"| S | |||
|align="center"| HL | |||
|} | |||
==Normal Throws== | |||
* '''b or f + C''' - Unbreakable (mashable), forward knockdown, face forward, rollable. | |||
* '''b or f + D''' - Unbreakable (mashable), reverse knockdown, back turned, un-rollable. | |||
D version preferred, but they are both good for being unbreakable throws. | |||
==Special Moves== | |||
* | * '''RSD aka Rolling Soul Diver (qcf + P)''' - Your main combo ender in meterless combos, lots of range so it won't ever miss. Both versions will combo from the same things, but A vesion has better recovery. On block it is punishable by fast long range moves like Iori's A rekkas, so be careful. The powered-up versions do more hits, and the C version knocks down. | ||
* | * '''Blast Upper (qcf + K)''' - D version is preferred due to range. A good safe move to end block strings with. It's also a good combo ender if you want a knockdown, but it's range is quite a bit less than RSD so it won't connect from that much stuff. The powered-up versions do 2 hits. As long as you space it right, qcf + D is safe on block. | ||
*'' | * '''Ducking Combination (qcb + P > qcb + P)''' - The first hit has invincibly as he's moving forward, so you can use this to go through fireballs or bait CD counters. A version is faster/less invincibility, C version slower/more invincibility. Note that it won't combo from anything. The followup qcb + P can be overhead (A version) or low (C version). Note that the C followup is a bit faster and will combo from the first qcb + P, but the overhead won't. The powered-up versions do additional hits and knockdown for both the first hits and the followup (depending if you stop at the first hit or not). | ||
''' | * '''Soul Flower (qcb + K)''' - Slow shitty dumb ass move. Okay you can use it as an early anti-air but come on. The powered-up versions do 2 hits. | ||
* '''Dancing Beat (dp + P)''' - A proximity unblockable. The Shadow (powered up) version does more hits and lets you juggle from it. | |||
* '''Shadow (d d + P)''' - Powers up all of Heady D's specials, making them do more hits/damage/safer etc. It also powers up itself, and behaves as a proximity unblockable like his Dancing Beat. This only powers moves up for one use, it's not stackable, and it also wears off if you get hit. | |||
==Desperation Moves== | |||
* '''D. Crazy (qcb hcf + P)''' - His main source of combo damage, and comboable from cr.A as well as heavier attacks. Very fast (you can punish incompleted Iori rekkas with it), invinciblity on startup, and punishable by very fast moves like cr.A. MAX version does more damage, and is very punishable due to a pause in the hits. | |||
* '''D. Magnum (qcf qcf + P)''' - The MAX version will combo off his powered-up Dancing Beat (good luck landing that), but other than that it's useless. You can charge it I guess. I mean it doesn't become unblockable or anything but if it makes you feel better then go right ahead. | |||
== Fastest Attacks == | |||
* 0F: C throw; D throw | |||
* 1F: - | |||
* 2F: '''cl.A''' | |||
* 3F: st.A; '''cr.A'''; cr.B; '''cr.C''' | |||
* 4F: '''cl.B'''; '''cl.D'''; st.B | |||
* 5F: '''cl.C''' | |||
* 6F: - | |||
* 7F: '''cr.D''' | |||
* 8F: st.D | |||
* 9F: st.C | |||
* 10F: - | |||
==Combos== | |||
He has a lot of different variations on things so experiment! | |||
* Best jump-ins: | |||
** j.A | |||
** j.B (As a crossup.) | |||
** j.C | |||
* cr.B x 1+, cr.A x 1+ > | |||
** f + A > | |||
*** (S)DM D. Crazy (qcb hcf + P) | |||
*** RSD (qcf + C) | |||
** (S)DM D. Crazy (qcb hcf + P) | |||
* Point Blank: cr. B, cr.A > dp + P | |||
If powered, see below for junggler follow ups. | |||
* cr.C / cl.C / cl.D (2 hits) > f + A > | |||
** (S)DM D. Crazy (qcb hcf + P) | |||
** RSD (qcf + C) | |||
** Blast Upper (qcf + D) | |||
Omit f + A after cl.D if not at point blank. | |||
* cr.B, cr.C > | |||
** (S)DM D. Crazy (qcb hcf + P) | |||
** RSD (qcf + C) | |||
** Blast Upper (qcf + D) | |||
* Powered: .. dp + P, | |||
** (S)DM D. Magnum (qcf qcf + P) (MAX only) | |||
** qcf + D | |||
** st.CD (Timming required.) | |||
** qcb + B | |||
** cl.C (reset) | |||
** jump D (reset) | |||
* Simple buffers | |||
** cr.B, cl.A / st.A / cl.B / st.B > (S)DM qcb hcf + P | |||
*** cr.B, qcb + A/B > hcf + P (As cr.B is not cancelable, qcb + A/B will chain into a normal attack.) | |||
{{StrategyCorner| | |||
* MAX: cr.B x 2, cr.A > {{f}} + A > {{qcf}} + C | |||
deals ??? than | |||
* cr.B x 2, cr.A > {{f}} + A > {{qcb}} {{hcf}} + P | |||
Keep this in mind, when you need to decide whether to trigger MAX or keep meter for a DM. | |||
}} | |||
[[ | == Links == | ||
{{Navbox-KOF98}} | |||
[[Category:The King of Fighters '98: The Slugfest]] | |||
[[Category:Heavy D!]] | |||
Latest revision as of 22:31, 29 January 2021
Heavy D!
Heavy D! is a black boxer/actor/rap artist from the U.S.A. The D in his name is a mystery.
In a nutshell
Heavy D! is a combo/poking/mixup-based character with some decent mid-range pokes and the fastest backdash in the game. He is a low-mid tier character, but he still has all the tools to win and is only really lacking a good reversal. He is not such a good character for beginners, since nothing he has is really abusable; playing Heavy D requires fast execution and good knowledge of matchups and his normal's properties to make him shine.
Colors

|

|

|

|
In-depth Analysis
Movelist
Normal Throws
- b or f + C - Unbreakable (mashable), forward knockdown, face forward, rollable.
- b or f + D - Unbreakable (mashable), reverse knockdown, back turned, un-rollable.
D version preferred, but they are both good for being unbreakable throws.
Special Moves
- RSD aka Rolling Soul Diver (qcf + P) - Your main combo ender in meterless combos, lots of range so it won't ever miss. Both versions will combo from the same things, but A vesion has better recovery. On block it is punishable by fast long range moves like Iori's A rekkas, so be careful. The powered-up versions do more hits, and the C version knocks down.
- Blast Upper (qcf + K) - D version is preferred due to range. A good safe move to end block strings with. It's also a good combo ender if you want a knockdown, but it's range is quite a bit less than RSD so it won't connect from that much stuff. The powered-up versions do 2 hits. As long as you space it right, qcf + D is safe on block.
- Ducking Combination (qcb + P > qcb + P) - The first hit has invincibly as he's moving forward, so you can use this to go through fireballs or bait CD counters. A version is faster/less invincibility, C version slower/more invincibility. Note that it won't combo from anything. The followup qcb + P can be overhead (A version) or low (C version). Note that the C followup is a bit faster and will combo from the first qcb + P, but the overhead won't. The powered-up versions do additional hits and knockdown for both the first hits and the followup (depending if you stop at the first hit or not).
- Soul Flower (qcb + K) - Slow shitty dumb ass move. Okay you can use it as an early anti-air but come on. The powered-up versions do 2 hits.
- Dancing Beat (dp + P) - A proximity unblockable. The Shadow (powered up) version does more hits and lets you juggle from it.
- Shadow (d d + P) - Powers up all of Heady D's specials, making them do more hits/damage/safer etc. It also powers up itself, and behaves as a proximity unblockable like his Dancing Beat. This only powers moves up for one use, it's not stackable, and it also wears off if you get hit.
Desperation Moves
- D. Crazy (qcb hcf + P) - His main source of combo damage, and comboable from cr.A as well as heavier attacks. Very fast (you can punish incompleted Iori rekkas with it), invinciblity on startup, and punishable by very fast moves like cr.A. MAX version does more damage, and is very punishable due to a pause in the hits.
- D. Magnum (qcf qcf + P) - The MAX version will combo off his powered-up Dancing Beat (good luck landing that), but other than that it's useless. You can charge it I guess. I mean it doesn't become unblockable or anything but if it makes you feel better then go right ahead.
Fastest Attacks
- 0F: C throw; D throw
- 1F: -
- 2F: cl.A
- 3F: st.A; cr.A; cr.B; cr.C
- 4F: cl.B; cl.D; st.B
- 5F: cl.C
- 6F: -
- 7F: cr.D
- 8F: st.D
- 9F: st.C
- 10F: -
Combos
He has a lot of different variations on things so experiment!
- Best jump-ins:
- j.A
- j.B (As a crossup.)
- j.C
- cr.B x 1+, cr.A x 1+ >
- f + A >
- (S)DM D. Crazy (qcb hcf + P)
- RSD (qcf + C)
- (S)DM D. Crazy (qcb hcf + P)
- f + A >
- Point Blank: cr. B, cr.A > dp + P
If powered, see below for junggler follow ups.
- cr.C / cl.C / cl.D (2 hits) > f + A >
- (S)DM D. Crazy (qcb hcf + P)
- RSD (qcf + C)
- Blast Upper (qcf + D)
Omit f + A after cl.D if not at point blank.
- cr.B, cr.C >
- (S)DM D. Crazy (qcb hcf + P)
- RSD (qcf + C)
- Blast Upper (qcf + D)
- Powered: .. dp + P,
- (S)DM D. Magnum (qcf qcf + P) (MAX only)
- qcf + D
- st.CD (Timming required.)
- qcb + B
- cl.C (reset)
- jump D (reset)
- Simple buffers
- cr.B, cl.A / st.A / cl.B / st.B > (S)DM qcb hcf + P
- cr.B, qcb + A/B > hcf + P (As cr.B is not cancelable, qcb + A/B will chain into a normal attack.)
- cr.B, cl.A / st.A / cl.B / st.B > (S)DM qcb hcf + P
Strategy Corner
- MAX: cr.B x 2, cr.A >
 + A >
+ A >  + C
+ C
deals ??? than
- cr.B x 2, cr.A >
 + A >
+ A > 
 + P
+ P
Keep this in mind, when you need to decide whether to trigger MAX or keep meter for a DM.
