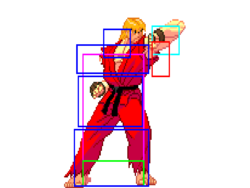
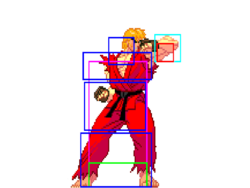
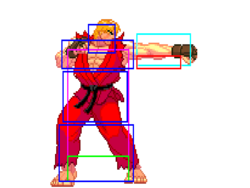
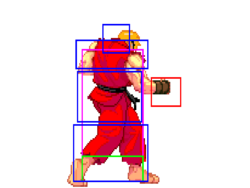
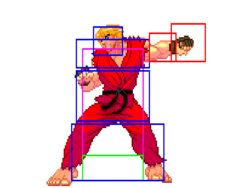
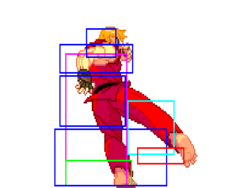
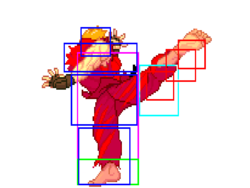
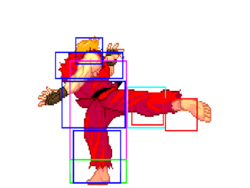
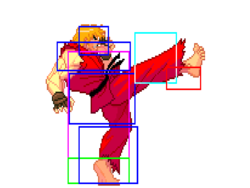
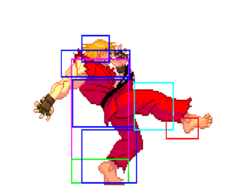
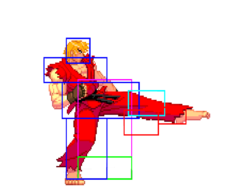
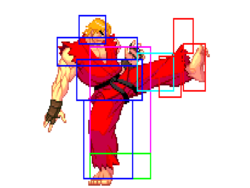
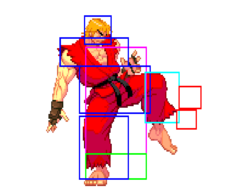
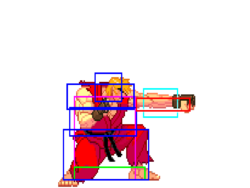
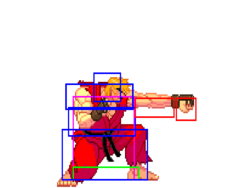
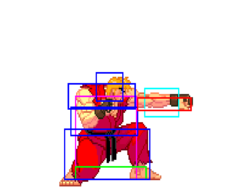
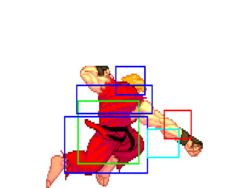
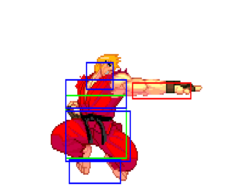
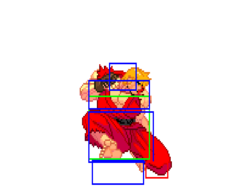
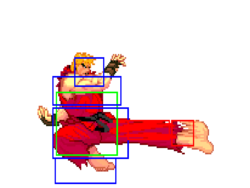
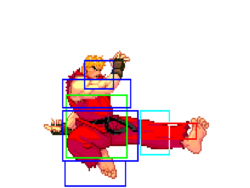
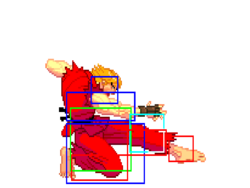
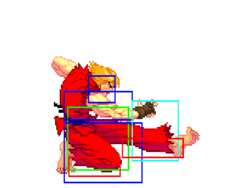
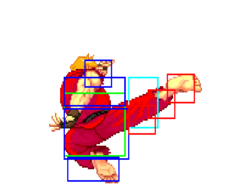
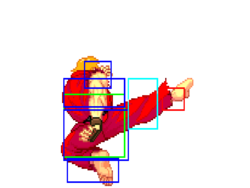
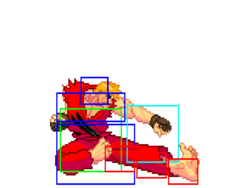
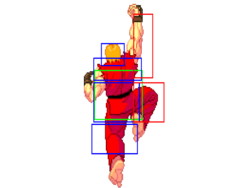
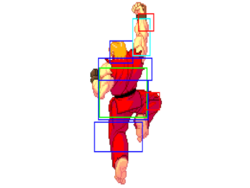
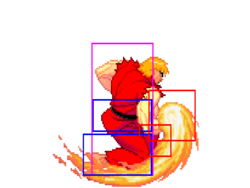
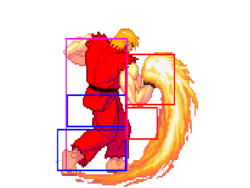
m (→8MK) |
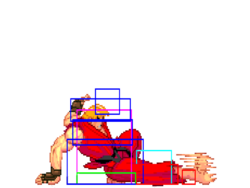
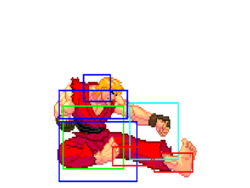
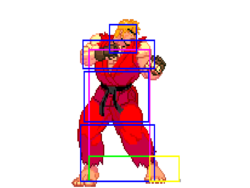
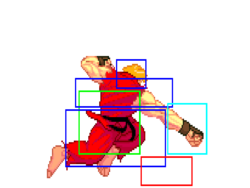
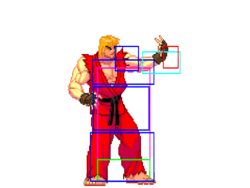
(→214K: frame data link in the wrong spot) |
||
| (251 intermediate revisions by 8 users not shown) | |||
| Line 22: | Line 22: | ||
}} | }} | ||
== Frame Data == | |||
<center>{{FrameDataKey-3S}}</center> | <center>{{FrameDataKey-3S}}</center> | ||
====Standing Normals==== | ====Standing Normals==== | ||
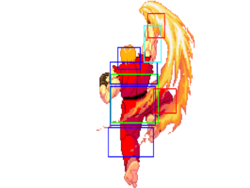
=====<font style="visibility:hidden; float:right">5LP (cl)</font>===== | =====<font style="visibility:hidden; float:right">5LP (cl)</font>===== | ||
| Line 31: | Line 29: | ||
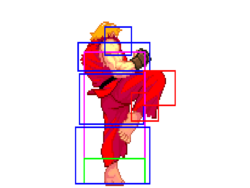
|name=Close LP | |name=Close LP | ||
|input={{lp}} (cl) | |input={{lp}} (cl) | ||
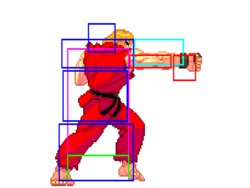
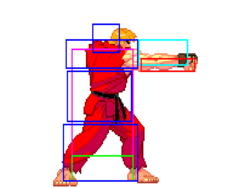
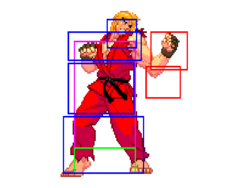
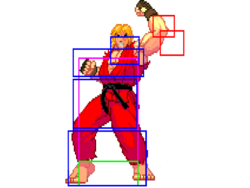
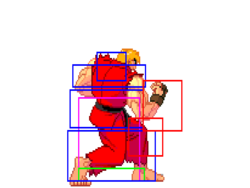
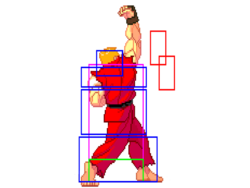
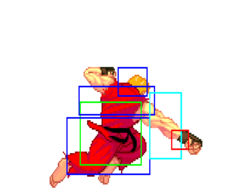
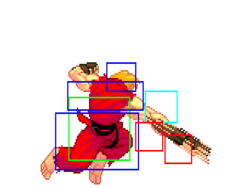
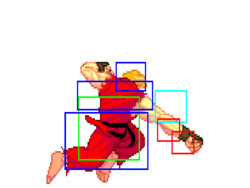
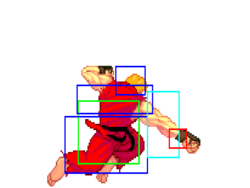
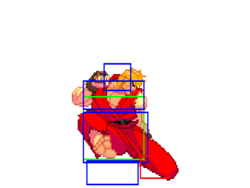
|image= | |image=3s_ken_cl.lp_1.png | ||
|imageSize=250px | |||
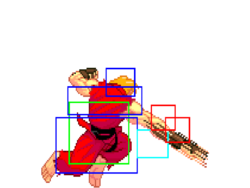
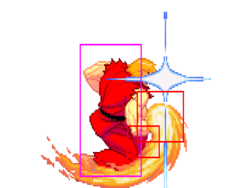
|image2=3s_ken_cl.lp_2.png | |||
|imageSize2=250px | |||
|caption=Frame 4 | |||
|caption2=Frames 5-6 | |||
|data= | |data= | ||
{{AttackData-3S | {{AttackData-3S | ||
| Line 37: | Line 40: | ||
|active=3 | |active=3 | ||
|recovery=5 | |recovery=5 | ||
| | |onBlock=+3 | ||
| | |onHit=+3 | ||
| | |onHitCrouch=+3 | ||
|damage=3 | |damage=3 | ||
|stun=3 | |stun=3 | ||
|karaDistance=0 | |||
|guard=HL | |||
|parry=HL | |||
|cancelOptions=ch, sp, su | |||
|selfMeterWhiff=0 | |||
|selfMeterHit=2 | |||
|selfMeterBlock=1 | |||
|oppMeterHit=0 | |||
|oppMeterBlock=0 | |||
|description= | |description= | ||
* | * layered anti-air | ||
* | * tick throw option | ||
This button is a pretty standard close jab, but it is notably Ken's fastest normal. It is somewhat limited in neutral and offensive situations because most characters can crouch under it, but it does see use as a tick into throw. It is quite useful as part of Ken's various layered anti-airs. It doesn't chain into itself, but it can be canceled into far jab, crouch jab, or crouch short. | |||
{{3S Button FAT|link=https://fullmeter.com/fatonline/#/framedata/movedetail/3S/Ken/normal/Close%20LP}} | {{3S Button FAT|link=https://fullmeter.com/fatonline/#/framedata/movedetail/3S/Ken/normal/Close%20LP}} | ||
}} | }} | ||
| Line 54: | Line 68: | ||
|name=Far LP | |name=Far LP | ||
|input={{lp}} (far) | |input={{lp}} (far) | ||
|image= | |image=3s_ken_st.lp.png | ||
|imageSize=250px | |||
|data= | |data= | ||
{{AttackData-3S | {{AttackData-3S | ||
| Line 60: | Line 75: | ||
|active=3 | |active=3 | ||
|recovery=4 | |recovery=4 | ||
| | |onBlock=+4 | ||
| | |onHit=+4 | ||
| | |onHitCrouch=+4 | ||
|damage=2 | |||
|damage= | |||
|stun=3 | |stun=3 | ||
|karaDistance=0 | |||
|guard=HL | |||
|parry=HL | |||
|cancelOptions=self, ch, sp, su | |||
|selfMeterWhiff=0 | |||
|selfMeterHit=2 | |||
|selfMeterBlock=1 | |||
|oppMeterHit=0 | |||
|oppMeterBlock=0 | |||
|description= | |description= | ||
* | * layered anti-air | ||
Far jab has slow startup for a light normal, most characters can duck under it, and despite pretty good frame advantage, it pushes Ken too far out to be of much use as a tick. It is primarily used as part of Ken's layered anti-airs due to both self-chaining and canceling into any of Ken's other light normals. | |||
{{3S Button FAT|link=https://fullmeter.com/fatonline/#/framedata/movedetail/3S/Ken/normal/Far%20LP}} | {{3S Button FAT|link=https://fullmeter.com/fatonline/#/framedata/movedetail/3S/Ken/normal/Far%20LP}} | ||
}} | }} | ||
| Line 77: | Line 102: | ||
|name=Close MP | |name=Close MP | ||
|input={{mp}} (cl) | |input={{mp}} (cl) | ||
|image= | |image=3s_ken_cl.mp.png | ||
|imageSize=250px | |||
|data= | |data= | ||
{{AttackData-3S | {{AttackData-3S | ||
| Line 83: | Line 109: | ||
|active=4 | |active=4 | ||
|recovery=10 | |recovery=10 | ||
|onHit=2 | |onBlock=+1 | ||
|onHitCrouch=3 | |onHit=+2 | ||
|onHitCrouch=+3 | |||
|damage=17 | |damage=17 | ||
|stun=7 | |stun=7 | ||
|karaDistance=0 | |||
|guard=HL | |||
|parry=H | |||
|cancelOptions=tc, sp, su | |||
|selfMeterWhiff=2 | |||
|selfMeterHit=11 | |||
|selfMeterBlock=6 | |||
|oppMeterHit=2 | |||
|oppMeterBlock=0 | |||
|description= | |description= | ||
* layered anti-air | |||
* tick throw option | |||
* frame trap option | |||
* mash option to beat throws on wakeup | |||
* SGGK option on offense or defense | |||
Close strong is one of Ken's best normals. It leaves him quite close to the opponent with slight frame advantage, putting him in prime position for frame traps and tick throws. If he forgoes the tick setup, he can cancel into target combo for one of the easiest super confirms in the game. Close strong is also a good abare option. It's fast enough to beat okizeme throws, and the target combo allows Ken to reliably confirm the mash into meaningful damage. | |||
Close strong provides Ken with an okay SGGK (parry-throw option select) by inputting parry -> cl.MP ~ LP+LK delay HP. If the opponent blocks, Ken will kara throw them, but if they push a button, Ken will parry followed by target combo, which can be hit-confirmed into DP or super. Because close strong has 0 kara range, Ken has to be very close to do this, so it is weaker than other SGGK options. | |||
Unfortunately, with only an 11f cancel window, close strong is not really a practical single-hit confirm. | |||
{{3S Button FAT|link=https://fullmeter.com/fatonline/#/framedata/movedetail/3S/Ken/normal/Close%20MP}} | {{3S Button FAT|link=https://fullmeter.com/fatonline/#/framedata/movedetail/3S/Ken/normal/Close%20MP}} | ||
}} | }} | ||
| Line 101: | Line 143: | ||
{{MoveData | {{MoveData | ||
|name=Far MP | |name=Far MP | ||
|input= | |input={{mp}} (far) | ||
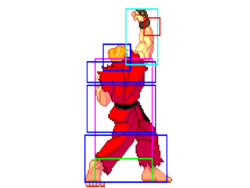
|image= | |image=3s_ken_st.mp_1.png | ||
|imageSize=250px | |||
|image2=3s_ken_st.mp_2.png | |||
|imageSize2=250px | |||
|caption=Frame 7 | |||
|caption2=Frames 8-9 | |||
|data= | |data= | ||
{{AttackData-3S | {{AttackData-3S | ||
| Line 108: | Line 155: | ||
|active=3 | |active=3 | ||
|recovery=10 | |recovery=10 | ||
|onHit=4 | |onBlock=+3 | ||
|onHitCrouch=5 | |onHit=+4 | ||
|onHitCrouch=+5 | |||
|damage=16 | |damage=16 | ||
|stun=11 | |stun=11 | ||
|karaDistance=0 | |||
|guard=HL | |||
|parry=H | |||
|selfMeterWhiff=2 | |||
|selfMeterHit=11 | |||
|selfMeterBlock=6 | |||
|oppMeterHit=2 | |||
|oppMeterBlock=0 | |||
|description= | |description= | ||
* disjoint hitbox | |||
* quite plus on block | |||
* easy hit confirm | |||
Very strong button that Ken will use a lot. In neutral, it will counterpoke all kinds of things. In offensive situations, Ken has many ways to setup frame traps into this button. If he's using SA3, which he should be, the hit confirm will rarely drop due to range. | |||
Startup is a little slow at 6f, so frame traps can be fairly loose and prone to mashing. There is also a little proximity ambiguity with cl.MP, which can lead to dropped hit confirms. Ken can mitigate this by always inputting target combo when he's expecting to hit far MP, and then hit-confirming appropriately. | |||
{{3S Button FAT|link=https://fullmeter.com/fatonline/#/framedata/movedetail/3S/Ken/normal/Far%20MP}} | {{3S Button FAT|link=https://fullmeter.com/fatonline/#/framedata/movedetail/3S/Ken/normal/Far%20MP}} | ||
}} | }} | ||
| Line 126: | Line 185: | ||
|name=Close HP | |name=Close HP | ||
|input={{hp}} (cl) | |input={{hp}} (cl) | ||
|image= | |image=3s_ken_cl.hp_1.png | ||
|imageSize=250px | |||
|image2=3s_ken_cl.hp_2.png | |||
|imageSize2=250px | |||
|caption=Frame 7 | |||
|caption2=Frames 8-9 | |||
|data= | |data= | ||
{{AttackData-3S | {{AttackData-3S | ||
| Line 132: | Line 196: | ||
|active=3 | |active=3 | ||
|recovery=15 | |recovery=15 | ||
|onBlock=-2 | |onBlock=-2 | ||
| | |onHit=0 | ||
|onHitCrouch=+2 | |||
|damage=23 | |damage=23 | ||
|stun=15 | |stun=15 | ||
|karaDistance=0 | |||
|guard=HL | |||
|parry=H | |||
|cancelOptions=sp, su | |||
|selfMeterWhiff=3 | |||
|selfMeterHit=19 | |||
|selfMeterBlock=10 | |||
|oppMeterHit=4 | |||
|oppMeterBlock=0 | |||
|description= | |description= | ||
* anti-air option | |||
* fast startup for a heavy | |||
* special cancel can save Ken from getting parried | |||
Close fierce is a good anti-air button. It lacks chains, so it doesn't have quite the layered anti-air potential of other options, but it makes up for this with excellent hitboxes. It is special cancelable, so all is not lost if it does get jump-in parried, as Ken can still cancel into any of his DPs. It is sometimes used as a meaty option because it's safe on block, leads to excellent damage on hit, and Ken can option-select parries with a late buffered DP, which will only come out if the opponent parries. | |||
{{3S Button FAT|link=https://fullmeter.com/fatonline/#/framedata/movedetail/3S/Ken/normal/Close%20HP}} | {{3S Button FAT|link=https://fullmeter.com/fatonline/#/framedata/movedetail/3S/Ken/normal/Close%20HP}} | ||
}} | }} | ||
| Line 150: | Line 224: | ||
|name=Far HP | |name=Far HP | ||
|input={{hp}} (far) | |input={{hp}} (far) | ||
|image= | |image=3s_ken_st.hp.png | ||
|imageSize=250px | |||
|data= | |data= | ||
{{AttackData-3S | {{AttackData-3S | ||
| Line 156: | Line 231: | ||
|active=3 | |active=3 | ||
|recovery=15 | |recovery=15 | ||
|onHit=2 | |onBlock=0 | ||
|onHitCrouch=4 | |onHit=+2 | ||
|onHitCrouch=+4 | |||
|damage=23 | |damage=23 | ||
|stun=13 | |stun=13 | ||
|karaDistance=0 | |||
|guard=HL | |||
|parry=H | |||
|selfMeterWhiff=3 | |||
|selfMeterHit=19 | |||
|selfMeterBlock=10 | |||
|oppMeterHit=4 | |||
|oppMeterBlock=0 | |||
|description= | |description= | ||
* situational anti-air | |||
* situational poke | |||
Far fierce is a situational poke and anti-air with a completely disjoint active hitbox. Due to its large hitbox and heavy priority, it blows up all kinds of buttons in neutral, and in some matchups, it provides excellent anti-air coverage. Unfortunately, it is not cancelable at all, so it's very bad if Ken gets parried. | |||
{{3S Button FAT|link=https://fullmeter.com/fatonline/#/framedata/movedetail/3S/Ken/normal/Far%20HP}} | {{3S Button FAT|link=https://fullmeter.com/fatonline/#/framedata/movedetail/3S/Ken/normal/Far%20HP}} | ||
}} | }} | ||
| Line 173: | Line 258: | ||
|name=Stand LK | |name=Stand LK | ||
|input={{lk}} | |input={{lk}} | ||
|image= | |image=3s_ken_st.lk.png | ||
|imageSize=250px | |||
|data= | |data= | ||
{{AttackData-3S | {{AttackData-3S | ||
| Line 179: | Line 265: | ||
|active=4 | |active=4 | ||
|recovery=7 | |recovery=7 | ||
| | |onBlock=+2 | ||
| | |onHit=+2 | ||
| | |onHitCrouch=+2 | ||
|damage=7 | |damage=7 | ||
|stun=3 | |stun=3 | ||
|karaDistance=0 | |||
|guard=HL | |||
|parry=HL | |||
|selfMeterWhiff=0 | |||
|selfMeterHit=2 | |||
|selfMeterBlock=1 | |||
|oppMeterHit=0 | |||
|oppMeterBlock=0 | |||
|description= | |description= | ||
This button sees limited use despite having decent startup and frame advantage. It doesn't cancel into anything, isn't plus enough link into anything, and the opponent can block or parry high or low. It could have some applications as a tick throw or weird frame trap. | |||
{{3S Button FAT|link=https://fullmeter.com/fatonline/#/framedata/movedetail/3S/Ken/normal/Stand%20LK}} | {{3S Button FAT|link=https://fullmeter.com/fatonline/#/framedata/movedetail/3S/Ken/normal/Stand%20LK}} | ||
}} | }} | ||
| Line 195: | Line 288: | ||
|name=Stand MK | |name=Stand MK | ||
|input={{mk}} | |input={{mk}} | ||
|image= | |image=3s_ken_st.mk.png | ||
|imageSize=250px | |||
|data= | |data= | ||
{{AttackData-3S | {{AttackData-3S | ||
| Line 201: | Line 295: | ||
|active=7 | |active=7 | ||
|recovery=16 | |recovery=16 | ||
|onBlock=-6 | |||
|onHit=-2 | |onHit=-2 | ||
| | |onHitCrouch=0 | ||
|damage=19 | |damage=19 | ||
|stun=15 | |stun=15 | ||
|karaDistance=6 | |||
|guard=HL | |||
|parry=H | |||
|selfMeterWhiff=2 | |||
|selfMeterHit=11 | |||
|selfMeterBlock=6 | |||
|oppMeterHit=2 | |||
|oppMeterBlock=0 | |||
|description= | |description= | ||
* 6 px kara option | |||
* situational anti-air | |||
* common down parry trap | |||
This is Ken's easiest kara throw option because it doesn't involve using a command or crouching normal. Unfortunately, it only adds 6 pixels to Ken's throw range. It has a pretty good anti-air hitbox, and is also used to check jump out attempts. Unfortunately, it has no cancel options, so it is prone to getting jump-in parried. A common gimmick is to end a block string with this move, and then buffer a down parry to catch opponents attempting a late or slow punish. This move is -6 on block though, so attentive opponents should punish this trick. | |||
{{3S Button FAT|link=https://fullmeter.com/fatonline/#/framedata/movedetail/3S/Ken/normal/Stand%20MK}} | {{3S Button FAT|link=https://fullmeter.com/fatonline/#/framedata/movedetail/3S/Ken/normal/Stand%20MK}} | ||
}} | }} | ||
| Line 219: | Line 322: | ||
|name=Stand HK | |name=Stand HK | ||
|input={{hk}} | |input={{hk}} | ||
|image= | |image=3s_ken_st.hk.png | ||
|imageSize=250px | |||
|data= | |data= | ||
{{AttackData-3S | {{AttackData-3S | ||
| Line 225: | Line 329: | ||
|active=6 | |active=6 | ||
|recovery=19 | |recovery=19 | ||
|onBlock=-4 | |||
|onHit=-2 | |onHit=-2 | ||
| | |onHitCrouch=0 | ||
|damage=26 | |damage=26 | ||
|stun=11 | |stun=11 | ||
|karaDistance=6 | |||
|guard=HL | |||
|parry=H | |||
|selfMeterWhiff=3 | |||
|selfMeterHit=19 | |||
|selfMeterBlock=10 | |||
|oppMeterHit=4 | |||
|oppMeterBlock=0 | |||
|description= | |description= | ||
* 6 px kara option | |||
* long range poke with disjoint active hitbox | |||
* vulnerable to jump-ins and whiff punishes | |||
Roundhouse is a good long range poke that tends to beat lots of other buttons. It's perfect for hitting the opponent at about the same range as 2MK, so they can't just stand around low forward range and fish for down parries. Ken has a variety of ways to set this range up, or he can just walk into 2MK / 5HK range and go for it. This button does have an extended limb hurtbox on startup, and at 36 frames total with 19 recovery frames, it is vulnerable to whiff punishes and jumps, so Ken can't use it carelessly. | |||
{{3S Button FAT|link=https://fullmeter.com/fatonline/#/framedata/movedetail/3S/Ken/normal/Stand%20HK}} | {{3S Button FAT|link=https://fullmeter.com/fatonline/#/framedata/movedetail/3S/Ken/normal/Stand%20HK}} | ||
}} | }} | ||
| Line 247: | Line 361: | ||
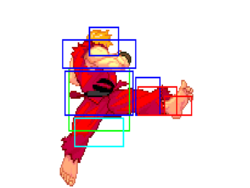
|name=Inazuma Kakato Wari (Short) | |name=Inazuma Kakato Wari (Short) | ||
|input={{b}}+{{mk}} | |input={{b}}+{{mk}} | ||
|image= | |image=3s_ken_b+mk_1.png | ||
|imageSize=250px | |||
|image2=3s_ken_b+mk_2.png | |||
|imageSize2=250px | |||
|caption=Frame 20 | |||
|caption2=Frame 21 | |||
|data= | |data= | ||
{{AttackData-3S | {{AttackData-3S | ||
| Line 253: | Line 372: | ||
|active=4 | |active=4 | ||
|recovery=10 | |recovery=10 | ||
|onHit=2 | |onBlock=+1 | ||
|onHitCrouch=3 | |onHit=+2 | ||
|onHitCrouch=+3 | |||
|damage=21 | |damage=21 | ||
|stun=13 | |stun=13 | ||
|karaDistance=10 | |||
|guard=H*H | |||
|parry=H*H | |||
|cancelOptions= | |||
|selfMeterWhiff=2 | |||
|selfMeterHit=11 | |||
|selfMeterBlock=5 | |||
|oppMeterHit=2 | |||
|oppMeterBlock=0 | |||
|description= | |description= | ||
* 10 px kara option | |||
* 10 kara | * situational mixup | ||
* | * overhead hit-confirm | ||
* | * 1f link into SA3 | ||
4MK is fairly slow overhead with 18f startup, but it still sees occasional use even in high-level play. On crouching hit, Ken can 1f link into SA3. As a kara throw option, it has better kara range than 5MK, and it's easier to do than 2MK, but unfortunately the back input makes kara neutral throw hard, and kara forward throw is pretty impractical, as it requires a neutral skip. It's also difficult to maximize the range, because if Ken pushes back for even 1f before MK, he loses a significant amount (2 or 3 pixels) of kara range. | |||
{{3S Button FAT|link=https://fullmeter.com/fatonline/#/framedata/movedetail/3S/Ken/normal/Inazuma%20Kakato%20Wari%20(Short)}} | {{3S Button FAT|link=https://fullmeter.com/fatonline/#/framedata/movedetail/3S/Ken/normal/Inazuma%20Kakato%20Wari%20(Short)}} | ||
}} | }} | ||
| Line 273: | Line 401: | ||
|name=Inazuma Kakato Wari (Long) | |name=Inazuma Kakato Wari (Long) | ||
|input={{mk}} (Hold) | |input={{mk}} (Hold) | ||
|image= | |image=3s_ken_st.mk.png | ||
|imageSize=250px | |||
|image2=3s_ken_b+mk_1.png | |||
|imageSize2=250px | |||
|image3=3s_ken_b+mk_2.png | |||
|imageSize3=250px | |||
|caption=Frames 9-12 | |||
|caption2=Frames 38-39 | |||
|caption3=Frames 40-41 | |||
|data= | |data= | ||
{{AttackData-3S | {{AttackData-3S | ||
| Line 279: | Line 415: | ||
|active=8 | |active=8 | ||
|recovery=10 | |recovery=10 | ||
|onBlock=-1 | |onBlock=-1 | ||
| | |onHit=+2 | ||
|onHitCrouch=+3 | |||
|damage=29 | |damage=29 | ||
|stun=22 | |stun=22 | ||
|karaDistance=6 | |||
|guard=HL*H*H | |||
|parry=H*H*H | |||
|cancelOptions= | |||
|selfMeterWhiff=4 | |||
|selfMeterHit=21 | |||
|selfMeterBlock=10 | |||
|oppMeterHit=4 | |||
|oppMeterBlock=0 | |||
|description= | |description= | ||
* 6 px kara option | |||
* 6 kara range | Not typically used because it's too hard to hit people with the overhead from a range that will also combo into super. If Ken needs to hit the opponent with a mid or an overhead, he always has better options than this. | ||
{{3S Button FAT|link=https://fullmeter.com/fatonline/#/framedata/movedetail/3S/Ken/normal/Inazuma%20Kakato%20Wari%20(Long)}} | {{3S Button FAT|link=https://fullmeter.com/fatonline/#/framedata/movedetail/3S/Ken/normal/Inazuma%20Kakato%20Wari%20(Long)}} | ||
}} | }} | ||
| Line 297: | Line 440: | ||
|name=Fumikomi Maegeri | |name=Fumikomi Maegeri | ||
|input={{f}}+{{mk}} | |input={{f}}+{{mk}} | ||
|image= | |image=3s_ken_f+mk.png | ||
|imageSize=250px | |||
|data= | |data= | ||
{{AttackData-3S | {{AttackData-3S | ||
| Line 303: | Line 447: | ||
|active=4 | |active=4 | ||
|recovery=15 | |recovery=15 | ||
|onBlock=-4 | |||
|onHit=-1 | |onHit=-1 | ||
| | |onHitCrouch=0 | ||
|damage=14 | |damage=14 | ||
|stun=7 | |stun=7 | ||
|karaDistance=0 | |||
|guard=HL | |||
|parry=HL | |||
|cancelOptions= | |||
|selfMeterWhiff=3 | |||
|selfMeterHit=19 | |||
|selfMeterBlock=10 | |||
|oppMeterHit=4 | |||
|oppMeterBlock=0 | |||
|description= | |description= | ||
Not typically used because the forward movement is slow, it doesn't cancel or link into anything, and leaves Ken negative on hit. Rarely sees use as a bootleg frame trap with LP DP, or as a buffer parry trap. | |||
{{3S Button FAT|link=https://fullmeter.com/fatonline/#/framedata/movedetail/3S/Ken/normal/Fumikomi%20Maegeri}} | {{3S Button FAT|link=https://fullmeter.com/fatonline/#/framedata/movedetail/3S/Ken/normal/Fumikomi%20Maegeri}} | ||
}} | }} | ||
| Line 320: | Line 471: | ||
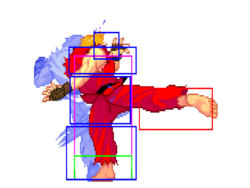
|name=Shiden Kakato Otoshi | |name=Shiden Kakato Otoshi | ||
|input={{f}}+{{hk}} | |input={{f}}+{{hk}} | ||
|image= | |image=3s_ken_f+hk_1.png | ||
|imageSize=250px | |||
|image2=3s_ken_f+hk_2.png | |||
|imageSize2=250px | |||
|caption=Frames 31-33 | |||
|caption2=Frames 34-35 | |||
|data= | |data= | ||
{{AttackData-3S | {{AttackData-3S | ||
| Line 326: | Line 482: | ||
|active=5 | |active=5 | ||
|recovery=18 | |recovery=18 | ||
|onBlock=-1 | |onBlock=-1 | ||
| | |onHit=+1 | ||
|onHitCrouch=+3 | |||
|damage=21 | |damage=21 | ||
|stun=11 | |stun=11 | ||
|karaDistance=0 | |||
|guard=H | |||
|parry=H | |||
|cancelOptions= | |||
|selfMeterWhiff=3 | |||
|selfMeterHit=19 | |||
|selfMeterBlock=10 | |||
|oppMeterHit=4 | |||
|oppMeterBlock=0 | |||
|description= | |description= | ||
Very slow overhead, not really used on purpose. If it does hit a crouching opponent, you can link into SA3, though. | |||
{{3S Button FAT|link=https://fullmeter.com/fatonline/#/framedata/movedetail/3S/Ken/normal/Shiden%20Kakato%20Otoshi}} | {{3S Button FAT|link=https://fullmeter.com/fatonline/#/framedata/movedetail/3S/Ken/normal/Shiden%20Kakato%20Otoshi}} | ||
}} | }} | ||
| Line 348: | Line 510: | ||
|name=Crouch LP | |name=Crouch LP | ||
|input={{d}}+{{lp}} | |input={{d}}+{{lp}} | ||
|image= | |image=3s_ken_cr.lp.png | ||
|imageSize=250px | |||
|data= | |data= | ||
{{AttackData-3S | {{AttackData-3S | ||
| Line 354: | Line 517: | ||
|active=3 | |active=3 | ||
|recovery=5 | |recovery=5 | ||
| | |onBlock=+3 | ||
| | |onHit=+3 | ||
| | |onHitCrouch=+3 | ||
|damage=3 | |damage=3 | ||
|stun=3 | |stun=3 | ||
|karaDistance=0 | |||
|guard=HL | |||
|parry=HL | |||
|cancelOptions=self, ch, sp, su | |||
|selfMeterWhiff=0 | |||
|selfMeterHit=2 | |||
|selfMeterBlock=1 | |||
|oppMeterHit=0 | |||
|oppMeterBlock=0 | |||
|description= | |description= | ||
* | * hit confirm option with light chains like 2LP > 2LK or 2LK > 2LP | ||
* good frame advantage, always +3 | |||
Often used as an alternative to low short. Shorter duration makes it suited for checking dashes with less risk of being whiff punished. Faster startup and improved frame advantage is useful when Ken wants to be aggressive with dash-up buttons or just mash. It's chainable into any of Ken's other light buttons, so it is usually hit-confirmable via a light chain. It doesn't completely outclass low short though, as it has shorter range, and it can be parried either high or low. | |||
{{3S Button FAT|link=https://fullmeter.com/fatonline/#/framedata/movedetail/3S/Ken/normal/Crouch%20LP}} | {{3S Button FAT|link=https://fullmeter.com/fatonline/#/framedata/movedetail/3S/Ken/normal/Crouch%20LP}} | ||
}} | }} | ||
| Line 370: | Line 544: | ||
|name=Crouch MP | |name=Crouch MP | ||
|input={{d}}+{{mp}} | |input={{d}}+{{mp}} | ||
|image= | |image=3s_ken_cr.mp_1.png | ||
|imageSize=250px | |||
|image2=3s_ken_cr.mp_2.png | |||
|imageSize2=250px | |||
|caption=Frame 6 | |||
|caption2=Frames 7-9 | |||
|data= | |data= | ||
{{AttackData-3S | {{AttackData-3S | ||
| Line 376: | Line 555: | ||
|active=4 | |active=4 | ||
|recovery=7 | |recovery=7 | ||
|onHit=4 | |onBlock=+3 | ||
|onHitCrouch=5 | |onHit=+4 | ||
|onHitCrouch=+5 | |||
|damage=16 | |damage=16 | ||
|stun=7 | |stun=7 | ||
|karaDistance=0 | |||
|guard=HL | |||
|parry=HL | |||
|cancelOptions=sp, su | |||
|selfMeterWhiff=2 | |||
|selfMeterHit=11 | |||
|selfMeterBlock=6 | |||
|oppMeterHit=2 | |||
|oppMeterBlock=0 | |||
|description= | |description= | ||
* | * cancels or links into SA3 | ||
* | * whiff for meter build in neutral | ||
Known as the emperor punch, low strong is one of the best general purpose pokes in the game. It has a completely disjoint active hitbox for 1f. It has all the same advantages and uses as far strong, but with better overall frame data. Since it can it can both cancel and link into super, it's excellent as both a punish and a hit-confirm. 2MP super also does a little bit more damage than 2MK super. The only thing to really watch out for is that 2MP can be parried both high and low. | |||
{{3S Button FAT|link=https://fullmeter.com/fatonline/#/framedata/movedetail/3S/Ken/normal/Crouch%20MP}} | {{3S Button FAT|link=https://fullmeter.com/fatonline/#/framedata/movedetail/3S/Ken/normal/Crouch%20MP}} | ||
}} | }} | ||
| Line 396: | Line 583: | ||
|name=Crouch HP | |name=Crouch HP | ||
|input={{d}}+{{hp}} | |input={{d}}+{{hp}} | ||
|image= | |image=3s_ken_cr.hp_1.png | ||
|imageSize=250px | |||
|image2=3s_ken_cr.hp_2.png | |||
|imageSize2=250px | |||
|image3=3s_ken_cr.hp_3.png | |||
|imageSize3=250px | |||
|caption=Frame 8 | |||
|caption2=Frames 9-10 | |||
|caption3=Frame 11 | |||
|data= | |data= | ||
{{AttackData-3S | {{AttackData-3S | ||
| Line 402: | Line 597: | ||
|active=5 | |active=5 | ||
|recovery=17 | |recovery=17 | ||
|onBlock=-6 | |||
|onHit=-4 | |onHit=-4 | ||
|onHitCrouch=-2 | |onHitCrouch=-2 | ||
|damage=23 | |damage=23 | ||
|stun=13 | |stun=13 | ||
|karaDistance=0 | |||
|guard=HL | |||
|parry=HL | |||
|cancelOptions=sp, su | |||
|selfMeterWhiff=3 | |||
|selfMeterHit=19 | |||
|selfMeterBlock=10 | |||
|oppMeterHit=4 | |||
|oppMeterBlock=0 | |||
|description= | |description= | ||
* | * anti-air option | ||
2HP has strong hitboxes and heavy priority, so it will beat a lot of buttons in neutral. When used this way, Ken usually buffers super, so that if the opponent sticks out a button, they get counterhit with 2HP xx SA3. Unfortunately 2HP is itself quite slow, so if Ken whiffs it, he is vulnerable to being whiff punished himself. | |||
Ken must be wary when using this as an anti-air, despite its good hitboxes and special cancel property, because the second, higher-hitting hitbox cannot be canceled. | |||
{{3S Button FAT|link=https://fullmeter.com/fatonline/#/framedata/movedetail/3S/Ken/normal/Crouch%20HP}} | {{3S Button FAT|link=https://fullmeter.com/fatonline/#/framedata/movedetail/3S/Ken/normal/Crouch%20HP}} | ||
}} | }} | ||
| Line 421: | Line 626: | ||
|name=Crouch LK | |name=Crouch LK | ||
|input={{d}}+{{lk}} | |input={{d}}+{{lk}} | ||
|image= | |image=3s_ken_cr.lk.png | ||
|imageSize=250px | |||
|data= | |data= | ||
{{AttackData-3S | {{AttackData-3S | ||
| Line 427: | Line 633: | ||
|active=3 | |active=3 | ||
|recovery=7 | |recovery=7 | ||
| | |onBlock=+1 | ||
| | |onHit=+1 | ||
| | |onHitCrouch=+1 | ||
|damage=3 | |damage=3 | ||
|stun=3 | |stun=3 | ||
|karaDistance=0 | |||
|guard=L | |||
|parry=L | |||
|cancelOptions=self, ch, sp, su | |||
|selfMeterWhiff=0 | |||
|selfMeterHit=2 | |||
|selfMeterBlock=1 | |||
|oppMeterHit=0 | |||
|oppMeterBlock=0 | |||
|description= | |description= | ||
* | * low hit confirm option | ||
* confirm to super with light chains, usually 2LK > 2LP or 2LK > 2LK | |||
This is Ken's standard close range low hit confirm button. Short short super is very easy, and almost everyone should be able to learn to hit-confirm it. 2LK generally has less utility than 2LP, but makes up for it by being low parry only and having slightly better range. Due to the extended range, Ken has a variety of frame trap options to setup 2LK 2LK chains. 2LK can also cancel into any of Ken's other light normals. A common offensive option is (meaty) 2LK > close LP. If the opponent blocks low, close LP will whiff, and Ken can follow up with an immediate throw. If the opponent stand blocks, they get hit with the 2LK > close LP chain, and Ken can confirm into LP DP. | |||
{{3S Button FAT|link=https://fullmeter.com/fatonline/#/framedata/movedetail/3S/Ken/normal/Crouch%20LK}} | {{3S Button FAT|link=https://fullmeter.com/fatonline/#/framedata/movedetail/3S/Ken/normal/Crouch%20LK}} | ||
}} | }} | ||
| Line 443: | Line 660: | ||
|name=Crouch MK | |name=Crouch MK | ||
|input={{d}}+{{mk}} | |input={{d}}+{{mk}} | ||
|image= | |image=3s_ken_cr.mk_1.png | ||
|imageSize=250px | |||
|image2=3s_ken_cr.mk_2.png | |||
|imageSize2=250px | |||
|caption=Frame 7 | |||
|caption2=Frames 8-11 | |||
|data= | |data= | ||
{{AttackData-3S | {{AttackData-3S | ||
| Line 449: | Line 671: | ||
|active=5 | |active=5 | ||
|recovery=17 | |recovery=17 | ||
|onBlock=-4 | |||
|onHit=-3 | |onHit=-3 | ||
|onHitCrouch=-2 | |onHitCrouch=-2 | ||
|damage=15 | |damage=15 | ||
|stun=3 | |stun=3 | ||
|karaDistance=13 | |||
|guard=L | |||
|parry=L | |||
|cancelOptions=sp, su | |||
|selfMeterWhiff=2 | |||
|selfMeterHit=11 | |||
|selfMeterBlock=6 | |||
|oppMeterHit=2 | |||
|oppMeterBlock=0 | |||
|description= | |description= | ||
* | * 13 px kara option | ||
* | * Ken's farthest kara throw | ||
* | * very difficult hit-confirm option, try using score / health / stun | ||
* | * great neutral / whiff punish button due to long range, SA cancel, and 6f startup | ||
Ken's low | * vulnerable to whiff punishes and jump-ins | ||
* W shoryu combos | |||
Ken's longest range cancelable low attack, 2MK is the stereotypical shoto footsies button. 2MK allows Ken to whiff punish and hit confirm into super (as long as he's using SA3) from much further away than most other characters. Unfortunately, with only 13 cancelable frames on hit, it is right on the edge of what most people consider confirmable. Realistically, after accounting for input delay and screen draw, you have more like 10 frames (~167 ms) to confirm. To ease the difficulty a bit, you can try looking at your score, opponent's health bar, or opponent's stun gauge. These are updated one frame earlier than hit sparks, plus you're looking at the top of the screen, where there is less delay waiting for screen draw. | |||
Also unfortunately, 2MK has a rather long total duration at 28 frames, making it vulnerable to counter-pokes and jump-ins, especially from fast jumping characters like Dudley and Alex. It's an excellent button, but Ken cannot use it carelessly. | |||
This is Ken's best kara throw option, adding 13 pixels to his throw range. Unfortunately, because of the way the game works, Ken cannot kara throw while holding down (2). The correct 2MK kara throw input is 2MK~4/5/6 LP+LK. That is, Ken must push 2LK, then on the very next frame, hit back, neutral, or forward plus throw. If this input is not done precisely, Ken will either do 2MK or non-kara throw. | |||
This is also one of the buttons used to kara LP shoryuken for W shoryu combos. | |||
{{3S Button FAT|link=https://fullmeter.com/fatonline/#/framedata/movedetail/3S/Ken/normal/Crouch%20MK}} | {{3S Button FAT|link=https://fullmeter.com/fatonline/#/framedata/movedetail/3S/Ken/normal/Crouch%20MK}} | ||
}} | }} | ||
| Line 469: | Line 708: | ||
|name=Crouch HK | |name=Crouch HK | ||
|input={{d}}+{{hk}} | |input={{d}}+{{hk}} | ||
|image= | |image=3s_ken_cr.hk.png | ||
|imageSize=250px | |||
|data= | |data= | ||
{{AttackData-3S | {{AttackData-3S | ||
| Line 475: | Line 715: | ||
|active=5 | |active=5 | ||
|recovery=26 | |recovery=26 | ||
|onBlock=-14 | |||
|onHit=D | |onHit=D | ||
|onHitCrouch=D | |onHitCrouch=D | ||
|damage=23 | |damage=23 | ||
|stun=3 | |stun=3 | ||
|karaDistance=13 | |||
|guard=L | |||
|parry=L | |||
|cancelOptions= | |||
|selfMeterWhiff=3 | |||
|selfMeterHit=19 | |||
|selfMeterBlock=10 | |||
|oppMeterHit=4 | |||
|oppMeterBlock=0 | |||
|description= | |description= | ||
* 13 kara range | * 13 px kara option | ||
* | * longest range low poke and meterless knockdown | ||
* meterless whiff punish | |||
* very negative on block, vulnerable to jump-ins | |||
2HK / low roundhouse / sweep is similar in usage to 2MK since they both have the same startup, with similar strengths and weaknesses. 2HK lacks any cancel options, has worse recovery, is slower overall, and is considerably more negative on block, but in return it has better range, and scores a meterless knockdown. | |||
Everything about 2MK kara throw and 2MK kara shoryuken also applies to 2HK. | |||
{{3S Button FAT|link=https://fullmeter.com/fatonline/#/framedata/movedetail/3S/Ken/normal/Crouch%20HK}} | {{3S Button FAT|link=https://fullmeter.com/fatonline/#/framedata/movedetail/3S/Ken/normal/Crouch%20HK}} | ||
}} | }} | ||
| Line 498: | Line 751: | ||
|name=Jump LP (Neutral) | |name=Jump LP (Neutral) | ||
|input={{u}}+{{lp}} | |input={{u}}+{{lp}} | ||
|image= | |image=3s_ken_nj.lp.png | ||
|imageSize=250px | |||
|data= | |data= | ||
{{AttackData-3S | {{AttackData-3S | ||
|startup=5 | |startup=5 | ||
| | |active=until landing | ||
|recovery= | |||
|onBlock=+3~+7 | |||
|onHit=+3~+7 | |||
|onHitCrouch=+7 | |||
|damage=10 | |damage=10 | ||
|stun=7 | |stun=7 | ||
|karaDistance= | |||
|guard=H | |||
|parry=H | |||
|cancelOptions= | |||
|selfMeterWhiff=0 | |||
|selfMeterHit=2 | |||
|selfMeterBlock=1 | |||
|oppMeterHit=0 | |||
|oppMeterBlock=0 | |||
|description= | |description= | ||
If Ken is going to neutral jump and push a button, he would usually use something else, but this can sometimes be used as weird tick or pre-emptive air-to-air. | |||
{{3S Button FAT|link=https://fullmeter.com/fatonline/#/framedata/movedetail/3S/Ken/normal/Jump%20LP%20(Neutral)}} | {{3S Button FAT|link=https://fullmeter.com/fatonline/#/framedata/movedetail/3S/Ken/normal/Jump%20LP%20(Neutral)}} | ||
}} | }} | ||
| Line 514: | Line 782: | ||
|name=Jump LP | |name=Jump LP | ||
|input={{uf}}+{{lp}} | |input={{uf}}+{{lp}} | ||
|image= | |image=3s_ken_j.lp.png | ||
|imageSize=250px | |||
|data= | |data= | ||
{{AttackData-3S | {{AttackData-3S | ||
|startup=4 | |startup=4 | ||
| | |active=until landing | ||
|recovery= | |||
|onBlock=-1~+8 | |||
|onHit=-2~+7 | |||
|onHitCrouch=+7 | |||
|damage=8 | |damage=8 | ||
|stun=7 | |stun=7 | ||
|karaDistance= | |||
|guard=H | |||
|parry=H | |||
|cancelOptions= | |||
|selfMeterWhiff=0 | |||
|selfMeterHit=2 | |||
|selfMeterBlock=1 | |||
|oppMeterHit=0 | |||
|oppMeterBlock=0 | |||
|description= | |description= | ||
Sometimes used as a pre-emptive air-to-air. | |||
{{3S Button FAT|link=https://fullmeter.com/fatonline/#/framedata/movedetail/3S/Ken/normal/Jump%20LP}} | {{3S Button FAT|link=https://fullmeter.com/fatonline/#/framedata/movedetail/3S/Ken/normal/Jump%20LP}} | ||
}} | }} | ||
| Line 530: | Line 813: | ||
|name=Jump MP (Neutral) | |name=Jump MP (Neutral) | ||
|input={{u}}+{{mp}} | |input={{u}}+{{mp}} | ||
|image= | |image=3s_ken_nj.mp_1.png | ||
|imageSize=250px | |||
|image2=3s_ken_nj.mp_2.png | |||
|imageSize2=250px | |||
|image3=3s_ken_j.mp_3.png | |||
|imageSize3=250px | |||
|caption=Frame 7 | |||
|caption2=Frames 8-9 | |||
|caption3=Frames 11-12 | |||
|data= | |data= | ||
{{AttackData-3S | {{AttackData-3S | ||
|startup=6 | |startup=6 | ||
|active=5 | |active=5 | ||
| | |recovery= | ||
|onBlock=+4~+11 | |||
|onHit=+2~+10 | |||
|onHitCrouch=+10 | |||
|damage=17 | |damage=17 | ||
|stun=11 | |stun=11 | ||
|karaDistance= | |||
|guard=H | |||
|parry=H | |||
|cancelOptions= | |||
|selfMeterWhiff=2 | |||
|selfMeterHit=11 | |||
|selfMeterBlock=6 | |||
|oppMeterHit=2 | |||
|oppMeterBlock=0 | |||
|description= | |description= | ||
Not typically used, as neutral jump MK is 1f faster with a good hitbox. | |||
{{3S Button FAT|link=https://fullmeter.com/fatonline/#/framedata/movedetail/3S/Ken/normal/Jump%20MP%20(Neutral)}} | {{3S Button FAT|link=https://fullmeter.com/fatonline/#/framedata/movedetail/3S/Ken/normal/Jump%20MP%20(Neutral)}} | ||
}} | }} | ||
| Line 550: | Line 851: | ||
|name=Jump MP | |name=Jump MP | ||
|input={{uf}}+{{mp}} | |input={{uf}}+{{mp}} | ||
|image= | |image=3s_ken_j.mp_1.png | ||
|imageSize=250px | |||
|image2=3s_ken_j.mp_2.png | |||
|imageSize2=250px | |||
|image3=3s_ken_j.mp_3.png | |||
|imageSize3=250px | |||
|caption=Frame 7 | |||
|caption2=Frames 8-9 | |||
|caption3=Frames 11-12 | |||
|data= | |data= | ||
{{AttackData-3S | {{AttackData-3S | ||
|startup=5 | |startup=5 | ||
|active=5 | |active=5 | ||
| | |recovery= | ||
|onBlock=+2~+11 | |||
|onHit=+1~+10 | |||
|onHitCrouch=+10 | |||
|damage=17 | |damage=17 | ||
|stun=11 | |stun=11 | ||
|karaDistance= | |||
|guard=H | |||
|parry=H | |||
|cancelOptions= | |||
|selfMeterWhiff=2 | |||
|selfMeterHit=11 | |||
|selfMeterBlock=6 | |||
|oppMeterHit=2 | |||
|oppMeterBlock=0 | |||
|description= | |description= | ||
Not typically used. Jump MK has the same startup with a crossup hitbox. Jump HP is only 1f slower and has a better hitbox for most circumstances. Could have some niche uses in a post-parry situations or as a pre-emptive air-to-air. | |||
{{3S Button FAT|link=https://fullmeter.com/fatonline/#/framedata/movedetail/3S/Ken/normal/Jump%20MP}} | {{3S Button FAT|link=https://fullmeter.com/fatonline/#/framedata/movedetail/3S/Ken/normal/Jump%20MP}} | ||
}} | }} | ||
| Line 569: | Line 889: | ||
|name=Jump HP (Neutral) | |name=Jump HP (Neutral) | ||
|input={{u}}+{{hp}} | |input={{u}}+{{hp}} | ||
|image= | |image=3s_ken_nj.hp.png | ||
|imageSize=250px | |||
|data= | |data= | ||
{{AttackData-3S | {{AttackData-3S | ||
|startup=7 | |startup=7 | ||
|active=3 | |active=3 | ||
| | |recovery= | ||
|onBlock=+10~+14 | |||
|onHit=+9~+13 | |||
|onHitCrouch=+13 | |||
|damage=23 | |damage=23 | ||
|stun=15 | |stun=15 | ||
|karaDistance= | |||
|guard=H | |||
|parry=H | |||
|cancelOptions= | |||
|selfMeterWhiff=3 | |||
|selfMeterHit=19 | |||
|selfMeterBlock=10 | |||
|oppMeterHit=4 | |||
|oppMeterBlock=0 | |||
|description= | |description= | ||
Not used too often, but it does see some situational use in air-to-air situations when the opponent is above Ken. | |||
{{3S Button FAT|link=https://fullmeter.com/fatonline/#/framedata/movedetail/3S/Ken/normal/Jump%20HP%20(Neutral)}} | {{3S Button FAT|link=https://fullmeter.com/fatonline/#/framedata/movedetail/3S/Ken/normal/Jump%20HP%20(Neutral)}} | ||
}} | }} | ||
| Line 588: | Line 920: | ||
|name=Jump HP | |name=Jump HP | ||
|input={{uf}}+{{hp}} | |input={{uf}}+{{hp}} | ||
|image= | |image=3s_ken_j.hp_1.png | ||
|imageSize=250px | |||
|image2=3s_ken_j.hp_2.png | |||
|imageSize2=250px | |||
|image3=3s_ken_j.hp_3.png | |||
|imageSize3=250px | |||
|caption=Frame 7 | |||
|caption2=Frame 8 | |||
|caption3=Frames 9-10 | |||
|data= | |data= | ||
{{AttackData-3S | {{AttackData-3S | ||
|startup=6 | |startup=6 | ||
|active=4 | |active=4 | ||
| | |recovery= | ||
|onBlock=+5~+12 | |||
|onHit=+1~+13 | |||
|onHitCrouch=+13 | |||
|damage=23 | |damage=23 | ||
|stun=15 | |stun=15 | ||
|karaDistance= | |||
|guard=H | |||
|parry=H | |||
|cancelOptions= | |||
|selfMeterWhiff=3 | |||
|selfMeterHit=19 | |||
|selfMeterBlock=10 | |||
|oppMeterHit=4 | |||
|oppMeterBlock=0 | |||
|description= | |description= | ||
Usually Ken uses jump HK for offensive jump-ins, but jump HP actually does 1 point more damage and 2 points more stun, so it can be a useful optimization. | |||
{{3S Button FAT|link=https://fullmeter.com/fatonline/#/framedata/movedetail/3S/Ken/normal/Jump%20HP}} | {{3S Button FAT|link=https://fullmeter.com/fatonline/#/framedata/movedetail/3S/Ken/normal/Jump%20HP}} | ||
}} | }} | ||
| Line 608: | Line 958: | ||
|name=Jump LK (Neutral) | |name=Jump LK (Neutral) | ||
|input={{u}}+{{lk}} | |input={{u}}+{{lk}} | ||
|image= | |image=3s_ken_nj.lk_1.png | ||
|imageSize=250px | |||
|image2=3s_ken_nj.lk_2.png | |||
|imageSize2=250px | |||
|caption=Frame 6 | |||
|caption2=Frames 7-onwards | |||
|data= | |data= | ||
{{AttackData-3S | {{AttackData-3S | ||
|startup=5 | |startup=5 | ||
| | |active=until landing | ||
|recovery= | |||
|onBlock=+3~+7 | |||
|onHit=+3~+7 | |||
|onHitCrouch=+7 | |||
|damage=8 | |damage=8 | ||
|stun=7 | |stun=7 | ||
|karaDistance= | |||
|guard=H | |||
|parry=H | |||
|cancelOptions= | |||
|selfMeterWhiff=0 | |||
|selfMeterHit=2 | |||
|selfMeterBlock=1 | |||
|oppMeterHit=0 | |||
|oppMeterBlock=0 | |||
|description= | |description= | ||
Rarely used as a weird tick. Like jump LP, this can be used as a pre-emptive anti-air due to extremely long active duration. | |||
{{3S Button FAT|link=https://fullmeter.com/fatonline/#/framedata/movedetail/3S/Ken/normal/Jump%20LK%20(Neutral)}} | {{3S Button FAT|link=https://fullmeter.com/fatonline/#/framedata/movedetail/3S/Ken/normal/Jump%20LK%20(Neutral)}} | ||
}} | }} | ||
| Line 624: | Line 993: | ||
|name=Jump LK | |name=Jump LK | ||
|input={{uf}}+{{lk}} | |input={{uf}}+{{lk}} | ||
|image= | |image=3s_ken_j.lk.png | ||
|imageSize=250px | |||
|data= | |data= | ||
{{AttackData-3S | {{AttackData-3S | ||
|startup=4 | |startup=4 | ||
|active=10 | |active=10 | ||
| | |recovery= | ||
|onBlock=-1~+6 | |||
|onHit=0~+6 | |||
|onHitCrouch=+6 | |||
|damage=8 | |damage=8 | ||
|stun=5 | |stun=5 | ||
|karaDistance= | |||
|guard=H | |||
|parry=H | |||
|cancelOptions= | |||
|selfMeterWhiff=0 | |||
|selfMeterHit=2 | |||
|selfMeterBlock=1 | |||
|oppMeterHit=0 | |||
|oppMeterBlock=0 | |||
|description= | |description= | ||
Similar to neutral jump LK, but with less active duration. Rarely used as a kind of weird tick. | |||
{{3S Button FAT|link=https://fullmeter.com/fatonline/#/framedata/movedetail/3S/Ken/normal/Jump%20LK}} | {{3S Button FAT|link=https://fullmeter.com/fatonline/#/framedata/movedetail/3S/Ken/normal/Jump%20LK}} | ||
}} | }} | ||
| Line 641: | Line 1,024: | ||
|name=Jump MK (Neutral) | |name=Jump MK (Neutral) | ||
|input={{u}}+{{mk}} | |input={{u}}+{{mk}} | ||
|image= | |image=3s_ken_nj.mk_1.png | ||
|imageSize=250px | |||
|image2=3s_ken_nj.mk_2.png | |||
|imageSize2=250px | |||
|caption=Frame 6 | |||
|caption2=Frames 7-11 | |||
|data= | |data= | ||
{{AttackData-3S | {{AttackData-3S | ||
|startup=5 | |startup=5 | ||
|active=6 | |active=6 | ||
| | |recovery= | ||
|onBlock=+3~+10 | |||
|onHit=+3~+10 | |||
|onHitCrouch=+10 | |||
|damage=16 | |damage=16 | ||
|stun=9 | |stun=9 | ||
|karaDistance= | |||
|guard=H | |||
|parry=H | |||
|cancelOptions= | |||
|selfMeterWhiff=2 | |||
|selfMeterHit=11 | |||
|selfMeterBlock=6 | |||
|oppMeterHit=2 | |||
|oppMeterBlock=0 | |||
|description= | |description= | ||
* | * neutral poke / zoning option | ||
* controls a lot of air space | |||
* hit-confirmable on grounded hits, even when it hits pretty high up | |||
Not used too commonly, but because it has a pretty good active hitbox and is hit-confirmable, it does see occasional use as a pre-emptive air-to-air when Ken has a read that the opponent wants to jump out of the corner. | |||
{{3S Button FAT|link=https://fullmeter.com/fatonline/#/framedata/movedetail/3S/Ken/normal/Jump%20MK%20(Neutral)}} | {{3S Button FAT|link=https://fullmeter.com/fatonline/#/framedata/movedetail/3S/Ken/normal/Jump%20MK%20(Neutral)}} | ||
}} | }} | ||
| Line 660: | Line 1,063: | ||
|name=Jump MK | |name=Jump MK | ||
|input={{uf}}+{{mk}} | |input={{uf}}+{{mk}} | ||
|image= | |image=3s_ken_j.mk_1.png | ||
|imageSize=250px | |||
|image2=3s_ken_j.mk_2.png | |||
|imageSize2=250px | |||
|caption=Frame 6 | |||
|caption2=Frames 7-11 | |||
|data= | |data= | ||
{{AttackData-3S | {{AttackData-3S | ||
|startup=5 | |startup=5 | ||
|active=6 | |active=6 | ||
| | |recovery= | ||
|onBlock=+3~+10 | |||
|onHit=+3~+10 | |||
|onHitCrouch=+10 | |||
|damage=16 | |damage=16 | ||
|stun=9 | |stun=9 | ||
|karaDistance= | |||
|guard=H | |||
|parry=H | |||
|cancelOptions= | |||
|selfMeterWhiff=2 | |||
|selfMeterHit=11 | |||
|selfMeterBlock=6 | |||
|oppMeterHit=2 | |||
|oppMeterBlock=0 | |||
|description= | |description= | ||
* | * the cross-up button | ||
* hit-confirmable | |||
Usually the button Ken will use when he wants to get offense started with a close jump. Since it can hit crossup, it's a little harder for the opponent to block or anti-air. Doesn't always combo, but on-hit advantage is pretty generous. Deeper hits will combo into target combo for a lot of damage. The crossup hitbox also makes it very useful in okizeme situations, such as after an SA3 hit, adding another layer to Ken's left-right mixup. | |||
{{3S Button FAT|link=https://fullmeter.com/fatonline/#/framedata/movedetail/3S/Ken/normal/Jump%20MK}} | {{3S Button FAT|link=https://fullmeter.com/fatonline/#/framedata/movedetail/3S/Ken/normal/Jump%20MK}} | ||
}} | }} | ||
| Line 679: | Line 1,101: | ||
|name=Jump HK (Neutral) | |name=Jump HK (Neutral) | ||
|input={{u}}+{{hk}} | |input={{u}}+{{hk}} | ||
|image= | |image=3s_ken_nj.hk_1.png | ||
|imageSize=250px | |||
|image2=3s_ken_nj.hk_2.png | |||
|imageSize2=250px | |||
|caption=Frames 8-9 | |||
|caption2=Frames 10-12 | |||
|data= | |data= | ||
{{AttackData-3S | {{AttackData-3S | ||
|startup=7 | |startup=7 | ||
|active=5 | |active=5 | ||
| | |recovery= | ||
|onBlock=+7~+13 | |||
|onHit=+9~+13 | |||
|onHitCrouch=+13 | |||
|damage=23 | |damage=23 | ||
|stun=13 | |stun=13 | ||
|karaDistance= | |||
|guard=H | |||
|parry=H | |||
|cancelOptions= | |||
|selfMeterWhiff=3 | |||
|selfMeterHit=19 | |||
|selfMeterBlock=10 | |||
|oppMeterHit=4 | |||
|oppMeterBlock=0 | |||
|description= | |description= | ||
* | * air-to-air option that covers different angles than neutral jump MK | ||
* hit-confirmable with big frame advantage | |||
Similar usage to neutral jump MK, but since it hits at more of an upward angle, it can be useful in matchups where the opponent can get above Ken in the air. The upward angle can make it a bit harder to hit-confirm, though. | |||
{{3S Button FAT|link=https://fullmeter.com/fatonline/#/framedata/movedetail/3S/Ken/normal/Jump%20HK%20(Neutral)}} | {{3S Button FAT|link=https://fullmeter.com/fatonline/#/framedata/movedetail/3S/Ken/normal/Jump%20HK%20(Neutral)}} | ||
}} | }} | ||
| Line 698: | Line 1,139: | ||
|name=Jump HK | |name=Jump HK | ||
|input={{uf}}+{{hk}} | |input={{uf}}+{{hk}} | ||
|image= | |image=3s_ken_j.hk_1.png | ||
|imageSize=250px | |||
|image2=3s_ken_j.hk_2.png | |||
|imageSize2=250px | |||
|caption=Frame 7 | |||
|caption2=Frames 8-10 | |||
|data= | |data= | ||
{{AttackData-3S | {{AttackData-3S | ||
|startup=6 | |startup=6 | ||
|active=4 | |active=4 | ||
| | |recovery= | ||
|onBlock=+5~+12 | |||
|onHit=+5~+12 | |||
|onHitCrouch=+12 | |||
|damage=22 | |damage=22 | ||
|stun=13 | |stun=13 | ||
|karaDistance= | |||
|guard=H | |||
|parry=H | |||
|cancelOptions= | |||
|selfMeterWhiff=3 | |||
|selfMeterHit=19 | |||
|selfMeterBlock=10 | |||
|oppMeterHit=4 | |||
|oppMeterBlock=0 | |||
|description= | |description= | ||
* | * standard offensive jump-in | ||
* defensive air-to-air | |||
* lots of frame advantage | |||
* easy hit confirm | |||
* "mixup" versus anti-air parry | |||
Probably Ken's most used jump-in option. Jump HP is better in some minor ways, but jump HK has a good hitbox and just works. It's easy to hit-confirm, and even if Ken hits the opponent in the forehead, he generally has enough advantage to combo directly into super or LP DP. Deeper hits can combo into target combo or even 2MK for big meterless damage. Because it has so much frame advantage, and almost always leads to a combo on hit, it's possible to mess with the opponent's anti-air parry timing by mixing between earliest and latest possible jump HK. It will rarely hit crossup, but without a specific setup, this is unreliable. Jump back HK also sees use as a pre-emptive, defensive anti-air, something that is particularly useful against Dudley. | |||
{{3S Button FAT|link=https://fullmeter.com/fatonline/#/framedata/movedetail/3S/Ken/normal/Jump%20HK}} | {{3S Button FAT|link=https://fullmeter.com/fatonline/#/framedata/movedetail/3S/Ken/normal/Jump%20HK}} | ||
}} | }} | ||
| Line 717: | Line 1,180: | ||
==== Target Combos ==== | ==== Target Combos ==== | ||
=====<font style="visibility:hidden; float:right">MPHP</font>===== | |||
{{MoveData | |||
|name=Target Combo | |||
|input={{mp}}>{{hp}} | |||
|image=3s_ken_cl.mp.png | |||
|imageSize=250px | |||
|image2=3s_ken_cl.hp_1.png | |||
|imageSize2=250px | |||
|image3=3s_ken_cl.hp_2.png | |||
|imageSize3=250px | |||
|data= | |||
{{AttackData-3S | |||
|startup=4 | |||
|active= | |||
|recovery= | |||
|onBlock=-2 | |||
|onHit=0 | |||
|onHitCrouch=2 | |||
|damage=7 | |||
|stun=3 | |||
|karaDistance= | |||
|guard=HL | |||
|parry=H | |||
|cancelOptions=sp, su | |||
|selfMeterWhiff= | |||
|selfMeterHit=6+1 | |||
|selfMeterBlock=11+1 | |||
|oppMeterHit=2 | |||
|oppMeterBlock=0 | |||
|description= | |||
* one of the best target combos in the game | |||
* very easy hit confirm with or without meter | |||
* confirms into DP meterless, although this can drop at extreme range | |||
* confirms into SA3 with meter | |||
Ken's target combo provides him with one of the easiest hit-confirms in the game. The range and high parry property synergize well with his frame traps and 2LK hit-confirms, forcing the opponent to guess if they want to parry out of his offense. It's safe on block at only -2, although push back does somewhat end Ken's "turn" offensively. | |||
If you find the super cancel difficult, you can ease the execution a bit by doing TC xx LP fireball xx SA3. This increases the amount of time you have to complete the super motion, although ideally you still want to confirm the target combo and avoid doing fireball on block. | |||
Because there is a little bit of proximity normal ambiguity between close MP and far MP, Ken can occasionally get target combo when he expects far MP. To deal with this he can just always input target combo when he wants to do a standing strong button, and then hit-confirm appropriately. | |||
Target combo provides Ken with an okay SGGK (parry-throw option select) by inputting parry -> cl.MP ~ LP+LK delay HP. If the opponent blocks, Ken will kara throw them, but if they push a button, Ken will parry followed by target combo, which can be hit-confirmed into DP or super. Because close strong has 0 kara range, Ken has to be very close to do this, so it is weaker than other SGGK options. This can also be useful to defend against some jump-ins. If done correctly, Ken can parry the jump in or tech an empty-jump throw. | |||
For some reason, Ken's target combo causes a 10f lockout on kara inputs upon recovery. This recovery can be canceled by tapping down or moving. | |||
}} | |||
}} | |||
<br> | <br> | ||
<br> | <br> | ||
| Line 727: | Line 1,235: | ||
|name=Hizageri | |name=Hizageri | ||
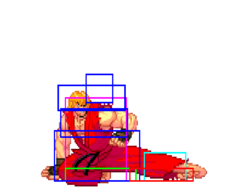
|input={{lp}}+{{lk}} (mash) | |input={{lp}}+{{lk}} (mash) | ||
| | |image2=(kenhg).gif | ||
|image=3s_ken_lp+lk.png | |||
|imageSize2=150px | |||
|imageSize=250px | |||
|data= | |data= | ||
{{AttackData-3S | {{AttackData-3S | ||
| Line 733: | Line 1,244: | ||
|active=1 | |active=1 | ||
|recovery=21 | |recovery=21 | ||
|onBlock= | |||
|onHit=D | |onHit=D | ||
|onHitCrouch=D | |onHitCrouch=D | ||
|damage=27 | |damage=27 | ||
|stun=12 | |stun=12 | ||
|karaDistance= | |||
|guard= | |||
|parry= | |||
|cancelOptions= | |||
|selfMeterWhiff=0 | |||
|selfMeterHit=7 | |||
|selfMeterBlock= | |||
|oppMeterHit=0 | |||
|oppMeterBlock=7 | |||
|description= | |description= | ||
* 24 throw range | * 24 throw range | ||
* mash for more hits | |||
* lots of frame advantage | |||
Theoretically does more damage than Ken's other throws, but the opponent is able to counter-mash to reduce damage. The main reason to use this is because the opponent is grounded for a lot longer than normal throw, so Ken gets way more frame advantage and better okizeme. This is particularly noticeable against Twelve, who recovers very quickly from forward throw. | |||
2MK and 4MK kara throws are also much easier to perform with neutral throw than forward throw. | |||
{{3S Button FAT|link=https://fullmeter.com/fatonline/#/framedata/movedetail/3S/Ken/normal/Hizageri}} | {{3S Button FAT|link=https://fullmeter.com/fatonline/#/framedata/movedetail/3S/Ken/normal/Hizageri}} | ||
}} | }} | ||
| Line 747: | Line 1,274: | ||
|name=Jigoku Kuruma | |name=Jigoku Kuruma | ||
|input={{b}}+{{lp}}+{{lk}} | |input={{b}}+{{lp}}+{{lk}} | ||
| | |image2=(kenjg).gif | ||
|image=3s_ken_lp+lk.png | |||
|imageSize2=150px | |||
|imageSize=250px | |||
|data= | |data= | ||
{{AttackData-3S | {{AttackData-3S | ||
| Line 753: | Line 1,283: | ||
|active=1 | |active=1 | ||
|recovery=21 | |recovery=21 | ||
|onBlock= | |||
|onHit=D | |onHit=D | ||
|onHitCrouch=D | |onHitCrouch=D | ||
|damage=19 | |damage=19 | ||
|stun=14 | |stun=14 | ||
|karaDistance= | |||
|guard= | |||
|parry= | |||
|cancelOptions= | |||
|selfMeterWhiff=0 | |||
|selfMeterHit=8 | |||
|selfMeterBlock= | |||
|oppMeterHit=2 | |||
|oppMeterBlock=7 | |||
|description= | |description= | ||
* 24 throw range | * 24 throw range | ||
* side-switches with the opponent | |||
* corner carry | |||
Back throw is really good around mid-stage, because it usually throws the opponent all the way to the corner. Ken actually recovers before the opponent hits the ground, so if this is going to kill them, Ken can sneak in a shoryu before they land to build a little bit of extra meter gain before the round ends. | |||
{{3S Button FAT|link=https://fullmeter.com/fatonline/#/framedata/movedetail/3S/Ken/normal/Jigoku%20Kuruma}} | {{3S Button FAT|link=https://fullmeter.com/fatonline/#/framedata/movedetail/3S/Ken/normal/Jigoku%20Kuruma}} | ||
}} | }} | ||
| Line 767: | Line 1,311: | ||
|name=Seoi Nage | |name=Seoi Nage | ||
|input={{f}}+{{lp}}+{{lk}} | |input={{f}}+{{lp}}+{{lk}} | ||
| | |image2=(kensn).gif | ||
|image=3s_ken_lp+lk.png | |||
|imageSize2=150px | |||
|imageSize=250px | |||
|data= | |data= | ||
{{AttackData-3S | {{AttackData-3S | ||
| Line 773: | Line 1,320: | ||
|active=1 | |active=1 | ||
|recovery=21 | |recovery=21 | ||
|onBlock= | |||
|onHit=D | |onHit=D | ||
|onHitCrouch=D | |onHitCrouch=D | ||
|damage=21 | |damage=21 | ||
|stun=8 | |stun=8 | ||
|karaDistance= | |||
|guard= | |||
|parry= | |||
|cancelOptions= | |||
|selfMeterWhiff=0 | |||
|selfMeterHit=8 | |||
|selfMeterBlock= | |||
|oppMeterHit=2 | |||
|oppMeterBlock=7 | |||
|description= | |description= | ||
* 24 throw range | * 24 throw range | ||
Forward throw provides weaker okizeme than neutral throw, but usually nets more damage because it isn't mashable. | |||
{{3S Button FAT|link=https://fullmeter.com/fatonline/#/framedata/movedetail/3S/Ken/normal/Seoi%20Nage}} | {{3S Button FAT|link=https://fullmeter.com/fatonline/#/framedata/movedetail/3S/Ken/normal/Seoi%20Nage}} | ||
}} | }} | ||
| Line 791: | Line 1,350: | ||
|name=Straight Hit | |name=Straight Hit | ||
|input={{mp}}+{{mk}} | |input={{mp}}+{{mk}} | ||
|image= | |image=3s_ken_mp+mk.png | ||
|imageSize=250px | |||
|data= | |data= | ||
{{AttackData-3S | {{AttackData-3S | ||
| Line 797: | Line 1,357: | ||
|active=8 | |active=8 | ||
|recovery=7 | |recovery=7 | ||
|onHit=0 ~ +7 | |onBlock=-5~-0 | ||
|onHitCrouch=1 ~ +8 | |onHit=-0~+7 | ||
|onHitCrouch=1~+8 | |||
|damage=7 | |damage=7 | ||
|stun=3 | |stun=3 | ||
|karaDistance= | |||
|guard=H | |||
|parry=H | |||
|cancelOptions= | |||
|selfMeterWhiff=0 | |||
|selfMeterHit=2 | |||
|selfMeterBlock=1 | |||
|oppMeterHit=0 | |||
|oppMeterBlock=0 | |||
|description= | |description= | ||
* variety of confirms available on meaty | |||
While the overhead is universal, the frame data isn't. Ken's UOH actually has the fewest active frames of the 3 types. While it can be up to +8, which makes the super link very easy, that also gives the opponent a lot more time to react and block. Ideally Ken hits this around +3 or +4 to minimize reaction time. | |||
{{3S Button FAT|link=https://fullmeter.com/fatonline/#/framedata/movedetail/3S/Ken/normal/Straight%20Hit}} | {{3S Button FAT|link=https://fullmeter.com/fatonline/#/framedata/movedetail/3S/Ken/normal/Straight%20Hit}} | ||
}} | }} | ||
| Line 816: | Line 1,387: | ||
|name=Taunt | |name=Taunt | ||
|input={{hp}}+{{hk}} | |input={{hp}}+{{hk}} | ||
|image=(kent).gif | |image=3s_ken_hp+hk.png | ||
|image2=(kent).gif | |||
|imageSize=250px | |||
|imageSize2=150px | |||
|data= | |data= | ||
{{AttackData-3S | {{AttackData-3S | ||
| Line 822: | Line 1,396: | ||
|active=2 | |active=2 | ||
|recovery=27 | |recovery=27 | ||
|onBlock=-18 | |||
|onHit=-18 | |onHit=-18 | ||
| | |onHitCrouch=-18 | ||
|damage=2 | |damage=2 | ||
|stun=6 | |stun=6 | ||
|karaDistance= | |||
|guard=HL | |||
|parry=HL | |||
|cancelOptions= | |||
|selfMeterWhiff=4 | |||
|selfMeterHit=8 | |||
|selfMeterBlock=6 | |||
|oppMeterHit=0 | |||
|oppMeterBlock=0 | |||
|description= | |description= | ||
* | * Usually used after hitting SA3 | ||
* | * Increases damage for the next hit or combo by 31.3%. One taunt is the maximum. | ||
* Taunt bonus only applies to the next hit or combo. | |||
* Taunt bonus does not stack. | |||
* If Ken does a combo, the bonus scales with the combo. It is not a flat 31.3% boost to the entire combo. | |||
* Ken loses the taunt bonus after the opponent gets hit, blocks an attack, parries an attack, or gets thrown. | |||
* Ken loses the taunt bonus if he is hit, unless his next attack is a reversal, in which case the reversal retains the taunt bonus. | |||
* Ken retains the taunt bonus if he blocks an attack. | |||
Ken's taunt hits twice, and each hit does 1 damage, so if he really wants to BM someone with taunt, he can try to kill them with this. | |||
{{3S Button FAT|link=https://fullmeter.com/fatonline/#/framedata/movedetail/3S/Ken/normal/Taunt}} | {{3S Button FAT|link=https://fullmeter.com/fatonline/#/framedata/movedetail/3S/Ken/normal/Taunt}} | ||
}} | }} | ||
| Line 842: | Line 1,433: | ||
|name=Hadouken | |name=Hadouken | ||
|input={{qcf}}+{{p}} | |input={{qcf}}+{{p}} | ||
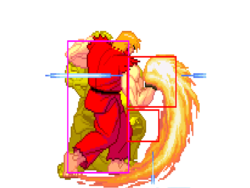
|image= | |image=3s_ken_qcf1.png | ||
|caption={{lp}}/{{mp}}/{{hp}} | |image2=3s_ken_qcf2.png | ||
| | |image3=3s_ken_exqcf_1.png | ||
|image4=3s_ken_exqcf_2.png | |||
|imageSize=250px | |||
|imageSize2=250px | |||
|imageSize3=250px | |||
|imageSize4=250px | |||
|caption=Frame 12 | |||
|caption3=Frame 12 | |||
|caption2={{lp}}/{{mp}}/{{hp}} Frame 13-onwards | |||
|caption4={{ex}} Frame 13-onwards | |||
|data= | |data= | ||
{{AttackData-3S | {{AttackData-3S | ||
|version= | |version={{lp}} | ||
|startup=11 | |startup=11 | ||
|active= | |||
|recovery=38 | |recovery=38 | ||
|onBlock=-11 | |onBlock=-11 | ||
| | |onHit=-10 | ||
|onHitCrouch=-10 | |||
|damage=10 | |damage=10 | ||
|stun=3 | |stun=3 | ||
|karaDistance= | |||
|guard=HL | |||
|parry=H | |||
|cancelOptions=su | |||
|selfMeterWhiff=0 | |||
|selfMeterHit=2 | |||
|selfMeterBlock=1 | |||
|oppMeterHit=0 | |||
|oppMeterBlock=0 | |||
|description= | |description= | ||
* | * If you're using the TC xx hadouken xx SA3 confirm, you should use LP hadouken. This prevents the hadouken from hitting the opponent and scaling damage. | ||
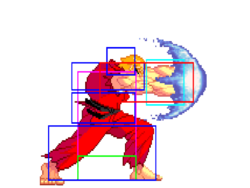
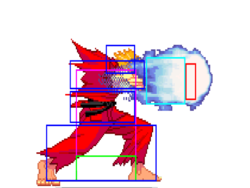
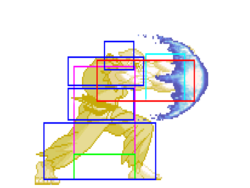
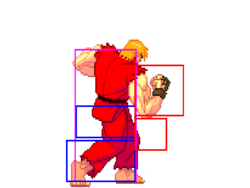
{{3S Button FAT|link=https://fullmeter.com/fatonline/#/framedata/movedetail/3S/Ken/normal/LP%20Hadouken}} | {{3S Button FAT|link=https://fullmeter.com/fatonline/#/framedata/movedetail/3S/Ken/normal/LP%20Hadouken}} | ||
}} | }} | ||
{{AttackData-3S | {{AttackData-3S | ||
|version= | |version={{mp}} | ||
|startup=11 | |startup=11 | ||
|active= | |||
|recovery=38 | |recovery=38 | ||
|onBlock=-11 | |onBlock=-11 | ||
|onHit=-10 | |||
|onHitCrouch=-10 | |||
|damage=10 | |||
|stun=3 | |||
|karaDistance= | |||
|guard=HL | |||
|parry=H | |parry=H | ||
| | |cancelOptions=su | ||
|selfMeterWhiff=0 | |||
|selfMeterHit=2 | |||
|selfMeterBlock=1 | |||
|oppMeterHit=0 | |||
|oppMeterBlock=0 | |||
|description= | |description= | ||
{{3S Button FAT|link=https://fullmeter.com/fatonline/#/framedata/movedetail/3S/Ken/normal/MP%20Hadouken}} | {{3S Button FAT|link=https://fullmeter.com/fatonline/#/framedata/movedetail/3S/Ken/normal/MP%20Hadouken}} | ||
}} | }} | ||
{{AttackData-3S | {{AttackData-3S | ||
|version= | |version={{hp}} | ||
|startup=11 | |startup=11 | ||
|active= | |||
|recovery=38 | |recovery=38 | ||
|onBlock=-11 | |onBlock=-11 | ||
| | |onHit=-10 | ||
|onHitCrouch=-10 | |||
|damage=10 | |damage=10 | ||
|stun=3 | |stun=3 | ||
|karaDistance= | |||
|guard=HL | |||
|parry=H | |||
|cancelOptions=su | |||
|selfMeterWhiff=0 | |||
|selfMeterHit=2 | |||
|selfMeterBlock=1 | |||
|oppMeterHit=0 | |||
|oppMeterBlock=0 | |||
|description= | |description= | ||
{{3S Button FAT|link=https://fullmeter.com/fatonline/#/framedata/movedetail/3S/Ken/normal/HP%20Hadouken}} | {{3S Button FAT|link=https://fullmeter.com/fatonline/#/framedata/movedetail/3S/Ken/normal/HP%20Hadouken}} | ||
}} | }} | ||
{{AttackData-3S | {{AttackData-3S | ||
|version= | |version={{ex}} | ||
|startup=11 | |startup=11 | ||
|active= | |||
|recovery=38 | |recovery=38 | ||
|onBlock=-6 | |onBlock=-6 | ||
| | |onHit=D | ||
|onHitCrouch=D | |||
|damage=20 | |damage=20 | ||
|stun=5 | |stun=5 | ||
|karaDistance= | |||
|guard=HL | |||
|parry=H | |||
|cancelOptions=su | |||
|selfMeterWhiff=-40 | |||
|selfMeterHit=-40 | |||
|selfMeterBlock=-40 | |||
|oppMeterHit=0 | |||
|oppMeterBlock=0 | |||
|description= | |description= | ||
* | * Quite a bit safer than meterless versions. | ||
* Sometimes used to end a block string. | |||
* | |||
{{3S Button FAT|link=https://fullmeter.com/fatonline/#/framedata/movedetail/3S/Ken/normal/EX%20Hadouken}} | {{3S Button FAT|link=https://fullmeter.com/fatonline/#/framedata/movedetail/3S/Ken/normal/EX%20Hadouken}} | ||
}} | }} | ||
<br> | |||
Ken's fireballs are unsafe near point blank, but become safer when they are spaced out. The sweet spot is a bit outside his normal poke range, where it's hard to consistently parry on reaction. Be aware of the opponent's meter, as some fast supers can be a threat even against well-spaced fireballs. The EX version is the most useful due to its knockdown and relative safety on block. Cancelling a normal into hadouken allows more time for a hit confirm. Throwing a raw fireball xx SA3 can mess up the opponent's parry timing when going for a chip KO. | |||
}} | }} | ||
| Line 904: | Line 1,545: | ||
|name=Shoryuken | |name=Shoryuken | ||
|input={{dp}}+{{p}} | |input={{dp}}+{{p}} | ||
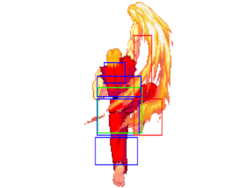
|image= | |image=3s_ken_dp.lp_1.png | ||
|caption={{lp}}/{{mp}} | |imageSize=250px | ||
| | |imageSize2=250px | ||
| | |imageSize3=250px | ||
|imageSize4=250px | |||
|imageSize5=250px | |||
|imageSize6=250px | |||
|imageSize7=250px | |||
|imageSize8=250px | |||
|imageSize9=250px | |||
|image2=3s_ken_dp.lp_2.png | |||
|image3=3s_ken_dp.lp_3.png | |||
|caption=Frames 3-4 | |||
|caption2=Frames 5-6 | |||
|caption3={{lp}}/{{mp}} Frames 7-10 | |||
|image4=3s_ken_dp.hp_1.png | |||
|caption4=Frames 4-5 | |||
|image5=3s_ken_dp.hp_2.png | |||
|caption5=Frames 6-7 | |||
|image6=3s_ken_dp.hp_3.png | |||
|caption6={{hp}} Frames 8-24 | |||
|image7=3s_ken_exdp_1.png | |||
|caption7=Frames 2-3 | |||
|image8=3s_ken_exdp_2.png | |||
|caption8=Frames 4-5 | |||
|image9=3s_ken_exdp_3.png | |||
|caption9={{ex}} Frames 6-24 | |||
|data= | |data= | ||
{{AttackData-3S | {{AttackData-3S | ||
|version= | |version={{lp}} | ||
|startup=2 | |startup=2 | ||
|active=8 | |active=8 | ||
|recovery=26 | |recovery=26 | ||
|onBlock=-17 | |onBlock=-17 | ||
| | |onHit=D | ||
|onHitCrouch=D | |||
|damage=26 | |damage=26 | ||
|stun=11 | |stun=11 | ||
|karaDistance= | |||
|guard=HL | |||
|parry=HL | |||
|cancelOptions=su | |||
|selfMeterWhiff=3 | |||
|selfMeterHit=21 | |||
|selfMeterBlock=15 | |||
|oppMeterHit=6 | |||
|oppMeterBlock=0 | |||
|description= | |description= | ||
* | * 1-4f upper-body invulnerability | ||
* | * Ken's fastest meterless DP at 2f startup | ||
* | * Be wary of TC xx LP DP, as it can drop from long range TC hits | ||
* Vulnerable to parry due to being one hit | |||
* Extremely high damage potential due to shoryu -> kara shoryu combo | |||
{{3S Button FAT|link=https://fullmeter.com/fatonline/#/framedata/movedetail/3S/Ken/normal/LP%20Shoryuken}} | {{3S Button FAT|link=https://fullmeter.com/fatonline/#/framedata/movedetail/3S/Ken/normal/LP%20Shoryuken}} | ||
}} | }} | ||
{{AttackData-3S | {{AttackData-3S | ||
|version= | |version={{mp}} | ||
|startup=3 | |startup=3 | ||
|active=14 | |active=14 | ||
|recovery=28 | |recovery=28 | ||
|onBlock=-24 | |onBlock=-24 | ||
| | |onHit=D | ||
|onHitCrouch=D | |||
|damage=28 | |damage=28 | ||
|stun=15 | |stun=15 | ||
|karaDistance= | |||
|guard=HL | |||
|parry=HL | |||
|cancelOptions=su | |||
|selfMeterWhiff=3 | |||
|selfMeterHit=22 | |||
|selfMeterBlock=16 | |||
|oppMeterHit=6 | |||
|oppMeterBlock=0 | |||
|description= | |description= | ||
* | * 1-5f upper-body invulnerability | ||
* | * First hit can be canceled into super for a full, grounded combo | ||
* | * Second hit can beat an opponent who only expects to parry once | ||
{{3S Button FAT|link=https://fullmeter.com/fatonline/#/framedata/movedetail/3S/Ken/normal/MP%20Shoryuken}} | {{3S Button FAT|link=https://fullmeter.com/fatonline/#/framedata/movedetail/3S/Ken/normal/MP%20Shoryuken}} | ||
}} | }} | ||
{{AttackData-3S | {{AttackData-3S | ||
|version= | |version={{hp}} | ||
|startup=3 | |startup=3 | ||
|active=21 | |active=21 | ||
|recovery=32 | |recovery=32 | ||
|onBlock=-31 | |onBlock=-31 | ||
| | |onHit=D | ||
|onHitCrouch=D | |||
|damage=32 | |damage=32 | ||
|stun=15 | |stun=15 | ||
|karaDistance= | |||
|guard=HL | |||
|parry=HL | |||
|cancelOptions=su | |||
|selfMeterWhiff=3 | |||
|selfMeterHit=23 | |||
|selfMeterBlock=17 | |||
|oppMeterHit=6 | |||
|oppMeterBlock=0 | |||
|description= | |description= | ||
* | * 1-3f fully invulnerable, 4-7f upper-body invulnerability | ||
* | * Great meterless anti-air with multiple hits | ||
* | * First two hits can be super canceled for a full, grounded combo. | ||
* Fully invulnerable '''until''' the first active frame. First active frame is only upper-body invulnerable. | |||
{{3S Button FAT|link=https://fullmeter.com/fatonline/#/framedata/movedetail/3S/Ken/normal/HP%20Shoryuken}} | {{3S Button FAT|link=https://fullmeter.com/fatonline/#/framedata/movedetail/3S/Ken/normal/HP%20Shoryuken}} | ||
}} | }} | ||
{{AttackData-3S | {{AttackData-3S | ||
|version= | |version={{ex}} | ||
|startup=1 | |startup=1 | ||
|active=20 | |active=20 | ||
|recovery=38 | |recovery=38 | ||
|onBlock=-36 | |onBlock=-36 | ||
| | |onHit=D | ||
|onHitCrouch=D | |||
|damage=34 | |damage=34 | ||
|stun=17 | |stun=17 | ||
|karaDistance= | |||
|guard=HL | |||
|parry=HL | |||
|cancelOptions=su | |||
|selfMeterWhiff=-40 | |||
|selfMeterHit=-40 | |||
|selfMeterBlock=-40 | |||
|oppMeterHit=0 | |||
|oppMeterBlock=0 | |||
|description= | |description= | ||
* | * 1-5f fully invulnerable | ||
* | * Also a great anti-air | ||
* | * Fully invulnerable '''through''' the first active frame | ||
* Sometimes used in optimized combos, notably in the corner against Chun Li | |||
{{3S Button FAT|link=https://fullmeter.com/fatonline/#/framedata/movedetail/3S/Ken/normal/EX%20Shoryuken}} | {{3S Button FAT|link=https://fullmeter.com/fatonline/#/framedata/movedetail/3S/Ken/normal/EX%20Shoryuken}} | ||
The flaming HP dragon punch is one of the most iconic moves in Street Fighter. All of Ken's uppercuts feature fast startup, some kind of invulnerability, great active hitboxes, and a lot of recovery frames. Even LP shoryuken is -17 on block, so attentive opponents should punish Ken for a poorly chosen DP. | |||
Despite the similarities, each version has a unique place in Ken's kit. LP shoryuken is the fastest meterless version, as well the key to Ken's high meterless damage with W shoryu combos. MP is generally used in combos -- the the first hit keeps the opponent grounded for a super cancel. HP is invulnerable up to the first active frame, so it's a strong meterless reversal that will beat most meaty attempts. EX is the fastest with 1f startup, and it is fully invulnerable up to and including the first active frame, making it a very strong reversal option. | |||
All versions of shoryuken are also strong anti-airs, due to the aforementioned upper-body or full invulnerability, fast startup, and large hitboxes. As with all anti-airs in 3rd Strike, Ken has to mix up his options to play around jump-in parry. If the opponent sticks a button out in the air though, Ken's DP will usually make the opponent suffer. | |||
}} | }} | ||
}} | }} | ||
| Line 978: | Line 1,689: | ||
|name=Tatsumaki Senpukyaku | |name=Tatsumaki Senpukyaku | ||
|input={{qcb}}+{{k}} | |input={{qcb}}+{{k}} | ||
|image= | |image=3s_ken_qcb_1.png | ||
|caption={{lk}}/{{mk}}/{{hk}} | |imageSize=250px | ||
|image2=3s_ken_qcb_2.png | |||
|imageSize2=250px | |||
|caption=Frame 7-8 / EX: Frame 5-6 | |||
|caption2={{lk}}/{{mk}}/{{hk}}/{{ex}} Frame 17-19 / EX: Frame 12-13 | |||
|data= | |data= | ||
{{AttackData-3S | {{AttackData-3S | ||
|version= | |version={{lk}} | ||
|startup=6 | |startup=6 | ||
|active=7 | |active=7 | ||
|recovery=14 | |recovery=14 | ||
|onBlock=-5 | |onBlock=-5 | ||
| | |onHit=-3 | ||
|onHitCrouch=-3 | |||
|damage=19 | |damage=19 | ||
|stun=9 | |stun=9 | ||
|karaDistance= | |||
|guard=HL | |||
|parry=H | |||
|cancelOptions=su | |||
|selfMeterWhiff=3 | |||
|selfMeterHit=19 | |||
|selfMeterBlock=13 | |||
|oppMeterHit=4 | |||
|oppMeterBlock=0 | |||
|description= | |description= | ||
{{3S Button FAT|link=https://fullmeter.com/fatonline/#/framedata/movedetail/3S/Ken/normal/LK%20Tatsumaki%20Senpukyaku}} | {{3S Button FAT|link=https://fullmeter.com/fatonline/#/framedata/movedetail/3S/Ken/normal/LK%20Tatsumaki%20Senpukyaku}} | ||
}} | }} | ||
{{AttackData-3S | {{AttackData-3S | ||
|version= | |version={{mk}} | ||
|startup=6 | |startup=6 | ||
|active=14 | |active=14 | ||
|recovery=15 | |recovery=15 | ||
|onBlock=-6 | |onBlock=-6 | ||
| | |onHit=-4 | ||
|onHitCrouch=-4 | |||
|damage=23 | |damage=23 | ||
|stun=13 | |stun=13 | ||
|karaDistance= | |||
|guard=HL | |||
|parry=H | |||
|cancelOptions=su | |||
|selfMeterWhiff=3 | |||
|selfMeterHit=21 | |||
|selfMeterBlock=15 | |||
|oppMeterHit=4 | |||
|oppMeterBlock=0 | |||
|description= | |description= | ||
{{3S Button FAT|link=https://fullmeter.com/fatonline/#/framedata/movedetail/3S/Ken/normal/MK%20Tatsumaki%20Senpukyaku}} | {{3S Button FAT|link=https://fullmeter.com/fatonline/#/framedata/movedetail/3S/Ken/normal/MK%20Tatsumaki%20Senpukyaku}} | ||
}} | }} | ||
{{AttackData-3S | {{AttackData-3S | ||
|version= | |version={{hk}} | ||
|startup=6 | |startup=6 | ||
|active=17 | |active=17 | ||
|recovery=15 | |recovery=15 | ||
|onBlock=-7 | |onBlock=-7 | ||
| | |onHit=-5 | ||
|onHitCrouch=-5 | |||
|damage=27 | |damage=27 | ||
|stun=15 | |stun=15 | ||
|karaDistance= | |||
|guard=HL | |||
|parry=H | |||
|cancelOptions=su | |||
|selfMeterWhiff=3 | |||
|selfMeterHit=22 | |||
|selfMeterBlock=16 | |||
|oppMeterHit=4 | |||
|oppMeterBlock=0 | |||
|description= | |description= | ||
{{3S Button FAT|link=https://fullmeter.com/fatonline/#/framedata/movedetail/3S/Ken/normal/HK%20Tatsumaki%20Senpukyaku}} | {{3S Button FAT|link=https://fullmeter.com/fatonline/#/framedata/movedetail/3S/Ken/normal/HK%20Tatsumaki%20Senpukyaku}} | ||
}} | }} | ||
{{AttackData-3S | {{AttackData-3S | ||
|version= | |version={{ex}} | ||
|startup=4 | |startup=4 | ||
|active=21 | |active=21 | ||
|recovery=13 | |recovery=13 | ||
|onBlock=-3 | |onBlock=-3 | ||
| | |onHit=-1 | ||
|onHitCrouch=-1 | |||
|damage=34 | |damage=34 | ||
|stun=17 | |stun=17 | ||
|karaDistance= | |||
|guard=HL | |||
|parry=H | |||
|cancelOptions=su | |||
|selfMeterWhiff=-40 | |||
|selfMeterHit=-40 | |||
|selfMeterBlock=-40 | |||
|oppMeterHit=0 | |||
|oppMeterBlock=0 | |||
|description= | |description= | ||
* | * niche combo tool | ||
* | * especially useful against characters who can't crouch 2MK xx EX tatsu (Urien, Alex, Dudley, Hugo, Q, Sean) | ||
* can close out a round if you aren't in range for a shoryuken and don't have meter for a super | |||
* First hit of all ground tatsus is super cancelable. This is usually used for DED. | |||
* All ground tatsus are throwable until after the first hit. | |||
{{3S Button FAT|link=https://fullmeter.com/fatonline/#/framedata/movedetail/3S/Ken/normal/EX%20Tatsumaki%20Senpukyaku}} | {{3S Button FAT|link=https://fullmeter.com/fatonline/#/framedata/movedetail/3S/Ken/normal/EX%20Tatsumaki%20Senpukyaku}} | ||
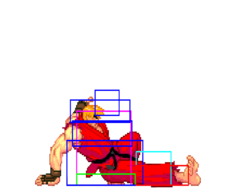
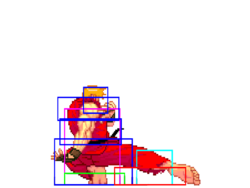
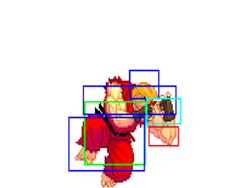
Ground tatsus are only situationally useful. All of them are minus, even on hit, although LK is only -3, and EX is just -1. This doesn't always keep Ken safe though, because many characters can make the tatsu whiff by crouching under it. Still, there are occasions when when a well-placed tatsu can close out a round for Ken when he doesn't have meter for super. | |||
}} | }} | ||
}} | }} | ||
| Line 1,050: | Line 1,796: | ||
|name=Air Tatsumaki Senpukyaku | |name=Air Tatsumaki Senpukyaku | ||
|input={{qcb}}+{{k}} (air) | |input={{qcb}}+{{k}} (air) | ||
|image= | |image=3s_ken_qcb_2.png | ||
|caption={{lk}}/{{mk}}/{{hk}} | |imageSize=250px | ||
|caption={{lk}}/{{mk}}/{{hk}}/{{ex}} | |||
|data= | |data= | ||
{{AttackData-3S | {{AttackData-3S | ||
|version= | |version={{lk}} | ||
|startup=7 | |startup=7 | ||
|active=4 | |active=4 | ||
| | |recovery= | ||
|onBlock=-5~+1 | |||
|onHit=-5~+1 | |||
|onHitCrouch=-1~+1 | |||
|damage=27 | |damage=27 | ||
|stun=9 | |stun=9 | ||
|karaDistance= | |||
|guard=H | |||
|parry=H | |||
|cancelOptions= | |||
|selfMeterWhiff=2 | |||
|selfMeterHit=17 | |||
|selfMeterBlock=3 | |||
|oppMeterHit=4 | |||
|oppMeterBlock=0 | |||
|description= | |description= | ||
{{3S Button FAT|link=https://fullmeter.com/fatonline/#/framedata/movedetail/3S/Ken/normal/LK%20Air%20Tatsumaki%20Senpukyaku}} | {{3S Button FAT|link=https://fullmeter.com/fatonline/#/framedata/movedetail/3S/Ken/normal/LK%20Air%20Tatsumaki%20Senpukyaku}} | ||
}} | }} | ||
{{AttackData-3S | {{AttackData-3S | ||
|version= | |version={{mk}} | ||
|startup=7 | |startup=7 | ||
|active=6 | |active=6 | ||
| | |recovery= | ||
|onBlock=-6~+1 | |||
|onHit=-6~+1 | |||
|onHitCrouch=-1~+1 | |||
|damage=40 | |damage=40 | ||
|stun=13 | |stun=13 | ||
|karaDistance= | |||
|guard=H | |||
|parry=H | |||
|cancelOptions= | |||
|selfMeterWhiff=3 | |||
|selfMeterHit=25 | |||
|selfMeterBlock=3 | |||
|oppMeterHit=6 | |||
|oppMeterBlock=0 | |||
|description= | |description= | ||
{{3S Button FAT|link=https://fullmeter.com/fatonline/#/framedata/movedetail/3S/Ken/normal/MK%20Air%20Tatsumaki%20Senpukyaku}} | {{3S Button FAT|link=https://fullmeter.com/fatonline/#/framedata/movedetail/3S/Ken/normal/MK%20Air%20Tatsumaki%20Senpukyaku}} | ||
}} | }} | ||
{{AttackData-3S | {{AttackData-3S | ||
|version= | |version={{hk}} | ||
|startup=7 | |startup=7 | ||
|active=8 | |active=8 | ||
| | |recovery= | ||
|onBlock=-6~+1 | |||
|onHit=-6~+1 | |||
|onHitCrouch=-1~+1 | |||
|damage=40 | |damage=40 | ||
|stun=13 | |stun=13 | ||
|karaDistance= | |||
|guard=H | |||
|parry=H | |||
|cancelOptions= | |||
|selfMeterWhiff=4 | |||
|selfMeterHit=26 | |||
|selfMeterBlock=3 | |||
|oppMeterHit=6 | |||
|oppMeterBlock=0 | |||
|description= | |description= | ||
{{3S Button FAT|link=https://fullmeter.com/fatonline/#/framedata/movedetail/3S/Ken/normal/HK%20Air%20Tatsumaki%20Senpukyaku}} | {{3S Button FAT|link=https://fullmeter.com/fatonline/#/framedata/movedetail/3S/Ken/normal/HK%20Air%20Tatsumaki%20Senpukyaku}} | ||
}} | }} | ||
{{AttackData-3S | {{AttackData-3S | ||
|version= | |version={{ex}} | ||
|startup=6 | |startup=6 | ||
|active=13 | |active=13 | ||
|onBlock= | |recovery= | ||
| | |onBlock=-1~+1 | ||
|onHit=D | |||
|onHitCrouch=D | |||
|damage=52 | |damage=52 | ||
|stun=17 | |stun=17 | ||
|karaDistance= | |||
|guard=H | |||
|parry=H | |||
|cancelOptions= | |||
|selfMeterWhiff=-40 | |||
|selfMeterHit=-40 | |||
|selfMeterBlock=-40 | |||
|oppMeterHit=0 | |||
|oppMeterBlock=0 | |||
|description= | |description= | ||
* | * Excellent corner escape, Ken zooms across the entire screen if timed correctly | ||
* | * Can create left/right mixups from a jump in | ||
* Used in some niche or situational high damage punishes | |||
* In some situations (notably when it hits crossup midscreen) Ken get dash in W shoryu for big damage | |||
* Easiest / most consistent option in case of crossup is just land -> 5MK. Land -> 5HK is also possible, but fairly strict. | |||
* If it hits twice, try to combo with W shoryu. If it hits three times or more, combo with MP shoryu. | |||
{{3S Button FAT|link=https://fullmeter.com/fatonline/#/framedata/movedetail/3S/Ken/normal/EX%20Air%20Tatsumaki%20Senpukyaku}} | {{3S Button FAT|link=https://fullmeter.com/fatonline/#/framedata/movedetail/3S/Ken/normal/EX%20Air%20Tatsumaki%20Senpukyaku}} | ||
EX is by far the most commonly used version. Normal versions are typically relegated to niche combos and okizeme setups. Tatsu trajectory is modified by Ken's jump. If he's moving forward, the tatsu goes forward more. If he's moving up, the tatsu goes up more. | |||
}} | }} | ||
}} | }} | ||
| Line 1,115: | Line 1,905: | ||
|name=Shoryureppa | |name=Shoryureppa | ||
|input={{qcf}}{{qcf}}+{{p}} (SA1) | |input={{qcf}}{{qcf}}+{{p}} (SA1) | ||
|image= | |image=3s_ken_sa1.png | ||
|imageSize=250px | |||
|data= | |data= | ||
{{AttackData-3S | {{AttackData-3S | ||
| Line 1,122: | Line 1,913: | ||
|recovery=45 | |recovery=45 | ||
|onBlock=-38 | |onBlock=-38 | ||
| | |onHit=D | ||
|onHitCrouch=D | |||
|damage=69 | |damage=69 | ||
|stun=6 | |stun=6 | ||
|karaDistance= | |||
|guard=HL | |||
|parry=HL | |||
|cancelOptions= | |||
|selfMeterWhiff=-112 | |||
|selfMeterHit=-112 | |||
|selfMeterBlock=-112 | |||
|oppMeterHit=0 | |||
|oppMeterBlock=0 | |||
|description= | |description= | ||
* fully invulnerable frames 1-7 | |||
* two meters, meter length 112 | |||
* limited hit confirms | |||
* Ken's fastest startup super | |||
Shoryureppa is kind of a middle ground between Ken's other two supers. It provides more access to EX moves than SA2, while doing more damage than SA3. Its main shortcoming is that the first hit doesn't move very far forward, so it severely limits Ken's ability to confirm into it compared to SA3. It is not typically chosen seriously by competitive players. | |||
{{3S Button FAT|link=https://fullmeter.com/fatonline/#/framedata/movedetail/3S/Ken/normal/Shoryureppa}} | {{3S Button FAT|link=https://fullmeter.com/fatonline/#/framedata/movedetail/3S/Ken/normal/Shoryureppa}} | ||
}} | }} | ||
| Line 1,135: | Line 1,941: | ||
|name=Shinryuken | |name=Shinryuken | ||
|input={{qcf}}{{qcf}}+{{k}} (mash K) (SA2) | |input={{qcf}}{{qcf}}+{{k}} (mash K) (SA2) | ||
|image= | |image=3s_ken_sa1.png | ||
|imageSize=250px | |||
|data= | |data= | ||
{{AttackData-3S | {{AttackData-3S | ||
| Line 1,142: | Line 1,949: | ||
|recovery=61 | |recovery=61 | ||
|onBlock=-80 | |onBlock=-80 | ||
| | |onHit=D | ||
|onHitCrouch=D | |||
|damage=67 | |damage=67 | ||
|stun=0 | |||
|karaDistance= | |||
|guard=HL | |||
|parry=HL | |||
|cancelOptions= | |||
|selfMeterWhiff=-104 | |||
|selfMeterHit=-104 | |||
|selfMeterBlock=-104 | |||
|oppMeterHit=0 | |||
|oppMeterBlock=0 | |||
|description= | |description= | ||
* fully invulnerable frames 1-8 | |||
* mash for up to 15 hits | |||
* Ken's highest damage super if you mash all the hits | |||
* one meter, meter length 104 | |||
* limited hit confirms, but slightly better than SA1 | |||
Shinryuken is supposed to be Ken's "nuke" super. It severely limits his EX usage due to only having one bar, but it does a lot of damage if Ken mashes out all the hits. It's also a pretty good anti-air due to the number of hits the opponent has to parry. Like SA1, its main shortcoming is that it lacks a lot of usable hit confirms compared to SA3. | |||
{{3S Button FAT|link=https://fullmeter.com/fatonline/#/framedata/movedetail/3S/Ken/normal/Shinryuken}} | {{3S Button FAT|link=https://fullmeter.com/fatonline/#/framedata/movedetail/3S/Ken/normal/Shinryuken}} | ||
}} | }} | ||
| Line 1,152: | Line 1,976: | ||
=====<font style="visibility:hidden; float:right">236236K (SA3)</font>===== | =====<font style="visibility:hidden; float:right">236236K (SA3)</font>===== | ||
{{MoveData | {{MoveData | ||
|name= | |name=Shippu Jinraikyaku | ||
|input={{qcf}}{{qcf}}+{{k}} (SA3) | |input={{qcf}}{{qcf}}+{{k}} (SA3) | ||
|image= | |image=3s_ken_sa3.png | ||
|imageSize=250px | |||
|data= | |data= | ||
{{AttackData-3S | {{AttackData-3S | ||
| Line 1,161: | Line 1,986: | ||
|recovery=27 | |recovery=27 | ||
|onBlock=-11 | |onBlock=-11 | ||
| | |onHit=D | ||
|onHitCrouch=D | |||
|damage=51 | |damage=51 | ||
|stun=16 | |stun=16 | ||
|karaDistance= | |||
|guard=HL | |||
|parry=H | |||
|cancelOptions= | |||
|selfMeterWhiff=-80 | |||
|selfMeterHit=-80 | |||
|selfMeterBlock=-80 | |||
|oppMeterHit=0 | |||
|oppMeterBlock=0 | |||
|description= | |description= | ||
* fully invulnerable frames 1-2 | |||
* 3 meters, meter length 80 | |||
* looping okizeme | |||
* On hit, Ken can cancel 3 frames of recovery by holding down as he lands. | |||
Shippu is one of the best supers in the game. With fast startup and a million reliable hit confirms, there's a reason Ken almost always chooses this. On hit, Ken can force a left/right high/low/throw mixup, and since SA3 has 3 meters, any hit can lead into another hit confirm and the same situation again. These setups are character-specific due to differing wakeup times across the cast, but they are worth learning. | |||
{{3S Button FAT|link=https://fullmeter.com/fatonline/#/framedata/movedetail/3S/Ken/normal/Shipuujinrai%20Kyaku}} | {{3S Button FAT|link=https://fullmeter.com/fatonline/#/framedata/movedetail/3S/Ken/normal/Shipuujinrai%20Kyaku}} | ||
}} | }} | ||
Latest revision as of 19:34, 13 June 2025
Introduction
After settling into married life for a couple of years, Ken entered the third Street Fighter tournament. He's a US Martial Artist who trains to keep up with his old friend and rival, Ryu.
As one of the most famous fighting game characters ever, and a popular pick in every Street Fighter game, Ken needs little introduction. He is one of the best characters in the game, with very high meterless damage potential, one of the best anti-airs in the game with EX DP, and one of the best supers with SA3.
Super Arts
SAI (Shoryureppa)
Has good close-range hit confirms, 2 stocks, good damage, and significant invulnerability frames. It is lacking in hit confirms from Ken's long range pokes and overheads.
SAII (Shinryuken)
A fairly good anti-air since you can mash it for lots of hits. Does the most damage out of his supers by a good amount. While it does combo from slightly farther away, it has mostly the same long-range hit confirm problem as SA1. Since it has a single, long bar, this super gives you the least opportunity to use EX moves.
SAIII (Shippujinraikyaku)
The universal choice for good reason. 3 stocks means you have loopable okizeme in addition to plenty of EX meter for fireballs, uppercuts, and air tatsus. Has an absurd number of hit confirms — it links or cancels from just about everything. Extremely fast startup and far range on the first hit lets Ken punish many moves that are usually considered safe, as well as making it one of the best whiff punish tools in the game. It is his lowest damage super, but it's still respectable for a 3 bar super with short meters, and the numerous positives outweigh this one small negative.
Pros & Cons
| Strengths | Weaknesses |
|---|---|
|
|
Character Colors
| Ken #3S_KE | |
|---|---|
| Vitals | |
| Life Points | 1200 |
| Stun Points | 64 |
| Super Art Stock/Size | |
| SA1 | 2/112 |
| SA2 | 1/104 |
| SA3 | 3/80 |
| Ground Movement | |
| Forward Dash duration/distance | 12 (16) (95px) |
| Back Dash duration/distance | 15 (54px) |
| Jumping | |
| Back Jump duration | 42(4+36+2) |
| Neutral Jump duration | 40(4+34+2) |
| Forward Jump duration | 41(4+35+2) |
| Back Super Jump duration | 47(6+39+2) |
| Neutral Super Jump duration | 46(6+38+2) |
| Forward Super Jump duration | 46(6+38+2) |
| Wake up | |
| Wake up duration | 75 |
| Quick rise duration | 48 |
Frame Data
| 3S Frame Data Glossary | |
|---|---|
| Active |
How many frames a move remains active (can hurt opponents) for. Consecutive sets of active frames on a multi-hit move are separated by an asterisk (ex: 3*5). If there is a gap between sets of active frames, the gap is denoted by a number in parentheses (ex: 2(4)2) |
| Attack |
Attack level is L for low attacks (must be blocked crouching), H is for High attacks (which can be blocked high or low) and M for overhead (must be blocked standing). T is for throw attacks (which cannot be blocked). |
| Cancel options |
Available cancel options.
|
| Damage |
Attack damage on hit in life points. Notation may denote multi-hit or "sweet spot" damage values on certain frames. |
| Hit/Block |
These are frame advantage values when the attack hits or is blocked. If the number is positive, then the move will end before the defender can act again. If the number is negative, the defender will be able to act before the attacker and maybe even punish. D refers to knockdown on hit. "Cr. Hit" is an additional frame advantage value denoting if the advantage on hit changes when the defender is being hit while crouching. |
| Kara Range |
Almost all normal attacks can be canceled into a special or a multi-button command within three frames of startup. During that time, some attacks will shift position forward or backward and affect the reach of the special or command accordingly. This is denoted in pixels of range. There are a handful of moves in the game that can be kara-canceled after this initial window and will be denoted as a late kara-cancel. |
| Link |
A combo that is performed by inputting the second move after the first move has completely recovered (as opposed to cancelling the first move's animation). In 3S, the final frame of a move's hitstun allows a character to block a normal or special move, as well as some projectile supers. Therefore, an attack's frame advantage must be 2 frames greater than the followup move's startup in order to link. Ex: a +6 normal can link into a 4f normal/special, or a 5f super. |
| Parry |
This field will show a value of A if the attack can be parried standing or crouching, H if it must be parried standing or L if it must be parried crouching. |
| Recovery |
How many frames it takes for a move to finish after it's been active. |
| Startup |
How many frames it takes before the move becomes 'active' or has a hitbox. 3S uses classic startup notation, which does not include the first active frame. A move with 3 startup becomes active on frame 4. |
| Stun |
Amount of stun added to the opponent's stun bar on hit. |
| Throw range |
Range in pixels from the center of the character to the center of the opponent which allows a grab to connect. |
Standing Normals
5LP (cl)
5LP (far)
5MP (cl)
5MP (far)
5HP (cl)
5HP (far)
5LK
5MK
5HK
Command Normals
4MK
5MK (Hold)
6MK
6HK
Crouching Normals
2LP
2MP
2HP
2LK
2MK
2HK
Jumping Normals
8LP
j.LP
8MP
j.MP
8HP
j.HP
8LK
j.LK
8MK
j.MK
8HK
j.HK
Target Combos
MPHP
| Startup | Active | Recovery | Block | Hit | Cr. Hit | Damage | Stun | Kara | Guard Level | Parry Level |
|---|---|---|---|---|---|---|---|---|---|---|
| 4 | - | - | -2 | 0 | 2 | 7 | 3 | - | HL | H |
| Cancel Options | Self Meter Gain | Whiff | Hit | Block / Tech | Opponent Meter Gain | Hit | Block / Tech | |||
| sp, su | - | 6+1 | 11+1 | 2 | 0 | |||||
Ken's target combo provides him with one of the easiest hit-confirms in the game. The range and high parry property synergize well with his frame traps and 2LK hit-confirms, forcing the opponent to guess if they want to parry out of his offense. It's safe on block at only -2, although push back does somewhat end Ken's "turn" offensively. If you find the super cancel difficult, you can ease the execution a bit by doing TC xx LP fireball xx SA3. This increases the amount of time you have to complete the super motion, although ideally you still want to confirm the target combo and avoid doing fireball on block. Because there is a little bit of proximity normal ambiguity between close MP and far MP, Ken can occasionally get target combo when he expects far MP. To deal with this he can just always input target combo when he wants to do a standing strong button, and then hit-confirm appropriately. Target combo provides Ken with an okay SGGK (parry-throw option select) by inputting parry -> cl.MP ~ LP+LK delay HP. If the opponent blocks, Ken will kara throw them, but if they push a button, Ken will parry followed by target combo, which can be hit-confirmed into DP or super. Because close strong has 0 kara range, Ken has to be very close to do this, so it is weaker than other SGGK options. This can also be useful to defend against some jump-ins. If done correctly, Ken can parry the jump in or tech an empty-jump throw. For some reason, Ken's target combo causes a 10f lockout on kara inputs upon recovery. This recovery can be canceled by tapping down or moving. | ||||||||||
Throws
LPLK (mash)
4LPLK
6LPLK
Universal Overhead
MPMK
Taunt
HPHK
Special Moves
236P
623P
214K
214K (air)


