No edit summary |
|||
| (119 intermediate revisions by 12 users not shown) | |||
| Line 1: | Line 1: | ||
= | [[image:Goro98stance.gif|right]] | ||
==Introduction== | |||
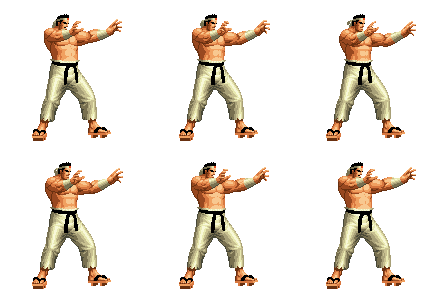
Goro Daimon was previously known as just "Daimon" before the King of Fighters tournament. The name means "Die, man". | |||
Just before the first KOF tournament, he defeated [http://en.wikipedia.org/wiki/Goro_%28Mortal_Kombat%29 Goro, prince of Shokan] in hand-to-hand mortal combat, taking his namesake as a trophy. | |||
Goro | |||
Anyone who could defeat Goro is extremely strong, so as expected, Goro Daimon is a top tier character. | |||
= | ===Colors=== | ||
{| | |||
! [[image:snka.gif]] | |||
! [[image:snkb.gif]] | |||
! [[image:snkc.gif]] | |||
! [[image:snkd.gif]] | |||
|- | |||
| [[image:Daimon98_colorA.png]] | |||
| [[image:Daimon98_colorB.png]] | |||
| [[image:Daimon98_colorC.png]] | |||
| [[image:Daimon98_colorD.png]] | |||
|} | |||
= ''' | ==Gameplay Overview== | ||
Standing | |||
Jump-in D, | Daimon does a ton of damage, has very high priority normals, very effective throw mixups, and is top-tier. Even from an anti-air he can do 30% or so thanks to ground pound OTGs and juggles. He has very good defense (ie takes less damage than average) and is basically a wall of pain. His only disadvantage is that he has a very large sprite. He has combos/tactics that vary from requiring nearly no execution skill to requiring godly execution. He is a decent character for a beginner. | ||
==In-depth Analysis== | |||
===[[The_King_of_Fighters_2002/Normals_Guide|Movelist]]=== | |||
{|border="1" | |||
!width="9%"| | |||
! Frames | |||
! Advantage | |||
! Cancel | |||
! Block | |||
!colspan="2"| Hitbox | |||
! Notes | |||
|- | |||
|colspan="8" align="center"| '''Standing Close''' | |||
|- | |||
! [[image:snka.gif]] | |||
|align="center"| 4/4/5 | |||
|align="center"| +3/+1 | |||
|align="center"| [[File:Cancel.png]] | |||
|align="center"| HL | |||
|colspan="2" | [[image:Daimon98_clA.png|center]] | |||
|Chain: repeatable | |||
|- | |||
! [[image:snkb.gif]] | |||
|align="center"| 7/4/9 | |||
|align="center"| -1/-3 | |||
|align="center"| [[File:Cancel.png]] | |||
|align="center"| HL | |||
|colspan="2" | [[image:Daimon98_clB.png|center]] | |||
|Chain: - | |||
|- | |||
! [[image:snkc.gif]] | |||
|align="center"| 4/4/13 | |||
|align="center"| +3/+1 | |||
|align="center"| [[File:Cancel.png]] | |||
|align="center"| HL | |||
|colspan="2" | [[image:Daimon98_clC.png|center]] | |||
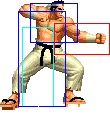
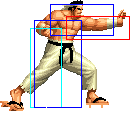
| Fast, cancelable, great as a meaty. More range than cl.[[File:Snkd.gif]], so you can use cr.[[File:Snka.gif]], cl.[[File:Snkc.gif]] as a block string. | |||
|- | |||
! [[image:snkd.gif]] | |||
|align="center"| 4/8/14 | |||
|align="center"| -2/-4 | |||
|align="center"| [[File:Cancel.png]] | |||
|align="center"| HL | |||
|colspan="2"| [[image:Daimon98_clD.png|center]] | |||
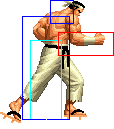
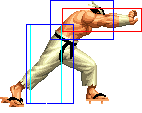
| Best meaty, and if not too meaty or out in the open, you actually have a good amount of time to hit-check [[File:Hcb.png]] [[File:F.png]] + [[File:P.png]] off of it. Same speed as cl.[[File:Snkc.gif]], cancelable. | |||
|- | |||
|colspan="8" align="center"| '''Standing Far''' | |||
|- | |||
! [[image:snka.gif]] | |||
|align="center"| 4/5/6 | |||
|align="center"| +1/-1 | |||
|align="center"| [[File:Cancel.png]] | |||
|align="center"| HL | |||
|colspan="2" | [[image:Daimon98_stA.png|center]] | |||
| Fast, really good anti-air against short hop. | |||
Chain: ender | |||
|- | |||
! [[image:snkb.gif]] | |||
|align="center"| 4/5/10 | |||
|align="center"| -3/-5 | |||
|align="center"| [[File:Cancel.png]] | |||
|align="center"| [[File:Low.png]] | |||
|colspan="2" | [[image:Daimon98_stB.png|center]] | |||
| THE POKE! Fast, low, long range, cancelable. You can do repeated st.[[File:Snkb.gif]]s, but if you think they will hit a button in between, cancel into [[File:Hcf.png]] + [[image:snkc.gif]]. You can also combo this into [[File:Hcb.png]] [[File:F.png]] + [[File:P.png]] if you're in range, which most people forget about. | |||
Chain: ender | |||
|- | |||
! [[image:snkc.gif]] | |||
|align="center"| 9/9/16 | |||
|align="center"| -5/-7 | |||
|align="center"| [[File:Nocancel.png]] | |||
|align="center"| HL | |||
|colspan="2" | [[image:Daimon98_stC.png|center]] | |||
| Nice and big, stays out a long time. Can stop short hops. | |||
|- | |||
! [[image:snkd.gif]] | |||
|align="center"| 5/6/16 | |||
|align="center"| -2/-4 | |||
|align="center"| [[File:Nocancel.png]] | |||
|align="center"| HL | |||
|colspan="2"| [[image:Daimon98_stD.png|center]] | |||
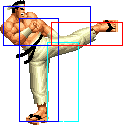
| Fast, high priority, one of the best anti-air normals in the game. It can also punish things like incompleted Iori rekkas. It will whiff over crouching characters, so watch that. | |||
|- | |||
! [[image:snkc.gif]]+[[image:snkd.gif]] | |||
|align="center"| 15/4/26 | |||
|align="center"| KD/-8 | |||
|align="center"| [[File:Specialcancel.png]] | |||
|align="center"| HL | |||
|colspan="2"| [[image:Daimon98_stCD.png|center]] | |||
| Big ass cancelable move. often used to cancel into his [[File:Qcf.png]] + [File:K.png]] counter and bait [[image:snkc.gif]]+[[image:snkd.gif]] counters. | |||
|- | |||
|colspan="8" align="center"| '''Crouching''' | |||
|- | |||
! [[image:snka.gif]] | |||
|align="center"| 3/5/5 | |||
|align="center"| +2/0 | |||
|align="center"| [[File:Cancel.png]] | |||
|align="center"| HL | |||
|colspan="2" | [[image:Daimon98_crA.png|center]] | |||
| #1 poke if you're too close for standing [[image:snkb.gif]]. Cancelable. | |||
Chain: ender | |||
|- | |||
! [[image:snkb.gif]] | |||
|align="center"| 4/5/6 | |||
|align="center"| +1/-1 | |||
|align="center"| [[File:Nocancel.png]] | |||
|align="center"| [[File:Low.png]] | |||
|colspan="2" | [[image:Daimon98_crB.png|center]] | |||
| Good poke if you're too close for standing [[image:snkb.gif]] as well. Links into super easily since it has a long animation/advantage. | |||
Chain: ender | |||
|- | |||
! [[image:snkc.gif]] | |||
|align="center"| 5/4/19 | |||
|align="center"| -3/-5 | |||
|align="center"| [[File:Nocancel.png]] | |||
|align="center"| HL | |||
|colspan="2" | [[image:Daimon98_crC.png|center]] | |||
| Fast, good range. Probably better options though. | |||
|- | |||
! [[image:snkd.gif]] | |||
|align="center"| 4/7/12 | |||
|align="center"| KD/-1 | |||
|align="center"| [[File:Cancel.png]] | |||
|align="center"| [[File:Low.png]] | |||
|colspan="2" | [[image:Daimon98_crD.png|center]] | |||
| A sweep! Can be meatied pretty easily. | |||
|- | |||
|colspan="8" align="center"| '''Jump''' | |||
|- | |||
! [[image:snka.gif]] | |||
|align="center"| 5/13/- | |||
|align="center"| -/- | |||
|align="center"| - | |||
|align="center"| [[File:High.png]] | |||
|colspan="2" | [[image:Daimon98_jA.png|center]] | |||
| Pretty good air-to-air. | |||
|- | |||
! [[image:snkb.gif]] | |||
|align="center"| 8/17/- | |||
|align="center"| -/- | |||
|align="center"| - | |||
|align="center"| [[File:High.png]] | |||
|colspan="2" | [[image:Daimon98_jB.png|center]] | |||
| Stays out for a long time, can be used as a crossup if it's very meaty, or your opponent is close to the corner, or in the corner and you are player 2. Good setup for his grab mixups. | |||
|- | |||
! [[image:snkc.gif]] | |||
|align="center"| 9/8/- | |||
|align="center"| -/- | |||
|align="center"| - | |||
|align="center"| [[File:High.png]] | |||
|colspan="2" | [[image:Daimon98_jC.png|center]] | |||
| Crosses up, has a pretty hefty hitbox (what doesn't?). | |||
|- | |||
! [[image:snkd.gif]] | |||
|align="center"| 7/7/- | |||
|align="center"| -/- | |||
|align="center"| - | |||
|align="center"| [[File:High.png]] | |||
|colspan="2" | [[image:Daimon98_jD.png|center]] | |||
| Godly jump move. Good for jumping in, or air-to-air jumping back. Can be used as an instant overhead (short hop only). | |||
|- | |||
! [[image:snkc.gif]]+[[image:snkd.gif]] | |||
|align="center"| 15/4/- | |||
|align="center"| KD/- | |||
|align="center"| - | |||
|align="center"| HL | |||
|colspan="2"| [[image:Daimon98_jCD.png|center]] | |||
| [[image:snkc.gif]][[image:snkd.gif]] in the air! | |||
|- | |||
|colspan="8" align="center"| '''Command Normals''' | |||
|- | |||
! [[File:F.png]] + [[image:snka.gif]] | |||
|align="center"| 22/4/26 | |||
|align="center"| KD/-12 | |||
|align="center"| [[File:Projnull.png]][[File:Nocancel.png]] | |||
|align="center"| HL | |||
|valign="bottom" style="border-right:0px;"| [[image:Daimon98_fA1.png|center]] | |||
|valign="bottom" style="border-left:0px;"| [[image:Daimon98_fA2.png|center]] | |||
| '''Takra Tsubushi-''' Not overhead! Active frames and last two start-up frames cancel projectiles. | |||
|- | |||
! [[File:df.png]] + [[image:snkc.gif]] | |||
|align="center"| 3/4+9/16 | |||
|align="center"| KD/-11 | |||
|align="center"| [[File:Specialcancel.png]][[File:Supercancel.png]] | |||
|align="center"| HL | |||
|valign="bottom" style="border-right:0px;"| [[image:Daimon98_dfC1.png|center]] | |||
|valign="bottom" style="border-left:0px;"| [[image:Daimon98_dfC2.png|center]] | |||
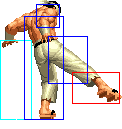
| '''Zujou Barai-''' Great anti-air. It doesn't beat as much stuff as standing D, but it will trade with most things, enabling you to perform a ground pound combo. Remember if it trades, you will have to re-buffer your [[File:Qcb.png]] + [[File:Snkb.gif]] / [[File:Qcf.png]] + [[File:Snkb.gif]] afterwards so the ground pound will hit OTG. | |||
|- | |||
|colspan="8" align="center"| '''Throws''' | |||
|- | |||
! [[File:F.png]]/[[File:B.png]] + [[File:Snkc.gif]] | |||
|align="center"| | |||
|align="center"| KD | |||
|align="center"| | |||
|align="center"| [[File:Throw.png]] | |||
|colspan="2"| | |||
| Unbreakable (mashable), forward knockdown, face forward, un-rollable. | |||
|- | |||
! [[File:F.png]]/[[File:B.png]] + [[File:Snkc.gif]] | |||
|align="center"| | |||
|align="center"| KD | |||
|align="center"| | |||
|align="center"| [[File:Throw.png]] | |||
|colspan="2"| | |||
| (just outside of normal throw range) - Breakable, forward knockdown, back turned, un-rollable. | |||
|- | |||
! [[File:F.png]]/[[File:B.png]] + [[File:Snkd.gif]] | |||
|align="center"| | |||
|align="center"| KD | |||
|align="center"| | |||
|align="center"| [[File:Throw.png]] | |||
|colspan="2"| | |||
| Breakable, reverse knockdown, back turned, rollable. | |||
|- | |||
|colspan="8" align="center"| '''Special Moves''' | |||
|- | |||
! [[File:Hcf.png]] + [[image:snka.gif]] | |||
|align="center"| 5/7/41 | |||
|align="center"| [[File:Upperbodyinv.png]] | |||
| | |||
|align="center"| HL | |||
|colspan="2"| [[image:Daimon98_hcfA.png|center]] | |||
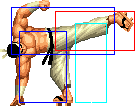
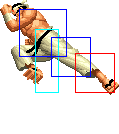
| '''Kumo Tsukami Nage ([[File:Snka.gif]] Overhead Slam)'''<br> | |||
Beats pretty much everything above the top half of the screen, his arm is not hittable. It can be air blocked if the opponent is jumping up or back, though. Can be comboed from [[File:df.png]] + [[image:snkc.gif]] on an opponent in the air. Ends in a back turned, un-rollable knockdown, and sets up for a meaty (unblockable) Ground Pound ([[File:Dp.png]] + [[File:Snka.gif]]). | |||
|- | |||
! [[File:Hcf.png]] + [[image:snkc.gif]] | |||
|align="center"| 12/4/37 | |||
|align="center"| [[File:Otg.png]] | |||
| | |||
|align="center"| HL | |||
|colspan="2"| [[image:Daimon98_hcfC.png|center]] | |||
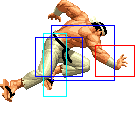
| '''Kiri Kabu Gaeshi ([[image:snkc.gif]] Overhead Slam)'''<br> | |||
Catches ground pokes, but is punishable by some fast long range things. Good to use as a combo ender if you aren't comfortable using [[File:Hcb.png]] [[File:F.png]] + [[File:P.png]]. Can hit [[File:Otg.png]]. Ends in a back turned, un-rollable knockdown, and sets up for a meaty (unblockable) Ground Pound ([[File:Dp.png]] + [[File:Snka.gif]]). | |||
|- | |||
! [[File:Hcb.png]] [[File:F.png]] + [[File:P.png]] | |||
|align="center"| 0/1/35 | |||
|align="center"| | |||
| | |||
|align="center"| [[File:Throw.png]] | |||
|colspan="2"| [[image:Daimon98_hcbfP.png|center]] | |||
| '''Tenchi Gaeshi (Ragdoll Toss)'''<br> | |||
Instant, long range, comboable throw. Not rollable, and sets up for a meaty (unblockable) Ground Pound ([[File:Dp.png]] + [[File:Snka.gif]]). | |||
|- | |||
! [[File:Hcb.png]] [[File:F.png]] + [[File:K.png]] | |||
|align="center"| 0/1/35 | |||
|align="center"| | |||
| | |||
|align="center"| [[File:Throw.png]] | |||
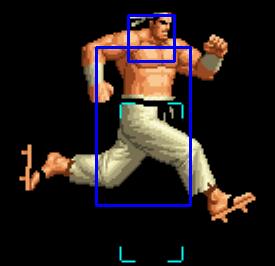
|colspan="2"| [[File:Daimon-hcbf-k.JPG]] | |||
| '''Uru Nage-''' Long range throw. Daimon runs, and if get close roll behind opponent and throw him. Crap move, the run it not very fast, and the throw startup (once it is triggered for being close) is very slow, so its very easy to dodge or counter. (Note for the image: working on finding a new one that actually has the throw box. For now, just imagine a -tiny- pink box in front of Daimon, because the range isn't good) | |||
|- | |||
! [[File:Dp.png]] + [[File:K.png]] | |||
|align="center"| 8/1/23 | |||
|align="center"| | |||
| | |||
|align="center"| [[File:Throw.png]] | |||
|colspan="2"| [[image:Daimon98_dpK.png|center]] | |||
| '''Chou Ousoto Gari (Trip Slam)'''<br> | |||
Slower grab with invincibility. You can even use it to go through fireballs. This is his main weapon in attack/throw mixups. Set it up by doing it on your opponents, wakeup, after a sloppy jump-in, or whatever. Not rollable, and sets up for a meaty (unblockable) Ground Pound ([[File:Dp.png]] + [[File:Snka.gif]]). | |||
|- | |||
! [[File:Dp.png]] + [[image:snka.gif]] | |||
|align="center"| 27/1/44 | |||
|align="center"| [[File:Otg.png]] | |||
| | |||
|align="center"| [[File:Low.png]] | |||
|colspan="2"| [[image:Daimon98_dpA.png|center]] | |||
|rowspan="2"| '''Jirai Shin (Ground Pound)/Fake Jirai Shin'''<br> | |||
[[image:snkc.gif]] version is a ground pound fake. It is 'blocked' by crouching, but there is no blockstun. You don't even need to hold d/b, just crouch. This can hit [[File:Otg.png]] (on the ground) after an anti-air [[File:df.png]] + [[image:snkc.gif]] canceled into a non-blockable move (like a throw or utility move). It is also unblockable if done as a meaty attack, but the window is small and the setups vary from character to character. The knockdown can be rolled, but if they miss, you can combo a [[File:Hcf.png]] + [[image:snkc.gif]] in the corner. | |||
|- | |||
! [[File:Dp.png]] + [[image:snkc.gif]] | |||
|align="center"| 35 | |||
|align="center"| | |||
| | |||
|align="center"| -- | |||
|colspan="2"| [[image:Daimon98_dpC.png|center]] | |||
|- | |||
! [[File:Qcb.png]] + [[image:snkb.gif]] | |||
|align="center"| 16+17 | |||
|align="center"| [[File:Startupinv.png]] | |||
| | |||
|align="center"| -- | |||
|rowspan="2" colspan="2"| [[image:Daimon98_qcbK.png|center]] | |||
|rowspan="2"| '''Chou Ukemi (Ground roll)'''<br>Invincible during the roll, but completely vulnerable at the end of the roll. Usually used for the ground pound combo bug or to gain meter after a knockdown. Can be canceled into to roll through some auto-guard moves or [[image:snkc.gif]][[image:snkd.gif]] counters. | |||
|- | |||
! [[File:Qcb.png]] + [[image:snkd.gif]] | |||
|align="center"| 23+18 | |||
|align="center"| | |||
| | |||
|align="center"| -- | |||
|- | |||
! [[File:Qcf.png]] + [[image:kick.gif]] | |||
|align="center"| 2/12/15 | |||
|align="center"| [[File:Counter.png]] | |||
| | |||
|align="center"| -- | |||
|colspan="2"| [[image:Daimon98_qcfK.png|center]] | |||
|'''Nekko Gaeshi (Counter)-''' Will counter any mid/high hitting normal attack or [[image:snkc.gif]][[image:snkd.gif]] counter. Usually used to cancel into to make moves safer (like standing [[image:snkc.gif]][[image:snkd.gif]]) and to bait [[image:snkc.gif]][[image:snkd.gif]] counters at the same time. Ends in a back turned, un-rollable knockdown, and sets up for a meaty (unblockable) Ground Pound ([[File:Dp.png]] + [[image:snka.gif]]). | |||
|- | |||
|colspan="8" align="center"| '''DMs''' | |||
|- | |||
! [[File:Hcb.png]] [[File:Hcb.png]] + [[File:P.png]] | |||
|align="center"| 0/1/35 | |||
|align="center"| | |||
| | |||
|align="center"| [[File:Throw.png]] | |||
|colspan="2"| [[image:Daimon98_hcbx2P.png|center]] | |||
| '''Jigoku Gokuraku Otoshi (Super Ragdoll Toss)-''' Instant good range super throw. Does damage. MAX version does more damage. Unlike other command throws, there is a difference between [[File:Snka.gif]] and [[File:Snkc.gif]] version, the [[File:Snka.gif]] version does slightly more damage (seems like a bug...) | |||
|- | |||
! [[File:Hcf.png]] [[File:Hcf.png]] + [[File:K.png]]> [[File:Hcf.png]] + [[File:K.png]] > [[File:Dp.png]] + [[File:K.png]] | |||
|align="center"| 14/1/11 | |||
|align="center"| | |||
| | |||
|align="center"| [[File:Throw.png]] | |||
|valign="bottom" style="border-right:0px;"| [[image:Daimon98_hcfx2K1.png|center]] | |||
|valign="bottom" style="border-left:0px;"| [[image:Daimon98_hcfx2K2.png|center]] | |||
| '''Arashi Noyama: Nekko Meki (Super Armor Throw)- '''A slower throw. DM version has autoguard on few frames. SDM version has super armor until recovery (ie you will still take full damage from any hits). The followups switch sides every time, and are timed as the previous part hits. MAX version does more damage. If you don't follow the first or second part, you can do a [[File:Hcf.png]] + [[File:Snkc.gif]] ([[File:Otg.png]]) on the knocked opponent, however it will do less damage than the follow-ups. | |||
|} | |||
== Fastest Attacks == | |||
=== Ground === | |||
* 0F: [[File:Snkc.gif]] throw; [[File:Snkd.gif]] throw; [[File:Hcb.png]] [[File:F.png]] + [[File:P.png]]; (S)DM [[File:Hcb.png]] [[File:Hcb.png]] + [[File:P.png]] | |||
* 1F: - | |||
* 2F: [[File:Qcf.png]] + [[File:K.png]] | |||
* 3F: '''cr.[[File:Snka.gif]]'''; '''[[File:df.png]] + [[File:Snkc.gif]]''' | |||
* 4F: '''cl.[[File:Snka.gif]]'''; '''cl.[[File:Snkc.gif]]'''; '''cl.[[File:Snkd.gif]]'''; '''st.[[File:Snka.gif]]'''; '''st.[[File:Snkb.gif]]'''; cr.[[File:Snkb.gif]]; '''cr.[[File:Snkd.gif]]''' | |||
* 5F: st.[[File:Snkd.gif]]; cr.[[File:Snkc.gif]]; [[File:Hcf.png]] + [[File:Snka.gif]] | |||
* 6F: - | |||
* 7F: '''cl.[[File:Snkb.gif]]''' | |||
* 8F: [[File:Dp.png]] + [[File:K.png]] | |||
* 9F: st.[[File:Snkc.gif]]; | |||
* 10F: - | |||
=== Air === | |||
* 0F: - | |||
* 1F: - | |||
* 2F: - | |||
* 3F: - | |||
* 4F: - | |||
* 5F: j.[[File:Snka.gif]] | |||
* 6F: - | |||
* 7F: j.[[File:Snkd.gif]] | |||
* 8F: j.[[File:Snkb.gif]] | |||
* 9F: j.[[File:Snkc.gif]] | |||
* 10F: - | |||
==Combos== | |||
As I stated above, his combos range from easy to extremely difficult depending on what you're comboing into. | |||
* Best jump-ins: | |||
** j.[[File:Snkd.gif]] | |||
** j.[[File:Snkc.gif]] (Can crossup.) | |||
* cl.[[File:Snkc.gif]] / cl.[[File:Snkd.gif]] > [[File:df.png]] + [[File:Snkc.gif]] (optional) > | |||
** (S)DM Super Ragdoll Toss ([[File:Hcb.png]] [[File:Hcb.png]] + [[File:Snka.gif]]) | |||
** Ragdoll Toss ([[File:Hcb.png]] [[File:F.png]] + [[File:P.png]]) | |||
** [[File:Snkc.gif]] Overhead Slam ([[File:Hcf.png]] + [[File:Snkc.gif]]) | |||
* cl.[[File:Snka.gif]], cl.[[File:Snka.gif]] / cr.[[File:Snka.gif]] > | |||
** (S)DM Super Ragdoll Toss ([[File:Hcb.png]] [[File:Hcb.png]] + [[File:Snka.gif]]) | |||
** Ragdoll Toss ([[File:Hcb.png]] f + [[File:P.png]]) | |||
* cl.[[File:Snka.gif]] / cr.[[File:Snka.gif]] > | |||
** [[File:df.png]] + [[File:Snkc.gif]] | |||
*** (S)DM Super Ragdoll Toss ([[File:Hcb.png]] [[File:Hcb.png]] + [[File:Snka.gif]]) | |||
*** Ragdoll Toss ([[File:Hcb.png]] [[File:F.png]] + [[File:P.png]]) | |||
*** [[File:Snkc.gif]] Overhead Slam ([[File:Hcf.png]] + [[File:Snkc.gif]]) | |||
** (S)DM Super Ragdoll Toss ([[File:Hcb.png]] [[File:Hcb.png]] + [[File:Snka.gif]]) | |||
** Ragdoll Toss ([[File:Hcb.png]] [[File:F.png]] + [[File:P.png]]) | |||
** [[File:Dp.png]] + [[File:K.png]] (Point blank.) | |||
* cr.[[File:Snkb.gif]], | |||
** (S)DM Super Ragdoll Toss ([[File:Hcb.png]] [[File:Hcb.png]] + [[File:Snka.gif]]) | |||
** Ragdoll Toss ([[File:Hcb.png]] [[File:F.png]] + [[File:P.png]]) | |||
Link combo. | |||
* st.[[File:Snkb.gif]] > | |||
** (S)DM Super Ragdoll Toss ([[File:Hcb.png]] [[File:Hcb.png]] + [[File:Snka.gif]]) (Not too far.) | |||
** Ragdoll Toss ([[File:Hcb.png]] [[File:F.png]] + [[File:P.png]]) (Not too far.) | |||
* [[File:Dp.png]] + [[File:Snka.gif]] / f + [[File:Snka.gif]] / Anti-air [[File:df.png]] + [[File:Snkc.gif]] / st.[[File:Snkc.gif]][[File:Snkd.gif]] / j.[[File:Snkc.gif]][[File:Snkd.gif]] / cr.[[File:Snkd.gif]], | |||
** [[File:Hcf.png]] + [[File:Snkc.gif]] (OTG) (If not too far.) | |||
Must not cancel the first move (if it is cancellable), otherwise [[File:Hcf.png]] + [[File:Snkc.gif]] will miss because opponent will not be on the floor yet. Except for [[File:F.png]] + [[File:Snka.gif]], opponent may do a recovery roll and in this case the [[File:Hcf.png]] + [[File:Snkc.gif]] will miss, however you have time to wait to see if they will do a recovery roll before using the [[File:Hcf.png]] + [[File:Snkc.gif]] ;). | |||
* Anti-air [[File:df.png]] + [[File:Snkc.gif]] > [[File:Snka.gif]] Overhead Slam ([[File:Hcf.png]] + [[File:Snka.gif]]) | |||
Depending on distance and height you don't need to cancel to combo, you may follow with [[File:Hcf.png]] + [[File:Snka.gif]] after recovering. In fact in some situations you can trade and still do the [[File:Hcf.png]] + [[File:Snka.gif]] after recovering :). Depending on spacing is easier to a st.[[File:Snkd.gif]] instead of [[File:Hcf.png]] + [[File:Snka.gif]]. | |||
* Counter-hit: Anti-air [[File:df.png]] + [[File:Snkc.gif]] > [[File:Qcb.png]] + [[File:Snkb.gif]], [[File:df.png]] + [[File:Snkc.gif]] > [[File:Snka.gif]] Overhead Slam ([[File:Hcf.png]] + [[File:Snka.gif]]) | |||
The [[File:Qcb.png]] + [[File:Snkb.gif]] is only to move close to opponent and may be skipped if you are already close or in the corner. | |||
Close to the corner, if first [[File:df.png]] + [[File:Snkc.gif]] hit high (second part animation) and second [[File:df.png]] + [[File:Snkc.gif]] hit low (first part animation), it's possible to do a third [[File:df.png]] + [[File:Snkc.gif]] (second part animation), but the timing is difficult, and it's even hard to follow with [[File:Hcf.png]] + [[File:Snka.gif]] after. If you are close to corner is easy to use [[File:Hcf.png]] + [[File:Snkc.gif]] (OTG), as in the combo above, instead of [[File:Hcf.png]] + [[File:Snka.gif]], but opponent may do a recovery roll to escape... Depending on spacing is easier to a st.[[File:Snkd.gif]] instead of [[File:Hcf.png]] + [[File:Snka.gif]]. | |||
* Anti-air [[File:df.png]] + [[File:Snkc.gif]] / st.[[File:Snkc.gif]][[File:Snkd.gif]] / cr.[[File:Snkd.gif]] > | |||
** [[File:Qcb.png]] + [[File:Snkb.gif]] / [[File:Qcf.png]] + [[File:Snkb.gif]] (miss) / [[File:Dp.png]] + [[File:K.png]] (miss) / [[File:Hcb.png]] [[File:F.png]] + [[File:P.png]] (miss) / [[File:Dp.png]] + [[File:Snkc.gif]] | |||
*** [[File:Snka.gif]] Ground Pound ([[File:Dp.png]] + [[File:Snka.gif]]) (OTG) | |||
**** [[File:Hcf.png]] + [[File:Snkc.gif]] (OTG) (Only if first move was st.[[File:Snkc.gif]][[File:Snkd.gif]] or cr.[[File:Snkd.gif]]. If not too far.) | |||
Ground Pound bug combo. | |||
You may use both (S)DM as the second move, but it is just for show off, as you will be spending meter with no benefits (actually you will end up doing less damage if you use a SDM as MAX mode will end...). | |||
The [[File:Hcf.png]] + [[File:Snkc.gif]] will always miss if the first move is an anti-air [[File:df.png]] + [[File:Snkc.gif]] (don't know why, because [[File:Hcf.png]] + [[File:Snkc.gif]] will hit when the first move is an anti-air st.[[File:Snkc.gif]][[File:Snkd.gif]] or cr.[[File:Snkd.gif]]...). | |||
If the first move is a st.[[File:Snkc.gif]][[File:Snkd.gif]] you will normally only be close enough to do the [[File:Hcf.png]] + [[File:Snkc.gif]] in the corner. | |||
Be aware that if the first move is cr.[[File:Snkd.gif]], and the second move is [[File:Qcb.png]] + [[File:Snkb.gif]] you may switch sides if you were too close, but this is the the only combination that normally enable the [[File:Hcf.png]] + [[File:Snkc.gif]] out of the corner. | |||
On the previous combo instead of ending with [[File:Snka.gif]] Overhead Slam ([[File:Hcf.png]] + [[File:Snka.gif]]), you may follow with this combo/bug (from the second move). | |||
* Simple buffers: | |||
** cl.[[File:Snka.gif]] / cl.[[File:Snkc.gif]] > (S)DM [[File:Hcb.png]] [[File:Hcb.png]] + [[File:Snka.gif]] | |||
*** [[File:Hcb.png]] + [[File:Snka.gif]]/[[File:Snkc.gif]] > [[File:Hcb.png]] + [[File:Snka.gif]] | |||
** cr.[[File:Snkb.gif]], (S)DM [[File:Hcb.png]] [[File:Hcb.png]] + [[File:P.png]] | |||
*** [[File:F.png]] [[File:df.png]] d [[File:db.png]] + [[File:B.png]] [[File:B.png]] [[File:Hcb.png]] + [[File:P.png]] | |||
It is possible to perform his Ground Pound ([[File:Dp.png]] + [[File:Snka.gif]]) on the opponent's wakeup with such timing that it cannot be blocked. Here is a list of unblockable Ground Pound setups after various moves for different characters: [[Goro Daimon's unblockable Ground Pound in KOF98|unblockable Ground Pound setups]] | |||
The [[File:df.png]] + [[File:Snkc.gif]] has less range than [[File:Hcb.png]] [[File:F.png]] + [[File:P.png]] (for example, [[File:df.png]] + [[File:Snkc.gif]] miss after st.[[File:Snkb.gif]] but [[File:Hcb.png]] [[File:F.png]] + [[File:P.png]] can combo), and [[File:df.png]] + [[File:Snkc.gif]] > [[File:Hcf.png]] + [[File:Snkc.gif]] does just a tiny more damage than [[File:Hcb.png]] [[File:F.png]] + [[File:P.png]] (almost the same out of MAX), so in general its better to just [[File:Hcb.png]] [[File:F.png]] + [[File:P.png]] instead of [[File:df.png]] + [[File:Snkc.gif]] > [[File:Hcf.png]] + [[File:Snkc.gif]] on combos. | |||
About his (S)DM Super Ragdoll Toss ([[File:Hcb.png]] [[File:Hcb.png]] + [[File:Snka.gif]]): unlike other command throws, there is a difference between [[File:Snka.gif]] and [[File:Snkc.gif]] version, the [[File:Snka.gif]] version does slightly more damage (seems like a bug...) | |||
{{StrategyCorner| | |||
* MAX: cl.[[File:Snkd.gif]] > [[File:Hcb.png]] [[File:F.png]] + [[File:P.png]] | |||
deals just a tiny less damage (~ 1/3 cl.[[File:Snka.gif]]) than | |||
* cl.[[File:Snkd.gif]] > DM [[File:Hcb.png]] [[File:Hcb.png]] + [[File:P.png]] | |||
Keep this in mind, when you need to decide whether to trigger MAX or keep meter for a DM. | |||
}} | |||
= Matchups= | |||
==Strategy with Daimon== | |||
=== vs Grappler === | |||
=== vs Zoner === | |||
=== vs Rushdown === | |||
==Strategy against Daimon== | |||
=== as Grappler === | |||
=== as Zoner === | |||
=== as Rushdown === | |||
== Links == | |||
{{Navbox-KOF98}} | |||
[[Category:The King of Fighters '98: The Slugfest]] | |||
[[Category:Goro Daimon]] | |||
Latest revision as of 21:58, 29 January 2021
Introduction
Goro Daimon was previously known as just "Daimon" before the King of Fighters tournament. The name means "Die, man".
Just before the first KOF tournament, he defeated Goro, prince of Shokan in hand-to-hand mortal combat, taking his namesake as a trophy.
Anyone who could defeat Goro is extremely strong, so as expected, Goro Daimon is a top tier character.
Colors

|

|

|

|
Gameplay Overview
Daimon does a ton of damage, has very high priority normals, very effective throw mixups, and is top-tier. Even from an anti-air he can do 30% or so thanks to ground pound OTGs and juggles. He has very good defense (ie takes less damage than average) and is basically a wall of pain. His only disadvantage is that he has a very large sprite. He has combos/tactics that vary from requiring nearly no execution skill to requiring godly execution. He is a decent character for a beginner.
In-depth Analysis
Movelist
Fastest Attacks
Ground
- 0F:
 throw;
  throw;
 +
+  ; (S)DM
 +
+ 
- 1F: -
- 2F:
 +
+ 
- 3F: cr.
 ;
;  +
+ 
- 4F: cl.
 ; cl.
; cl. ; cl.
; cl. ; st.
; st. ; st.
; st. ; cr.
; cr. ; cr.
; cr.
- 5F: st.
 ; cr.
; cr. ;
;  +
+ 
- 6F: -
- 7F: cl.

- 8F:
 +
+ 
- 9F: st.
 ;
; - 10F: -
Air
Combos
As I stated above, his combos range from easy to extremely difficult depending on what you're comboing into.
Link combo.
Must not cancel the first move (if it is cancellable), otherwise ![]() +
+ ![]() will miss because opponent will not be on the floor yet. Except for
will miss because opponent will not be on the floor yet. Except for ![]() +
+ ![]() , opponent may do a recovery roll and in this case the
, opponent may do a recovery roll and in this case the ![]() +
+ ![]() will miss, however you have time to wait to see if they will do a recovery roll before using the
will miss, however you have time to wait to see if they will do a recovery roll before using the ![]() +
+ ![]() ;).
;).
Depending on distance and height you don't need to cancel to combo, you may follow with ![]() +
+ ![]() after recovering. In fact in some situations you can trade and still do the
after recovering. In fact in some situations you can trade and still do the ![]() +
+ ![]() after recovering :). Depending on spacing is easier to a st.
after recovering :). Depending on spacing is easier to a st.![]() instead of
instead of ![]() +
+ ![]() .
.
The ![]() +
+ ![]() is only to move close to opponent and may be skipped if you are already close or in the corner.
Close to the corner, if first
is only to move close to opponent and may be skipped if you are already close or in the corner.
Close to the corner, if first ![]() +
+ ![]() hit high (second part animation) and second
hit high (second part animation) and second ![]() +
+ ![]() hit low (first part animation), it's possible to do a third
hit low (first part animation), it's possible to do a third ![]() +
+ ![]() (second part animation), but the timing is difficult, and it's even hard to follow with
(second part animation), but the timing is difficult, and it's even hard to follow with ![]() +
+ ![]() after. If you are close to corner is easy to use
after. If you are close to corner is easy to use ![]() +
+ ![]() (OTG), as in the combo above, instead of
(OTG), as in the combo above, instead of ![]() +
+ ![]() , but opponent may do a recovery roll to escape... Depending on spacing is easier to a st.
, but opponent may do a recovery roll to escape... Depending on spacing is easier to a st.![]() instead of
instead of ![]() +
+ ![]() .
.
Ground Pound bug combo.
You may use both (S)DM as the second move, but it is just for show off, as you will be spending meter with no benefits (actually you will end up doing less damage if you use a SDM as MAX mode will end...).
The ![]() +
+ ![]() will always miss if the first move is an anti-air
will always miss if the first move is an anti-air ![]() +
+ ![]() (don't know why, because
(don't know why, because ![]() +
+ ![]() will hit when the first move is an anti-air st.
will hit when the first move is an anti-air st.![]()
![]() or cr.
or cr.![]() ...).
If the first move is a st.
...).
If the first move is a st.![]()
![]() you will normally only be close enough to do the
you will normally only be close enough to do the ![]() +
+ ![]() in the corner.
Be aware that if the first move is cr.
in the corner.
Be aware that if the first move is cr.![]() , and the second move is
, and the second move is ![]() +
+ ![]() you may switch sides if you were too close, but this is the the only combination that normally enable the
you may switch sides if you were too close, but this is the the only combination that normally enable the ![]() +
+ ![]() out of the corner.
On the previous combo instead of ending with
out of the corner.
On the previous combo instead of ending with ![]() Overhead Slam (
Overhead Slam (![]() +
+ ![]() ), you may follow with this combo/bug (from the second move).
), you may follow with this combo/bug (from the second move).
It is possible to perform his Ground Pound (![]() +
+ ![]() ) on the opponent's wakeup with such timing that it cannot be blocked. Here is a list of unblockable Ground Pound setups after various moves for different characters: unblockable Ground Pound setups
) on the opponent's wakeup with such timing that it cannot be blocked. Here is a list of unblockable Ground Pound setups after various moves for different characters: unblockable Ground Pound setups
The ![]() +
+ ![]() has less range than
has less range than ![]()
![]() +
+ ![]() (for example,
(for example, ![]() +
+ ![]() miss after st.
miss after st.![]() but
but ![]()
![]() +
+ ![]() can combo), and
can combo), and ![]() +
+ ![]() >
> ![]() +
+ ![]() does just a tiny more damage than
does just a tiny more damage than ![]()
![]() +
+ ![]() (almost the same out of MAX), so in general its better to just
(almost the same out of MAX), so in general its better to just ![]()
![]() +
+ ![]() instead of
instead of ![]() +
+ ![]() >
> ![]() +
+ ![]() on combos.
on combos.
About his (S)DM Super Ragdoll Toss (![]()
![]() +
+ ![]() ): unlike other command throws, there is a difference between
): unlike other command throws, there is a difference between ![]() and
and ![]() version, the
version, the ![]() version does slightly more damage (seems like a bug...)
version does slightly more damage (seems like a bug...)
