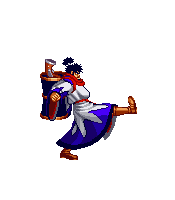
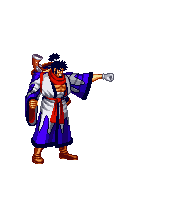
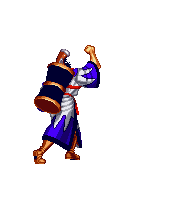
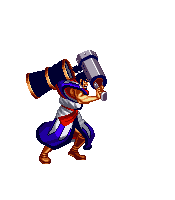
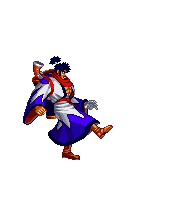
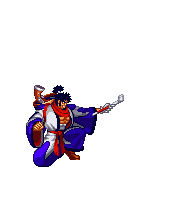
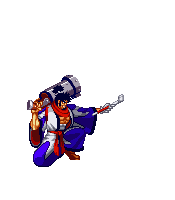
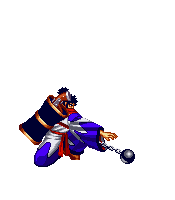
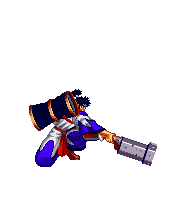
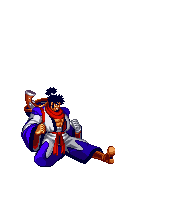
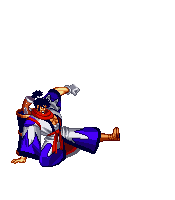
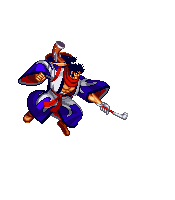
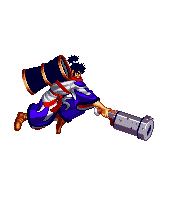
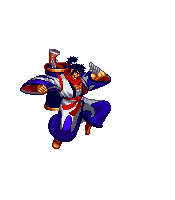
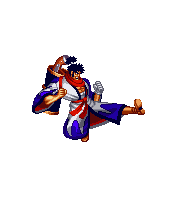
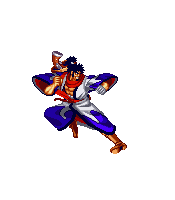
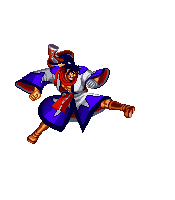
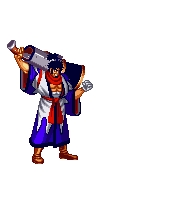
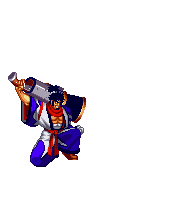
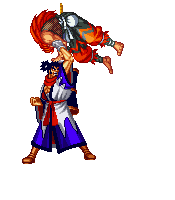
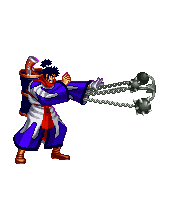
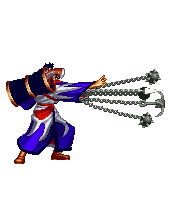
(→Notable Chains: Built the section, added the most important chains for the character.) |
|||
| (18 intermediate revisions by the same user not shown) | |||
| Line 19: | Line 19: | ||
==Strategy== | ==Strategy== | ||
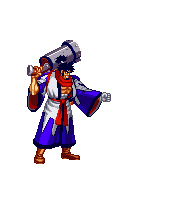
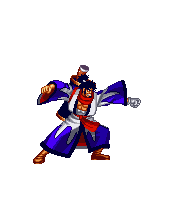
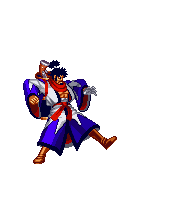
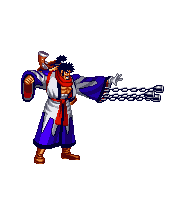
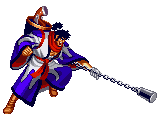
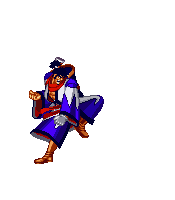
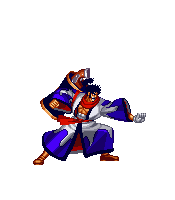
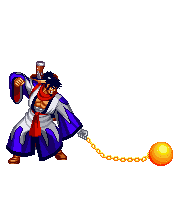
Goemon is a toolbox, he has a move for nearly every situation, featuring a low-hitting projectile, an amazing regular throw and equally amazing Normals for poking, neutral and pressuring, all this makes him a character that is difficult to answer properly and can quickly overwhelm the opponent. | |||
However, he has no reliable Anti-air, his most Damaging combos are tight on execution and so are his most damaging throw juggles, an error on your inputs can leave you with no meter and thus no reliable Reversal option... This is where Goemon struggles as his defense is bad without meter, making it easy for the opponent to pressure him if they win the neutral. | |||
To play Goemon, you need to have your Neutral well defined and know how to get in with your strong tools, as well as improving your execution so you can get his Combos properly. | |||
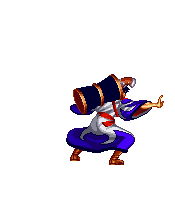
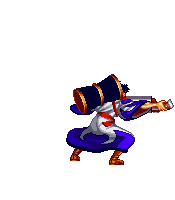
''' | '''Weapon info''' | ||
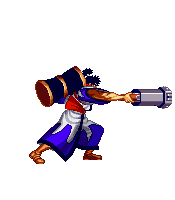
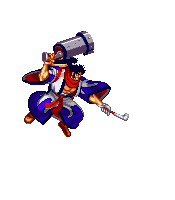
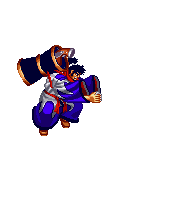
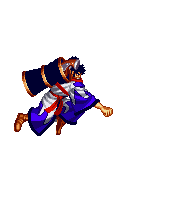
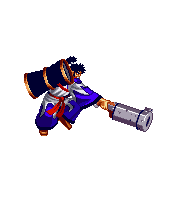
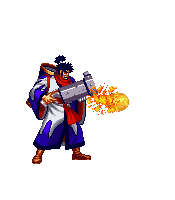
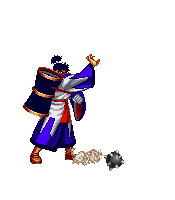
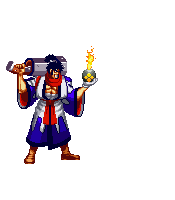
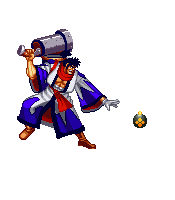
' | Goemon's weapon is a hand Cannon, while armed he cannot use his 4B, j.2B or 214P, his Fireball changes to be a mid-height one that travels at the same speed as his unarmed Fireball with slightly increased damage | ||
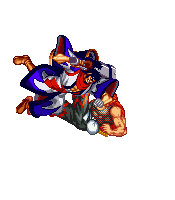
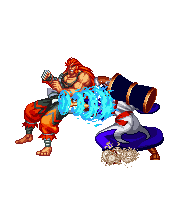
The command grab also changes; This one sends the opponent almost a screen away which is useful to force characters without projectiles into a distance | |||
A good state for different situations and demands matchup knowledge from the opponent | |||
{{StrengthsAndWeaknesses | |||
| intro = | |||
| pros = | |||
* Great Normals all around, useful for poking and pressuring, both with and without the weapon | |||
* Low Fireball to win Fireball wars | |||
* Amazing regular throw that can be juggled after for big damage | |||
* Supers are strong conditioning tools | |||
| cons = | |||
* Combos into Specials and Supers require good execution | |||
* Most damaging Juggles after regular throw are tight, being 1 frame in some cases | |||
* Has serious issues to get out of the opponent's pressure without meter | |||
* Lack of a reliable Anti-air makes some matchups a nightmare | |||
}} | |||
=Move list= | =Move list= | ||
| Line 61: | Line 65: | ||
| version = | | version = | ||
| subtitle = | | subtitle = | ||
| damage = | | damage = 4 | ||
| guard = | | guard = HL | ||
| startup = - | | startup = - | ||
| cancel = | | cancel = Chain | ||
| description = | |||
Special | |||
Super | |||
| description = Extremely quick poke with good cancel options for frame traps, up close it can combo into 623P and is a great chain starter | |||
Whiffs against all crouchers though, so be careful with that. | |||
}} | }} | ||
}} | }} | ||
| Line 78: | Line 88: | ||
| version = | | version = | ||
| subtitle = | | subtitle = | ||
| damage = | | damage = 6 | ||
| guard = | | guard = HL | ||
| startup = - | | startup = - | ||
| cancel = - | | cancel = - | ||
| description = | | description = Slightly more damaging and slower than the Unarmed version but in exchange it doesn't whiffs against crouchers, it also doesn't combos into 623S anymore, outside of that it retains the same advantages as the Unarmed version. | ||
}} | }} | ||
}} | }} | ||
| Line 98: | Line 108: | ||
| version = | | version = | ||
| subtitle = | | subtitle = | ||
| damage = | | damage = 21 | ||
| guard = | | guard = HL | ||
| startup = - | | startup = - | ||
| cancel = - | | cancel = - | ||
| description = | | description = Long range arm swing that knocks down on hit, does nice damage but the lack of cancel options and mediocre recovery makes it not have much use other than occasionally punishing with it. | ||
}} | }} | ||
}} | }} | ||
| Line 115: | Line 125: | ||
| version = | | version = | ||
| subtitle = | | subtitle = | ||
| damage = | | damage = 25 | ||
| guard = | | guard = HL | ||
| startup = - | | startup = - | ||
| cancel = - | | cancel = - | ||
| description = - | | description = Amazing long-range poke with good damage but no cancel options and has a bit of recovery | ||
While it doesn't grant you a knockdown on hit like the Unarmed version, the range more than makes up for that, and if you start the round with your weapon ready you can just throw it out and will beat a lot of stuff | |||
Definitely a move you should use whenever you have your weapon out, it will pester your opponents a lot. | |||
}} | }} | ||
}} | }} | ||
| Line 127: | Line 141: | ||
| name = {{Icon-SNK|C}} | | name = {{Icon-SNK|C}} | ||
| input = | | input = | ||
| subtitle = | | subtitle = Watch your shins | ||
| image = Ninjamas_GoeF5C.png | | image = Ninjamas_GoeF5C.png | ||
| image2 = | | image2 = | ||
| Line 134: | Line 148: | ||
| version = | | version = | ||
| subtitle = | | subtitle = | ||
| damage = | | damage = 9 | ||
| guard = | | guard = L | ||
| startup = - | | startup = - | ||
| cancel = - | | cancel = - | ||
| description = | | description = Quick kick to the shins, a bit more range than 5A with double the damage but no cancel options | ||
It hits low, but there's not much you can do to take advantage of that other than tick throwing, although the crouching version is better for that. | |||
}} | }} | ||
}} | }} | ||
| Line 153: | Line 169: | ||
| version = | | version = | ||
| subtitle = | | subtitle = | ||
| damage = | | damage = 24 | ||
| guard = | | guard = HL | ||
| startup = - | | startup = - | ||
| cancel = - | | cancel = - | ||
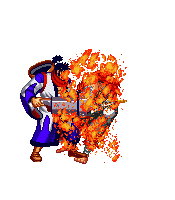
| description = | | description = This is by far his worst Normal; It has less range than u.5B, more startup, more recovery and it doesn't even knocks down on hit! | ||
This thing's only good point is that it does marginally better damage but that doesn't really matters | |||
Avoid this crappy kick. | |||
}} | }} | ||
}} | }} | ||
| Line 177: | Line 197: | ||
| startup = - | | startup = - | ||
| cancel = - | | cancel = - | ||
| description = | | description = Same as the Far version. | ||
}} | }} | ||
}} | }} | ||
| Line 194: | Line 214: | ||
| startup = - | | startup = - | ||
| cancel = - | | cancel = - | ||
| description = | | description = Same as the Far version. | ||
}} | }} | ||
}} | }} | ||
| Line 209: | Line 229: | ||
| version = | | version = | ||
| subtitle = | | subtitle = | ||
| damage = | | damage = 21 | ||
| guard = | | guard = HL | ||
| startup = - | | startup = - | ||
| cancel = | | cancel = Chain | ||
| description = - | |||
Special | |||
Super | |||
| description = Quick uppercut with exceedingly good cancel options, it can be used to confirm pretty much anything you want except 623P, 2146AB and 4216AC, though these last two serve as neat frame traps specially against jump-happy opponents | |||
Be careful about a detail though, if you Chain cancel into this from 5A or cl.5D it will whiff on crouchers | |||
It also can serve as a niche Anti-air but is risky, still a move you should definitely use to bully your opponent. | |||
}} | }} | ||
}} | }} | ||
| Line 226: | Line 254: | ||
| version = | | version = | ||
| subtitle = | | subtitle = | ||
| damage = | | damage = 27 | ||
| guard = | | guard = HL | ||
| startup = - | | startup = - | ||
| cancel = | | cancel = Chain | ||
| description = | |||
Special | |||
Super | |||
| description = Similar to Wc.5B with more damage but doesn't combos into anything other than Chains and 236K, though it retains the same applications | |||
It also has the same problem as Uc.5B when chained into from 5A or cl.5D. | |||
}} | }} | ||
}} | }} | ||
| Line 245: | Line 279: | ||
| version = | | version = | ||
| subtitle = | | subtitle = | ||
| damage = | | damage = 9 | ||
| guard = - | | guard = - | ||
| startup = - | | startup = - | ||
| cancel = | | cancel = Chain | ||
| description = | | description = Basically the same as the Far version but can be Chain cancelled to make use of the fact that it hits low, making it a pretty good starter due to this. | ||
}} | }} | ||
}} | }} | ||
| Line 264: | Line 298: | ||
| version = | | version = | ||
| subtitle = | | subtitle = | ||
| damage = | | damage = 24 | ||
| guard = | | guard = HL | ||
| startup = - | | startup = - | ||
| cancel = | | cancel = Chain | ||
| description = - | |||
Special | |||
Super | |||
| description = A Ucl.5B with more damage but cannot be used as an Anti-air (Even though U.5B is not good at that) | |||
It retains the same cancel options but also can be Chain canceled into 5B to extend punishes | |||
Pretty good normal overall. | |||
}} | }} | ||
}} | }} | ||
| Line 284: | Line 326: | ||
| version = | | version = | ||
| subtitle = | | subtitle = | ||
| damage = | | damage = 6 | ||
| guard = | | guard = HL | ||
| startup = - | | startup = - | ||
| cancel = | | cancel = Special | ||
| description = | | description = This thing is fast, REALLY fast, it might as well be the quickest Normal of the game while having good range to boot | ||
Great Normal to just throw whenever and poke. | |||
}} | }} | ||
}} | }} | ||
| Line 301: | Line 345: | ||
| version = | | version = | ||
| subtitle = | | subtitle = | ||
| damage = | | damage = 6 | ||
| guard = | | guard = HL | ||
| startup = - | | startup = - | ||
| cancel = - | | cancel = - | ||
| description = | | description = Pretty much the same as the Unarmed version but with slightly more recovery. | ||
}} | }} | ||
}} | }} | ||
| Line 320: | Line 364: | ||
| version = | | version = | ||
| subtitle = | | subtitle = | ||
| damage = | | damage = 24 | ||
| guard = | | guard = L | ||
| startup = - | | startup = - | ||
| cancel = | | cancel = Special | ||
| description = - | |||
Super | |||
| description = 2-Hit iron ball that can be canceled only on the 2nd hit, though it won't actually combo into anything other than 236K even at max range but depending on the spacing the 2nd hit can whiff leaving you completely open as its recovery is bad | |||
Not a bad Normal to throw for here and there and can be a surprisingly good punish tool if you space it correctly but is not that good either. | |||
}} | }} | ||
}} | }} | ||
| Line 337: | Line 385: | ||
| version = | | version = | ||
| subtitle = | | subtitle = | ||
| damage = | | damage = 27 | ||
| guard = | | guard = HL | ||
| startup = - | | startup = - | ||
| cancel = - | | cancel = - | ||
| description = - | | description = This move is interesting, if done it with proper spacing and timing it can be an Anti-air which is hard to contest but getting it under those circumstances is difficult due to the startup of the move, and since it lacks cancel options it will reset to Neutral most of the time | ||
Outside of that is a poke, but you can use the standing version for that since it has better range and startup | |||
Definitely a Normal you can experiment with. | |||
}} | }} | ||
}} | }} | ||
| Line 356: | Line 408: | ||
| version = | | version = | ||
| subtitle = | | subtitle = | ||
| damage = | | damage = 9 | ||
| guard = | | guard = L | ||
| startup = - | | startup = - | ||
| cancel = | | cancel = Special | ||
| description = | | description = Pretty much a 2A that's a bit slower and has less range but hits low, making it a great Normal to Tick Throw. | ||
}} | }} | ||
}} | }} | ||
| Line 375: | Line 427: | ||
| version = | | version = | ||
| subtitle = | | subtitle = | ||
| damage = | | damage = 24 | ||
| guard = | | guard = L | ||
| startup = - | | startup = - | ||
| cancel = - | | cancel = - | ||
| description = | | description = This sweep moves him forward slightly, improving its range a bit | ||
Not much use for it other than punishing with a knockdown or to finish a chain. | |||
}} | }} | ||
}} | }} | ||
| Line 395: | Line 449: | ||
| version = | | version = | ||
| subtitle = | | subtitle = | ||
| damage = | | damage = 9 | ||
| guard = | | guard = H | ||
| startup = - | | startup = - | ||
| cancel = - | | cancel = - | ||
| description = - | | description = This Normal is amazing, it stays out for the entire jump, has good range and is almost impossible to contest on Air-to-Air situations, really its only bad side is that it is mediocre for jump-ins due to the low hitstun | ||
Still one of Goemon's best Normals, abuse liberally. | |||
}} | }} | ||
}} | }} | ||
| Line 412: | Line 468: | ||
| version = | | version = | ||
| subtitle = | | subtitle = | ||
| damage = | | damage = 9 | ||
| guard = | | guard = H | ||
| startup = - | | startup = - | ||
| cancel = - | | cancel = - | ||
| description = | | description = Same as the Unarmed version. | ||
}} | }} | ||
}} | }} | ||
| Line 426: | Line 482: | ||
| subtitle = Unarmed | | subtitle = Unarmed | ||
| image = Ninjamas_GoeJB-1.png | | image = Ninjamas_GoeJB-1.png | ||
| data = | | data = | ||
{{AttackData-NinjaMas | {{AttackData-NinjaMas | ||
| version = Neutral | | version = Neutral | ||
| subtitle = | | subtitle = | ||
| damage = | | damage = 19 | ||
| guard = | | guard = H | ||
| startup = - | | startup = - | ||
| cancel = - | | cancel = - | ||
| description = - | | description = Weird hammer strike that only hits forward | ||
Not much to say, a mediocre Air-to-Air at best. | |||
}} | }} | ||
}} | |||
{{MoveData | |||
| name = {{Icon-SNK|B}} | |||
| input = | |||
| subtitle = Diagonal | |||
| image = Ninjamas_GoejB-2.png | |||
| image2 = | |||
| data = | |||
{{AttackData-NinjaMas | {{AttackData-NinjaMas | ||
| version = | |||
| version = | |||
| subtitle = | | subtitle = | ||
| damage = | | damage = 19 | ||
| guard = | | guard = H | ||
| startup = - | | startup = - | ||
| cancel = - | | cancel = - | ||
| description = | | description = Is like j.A with less range but with more damage, though is outclassed badly by both j.A and j.D so it doesn't really counts with a purpose or reason to be used. | ||
}} | }} | ||
}} | }} | ||
{{MoveData | {{MoveData | ||
| name = {{Icon-SNK|B}} | | name = {{Icon-SNK|B}} | ||
| Line 453: | Line 519: | ||
| subtitle = Armed | | subtitle = Armed | ||
| image = Ninjamas_GoejB-3.png | | image = Ninjamas_GoejB-3.png | ||
| image2 = | | image2 = | ||
| data = | | data = | ||
{{AttackData-NinjaMas | {{AttackData-NinjaMas | ||
| version = Neutral | | version = Neutral | ||
| subtitle = | | subtitle = | ||
| damage = | | damage = 27 | ||
| guard = | | guard = H | ||
| startup = - | | startup = - | ||
| cancel = - | | cancel = - | ||
| description = | | description = Pretty much the latter hit of W.2B but in the air | ||
Not much else to say, it also gets heavily outclassed by Wj.B so theere's not a real reason to use it. | |||
}} | }} | ||
}} | |||
{{MoveData | |||
| name = {{Icon-SNK|B}} | |||
| input = | |||
| subtitle = Armed Diagonal | |||
| image = Ninjamas_GoejB-4.png | |||
| image2 = | |||
| data = | |||
{{AttackData-NinjaMas | {{AttackData-NinjaMas | ||
| version = | |||
| version = | |||
| subtitle = | | subtitle = | ||
| damage = | | damage = 27 | ||
| guard = | | guard = H | ||
| startup = - | | startup = - | ||
| cancel = - | | cancel = - | ||
| description = - | | description = Oh boy, this Normal is amazing on everything | ||
It starts about as quick as j.A but it has better range and triple the damage while also being a great jump-in | |||
Thanks to the range it can contest a lot of Anti-Airs, forcing the opponent to respect you when you jump, mix this with W.5B and Projectiles to give yourself a solid neutral | |||
Overall another of Goemon's best Normals, feel free to abuse the heck out of it. | |||
}} | }} | ||
}} | }} | ||
| Line 487: | Line 568: | ||
| version = | | version = | ||
| subtitle = | | subtitle = | ||
| damage = | | damage = 10 | ||
| guard = | | guard = H | ||
| startup = - | | startup = - | ||
| cancel = - | | cancel = - | ||
| description = | | description = Similar to j.A but worse on all aspects except damage, you shouldn't really try to use this knee. | ||
}} | }} | ||
}} | }} | ||
| Line 501: | Line 582: | ||
| subtitle = | | subtitle = | ||
| image = Ninjamas_GoejD-1.png | | image = Ninjamas_GoejD-1.png | ||
| image2 = | | image2 = | ||
| data = | | data = | ||
{{AttackData-NinjaMas | {{AttackData-NinjaMas | ||
| version = | | version = | ||
| subtitle = | | subtitle = | ||
| damage = - | | damage = 22 | ||
| guard = | | guard = H | ||
| startup = - | |||
| cancel = - | |||
| description = Defensive boot, a neat Air-to-Air you can throw here and there when the opponent tries to contest you. | |||
}} | |||
}} | |||
{{MoveData | |||
| name = {{Icon-SNK|D}} | |||
| input = | |||
| subtitle = Diagonal | |||
| image = Ninjamas_GoejD-2.png | |||
| image2 = | |||
| data = | |||
{{AttackData-NinjaMas | |||
| version = | |||
| subtitle = | |||
| damage = 22 | |||
| guard = H | |||
| startup = - | | startup = - | ||
| cancel = - | | cancel = - | ||
| description = - | | description = Goemon's designated jump-in, good damage and range as well as having a lot of reward when you land it | ||
It can crossup but is very hard to do properly, so just stick to using it as his jump-in. | |||
}} | }} | ||
}} | }} | ||
| Line 517: | Line 617: | ||
{{MoveData | {{MoveData | ||
| name = | | name = | ||
| input = {{Motion|3}} + {{Icon-SNK|A}} | | input = {{Motion|3}} + {{Icon-SNK|A}} | ||
| subtitle = Armed | | subtitle = Armed | ||
| Line 526: | Line 626: | ||
| version = | | version = | ||
| subtitle = | | subtitle = | ||
| damage = | | damage = 9 | ||
| guard = | | guard = H | ||
| startup = - | | startup = - | ||
| cancel = | | cancel = Chain | ||
| description = | | description = If it hits a crouching opponent, it will stagger them. | ||
This overhead has different applications than 6A, it can be Chain Canceled into 5B for either a meterless combo or your Dark Combo. | |||
If blocked and not canceled, it has worse recovery than 6A so be aware of that. | |||
}} | }} | ||
}} | }} | ||
{{MoveData | {{MoveData | ||
| name = | | name = | ||
| input = {{Motion|3}} + {{Icon-SNK|A}} | | input = {{Motion|3}} + {{Icon-SNK|A}} | ||
| subtitle = Unarmed | | subtitle = Unarmed | ||
| Line 543: | Line 647: | ||
| version = | | version = | ||
| subtitle = | | subtitle = | ||
| damage = | | damage = 9 | ||
| guard = | | guard = H | ||
| startup = - | | startup = - | ||
| cancel = | | cancel = Chain | ||
| description = | | description = Same as the Unarmed Version | ||
}} | }} | ||
}} | }} | ||
| Line 553: | Line 657: | ||
{{MoveData | {{MoveData | ||
| name = | | name = | ||
| input = {{Motion|6}} + {{Icon-SNK|A}} | | input = {{Motion|6}} + {{Icon-SNK|A}} | ||
| subtitle = | | subtitle = | ||
| Line 562: | Line 666: | ||
| version = | | version = | ||
| subtitle = | | subtitle = | ||
| damage = | | damage = 13 | ||
| guard = | | guard = H | ||
| startup = - | | startup = - | ||
| cancel = - | | cancel = - | ||
| description = overhead | | description = If it hits a crouching opponent, it will stagger them. | ||
This overhead has a different application than 3A: With the stagger and the quick recovery it has you can do a short dash to convert into a combo, mainly 5A Chains. | |||
Pretty safe if blocked so you can throw it out to scare people. | |||
}} | }} | ||
}} | }} | ||
{{MoveData | {{MoveData | ||
| name = | | name = | ||
| input = {{Motion|4}} + {{Icon-SNK|B}} | | input = {{Motion|4}} + {{Icon-SNK|B}} | ||
| subtitle = Unarmed | | subtitle = Unarmed | ||
| Line 580: | Line 688: | ||
| version = | | version = | ||
| subtitle = | | subtitle = | ||
| damage = | | damage = 24 | ||
| guard = | | guard = HL | ||
| startup = - | | startup = - | ||
| cancel = - | | cancel = - | ||
| description = | | description = This Normal is pretty good, has about the same range and startup as u.5B but with more damage and better priority | ||
Though it doesn't knocks down on hit, thanks to the priority it can be used as an Anti-Air if spaced well | |||
Overall a useful Normal for poking. | |||
}} | }} | ||
}} | }} | ||
{{MoveData | {{MoveData | ||
| name = | | name = | ||
| input = {{Motion|2}} + {{Icon-SNK|B}} | | input = {{Motion|2}} + {{Icon-SNK|B}} | ||
| subtitle = Armed | | subtitle = Armed | ||
| Line 598: | Line 710: | ||
| version = | | version = | ||
| subtitle = Jumping Unarmed | | subtitle = Jumping Unarmed | ||
| damage = - | | damage = 24 | ||
| guard = | | guard = H | ||
| startup = - | |||
| cancel = - | |||
| description = The range on this thing is big and if the opponent tries to go Air-to-Air with you it will most surely knock them down, it can also be used as a jump-in although is not that great at it | |||
An amazing Neutral tool, abuse liberally. | |||
}} | |||
}} | |||
{{MoveData | |||
| name = | |||
| input = {{Motion|6}} + {{Icon-SNK|B}}{{Icon-SNK|C}} | |||
| subtitle = Armed | |||
| image = Ninjamas_Goe6BC.png | |||
| image2 = | |||
| data = | |||
{{AttackData-NinjaMas | |||
| version = | |||
| subtitle = | |||
| damage = 16 | |||
| guard = HL | |||
| startup = - | | startup = - | ||
| cancel = - | | cancel = - | ||
| description = | | description = You can only use this move if you lost your Weapon, a good range poke but it has slow startup and is punishable if it hits up close | ||
This move's main purpose is to launch your weapon towards you if it connects with it at around max range (This happens even if it hits the opponent on the way), this allows you to catch it once it comes down | |||
Not a bad tool, but if you lost your Weapon that means you got stunned and probably aren't on a position to poke with it. | |||
}} | }} | ||
}} | }} | ||
{{MoveData | {{MoveData | ||
| name = | | name = | ||
| input = Dash {{Motion|3}} + {{Icon-SNK|D}} | | input = Dash {{Motion|3}} + {{Icon-SNK|D}} | ||
| subtitle = Unarmed | | subtitle = Unarmed | ||
| Line 616: | Line 752: | ||
| version = | | version = | ||
| subtitle = | | subtitle = | ||
| damage = | | damage = 24 | ||
| guard = | | guard = H | ||
| startup = - | | startup = - | ||
| cancel = - | | cancel = - | ||
| description = | | description = Knocks down on hit, covers a good distance but is unsafe on block | ||
}} | }} | ||
}} | }} | ||
| Line 667: | Line 803: | ||
{{MoveData | {{MoveData | ||
| name = | | name = | ||
| input = | | input = {{Motion|6}} + {{Icon-SNK|B}} | ||
| subtitle = Close | | subtitle = Close | ||
| image = Ninjamas_GoeThrow-1.png | | image = Ninjamas_GoeThrow-1.png | ||
| Line 675: | Line 811: | ||
| version = | | version = | ||
| subtitle = | | subtitle = | ||
| damage = | | damage = 16, 15 | ||
| guard = | | guard = | ||
| startup = 1 | | startup = 1 | ||
| cancel = | | cancel = | ||
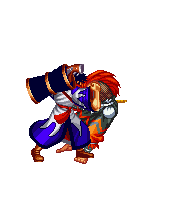
| description = | | description = This throw is probably one of the best of the game | ||
It deals 16 damage when it launches the opponent, but it puts them into a Juggle state that you can follow with pretty much anything, either a Normal for resets or setups, his Air throw for style points or Specials/Supers for damage, here are some notable juggles: | |||
* 2146AB | |||
Total damage: 48 Meterless, 78 with Meter | |||
1 Frame to land it making it the most difficult but also giving the biggest damage outside of the corner. | |||
* 214A | |||
Total damage: 46 | |||
Simple damage, 214B doesn't lands for some reason so stick to the A version. | |||
* 4623AC | |||
Total damage: 120 | |||
The most damage off the throw but only works on the corner. | |||
}} | }} | ||
}} | }} | ||
| Line 695: | Line 848: | ||
| subtitle = | | subtitle = | ||
| damage = - | | damage = - | ||
| guard = | | guard = | ||
| startup = 1 | | startup = 1 | ||
| cancel = | | cancel = | ||
| description = Pretty good when your opponent tries to avoid your keepaway. | | description = Pretty good when your opponent tries to avoid your keepaway. | ||
}} | }} | ||
| Line 705: | Line 858: | ||
{{MoveData | {{MoveData | ||
| name = | | name = Dogouhou | ||
| input = {{Motion|421}} + {{Icon-SNK|D}} | | input = {{Motion|421}} + {{Icon-SNK|D}} | ||
| subtitle = | | subtitle = Unarmed | ||
| image = Ninjamas_Goe421D-1.png | | image = Ninjamas_Goe421D-1.png | ||
| caption = | | caption = | ||
| image2 = | | image2 = | ||
| caption2 = | | caption2 = | ||
| image3 = | | image3 = | ||
| data = | | data = | ||
| Line 717: | Line 870: | ||
| version = | | version = | ||
| subtitle = | | subtitle = | ||
| damage = - | | damage = 39 | ||
| guard = - | |||
| startup = 1 | |||
| cancel = - | |||
| description = Good command grab that can be tick into easily, leaves the opponent at a good distance to set up some mixups or just to reset the Neutral which is really important for Goemon. | |||
}} | |||
}} | |||
{{MoveData | |||
| name = Saiki Funou Naguri | |||
| input = {{Motion|421}} + {{Icon-SNK|D}} | |||
| subtitle = Armed | |||
| image = Ninjamas_Goe421D-2.png | |||
| caption = | |||
| data = | |||
{{AttackData-NinjaMas | |||
| version = | |||
| subtitle = | |||
| damage = 39 | |||
| guard = - | | guard = - | ||
| startup = 1 | | startup = 1 | ||
| cancel = | | cancel = | ||
| description = | | description = Same damage as the Unarmed version but it sends the opponent to the other side of the screen, great to punish sloppy offensive, put characters without a projectile into a disadvantage or reset the Neutral on demand. | ||
}} | }} | ||
}} | }} | ||
| Line 733: | Line 901: | ||
| subtitle = Armed | | subtitle = Armed | ||
| image = Ninjamas_Goe236P-2.png | | image = Ninjamas_Goe236P-2.png | ||
| data = | | data = | ||
{{AttackData-NinjaMas | {{AttackData-NinjaMas | ||
| version = | | version = | ||
| subtitle = | | subtitle = | ||
| damage = | | damage = 22 | ||
| guard = | | guard = HL | ||
| startup = - | | startup = - | ||
| cancel = - | | cancel = - | ||
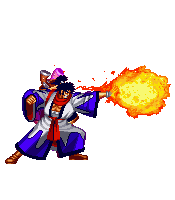
| description = A more traditional Fireball, does good damage and can create a slight zoning if used properly, not much else to say since it is simple and effective | |||
| | |||
The speed depends on the button used, with A being the slowest and AB the fastest. | |||
A | |||
}} | }} | ||
}} | }} | ||
| Line 775: | Line 919: | ||
| name = Chitekkyu | | name = Chitekkyu | ||
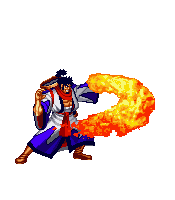
| input = {{Motion|236}} + {{Icon-Capcom|P}} | | input = {{Motion|236}} + {{Icon-Capcom|P}} | ||
| subtitle = | | subtitle = | ||
| image = Ninjamas_Goe236P-1.png | | image = Ninjamas_Goe236P-1.png | ||
| image2 = | | image2 = | ||
| Line 781: | Line 925: | ||
| data = | | data = | ||
{{AttackData-NinjaMas | {{AttackData-NinjaMas | ||
| version = | | version = Unarmed | ||
| subtitle = | | subtitle = | ||
| damage = | | damage = 21 | ||
| guard = | | guard = L | ||
| startup = - | | startup = - | ||
| cancel = - | | cancel = - | ||
| description = | | description = Pretty good fireball to pester your opponents although it can be difficult to use on Fireball wars, the A version also can be used to setup a near unblockable scenario but is complicated to do | ||
A | The speed of the projectile depends on the button used, with A being the slower and AB being the faster. | ||
}} | }} | ||
}} | }} | ||
| Line 825: | Line 947: | ||
| data = | | data = | ||
{{AttackData-NinjaMas | {{AttackData-NinjaMas | ||
| version = | | version = | ||
| subtitle = | | subtitle = | ||
| damage = | | damage = 15, 12, 18 | ||
| guard = | | guard = HL | ||
| startup = - | | startup = - | ||
| cancel = - | | cancel = - | ||
| description = Goemon's rekka, a great combo tool and easy to hit confirm from pretty much any heavy | |||
| description = Goemon | |||
}} | }} | ||
}} | }} | ||
| Line 889: | Line 991: | ||
| startup = - | | startup = - | ||
| cancel = - | | cancel = - | ||
| description = Goemon throws a bomb at an angle while leaping backwards | | description = Goemon throws a bomb at an angle while leaping backwards, mostly used for tricky combos. | ||
If you hold the button Goemon will delay the throw and the hop, but if the opponent touches the bomb, it will explode immediately making it a risky Anti-air. | |||
}} | }} | ||
}} | }} | ||
| Line 911: | Line 1,008: | ||
| version = Light | | version = Light | ||
| subtitle = | | subtitle = | ||
| damage = | | damage = 30 | ||
| guard = | | guard = HL | ||
| startup = - | | startup = - | ||
| cancel = - | | cancel = - | ||
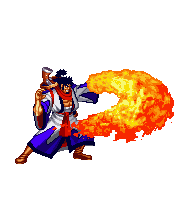
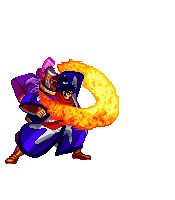
| description = Quick fire swing, cancels projectiles it intercepts and knocks down on hit | |||
Good move to combo into. | |||
}} | }} | ||
{{AttackData-NinjaMas | {{AttackData-NinjaMas | ||
| header = | | header = yes | ||
| version = Heavy | | version = Heavy | ||
| subtitle = | | subtitle = | ||
| damage = | | damage = 30 | ||
| guard = | | guard = HL | ||
| startup = - | | startup = - | ||
| cancel = - | | cancel = - | ||
| description = Same damage as the A version but more startup and active frames | |||
Better used as a Frame Trap. | |||
}} | }} | ||
{{AttackData-NinjaMas | {{AttackData-NinjaMas | ||
| header = | | header = yes | ||
| version = EX | | version = EX | ||
| subtitle = | | subtitle = | ||
| damage = | | damage = 30 | ||
| guard = | | guard = HL | ||
| startup = - | | startup = - | ||
| cancel = - | | cancel = - | ||
| description = | | description = Same damage as the other versions but stays out longer and has the startup of the A version and a bit more active frames than the B version | ||
Amazing move for combos, throw juggles and can be used as a situational Anti-air | |||
}} | }} | ||
}} | }} | ||
==Spirit Gauge== | ==Spirit Gauge== | ||
| Line 956: | Line 1,054: | ||
| data = | | data = | ||
{{AttackData-NinjaMas | {{AttackData-NinjaMas | ||
| version = Level 1 | | version = Level 1 | ||
| subtitle = | | subtitle = | ||
| damage = | | damage = 10, 10, 10 | ||
| guard = | | guard = HL | ||
| startup = - | | startup = - | ||
| cancel = - | | cancel = - | ||
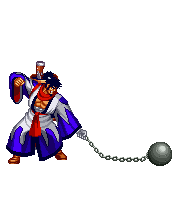
| description = Goemon slams a large ball and chain on to the ground, it hits on the initial swing so it can be a preemptive anti-air | |||
This is the version you get with less than 50% meter hitting up to 3 times but without causing a knockdown, it is mostly reserved for blockstrings or cheap finishers. | |||
}} | }} | ||
{{AttackData-NinjaMas | {{AttackData-NinjaMas | ||
| Line 976: | Line 1,069: | ||
| version = Level 2 | | version = Level 2 | ||
| subtitle = | | subtitle = | ||
| damage = | | damage = 43 | ||
| guard = - | | guard = - | ||
| startup = - | | startup = - | ||
| cancel = - | | cancel = - | ||
| description = This version is with more than 50% meter but without Max or Hyper mode | |||
Hits once for good damage and knocks down, it also keeps doing 3 hits on block, so it retains the same uses as the Level 1 version but with better chip damage | |||
}} | }} | ||
{{AttackData-NinjaMas | {{AttackData-NinjaMas | ||
| header = no | | header = no | ||
| version = | | version = Level 3 | ||
| subtitle = | | subtitle = | ||
| damage = | | damage = 62 | ||
| guard = - | | guard = - | ||
| startup = - | | startup = - | ||
| cancel = - | | cancel = - | ||
| description = | | description = This version is with Max or Hyper mode | ||
Tt does the most damage out of the three both on hit and block but empties your Gauge when used | |||
Retains the same applications but it can be riskier to use since Goemon needs the meter for Reversal burst. | |||
}} | }} | ||
}} | }} | ||
===Combo Super=== | ===Combo Super=== | ||
| Line 1,010: | Line 1,105: | ||
| version = | | version = | ||
| subtitle = | | subtitle = | ||
| damage = | | damage = 70 | ||
| guard = - | | guard = - | ||
| startup = - | | startup = - | ||
| Line 1,030: | Line 1,125: | ||
| version = | | version = | ||
| subtitle = | | subtitle = | ||
| damage = | | damage = 42, 42 | ||
| guard = | | guard = HL | ||
| startup = - | | startup = - | ||
| cancel = - | | cancel = - | ||
| description = | | description = Good Desperation move overall, it comes out quick and hits hard and it can be confirmed from 5A~5B chain but is tight | ||
When you are at red health however, this move becomes a great pressure tool, your opponent will have a lot of difficulties to contest it due to its range, speed and the fact that it can come out at any moment | |||
Try to get used to the input because you are going to want this move ready. | |||
}} | }} | ||
}} | }} | ||
| Line 1,050: | Line 1,149: | ||
| version = | | version = | ||
| subtitle = | | subtitle = | ||
| damage = | | damage = 50, 50 | ||
| guard = | | guard = HL | ||
| startup = - | | startup = - | ||
| cancel = - | | cancel = - | ||
| description = | | description = Another good Desperation move, while it has a bit more startup, it hits much harder while also having better priority and range | ||
This one is easier to combo into from 5A~5B chain, adding to the fact that you need to use the Burst which is a great tool for Goemon makes it so is generally easier to apply than his 4216AC | |||
Like stated on his regular throw, doing this on the corner will reward you with crazy damage for a throw and the timing is not that strict | |||
Another move on his arsenal that you cannot ignore. | |||
}} | |||
}} | |||
=Notable Chains= | |||
==Unarmed== | |||
{{Icon-SNK|A}}{{Icon-SNK|B}} '''xx''' Any Special Move or Super | |||
* Damage: 13 + X | |||
* Works on: Everyone standing | |||
* Notes: Your main way to combo into Specials or Supers, almost all of them combo nicely but some like 214B or 2146AB are used as Frame Traps. | |||
{{Icon-SNK|A}}{{Icon-SNK|B}}{{Icon-SNK|C}}{{Icon-SNK|D}} '''~''' {{Icon-SNK|D}} | |||
* Damage: 51 | |||
* Works on: Everyone standing | |||
* Notes: Your most optimal punish and pressure option, last hit is an Overhead but be careful as the starter whiffs on all crouchers, is also a great option after a 6A stagger. | |||
Close {{Icon-SNK|D}}{{Icon-SNK|B}}{{Icon-SNK|C}}{{Icon-SNK|D}} '''~''' {{Icon-SNK|D}} | |||
* Damage: 71 | |||
* Works on: Everyone standing | |||
* Notes: Heavier version of the previous Chain, more damage but can be harder to land depending on the situation, still an amazing punish option. | |||
Close {{Icon-SNK|C}}{{Icon-SNK|D}} '''~''' {{Icon-SNK|D}} | |||
* Damage: 31 | |||
* Works on: Everyone | |||
* Notes: Similar to the ones above, but it sacrifices damage for a low starter. | |||
{{Motion|3}}'''+'''{{Icon-SNK|A}}''',''' {{Icon-SNK|B}}{{Icon-SNK|B}}{{Icon-SNK|B}} '''~''' {{Motion|6}}'''+'''{{Icon-SNK|B}} | |||
* Damage: 53 | |||
* Works on: Everyone | |||
* Notes: Overhead into knockdown Chain, good option to open up turtlers or for mixups. | |||
Close {{Icon-SNK|C}}{{Icon-SNK|A}}'''~'''{{Motion|6}}'''+'''{{Icon-SNK|B}} | |||
* Damage: 38 | |||
* Works on: Everyone | |||
* Notes: Low into Overhead knockdown, another mixup option. | |||
==Armed== | |||
Close {{Icon-SNK|A}}{{Icon-SNK|B}} '''xx''' Any Special or Super | |||
* Damage: 15 + X | |||
* Works on: Everyone standing | |||
* Notes: Similar to the Unarmed version, but is a bit more useful for Frame Traps thanks to the different blockstun of 5B, specially with 4216AC. | |||
After this little difference, the chains are pretty much the same as the Unarmed state. | |||
{{Navbox-NinMas}} | {{Navbox-NinMas}} | ||
[[Category:Ninja Masters]] | [[Category:Ninja Masters]] | ||
Latest revision as of 22:55, 3 January 2025
Introduction
| Unarmed | Weapon |
Story:
A lone-wolf thief who has kept the country astir.
Steals only from those who fill their pockets through bad deeds, however, and gives away the wealth to orphans and poor people.
Having heard rumors of the Golden Palace, seeks it as the next target.
Strategy
Goemon is a toolbox, he has a move for nearly every situation, featuring a low-hitting projectile, an amazing regular throw and equally amazing Normals for poking, neutral and pressuring, all this makes him a character that is difficult to answer properly and can quickly overwhelm the opponent.
However, he has no reliable Anti-air, his most Damaging combos are tight on execution and so are his most damaging throw juggles, an error on your inputs can leave you with no meter and thus no reliable Reversal option... This is where Goemon struggles as his defense is bad without meter, making it easy for the opponent to pressure him if they win the neutral.
To play Goemon, you need to have your Neutral well defined and know how to get in with your strong tools, as well as improving your execution so you can get his Combos properly.
Weapon info
Goemon's weapon is a hand Cannon, while armed he cannot use his 4B, j.2B or 214P, his Fireball changes to be a mid-height one that travels at the same speed as his unarmed Fireball with slightly increased damage
The command grab also changes; This one sends the opponent almost a screen away which is useful to force characters without projectiles into a distance
A good state for different situations and demands matchup knowledge from the opponent
| Pros | Cons |
|
|
Move list
Normals
Standing
Far
| Damage | Meter | Stun | Guard | Cancel | Startup | Active | Recovery | On Hit | On Block |
|---|---|---|---|---|---|---|---|---|---|
| 4 | - | - | HL | Chain
Special Super |
- | - | - | - | - |
|
Extremely quick poke with good cancel options for frame traps, up close it can combo into 623P and is a great chain starter Whiffs against all crouchers though, so be careful with that. | |||||||||
| Damage | Meter | Stun | Guard | Cancel | Startup | Active | Recovery | On Hit | On Block |
|---|---|---|---|---|---|---|---|---|---|
| 6 | - | - | HL | - | - | - | - | - | - |
|
Slightly more damaging and slower than the Unarmed version but in exchange it doesn't whiffs against crouchers, it also doesn't combos into 623S anymore, outside of that it retains the same advantages as the Unarmed version. | |||||||||
| Damage | Meter | Stun | Guard | Cancel | Startup | Active | Recovery | On Hit | On Block |
|---|---|---|---|---|---|---|---|---|---|
| 21 | - | - | HL | - | - | - | - | - | - |
|
Long range arm swing that knocks down on hit, does nice damage but the lack of cancel options and mediocre recovery makes it not have much use other than occasionally punishing with it. | |||||||||
| Damage | Meter | Stun | Guard | Cancel | Startup | Active | Recovery | On Hit | On Block |
|---|---|---|---|---|---|---|---|---|---|
| 25 | - | - | HL | - | - | - | - | - | - |
|
Amazing long-range poke with good damage but no cancel options and has a bit of recovery While it doesn't grant you a knockdown on hit like the Unarmed version, the range more than makes up for that, and if you start the round with your weapon ready you can just throw it out and will beat a lot of stuff Definitely a move you should use whenever you have your weapon out, it will pester your opponents a lot. | |||||||||
| Damage | Meter | Stun | Guard | Cancel | Startup | Active | Recovery | On Hit | On Block |
|---|---|---|---|---|---|---|---|---|---|
| 9 | - | - | L | - | - | - | - | - | - |
|
Quick kick to the shins, a bit more range than 5A with double the damage but no cancel options It hits low, but there's not much you can do to take advantage of that other than tick throwing, although the crouching version is better for that. | |||||||||
| Damage | Meter | Stun | Guard | Cancel | Startup | Active | Recovery | On Hit | On Block |
|---|---|---|---|---|---|---|---|---|---|
| 24 | - | - | HL | - | - | - | - | - | - |
|
This is by far his worst Normal; It has less range than u.5B, more startup, more recovery and it doesn't even knocks down on hit! This thing's only good point is that it does marginally better damage but that doesn't really matters Avoid this crappy kick. | |||||||||
Close
| Damage | Meter | Stun | Guard | Cancel | Startup | Active | Recovery | On Hit | On Block |
|---|---|---|---|---|---|---|---|---|---|
| - | - | - | - | - | - | - | - | - | - |
|
Same as the Far version. | |||||||||
| Damage | Meter | Stun | Guard | Cancel | Startup | Active | Recovery | On Hit | On Block |
|---|---|---|---|---|---|---|---|---|---|
| - | - | - | - | - | - | - | - | - | - |
|
Same as the Far version. | |||||||||
| Damage | Meter | Stun | Guard | Cancel | Startup | Active | Recovery | On Hit | On Block |
|---|---|---|---|---|---|---|---|---|---|
| 21 | - | - | HL | Chain
Special Super |
- | - | - | - | - |
|
Quick uppercut with exceedingly good cancel options, it can be used to confirm pretty much anything you want except 623P, 2146AB and 4216AC, though these last two serve as neat frame traps specially against jump-happy opponents Be careful about a detail though, if you Chain cancel into this from 5A or cl.5D it will whiff on crouchers It also can serve as a niche Anti-air but is risky, still a move you should definitely use to bully your opponent. | |||||||||
| Damage | Meter | Stun | Guard | Cancel | Startup | Active | Recovery | On Hit | On Block |
|---|---|---|---|---|---|---|---|---|---|
| 27 | - | - | HL | Chain
Special Super |
- | - | - | - | - |
|
Similar to Wc.5B with more damage but doesn't combos into anything other than Chains and 236K, though it retains the same applications It also has the same problem as Uc.5B when chained into from 5A or cl.5D. | |||||||||
| Damage | Meter | Stun | Guard | Cancel | Startup | Active | Recovery | On Hit | On Block |
|---|---|---|---|---|---|---|---|---|---|
| 9 | - | - | - | Chain | - | - | - | - | - |
|
Basically the same as the Far version but can be Chain cancelled to make use of the fact that it hits low, making it a pretty good starter due to this. | |||||||||
| Damage | Meter | Stun | Guard | Cancel | Startup | Active | Recovery | On Hit | On Block |
|---|---|---|---|---|---|---|---|---|---|
| 24 | - | - | HL | Chain
Special Super |
- | - | - | - | - |
|
A Ucl.5B with more damage but cannot be used as an Anti-air (Even though U.5B is not good at that) It retains the same cancel options but also can be Chain canceled into 5B to extend punishes Pretty good normal overall. | |||||||||
Crouching
| Damage | Meter | Stun | Guard | Cancel | Startup | Active | Recovery | On Hit | On Block |
|---|---|---|---|---|---|---|---|---|---|
| 6 | - | - | HL | Special | - | - | - | - | - |
|
This thing is fast, REALLY fast, it might as well be the quickest Normal of the game while having good range to boot Great Normal to just throw whenever and poke. | |||||||||
| Damage | Meter | Stun | Guard | Cancel | Startup | Active | Recovery | On Hit | On Block |
|---|---|---|---|---|---|---|---|---|---|
| 6 | - | - | HL | - | - | - | - | - | - |
|
Pretty much the same as the Unarmed version but with slightly more recovery. | |||||||||
| Damage | Meter | Stun | Guard | Cancel | Startup | Active | Recovery | On Hit | On Block |
|---|---|---|---|---|---|---|---|---|---|
| 24 | - | - | L | Special
Super |
- | - | - | - | - |
|
2-Hit iron ball that can be canceled only on the 2nd hit, though it won't actually combo into anything other than 236K even at max range but depending on the spacing the 2nd hit can whiff leaving you completely open as its recovery is bad Not a bad Normal to throw for here and there and can be a surprisingly good punish tool if you space it correctly but is not that good either. | |||||||||
| Damage | Meter | Stun | Guard | Cancel | Startup | Active | Recovery | On Hit | On Block |
|---|---|---|---|---|---|---|---|---|---|
| 27 | - | - | HL | - | - | - | - | - | - |
|
This move is interesting, if done it with proper spacing and timing it can be an Anti-air which is hard to contest but getting it under those circumstances is difficult due to the startup of the move, and since it lacks cancel options it will reset to Neutral most of the time Outside of that is a poke, but you can use the standing version for that since it has better range and startup Definitely a Normal you can experiment with. | |||||||||
| Damage | Meter | Stun | Guard | Cancel | Startup | Active | Recovery | On Hit | On Block |
|---|---|---|---|---|---|---|---|---|---|
| 9 | - | - | L | Special | - | - | - | - | - |
|
Pretty much a 2A that's a bit slower and has less range but hits low, making it a great Normal to Tick Throw. | |||||||||
| Damage | Meter | Stun | Guard | Cancel | Startup | Active | Recovery | On Hit | On Block |
|---|---|---|---|---|---|---|---|---|---|
| 24 | - | - | L | - | - | - | - | - | - |
|
This sweep moves him forward slightly, improving its range a bit Not much use for it other than punishing with a knockdown or to finish a chain. | |||||||||
Jumping
| Damage | Meter | Stun | Guard | Cancel | Startup | Active | Recovery | On Hit | On Block |
|---|---|---|---|---|---|---|---|---|---|
| 9 | - | - | H | - | - | - | - | - | - |
|
This Normal is amazing, it stays out for the entire jump, has good range and is almost impossible to contest on Air-to-Air situations, really its only bad side is that it is mediocre for jump-ins due to the low hitstun Still one of Goemon's best Normals, abuse liberally. | |||||||||
| Damage | Meter | Stun | Guard | Cancel | Startup | Active | Recovery | On Hit | On Block |
|---|---|---|---|---|---|---|---|---|---|
| 9 | - | - | H | - | - | - | - | - | - |
|
Same as the Unarmed version. | |||||||||
| Version | Damage | Meter | Stun | Guard | Cancel | Startup | Active | Recovery | On Hit | On Block |
|---|---|---|---|---|---|---|---|---|---|---|
| Neutral | 19 | - | - | H | - | - | - | - | - | - |
|
Weird hammer strike that only hits forward Not much to say, a mediocre Air-to-Air at best. | ||||||||||
| Damage | Meter | Stun | Guard | Cancel | Startup | Active | Recovery | On Hit | On Block |
|---|---|---|---|---|---|---|---|---|---|
| 19 | - | - | H | - | - | - | - | - | - |
|
Is like j.A with less range but with more damage, though is outclassed badly by both j.A and j.D so it doesn't really counts with a purpose or reason to be used. | |||||||||
| Version | Damage | Meter | Stun | Guard | Cancel | Startup | Active | Recovery | On Hit | On Block |
|---|---|---|---|---|---|---|---|---|---|---|
| Neutral | 27 | - | - | H | - | - | - | - | - | - |
|
Pretty much the latter hit of W.2B but in the air Not much else to say, it also gets heavily outclassed by Wj.B so theere's not a real reason to use it. | ||||||||||
| Damage | Meter | Stun | Guard | Cancel | Startup | Active | Recovery | On Hit | On Block |
|---|---|---|---|---|---|---|---|---|---|
| 27 | - | - | H | - | - | - | - | - | - |
|
Oh boy, this Normal is amazing on everything It starts about as quick as j.A but it has better range and triple the damage while also being a great jump-in Thanks to the range it can contest a lot of Anti-Airs, forcing the opponent to respect you when you jump, mix this with W.5B and Projectiles to give yourself a solid neutral Overall another of Goemon's best Normals, feel free to abuse the heck out of it. | |||||||||
| Damage | Meter | Stun | Guard | Cancel | Startup | Active | Recovery | On Hit | On Block |
|---|---|---|---|---|---|---|---|---|---|
| 10 | - | - | H | - | - | - | - | - | - |
|
Similar to j.A but worse on all aspects except damage, you shouldn't really try to use this knee. | |||||||||
| Damage | Meter | Stun | Guard | Cancel | Startup | Active | Recovery | On Hit | On Block |
|---|---|---|---|---|---|---|---|---|---|
| 22 | - | - | H | - | - | - | - | - | - |
|
Defensive boot, a neat Air-to-Air you can throw here and there when the opponent tries to contest you. | |||||||||
| Damage | Meter | Stun | Guard | Cancel | Startup | Active | Recovery | On Hit | On Block |
|---|---|---|---|---|---|---|---|---|---|
| 22 | - | - | H | - | - | - | - | - | - |
|
Goemon's designated jump-in, good damage and range as well as having a lot of reward when you land it It can crossup but is very hard to do properly, so just stick to using it as his jump-in. | |||||||||
Command Normals
| Damage | Meter | Stun | Guard | Cancel | Startup | Active | Recovery | On Hit | On Block |
|---|---|---|---|---|---|---|---|---|---|
| 9 | - | - | H | Chain | - | - | - | - | - |
|
If it hits a crouching opponent, it will stagger them. This overhead has different applications than 6A, it can be Chain Canceled into 5B for either a meterless combo or your Dark Combo. If blocked and not canceled, it has worse recovery than 6A so be aware of that. | |||||||||
| Damage | Meter | Stun | Guard | Cancel | Startup | Active | Recovery | On Hit | On Block |
|---|---|---|---|---|---|---|---|---|---|
| 9 | - | - | H | Chain | - | - | - | - | - |
|
Same as the Unarmed Version | |||||||||
| Damage | Meter | Stun | Guard | Cancel | Startup | Active | Recovery | On Hit | On Block |
|---|---|---|---|---|---|---|---|---|---|
| 13 | - | - | H | - | - | - | - | - | - |
|
If it hits a crouching opponent, it will stagger them. This overhead has a different application than 3A: With the stagger and the quick recovery it has you can do a short dash to convert into a combo, mainly 5A Chains. Pretty safe if blocked so you can throw it out to scare people. | |||||||||
| Damage | Meter | Stun | Guard | Cancel | Startup | Active | Recovery | On Hit | On Block |
|---|---|---|---|---|---|---|---|---|---|
| 24 | - | - | HL | - | - | - | - | - | - |
|
This Normal is pretty good, has about the same range and startup as u.5B but with more damage and better priority Though it doesn't knocks down on hit, thanks to the priority it can be used as an Anti-Air if spaced well Overall a useful Normal for poking. | |||||||||
| Damage | Meter | Stun | Guard | Cancel | Startup | Active | Recovery | On Hit | On Block |
|---|---|---|---|---|---|---|---|---|---|
| 24 | - | - | H | - | - | - | - | - | - |
|
The range on this thing is big and if the opponent tries to go Air-to-Air with you it will most surely knock them down, it can also be used as a jump-in although is not that great at it An amazing Neutral tool, abuse liberally. | |||||||||
| Damage | Meter | Stun | Guard | Cancel | Startup | Active | Recovery | On Hit | On Block |
|---|---|---|---|---|---|---|---|---|---|
| 16 | - | - | HL | - | - | - | - | - | - |
|
You can only use this move if you lost your Weapon, a good range poke but it has slow startup and is punishable if it hits up close This move's main purpose is to launch your weapon towards you if it connects with it at around max range (This happens even if it hits the opponent on the way), this allows you to catch it once it comes down Not a bad tool, but if you lost your Weapon that means you got stunned and probably aren't on a position to poke with it. | |||||||||
| Damage | Meter | Stun | Guard | Cancel | Startup | Active | Recovery | On Hit | On Block |
|---|---|---|---|---|---|---|---|---|---|
| 24 | - | - | H | - | - | - | - | - | - |
|
Knocks down on hit, covers a good distance but is unsafe on block | |||||||||
Universal Mechanics
| Damage | Meter | Stun | Guard | Cancel | Startup | Active | Recovery | On Hit | On Block |
|---|---|---|---|---|---|---|---|---|---|
| - | - | - | - | - | - | - | - | - | - |
|
- | |||||||||
| Damage | Meter | Stun | Guard | Cancel | Startup | Active | Recovery | On Hit | On Block |
|---|---|---|---|---|---|---|---|---|---|
| - | - | - | - | - | - | - | - | - | - |
|
- | |||||||||
| Damage | Meter | Stun | Guard | Cancel | Startup | Active | Recovery | On Hit | On Block |
|---|---|---|---|---|---|---|---|---|---|
| 16, 15 | - | - | - | - | 1 | - | - | - | - |
|
This throw is probably one of the best of the game It deals 16 damage when it launches the opponent, but it puts them into a Juggle state that you can follow with pretty much anything, either a Normal for resets or setups, his Air throw for style points or Specials/Supers for damage, here are some notable juggles:
Total damage: 48 Meterless, 78 with Meter 1 Frame to land it making it the most difficult but also giving the biggest damage outside of the corner.
Total damage: 46 Simple damage, 214B doesn't lands for some reason so stick to the A version.
Total damage: 120 The most damage off the throw but only works on the corner. | |||||||||
| Damage | Meter | Stun | Guard | Cancel | Startup | Active | Recovery | On Hit | On Block |
|---|---|---|---|---|---|---|---|---|---|
| - | - | - | - | - | 1 | - | - | - | - |
|
Pretty good when your opponent tries to avoid your keepaway. | |||||||||
Special Moves
| Damage | Meter | Stun | Guard | Cancel | Startup | Active | Recovery | On Hit | On Block |
|---|---|---|---|---|---|---|---|---|---|
| 39 | - | - | - | - | 1 | - | - | - | - |
|
Good command grab that can be tick into easily, leaves the opponent at a good distance to set up some mixups or just to reset the Neutral which is really important for Goemon. | |||||||||
| Damage | Meter | Stun | Guard | Cancel | Startup | Active | Recovery | On Hit | On Block |
|---|---|---|---|---|---|---|---|---|---|
| 39 | - | - | - | - | 1 | - | - | - | - |
|
Same damage as the Unarmed version but it sends the opponent to the other side of the screen, great to punish sloppy offensive, put characters without a projectile into a disadvantage or reset the Neutral on demand. | |||||||||
| Damage | Meter | Stun | Guard | Cancel | Startup | Active | Recovery | On Hit | On Block |
|---|---|---|---|---|---|---|---|---|---|
| 22 | - | - | HL | - | - | - | - | - | - |
|
A more traditional Fireball, does good damage and can create a slight zoning if used properly, not much else to say since it is simple and effective The speed depends on the button used, with A being the slowest and AB the fastest. | |||||||||
| Version | Damage | Meter | Stun | Guard | Cancel | Startup | Active | Recovery | On Hit | On Block |
|---|---|---|---|---|---|---|---|---|---|---|
| Unarmed | 21 | - | - | L | - | - | - | - | - | - |
|
Pretty good fireball to pester your opponents although it can be difficult to use on Fireball wars, the A version also can be used to setup a near unblockable scenario but is complicated to do The speed of the projectile depends on the button used, with A being the slower and AB being the faster. | ||||||||||
| Damage | Meter | Stun | Guard | Cancel | Startup | Active | Recovery | On Hit | On Block |
|---|---|---|---|---|---|---|---|---|---|
| 15, 12, 18 | - | - | HL | - | - | - | - | - | - |
|
Goemon's rekka, a great combo tool and easy to hit confirm from pretty much any heavy | |||||||||
| Version | Damage | Meter | Stun | Guard | Cancel | Startup | Active | Recovery | On Hit | On Block |
|---|---|---|---|---|---|---|---|---|---|---|
| Light | - | - | - | - | - | - | - | - | - | - |
| Heavy | - | - | - | - | - | - | - | - | - | - |
| EX | - | - | - | - | - | - | - | - | - | - |
|
Goemon throws a bomb at an angle while leaping backwards, mostly used for tricky combos. If you hold the button Goemon will delay the throw and the hop, but if the opponent touches the bomb, it will explode immediately making it a risky Anti-air. | ||||||||||
| Version | Damage | Meter | Stun | Guard | Cancel | Startup | Active | Recovery | On Hit | On Block |
|---|---|---|---|---|---|---|---|---|---|---|
| Light | 30 | - | - | HL | - | - | - | - | - | - |
|
Quick fire swing, cancels projectiles it intercepts and knocks down on hit Good move to combo into. | ||||||||||
| Version | Damage | Meter | Stun | Guard | Cancel | Startup | Active | Recovery | On Hit | On Block |
| Heavy | 30 | - | - | HL | - | - | - | - | - | - |
|
Same damage as the A version but more startup and active frames Better used as a Frame Trap. | ||||||||||
| Version | Damage | Meter | Stun | Guard | Cancel | Startup | Active | Recovery | On Hit | On Block |
| EX | 30 | - | - | HL | - | - | - | - | - | - |
|
Same damage as the other versions but stays out longer and has the startup of the A version and a bit more active frames than the B version Amazing move for combos, throw juggles and can be used as a situational Anti-air | ||||||||||
Spirit Gauge
Power Move
| Version | Damage | Meter | Stun | Guard | Cancel | Startup | Active | Recovery | On Hit | On Block |
|---|---|---|---|---|---|---|---|---|---|---|
| Level 1 | 10, 10, 10 | - | - | HL | - | - | - | - | - | - |
|
Goemon slams a large ball and chain on to the ground, it hits on the initial swing so it can be a preemptive anti-air
| ||||||||||
| Level 2 | 43 | - | - | - | - | - | - | - | - | - |
|
This version is with more than 50% meter but without Max or Hyper mode Hits once for good damage and knocks down, it also keeps doing 3 hits on block, so it retains the same uses as the Level 1 version but with better chip damage | ||||||||||
| Level 3 | 62 | - | - | - | - | - | - | - | - | - |
|
This version is with Max or Hyper mode Tt does the most damage out of the three both on hit and block but empties your Gauge when used Retains the same applications but it can be riskier to use since Goemon needs the meter for Reversal burst. | ||||||||||
Combo Super
| Damage | Meter | Stun | Guard | Cancel | Startup | Active | Recovery | On Hit | On Block |
|---|---|---|---|---|---|---|---|---|---|
| 70 | - | - | - | - | - | - | - | - | - |
|
Goemon hits the opponent several times, then throws them in to the air and blasts them away with a large energy punch. | |||||||||
Desperation Move
| Damage | Meter | Stun | Guard | Cancel | Startup | Active | Recovery | On Hit | On Block |
|---|---|---|---|---|---|---|---|---|---|
| 42, 42 | - | - | HL | - | - | - | - | - | - |
|
Good Desperation move overall, it comes out quick and hits hard and it can be confirmed from 5A~5B chain but is tight When you are at red health however, this move becomes a great pressure tool, your opponent will have a lot of difficulties to contest it due to its range, speed and the fact that it can come out at any moment Try to get used to the input because you are going to want this move ready. | |||||||||
Finisher
| Damage | Meter | Stun | Guard | Cancel | Startup | Active | Recovery | On Hit | On Block |
|---|---|---|---|---|---|---|---|---|---|
| 50, 50 | - | - | HL | - | - | - | - | - | - |
|
Another good Desperation move, while it has a bit more startup, it hits much harder while also having better priority and range This one is easier to combo into from 5A~5B chain, adding to the fact that you need to use the Burst which is a great tool for Goemon makes it so is generally easier to apply than his 4216AC Like stated on his regular throw, doing this on the corner will reward you with crazy damage for a throw and the timing is not that strict Another move on his arsenal that you cannot ignore. | |||||||||
Notable Chains
Unarmed
- Damage: 13 + X
- Works on: Everyone standing
- Notes: Your main way to combo into Specials or Supers, almost all of them combo nicely but some like 214B or 2146AB are used as Frame Traps.
- Damage: 51
- Works on: Everyone standing
- Notes: Your most optimal punish and pressure option, last hit is an Overhead but be careful as the starter whiffs on all crouchers, is also a great option after a 6A stagger.
- Damage: 71
- Works on: Everyone standing
- Notes: Heavier version of the previous Chain, more damage but can be harder to land depending on the situation, still an amazing punish option.
- Damage: 31
- Works on: Everyone
- Notes: Similar to the ones above, but it sacrifices damage for a low starter.
- Damage: 53
- Works on: Everyone
- Notes: Overhead into knockdown Chain, good option to open up turtlers or for mixups.
- Damage: 38
- Works on: Everyone
- Notes: Low into Overhead knockdown, another mixup option.
Armed
- Damage: 15 + X
- Works on: Everyone standing
- Notes: Similar to the Unarmed version, but is a bit more useful for Frame Traps thanks to the different blockstun of 5B, specially with 4216AC.
After this little difference, the chains are pretty much the same as the Unarmed state.
