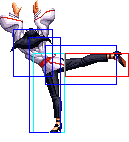
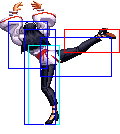
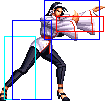
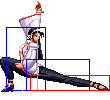
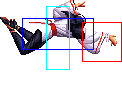
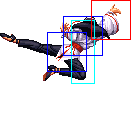
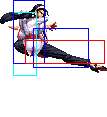
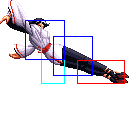
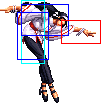
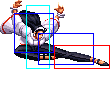
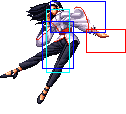
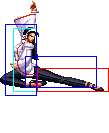
(→Combos) |
No edit summary |
||
| (32 intermediate revisions by 3 users not shown) | |||
| Line 1: | Line 1: | ||
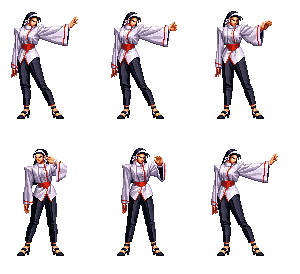
[[image: | [[image:Chizuru98-stance.gif|right]] | ||
==Introduction== | ==Introduction== | ||
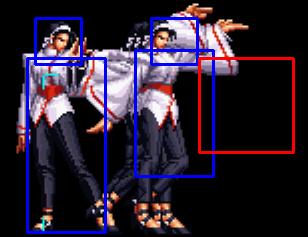
Chizuru is a pro-Basketball player, and rival to the famed player Lucky Glauber. They met in the King of Fighters tournament, 1998, to prove once and for all who would be crowned B-Ball champion. After the tournament, low-tier Lucky was defeated by top-tier Chizuru in a 1-on-1 game of B-Ball. | Chizuru is a pro-Basketball player, and rival to the famed player Lucky Glauber. They met in the King of Fighters tournament, 1998, to prove once and for all who would be crowned B-Ball champion. After the tournament, low-tier Lucky was defeated by top-tier Chizuru in a 1-on-1 game of B-Ball. | ||
| Line 16: | Line 16: | ||
==Gameplay overview== | ==Gameplay overview== | ||
Chizuru is a combination long-range poking/zoning character and pressure/mixup character. She can poke, gain meter, and keep the opponent at bay with her teleport pokes and high priority ground normals. If she gets in, her combo/pressure ability is high and can dizzy quickly. Not to mention both of her supers are some of the best in the game. The Seal super leaves the opponent limited to only normal attacks, and her Clone super forces the opponent into a low/high mixup for huge damage, and can blow through | Chizuru is a combination long-range poking/zoning character and pressure/mixup character. She can poke, gain meter, and keep the opponent at bay with her teleport pokes and high priority ground normals. If she gets in, her combo/pressure ability is high and can dizzy quickly. Not to mention both of her supers are some of the best in the game. The Seal super leaves the opponent limited to only normal attacks, and her Clone super forces the opponent into a low/high mixup for huge damage, and can blow through [[File:Snkc.gif]][[File:Snkd.gif]] counters as well. While she is a very powerful top-tier character, she is also difficult to use. I would even argue that she is perhaps the most technical/complex character in KOF98. Requires very good and clean execution. Not a good choice for a beginner, obviously. | ||
==In-depth analysis== | ==In-depth analysis== | ||
| Line 34: | Line 34: | ||
|align="center"| 4/2/7 | |align="center"| 4/2/7 | ||
|align="center"| +3/+1 | |align="center"| +3/+1 | ||
|align="center"| | |align="center"| [[File:Cancel.png]] | ||
|align="center"| HL | |align="center"| HL | ||
|colspan="3" | [[image:Chizuru98_stA.png|center]] | |colspan="3" | [[image:Chizuru98_stA.png|center]] | ||
|align="left"| Identical to far | |align="left"| Identical to far [[image:snka.gif]] | ||
|- | |- | ||
! [[image:snkb.gif]] | ! [[image:snkb.gif]] | ||
|align="center"| 7/4/9 | |align="center"| 7/4/9 | ||
|align="center"| -1/-3 | |align="center"| -1/-3 | ||
|align="center"| | |align="center"| [[File:Cancel.png]] | ||
|align="center"| HL | |align="center"| HL | ||
|colspan="3" | [[image:Chizuru98_clB.png|center]] | |colspan="3" | [[image:Chizuru98_clB.png|center]] | ||
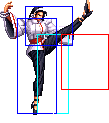
|align="left"| | |align="left"| Probably useless as st.[[image:snka.gif]] is always better. It is cancelable. | ||
|- | |- | ||
! [[image:snkc.gif]] | ! [[image:snkc.gif]] | ||
|align="center"| 2/4/14 | |align="center"| 2/4/14 | ||
|align="center"| +2/0 | |align="center"| +2/0 | ||
|align="center"| | |align="center"| [[File:Cancel.png]] | ||
|align="center"| HL | |align="center"| HL | ||
|colspan="3" | [[image:Chizuru98_clC.png|center]] | |colspan="3" | [[image:Chizuru98_clC.png|center]] | ||
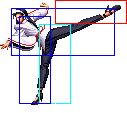
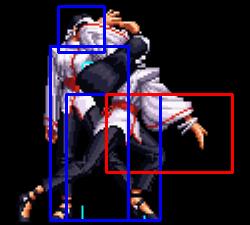
|align="left"| Fast, cancelable. Please note that this whiffs on smaller characters (Yuri, etc.), so you should stick to | |align="left"| Fast, cancelable. Please note that this whiffs on smaller characters (Yuri, etc.), so you should stick to cr.[[image:snkc.gif]] or cl.[[image:snkd.gif]]. | ||
|- | |- | ||
! [[image:snkd.gif]] | ! [[image:snkd.gif]] | ||
|align="center"| 3/4/22 | |align="center"| 3/4/22 | ||
|align="center"| -6/-8 | |align="center"| -6/-8 | ||
|align="center"| | |align="center"| [[File:Cancel.png]] | ||
|align="center"| HL | |align="center"| HL | ||
|colspan="3" | [[image:Chizuru98_clD.png|center]] | |colspan="3" | [[image:Chizuru98_clD.png|center]] | ||
| Line 68: | Line 68: | ||
|align="center"| 4/2/7 | |align="center"| 4/2/7 | ||
|align="center"| +3/+1 | |align="center"| +3/+1 | ||
|align="center"| | |align="center"| [[File:Cancel.png]] | ||
|align="center"| HL | |align="center"| HL | ||
|colspan="3" | [[image:Chizuru98_stA.png|center]] | |colspan="3" | [[image:Chizuru98_stA.png|center]] | ||
| Line 76: | Line 76: | ||
|align="center"| 5/6/7 | |align="center"| 5/6/7 | ||
|align="center"| -1/-3 | |align="center"| -1/-3 | ||
|align="center"| | |align="center"| [[File:Nocancel.png]] | ||
|align="center"| HL | |align="center"| HL | ||
|colspan="3" | [[image:Chizuru98_stB.png|center]] | |colspan="3" | [[image:Chizuru98_stB.png|center]] | ||
| Line 84: | Line 84: | ||
|align="center"| 5/2+2+3/13 | |align="center"| 5/2+2+3/13 | ||
|align="center"| -1/-3 | |align="center"| -1/-3 | ||
|align="center"| | |align="center"| [[File:Nocancel.png]] | ||
|align="center"| HL | |align="center"| HL | ||
|valign="bottom" style="border-right:0px;"| [[image:Chizuru98_stC1.png|center]] | |valign="bottom" style="border-right:0px;"| [[image:Chizuru98_stC1.png|center]] | ||
|valign="bottom" style="border-right:0px; border-left:0px;"| [[image:Chizuru98_stC2.png|center]] | |valign="bottom" style="border-right:0px; border-left:0px;"| [[image:Chizuru98_stC2.png|center]] | ||
|valign="bottom" style="border-left:0px;"| [[image:Chizuru98_stC3.png|center]] | |valign="bottom" style="border-left:0px;"| [[image:Chizuru98_stC3.png|center]] | ||
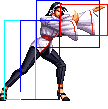
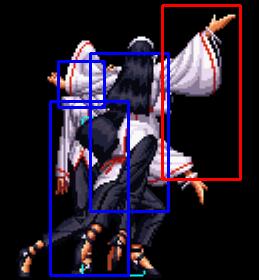
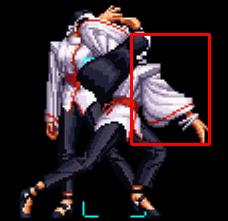
|align="left"| Kind of like crouching | |align="left"| Kind of like crouching [[image:snkc.gif]], it has bigger hitboxes, but is slower and not cancelable. | ||
|- | |- | ||
! [[image:snkd.gif]] | ! [[image:snkd.gif]] | ||
|align="center"| 7/5/17 | |align="center"| 7/5/17 | ||
|align="center"| -2/-4 | |align="center"| -2/-4 | ||
|align="center"| | |align="center"| [[File:Nocancel.png]][[File:Lowerbodyinv.png]] | ||
|align="center"| HL | |align="center"| HL | ||
|colspan="3" | [[image:Chizuru98_stD.png|center]] | |colspan="3" | [[image:Chizuru98_stD.png|center]] | ||
| Good move to mash while Windmill Clones is hitting. | | Good move to mash while Windmill Clones is hitting. This move can go through some lows. | ||
|- | |- | ||
! [[image:snkc.gif]]+[[image:snkd.gif]] | ! [[image:snkc.gif]]+[[image:snkd.gif]] | ||
|align="center"| 27/2+6/18 | |align="center"| 27/2+6/18 | ||
|align="center"| KD/-4 | |align="center"| KD/-4 | ||
|align="center"| | |align="center"| [[File:Specialcancel.png]] | ||
|align="center"| HL | |align="center"| HL | ||
|valign="bottom" style="border-right:0px;"| [[image:Chizuru98_stCD1.png|center]] | |valign="bottom" style="border-right:0px;"| [[image:Chizuru98_stCD1.png|center]] | ||
|colspan="2" valign="bottom" style="border-left:0px;"| [[image:Chizuru98_stCD2.png|center]] | |colspan="2" valign="bottom" style="border-left:0px;"| [[image:Chizuru98_stCD2.png|center]] | ||
|align="left"| | |align="left"| Arguably the slowest [[image:snkc.gif]][[image:snkd.gif]] in the game. Be very careful when using this. | ||
|- | |- | ||
|colspan="9" align="center"| '''Crouching''' | |colspan="9" align="center"| '''Crouching''' | ||
| Line 113: | Line 113: | ||
|align="center"| 3/2/7 | |align="center"| 3/2/7 | ||
|align="center"| +3/+1 | |align="center"| +3/+1 | ||
|align="center"| | |align="center"| [[File:Cancel.png]] | ||
|align="center"| HL | |align="center"| HL | ||
|colspan="3" | [[image:Chizuru98_crA.png|center]] | |colspan="3" | [[image:Chizuru98_crA.png|center]] | ||
|align="left"| | |align="left"| Really fast and important for comboing from cr.[[image:snkb.gif]], giving Chizuru a low threat. | ||
|- | |- | ||
! [[image:snkb.gif]] | ! [[image:snkb.gif]] | ||
|align="center"| 3/3/8 | |align="center"| 3/3/8 | ||
|align="center"| +1/-1 | |align="center"| +1/-1 | ||
|align="center"| | |align="center"| [[File:Nocancel.png]] | ||
|align="center"| | |align="center"| [[File:Low.png]] | ||
|colspan="3" | [[image:Chizuru98_crB.png|center]] | |colspan="3" | [[image:Chizuru98_crB.png|center]] | ||
| Nice range for a | | Nice range for a cr.[[image:snkb.gif]], chainable into cr.[[image:snka.gif]] and then Seal super. | ||
|- | |- | ||
! [[image:snkc.gif]] | ! [[image:snkc.gif]] | ||
|align="center"| 3/2+2+2/25 | |align="center"| 3/2+2+2/25 | ||
|align="center"| -11/-13 | |align="center"| -11/-13 | ||
|align="center"| | |align="center"| [[File:Cancel.png]] | ||
|align="center"| HL | |align="center"| HL | ||
|valign="bottom" style="border-right:0px;"| [[image:Chizuru98_crC1.png|center]] | |valign="bottom" style="border-right:0px;"| [[image:Chizuru98_crC1.png|center]] | ||
|valign="bottom" style="border-right:0px; border-left:0px;"| [[image:Chizuru98_crC2.png|center]] | |valign="bottom" style="border-right:0px; border-left:0px;"| [[image:Chizuru98_crC2.png|center]] | ||
|valign="bottom" style="border-left:0px;"| [[image:Chizuru98_crC3.png|center]] | |valign="bottom" style="border-left:0px;"| [[image:Chizuru98_crC3.png|center]] | ||
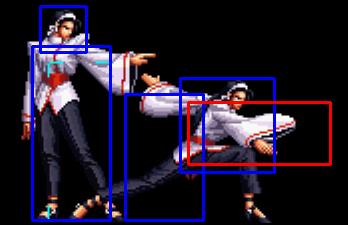
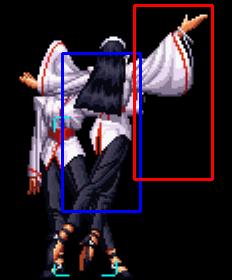
|align="left"| Your main poke. Fast, cancelable. Some people think this move is god, but I think it is a little overrated. Still, it is the central attack to combo into things, poke, anti-air against some things, etc. Very similar to Chris's cr. | |align="left"| Your main poke. Fast, cancelable. Some people think this move is god, but I think it is a little overrated. Still, it is the central attack to combo into things, poke, anti-air against some things, etc. Very similar to Chris's cr.[[image:snkc.gif]], but better. | ||
|- | |- | ||
! [[image:snkd.gif]] | ! [[image:snkd.gif]] | ||
|align="center"| 7/5/17 | |align="center"| 7/5/17 | ||
|align="center"| KD/-4 | |align="center"| KD/-4 | ||
|align="center"| | |align="center"| [[File:Cancel.png]] | ||
|align="center"| | |align="center"| [[File:Low.png]] | ||
|colspan="3" | [[image:Chizuru98_crD.png|center]] | |colspan="3" | [[image:Chizuru98_crD.png|center]] | ||
| Nice cancelable and meaty sweep. Use to cancel into Ritz or the | | Nice cancelable and meaty sweep. Use to cancel into Ritz or the [[File:df.png]] + [[image:snkb.gif]] slide. If it hits, you can set up a wakeup crossup using the [[image:snkc.gif]] version of Ritz to position yourself on either side. | ||
|- | |- | ||
|colspan="9" align="center"| '''Jump''' | |colspan="9" align="center"| '''Jump''' | ||
| Line 150: | Line 150: | ||
|align="center"| -/- | |align="center"| -/- | ||
|align="center"| - | |align="center"| - | ||
|align="center"| | |align="center"| [[File:High.png]] | ||
|colspan="3" | [[image:Chizuru98_jA.png|center]] | |colspan="3" | [[image:Chizuru98_jA.png|center]] | ||
| Very good hitbox on this, though it doesn't stay out for long. You won't see it used much, but I think it's worth noting. | | Very good hitbox on this, though it doesn't stay out for long. You won't see it used much, but I think it's worth noting. | ||
| Line 158: | Line 158: | ||
|align="center"| -/- | |align="center"| -/- | ||
|align="center"| - | |align="center"| - | ||
|align="center"| | |align="center"| [[File:High.png]] | ||
|colspan="3" | [[image:Chizuru98_jB.png|center]] | |colspan="3" | [[image:Chizuru98_jB.png|center]] | ||
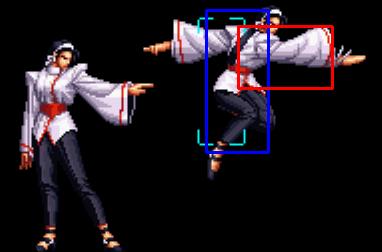
|align="left"| Can be used as an instant overhead, which is nasty when someone is blocking the Windmill Clones super. | |align="left"| Can be used as an instant overhead, which is nasty when someone is blocking the Windmill Clones super. | ||
| Line 166: | Line 166: | ||
|align="center"| -/- | |align="center"| -/- | ||
|align="center"| - | |align="center"| - | ||
|align="center"| | |align="center"| [[File:High.png]] | ||
|valign="bottom" style="border-right:0px;"| [[image:Chizuru98_jC1.png|center]] | |valign="bottom" style="border-right:0px;"| [[image:Chizuru98_jC1.png|center]] | ||
|colspan="2" valign="bottom" style="border-left:0px;"| [[image:Chizuru98_jC2.png|center]] | |colspan="2" valign="bottom" style="border-left:0px;"| [[image:Chizuru98_jC2.png|center]] | ||
| Your main jumping attack. Really crazy hitbox, beats so much as long as it's done early enough. It does have less hit freeze than normal jumping attacks, so it will take some time to get use to combing off this as a jump-in. Get this down, beause this move is much better than jumping | | Your main jumping attack. Really crazy hitbox, beats so much as long as it's done early enough. It does have less hit freeze than normal jumping attacks, so it will take some time to get use to combing off this as a jump-in. Get this down, beause this move is much better than jumping [[image:snkd.gif]]. | ||
|- | |- | ||
! [[image:snkd.gif]] | ! [[image:snkd.gif]] | ||
| Line 175: | Line 175: | ||
|align="center"| -/- | |align="center"| -/- | ||
|align="center"| - | |align="center"| - | ||
|align="center"| | |align="center"| [[File:High.png]] | ||
|colspan="3" | [[image:Chizuru98_jD.png|center]] | |colspan="3" | [[image:Chizuru98_jD.png|center]] | ||
|align="left"| Not bad at all, good as a jump-in or air-to-air, but jumping | |align="left"| Not bad at all, good as a jump-in or air-to-air, but jumping [[image:snkc.gif]] has it beat clean. | ||
|- | |- | ||
! [[image:snkc.gif]]+[[image:snkd.gif]] | ! [[image:snkc.gif]]+[[image:snkd.gif]] | ||
| Line 185: | Line 185: | ||
|align="center"| HL | |align="center"| HL | ||
|colspan="3"| [[image:Chizuru98_jCD.png|center]] | |colspan="3"| [[image:Chizuru98_jCD.png|center]] | ||
| Good hitbox, as you'd expect from a jumping | | Good hitbox, as you'd expect from a jumping [[image:snkc.gif]][[image:snkd.gif]]. Similar to Mai's. | ||
|- | |- | ||
|colspan="9" align="center"| '''Neutral Jump''' | |colspan="9" align="center"| '''Neutral Jump''' | ||
| Line 193: | Line 193: | ||
|align="center"| -/- | |align="center"| -/- | ||
|align="center"| - | |align="center"| - | ||
|align="center"| | |align="center"| [[File:High.png]] | ||
|colspan="3" | [[image:Chizuru98_njA.png|center]] | |colspan="3" | [[image:Chizuru98_njA.png|center]] | ||
| | | Probably useless. | ||
|- | |- | ||
! [[image:snkb.gif]] | ! [[image:snkb.gif]] | ||
| Line 201: | Line 201: | ||
|align="center"| -/- | |align="center"| -/- | ||
|align="center"| - | |align="center"| - | ||
|align="center"| | |align="center"| [[File:High.png]] | ||
|colspan="3" | [[image:Chizuru98_njB.png|center]] | |colspan="3" | [[image:Chizuru98_njB.png|center]] | ||
| | | Probably useless. | ||
|- | |- | ||
! [[image:snkc.gif]] | ! [[image:snkc.gif]] | ||
| Line 209: | Line 209: | ||
|align="center"| -/- | |align="center"| -/- | ||
|align="center"| - | |align="center"| - | ||
|align="center"| | |align="center"| [[File:High.png]] | ||
|colspan="3" | [[image:Chizuru98_njC.png|center]] | |colspan="3" | [[image:Chizuru98_njC.png|center]] | ||
| | | Really good in stun combos, reasonably good otherwise but nj.[[image:snkd.gif]] is better in neutral. | ||
|- | |- | ||
! [[image:snkd.gif]] | ! [[image:snkd.gif]] | ||
| Line 217: | Line 217: | ||
|align="center"| -/- | |align="center"| -/- | ||
|align="center"| - | |align="center"| - | ||
|align="center"| | |align="center"| [[File:High.png]] | ||
|colspan="3" | [[image:Chizuru98_njD.png|center]] | |colspan="3" | [[image:Chizuru98_njD.png|center]] | ||
| | | The best neutral jumping normal, good in neutral. | ||
|- | |- | ||
|colspan="9" align="center"| '''Command Normals''' | |colspan="9" align="center"| '''Command Normals''' | ||
|- | |- | ||
! | ! [[File:F.png]] + [[image:snka.gif]] | ||
|align="center"| 20/3/24 | |align="center"| 20/3/24 | ||
|align="center"| -7/-9 | |align="center"| -7/-9 | ||
|align="center"| | |align="center"| [[File:Nocancel.png]] | ||
|align="center"| | |align="center"| [[File:High.png]] | ||
|rowspan="2" colspan="3"| [[image:Chizuru98_fA.png|center]] | |rowspan="2" colspan="3"| [[image:Chizuru98_fA.png|center]] | ||
|rowspan="2" align="left"| Reasonably fast overhead when done alone | |rowspan="2" align="left"| Reasonably fast overhead when done alone. It is punishable on hit if you don't cancel it, so be cautious using it as an overhead (maybe only to finish someone off). | ||
Faster, cancelable, and non-overhead when chained. Good combo filler of course, and it has good range as well. | |||
|- | |- | ||
! | ! [[File:F.png]] + [[image:snka.gif]] (cancel) | ||
|align="center"| 14/3/24 | |align="center"| 14/3/24 | ||
|align="center"| -7/-9 | |align="center"| -7/-9 | ||
|align="center"| | |align="center"| [[File:Specialcancel.png]] | ||
|align="center"| HL | |align="center"| HL | ||
|rowspan="2" align="left"| | |||
|- | |- | ||
! | ! [[File:F.png]] + [[image:snkb.gif]] | ||
|align="center"| 21/4/24 | |align="center"| 21/4/24 | ||
|align="center"| -8/-10 | |align="center"| -8/-10 | ||
|align="center"| | |align="center"| [[File:Specialcancel.png]] | ||
|align="center"| HL | |align="center"| HL | ||
|colspan="3" | [[image:Chizuru98_fB.png|center]] | |colspan="3" | [[image:Chizuru98_fB.png|center]] | ||
|align="left"| | |align="left"| Good move in chains or to close space, cancellable into basically any special/super. | ||
|- | |- | ||
! df+[[image:snkb.gif]] | ! [[File:df.png]] + [[image:snkb.gif]] | ||
|align="center"| 9/13/12 | |align="center"| 9/13/12 | ||
|align="center"| -5/-7 | |align="center"| -5/-7 | ||
|align="center"| [[File:Nocancel.png]] | |||
|align="center"| [[File:Low.png]] | |||
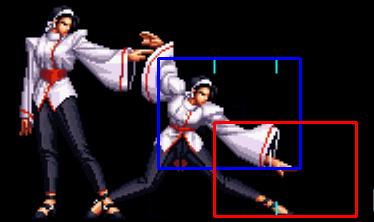
|colspan="3" | [[image:Chizuru98_dfB.png|center]] | |||
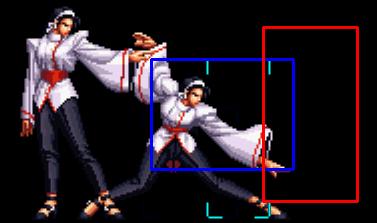
|align="left"| Very nice slide, second only to Chris's. Good to cancel into from cr.[[File:Snkc.gif]] or cr.[[File:Snkd.gif]]. Goes under Athena/Kensou/Mai/King-height projectiles, as well as higher fireballs like Takuma's. | |||
|- | |||
|colspan="9" align="center"| '''Throws''' | |||
|- | |||
! [[File:B.png]]/[[File:F.png]] + [[image:snkc.gif]] | |||
|align="center"| 0 | |||
|align="center"| -/- | |||
|align="center"| [[File:Softknockdown.png]] | |||
|align="center"| [[File:Throw.png]] | |||
|colspan="3" | | |||
| Breakable, forward knockdown, face forward, rollable. | |||
Although they are breakable, both of Chizuru's throws don't have the blue grab 'effect' or the sound cue, which makes them a little harder to break on reaction. [[File:Snkc.gif]] throw is preferred technically, since you recover much faster. Otherwise, just use the direction which would benefit your position the most. | |||
|- | |||
! [[File:B.png]]/[[File:F.png]] + [[image:snkd.gif]] | |||
|align="center"| 0 | |||
|align="center"| -/- | |||
|align="center"| [[File:Softknockdown.png]] | |||
|align="center"| [[File:Throw.png]] | |||
|colspan="3" | | |||
|align="left"| Breakable, reverse knockdown, back turned, rollable. | |||
Although they are breakable, both of Chizuru's throws don't have the blue grab 'effect' or the sound cue, which makes them a little harder to break on reaction. [[File:Snkc.gif]] throw is preferred technically, since you recover much faster. Otherwise, just use the direction which would benefit your position the most. | |||
|- | |||
|colspan="9" align="center"| '''Special Moves''' | |||
|- | |||
! [[File:Hcb.png]] + [[File:P.png]] + [[File:P.png]] | |||
|align="center"| - | |||
|align="center"| - | |align="center"| - | ||
|align="center"| | |align="center"| [[File:Supercancel.png]] | ||
|colspan="3" | [[ | |align="center"| HL | ||
| | |colspan="3"| [[File:Chizuru-hcb-p1.JPG]][[File:Chizuru-hcb-p2.JPG]] | ||
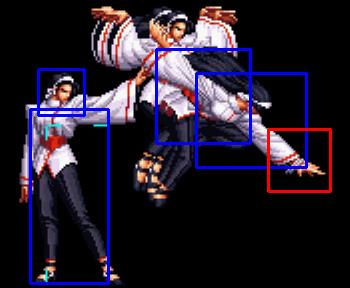
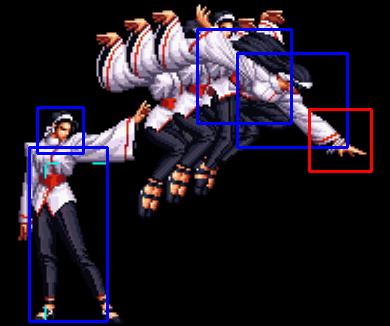
| '''212 Katsu Shinsoku no Noroti (Ritz Upper)-''' [[File:Snka.gif]] version will return you to your starting point, while [[File:Snkc.gif]] will leave you wherever you stopped when the move recovers. You can control how far this travels by pressing [[File:P.png]] again quickly after [[File:Hcb.png]] + [[File:P.png]]. This is your main poking/meter building/zoning/combo tool. You can use it to punish whiffs, catch early jumps from range, etc. While the move is great, it can also be difficult to use, because a lot of nice pokes can beat the shit out of it and cause a counter-hit. Think of it like Dhalsim's limbs; you can do them at any time really, but you are always risking being hit by a DP, a fireball, or certain normals. The [[File:Snkc.gif]] version can be used on wakeup to cross over the body of your opponent for wakeup cross-up games. | |||
When the first part is blocked close, you can keep pressuring from there with cr.[[File:Snkc.gif]] or cr.[[File:Snkd.gif]] canceled into slide, another [[File:F.png]] + [[File:Snka.gif]] / [[File:Hcb.png]] + [[File:P.png]], whatever. Remember that you can threaten people that want to hit something fast afterwards with the [[File:Qcb.png]] + [[File:Snkc.gif]] followup (though it is unsafe on block). Be creative. | |||
|- | |||
! >[[File:Qcb.png]] + [[File:Snka.gif]] | |||
|align="center"| - | |||
|align="center"| - | |||
|align="center"| [[File:Lowerbodyinv.png]] | |||
=== | |align="center"| HL | ||
|colspan="3" | [[File:Chizuru-qcb-a.JPG]] | |||
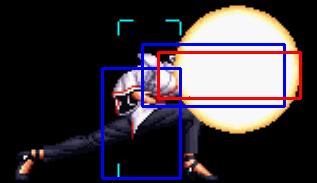
''' | | '''212 Katsu Shinsoku no Noroti Ten Sui (Tenzui)-''' The [[File:Qcb.png]] + [[File:Snka.gif]] followup is a jumping swipe that juggles from the first hit. | ||
|- | |||
! >[[File:Qcb.png]] + [[File:Snkc.gif]] | |||
|align="center"| - | |||
[[File: | |align="center"| - | ||
[[File: | |align="center"| [[File:Hardknockdown.png]] | ||
|align="center"| HL | |||
|colspan="3" | [[File:Chizuru-qcb-c.JPG]] | |||
|align="left"| '''212 Katsu Shinsoku no Noroti Ten Sui (Tenzui)-''' [[File:Qcb.png]] + [[File:Snkc.gif]] will perform a downward slam move, forcing the opponent into a un-rollable knockdown. | |||
|- | |||
[[File: | ! [[File:Hcb.png]] + [[File:K.png]] | ||
|align="center"| - | |||
|align="center"| - | |||
|align="center"| [[File:Hardknockdown.png]] | |||
|align="center"| [[File:Low.png]] | |||
[[File:Chizuru-qcb-c.JPG]] | |colspan="3" | [[File:Chizuru-hcb-k.JPG]] | ||
|align="left"| '''212 Katsu Shinsoku no Noroti (Ritz Swipe)-''' [[File:Hcb.png]] + [[File:K.png]] will perform a downward slam move, forcing the opponent into a un-rollable knockdown. Refer to Ritz Upper info for usage, as this move works exactly the same, except with kick buttons. This move is much slower than Ritz Upper and won't combo from anything, but it can avoid some pokes that Ritz Upper can't because of it's smaller vulnerable hitbox. | |||
|- | |||
! [[File:Qcb.png]] + [[File:Snkb.gif]] | |||
|align="center"| - | |||
|align="center"| - | |||
|align="center"| [[File:Lowerbodyinv.png]] | |||
|align="center"| HL | |||
|colspan="3" | [[File:Chizuru-qcb-a.JPG]] | |||
|align="left"| '''212 Katsu Shinsoku no Noroti Ten Sui (Tenzui)-''' The [[File:Qcb.png]] + [[File:Snkb.gif]] air swipe obviously does not juggle from the first hit. | |||
'''Ritz Swipe | |- | ||
! [[File:Qcb.png]] + [[File:Snkd.gif]] | |||
This move is much slower than Ritz Upper and won't combo from anything, but it can avoid some pokes that Ritz Upper can't because of it's smaller vulnerable hitbox. | |align="center"| - | ||
|align="center"| - | |||
|align="center"| [[File:Otg.png]] | |||
|align="center"| HL | |||
[[File:Chizuru- | |colspan="3" | [[File:Chizuru-qcb-d.JPG]] | ||
|align="left"| '''212 Katsu Shinsoku no Noroti Ten Sui (Tenzui)-''' The [[File:Qcb.png]] + [[File:Snkd.gif]] downward smash will hit [[File:Otg.png]] after [[File:Hcb.png]] + [[File:K.png]]. | |||
|- | |||
! [[File:Dp.png]] + [[File:P.png]] | |||
[[File:Chizuru-qcb-d.JPG]] | |align="center"| - | ||
|align="center"| - | |||
|align="center"| [[File:Startupinv.png]] | |||
''' | |align="center"| HL | ||
|colspan="3" | [[File:Chizuru-dp-a1.JPG]] | |||
[[File:Chizuru-dp-a1.JPG]] | |||
[[File:Chizuru-dp-a2.JPG]] | [[File:Chizuru-dp-a2.JPG]] | ||
[[File:Chizuru-dp-c1.JPG]] | [[File:Chizuru-dp-c1.JPG]] | ||
[[File:Chizuru-dp-c2.JPG]] | [[File:Chizuru-dp-c2.JPG]] | ||
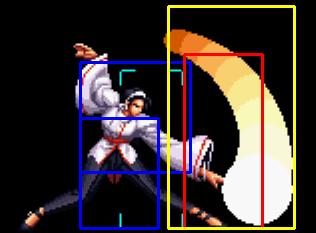
|align="left"| '''100 Katso Tenjin no Kotowari (Dragon Punch)-''' [[File:Snka.gif]] version is not invincible, [[File:Snkc.gif]] version is totally invincible on startup. [[File:Snkc.gif]] version is one of the best DP style anti-airs in KOF98. | |||
|- | |||
! [[File:D.png]][[File:D.png]] + [[File:P.png]]/[[File:K.png]] | |||
|align="center"| - | |||
|align="center"| - | |||
|align="center"| [[File:Lowerbodyinv.png]] | |||
|align="center"| HL | |||
|colspan="3" | [[File:Chizuru-dd-ab.JPG]] | |||
[[File:Chizuru-dd-cd.JPG]] | |||
|align="left"| '''202 Katsu Otsu Shiki Choumon no Isshin (Ritz Jump)-''' Lights go close, hards go far. Punches return you to the starting position, kicks leave you where you travel to. This move isn't overhead, but it can jump over lows. You will probably not be using this much, but there it is. | |||
|- | |||
! [[File:Qcf.png]] + [[File:P.png]] | |||
|align="center"| - | |||
|align="center"| - | |||
|align="center"| [[File:Projnull.png]](reflector) | |||
|align="center"| HL | |||
|colspan="3" | [[File:Chizuru-qcf-p.JPG]] | |||
|align="left"| '''202 Katsu Otsu Shiki Choumon no Isshin (Ritz Jump)-''' Reflects projectiles. Does equal damage to the projectile on first reflect, then one pixel afterwards. Punishable on block. The C version "rolls" before hitting, and is a good way to get yourself killed. | |||
|- | |||
|colspan="9" align="center"| '''Desperation Moves''' | |||
|- | |||
! [[File:Qcb.png]][[File:Hcf.png]] + [[File:P.png]] | |||
|align="center"| - | |||
|align="center"| - | |||
|align="center"| - | |||
|align="center"| HL | |||
|colspan="3" | [[File:Chizuru-qcbhcf-p.JPG]] | |||
|align="left"| '''Ichimen Ikkatsu San Rai no Fui Jin (Seal Strike)-''' [[File:Snka.gif]] version is preferred as it comes out way faster and combos from stuff, including light attacks. When it hits, it does quite a chunk of damage, and limits the opponent's attacks to normals and normal throws only (not even command normals are allowed). They can still perform [[File:Snkc.gif]][[File:Snkd.gif]] counters or guard cancel rolls. Since this super is pretty fast, you can use it to punish some semi-laggy moves on block (incompleted Iori rekkas), or punish some whiffs. Lasts for about 10 seconds on the clock. MAX version is always slow and useless. | |||
|- | |||
! [[File:Qcf.png]][[File:Qcf.png]] + [[File:K.png]] | |||
|align="center"| - | |||
|align="center"| - | |||
|align="center"| [[File:Startupinv.png]] | |||
|align="center"| HL | |||
|colspan="3" | [[File:Chizuru-qcfqcf-k.JPG]] | |||
|align="left"| '''Ichimen 85 Katsu Reigi no Ishizue (Windmill Clones)-''' Invincibility on startup, though it can trade. It can blow through [[File:Snkc.gif]][[File:Snkd.gif]] counters when canceled from the move that got [[File:Snkc.gif]][[File:Snkd.gif]] countered. This is yet another big part of why Chizuru is so powerful. When it gets blocked, you can mixup by using cr.[[File:Snkb.gif]] and forward jump/hop [[File:Snkb.gif]] as an instant overhead. Another good mixup is short hop [[File:Snkc.gif]]~land cr.[[File:Snkb.gif]]. Because of jumping [[File:Snkc.gif]]'s small hit freeze, this can be confusing to block with the clones concealing everything. This is especially nasty if your opponent has no meter to [[File:Snkc.gif]][[File:Snkd.gif]] counter or guard cancel roll out. After it hits, refer to the combo section. When this connects in the corner, try doing fast moves until the clones are almost off-screen and then combo into a knockdown with cr.[[File:Snkd.gif]]. | |||
This move can be hit easily after startup (which causes you to get hit on counter no mater where you are), so use it in a controlled, close situation only. Note that while it's active, you can only perform normal attacks. No command normals, throws, specials, supers, etc. It's good to cancel into from a cl.[[File:Snkd.gif]] especially from a wakeup cross-up with [[File:Hcb.png]] + [[File:Snkc.gif]] > [[File:Snkc.gif]]. MAX version lasts longer. | |||
|} | |||
== Fastest Attacks == | |||
[[File: | * 0F: [[File:Snkc.gif]] throw; [[File:Snkd.gif]] throw | ||
* 1F: - | |||
* 2F: '''cl.[[File:Snkc.gif]]''' | |||
* 3F: '''cl.[[File:Snkd.gif]]'''; '''cr.[[File:Snka.gif]]'''; cr.[[File:Snkb.gif]]; '''cr.[[File:Snkc.gif]]''' | |||
* 4F: '''cl.[[File:Snka.gif]]'''; st.[[File:Snka.gif]] | |||
* 5F: st.[[File:Snkb.gif]]; st.[[File:Snkc.gif]] | |||
* 6F: - | |||
* 7F: '''cl.[[File:Snkb.gif]]'''; st.[[File:Snkd.gif]]; '''cr.[[File:Snkd.gif]]''' | |||
* 8F: - | |||
* 9F: [[File:df.png]] + [[File:Snkb.gif]] | |||
* 10F: - | |||
* 27F: [[File:Snkc.gif]][[File:Snkd.gif]] | |||
==Combos== | |||
[[File: | * Best jump-ins: | ||
** j.[[File:Snkc.gif]] | |||
* cr.[[File:Snkc.gif]] / cl.[[File:Snkc.gif]] / cl.[[File:Snkd.gif]] > | |||
** [[File:F.png]] + [[File:Snka.gif]] > | |||
*** DM [[File:Snkd.gif]] Windmill Clones ([[File:Qcf.png]] [[File:Qcf.png]] + [[File:Snkd.gif]]), [follow up] (Point blank and out of MAX.) | |||
*** DM [[File:Snka.gif]] Seal Strike ([[File:Qcb.png]] [[File:Hcf.png]] + [[File:Snka.gif]]) | |||
*** Ritz Upper ([[File:Hcb.png]] + [[File:P.png]] > [[File:P.png]]), [follow up] | |||
*** Ritz Swipe ([[File:Hcb.png]] + [[File:K.png]] > [[File:K.png]] > [[File:Qcb.png]] + [[File:Snkd.gif]]) | |||
*** [[File:Dp.png]] + [[File:Snka.gif]] (Corner and out of MAX.) | |||
*** [[File:Qcf.png]] + [[File:Snka.gif]] | |||
** (S)DM [[File:Snkd.gif]] Windmill Clones ([[File:Qcf.png]] [[File:Qcf.png]] + [[File:Snkd.gif]]), [follow up] | |||
** DM [[File:Snka.gif]] Seal Strike ([[File:Qcb.png]] [[File:Hcf.png]] + [[File:Snka.gif]]) | |||
** Ritz Upper ([[File:Hcb.png]] + [[File:P.png]] > [[File:P.png]]), [follow up] | |||
** Ritz Swipe ([[File:Hcb.png]] + [[File:K.png]] > [[File:K.png]] > [[File:Qcb.png]] + [[File:Snkd.gif]]) | |||
** [[File:Dp.png]] + [[File:Snkc.gif]] | |||
** [[File:Dp.png]] + [[File:Snka.gif]] | |||
** [[File:Qcf.png]] + [[File:Snka.gif]] | |||
** [[File:df.png]] + [[File:Snkb.gif]] | |||
* [[File:F.png]] + [[File:Snkb.gif]] > | |||
** (S)DM [[File:Snkd.gif]] Windmill Clones ([[File:Qcf.png]] [[File:Qcf.png]] + [[File:Snkd.gif]]), [follow up] | |||
** DM [[File:Snka.gif]] Seal Strike ([[File:Qcb.png]] [[File:Hcf.png]] + [[File:Snka.gif]]) | |||
** Ritz Upper ([[File:Hcb.png]] + [[File:P.png]] > [[File:P.png]]), [follow up] | |||
** Ritz Swipe ([[File:Hcb.png]] + [[File:K.png]] > [[File:K.png]] > [[File:Qcb.png]] + [[File:Snkd.gif]]) | |||
** [[File:Qcf.png]] + [[File:Snka.gif]] | |||
[[File: | * cr.[[File:Snka.gif]] / cl.[[File:Snka.gif]] | ||
** DM [[File:Snka.gif]] Seal Strike ([[File:Qcb.png]] [[File:Hcf.png]] + [[File:Snka.gif]]) | |||
** [[File:Dp.png]] + [[File:Snkc.gif]] | |||
** [[File:Dp.png]] + [[File:Snka.gif]] | |||
** [[File:df.png]] + [[File:Snkb.gif]] | |||
* cr.[[File:Snkb.gif]], cr.[[File:Snka.gif]] > | |||
** DM [[File:Snka.gif]] Seal Strike ([[File:Qcb.png]] [[File:Hcf.png]] + [[File:Snka.gif]]) | |||
** [[File:Dp.png]] + [[File:Snka.gif]] (Corner and point blank. The [[File:Dp.png]] + [[File:Snkc.gif]] will combo but does only one hit and will do less damage.) | |||
** [[File:df.png]] + [[File:Snkb.gif]] | |||
[[File: | * st.[[File:Snka.gif]] > | ||
** DM [[File:Snka.gif]] Seal Strike ([[File:Qcb.png]] [[File:Hcf.png]] + [[File:Snka.gif]]) | |||
** [[File:df.png]] + [[File:Snkb.gif]] | |||
* ... Ritz Upper ([[File:Hcb.png]] + [[File:P.png]] > [[File:P.png]]), | |||
** DM [[File:Snka.gif]] Seal Strike ([[File:Qcb.png]] [[File:Hcf.png]] + [[File:Snka.gif]]) (Corner.) | |||
** cl.[[File:Snkc.gif]] / cr. [[File:Snkc.gif]] (Corner. Reset. Timming required.) | |||
** [[File:Qcb.png]] + [[File:P.png]] (Only close or in the corner. Must cancel from previous move.) | |||
* ... (S)DM [[File:Snkd.gif]] Windmill Clones ([[File:Qcf.png]] [[File:Qcf.png]] + [[File:Snkd.gif]]), | |||
After Clones connects, dashing cr.[[File:Snkc.gif]]s or repeated st.[[File:Snkd.gif]]s are your best bets for damage. | |||
* Simple buffer: | |||
** cl.[[File:Snkd.gif]] > (S)DM [[File:Qcf.png]] [[File:Qcf.png]] + [[File:Snkd.gif]] | |||
*** [[File:Qcf.png]] + [[File:Snkd.gif]] > [[File:Qcf.png]] + [[File:Snkd.gif]] | |||
** cl.[[File:Snka.gif]] / st.[[File:Snka.gif]] / cl.[[File:Snkb.gif]] / cl.[[File:Snkc.gif]] / cl.[[File:Snkd.gif]] > DM [[File:Qcb.png]] [[File:Hcf.png]] + [[File:Snka.gif]] | |||
*** [[File:Qcb.png]] + [[File:Snka.gif]]/[[File:Snkb.gif]]/[[File:Snkc.gif]]/[[File:Snkd.gif]]> [[File:Hcf.png]] + [[File:Snka.gif]] | |||
You can do either version of Ritz Upper ([[File:Hcb.png]] + [[File:P.png]] > [[File:P.png]]) in combos. The [[File:Qcb.png]] + [[File:P.png]] followups usually only connect in the corner, although it's possible midscreen if you're deep enough. | |||
{{StrategyCorner| | |||
* MAX: cl.[[File:Snkc.gif]] > [[File:F.png]] + [[File:Snka.gif]] > ([[File:Hcb.png]] + [[File:P.png]] > [[File:P.png]]) > [[File:Qcb.png]] + [[File:P.png]] | |||
deals ??? than | |||
* cl.[[File:Snkc.gif]] > [[File:F.png]] + [[File:Snka.gif]] > [[File:Qcb.png]] [[File:Hcf.png]] + [[File:Snka.gif]] | |||
Keep this in mind, when you need to decide whether to trigger MAX or keep meter for a DM. | |||
}} | |||
==Attack Info and Frame Data== | ==Attack Info and Frame Data== | ||
| Line 383: | Line 489: | ||
! align="center" | Meter Increase (Whiff / Hit) | ! align="center" | Meter Increase (Whiff / Hit) | ||
|- | |- | ||
| align="center" | Standing | | align="center" | Standing [[File:Snka.gif]] | ||
| align="center" | 1 | | align="center" | 1 | ||
| align="center" | - | | align="center" | - | ||
| Line 395: | Line 501: | ||
| align="center" | 0/3 | | align="center" | 0/3 | ||
|- | |- | ||
| align="center" | Standing | | align="center" | Standing [[File:Snkb.gif]] | ||
| align="center" | 1 | | align="center" | 1 | ||
| align="center" | - | | align="center" | - | ||
| Line 407: | Line 513: | ||
| align="center" | 0/3 | | align="center" | 0/3 | ||
|- | |- | ||
| align="center" | Standing | | align="center" | Standing [[File:Snkc.gif]] | ||
| align="center" | 1 | | align="center" | 1 | ||
| align="center" | - | | align="center" | - | ||
| Line 419: | Line 525: | ||
| align="center" | 0/6 | | align="center" | 0/6 | ||
|- | |- | ||
| align="center" | Standing | | align="center" | Standing [[File:Snkd.gif]] | ||
| align="center" | 1 | | align="center" | 1 | ||
| align="center" | - | | align="center" | - | ||
| Line 431: | Line 537: | ||
| align="center" | 0/6 | | align="center" | 0/6 | ||
|- | |- | ||
| align="center" | Close | | align="center" | Close [[File:Snka.gif]] | ||
| align="center" | 1 | | align="center" | 1 | ||
| align="center" | - | | align="center" | - | ||
| Line 443: | Line 549: | ||
| align="center" | 0/3 | | align="center" | 0/3 | ||
|- | |- | ||
| align="center" | Close | | align="center" | Close [[File:Snkb.gif]] | ||
| align="center" | 1 | | align="center" | 1 | ||
| align="center" | - | | align="center" | - | ||
| Line 455: | Line 561: | ||
| align="center" | 0/3 | | align="center" | 0/3 | ||
|- | |- | ||
| align="center" | Close | | align="center" | Close [[File:Snkc.gif]] | ||
| align="center" | 1 | | align="center" | 1 | ||
| align="center" | - | | align="center" | - | ||
| Line 467: | Line 573: | ||
| align="center" | 0/6 | | align="center" | 0/6 | ||
|- | |- | ||
| align="center" | Close | | align="center" | Close [[File:Snkd.gif]] | ||
| align="center" | 1 | | align="center" | 1 | ||
| align="center" | - | | align="center" | - | ||
| Line 479: | Line 585: | ||
| align="center" | 0/6 | | align="center" | 0/6 | ||
|- | |- | ||
| align="center" | Crouching | | align="center" | Crouching [[File:Snka.gif]] | ||
| align="center" | 1 | | align="center" | 1 | ||
| align="center" | - | | align="center" | - | ||
| Line 491: | Line 597: | ||
| align="center" | 0/3 | | align="center" | 0/3 | ||
|- | |- | ||
| align="center" | Crouching | | align="center" | Crouching [[File:Snkb.gif]] | ||
| align="center" | 1 | | align="center" | 1 | ||
| align="center" | - | | align="center" | - | ||
| Line 503: | Line 609: | ||
| align="center" | 0/3 | | align="center" | 0/3 | ||
|- | |- | ||
| align="center" | Crouching | | align="center" | Crouching [[File:Snkc.gif]] | ||
| align="center" | 1 | | align="center" | 1 | ||
| align="center" | - | | align="center" | - | ||
| Line 515: | Line 621: | ||
| align="center" | 0/6 | | align="center" | 0/6 | ||
|- | |- | ||
| align="center" | Crouching | | align="center" | Crouching [[File:Snkd.gif]] | ||
| align="center" | 1 | | align="center" | 1 | ||
| align="center" | - | | align="center" | - | ||
| Line 527: | Line 633: | ||
| align="center" | 0/6 | | align="center" | 0/6 | ||
|- | |- | ||
| align="center" | Neutral Jumping | | align="center" | Neutral Jumping [[File:Snka.gif]] | ||
| align="center" | 1 | | align="center" | 1 | ||
| align="center" | - | | align="center" | - | ||
| Line 539: | Line 645: | ||
| align="center" | 0/3 | | align="center" | 0/3 | ||
|- | |- | ||
| align="center" | Forward Jumping | | align="center" | Forward Jumping [[File:Snka.gif]] | ||
| align="center" | 1 | | align="center" | 1 | ||
| align="center" | - | | align="center" | - | ||
| Line 551: | Line 657: | ||
| align="center" | 0/3 | | align="center" | 0/3 | ||
|- | |- | ||
| align="center" | Backwards Jumping | | align="center" | Backwards Jumping [[File:Snka.gif]] | ||
| align="center" | 1 | | align="center" | 1 | ||
| align="center" | - | | align="center" | - | ||
| Line 563: | Line 669: | ||
| align="center" | 0/3 | | align="center" | 0/3 | ||
|- | |- | ||
| align="center" | Neutral Jumping | | align="center" | Neutral Jumping [[File:Snkb.gif]] | ||
| align="center" | 1 | | align="center" | 1 | ||
| align="center" | - | | align="center" | - | ||
| Line 575: | Line 681: | ||
| align="center" | 0/3 | | align="center" | 0/3 | ||
|- | |- | ||
| align="center" | Forward Jumping | | align="center" | Forward Jumping [[File:Snkb.gif]] | ||
| align="center" | 1 | | align="center" | 1 | ||
| align="center" | - | | align="center" | - | ||
| Line 587: | Line 693: | ||
| align="center" | 0/3 | | align="center" | 0/3 | ||
|- | |- | ||
| align="center" | Backwards Jumping | | align="center" | Backwards Jumping [[File:Snkb.gif]] | ||
| align="center" | 1 | | align="center" | 1 | ||
| align="center" | - | | align="center" | - | ||
| Line 599: | Line 705: | ||
| align="center" | 0/3 | | align="center" | 0/3 | ||
|- | |- | ||
| align="center" | Neutral Jumping | | align="center" | Neutral Jumping [[File:Snkc.gif]] | ||
| align="center" | 1 | | align="center" | 1 | ||
| align="center" | - | | align="center" | - | ||
| Line 611: | Line 717: | ||
| align="center" | 0/6 | | align="center" | 0/6 | ||
|- | |- | ||
| align="center" | Forward Jumping | | align="center" | Forward Jumping [[File:Snkc.gif]] | ||
| align="center" | 1 | | align="center" | 1 | ||
| align="center" | - | | align="center" | - | ||
| Line 623: | Line 729: | ||
| align="center" | 0/6 | | align="center" | 0/6 | ||
|- | |- | ||
| align="center" | Backwards Jumping | | align="center" | Backwards Jumping [[File:Snkc.gif]] | ||
| align="center" | 1 | | align="center" | 1 | ||
| align="center" | - | | align="center" | - | ||
| Line 635: | Line 741: | ||
| align="center" | 0/6 | | align="center" | 0/6 | ||
|- | |- | ||
| align="center" | Neutral Jumping | | align="center" | Neutral Jumping [[File:Snkd.gif]] | ||
| align="center" | 1 | | align="center" | 1 | ||
| align="center" | - | | align="center" | - | ||
| Line 647: | Line 753: | ||
| align="center" | 0/6 | | align="center" | 0/6 | ||
|- | |- | ||
| align="center" | Forward Jumping | | align="center" | Forward Jumping [[File:Snkd.gif]] | ||
| align="center" | 1 | | align="center" | 1 | ||
| align="center" | - | | align="center" | - | ||
| Line 659: | Line 765: | ||
| align="center" | 0/6 | | align="center" | 0/6 | ||
|- | |- | ||
| align="center" | Backwards Jumping | | align="center" | Backwards Jumping [[File:Snkd.gif]] | ||
| align="center" | 1 | | align="center" | 1 | ||
| align="center" | - | | align="center" | - | ||
| Line 671: | Line 777: | ||
| align="center" | 0/6 | | align="center" | 0/6 | ||
|- | |- | ||
| align="center" | | | align="center" | [[File:Snkc.gif]][[File:Snkd.gif]] | ||
| align="center" | 1 | | align="center" | 1 | ||
| align="center" | - | | align="center" | - | ||
| Line 683: | Line 789: | ||
| align="center" | 0/8 | | align="center" | 0/8 | ||
|- | |- | ||
| align="center" | Jumping | | align="center" | Jumping [[File:Snkc.gif]][[File:Snkd.gif]] | ||
| align="center" | 1 | | align="center" | 1 | ||
| align="center" | - | | align="center" | - | ||
| Line 695: | Line 801: | ||
| align="center" | 0/8 | | align="center" | 0/8 | ||
|- | |- | ||
| align="center" | | | align="center" | [[File:F.png]] + [[File:Snka.gif]] | ||
| align="center" | 1 | | align="center" | 1 | ||
| align="center" | - | | align="center" | - | ||
| Line 707: | Line 813: | ||
| align="center" | 0/7 | | align="center" | 0/7 | ||
|- | |- | ||
| align="center" | | | align="center" | [[File:F.png]] + [[File:Snka.gif]] (in a combo) | ||
| align="center" | 1 | | align="center" | 1 | ||
| align="center" | - | | align="center" | - | ||
| Line 719: | Line 825: | ||
| align="center" | 0/7 | | align="center" | 0/7 | ||
|- | |- | ||
| align="center" | | | align="center" | [[File:F.png]] + [[File:Snkb.gif]] | ||
| align="center" | 1 | | align="center" | 1 | ||
| align="center" | - | | align="center" | - | ||
| Line 731: | Line 837: | ||
| align="center" | 0/7 | | align="center" | 0/7 | ||
|- | |- | ||
| align="center" | df + | | align="center" | [[File:df.png]] + [[File:Snkb.gif]] | ||
| align="center" | 1 | | align="center" | 1 | ||
| align="center" | - | | align="center" | - | ||
| Line 744: | Line 850: | ||
|} | |} | ||
{{ | == Links == | ||
{{Navbox-KOF98}} | |||
[[Category:The King of Fighters '98: The Slugfest]] | [[Category:The King of Fighters '98: The Slugfest]] | ||
[[Category:Chizuru Kagura]] | |||
Latest revision as of 22:30, 29 January 2021
Introduction
Chizuru is a pro-Basketball player, and rival to the famed player Lucky Glauber. They met in the King of Fighters tournament, 1998, to prove once and for all who would be crowned B-Ball champion. After the tournament, low-tier Lucky was defeated by top-tier Chizuru in a 1-on-1 game of B-Ball.
Colors

|

|

|

|
Gameplay overview
Chizuru is a combination long-range poking/zoning character and pressure/mixup character. She can poke, gain meter, and keep the opponent at bay with her teleport pokes and high priority ground normals. If she gets in, her combo/pressure ability is high and can dizzy quickly. Not to mention both of her supers are some of the best in the game. The Seal super leaves the opponent limited to only normal attacks, and her Clone super forces the opponent into a low/high mixup for huge damage, and can blow through ![]()
![]() counters as well. While she is a very powerful top-tier character, she is also difficult to use. I would even argue that she is perhaps the most technical/complex character in KOF98. Requires very good and clean execution. Not a good choice for a beginner, obviously.
counters as well. While she is a very powerful top-tier character, she is also difficult to use. I would even argue that she is perhaps the most technical/complex character in KOF98. Requires very good and clean execution. Not a good choice for a beginner, obviously.
In-depth analysis
Movelist
Fastest Attacks
Combos
- cr.
 / cl.
/ cl. / cl.
/ cl. >
>
After Clones connects, dashing cr.![]() s or repeated st.
s or repeated st.![]() s are your best bets for damage.
s are your best bets for damage.
You can do either version of Ritz Upper (![]() +
+ ![]() >
> ![]() ) in combos. The
) in combos. The ![]() +
+ ![]() followups usually only connect in the corner, although it's possible midscreen if you're deep enough.
followups usually only connect in the corner, although it's possible midscreen if you're deep enough.
Attack Info and Frame Data
