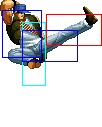
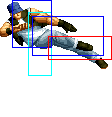
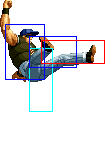
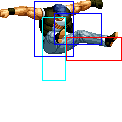
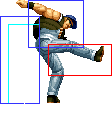
Lichmassacre (talk | contribs) m (Old Navbox removed for new Navbox.) |
|||
| (43 intermediate revisions by 4 users not shown) | |||
| Line 21: | Line 21: | ||
==In-depth Analysis== | ==In-depth Analysis== | ||
===[[ | ===[[The King of Fighters 2002/Normals Guide|Movelist]]=== | ||
{|border="1" | {|border="1" | ||
!width="10%"| | !width="10%"| | ||
| Line 36: | Line 36: | ||
|align="center"| 4/4/5 | |align="center"| 4/4/5 | ||
|align="center"| +3/+1 | |align="center"| +3/+1 | ||
| | |align="center"| C | ||
|align="center"| HL | |align="center"| HL | ||
|colspan="2" | [[image:Clark98_stA.png|center]] | |colspan="2" | [[image:Clark98_stA.png|center]] | ||
| | |Identical to far A. | ||
|- | |- | ||
! [[image:snkb.gif]] | ! [[image:snkb.gif]] | ||
|align="center"| 2/5/5 | |align="center"| 2/5/5 | ||
|align="center"| +2/0 | |align="center"| +2/0 | ||
|align="center"| | |align="center"| C | ||
|align="center"| HL | |align="center"| HL | ||
|colspan="2" | [[image:Clark98_clB.png|center]] | |colspan="2" | [[image:Clark98_clB.png|center]] | ||
| You can chain cr.A off of this move, especially when it is used as a meaty. | | You can chain cr.A off of this move, especially when it is used as a meaty. | ||
Chain: starter | |||
|- | |- | ||
! [[image:snkc.gif]] | ! [[image:snkc.gif]] | ||
|align="center"| 3/4*7/16 | |align="center"| 3/4*7/16 | ||
|align="center"| -3/-5 | |align="center"| -3/-5 | ||
|align="center"| | |align="center"| C/- | ||
|align="center"| HL | |align="center"| HL/HL | ||
|valign="bottom" style="border-right:0px;"| [[image:Clark98_clC1.png|center]] | |valign="bottom" style="border-right:0px;"| [[image:Clark98_clC1.png|center]] | ||
|valign="bottom" style="border-left:0px;"| [[image:Clark98_clC2.png|center]] | |valign="bottom" style="border-left:0px;"| [[image:Clark98_clC2.png|center]] | ||
| Line 61: | Line 62: | ||
|align="center"| 9/3/21 | |align="center"| 9/3/21 | ||
|align="center"| -4/-6 | |align="center"| -4/-6 | ||
| | |align="center"| - | ||
|align="center"| HL | |align="center"| HL | ||
|colspan="2"| [[image:Clark98_clD.png|center]] | |colspan="2"| [[image:Clark98_clD.png|center]] | ||
| Line 71: | Line 72: | ||
|align="center"| 4/4/5 | |align="center"| 4/4/5 | ||
|align="center"| +3/+1 | |align="center"| +3/+1 | ||
| | |align="center"| C | ||
|align="center"| HL | |align="center"| HL | ||
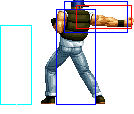
|colspan="2" | [[image:Clark98_stA.png|center]] | |colspan="2" | [[image:Clark98_stA.png|center]] | ||
| Not as ridiculous as Ralf's, but still good. Can be anti-air vs short hop. | | Not as ridiculous as Ralf's, but still good. Can be anti-air vs short hop. Good vs early anti-air. Can combo it after a cr.B. | ||
Chain: repeatable | |||
|- | |- | ||
! [[image:snkb.gif]] | ! [[image:snkb.gif]] | ||
|align="center"| 3/5/5 | |align="center"| 3/5/5 | ||
|align="center"| +2/0 | |align="center"| +2/0 | ||
| | |align="center"| - | ||
|align="center"| HL | |align="center"| HL | ||
|colspan="2" | [[image:Clark98_stB.png|center]] | |colspan="2" | [[image:Clark98_stB.png|center]] | ||
| | |Chain: ender | ||
|- | |- | ||
! [[image:snkc.gif]] | ! [[image:snkc.gif]] | ||
|align="center"| 11/6/21 | |align="center"| 11/6/21 | ||
|align="center"| -7/-9 | |align="center"| -7/-9 | ||
| | |align="center"| - | ||
|align="center"| HL | |align="center"| HL | ||
|colspan="2" | [[image:Clark98_stC.png|center]] | |colspan="2" | [[image:Clark98_stC.png|center]] | ||
| Line 95: | Line 97: | ||
|align="center"| 8/4/16 | |align="center"| 8/4/16 | ||
|align="center"| 0/-2 | |align="center"| 0/-2 | ||
| | |align="center"| - | ||
|align="center"| HL | |align="center"| HL | ||
|colspan="2"| [[image:Clark98_stD.png|center]] | |colspan="2"| [[image:Clark98_stD.png|center]] | ||
| Line 103: | Line 105: | ||
|align="center"| 22/5/16 | |align="center"| 22/5/16 | ||
|align="center"| KD/+1 | |align="center"| KD/+1 | ||
| | |align="center"| S | ||
|align="center"| HL | |align="center"| HL | ||
|colspan="2"| [[image:Clark98_stCD.png|center]] | |colspan="2"| [[image:Clark98_stCD.png|center]] | ||
| Line 113: | Line 115: | ||
|align="center"| 4/4/5 | |align="center"| 4/4/5 | ||
|align="center"| +3/+1 | |align="center"| +3/+1 | ||
|align="center"| | |align="center"| C | ||
|align="center"| HL | |align="center"| HL | ||
|colspan="2" | [[image:Clark98_crA.png|center]] | |colspan="2" | [[image:Clark98_crA.png|center]] | ||
| Standard shit, use for some combos into a backbreaker. | | Standard shit, use for some combos into a backbreaker. | ||
Chain: ender | |||
|- | |- | ||
! [[image:snkb.gif]] | ! [[image:snkb.gif]] | ||
|align="center"| 4/5/6 | |align="center"| 4/5/6 | ||
|align="center"| +1/-1 | |align="center"| +1/-1 | ||
| | |align="center"| - | ||
|align="center"| L | |align="center"| L | ||
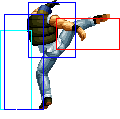
|colspan="2" | [[image:Clark98_crB.png|center]] | |colspan="2" | [[image:Clark98_crB.png|center]] | ||
| The move of choice if you want to link into a backbreaker. Clark needs something of a high/low game to catch alternate guard, and this is it. | | The move of choice if you want to link into a backbreaker. Clark needs something of a high/low game to catch alternate guard, and this is it. | ||
Chain: repeatable | |||
|- | |- | ||
! [[image:snkc.gif]] | ! [[image:snkc.gif]] | ||
|align="center"| 5/9/9 | |align="center"| 5/9/9 | ||
|align="center"| +4/0 | |align="center"| +4/0 | ||
| | |align="center"| - | ||
|align="center"| HL | |align="center"| HL | ||
|colspan="2" | [[image:Clark98_crC.png|center]] | |colspan="2" | [[image:Clark98_crC.png|center]] | ||
| Line 137: | Line 141: | ||
|align="center"| 7/7/17 | |align="center"| 7/7/17 | ||
|align="center"| KD/-6 | |align="center"| KD/-6 | ||
| | |align="center"| - | ||
|align="center"| L | |align="center"| L | ||
|colspan="2"| [[image:Clark98_crD.png|center]] | |colspan="2"| [[image:Clark98_crD.png|center]] | ||
| Line 147: | Line 151: | ||
|align="center"| 3/7/- | |align="center"| 3/7/- | ||
|align="center"| -/- | |align="center"| -/- | ||
| | |align="center"| - | ||
|align="center"| H | |align="center"| H | ||
|colspan="2" | [[image:Clark98_jA.png|center]] | |colspan="2" | [[image:Clark98_jA.png|center]] | ||
| Line 155: | Line 159: | ||
|align="center"| 3/5/- | |align="center"| 3/5/- | ||
|align="center"| -/- | |align="center"| -/- | ||
| | |align="center"| - | ||
|align="center"| H | |align="center"| H | ||
|colspan="2" | [[image:Clark98_jB.png|center]] | |colspan="2" | [[image:Clark98_jB.png|center]] | ||
| Line 163: | Line 167: | ||
|align="center"| 6/5/- | |align="center"| 6/5/- | ||
|align="center"| -/- | |align="center"| -/- | ||
| | |align="center"| - | ||
|align="center"| H | |align="center"| H | ||
|colspan="2" | [[image:Clark98_jC.png|center]] | |colspan="2" | [[image:Clark98_jC.png|center]] | ||
| Line 171: | Line 175: | ||
|align="center"| 4/7/- | |align="center"| 4/7/- | ||
|align="center"| -/- | |align="center"| -/- | ||
| | |align="center"| - | ||
|align="center"| H | |align="center"| H | ||
|colspan="2"| [[image:Clark98_jD.png|center]] | |colspan="2"| [[image:Clark98_jD.png|center]] | ||
| Line 179: | Line 183: | ||
|align="center"| 13/4/- | |align="center"| 13/4/- | ||
|align="center"| KD/- | |align="center"| KD/- | ||
| | |align="center"| - | ||
|align="center"| HL | |align="center"| HL | ||
|colspan="2"| [[image:Clark98_jCD.png|center]] | |colspan="2"| [[image:Clark98_jCD.png|center]] | ||
| Line 189: | Line 193: | ||
|align="center"| 3/5/- | |align="center"| 3/5/- | ||
|align="center"| -/- | |align="center"| -/- | ||
| | |align="center"| - | ||
|align="center"| H | |align="center"| H | ||
|colspan="2" | [[image:Clark02_njB.png|center]] | |colspan="2" | [[image:Clark02_njB.png|center]] | ||
| Line 197: | Line 201: | ||
|align="center"| 11/3/- | |align="center"| 11/3/- | ||
|align="center"| -/- | |align="center"| -/- | ||
| | |align="center"| - | ||
|align="center"| H | |align="center"| H | ||
|colspan="2"| [[image:Clark02_njD.png|center]] | |colspan="2"| [[image:Clark02_njD.png|center]] | ||
| Line 204: | Line 208: | ||
|colspan="8" align="center"| '''Command Normals''' | |colspan="8" align="center"| '''Command Normals''' | ||
|- | |- | ||
! f+[[image:snkb.gif]] | ! f + [[image:snkb.gif]] | ||
|align="center"| 13/4/22 | |align="center"| 13/4/22 | ||
|align="center"| -6/-8 | |align="center"| -6/-8 | ||
|align="center"| S | |align="center"| S | ||
|align="center"| HL | |align="center"| HL | ||
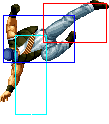
|colspan="2" | [[image:Clark98_fB.png|center]] | |colspan="2" | [[image:Clark98_fB.png|center]] | ||
| Relatively fast, very meaty cancelable move, no matter how it's performed. This move is useful as an anti-mash/anti-jump setup chained from a cr.A and canceled into a backbreaker (ie cr.A | | Relatively fast, very meaty cancelable move, no matter how it's performed. This move is useful as an anti-mash/anti-jump setup chained from a cr.A and canceled into a backbreaker (ie cr.A > f + B > hcf + K). You can mixup with cr.A, dp + K, but alternate guard kills that mixup, so you have to mix in cr.B links and other things as well. | ||
|- | |- | ||
|colspan="8" align="center"| '''Special Moves''' | |colspan="8" align="center"| '''Special Moves''' | ||
|- | |- | ||
! dp+[[image:snka.gif]] | ! dp + [[image:snka.gif]] | ||
|align="center"| 9/13/19+13 | |align="center"| 9/13/19+13 | ||
|align="center"| KD/- | |align="center"| KD/- | ||
|align="center"| | |align="center"| > qcf + P | ||
|align="center"| - | |align="center"| - | ||
|colspan="2" | [[image:Clark02_dpA.png|center]] | |colspan="2" | [[image:Clark02_dpA.png|center]] | ||
|rowspan="2"| '''Napalm Stretch - dp+P''' | |rowspan="2"| '''Napalm Stretch - dp + P''' | ||
* Clark jumps into the air, attempting to throw his opponent | * Clark jumps into the air, attempting to throw his opponent | ||
* not very useful, unless it is done very early in the opponent's jump | * not very useful, unless it is done very early in the opponent's jump | ||
* Invincible: Frame 1-2. | * Invincible: Frame 1-2. | ||
|- | |- | ||
! dp+[[image:snkc.gif]] | ! dp + [[image:snkc.gif]] | ||
|align="center"| 9/13/19+15 | |align="center"| 9/13/19+15 | ||
|align="center"| KD/- | |align="center"| KD/- | ||
|align="center"| | |align="center"| > qcf + P | ||
|align="center"| - | |align="center"| - | ||
|colspan="2" | [[image:Clark02_dpC.png|center]] | |colspan="2" | [[image:Clark02_dpC.png|center]] | ||
|- | |- | ||
! <br>dp+[[image:snkb.gif]]<br><br> | ! <br>dp + [[image:snkb.gif]]<br><br> | ||
|align="center"| 11/1/49 | |align="center"| 11/1/49 | ||
|align="center"| KD/- | |align="center"| KD/- | ||
|align="center"| | |align="center"| > qcf + P | ||
|align="center"| | |align="center"| HL | ||
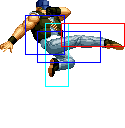
|rowspan="2" colspan="2" | [[image:Clark02_dpK.png|center]] | |rowspan="2" colspan="2" | [[image:Clark02_dpK.png|center]] | ||
|rowspan="2"| '''Frankensteiner - dp+K''' | |rowspan="2"| '''Frankensteiner - dp + K''' | ||
* Invincibility: Complete startup. | * Invincibility: Complete startup. | ||
* has a lot of recovery time if it misses, but since it is so delayed, it can be used as an anti-air | * has a lot of recovery time if it misses, but since it is so delayed, it can be used as an anti-air | ||
|- | |- | ||
! dp+[[image:snkd.gif]] | ! dp + [[image:snkd.gif]] | ||
|align="center"| 16/1/54 | |align="center"| 16/1/54 | ||
|align="center"| KD/- | |align="center"| KD/- | ||
|align="center"| | |align="center"| > qcf + P | ||
|align="center"| | |align="center"| HL | ||
|- | |- | ||
! hcf+[[image:kick.gif]] | ! hcf + [[image:kick.gif]] | ||
|align="center"| 0/1/40 | |align="center"| 0/1/40 | ||
|align="center"| KD/- | |align="center"| KD/- | ||
|align="center"| qcf+P | |align="center"| > qcf + P | ||
|align="center"| Grab | |align="center"| Grab | ||
|colspan="2" | [[image:Clark02_hcfK.png|center]] | |colspan="2" | [[image:Clark02_hcfK.png|center]] | ||
| '''Super Argentine Backbreaker - hcf+K''' | | '''Super Argentine Backbreaker - hcf + K''' | ||
* instant command throw which does good damage | * instant command throw which does good damage | ||
* can be followed up with the Flashing Elbow qcf+P | * can be followed up with the Flashing Elbow qcf + P | ||
* hard knockdown | * hard knockdown | ||
|- | |- | ||
! | ! hcf + [[image:snka.gif]] | ||
|align="center"| | |align="center"| -/-/- | ||
|align="center"| -/- | |||
|align="center"| | |align="center"| | ||
|align="center"| | |||
|align="center"| Grab | |align="center"| Grab | ||
|colspan="2"| | |colspan="2"| | ||
| ''' | | '''Super Arabian Burglary B.B. - hcf + A''' | ||
* Clark runs almost half screen to throw the opponent | |||
* hard knockdown | * hard knockdown | ||
* can be followed up by the Flashing Elbow qcf + P | |||
|- | |- | ||
! | ! hcf + [[image:snkc.gif]] | ||
|align="center"| -/-/- | |||
|align="center"| -/- | |||
|align="center"| | |align="center"| | ||
|align="center"| | |align="center"| Grab | ||
|colspan="2"| | |colspan="2"| | ||
| '''Rolling Cradle - | | '''Rolling Cradle - hcf + C''' | ||
* Clark runs almost fullscreen to throw the opponent | |||
* hard knockdown | * hard knockdown | ||
* can be followed up by the Flashing Elbow qcf + P | |||
|- | |- | ||
! qcf+[[image:punch.gif]] | ! qcf + [[image:punch.gif]] | ||
|align="center"| 14/11/24 | |align="center"| 14/11/24 | ||
|align="center"| KD | |align="center"| KD | ||
|align="center"| | |align="center"| | ||
|align="center"| - | |align="center"| - | ||
|colspan="2" | [[image:Clark02_qcfP.png|center]] | |colspan="2" | [[image:Clark02_qcfP.png|center]] | ||
| '''Flashing Elbow - qcf+P (after dp+P, dp+K, hcf+K or hcf+P | | '''Flashing Elbow - qcf + P (after dp + P, dp + K, hcf + K or hcf + P)''' | ||
* runs up and elbows the opponent who is already on the ground | * runs up and elbows the opponent who is already on the ground | ||
* hard knockdown | * hard knockdown | ||
| Line 337: | Line 297: | ||
|colspan="8" align="center"| '''DMs''' | |colspan="8" align="center"| '''DMs''' | ||
|- | |- | ||
! <br> | ! <br>hcf hcf + [[image:snkb.gif]]<br><br> | ||
|align="center"| 13/24/10 | |align="center"| 13/24/10 | ||
|align="center"| KD/- | |align="center"| KD/- | ||
| Line 343: | Line 303: | ||
|align="center"| Grab | |align="center"| Grab | ||
|rowspan="2" colspan="2" | [[image:Clark02_hcfx2K.png|center]] | |rowspan="2" colspan="2" | [[image:Clark02_hcfx2K.png|center]] | ||
|rowspan="2"| '''Running Three - | |rowspan="2"| '''Running Three - hcf hcf + K''' | ||
* Clark runs up to throw the opponent | * Clark runs up to throw the opponent | ||
* Invincibility: Complete startup. Lower body invincibility: Complete run forward. | * Invincibility: Complete startup. Lower body invincibility: Complete run forward. | ||
* The active period is the run forward. When the opponent is in range, it cancels to a move with the following data: B: 4/1/38, D: 4/1/39. | * The active period is the run forward. When the opponent is in range, it cancels to a move with the following data: B: 4/1/38, D: 4/1/39. | ||
|- | |- | ||
! | ! hcf hcf + [[image:snkd.gif]] | ||
|align="center"| 14/24/14 | |align="center"| 14/24/14 | ||
|align="center"| KD/- | |align="center"| KD/- | ||
| Line 354: | Line 314: | ||
|align="center"| Grab | |align="center"| Grab | ||
|- | |- | ||
! | ! hcb hcb + [[image:punch.gif]] | ||
|align="center"| 0/1/28 | |align="center"| 0/1/28 | ||
|align="center"| KD/- | |align="center"| KD/- | ||
| Line 360: | Line 320: | ||
|align="center"| Grab | |align="center"| Grab | ||
|colspan="2" | [[image:Clark02_hcbx2P.png|center]] | |colspan="2" | [[image:Clark02_hcbx2P.png|center]] | ||
| '''Ultra Argentine Backbreaker - | | '''Ultra Argentine Backbreaker - hcb hcb + P''' | ||
* instant throw with good range and damage | * instant throw with good range and damage | ||
* hard knockdown | * hard knockdown | ||
| Line 366: | Line 326: | ||
|colspan="8" align="center"| '''SDM''' | |colspan="8" align="center"| '''SDM''' | ||
|- | |- | ||
! | ! <br>MAX: hcf hcf + [[image:kick.gif]]<br><br> | ||
|align="center"| | |||
|align="center"| KD/- | |||
|align="center"| | |||
|align="center"| Grab | |||
|colspan="2" | [[image:Clark02_hcfx2K.png|center]] | |||
| '''Running Three - MAX: hcf hcf + K''' | |||
* Clark runs up to throw the opponent | |||
* Invincibility: Complete startup. Lower body invincibility: Complete run forward. | |||
* The active period is the run forward. When the opponent is in range, it cancels to a move with the following data: 4/1/39. | |||
|- | |||
! MAX: hcb hcb + [[image:punch.gif]] | |||
|align="center"| 0/1/33 | |align="center"| 0/1/33 | ||
|align="center"| KD/- | |align="center"| KD/- | ||
| Line 372: | Line 343: | ||
|align="center"| Grab | |align="center"| Grab | ||
|colspan="2" | [[image:Clark02_hcbx2P.png|center]] | |colspan="2" | [[image:Clark02_hcbx2P.png|center]] | ||
| '''Ultra Argentine Backbreaker - | | '''Ultra Argentine Backbreaker - MAX: hcb hcb + P''' | ||
* same properties as the DM version, but more damage (about 50%) | * same properties as the DM version, but more damage (about 50%) | ||
* hard knockdown | * hard knockdown | ||
| Line 379: | Line 350: | ||
===Normal Throws=== | ===Normal Throws=== | ||
'''b or f+D''' - Breakable, reverse knockdown, back turned, un-rollable. | * '''b or f + C''' - Breakable, forward knockdown, face forward, rollable. | ||
* '''b or f + D''' - Breakable, reverse knockdown, back turned, un-rollable. | |||
* '''d or b or f + C/D in air''' - Unbreakable, forward knockdown, face forward, un-rollable. | |||
D throw preferred, since the C throw is punishable in the corner if they roll it. But really both of them are horrible. | D throw preferred, since the C throw is punishable in the corner if they roll it. But really both of them are horrible. | ||
| Line 391: | Line 366: | ||
===Special Moves=== | ===Special Moves=== | ||
''' | * '''Vulcan Punch (P rapidly, f to move)''' - Dumb crap move, never use it. Well, you can catch a lucky anti-air by mashing from a block string or something but I wouldn't recommend it. It's not nearly as good as Ralf's and Ralf's ain't all that. | ||
'''Super | * '''Super Argentine Backbreaker > Flashing Elbow (hcf + K > qcf + P)''' - Instant command throw. Really short whiff animation, shorter than Ralf's. It is virtually impossible to punish on reaction when done from a blocked attack, and sometimes not at all. Good for meter building as you'd imagine. This is of course his main combo and damage tool. Use off empty short hops, comboed from cl.C or linked from cr.B, etc. Great wakeups as well, you can even setup safejumps from it. | ||
'''Frankensteiner | |||
* '''Napalm Stretch > Flashing Elbow (aka Palmer Splits) (dp + P > qcf + P)''' - Anti-air 'grab', though it can be air blocked. It's more of a show-off move, since it's horrible on block/whiff. | |||
* '''Super Arabian Burglary B.B. > Flashing Elbow / Rolling Cradle > Flashing Elbow (hcf + A > qcf + P / hcf + C > qcf + P)''' - Running grabs, C version travels further than A. Generally I recommend getting used to buffering his normal backbreaker from a run instead of using this, since you'd have more options after you start running. Still, can be used to more easily punish moves that require a long-range fast attack, like some A DP's on whiff/hit. It has invincibility to lows near the end. | |||
* '''Frankensteiner > Flashing Elbow (dp + K > qcf + P)''' - Slow invincible throw. You can use this as a reversal, or as a delayed throw option on your opponent's wakeup. You can also use it as a tick if they don't know how to alternate guard. The big problem with this throw is that they recovery is very bad, so if someone sees it or guesses right, you're gonna lose a lot of hp. | |||
===Desperation Moves=== | ===Desperation Moves=== | ||
'''Running Three aka Run In Dis Yard (hcf | * '''Ultra Argentine Backbreaker (hcb hcb + P)''' - Instant super throw. Similar to any other instant super throw, really. Can be used as a reversal, etc. MAX version does more damage. | ||
* '''Running Three aka Run In Dis Yard (hcf hcf + K)''' - Some small invincibility on startup, and completely invulnerable to lows. You can always jump out, unless it's guaranteed (landing from a jump does not make it guaranteed). MAX version behaves the same and does more damage. | |||
== Fastest Attacks == | |||
* 0F: C throw; D throw; hcf + K; (S)DM hcb hcb + P | |||
* 1F: - | |||
* 2F: '''cl.B''' | |||
* 3F: '''cl.C'''; st.B | |||
* 4F: '''cl.A'''; '''st.A'''; '''cr.A'''; cr.B | |||
* 5F: cr.C | |||
* 6F: - | |||
* 7F: cr.D | |||
* 8F: st.D | |||
* 9F: cl.D; dp + P | |||
* 10F: - | |||
==Combos== | ==Combos== | ||
*cr.B, Super Argentine Backbreaker | * Best jump-ins: | ||
** j.A | |||
* cl.B / (cr.B / cl.B, cr.A) / st.A > | |||
** (S)DM Ultra Argentine Backbreaker (hcb hcb + P) | |||
** Super Argentine Backbreaker > Flashing Elbow (hcf + K > qcf + P) | |||
* cl.C (1 hit) / f + B > | |||
** (S)DM Ultra Argentine Backbreaker (hcb hcb + P) | |||
** (S)DM hcf hcf + K | |||
** Super Argentine Backbreaker > Flashing Elbow (hcf + K > qcf + P) | |||
** hcf + C > qcf + P | |||
** hcf + A > qcf + P | |||
* cl.C (1 hit) > f + B | |||
* cr.B / st.B, | |||
** (S)DM Ultra Argentine Backbreaker (hcb hcb + P) | |||
** Super Argentine Backbreaker > Flashing Elbow (hcf + K > qcf + P) | |||
Link combo. Normally you will not be in range to link hcf + K from st.B, but its is possible if opponent enter in close range after the move started - example if they are rolling next to you. Super has more range and can link form st.B in normal situations. | |||
* For shits, counter-hit: st.CD > A Napalm Stretch > Flashing Elbow (dp + A > qcf + P) | |||
His DM hcb hcb + P deals more damage than DM hcf hcf + K, but SDM hcf hcf + K deals more damage than SDM hcb hcb + P. | |||
* Simple buffers: | |||
** cl.A / cl.B / cl.C (1 hit) > (S)DM hcb hcb + P | |||
*** hcb + A/B/C > hcb + P | |||
{{StrategyCorner| | |||
* MAX: cl.C (1 hit) > {{hcf}} + K > {{qcf}} + P | |||
deals just a tiny less damage (~ 1/2 cl.A) than | |||
* | * cl.C (1 hit) > DM {{hcb}} {{hcb}} + P | ||
Keep this in mind, when you need to decide whether to trigger MAX or keep meter for a DM. | |||
}} | |||
{{ | == Links == | ||
{{Navbox-KOF98}} | |||
[[Category:The King of Fighters '98: The Slugfest]] | [[Category:The King of Fighters '98: The Slugfest]] | ||
Latest revision as of 04:04, 1 January 2021
Introduction
Clark, also known as The Wearer Of The Black Glove, is the arch-nemesis of Michael Jackson, also known as The Wearer Of The White Glove. Both were born at the beginning of time itself to balance the Universe in good vs evil, and their struggle continues to this day. It is not clear which represents good and which represents evil.
Colors

|

|

|

|
Gameplay Overview
Clark is an in-close attack/throw mixup-based character. His far pokes are not on the level of Ralf's, but his jump-in A is slightly better for up-close hops than anything Ralf has. Of course as you'll notice, he has more throw options, including an instant super throw. Clark is a mid-tier character, and a good choice for a beginner. He does have some opportunities to combo into his super if you have the execution, though.
In-depth Analysis
Movelist
Normal Throws
- b or f + C - Breakable, forward knockdown, face forward, rollable.
- b or f + D - Breakable, reverse knockdown, back turned, un-rollable.
- d or b or f + C/D in air - Unbreakable, forward knockdown, face forward, un-rollable.
D throw preferred, since the C throw is punishable in the corner if they roll it. But really both of them are horrible.
His air throw is great, and is a good anti-air option.
Special Moves
- Vulcan Punch (P rapidly, f to move) - Dumb crap move, never use it. Well, you can catch a lucky anti-air by mashing from a block string or something but I wouldn't recommend it. It's not nearly as good as Ralf's and Ralf's ain't all that.
- Super Argentine Backbreaker > Flashing Elbow (hcf + K > qcf + P) - Instant command throw. Really short whiff animation, shorter than Ralf's. It is virtually impossible to punish on reaction when done from a blocked attack, and sometimes not at all. Good for meter building as you'd imagine. This is of course his main combo and damage tool. Use off empty short hops, comboed from cl.C or linked from cr.B, etc. Great wakeups as well, you can even setup safejumps from it.
- Napalm Stretch > Flashing Elbow (aka Palmer Splits) (dp + P > qcf + P) - Anti-air 'grab', though it can be air blocked. It's more of a show-off move, since it's horrible on block/whiff.
- Super Arabian Burglary B.B. > Flashing Elbow / Rolling Cradle > Flashing Elbow (hcf + A > qcf + P / hcf + C > qcf + P) - Running grabs, C version travels further than A. Generally I recommend getting used to buffering his normal backbreaker from a run instead of using this, since you'd have more options after you start running. Still, can be used to more easily punish moves that require a long-range fast attack, like some A DP's on whiff/hit. It has invincibility to lows near the end.
- Frankensteiner > Flashing Elbow (dp + K > qcf + P) - Slow invincible throw. You can use this as a reversal, or as a delayed throw option on your opponent's wakeup. You can also use it as a tick if they don't know how to alternate guard. The big problem with this throw is that they recovery is very bad, so if someone sees it or guesses right, you're gonna lose a lot of hp.
Desperation Moves
- Ultra Argentine Backbreaker (hcb hcb + P) - Instant super throw. Similar to any other instant super throw, really. Can be used as a reversal, etc. MAX version does more damage.
- Running Three aka Run In Dis Yard (hcf hcf + K) - Some small invincibility on startup, and completely invulnerable to lows. You can always jump out, unless it's guaranteed (landing from a jump does not make it guaranteed). MAX version behaves the same and does more damage.
Fastest Attacks
- 0F: C throw; D throw; hcf + K; (S)DM hcb hcb + P
- 1F: -
- 2F: cl.B
- 3F: cl.C; st.B
- 4F: cl.A; st.A; cr.A; cr.B
- 5F: cr.C
- 6F: -
- 7F: cr.D
- 8F: st.D
- 9F: cl.D; dp + P
- 10F: -
Combos
- Best jump-ins:
- j.A
- cl.B / (cr.B / cl.B, cr.A) / st.A >
- (S)DM Ultra Argentine Backbreaker (hcb hcb + P)
- Super Argentine Backbreaker > Flashing Elbow (hcf + K > qcf + P)
- cl.C (1 hit) / f + B >
- (S)DM Ultra Argentine Backbreaker (hcb hcb + P)
- (S)DM hcf hcf + K
- Super Argentine Backbreaker > Flashing Elbow (hcf + K > qcf + P)
- hcf + C > qcf + P
- hcf + A > qcf + P
- cl.C (1 hit) > f + B
- cr.B / st.B,
- (S)DM Ultra Argentine Backbreaker (hcb hcb + P)
- Super Argentine Backbreaker > Flashing Elbow (hcf + K > qcf + P)
Link combo. Normally you will not be in range to link hcf + K from st.B, but its is possible if opponent enter in close range after the move started - example if they are rolling next to you. Super has more range and can link form st.B in normal situations.
- For shits, counter-hit: st.CD > A Napalm Stretch > Flashing Elbow (dp + A > qcf + P)
His DM hcb hcb + P deals more damage than DM hcf hcf + K, but SDM hcf hcf + K deals more damage than SDM hcb hcb + P.
- Simple buffers:
- cl.A / cl.B / cl.C (1 hit) > (S)DM hcb hcb + P
- hcb + A/B/C > hcb + P
- cl.A / cl.B / cl.C (1 hit) > (S)DM hcb hcb + P
Strategy Corner
- MAX: cl.C (1 hit) >
 + K >
+ K >  + P
+ P
deals just a tiny less damage (~ 1/2 cl.A) than
- cl.C (1 hit) > DM

 + P
+ P
Keep this in mind, when you need to decide whether to trigger MAX or keep meter for a DM.


