mNo edit summary |
|||
| (10 intermediate revisions by 4 users not shown) | |||
| Line 1: | Line 1: | ||
[[image:Kyo98_stance.gif|right]] | [[image:Kyo98_stance.gif|right]] | ||
== | == Introduction == | ||
{{KOF98CharacterBox| KOF98_kyo_small.png}} | {{KOF98CharacterBox| KOF98_kyo_small.png}} | ||
| Line 6: | Line 6: | ||
{{Nutshell| | {{Nutshell| | ||
Essentially is style of Kyo is a mesh between Iori's zoning ability and Kyo's moveset. Kyo makes his best use of pressuring from far and mid-far screen using fireballs in a similar manner Iori does to zone and then controls approaches with hop Jumping D and Jumping B. 95-Era Kyo has a similar close game compared to default Kyo but lacks 114 Shiki: Aragami (default Kyo's qcf+A) to control the ground and hop space effectively for pressure. 95-Era Kyo has 108 Shiki: Yami Barai (qcf+P) in lieu of 114 Shiki: Aragami and is very similar to Iori's fireball; but in application within the close range, it works like Iori's fireball in the sense it's a secondary sweep and is susceptible to escapes via hops and jumps. | Essentially is style of Kyo is a mesh between Iori's zoning ability and Kyo's moveset. Kyo makes his best use of pressuring from far and mid-far screen using fireballs in a similar manner Iori does to zone and then controls approaches with hop Jumping D and Jumping B. 95-Era Kyo has a similar close game compared to default Kyo but lacks 114 Shiki: Aragami (default Kyo's {{qcf}} + A) to control the ground and hop space effectively for pressure. 95-Era Kyo has 108 Shiki: Yami Barai (qcf + P) in lieu of 114 Shiki: Aragami and is very similar to Iori's fireball; but in application within the close range, it works like Iori's fireball in the sense it's a secondary {{sweep}} and is susceptible to escapes via hops and jumps. | ||
Overall, this is a weaker version of Kyo that excels in a more defensive neutral game than default Kyo but lacks the damage-output default Kyo is capable of from a low-hitting hitconfirm combo as well as the great rushdown that makes default Kyo one of the best characters in the game. Not only does 95-Era Kyo lack the damage-output from low attacks in comparison but lacks the ability to get as much damage from a jump-in attack on an opponent from mid-screen. The amount of pluses that 95-Era Kyo have is incomparable to default Kyo, but nonetheless as a character, 95-Era Kyo is still a decent character and is still viable. It's just that Iori has a similar fireball game that 95-Era Kyo has but has better damage output and overall zoning combined with better mid-screen and corner pressure, options, and damage. | Overall, this is a weaker version of Kyo that excels in a more defensive neutral game than default Kyo but lacks the damage-output default Kyo is capable of from a low-hitting hitconfirm combo as well as the great rushdown that makes default Kyo one of the best characters in the game. Not only does 95-Era Kyo lack the damage-output from {{low}} attacks in comparison but lacks the ability to get as much damage from a jump-in attack on an opponent from mid-screen. The amount of pluses that 95-Era Kyo have is incomparable to default Kyo, but nonetheless as a character, 95-Era Kyo is still a decent character and is still viable. It's just that Iori has a similar fireball game that 95-Era Kyo has but has better damage output and overall zoning combined with better mid-screen and corner pressure, options, and damage. | ||
}} | }} | ||
===Colors=== | ===Colors=== | ||
| Line 23: | Line 23: | ||
|} | |} | ||
==[[ | ==[[The King of Fighters 2002/Normals Guide|Movelist]]== | ||
{|border="1" | {|border="1" | ||
!width="10%"| | !width="10%"| | ||
| Line 100: | Line 100: | ||
|align="center"| HL | |align="center"| HL | ||
|colspan="4" | [[image:Kyo98_stD.png|center]] | |colspan="4" | [[image:Kyo98_stD.png|center]] | ||
|Can go over lows, but the range/hitbox speed is not what it is in CvS2, so don't think about using it like you would in that game. Still could be used in a block string such as cl.C > st.D > qcf+A | |Can go over lows, but the range/hitbox speed is not what it is in CvS2, so don't think about using it like you would in that game. Still could be used in a block string such as cl.C > st.D > qcf + A | ||
|- | |- | ||
! [[image:snkc.gif]]+[[image:snkd.gif]] | ! [[image:snkc.gif]]+[[image:snkd.gif]] | ||
| Line 126: | Line 126: | ||
|align="center"| L | |align="center"| L | ||
|colspan="4" | [[image:Kyo98_crB.png|center]] | |colspan="4" | [[image:Kyo98_crB.png|center]] | ||
|One of the best 'footsie' moves in the game. Beats a lot of moves at its max range. Use this when running in. Links into cl.C and can combo into C Rekka series or block string with qcf+A or f+B into qcf+A/qcf+C | |One of the best 'footsie' moves in the game. Beats a lot of moves at its max range. Use this when running in. Links into cl.C and can combo into C Rekka series or block string with qcf + A or f + B into qcf + A / qcf + C | ||
|- | |- | ||
! [[image:snkc.gif]] | ! [[image:snkc.gif]] | ||
| Line 143: | Line 143: | ||
|align="center"| L | |align="center"| L | ||
|colspan="4" | [[image:Kyo98_crD.png|center]] | |colspan="4" | [[image:Kyo98_crD.png|center]] | ||
|Slow, but easily whiff cancelable (preferably into qcf+A) if someone short hops it. Makes his hitbox shrink vertically, and he can use it to 'duck' under Takuma/old characters (O.Robert/O.Ryo/O.Yuri) fireballs completely | |Slow, but easily whiff cancelable (preferably into qcf + A) if someone short hops it. Makes his hitbox shrink vertically, and he can use it to 'duck' under Takuma/old characters (O.Robert/O.Ryo/O.Yuri) fireballs completely | ||
|- | |- | ||
|colspan="10" align="center"| '''Jump''' | |colspan="10" align="center"| '''Jump''' | ||
| Line 177: | Line 177: | ||
|align="center"| H | |align="center"| H | ||
|colspan="4" | [[image:Kyo98_jD.png|center]] | |colspan="4" | [[image:Kyo98_jD.png|center]] | ||
|Long range and very good priority for air-to-air or long range air-to-ground. For example neutral h.D can beat Ralf's st.C clean from range. Great in conjunction with qcf+A in a blockstring. | |Long range and very good priority for air-to-air or long range air-to-ground. For example neutral h.D can beat Ralf's st.C clean from range. Great in conjunction with qcf + A in a blockstring. | ||
|- | |- | ||
! [[image:snkc.gif]]+[[image:snkd.gif]] | ! [[image:snkc.gif]]+[[image:snkd.gif]] | ||
| Line 223: | Line 223: | ||
|colspan="10" align="center"| '''Command Normals''' | |colspan="10" align="center"| '''Command Normals''' | ||
|- | |- | ||
! <br>f+[[image:snkb.gif]]<br><br> | ! <br>f + [[image:snkb.gif]]<br><br> | ||
|align="center"| 11/7(3)7/18 | |align="center"| 11/7(3)7/18 | ||
|align="center"| -5/-7 | |align="center"| -5/-7 | ||
| Line 230: | Line 230: | ||
|valign="bottom" rowspan="2" colspan="2" style="border-right:0px;"| [[image:Kyo98_fB1.png|center]] | |valign="bottom" rowspan="2" colspan="2" style="border-right:0px;"| [[image:Kyo98_fB1.png|center]] | ||
|valign="bottom" rowspan="2" colspan="2" style="border-left:0px;"| [[image:Kyo98_fB2.png|center]] | |valign="bottom" rowspan="2" colspan="2" style="border-left:0px;"| [[image:Kyo98_fB2.png|center]] | ||
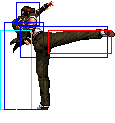
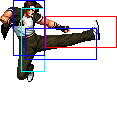
|rowspan="2"|'''Ge Shiki: Goufu You - (f+B)''' - 2 hits, second hit is overhead if done alone. 2nd hit is not overhead but cancelable when chained from a normal, but will only fully combo if you're close enough for both hits to connect. The canceled into version is great for staggered blockstrings from Close C or Crouching A and frametraps relatively well and confirm into rekkas/fireball for a combo if staggered from light attacks | |rowspan="2"|'''Ge Shiki: Goufu You - (f + B)''' - 2 hits, second hit is overhead if done alone. 2nd hit is not overhead but cancelable when chained from a normal, but will only fully combo if you're close enough for both hits to connect. The canceled into version is great for staggered blockstrings from Close C or Crouching A and frametraps relatively well and confirm into rekkas/fireball for a combo if staggered from light attacks | ||
|- | |- | ||
! f+[[image:snkb.gif]]<br>(cancel) | ! f + [[image:snkb.gif]]<br>(cancel) | ||
|align="center"| 11/7(3)7/18 | |align="center"| 11/7(3)7/18 | ||
|align="center"| -5/-7 | |align="center"| -5/-7 | ||
| Line 238: | Line 238: | ||
|align="center"| HL | |align="center"| HL | ||
|- | |- | ||
! df+[[image:snkd.gif]] | ! df + [[image:snkd.gif]] | ||
|align="center"| 2/3(12)4/24 | |align="center"| 2/3(12)4/24 | ||
|align="center"| -8/-10 | |align="center"| -8/-10 | ||
| Line 245: | Line 245: | ||
|valign="bottom" colspan="2" style="border-right:0px;"| [[image:Kyo98_dfD1.png|center]] | |valign="bottom" colspan="2" style="border-right:0px;"| [[image:Kyo98_dfD1.png|center]] | ||
|valign="bottom" colspan="2" style="border-left:0px;"| [[image:Kyo98_dfD2.png|center]] | |valign="bottom" colspan="2" style="border-left:0px;"| [[image:Kyo98_dfD2.png|center]] | ||
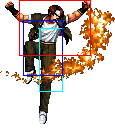
|'''88 Shiki - (df+D)''' - There are certain moves this thing can hit, like Ralf's st.C. Otherwise only use it in a combo | |'''88 Shiki - (df + D)''' - There are certain moves this thing can hit, like Ralf's st.C. Otherwise only use it in a combo | ||
|- | |- | ||
! | ! air d + [[image:snkc.gif]] | ||
|align="center"| 6/5/- | |align="center"| 6/5/- | ||
|align="center"| -/- | |align="center"| -/- | ||
| Line 253: | Line 253: | ||
|align="center"| H | |align="center"| H | ||
|colspan="4"| [[image:Kyo98_jdC.png|center]] | |colspan="4"| [[image:Kyo98_jdC.png|center]] | ||
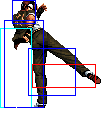
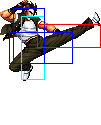
|'''Ge Shiki: Naraku Otoshi - ( | |'''Ge Shiki: Naraku Otoshi - (air d + C)''' - A very good jump-in. Has long hit stun, so it can be performed early and still combo into things. Great as a crossup. Slams when used air-to-air. Since it is a command move, you can use it during a backdash and you will travel much further as well as decrease recovery. In Extra mode it can be done during a front dash, and can be comboed into itself this way as an infinite. If done on a crouching opponent or late, it will combo at best into a cr.A rather than be able to do a cr.B into cr.A and cl.C will whiff most of the time due to push back. This move tends to whiff on characters that could shrink their hitboxes by crouching or doing a crouching attack so keep that in mind | ||
|- | |- | ||
|colspan="10" align="center"| '''Special Moves''' | |colspan="10" align="center"| '''Special Moves''' | ||
|- | |- | ||
! qcf+[[image:snka.gif]] | ! qcf + [[image:snka.gif]] | ||
|align="center"| 10/36 | |align="center"| 10/36 | ||
|align="center"| | |align="center"| | ||
| Line 263: | Line 263: | ||
|align="center"| HL | |align="center"| HL | ||
|colspan="4" | [[image:ExKyo98_qcfA.png|center]] | |colspan="4" | [[image:ExKyo98_qcfA.png|center]] | ||
|rowspan="2"|'''108 Shiki: Yami Barai - (qcf+P)''' | |rowspan="2"|'''108 Shiki: Yami Barai - (qcf + P)''' | ||
|- | |- | ||
! qcf+[[image:snkc.gif]] | ! qcf + [[image:snkc.gif]] | ||
|align="center"| 11/36 | |align="center"| 11/36 | ||
|align="center"| | |align="center"| | ||
| Line 272: | Line 272: | ||
|colspan="4" | [[image:ExKyo98_qcfC.png|center]] | |colspan="4" | [[image:ExKyo98_qcfC.png|center]] | ||
|- | |- | ||
! dp+[[image:snka.gif]] | ! dp + [[image:snka.gif]] | ||
|align="center"| 5/4+13/27 | |align="center"| 5/4+13/27 | ||
|align="center"| | |align="center"| | ||
| Line 279: | Line 279: | ||
|valign="bottom" colspan="2" style="border-right:0px;"| [[image:ExKyo98_dpA1.png|center]] | |valign="bottom" colspan="2" style="border-right:0px;"| [[image:ExKyo98_dpA1.png|center]] | ||
|valign="bottom" colspan="2" style="border-left:0px;"| [[image:ExKyo98_dpA2.png|center]] | |valign="bottom" colspan="2" style="border-left:0px;"| [[image:ExKyo98_dpA2.png|center]] | ||
|rowspan="2"|'''100 Shiki: Oni Yaki - (dp+P)''' | |rowspan="2"|'''100 Shiki: Oni Yaki - (dp + P)''' | ||
|- | |- | ||
! dp+[[image:snkc.gif]] | ! dp + [[image:snkc.gif]] | ||
|align="center"| 5/4+22/27 | |align="center"| 5/4+22/27 | ||
|align="center"| | |align="center"| | ||
| Line 289: | Line 289: | ||
|valign="bottom" colspan="2" style="border-left:0px;"| [[image:ExKyo98_dpC2.png|center]] | |valign="bottom" colspan="2" style="border-left:0px;"| [[image:ExKyo98_dpC2.png|center]] | ||
|- | |- | ||
! rdp+[[image:snkb.gif]] | ! rdp + [[image:snkb.gif]] | ||
|align="center"| 9/7/30 | |align="center"| 9/7/30 | ||
|align="center"| | |align="center"| | ||
| Line 295: | Line 295: | ||
|align="center"| HL | |align="center"| HL | ||
|valign="bottom" colspan="4"| [[image:ExKyo98_rdpB.png|center]] | |valign="bottom" colspan="4"| [[image:ExKyo98_rdpB.png|center]] | ||
|rowspan="2"|'''101 Shiki: Oboru Guruma - (rdp+K)''' | |rowspan="2"|'''101 Shiki: Oboru Guruma - (rdp + K)''' | ||
|- | |- | ||
! rdp+[[image:snkd.gif]] | ! rdp + [[image:snkd.gif]] | ||
|align="center"| 11/42/33 | |align="center"| 11/42/33 | ||
|align="center"| | |align="center"| | ||
| Line 305: | Line 305: | ||
|valign="bottom" colspan="2" style="border-left:0px;"| [[image:ExKyo98_rdpD2.png|center]] | |valign="bottom" colspan="2" style="border-left:0px;"| [[image:ExKyo98_rdpD2.png|center]] | ||
|- | |- | ||
! hcb+[[image:snkb.gif]] | ! hcb + [[image:snkb.gif]] | ||
|align="center"| | |align="center"| | ||
|align="center"| | |align="center"| | ||
| Line 311: | Line 311: | ||
|align="center"| HL | |align="center"| HL | ||
|rowspan="2" colspan="4"| [[image:ExKyo98_hcbK.png|center]] | |rowspan="2" colspan="4"| [[image:ExKyo98_hcbK.png|center]] | ||
|rowspan="2"|'''212 Shiki: Koto Tsuki-Yō - (hcb+K)''' | |rowspan="2"|'''212 Shiki: Koto Tsuki-Yō - (hcb + K)''' | ||
|- | |- | ||
! hcb+[[image:snkd.gif]] | ! hcb + [[image:snkd.gif]] | ||
|align="center"| | |align="center"| | ||
|align="center"| | |align="center"| | ||
| Line 319: | Line 319: | ||
|align="center"| HL | |align="center"| HL | ||
|- | |- | ||
! qcf+[[image:snkb.gif]] | ! qcf + [[image:snkb.gif]] | ||
|align="center"| | |align="center"| | ||
|align="center"| | |align="center"| | ||
| Line 325: | Line 325: | ||
|align="center"| HL | |align="center"| HL | ||
|rowspan="2" colspan="4"| [[image:ExKyo98_qcfK.png|center]] | |rowspan="2" colspan="4"| [[image:ExKyo98_qcfK.png|center]] | ||
|rowspan="4"|'''75 Shiki Kai - (qcf+K | |rowspan="4"|'''75 Shiki Kai - (qcf + K > K)''' | ||
|- | |- | ||
! qcf+[[image:snkd.gif]] | ! qcf + [[image:snkd.gif]] | ||
|align="center"| | |align="center"| | ||
|align="center"| | |align="center"| | ||
| Line 348: | Line 348: | ||
|colspan="10" align="center"| '''DM''' | |colspan="10" align="center"| '''DM''' | ||
|- | |- | ||
! <br>qcb | ! <br>qcb hcf + [[image:snka.gif]]<br><br> | ||
|align="center"| 20/16/28 | |align="center"| 20/16/28 | ||
|align="center"| KD/-15 | |align="center"| KD/-15 | ||
| Line 354: | Line 354: | ||
|align="center"| HL | |align="center"| HL | ||
|rowspan="2" colspan="4" | [[image:Kyo98_qcbhcfP.png|center]] | |rowspan="2" colspan="4" | [[image:Kyo98_qcbhcfP.png|center]] | ||
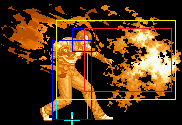
|rowspan="2"| '''Ura 108 Shiki: Orochi Nagi - qcb | |rowspan="2"| '''Ura 108 Shiki: Orochi Nagi - qcb hcf + P''' | ||
*28 frames of blockstun. | *28 frames of blockstun. | ||
|- | |- | ||
! <br>qcb | ! <br>qcb hcf + [[image:snkc.gif]]<br><br> | ||
|align="center"| 18/16/32 | |align="center"| 18/16/32 | ||
|align="center"| KD/-19 | |align="center"| KD/-19 | ||
| Line 365: | Line 363: | ||
|align="center"| HL | |align="center"| HL | ||
|- | |- | ||
! <br>qcb | ! <br>qcb hcf + [[image:punch.gif]]<br><br> | ||
|align="center"| 2+0~90+17/36/16 | |align="center"| 2+0~90+17/36/16 | ||
|align="center"| KD/-15 | |align="center"| KD/-15 | ||
| Line 376: | Line 374: | ||
|} | |} | ||
== Combos == | |||
{{ | |||
* cl.C / cr.C | |||
** DM qcb hcf + C | |||
** rdp + D | |||
** qcf + D > D, [junggler] (Very close) | |||
** hcb + D | |||
** df + D | |||
* cr.B, cr.A / cl.A / cl.B / st.A > | |||
** rdp + D (??) | |||
** df + D | |||
** dp + A (Close) | |||
* ... qcf + D > D, | |||
** SDM qcb hcf + P (Corner. Miss one hit. Timming required), | |||
*** dp + C (Timming required.) | |||
** (S)DM qcb hcf + P | |||
** rdp + B, dp + C (Corner. Timming required) | |||
** rdp + D | |||
** hcf + D (Timming required) | |||
** j.CD | |||
** air d + C | |||
** j.C (Reset) | |||
* cl.C > f + B (2 hits) > | |||
** DM qcb hcf + C | |||
** rdp + D | |||
** hcb + D | |||
The f + B will only combo on some characters, normally only on the bigger/larger ones, but will work un some specific thin characters. | |||
Will work on Shermie. | |||
* st. C > | |||
** DM qcb hcf + C | |||
** rdp + D (??) | |||
** hcb + B (if not too far) | |||
* Point blank: cr.C / cl.C / cr.A / cl.B > SDM qcb hcf + P | |||
Holp P to burn opponent while charging (otherwise it will not combo), then release to hit launched opponent in the air with the second part. Out of the corner the charging will do only one hit, and you need to release the charge immediately after hit, on the corner the charge can do 2-3 hits and you have to wait a few frames to release to get the full 3 hits of the second part. Does a lot of damage, specially in the corner. | |||
Note that you can link close C from cr.B. It is a 1-frame link, but more if you perform the cr.B meaty. | |||
{{StrategyCorner| | |||
* MAX: cl.C > {{rdp}} + D | |||
deals ??? than | |||
* cl.C > {{qcb}} {{hcf}} + C | |||
Keep this in mind, when you need to decide whether to trigger MAX or keep meter for a DM. | |||
}} | |||
== Links == | |||
{{Navbox-KOF98}} | |||
[[Category:The King of Fighters '98: The Slugfest]] | [[Category:The King of Fighters '98: The Slugfest]] | ||
Latest revision as of 00:27, 4 March 2021
Introduction
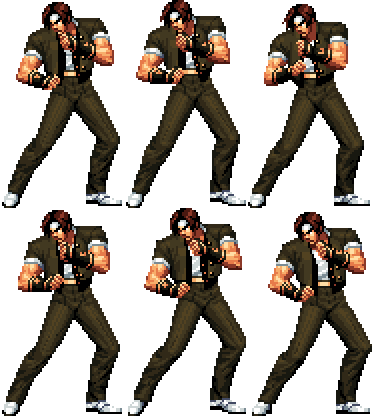
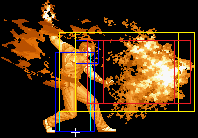
Kyo with his style from KOF '95.
In a nutshell
Essentially is style of Kyo is a mesh between Iori's zoning ability and Kyo's moveset. Kyo makes his best use of pressuring from far and mid-far screen using fireballs in a similar manner Iori does to zone and then controls approaches with hop Jumping D and Jumping B. 95-Era Kyo has a similar close game compared to default Kyo but lacks 114 Shiki: Aragami (default Kyo's ![]() + A) to control the ground and hop space effectively for pressure. 95-Era Kyo has 108 Shiki: Yami Barai (qcf + P) in lieu of 114 Shiki: Aragami and is very similar to Iori's fireball; but in application within the close range, it works like Iori's fireball in the sense it's a secondary
+ A) to control the ground and hop space effectively for pressure. 95-Era Kyo has 108 Shiki: Yami Barai (qcf + P) in lieu of 114 Shiki: Aragami and is very similar to Iori's fireball; but in application within the close range, it works like Iori's fireball in the sense it's a secondary ![]() and is susceptible to escapes via hops and jumps.
and is susceptible to escapes via hops and jumps.
Overall, this is a weaker version of Kyo that excels in a more defensive neutral game than default Kyo but lacks the damage-output default Kyo is capable of from a low-hitting hitconfirm combo as well as the great rushdown that makes default Kyo one of the best characters in the game. Not only does 95-Era Kyo lack the damage-output from ![]() attacks in comparison but lacks the ability to get as much damage from a jump-in attack on an opponent from mid-screen. The amount of pluses that 95-Era Kyo have is incomparable to default Kyo, but nonetheless as a character, 95-Era Kyo is still a decent character and is still viable. It's just that Iori has a similar fireball game that 95-Era Kyo has but has better damage output and overall zoning combined with better mid-screen and corner pressure, options, and damage.
attacks in comparison but lacks the ability to get as much damage from a jump-in attack on an opponent from mid-screen. The amount of pluses that 95-Era Kyo have is incomparable to default Kyo, but nonetheless as a character, 95-Era Kyo is still a decent character and is still viable. It's just that Iori has a similar fireball game that 95-Era Kyo has but has better damage output and overall zoning combined with better mid-screen and corner pressure, options, and damage.
Colors

|

|

|

|
Movelist
Combos
- cl.C / cr.C
- DM qcb hcf + C
- rdp + D
- qcf + D > D, [junggler] (Very close)
- hcb + D
- df + D
- cr.B, cr.A / cl.A / cl.B / st.A >
- rdp + D (??)
- df + D
- dp + A (Close)
- ... qcf + D > D,
- SDM qcb hcf + P (Corner. Miss one hit. Timming required),
- dp + C (Timming required.)
- (S)DM qcb hcf + P
- rdp + B, dp + C (Corner. Timming required)
- rdp + D
- hcf + D (Timming required)
- j.CD
- air d + C
- j.C (Reset)
- SDM qcb hcf + P (Corner. Miss one hit. Timming required),
- cl.C > f + B (2 hits) >
- DM qcb hcf + C
- rdp + D
- hcb + D
The f + B will only combo on some characters, normally only on the bigger/larger ones, but will work un some specific thin characters. Will work on Shermie.
- st. C >
- DM qcb hcf + C
- rdp + D (??)
- hcb + B (if not too far)
- Point blank: cr.C / cl.C / cr.A / cl.B > SDM qcb hcf + P
Holp P to burn opponent while charging (otherwise it will not combo), then release to hit launched opponent in the air with the second part. Out of the corner the charging will do only one hit, and you need to release the charge immediately after hit, on the corner the charge can do 2-3 hits and you have to wait a few frames to release to get the full 3 hits of the second part. Does a lot of damage, specially in the corner.
Note that you can link close C from cr.B. It is a 1-frame link, but more if you perform the cr.B meaty.
Strategy Corner
- MAX: cl.C >
 + D
+ D
deals ??? than
- cl.C >

 + C
+ C
Keep this in mind, when you need to decide whether to trigger MAX or keep meter for a DM.
