mNo edit summary |
|||
| (37 intermediate revisions by 7 users not shown) | |||
| Line 1: | Line 1: | ||
== | ==Introduction== | ||
{{KOF98CharacterBox| KOF98_yashiro_small.png}} | {{KOF98CharacterBox| KOF98_yashiro_small.png}} | ||
Highly stressed from his mediocre indie band being outsold by some waluigi guy with a mop for a haircut, Yashiro has already had his scalp entirely grey out from stress in his early 20s. Also probably some snake god thing but who cares. | |||
{{Nutshell| | {{Nutshell| | ||
He is a rushdown and poking medium weight with a lot of cheap damage options, is more mid tier compared to his chuckster counterpart. | |||
}} | }} | ||
===Colors=== | ===Colors=== | ||
| Line 19: | Line 19: | ||
| [[image:Yash98_colorD.png]] | | [[image:Yash98_colorD.png]] | ||
|} | |} | ||
=Gameplay Overview= | =Gameplay Overview= | ||
=In-depth Analysis= | =In-depth Analysis= | ||
==[[ | ==[[The King of Fighters 2002/Normals Guide|Movelist]]== | ||
{|border="1" | {|border="1" | ||
!width="8%"| | !width="8%"| | ||
| Line 39: | Line 38: | ||
|align="center"| 3/4/4 | |align="center"| 3/4/4 | ||
|align="center"| +4/+2 | |align="center"| +4/+2 | ||
|align="center"| | |align="center"| C | ||
|align="center"| HL | |align="center"| HL | ||
|colspan="2" | [[image:Yash98_clA.png|center]] | |colspan="2" | [[image:Yash98_clA.png|center]] | ||
| Line 47: | Line 46: | ||
|align="center"| 3/5/9 | |align="center"| 3/5/9 | ||
|align="center"| -2/-4 | |align="center"| -2/-4 | ||
|align="center"| | |align="center"| C | ||
|align="center"| HL | |align="center"| HL | ||
|colspan="2" | [[image:Yash98_clB.png|center]] | |colspan="2" | [[image:Yash98_clB.png|center]] | ||
| Line 55: | Line 54: | ||
|align="center"| 3/3+4/15 | |align="center"| 3/3+4/15 | ||
|align="center"| -2/-4 | |align="center"| -2/-4 | ||
|align="center"| | |align="center"| C (1st part) | ||
|align="center"| HL | |align="center"| HL | ||
|valign="bottom" style="border-right:0px;"| [[image:Yash98_clC1.png|center]] | |valign="bottom" style="border-right:0px;"| [[image:Yash98_clC1.png|center]] | ||
| Line 64: | Line 63: | ||
|align="center"| 3/5/21 | |align="center"| 3/5/21 | ||
|align="center"| -6/-8 | |align="center"| -6/-8 | ||
|align="center"| | |align="center"| C | ||
|align="center"| HL | |align="center"| HL | ||
|colspan="2" | [[image:Yash98_clD.png|center]] | |colspan="2" | [[image:Yash98_clD.png|center]] | ||
| Line 74: | Line 73: | ||
|align="center"| 3/4/7 | |align="center"| 3/4/7 | ||
|align="center"| +1/-1 | |align="center"| +1/-1 | ||
| | |align="center"| C | ||
|align="center"| HL | |align="center"| HL | ||
|colspan="2" | [[image:Yash98_stA.png|center]] | |colspan="2" | [[image:Yash98_stA.png|center]] | ||
| Good long range poke. Generally Standing B is better, but this one is cancelable, so you can cancel into f+A to bait someone mashing. | | Good long range poke. Generally Standing B is better, but this one is cancelable, so you can cancel into f + A to bait someone mashing. | ||
|- | |- | ||
! [[image:snkb.gif]] | ! [[image:snkb.gif]] | ||
|align="center"| 4/8/13 | |align="center"| 4/8/13 | ||
|align="center"| -9/-11 | |align="center"| -9/-11 | ||
| | |align="center"| - | ||
|align="center"| HL | |align="center"| HL | ||
|colspan="2" | [[image:Yash98_stB.png|center]] | |colspan="2" | [[image:Yash98_stB.png|center]] | ||
| Line 90: | Line 89: | ||
|align="center"| 10/3/32 | |align="center"| 10/3/32 | ||
|align="center"| -15/-17 | |align="center"| -15/-17 | ||
| | |align="center"| C | ||
|align="center"| HL | |align="center"| HL | ||
|colspan="2" | [[image:Yash98_stC.png|center]] | |colspan="2" | [[image:Yash98_stC.png|center]] | ||
| Slow recovery, but it is whiff cancelable (f+B preferred) and connects against crouchers. Still, crouching C has all this move's got and more. | | Slow recovery, but it is whiff cancelable (f + B preferred) and connects against crouchers. Still, crouching C has all this move's got and more. | ||
|- | |- | ||
! [[image:snkd.gif]] | ! [[image:snkd.gif]] | ||
|align="center"| 8/4/33 | |align="center"| 8/4/33 | ||
|align="center"| -17/-19 | |align="center"| -17/-19 | ||
| | |align="center"| - | ||
|align="center"| HL | |align="center"| HL | ||
|colspan="2"| [[image:Yash98_stD.png|center]] | |colspan="2"| [[image:Yash98_stD.png|center]] | ||
| Line 106: | Line 105: | ||
|align="center"| 15/5/24 | |align="center"| 15/5/24 | ||
|align="center"| KD/-7 | |align="center"| KD/-7 | ||
|align="center"| S | |align="center"| S | ||
|align="center"| HL | |align="center"| HL | ||
|colspan="2"| [[image:Yash98_stCD.png|center]] | |colspan="2"| [[image:Yash98_stCD.png|center]] | ||
| Line 116: | Line 115: | ||
|align="center"| 3/4/6 | |align="center"| 3/4/6 | ||
|align="center"| +2/0 | |align="center"| +2/0 | ||
|align="center"| | |align="center"| C | ||
|align="center"| HL | |align="center"| HL | ||
|colspan="2" | [[image:Yash98_crA.png|center]] | |colspan="2" | [[image:Yash98_crA.png|center]] | ||
| Nice and long range for a cr.A. Cancelable into f+A as an anti-mash setup. | | Nice and long range for a cr.A. Cancelable into f + A as an anti-mash setup. | ||
|- | |- | ||
! [[image:snkb.gif]] | ! [[image:snkb.gif]] | ||
|align="center"| 6/3/10 | |align="center"| 6/3/10 | ||
|align="center"| -1/-3 | |align="center"| -1/-3 | ||
|align="center"| | |align="center"| - | ||
|align="center"| L | |align="center"| L | ||
|colspan="2" | [[image:Yash98_crB.png|center]] | |colspan="2" | [[image:Yash98_crB.png|center]] | ||
| Line 132: | Line 131: | ||
|align="center"| 3/2+3/28 | |align="center"| 3/2+3/28 | ||
|align="center"| -13/-15 | |align="center"| -13/-15 | ||
|align="center"| | |align="center"| C (1st part) | ||
|align="center"| HL | |align="center"| HL | ||
|valign="bottom" style="border-right:0px;"| [[image:Yash98_crC1.png|center]] | |valign="bottom" style="border-right:0px;"| [[image:Yash98_crC1.png|center]] | ||
| Line 141: | Line 140: | ||
|align="center"| 9/3(5)5/22 | |align="center"| 9/3(5)5/22 | ||
|align="center"| KD/-9 | |align="center"| KD/-9 | ||
|align="center"| | |align="center"| C/- | ||
|align="center"| L | |align="center"| L/L | ||
|valign="bottom" style="border-right:0px;"| [[image:Yash98_crD1.png|center]] | |valign="bottom" style="border-right:0px;"| [[image:Yash98_crD1.png|center]] | ||
|valign="bottom" style="border-left:0px;"| [[image:Yash98_crD2.png|center]] | |valign="bottom" style="border-left:0px;"| [[image:Yash98_crD2.png|center]] | ||
| Line 152: | Line 151: | ||
|align="center"| 6/9/- | |align="center"| 6/9/- | ||
|align="center"| -/- | |align="center"| -/- | ||
| | |align="center"| - | ||
|align="center"| H | |align="center"| H | ||
|colspan="2" | [[image:Yash98_jA.png|center]] | |colspan="2" | [[image:Yash98_jA.png|center]] | ||
| Line 160: | Line 159: | ||
|align="center"| 7/9 | |align="center"| 7/9 | ||
|align="center"| -/- | |align="center"| -/- | ||
| | |align="center"| - | ||
|align="center"| H | |align="center"| H | ||
|colspan="2" | [[image:Yash98_jB.png|center]] | |colspan="2" | [[image:Yash98_jB.png|center]] | ||
| Line 168: | Line 167: | ||
|align="center"| 8/5 | |align="center"| 8/5 | ||
|align="center"| -/- | |align="center"| -/- | ||
| | |align="center"| - | ||
|align="center"| H | |align="center"| H | ||
|colspan="2" | [[image:Yash98_jC.png|center]] | |colspan="2" | [[image:Yash98_jC.png|center]] | ||
| Line 176: | Line 175: | ||
|align="center"| 7/7 | |align="center"| 7/7 | ||
|align="center"| -/- | |align="center"| -/- | ||
| | |align="center"| - | ||
|align="center"| H | |align="center"| H | ||
|colspan="2"| [[image:Yash98_jD.png|center]] | |colspan="2"| [[image:Yash98_jD.png|center]] | ||
| Line 184: | Line 183: | ||
|align="center"| 11/4 | |align="center"| 11/4 | ||
|align="center"| KD/- | |align="center"| KD/- | ||
| | |align="center"| - | ||
|align="center"| HL | |align="center"| HL | ||
|colspan="2"| [[image:Yash98_jCD.png|center]] | |colspan="2"| [[image:Yash98_jCD.png|center]] | ||
| Line 191: | Line 190: | ||
|colspan="8" align="center"| '''Command Normals''' | |colspan="8" align="center"| '''Command Normals''' | ||
|- | |- | ||
! <br>f+[[image:snka.gif]]<br><br> | ! <br>f + [[image:snka.gif]]<br><br> | ||
|align="center"| 22/3/24 | |align="center"| 22/3/24 | ||
|align="center"| KD/-9 | |align="center"| KD/-9 | ||
|align="center"| | |align="center"| - | ||
|align="center"| H | |align="center"| H | ||
|rowspan="2" colspan="2"| [[image:Yash98_fA.png|center]] | |rowspan="2" colspan="2"| [[image:Yash98_fA.png|center]] | ||
|rowspan="2"| Overhead and knocks down when done alone. Fast, cancelable, and non-overhead when chained. | |rowspan="2"| Overhead and knocks down when done alone. Fast, cancelable, and non-overhead when chained. | ||
|- | |- | ||
! f+[[image:snka.gif]] (cancel) | ! f + [[image:snka.gif]] (cancel) | ||
|align="center"| 12/3/24 | |align="center"| 12/3/24 | ||
|align="center"| -7/-9 | |align="center"| -7/-9 | ||
|align="center"| S | |align="center"| S | ||
|align="center"| HL | |align="center"| HL | ||
|- | |- | ||
! f+[[image:snkb.gif]] | ! f + [[image:snkb.gif]] | ||
|align="center"| 11/5/28 | |align="center"| 11/5/28 | ||
|align="center"| -13/-15 | |align="center"| -13/-15 | ||
|align="center"| S | |align="center"| S | ||
|align="center"| HL | |align="center"| HL | ||
|colspan="2"| [[image:Yash98_fB.png|center]] | |colspan="2"| [[image:Yash98_fB.png|center]] | ||
| Always fast and cancelable, does more damage than f+A but doesn't travel as far. This is the move of choice to cancel into on your opponent's wakeup, since if they reversal roll backwards, you can still whiff cancel into f+B with the same timing (close C/D | | Always fast and cancelable, does more damage than f + A but doesn't travel as far. This is the move of choice to cancel into on your opponent's wakeup, since if they reversal roll backwards, you can still whiff cancel into f + B with the same timing (close C/D > f + B) and catch their roll anyway. | ||
|} | |} | ||
==Normal Throws== | ==Normal Throws== | ||
'''b or f+D''' - Breakable, reverse knockdown, back turned, un-rollable. | * '''b or f + C''' - Breakable, forward knockdown, face forward, rollable. | ||
* '''b or f + D''' - Breakable, reverse knockdown, back turned, un-rollable. | |||
==Special Moves== | ==Special Moves== | ||
*'''Upper Duel (dp+P)''' - | |||
timing, you might get lucky on the autoguard. | |||
*'''Missile Might Bash (hcb+P)''' - A wild series of punches in the mid section. The move is a lot safer than the | *'''Upper Duel (dp + P)''' - Yashiro does an uppercut with a jumping one follow up if hits, use it to counter your opponent who's trying to punish your mistake on bad timing, you might get lucky on the autoguard. | ||
same move in KOF97 (which was absolutely easy to be punished if blocked) | |||
*'''Sledgehammer (qcb+K)''' - Yashiro does a fast forward leaping downward swing, use if after a blocked attack, a decent overhead move for suprise tactics. | |||
*'''Jet Counter (hcf+P)''' - A very quick rush punch to the mid section of the enemy and with a bit frames of invicibility, safe on block | *'''Missile Might Bash (hcb + P)''' - A wild series of punches in the mid section. The move is a lot safer than the same move in KOF97 (which was absolutely easy to be punished if blocked). | ||
*'''Jet Counter: Still (hcf+P | |||
A version | |||
*'''Sledgehammer (qcb + K)''' - Yashiro does a fast forward leaping downward swing, use if after a blocked attack, a decent overhead move for suprise tactics. | |||
*'''Jet Counter (hcf + P)''' - A very quick rush punch to the mid section of the enemy, Yashiro dashes and does a uppercut to the opoponent's jaw in A version, C version its an overhead downward swing, and with a bit frames of invicibility, safe on block | |||
** '''Jet Counter: Still (hcf + P > qcf + P)''' - A version is a straight punch aimed at the opponent's face that doesn't knock down, C version is an uppercut that knocks down. | |||
==Desperation Moves== | ==Desperation Moves== | ||
{{ | |||
*'''Million Bash Stream (qcb hcf + P > P rapidly)''' - Can mash P to deal more hits, a nice combo ender and cheap damage maker. | |||
*'''Final Impact (qcf qcf + P, may charge)''' - Can hold P to charge and deal a lot more of damage, though impractical in matches, use it at your own risk for far combat. | |||
== Fastest Attacks == | |||
* 0F: C throw; D throw | |||
* 1F: - | |||
* 2F: - | |||
* 3F: '''cl.A'''; '''cl.B'''; '''cl.C'''; '''cl.D'''; '''st.A'''; '''cr.A'''; '''cr.C''' | |||
* 4F: st.B | |||
* 5F: - | |||
* 6F: cr.B | |||
* 7F: - | |||
* 8F: st.D | |||
* 9F: '''cr.D''' | |||
* 10F: '''st.C''' | |||
==Combos== | |||
* Best jump-ins: | |||
** j.A | |||
** j.C | |||
** j.D | |||
* cr.C / cl.D / cl.C / st.C > f + A | |||
** (S)DM qcb hcf + P > P rapidly (Very close.) | |||
** (S)DM qcf qcf + P (Can always use f + B before instead of f + A for more damage) | |||
** hcf + A > qcf + P | |||
** hcb + C (Very close.) | |||
** dp + C (Very close.) | |||
* cr.B / cr.A, cr.A, cr.A / st.A > (S)DM qcf qcf + P | |||
* cr.B / cr.A, cr.A, cr.A / st.A, st.B | |||
* cr.B / cr.A, cr.A > | |||
** (S)DM qcf qcf + P | |||
** dp + A | |||
* Simple buffers: | |||
** f + A / f + B > (S)DM qcf qcf + P | |||
*** qcf + A/B > qcf + P | |||
** cr.B, st.A / cl.A / cl.B > (S)DM qcf qcf + P | |||
*** cr.B, qcf + A/B > qcf + P (As cr.B is not cancelable, qcf + A/B will chain into a normal attack.) | |||
{{StrategyCorner| | |||
* MAX: cl.D > {{f}} + A > {{hcf}} + A > {{qcf}} + C | |||
deals just a tiny less damage (~ 3/4 cl.A) than | |||
* cl.D > {{f}} + B > {{qcf}} {{qcf}} + P | |||
Keep this in mind, when you need to decide whether to trigger MAX or keep meter for a DM. | |||
}} | |||
== Links == | |||
{{Navbox-KOF98}} | |||
[[Category:The King of Fighters '98: The Slugfest]] | [[Category:The King of Fighters '98: The Slugfest]] | ||
Latest revision as of 01:08, 24 February 2021
Introduction
Highly stressed from his mediocre indie band being outsold by some waluigi guy with a mop for a haircut, Yashiro has already had his scalp entirely grey out from stress in his early 20s. Also probably some snake god thing but who cares.
In a nutshell
He is a rushdown and poking medium weight with a lot of cheap damage options, is more mid tier compared to his chuckster counterpart.
Colors

|

|

|

|
Gameplay Overview
In-depth Analysis
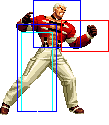
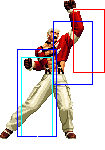
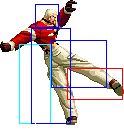
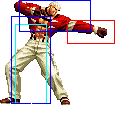
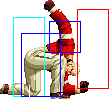
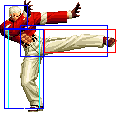
Movelist
Normal Throws
- b or f + C - Breakable, forward knockdown, face forward, rollable.
- b or f + D - Breakable, reverse knockdown, back turned, un-rollable.
Special Moves
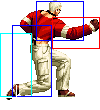
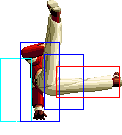
- Upper Duel (dp + P) - Yashiro does an uppercut with a jumping one follow up if hits, use it to counter your opponent who's trying to punish your mistake on bad timing, you might get lucky on the autoguard.
- Missile Might Bash (hcb + P) - A wild series of punches in the mid section. The move is a lot safer than the same move in KOF97 (which was absolutely easy to be punished if blocked).
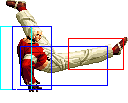
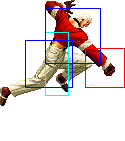
- Sledgehammer (qcb + K) - Yashiro does a fast forward leaping downward swing, use if after a blocked attack, a decent overhead move for suprise tactics.
- Jet Counter (hcf + P) - A very quick rush punch to the mid section of the enemy, Yashiro dashes and does a uppercut to the opoponent's jaw in A version, C version its an overhead downward swing, and with a bit frames of invicibility, safe on block
- Jet Counter: Still (hcf + P > qcf + P) - A version is a straight punch aimed at the opponent's face that doesn't knock down, C version is an uppercut that knocks down.
Desperation Moves
- Million Bash Stream (qcb hcf + P > P rapidly) - Can mash P to deal more hits, a nice combo ender and cheap damage maker.
- Final Impact (qcf qcf + P, may charge) - Can hold P to charge and deal a lot more of damage, though impractical in matches, use it at your own risk for far combat.
Fastest Attacks
- 0F: C throw; D throw
- 1F: -
- 2F: -
- 3F: cl.A; cl.B; cl.C; cl.D; st.A; cr.A; cr.C
- 4F: st.B
- 5F: -
- 6F: cr.B
- 7F: -
- 8F: st.D
- 9F: cr.D
- 10F: st.C
Combos
- Best jump-ins:
- j.A
- j.C
- j.D
- cr.C / cl.D / cl.C / st.C > f + A
- (S)DM qcb hcf + P > P rapidly (Very close.)
- (S)DM qcf qcf + P (Can always use f + B before instead of f + A for more damage)
- hcf + A > qcf + P
- hcb + C (Very close.)
- dp + C (Very close.)
- cr.B / cr.A, cr.A, cr.A / st.A > (S)DM qcf qcf + P
- cr.B / cr.A, cr.A, cr.A / st.A, st.B
- cr.B / cr.A, cr.A >
- (S)DM qcf qcf + P
- dp + A
- Simple buffers:
- f + A / f + B > (S)DM qcf qcf + P
- qcf + A/B > qcf + P
- cr.B, st.A / cl.A / cl.B > (S)DM qcf qcf + P
- cr.B, qcf + A/B > qcf + P (As cr.B is not cancelable, qcf + A/B will chain into a normal attack.)
- f + A / f + B > (S)DM qcf qcf + P
Strategy Corner
- MAX: cl.D >
 + A >
+ A >  + A >
+ A >  + C
+ C
deals just a tiny less damage (~ 3/4 cl.A) than
- cl.D >
 + B >
+ B > 
 + P
+ P
Keep this in mind, when you need to decide whether to trigger MAX or keep meter for a DM.


