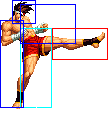
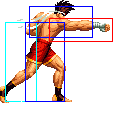
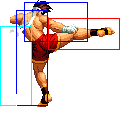
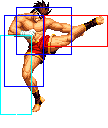
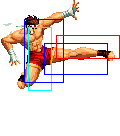
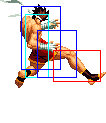
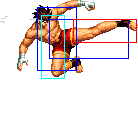
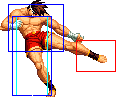
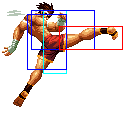
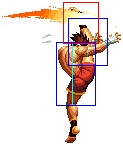
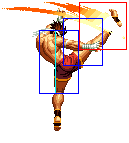
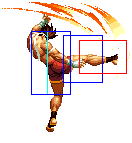
No edit summary |
|||
| (41 intermediate revisions by 5 users not shown) | |||
| Line 22: | Line 22: | ||
==In-depth analysis== | ==In-depth analysis== | ||
===[[ | ===[[The King of Fighters 2002/Normals Guide|Movelist]]=== | ||
{|border="1" | {|border="1" | ||
!width="8%"| | !width="8%"| | ||
| Line 36: | Line 36: | ||
! [[image:snka.gif]] | ! [[image:snka.gif]] | ||
|align="center"| 3/3/9 | |align="center"| 3/3/9 | ||
| | |align="center"| -/- | ||
| | |align="center"| C | ||
|align="center"| HL | |align="center"| HL | ||
|colspan="2" | [[image:Joe98_clA.png|center]] | |colspan="2" | [[image:Joe98_clA.png|center]] | ||
|align="left"| Hits crouchers, cancelable. Can be used as combo filler. | |align="left"| Hits crouchers, cancelable. Can be used as combo filler. | ||
Chain: ender | |||
|- | |- | ||
! [[image:snkb.gif]] | ! [[image:snkb.gif]] | ||
|align="center"| 7/3/7 | |align="center"| 7/3/7 | ||
| | |align="center"| -/- | ||
| | |align="center"| C | ||
|align="center"| HL | |align="center"| HL | ||
|colspan="2" | [[image:Joe98_clB.png|center]] | |colspan="2" | [[image:Joe98_clB.png|center]] | ||
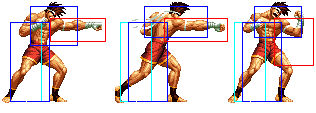
| | |Maybe Joe's best close poke. Cancelable (can combo with dp.K). | ||
Chain: - | |||
|- | |- | ||
! [[image:snkc.gif]] | ! [[image:snkc.gif]] | ||
|align="center"| 2/2/20 | |align="center"| 2/2/20 | ||
| | |align="center"| -/- | ||
| | |align="center"| C | ||
|align="center"| HL | |align="center"| HL | ||
|colspan="2" | [[image:Joe98_clC.png|center]] | |colspan="2" | [[image:Joe98_clC.png|center]] | ||
| Line 60: | Line 62: | ||
! [[image:snkd.gif]] | ! [[image:snkd.gif]] | ||
|align="center"| 6/3/28 | |align="center"| 6/3/28 | ||
| | |align="center"| -/- | ||
| | |align="center"| - | ||
|align="center"| HL | |align="center"| HL | ||
|colspan="2"| [[image:Joe98_clD.png|center]] | |colspan="2"| [[image:Joe98_clD.png|center]] | ||
| | |Joe's best long range poke. Good priority. | ||
|- | |- | ||
|colspan="8" align="center"| '''Standing Far''' | |colspan="8" align="center"| '''Standing Far''' | ||
| Line 70: | Line 72: | ||
! [[image:snka.gif]] | ! [[image:snka.gif]] | ||
|align="center"| 3/2/8 | |align="center"| 3/2/8 | ||
| | |align="center"| -/- | ||
| | |align="center"| S | ||
|align="center"| HL | |align="center"| HL | ||
|colspan="2" | [[image:Joe98_stA.png|center]] | |colspan="2" | [[image:Joe98_stA.png|center]] | ||
|align="left"| Not a bad standing A. Not the best range but hits most characters crouching and is cancelable. Can be anti-air vs short hop. | |align="left"| Not a bad standing A. Not the best range but hits most characters crouching and is cancelable. Can be anti-air vs short hop. | ||
Chain: ender | |||
|- | |- | ||
! [[image:snkb.gif]] | ! [[image:snkb.gif]] | ||
|align="center"| 7/3/7 | |align="center"| 7/3/7 | ||
| | |align="center"| -/- | ||
| | |align="center"| C | ||
|align="center"| HL | |align="center"| HL | ||
|colspan="2" | [[image:Joe98_stB.png|center]] | |colspan="2" | [[image:Joe98_stB.png|center]] | ||
|align="left"| Nice front poke. A little slow, but good reach/hitbox and cancelable. | |align="left"| Nice front poke. A little slow, but good reach/hitbox and cancelable. | ||
Chain: - | |||
|- | |- | ||
! [[image:snkc.gif]] | ! [[image:snkc.gif]] | ||
|align="center"| 7/2/16 | |align="center"| 7/2/16 | ||
| | |align="center"| -/- | ||
| | |align="center"| - | ||
|align="center"| HL | |align="center"| HL | ||
|colspan="2" | [[image:Joe98_stC.png|center]] | |colspan="2" | [[image:Joe98_stC.png|center]] | ||
| Line 94: | Line 98: | ||
! [[image:snkd.gif]] | ! [[image:snkd.gif]] | ||
|align="center"| 6/3/28 | |align="center"| 6/3/28 | ||
| | |align="center"| -/- | ||
| | |align="center"| - | ||
|align="center"| HL | |align="center"| HL | ||
|colspan="2"| [[image:Joe98_stD.png|center]] | |colspan="2"| [[image:Joe98_stD.png|center]] | ||
| Line 102: | Line 106: | ||
! [[image:snkc.gif]]+[[image:snkd.gif]] | ! [[image:snkc.gif]]+[[image:snkd.gif]] | ||
|align="center"| 20/2/25 | |align="center"| 20/2/25 | ||
| | |align="center"| -/- | ||
| | |align="center"| S | ||
|align="center"| HL | |align="center"| HL | ||
|colspan="2"| [[image:Joe98_stCD.png|center]] | |colspan="2"| [[image:Joe98_stCD.png|center]] | ||
| Line 112: | Line 116: | ||
! [[image:snka.gif]] | ! [[image:snka.gif]] | ||
|align="center"| 3/3/6 | |align="center"| 3/3/6 | ||
| | |align="center"| -/- | ||
| | |align="center"| C | ||
|align="center"| HL | |align="center"| HL | ||
|colspan="2" | [[image:Joe98_crA.png|center]] | |colspan="2" | [[image:Joe98_crA.png|center]] | ||
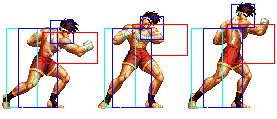
|align="left"| Standard low A, cancelable. | |align="left"| Standard low A, cancelable. | ||
Chain: repeatable | |||
|- | |- | ||
! [[image:snkb.gif]] | ! [[image:snkb.gif]] | ||
|align="center"| 3/3/7 | |align="center"| 3/3/7 | ||
| | |align="center"| -/- | ||
| | |align="center"| - | ||
|align="center"| L | |align="center"| L | ||
|colspan="2" | [[image:Joe98_crB.png|center]] | |colspan="2" | [[image:Joe98_crB.png|center]] | ||
|align="left"| Good range for a low B, main combo starter in-close. Great meaty as well. | |align="left"| Good range for a low B, main combo starter in-close. Great meaty as well. | ||
Chain: repeatable | |||
|- | |- | ||
! [[image:snkc.gif]] | ! [[image:snkc.gif]] | ||
|align="center"| 4/3/19 | |align="center"| 4/3/19 | ||
| | |align="center"| -/- | ||
| | |align="center"| C | ||
|align="center"| HL | |align="center"| HL | ||
|colspan="2" | [[image:Joe98_crC.png|center]] | |colspan="2" | [[image:Joe98_crC.png|center]] | ||
| Line 136: | Line 142: | ||
! [[image:snkd.gif]] | ! [[image:snkd.gif]] | ||
|align="center"| 8/4/9+14 | |align="center"| 8/4/9+14 | ||
| | |align="center"| -/- | ||
| | |align="center"| C | ||
|align="center"| L | |align="center"| L | ||
|colspan="2" | [[image:Joe98_crD.png|center]] | |colspan="2" | [[image:Joe98_crD.png|center]] | ||
| Line 147: | Line 153: | ||
|align="center"| 3/7/- | |align="center"| 3/7/- | ||
|align="center"| -/- | |align="center"| -/- | ||
| | |align="center"| - | ||
|align="center"| H | |align="center"| H | ||
|colspan="2" | [[image:Joe98_jA.png|center]] | |colspan="2" | [[image:Joe98_jA.png|center]] | ||
| Line 155: | Line 161: | ||
|align="center"| 6/12/- | |align="center"| 6/12/- | ||
|align="center"| -/- | |align="center"| -/- | ||
| | |align="center"| - | ||
|align="center"| H | |align="center"| H | ||
|colspan="2" | [[image:Joe98_jB.png|center]] | |colspan="2" | [[image:Joe98_jB.png|center]] | ||
| Line 163: | Line 169: | ||
|align="center"| 4/9/- | |align="center"| 4/9/- | ||
|align="center"| -/- | |align="center"| -/- | ||
| | |align="center"| - | ||
|align="center"| H | |align="center"| H | ||
|colspan="2" | [[image:Joe98_jC.png|center]] | |colspan="2" | [[image:Joe98_jC.png|center]] | ||
| Line 171: | Line 177: | ||
|align="center"| 4/12/- | |align="center"| 4/12/- | ||
|align="center"| -/- | |align="center"| -/- | ||
| | |align="center"| - | ||
|align="center"| H | |align="center"| H | ||
|colspan="2" | [[image:Joe98_jD.png|center]] | |colspan="2" | [[image:Joe98_jD.png|center]] | ||
| Line 179: | Line 185: | ||
|align="center"| 11/5/- | |align="center"| 11/5/- | ||
|align="center"| KD/- | |align="center"| KD/- | ||
| | |align="center"| - | ||
|align="center"| HL | |align="center"| HL | ||
|colspan="2"| [[image:Joe98_jCD.png|center]] | |colspan="2"| [[image:Joe98_jCD.png|center]] | ||
| Line 186: | Line 192: | ||
|colspan="8" align="center"| '''Command Normals''' | |colspan="8" align="center"| '''Command Normals''' | ||
|- | |- | ||
! f+[[image:snkb.gif]] | ! f + [[image:snkb.gif]] | ||
|align="center"| 13/2/25 | |align="center"| 13/2/25 | ||
| | |align="center"| -/- | ||
| | |align="center"| S | ||
|align="center"| HL | |align="center"| HL | ||
|colspan="2" | [[image:Joe98_fB.png|center]] | |colspan="2" | [[image:Joe98_fB.png|center]] | ||
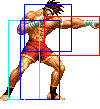
|align="left"| Always the same speed and cancelable. not only your combo filler from hard hits, but it's actually a really good long-range poke. It has the longest range of any of his normals, and his entire lower leg up to the knee is invincible. | |align="left"| Always the same speed and cancelable. not only your combo filler from hard hits, but it's actually a really good long-range poke. It has the longest range of any of his normals, and his entire lower leg up to the knee is invincible. | ||
|- | |- | ||
! df+[[image:snkb.gif]] | ! df + [[image:snkb.gif]] | ||
|align="center"| 13/4/24 | |align="center"| 13/4/24 | ||
| | |align="center"| KD/- | ||
| | |align="center"| - | ||
|align="center"| L | |align="center"| L | ||
|colspan="2" | [[image:Joe98_dfB.png|center]] | |rowspan="2" colspan="2" | [[image:Joe98_dfB.png|center]] | ||
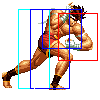
|align="left"| Low slide kick. Crappy recovery, but you can use it to go under all non-ground fireballs. | |rowspan="2" align="left"| Low slide kick. Crappy recovery, but you can use it to go under all non-ground fireballs. | ||
|- | |||
! df + [[image:snkb.gif]]<br>(cancel) | |||
|align="center"| 13/4/24 | |||
|align="center"| KD/- | |||
|align="center"| - | |||
|align="center"| HL | |||
|- | |- | ||
|colspan="8" align="center"| '''Special Moves''' | |colspan="8" align="center"| '''Special Moves''' | ||
|- | |- | ||
! hcf+[[image:snka.gif]] | ! hcf + [[image:snka.gif]] | ||
|align="center"| 13/-/36 | |align="center"| 13/-/36 | ||
|align="center"| -4/-6 | |align="center"| -4/-6 | ||
| Line 210: | Line 222: | ||
|align="center"| HL | |align="center"| HL | ||
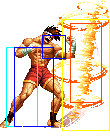
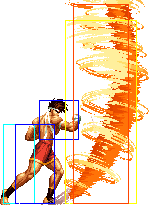
|colspan="2" | [[image:Joe02_hcfA.png|center]] | |colspan="2" | [[image:Joe02_hcfA.png|center]] | ||
|rowspan="2"|'''Hurricane Upper - hcf+P''' | |rowspan="2"|'''Hurricane Upper - hcf + P''' | ||
* Joe releases one or two hurricane projectiles (depending on the button used) | * Joe releases one or two hurricane projectiles (depending on the button used) | ||
* hcf+A sends out one projectile, while hcf+C sends out two | * hcf + A sends out one projectile, while hcf + C sends out two | ||
* the projectiles are tall and cannot be jumped by most characters. It's difficult to punish hcf+A but hcf+C is easy to punish by rolling the second projectile | * the projectiles are tall and cannot be jumped by most characters. It's difficult to punish hcf + A but hcf + C is easy to punish by rolling the second projectile | ||
* hcf+A fireball stays active for 19 frames. both hcf+C fireballs stay active for 11 frames. | * hcf + A fireball stays active for 19 frames. both hcf + C fireballs stay active for 11 frames. | ||
|- | |- | ||
! hcf+[[image:snkc.gif]] | ! hcf + [[image:snkc.gif]] | ||
|align="center"| 19/-(22)-/36 | |align="center"| 19/-(22)-/36 | ||
|align="center"| KD/-6 | |align="center"| KD/-6 | ||
| Line 224: | Line 236: | ||
|valign="bottom" style="border-left:0px;"| [[image:Joe02_hcfC2.png|center]] | |valign="bottom" style="border-left:0px;"| [[image:Joe02_hcfC2.png|center]] | ||
|- | |- | ||
! hcf+[[image:snkb.gif]] | ! hcf + [[image:snkb.gif]] | ||
|align="center"| 14/4/4+22 | |align="center"| 14/4/4+22 | ||
|align="center"| KD/-12 | |align="center"| KD/-12 | ||
|align="center"| | |align="center"| | ||
|align="center"| HL | |align="center"| HL | ||
|colspan="2" | [[image:Joe02_hcfB.png|center]] | |colspan="2" | [[image:Joe02_hcfB.png|center]] | ||
|rowspan="2"|'''Slash Kick - hcf+K''' | |rowspan="2"|'''Slash Kick - hcf + K''' | ||
* Joe performs a horizontal kick moving across the screen, which does good damage | * Joe performs a horizontal kick moving across the screen, which does good damage | ||
* hcf+B version goes about 1/3 screen length while hcf+D goes 3/4 length | * hcf + B version goes about 1/3 screen length while hcf + D goes 3/4 length | ||
* has some recovery time if blocked, though if done from far away it's usually difficult to punish on block | * has some recovery time if blocked, though if done from far away it's usually difficult to punish on block | ||
* Depending on the distance, the startup of the D version is longer. The longer the startup, the shorter the recovery. | * Depending on the distance, the startup of the D version is longer. The longer the startup, the shorter the recovery. | ||
|- | |- | ||
! hcf+[[image:snkd.gif]] | ! hcf + [[image:snkd.gif]] | ||
|align="center"| 14+0~5/7/4~9+24 | |align="center"| 14+0~5/7/4~9+24 | ||
|align="center"| KD/-22 | |align="center"| KD/-22 | ||
|align="center"| | |align="center"| | ||
|align="center"| HL | |align="center"| HL | ||
|colspan="2" | [[image:Joe02_hcfD.png|center]] | |colspan="2" | [[image:Joe02_hcfD.png|center]] | ||
|- | |- | ||
! dp+[[image:snkb.gif]] | ! dp + [[image:snkb.gif]] | ||
|align="center"| 5/3*18/17+13 | |align="center"| 5/3*18/17+13 | ||
|align="center"| KD/-30 | |align="center"| KD/-30 | ||
|align="center"| | |align="center"| | ||
|align="center"| HL | |align="center"| HL | ||
|valign="bottom" style="border-right:0px;"| [[image:Joe02_dpB1.png|center]] | |valign="bottom" style="border-right:0px;"| [[image:Joe02_dpB1.png|center]] | ||
|valign="bottom" style="border-left:0px;"| [[image:Joe02_dpB2.png|center]] | |valign="bottom" style="border-left:0px;"| [[image:Joe02_dpB2.png|center]] | ||
|rowspan="2"|'''Tiger Kick - dp+K''' | |rowspan="2"|'''Tiger Kick - dp + K''' | ||
* Joe does a very fast rising kick attack that does two hits | * Joe does a very fast rising kick attack that does two hits | ||
* Invincible: B: Complete startup, D: Complete startup and first active period. Upper body invincible: First active period fo B version. | * Invincible: B: Complete startup, D: Complete startup and first active period. Upper body invincible: First active period fo B version. | ||
|- | |- | ||
! dp+[[image:snkd.gif]] | ! dp + [[image:snkd.gif]] | ||
|align="center"| 5/3*22/21+13 | |align="center"| 5/3*22/21+13 | ||
|align="center"| KD/-38 | |align="center"| KD/-38 | ||
|align="center"| | |align="center"| | ||
|align="center"| HL | |align="center"| HL | ||
|valign="bottom" style="border-right:0px;"| [[image:Joe02_dpD1.png|center]] | |valign="bottom" style="border-right:0px;"| [[image:Joe02_dpD1.png|center]] | ||
|valign="bottom" style="border-left:0px;"| [[image:Joe02_dpD2.png|center]] | |valign="bottom" style="border-left:0px;"| [[image:Joe02_dpD2.png|center]] | ||
|- | |- | ||
!rowspan="2"| qcb+[[image:snkb.gif]] | !rowspan="2"| qcb + [[image:snkb.gif]] | ||
|align="center" rowspan="2"|9+3/3*3*2*2/5+14 | |align="center" rowspan="2"|9+3/3*3*2*2/5+14 | ||
|align="center" rowspan="2"| -1/-3 | |align="center" rowspan="2"| -1/-3 | ||
|align="center" rowspan="2"| | |align="center" rowspan="2"| | ||
|align="center" rowspan="2" align="center"| HL | |align="center" rowspan="2" align="center"| HL | ||
|valign="bottom" style="border-right:0px; border-bottom:0px;"| [[image:Joe02_qcbB1.png|center]] | |valign="bottom" style="border-right:0px; border-bottom:0px;"| [[image:Joe02_qcbB1.png|center]] | ||
|valign="bottom" style="border-left:0px; border-bottom:0px;"| [[image:Joe02_qcbB2.png|center]] | |valign="bottom" style="border-left:0px; border-bottom:0px;"| [[image:Joe02_qcbB2.png|center]] | ||
|rowspan="4"|'''Ougon no Kakato - qcb+K''' | |rowspan="4"|'''Ougon no Kakato - qcb + K''' | ||
* Joe executes a jumping spinning kick that does two hits and has very good recovery, usually being unpunishable | * Joe executes a jumping spinning kick that does two hits and has very good recovery, usually being unpunishable | ||
* the move takes some time to come out but has a large hitbox that will almost always catch the opponent out of the air | * the move takes some time to come out but has a large hitbox that will almost always catch the opponent out of the air | ||
* it's possible to juggle the opponent if this move hits them airborne | * it's possible to juggle the opponent if this move hits them airborne | ||
|- | |- | ||
|valign="bottom" style="border-right:0px; border-top:0px;"| [[image:Joe02_qcbB3.png|center]] | |valign="bottom" style="border-right:0px; border-top:0px;"| [[image:Joe02_qcbB3.png|center]] | ||
|valign="bottom" style="border-left:0px; border-top:0px;"| [[image:Joe02_qcbB4.png|center]] | |valign="bottom" style="border-left:0px; border-top:0px;"| [[image:Joe02_qcbB4.png|center]] | ||
|- | |- | ||
!rowspan="2"| qcb+[[image:snkd.gif]] | !rowspan="2"| qcb + [[image:snkd.gif]] | ||
|align="center" rowspan="2"| 11+5/3*2*2*2/5+16 | |align="center" rowspan="2"| 11+5/3*2*2*2/5+16 | ||
|align="center" rowspan="2"| -3/-5 | |align="center" rowspan="2"| -3/-5 | ||
|align="center" rowspan="2"| | |align="center" rowspan="2"| | ||
|align="center" rowspan="2" align="center"| HL | |align="center" rowspan="2" align="center"| HL | ||
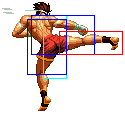
|valign="bottom" style="border-right:0px; border-bottom:0px;"| [[image:Joe02_qcbD1.png|center]] | |valign="bottom" style="border-right:0px; border-bottom:0px;"| [[image:Joe02_qcbD1.png|center]] | ||
| Line 295: | Line 301: | ||
|- | |- | ||
|- | |- | ||
! | ! [[image:snka.gif]] rapidly | ||
|align="center"| 9/2(7)2(9)2(10)1(11)2(6)1(16)2(7)2(8)2(10)1(11)2(5)1/28 | |align="center"| 9/2(7)2(9)2(10)1(11)2(6)1(16)2(7)2(8)2(10)1(11)2(5)1/28 | ||
|align="center"| variable | |align="center"| variable | ||
|align="center"| >qcf+A, >qcf+C | |align="center"| > qcf + A, > qcf + C | ||
|align="center"| HL | |align="center"| HL | ||
|colspan="2" style="border-bottom:0px;"| [[image:Joe02_MashP1-3.png|center]] | |colspan="2" style="border-bottom:0px;"| [[image:Joe02_MashP1-3.png|center]] | ||
|rowspan="2"|'''Bakuretsu Ken - | |rowspan="2"|'''Bakuretsu Ken - P rapidly''' | ||
* Joe performs a series of punches while moving forward slightly during the move | * Joe performs a series of punches while moving forward slightly during the move | ||
* he'll do about 10 punches, though after about 5 hits, Joe will be out of range and the next hits will not combo | * he'll do about 10 punches, though after about 5 hits, Joe will be out of range and the next hits will not combo | ||
* each of those punches have a large hitbox, making it difficult to counter, though can be easily guard rolled and punished from behind | * each of those punches have a large hitbox, making it difficult to counter, though can be easily guard rolled and punished from behind | ||
* it's possible to juggle the opponent if this move hits them airborne | * it's possible to juggle the opponent if this move hits them airborne | ||
* can be followed up by qcf+A or qcf+C after any punch, whether that punch connected or whiffed | * can be followed up by qcf + A or qcf + C after any punch, whether that punch connected or whiffed | ||
|- | |- | ||
! | ! [[image:snkc.gif]] rapidly | ||
|align="center"| 11/2(7)2(9)1(10)1(11)2(6)1(18)2(7)2(9)1(10)1(11)2(6)1/30 | |align="center"| 11/2(7)2(9)1(10)1(11)2(6)1(18)2(7)2(9)1(10)1(11)2(6)1/30 | ||
|align="center"| variable | |align="center"| variable | ||
|align="center"| >qcf+A, >qcf+C | |align="center"| > qcf + A, > qcf + C | ||
|align="center"| HL | |align="center"| HL | ||
|colspan="2" style="border-top:0px;" align="center"| [[image:Joe02_MashP4-6.png|center]]<br>entire sequence repeats once | |colspan="2" style="border-top:0px;" align="center"| [[image:Joe02_MashP4-6.png|center]]<br>entire sequence repeats once | ||
|- | |- | ||
! > qcf+[[image:snka.gif]] | ! > qcf + [[image:snka.gif]] | ||
|align="center"| 20/3/28 | |align="center"| 20/3/28 | ||
|align="center"| -11/-13 | |align="center"| -11/-13 | ||
|align="center"| | |align="center"| | ||
|align="center"| H | |align="center"| H | ||
|colspan="2" | [[image:Joe02_mashPqcfA.png|center]] | |colspan="2" | [[image:Joe02_mashPqcfA.png|center]] | ||
|'''Bakuretsu Finish - qcf+A''' | |'''Bakuretsu Finish (A) - qcf + A''' | ||
* Joe performs an overhead | * Joe performs an overhead elbow attack that deals good damage and is safe on block | ||
* overhead | * overhead | ||
|- | |- | ||
! > qcf+[[image:snkc.gif]] | ! > qcf + [[image:snkc.gif]] | ||
|align="center"| 14/12/24 | |align="center"| 14/12/24 | ||
|align="center"| KD/-18 | |align="center"| KD/-18 | ||
| | | | ||
|align="center"| | |align="center"| HL | ||
|colspan="2" | | |colspan="2" | | ||
|''' | |'''Bakuretsu Finish (C) - qcf + C''' | ||
* Joe does a kick | * Joe slides forward and does a high knockdown kick. | ||
* the recovery on this move isn't good, it's riskier to do it as opposed to the qcf+A followup | * the recovery on this move isn't good, it's riskier to do it as opposed to the qcf + A followup | ||
|- | |- | ||
|colspan="8" align="center"| '''DMs''' | |colspan="8" align="center"| '''DMs''' | ||
|- | |- | ||
! <br>qcf | ! <br>qcf hcb + [[image:snka.gif]]<br><br> | ||
|align="center"| 2/2(5)2(5)2(9)2(7)2(3)2(14)-(19)-(16)4*8(12)3/17+18 | |align="center"| 2/2(5)2(5)2(9)2(7)2(3)2(14)-(19)-(16)4*8(12)3/17+18 | ||
|align="center"| KD/-40 | |align="center"| KD/-40 | ||
| Line 347: | Line 349: | ||
|align="center"| HL | |align="center"| HL | ||
|align="center" rowspan="2" colspan="2" | [[image:Joe02_qcfhcbP.png|center]]<br>etc. | |align="center" rowspan="2" colspan="2" | [[image:Joe02_qcfhcbP.png|center]]<br>etc. | ||
|rowspan="2" | '''Bakuretsu Hurricane Tiger Kakato - qcf hcb+P''' | |rowspan="2" | '''Bakuretsu Hurricane Tiger Kakato - qcf hcb + P''' | ||
* Joe dashes forward with a series of punches and tornados, followed with a rising attack | * Joe dashes forward with a series of punches and tornados, followed with a rising attack | ||
* this DM comes out very fast, so it can be comboed into easily and used to punish things like blocked cd counters | * this DM comes out very fast, so it can be comboed into easily and used to punish things like blocked cd counters | ||
| Line 355: | Line 357: | ||
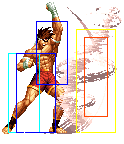
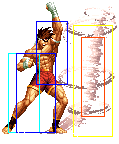
* Invincible: Complete startup. | * Invincible: Complete startup. | ||
|- | |- | ||
! qcf | ! qcf hcb + [[image:snkc.gif]] | ||
|align="center"| 2/2(5)2(5)2(9)2(7)2(3)2(14)-(19)-(16)4*8(12)3/17+20 | |align="center"| 2/2(5)2(5)2(9)2(7)2(3)2(14)-(19)-(16)4*8(12)3/17+20 | ||
|align="center"| KD/-42 | |align="center"| KD/-42 | ||
| Line 361: | Line 363: | ||
|align="center"| HL | |align="center"| HL | ||
|- | |- | ||
! <br> | ! <br>qcf qcf + [[image:snka.gif]]<br><br> | ||
|align="center"| 8/-(24)-/67 | |align="center"| 8/-(24)-/67 | ||
|align="center"| KD/+9 | |align="center"| KD/+9 | ||
| Line 368: | Line 370: | ||
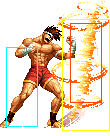
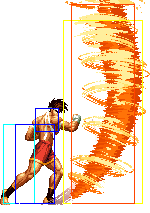
|rowspan="2" valign="bottom" style="border-right:0px;"| [[image:Joe02_qcfx2P1.png|center]] | |rowspan="2" valign="bottom" style="border-right:0px;"| [[image:Joe02_qcfx2P1.png|center]] | ||
|rowspan="2" valign="bottom" style="border-left:0px;"| [[image:Joe02_qcfx2P2.png|center]] | |rowspan="2" valign="bottom" style="border-left:0px;"| [[image:Joe02_qcfx2P2.png|center]] | ||
|rowspan="2"|'''Screw Upper - | |rowspan="2"|'''Screw Upper - qcf qcf + P''' | ||
* Joe creates a vertical wall of tornados that moves forward a slight bit, maybe 1/3 screen | * Joe creates a vertical wall of tornados that moves forward a slight bit, maybe 1/3 screen | ||
* can be rolled easily and punished | * can be rolled easily and punished | ||
| Line 374: | Line 376: | ||
* First fireball is active for 24 frames. Second fireball is active for 48 frames and hits multiple times. | * First fireball is active for 24 frames. Second fireball is active for 48 frames and hits multiple times. | ||
|- | |- | ||
! | ! qcf qcf + [[image:snkc.gif]] | ||
|align="center"| 15/-(24)-/71 | |align="center"| 15/-(24)-/71 | ||
|align="center"| KD/+5 | |align="center"| KD/+5 | ||
| Line 382: | Line 384: | ||
|colspan="8" align="center"| '''SDM''' | |colspan="8" align="center"| '''SDM''' | ||
|- | |- | ||
! | ! <br>MAX: qcf hcb + [[image:punch.gif]]<br><br> | ||
|align="center"| | |||
|align="center"| KD/?? | |||
|align="center"| | |||
|align="center"| HL | |||
|align="center" colspan="2" | [[image:Joe02_qcfhcbP.png|center]]<br>etc. | |||
| '''Bakuretsu Hurricane Tiger Kakato - MAX: qcf hcb + P''' | |||
|- | |||
! MAX: qcf qcf + [[image:punch.gif]] | |||
|align="center"| 8/-(24)-/88 | |align="center"| 8/-(24)-/88 | ||
|align="center"| KD/-39 | |align="center"| KD/-39 | ||
| Line 389: | Line 399: | ||
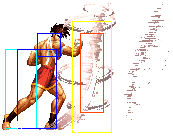
|valign="bottom" style="border-right:0px;"| [[image:Joe02_qcfx2AC1.png|center]] | |valign="bottom" style="border-right:0px;"| [[image:Joe02_qcfx2AC1.png|center]] | ||
|valign="bottom" style="border-left:0px;"| [[image:Joe02_qcfx2AC2.png|center]] | |valign="bottom" style="border-left:0px;"| [[image:Joe02_qcfx2AC2.png|center]] | ||
| '''Screw Upper - | | '''Screw Upper - MAX: qcf qcf + P''' | ||
* Joe sends out a vertical wall of tornados similar to the DM version, except doing much more damage and traveling all the way across the screen | * Joe sends out a vertical wall of tornados similar to the DM version, except doing much more damage and traveling all the way across the screen | ||
* Invincibility: Frame 1-18. | * Invincibility: Frame 1-18. | ||
| Line 397: | Line 407: | ||
===Normal Throws=== | ===Normal Throws=== | ||
'''b or f+D''' - Breakable, reverse knockdown, back turned, un-rollable. | * '''b or f + C''' - Unbreakable (mashable), front knockdown, face forward, rollable. | ||
* '''b or f + D''' - Breakable, reverse knockdown, back turned, un-rollable. | |||
C throw preferred of course because it's unbreakable! | C throw preferred of course because it's unbreakable! | ||
| Line 405: | Line 418: | ||
===Special Moves=== | ===Special Moves=== | ||
''' | * '''Hurricane Upper (hcf + P)''' - A version is best most of the time, since it covers a lot of space quickly and has great recovery. The C version can hit angles where someone would try to get past an A version and get tagged by the 2nd one. Of course a great thing to cancel into this when your hits get blocked. | ||
''' | * '''Exploding Fist (P rapidly > qcf + P)''' - You can only cancel it by performing qcf + P after it starts. The qcf + A is an overhead, and the qcf + C can be blocked either way but knocks down and combos more easily. You can get a lot of hits from this on a back-turned opponent. Generally I would stay away from it because of guard cancel roll. | ||
'''Tiger Knee (dp+K)''' - D version preferred because it has full invincibility on startup. One of the better dp style anti-airs in terms of priority, but beware of hitting grounded opponents from long range (especially crouching), as the 2nd hit can whiff and not knock down. | |||
* '''Slash Kick aka Slushy Kick (hcf + K)''' - B version preferred and safe from most things, D version is slower/more damage/goes further/whiffs on smaller crouchers. Still, don't cancel into it if your hits get blocked, that's silly. Can be used as a whiff punisher. | |||
* '''Golden Heel (qcb + K)''' - B version preferred, though the D version goes longer if you need it (and has longer recovery). You can also only juggle off the B version if it hits your opponent in the air (doesn't require a counter-hit). I listed the best damage combos above. If done close against a crouching opponent, it will cross up and give some advantage on hit (though nothing combos). The B version goes far enough to crossup after even 2 crouching As done at point blank range. This is a pretty good pressure/preventative anti-air move (like Terry's crack shoot but better on block), and it's a good move to cancel into, along with hcf + A. | |||
* '''Tiger Knee (dp+K)''' - D version preferred because it has full invincibility on startup. One of the better dp style anti-airs in terms of priority, but beware of hitting grounded opponents from long range (especially crouching), as the 2nd hit can whiff and not knock down. | |||
===Desperation Moves=== | ===Desperation Moves=== | ||
'''Exploding Hurricane Tiger Heel (qcf | * '''Screw Upper (qcf qcf + P)''' - Projectile-like super that is safe on block (beware of guard cancel roll). MAX version does more damage, travels full-screen, and has control-able speed using A or C. It's also punishable. | ||
* '''Exploding Hurricane Tiger Heel (qcf hcb + P)''' - Rush super that has invincibility on startup. Ridiculously unsafe, good for combos. Also, if you roll/guard cancel roll past it and run toward Joe's back, the Tiger Knee part will hit you from behind! Cool! | |||
== Fastest Attacks == | |||
* 0F: C throw; D throw | |||
* 1F: - | |||
* 2F: '''cl.C'''; (S)DM qcf hcb + P | |||
* 3F: '''cl.A'''; '''st.A'''; '''cr.A'''; cr.B | |||
* 4F: '''cr.C''' | |||
* 5F: dp + K | |||
* 6F: cl.D; st.D | |||
* 7F: '''cl.B'''; st.B; st.C | |||
* 8F: '''cr.D'''; DM qcf qcf + A; SDM qcf qcf + P | |||
* 9F: A rapidly | |||
* 10F: - | |||
==Combos== | ==Combos== | ||
*cr.B( | * Best jump-ins: | ||
** j.D (Can crossup.) | |||
* cl.C / cr.C > | |||
** f + B > | |||
*** (S)DM Hurricane Tiger (qcf hcb + P) | |||
*** D Slash Kick (hcf + D) (Whiffs on some crouchers.) | |||
*** B Slash Kick (hcf + B) | |||
** (S)DM Hurricane Tiger (qcf hcb + C) | |||
** (S)DM qcf qcf + C | |||
** D Slash Kick (hcf + D) (Whiffs on some crouchers.) | |||
** B Slash Kick (hcf + B) | |||
* cr.B x 2, cr.A / st.A > | |||
** (S)DM Exploding Hurricane Tiger Heel (qcf hcb + P) | |||
** dp + D | |||
** dp + B (If not too far.) | |||
* | * cr.B, cr.A > | ||
** (S)DM Exploding Hurricane Tiger Heel (qcf hcb + P) | |||
** DM qcf qcf + A | |||
** dp + D | |||
** dp + B (If not too far.) | |||
* | * st.B > | ||
** (S)DM Exploding Hurricane Tiger Heel (qcf hcb + P) | |||
** dp + D | |||
** dp + B (If not too far.) | |||
* Anti-air: B Golden Heel (qcb + B), | |||
** hcf + D | |||
** D Tiger Knee (dp + D) (Corner) | |||
** st.D (Corner) | |||
* cr.A / cl.A / cr.C / cl.C > Exploding Fist (P rapidly > qcf + C) | |||
Not recommended, doesn't work properly on some crouchers. | |||
* cr.A / cr.B (meaty), cl.C > f + B > | |||
** (S)DM Hurricane Tiger (qcf hcb + P) | |||
** D Slash Kick (hcf + D) (Whiffs on some crouchers.) | |||
** B Slash Kick (hcf + B) | |||
* Simple buffers: | |||
** f + B > (S)DM qcf hcb + P | |||
*** qcf + B > hcb + P | |||
** st.A / cl.A / cl.C > (S)DM qcf hcb + P | |||
*** qcf + A/C > hcb + P | |||
** cl.A > DM qcf qcf + A | |||
*** qcf + A > qcf + A | |||
** cl.C > (S)DM qcf qcf + C | |||
*** qcf + C > qcf + C | |||
{{StrategyCorner| | |||
* MAX: cl.C > {{f}} + B > {{hcf}} + D | |||
deals considerable less damage (~ cl.C + cl.A) than | |||
* cl.C > {{f}} + B > {{qcf}} {{hcb}} + P | |||
Keep this in mind, when you need to decide whether to trigger MAX or keep meter for a DM. | |||
}} | |||
==Attack Info and Frame Data== | ==Attack Info and Frame Data== | ||
| Line 802: | Line 897: | ||
|} | |} | ||
== Links == | |||
{{ | {{Navbox-KOF98}} | ||
[[Category:The King of Fighters '98: The Slugfest]] | [[Category:The King of Fighters '98: The Slugfest]] | ||
[[Category:Joe Higashi]] | |||
Latest revision as of 01:16, 1 February 2021
Introduction
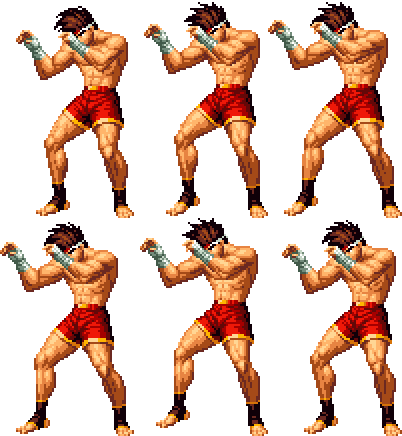
<GINGA_JOE> joes just boring ol joe he doesnt have a story
Colors

|

|

|

|
Gameplay Overview
Joe is a high-mid tier character based on zoning/poking with some decent combo damage and mixup/pressure options. He requires a bit of execution for hit-confirming into super, but he is still a good solid character for a beginner to use.
In-depth analysis
Movelist
Normal Throws
- b or f + C - Unbreakable (mashable), front knockdown, face forward, rollable.
- b or f + D - Breakable, reverse knockdown, back turned, un-rollable.
C throw preferred of course because it's unbreakable!
Special Moves
- Hurricane Upper (hcf + P) - A version is best most of the time, since it covers a lot of space quickly and has great recovery. The C version can hit angles where someone would try to get past an A version and get tagged by the 2nd one. Of course a great thing to cancel into this when your hits get blocked.
- Exploding Fist (P rapidly > qcf + P) - You can only cancel it by performing qcf + P after it starts. The qcf + A is an overhead, and the qcf + C can be blocked either way but knocks down and combos more easily. You can get a lot of hits from this on a back-turned opponent. Generally I would stay away from it because of guard cancel roll.
- Slash Kick aka Slushy Kick (hcf + K) - B version preferred and safe from most things, D version is slower/more damage/goes further/whiffs on smaller crouchers. Still, don't cancel into it if your hits get blocked, that's silly. Can be used as a whiff punisher.
- Golden Heel (qcb + K) - B version preferred, though the D version goes longer if you need it (and has longer recovery). You can also only juggle off the B version if it hits your opponent in the air (doesn't require a counter-hit). I listed the best damage combos above. If done close against a crouching opponent, it will cross up and give some advantage on hit (though nothing combos). The B version goes far enough to crossup after even 2 crouching As done at point blank range. This is a pretty good pressure/preventative anti-air move (like Terry's crack shoot but better on block), and it's a good move to cancel into, along with hcf + A.
- Tiger Knee (dp+K) - D version preferred because it has full invincibility on startup. One of the better dp style anti-airs in terms of priority, but beware of hitting grounded opponents from long range (especially crouching), as the 2nd hit can whiff and not knock down.
Desperation Moves
- Screw Upper (qcf qcf + P) - Projectile-like super that is safe on block (beware of guard cancel roll). MAX version does more damage, travels full-screen, and has control-able speed using A or C. It's also punishable.
- Exploding Hurricane Tiger Heel (qcf hcb + P) - Rush super that has invincibility on startup. Ridiculously unsafe, good for combos. Also, if you roll/guard cancel roll past it and run toward Joe's back, the Tiger Knee part will hit you from behind! Cool!
Fastest Attacks
- 0F: C throw; D throw
- 1F: -
- 2F: cl.C; (S)DM qcf hcb + P
- 3F: cl.A; st.A; cr.A; cr.B
- 4F: cr.C
- 5F: dp + K
- 6F: cl.D; st.D
- 7F: cl.B; st.B; st.C
- 8F: cr.D; DM qcf qcf + A; SDM qcf qcf + P
- 9F: A rapidly
- 10F: -
Combos
- Best jump-ins:
- j.D (Can crossup.)
- cl.C / cr.C >
- f + B >
- (S)DM Hurricane Tiger (qcf hcb + P)
- D Slash Kick (hcf + D) (Whiffs on some crouchers.)
- B Slash Kick (hcf + B)
- (S)DM Hurricane Tiger (qcf hcb + C)
- (S)DM qcf qcf + C
- D Slash Kick (hcf + D) (Whiffs on some crouchers.)
- B Slash Kick (hcf + B)
- f + B >
- cr.B x 2, cr.A / st.A >
- (S)DM Exploding Hurricane Tiger Heel (qcf hcb + P)
- dp + D
- dp + B (If not too far.)
- cr.B, cr.A >
- (S)DM Exploding Hurricane Tiger Heel (qcf hcb + P)
- DM qcf qcf + A
- dp + D
- dp + B (If not too far.)
- st.B >
- (S)DM Exploding Hurricane Tiger Heel (qcf hcb + P)
- dp + D
- dp + B (If not too far.)
- Anti-air: B Golden Heel (qcb + B),
- hcf + D
- D Tiger Knee (dp + D) (Corner)
- st.D (Corner)
- cr.A / cl.A / cr.C / cl.C > Exploding Fist (P rapidly > qcf + C)
Not recommended, doesn't work properly on some crouchers.
- cr.A / cr.B (meaty), cl.C > f + B >
- (S)DM Hurricane Tiger (qcf hcb + P)
- D Slash Kick (hcf + D) (Whiffs on some crouchers.)
- B Slash Kick (hcf + B)
- Simple buffers:
- f + B > (S)DM qcf hcb + P
- qcf + B > hcb + P
- st.A / cl.A / cl.C > (S)DM qcf hcb + P
- qcf + A/C > hcb + P
- cl.A > DM qcf qcf + A
- qcf + A > qcf + A
- cl.C > (S)DM qcf qcf + C
- qcf + C > qcf + C
- f + B > (S)DM qcf hcb + P
Strategy Corner
- MAX: cl.C >
 + B >
+ B >  + D
+ D
deals considerable less damage (~ cl.C + cl.A) than
- cl.C >
 + B >
+ B > 
 + P
+ P
Keep this in mind, when you need to decide whether to trigger MAX or keep meter for a DM.
Attack Info and Frame Data
| Command | Hits | Damage Scaling | Startup | Active | Recovery | Damage | Counter Damage | Dizzy | Guard Damage | Meter Increase (Whiff / Hit) |
|---|---|---|---|---|---|---|---|---|---|---|
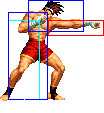
| Standing A | 1 | - | 3 | 2 | 8 | 5 | 7 | 3 | 7 | 0/3 |
| Standing B | 1 | - | 7 | 3 | 7 | 7 | 8 | 4 | 8 | 0/3 |
| Standing C | 1 | - | 7 | 2 | 16 | 11 | 21 | 17 | 24 | 0/6 |
| Standing D | 1 | - | 6 | 3 | 28 | 13 | 16 | 14 | 29 | 0/6 |
| Close A | 1 | - | 3 | 3 | 9 | 4 | 6 | 3 | 7 | 0/3 |
| Close B | 1 | - | 7 | 3 | 7 | 7 | 8 | 4 | 8 | 0/3 |
| Close C | 1 | - | 2 | 2 | 20 | 10 | 15 | 14 | 18 | 0/6 |
| Close D | 1 | - | 6 | 3 | 28 | 11 | 16 | 13 | 20 | 0/6 |
| Crouching A | 1 | - | 3 | 3 | 6 | 4 | 6 | 3 | 6 | 0/3 |
| Crouching B | 1 | - | 3 | 3 | 7 | 6 | 7 | 3 | 7 | 0/3 |
| Crouching C | 1 | - | 4 | 3 | 19 | 10 | 15 | 13 | 16 | 0/6 |
| Crouching D | 1 | - | 8 | 4 | 9 + 14 | 15 | 17 | 13 | 18 | 0/6 |
| Neutral Jumping A | 1 | - | 3 | 7 | - | 7 | 9 | 5 | 8 | 0/3 |
| Forward Jumping A | 1 | - | 3 | 7 | - | 6 | 8 | 4 | 8 | 0/3 |
| Backwards Jumping A | 1 | - | 3 | 7 | - | 6 | 7 | 3 | 7 | 0/3 |
| Neutral Jumping B | 1 | - | 6 | 12 | - | 8 | 9 | 6 | 9 | 0/3 |
| Forward Jumping B | 1 | - | 6 | 12 | - | 9 | 10 | 5 | 9 | 0/3 |
| Backwards Jumping B | 1 | - | 6 | 12 | - | 6 | 7 | 4 | 8 | 0/3 |
| Neutral Jumping C | 1 | - | 4 | 9 | - | 14 | 18 | 18 | 17 | 0/6 |
| Forward Jumping C | 1 | - | 4 | 9 | - | 11 | 15 | 16 | 17 | 0/6 |
| Backwards Jumping C | 1 | - | 4 | 9 | - | 11 | 15 | 15 | 16 | 0/6 |
| Neutral Jumping D | 1 | - | 4 | 12 | - | 15 | 18 | 15 | 18 | 0/6 |
| Forward Jumping D | 1 | - | 4 | 12 | - | 13 | 17 | 13 | 18 | 0/6 |
| Backwards Jumping D | 1 | - | 4 | 12 | - | 15 | 17 | 13 | 18 | 0/6 |
| CD | 1 | - | 20 | 2 | 25 | 16 | 20 | 18 | 24 | 0/8 |
| Jumping CD | 1 | - | 11 | 5 | - | 16 | 20 | 16 | 21 | 0/8 |
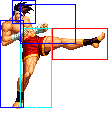
| f + B | 1 | - | 13 | 2 | 25 | 10 | 16 | 22 | 24 | 0/7 |
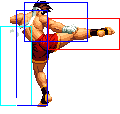
| df + B | 1 | - | 13 | 4 | 24 | 12 | 16 | 18 | 24 | 0/5 |
| df + B (in a combo) | 1 | - | 13 | 4 | 24 | 9 | 9 | 8 | - | 0/5 |
