Lichmassacre (talk | contribs) m (Old Navbox removed for new Navbox.) |
|||
| (14 intermediate revisions by 5 users not shown) | |||
| Line 19: | Line 19: | ||
==In-depth Analysis== | ==In-depth Analysis== | ||
===[[ | ===[[The King of Fighters 2002/Normals Guide|Movelist]]=== | ||
{|border="1" | {|border="1" | ||
!width="8%"| | !width="8%"| | ||
| Line 183: | Line 183: | ||
|colspan="8" align="center"| '''Command Normals''' | |colspan="8" align="center"| '''Command Normals''' | ||
|- | |- | ||
! f+[[image:snkb.gif]] | ! f + [[image:snkb.gif]] | ||
|align="center"| 13/2/25 | |align="center"| 13/2/25 | ||
| | | | ||
| Line 191: | Line 191: | ||
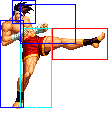
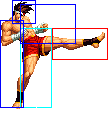
|align="left"| Always the same speed and cancelable. not only your combo filler from hard hits, but it's actually a really good long-range poke. It has the longest range of any of his normals, and his entire lower leg up to the knee is invincible. | |align="left"| Always the same speed and cancelable. not only your combo filler from hard hits, but it's actually a really good long-range poke. It has the longest range of any of his normals, and his entire lower leg up to the knee is invincible. | ||
|- | |- | ||
! df+[[image:snkb.gif]] | ! df + [[image:snkb.gif]] | ||
|align="center"| 13/4/24 | |align="center"| 13/4/24 | ||
| | | | ||
| Line 201: | Line 201: | ||
|colspan="8" align="center"| '''Special Moves''' | |colspan="8" align="center"| '''Special Moves''' | ||
|- | |- | ||
! hcf+[[image:snka.gif]] | ! hcf + [[image:snka.gif]] | ||
|align="center"| | |align="center"| | ||
|align="center"| | |align="center"| | ||
| | | | ||
|align="center"| HL | |align="center"| HL | ||
|colspan="2" | | |colspan="2" | | ||
|rowspan="2"|'''Hurricane Upper - hcf+P''' | |rowspan="2"|'''Hurricane Upper - hcf + P''' | ||
* Joe releases one | * Joe releases one hurricane projectiles that travels fullscreen. | ||
* hcf+A sends out | * hcf + A sends out a slow projectile, while hcf + C sends aou a fast one. | ||
* the projectiles are tall and cannot be jumped by most characters | * the projectiles are tall and cannot be jumped by most characters. | ||
|- | |- | ||
! hcf+[[image:snkc.gif]] | ! hcf + [[image:snkc.gif]] | ||
|align="center"| | |align="center"| | ||
|align="center"| | |align="center"| | ||
| | | | ||
|align="center"| HL | |align="center"| HL | ||
|valign="bottom" style="border-right:0px;"| | |valign="bottom" style="border-right:0px;"| | ||
|valign="bottom" style="border-left:0px;"| | |valign="bottom" style="border-left:0px;"| | ||
|- | |- | ||
! hcf+[[image:snkb.gif]] | ! hcf + [[image:snkb.gif]] | ||
|align="center"| 14/4/4+22 | |align="center"| 14/4/4+22 | ||
|align="center"| KD/-12 | |align="center"| KD/-12 | ||
|align="center"| | |align="center"| | ||
|align="center"| HL | |align="center"| HL | ||
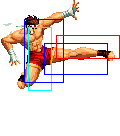
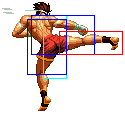
|colspan="2" | [[image:Joe02_hcfB.png|center]] | |colspan="2" | [[image:Joe02_hcfB.png|center]] | ||
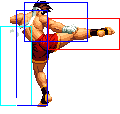
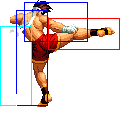
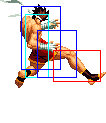
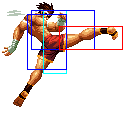
|rowspan="2"|'''Slash Kick - hcf+K''' | |rowspan="2"|'''Slash Kick - hcf + K''' | ||
* Joe performs a horizontal kick moving across the screen, which does good damage | * Joe performs a horizontal kick moving across the screen, which does good damage | ||
* hcf+B version goes about 1/3 screen length while hcf+D goes 3/4 length | * hcf + B version goes about 1/3 screen length while hcf + D goes 3/4 length | ||
* has some recovery time if blocked, though if done from far away it's usually difficult to punish on block | * has some recovery time if blocked, though if done from far away it's usually difficult to punish on block | ||
* Depending on the distance, the startup of the D version is longer. The longer the startup, the shorter the recovery. | * Depending on the distance, the startup of the D version is longer. The longer the startup, the shorter the recovery. | ||
|- | |- | ||
! hcf+[[image:snkd.gif]] | ! hcf + [[image:snkd.gif]] | ||
|align="center"| 14+0~5/7/4~9+24 | |align="center"| 14+0~5/7/4~9+24 | ||
|align="center"| KD/-22 | |align="center"| KD/-22 | ||
|align="center"| | |align="center"| | ||
|align="center"| HL | |align="center"| HL | ||
|colspan="2" | [[image:Joe02_hcfD.png|center]] | |colspan="2" | [[image:Joe02_hcfD.png|center]] | ||
|- | |- | ||
! dp+[[image:snkb.gif]] | ! dp + [[image:snkb.gif]] | ||
|align="center"| 5/3*18/17+13 | |align="center"| 5/3*18/17+13 | ||
|align="center"| KD/-30 | |align="center"| KD/-30 | ||
|align="center"| | |align="center"| | ||
|align="center"| HL | |align="center"| HL | ||
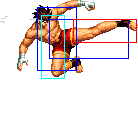
|valign="bottom" style="border-right:0px;"| [[image:Joe02_dpB1.png|center]] | |valign="bottom" style="border-right:0px;"| [[image:Joe02_dpB1.png|center]] | ||
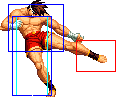
|valign="bottom" style="border-left:0px;"| [[image:Joe02_dpB2.png|center]] | |valign="bottom" style="border-left:0px;"| [[image:Joe02_dpB2.png|center]] | ||
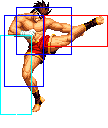
|rowspan="2"|'''Tiger Kick - dp+K''' | |rowspan="2"|'''Tiger Kick - dp + K''' | ||
* Joe does a very fast rising kick attack that does two hits | * Joe does a very fast rising kick attack that does two hits | ||
* Invincible: B: Complete startup, D: Complete startup and first active period. Upper body invincible: First active period fo B version. | * Invincible: B: Complete startup, D: Complete startup and first active period. Upper body invincible: First active period fo B version. | ||
|- | |- | ||
! dp+[[image:snkd.gif]] | ! dp + [[image:snkd.gif]] | ||
|align="center"| 5/3*22/21+13 | |align="center"| 5/3*22/21+13 | ||
|align="center"| KD/-38 | |align="center"| KD/-38 | ||
|align="center"| | |align="center"| | ||
|align="center"| HL | |align="center"| HL | ||
|valign="bottom" style="border-right:0px;"| [[image:Joe02_dpD1.png|center]] | |valign="bottom" style="border-right:0px;"| [[image:Joe02_dpD1.png|center]] | ||
|valign="bottom" style="border-left:0px;"| [[image:Joe02_dpD2.png|center]] | |valign="bottom" style="border-left:0px;"| [[image:Joe02_dpD2.png|center]] | ||
|- | |- | ||
! | ! [[image:snka.gif]] rapidly | ||
|align="center"| | |||
|align="center"| | |||
|align="center"| > qcf + A | |||
/ qcf + C | |||
|align="center"| | |||
|align="center"| | |||
|align="center"| >qcf+A | |||
|align="center"| HL | |align="center"| HL | ||
|colspan="2" style="border-bottom:0px;"| | |colspan="2" style="border-bottom:0px;"| | ||
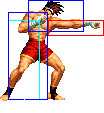
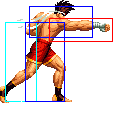
|rowspan="2"|'''Bakuretsu Ken - | |rowspan="2"|'''Bakuretsu Ken - P rapidly''' | ||
* Joe performs a series of punches | * Joe performs a series of punches | ||
* You may press forward to make him slowly move forward. | |||
* each of those punches have a large hitbox, making it difficult to counter, though can be easily guard rolled and punished from behind | * each of those punches have a large hitbox, making it difficult to counter, though can be easily guard rolled and punished from behind | ||
* can be followed up by qcf + A or qcf + C after any punch, whether that punch connected or whiffed. | |||
* can be followed up by qcf+A or qcf+C after any punch, whether that punch connected or whiffed | |||
|- | |- | ||
! | ! [[image:snkc.gif]] rapidly | ||
|align="center"| | |align="center"| | ||
|align="center"| | |align="center"| | ||
|align="center"| >qcf+A | |align="center"| > qcf + A | ||
/ qcf + C | |||
|align="center"| HL | |align="center"| HL | ||
|colspan="2" style="border-top:0px;" align="center"| | |colspan="2" style="border-top:0px;" align="center"| | ||
|- | |- | ||
! > qcf+[[image:snka.gif]] | ! > qcf + [[image:snka.gif]] | ||
|align="center"| | |align="center"| | ||
|align="center"| | |align="center"| KD/?? | ||
|align="center"| | |align="center"| | ||
|align="center"| | |align="center"| HL | ||
|colspan="2" | | |colspan="2" | | ||
|'''Bakuretsu Finish - qcf+A''' | |'''Bakuretsu Finish (A) - qcf + A''' | ||
* Joe | * Joe does a single hit uppercut that knocks down and is fast. | ||
|- | |- | ||
! > qcf+[[image:snkc.gif]] | ! > qcf + [[image:snkc.gif]] | ||
|align="center"| | |align="center"| | ||
|align="center"| KD/ | |align="center"| KD/?? | ||
| | | | ||
|align="center"| | |align="center"| HL | ||
|colspan="2" | | |colspan="2" | | ||
|''' | |'''Bakuretsu Finish (C) - qcf + C''' | ||
* Joe does | * Joe does jumping uppercut that deals two hits, knocks down and is slow (but can still combo). | ||
|- | |- | ||
|colspan="8" align="center"| '''DMs''' | |colspan="8" align="center"| '''DMs''' | ||
|- | |- | ||
! <br>qcf | ! <br>qcf qcf + [[image:snka.gif]]<br><br> | ||
|align="center"| 8/-(24)-/67 | |align="center"| 8/-(24)-/67 | ||
|align="center"| KD/+9 | |align="center"| KD/+9 | ||
| Line 365: | Line 306: | ||
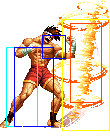
|rowspan="2" valign="bottom" style="border-right:0px;"| [[image:Joe02_qcfx2P1.png|center]] | |rowspan="2" valign="bottom" style="border-right:0px;"| [[image:Joe02_qcfx2P1.png|center]] | ||
|rowspan="2" valign="bottom" style="border-left:0px;"| [[image:Joe02_qcfx2P2.png|center]] | |rowspan="2" valign="bottom" style="border-left:0px;"| [[image:Joe02_qcfx2P2.png|center]] | ||
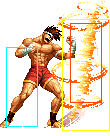
|rowspan="2"|'''Screw Upper - | |rowspan="2"|'''Screw Upper - qcf qcf + P''' | ||
* Joe creates a vertical wall of tornados that moves forward a slight bit, maybe 1/3 screen | * Joe creates a vertical wall of tornados that moves forward a slight bit, maybe 1/3 screen | ||
* can be rolled easily and punished | * can be rolled easily and punished | ||
| Line 371: | Line 312: | ||
* First fireball is active for 24 frames. Second fireball is active for 48 frames and hits multiple times. | * First fireball is active for 24 frames. Second fireball is active for 48 frames and hits multiple times. | ||
|- | |- | ||
! | ! qcf qcf + [[image:snkc.gif]] | ||
|align="center"| 15/-(24)-/71 | |align="center"| 15/-(24)-/71 | ||
|align="center"| KD/+5 | |align="center"| KD/+5 | ||
| Line 379: | Line 320: | ||
|colspan="8" align="center"| '''SDM''' | |colspan="8" align="center"| '''SDM''' | ||
|- | |- | ||
! | ! MAX: qcf qcf + [[image:punch.gif]] | ||
|align="center"| 8/-(24)-/88 | |align="center"| 8/-(24)-/88 | ||
|align="center"| KD/-39 | |align="center"| KD/-39 | ||
| Line 386: | Line 327: | ||
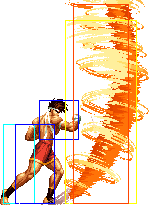
|valign="bottom" style="border-right:0px;"| [[image:Joe02_qcfx2AC1.png|center]] | |valign="bottom" style="border-right:0px;"| [[image:Joe02_qcfx2AC1.png|center]] | ||
|valign="bottom" style="border-left:0px;"| [[image:Joe02_qcfx2AC2.png|center]] | |valign="bottom" style="border-left:0px;"| [[image:Joe02_qcfx2AC2.png|center]] | ||
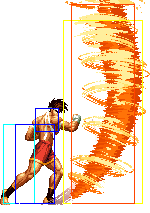
| '''Screw Upper - | | '''Screw Upper - MAX: qcf qcf + P''' | ||
* Joe sends out a vertical wall of tornados similar to the DM version, except doing much more damage and traveling all the way across the screen | * Joe sends out a vertical wall of tornados similar to the DM version, except doing much more damage and traveling all the way across the screen | ||
* Invincibility: Frame 1-18. | * Invincibility: Frame 1-18. | ||
| Line 398: | Line 339: | ||
==Combos== | ==Combos== | ||
{{ | |||
* cl.C / cr.C > | |||
** f + B > | |||
*** D Slash Kick (hcf + D) (Whiffs on some crouchers.) | |||
*** B Slash Kick (hcf + B) | |||
** (S)DM qcf qcf + C | |||
* cr.B, cr.A > | |||
** dp + | |||
** DM qcf qcf + A | |||
* st.B / st.A > | |||
** dp + D | |||
** dp + B (If not too far.) | |||
* cr.A / cr.B (meaty), cl.C > f + B > | |||
** D Slash Kick (hcf + D) (Whiffs on some crouchers.) | |||
** B Slash Kick (hcf + B) | |||
{{StrategyCorner| | |||
* MAX: cl.C > {{f}} + B > {{hcf}} + D | |||
deals ??? than | |||
* cl.C > {{qcf}} {{qcf}} + A | |||
Keep this in mind, when you need to decide whether to trigger MAX or keep meter for a DM. | |||
}} | |||
== Links == | |||
{{Navbox-KOF98}} | |||
[[Category:The King of Fighters '98: The Slugfest]] | [[Category:The King of Fighters '98: The Slugfest]] | ||
Latest revision as of 04:16, 1 January 2021
Introduction
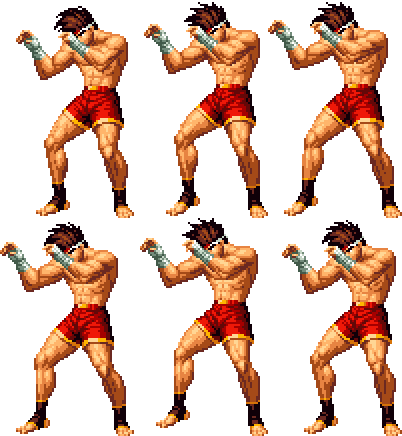
Colors

|

|

|

|
Gameplay Overview
Joe '94 its another balanced EX Character but it have a lot of disadvantages, he loss his Overhead Special and Ryuko Ranbu alike DM, but have a buffed TNT Punch and Hurricane Upper useful for keepaway tactics.
In-depth Analysis
Movelist
Special Moves
Desperation Moves
Combos
- cl.C / cr.C >
- f + B >
- D Slash Kick (hcf + D) (Whiffs on some crouchers.)
- B Slash Kick (hcf + B)
- (S)DM qcf qcf + C
- f + B >
- cr.B, cr.A >
- dp +
- DM qcf qcf + A
- st.B / st.A >
- dp + D
- dp + B (If not too far.)
- cr.A / cr.B (meaty), cl.C > f + B >
- D Slash Kick (hcf + D) (Whiffs on some crouchers.)
- B Slash Kick (hcf + B)
Strategy Corner
- MAX: cl.C >
 + B >
+ B >  + D
+ D
deals ??? than
- cl.C >

 + A
+ A
Keep this in mind, when you need to decide whether to trigger MAX or keep meter for a DM.
