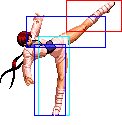
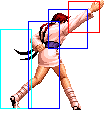
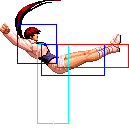
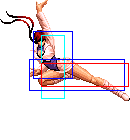
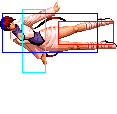
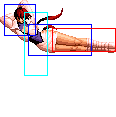
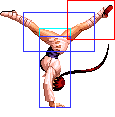
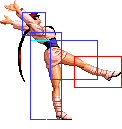
Lichmassacre (talk | contribs) m (Old Navbox removed for new Navbox.) |
|||
| (33 intermediate revisions by 4 users not shown) | |||
| Line 15: | Line 15: | ||
==Gameplay Overview== | ==Gameplay Overview== | ||
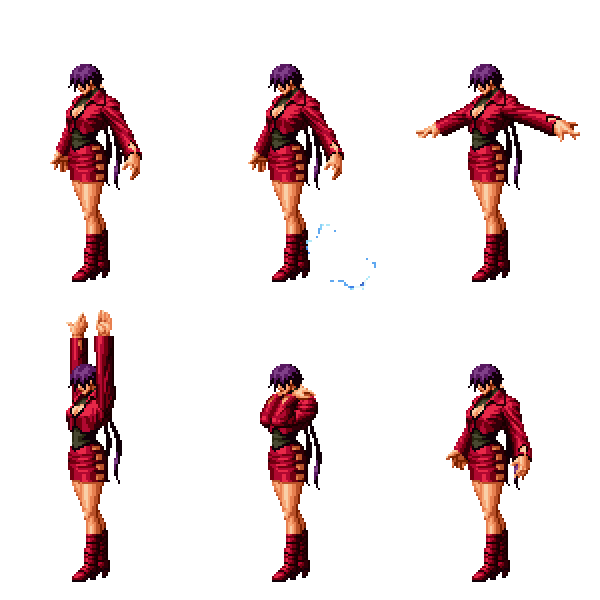
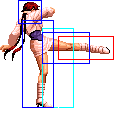
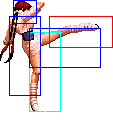
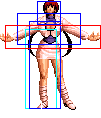
The majority of her special moves are for zoning; wedging them in at point blank is a problem. If you make a tiny mistake in reading the opponent, it resounds in a big way, so this character is not really oriented towards beginners. her normal and command moves are the same as the normal Shermie's. | |||
==In-depth Analysis== | ==In-depth Analysis== | ||
===[[ | ===[[The King of Fighters 2002/Normals Guide|Movelist]]=== | ||
{|border="1" | {|border="1" | ||
! width="9%"| | ! width="9%"| | ||
| Line 58: | Line 53: | ||
|align="center"| HL | |align="center"| HL | ||
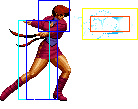
|colspan="4" | [[image:Shermie98_clC.png|center]] | |colspan="4" | [[image:Shermie98_clC.png|center]] | ||
| | |Fast and cancelable. Good as meaty. | ||
|- | |- | ||
! [[image:snkd.gif]] | ! [[image:snkd.gif]] | ||
| Line 202: | Line 197: | ||
|colspan="10" align="center"| '''Command Normals''' | |colspan="10" align="center"| '''Command Normals''' | ||
|- | |- | ||
! <br>f+[[image:snkb.gif]]<br><br> | ! <br>f + [[image:snkb.gif]]<br><br> | ||
|align="center"| 15/4(4)4+4+4/11 | |align="center"| 15/4(4)4+4+4/11 | ||
|align="center"| -3/-5 | |align="center"| -3/-5 | ||
| Line 212: | Line 207: | ||
A two hit move. The first hit has a mid property while the second hit has an overhead property (unless Shermie cancels into Shermie Stand from a normal move). Although not to be used too much, the first hit of Shermie Stand could be used as a means of anti-air. When canceled into, the second hit of this move becomes cancelable into a special or super although there isn't anything that combos afterwards. | A two hit move. The first hit has a mid property while the second hit has an overhead property (unless Shermie cancels into Shermie Stand from a normal move). Although not to be used too much, the first hit of Shermie Stand could be used as a means of anti-air. When canceled into, the second hit of this move becomes cancelable into a special or super although there isn't anything that combos afterwards. | ||
|- | |- | ||
! f+[[image:snkb.gif]]<br>(cancel) | ! f + [[image:snkb.gif]]<br>(cancel) | ||
|align="center"| 15/4(4)4+4+4/11 | |align="center"| 15/4(4)4+4+4/11 | ||
|align="center"| -3/-5 | |align="center"| -3/-5 | ||
| Line 222: | Line 217: | ||
|colspan="10" align="center"| '''Special Moves''' | |colspan="10" align="center"| '''Special Moves''' | ||
|- | |- | ||
! hcf+[[image:snka.gif]] | ! hcf + [[image:snka.gif]] | ||
|align="center"| 26/23/33 | |align="center"| 26/23/33 | ||
|align="center"| | |align="center"| | ||
| Line 228: | Line 223: | ||
|align="center"| HL | |align="center"| HL | ||
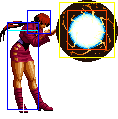
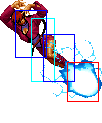
|colspan="4" | [[image:OShermie02_hcfA.png|center]] | |colspan="4" | [[image:OShermie02_hcfA.png|center]] | ||
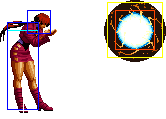
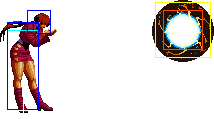
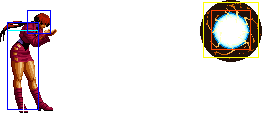
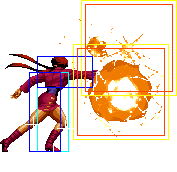
|rowspan="4"| | |rowspan="4"| Mugetsu no Raiun - hcf + any button | ||
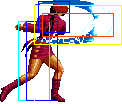
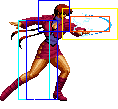
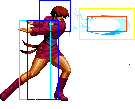
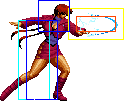
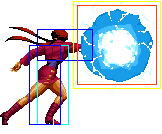
A lightning-based projectile pops up in a location dependent on the button you use; it ranges from close (A) to very far (D). It takes a while for the lightning ball to appear, so you really do have to predict where your opponent is going to be. | |||
|- | |- | ||
! hcf+[[image:snkb.gif]] | ! hcf + [[image:snkb.gif]] | ||
|align="center"| 30/23/33 | |align="center"| 30/23/33 | ||
|align="center"| | |align="center"| | ||
| Line 237: | Line 234: | ||
|colspan="4" | [[image:OShermie02_hcfB.png|center]] | |colspan="4" | [[image:OShermie02_hcfB.png|center]] | ||
|- | |- | ||
! hcf+[[image:snkc.gif]] | ! hcf + [[image:snkc.gif]] | ||
|align="center"| 34/23/33 | |align="center"| 34/23/33 | ||
|align="center"| | |align="center"| | ||
| Line 244: | Line 241: | ||
|colspan="4" | [[image:OShermie02_hcfC.png|center]] | |colspan="4" | [[image:OShermie02_hcfC.png|center]] | ||
|- | |- | ||
! hcf+[[image:snkd.gif]] | ! hcf + [[image:snkd.gif]] | ||
|align="center"| 38/23/33 | |align="center"| 38/23/33 | ||
|align="center"| | |align="center"| | ||
| Line 251: | Line 248: | ||
|colspan="4" | [[image:OShermie02_hcfD.png|center]] | |colspan="4" | [[image:OShermie02_hcfD.png|center]] | ||
|- | |- | ||
! qcb+[[image:snka.gif]] | ! qcb + [[image:snka.gif]] | ||
|align="center"| 14/8/4/16/18 | |align="center"| 14/8/4/16/18 | ||
|align="center"| | |align="center"| | ||
| Line 259: | Line 256: | ||
|valign="bottom" style="border-right:0px; border-left:0px;"| [[image:OShermie02_qcbA2.png|center]] | |valign="bottom" style="border-right:0px; border-left:0px;"| [[image:OShermie02_qcbA2.png|center]] | ||
|colspan="2" valign="bottom" style="border-left:0px;"| [[image:OShermie02_qcbA3.png|center]] | |colspan="2" valign="bottom" style="border-left:0px;"| [[image:OShermie02_qcbA3.png|center]] | ||
|rowspan="2"| | |rowspan="2"| Yatanagi no Muchi - qcb + P | ||
Two-step projectile with a limited distance. The strong version reaches farther. | |||
|- | |- | ||
! qcb+[[image:snkc.gif]] | ! qcb + [[image:snkc.gif]] | ||
|align="center"| 16/8/4/16/22 | |align="center"| 16/8/4/16/22 | ||
|align="center"| | |align="center"| | ||
| Line 270: | Line 269: | ||
|colspan="2" valign="bottom" style="border-left:0px;"| [[image:OShermie02_qcbC3.png|center]] | |colspan="2" valign="bottom" style="border-left:0px;"| [[image:OShermie02_qcbC3.png|center]] | ||
|- | |- | ||
! <br>qcb+[[image:snkb.gif]]<br><br> | ! <br>qcb + [[image:snkb.gif]]<br><br> | ||
|align="center"| 5 | |align="center"| 5 + 7+2, 3, 3, 3, 3, 3, 3, 3, 3, 3, 3+2+13 | ||
|align="center"| | |align="center"| | ||
|align="center"| | |align="center"| | ||
|align="center"| HL | |align="center"| HL | ||
|rowspan="2" colspan="4" | [[image:OShermie02_qcbK.png|center]] | |rowspan="2" colspan="4" | [[image:OShermie02_qcbK.png|center]] | ||
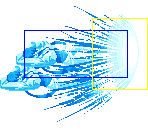
|rowspan="2"| | |rowspan="2"| Shajitsu no Odori - qcb + K | ||
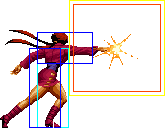
A multi-hit rushing move (looks an awful lot like Axle Spin Kick... with lightning). It doesn’t do knockdown, even on a successful hit, but as long as the opponent isn’t cornered, it is hard for them to serve you a severe counterattack if it is blocked. | |||
|- | |- | ||
! qcb+[[image:snkd.gif]] | ! qcb + [[image:snkd.gif]] | ||
|align="center"| 9 | |align="center"| 9 + 9+2, 3, 3, 3, 3, 3, 3, 3, 3, 3, 2+2+15 | ||
|align="center"| | |align="center"| | ||
|align="center"| | |align="center"| | ||
|align="center"| HL | |align="center"| HL | ||
|- | |- | ||
! | ! air qcf + [[image:snkb.gif]] | ||
|align="center"| 26/7/11 | |align="center"| 26/7/11 | ||
|align="center"| | |align="center"| | ||
| Line 290: | Line 291: | ||
|align="center"| H | |align="center"| H | ||
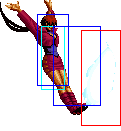
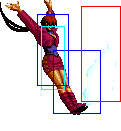
|colspan="4" | [[image:OShermie02_jqcfB.png|center]] | |colspan="4" | [[image:OShermie02_jqcfB.png|center]] | ||
|rowspan="2"| | |rowspan="2"| Raijin no Tsue - air qcf + K | ||
A move that attempts to trample the opponent underfoot while advancing forward a little in midair. It is an overhead, and if it hits, it does unrollable knockdown, but it leaves you pretty open. | |||
|- | |- | ||
! | ! air qcf + [[image:snkd.gif]] | ||
|align="center"| 32/7/13 | |align="center"| 32/7/13 | ||
|align="center"| | |align="center"| | ||
| Line 301: | Line 304: | ||
|colspan="10" align="center"| '''DMs''' | |colspan="10" align="center"| '''DMs''' | ||
|- | |- | ||
! <br> | ! <br>qcf qcf + [[image:snka.gif]]<br><br> | ||
|align="center"| ( {1 + 28 | |align="center"| ( {1 + 28 + 3} + 1, 1+4, 5, 4, 5, 4, 5, 4, 5, 4, 7+27) | ||
|align="center"| | |align="center"| | ||
|align="center"| | |align="center"| | ||
|align="center"| HL | |align="center"| HL | ||
|rowspan="2" colspan="4" | [[image:OShermie02_qcfx2P.png|center]] | |rowspan="2" colspan="4" | [[image:OShermie02_qcfx2P.png|center]] | ||
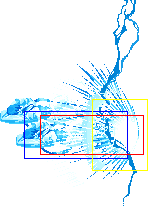
|rowspan="2"| | |rowspan="2"| Ankoku Raikou Ken - qcf qcf + P | ||
Takes the form of Benimaru’s Raikōken. The startup is extremely fast. The normal version does five hits, the MAX version does eight. It does not do knockdown if the last one doesn’t hit. | |||
|- | |- | ||
! | ! qcf qcf + [[image:snkc.gif]] | ||
|align="center"| ( {1 + 28 | |align="center"| ( {1 + 28 + 7} + 1, 1+4, 5, 4, 5, 4, 5, 4, 5, 4, 11+27) | ||
|align="center"| | |align="center"| | ||
|align="center"| | |align="center"| | ||
|align="center"| HL | |align="center"| HL | ||
|- | |- | ||
! <br> | ! <br>qcf qcf + [[image:snkb.gif]]<br><br> | ||
|align="center"| ( {1 + 28 | |align="center"| ( {1 + 28 + 12}, 28, 11+25) ( {1 + 28 + 12} + 3, 1, 3, 1, 3, 1, 3, 1, 3, 1, 3, 1, 3, 1, 11+25) | ||
|align="center"| | |align="center"| | ||
|align="center"| | |align="center"| | ||
| Line 322: | Line 327: | ||
|rowspan="2" colspan="2" valign="bottom" style="border-right:0px;"| [[image:OShermie02_qcfx2K1.png|center]] | |rowspan="2" colspan="2" valign="bottom" style="border-right:0px;"| [[image:OShermie02_qcfx2K1.png|center]] | ||
|rowspan="2" colspan="2" valign="bottom" style="border-left:0px;"| [[image:OShermie02_qcfx2K2.png|center]] | |rowspan="2" colspan="2" valign="bottom" style="border-left:0px;"| [[image:OShermie02_qcfx2K2.png|center]] | ||
|rowspan="2"| | |rowspan="2"| Shukumei, Gen'ei, Shinshi - qcf qcf + K | ||
A multi-hit rushing move. It has startup invincibility. The normal weak version (and only that version) will combo from strong attacks when very close. It goes through the opponent regardless of whether it hits or is blocked. | |||
|- | |- | ||
! | ! qcf qcf + [[image:snkd.gif]] | ||
|align="center"| ( {1 + 28 | |align="center"| ( {1 + 28 + 15}, 36, 11+28) ( {1 + 28 + 15} + 3, 1, 3, 1, 3, 1, 3, 1, 7, 1, 3, 1, 3, 1, 3, 1, 11+28) | ||
|align="center"| | |align="center"| | ||
|align="center"| | |align="center"| | ||
| Line 332: | Line 339: | ||
|colspan="10" align="center"| '''SDMs''' | |colspan="10" align="center"| '''SDMs''' | ||
|- | |- | ||
! | ! MAX: qcf qcf + [[image:punch.gif]] | ||
|align="center"| ( {1 + 28 | |align="center"| ( {1 + 28} + 4, {[1](0, 1+6), [2](4, 1+6), [3](8, 1+6), [4](12, 1+6), [5](16, 1+6), [6](20, 1+6), [7](24, 1+6), [8](28, 1+6)}, 25+27) | ||
|align="center"| | |align="center"| | ||
|align="center"| | |align="center"| | ||
| Line 339: | Line 346: | ||
|colspan="2" valign="bottom" style="border-right:0px;"| [[image:OShermie02_qcfx2AC1.png|center]] | |colspan="2" valign="bottom" style="border-right:0px;"| [[image:OShermie02_qcfx2AC1.png|center]] | ||
|colspan="2" valign="bottom" style="border-left:0px;"| [[image:OShermie02_qcfx2AC2.png|center]] | |colspan="2" valign="bottom" style="border-left:0px;"| [[image:OShermie02_qcfx2AC2.png|center]] | ||
| | | Ankoku Raikou Ken - MAX: qcf qcf P | ||
See DM description above. | |||
|- | |- | ||
! | ! MAX: qcf qcf + [[image:kick.gif]] | ||
|align="center"| ( {1 + 28 | |align="center"| ( {1 + 28 + 11} + 3, 1, 3, 1, 3, 1, 3, 1, 3, 1, 3, 1, 3, 1, 3, 1, 3, 1, 11+32) | ||
|align="center"| | |align="center"| | ||
|align="center"| | |align="center"| | ||
| Line 348: | Line 357: | ||
|colspan="2" valign="bottom" style="border-right:0px;"| [[image:OShermie02_qcfx2BD1.png|center]] | |colspan="2" valign="bottom" style="border-right:0px;"| [[image:OShermie02_qcfx2BD1.png|center]] | ||
|colspan="2" valign="bottom" style="border-left:0px;"| [[image:OShermie02_qcfx2BD2.png|center]] | |colspan="2" valign="bottom" style="border-left:0px;"| [[image:OShermie02_qcfx2BD2.png|center]] | ||
| | | Shukumei, Gen'ei, Shinshi - MAX: qcf qcf + K | ||
See DM description above. | |||
|- | |- | ||
|} | |} | ||
== The basics == | |||
At far to mid range, zoning is done with Mugetsu no Raiun (hcf + P/K), but if you make it just a little too close, or use the A version, the opponent can be expected to roll or jump in, to give you a hard time. Though you should put it right on the opponent’s location sometimes (all bluff is no bluff at all!). Whiff canceling from cr.C, st.B, st.CD, and such is also essential feinting. | |||
It is also essential to occasionally zone/feint with Yatanagi no Muchi (qcb + P) and Shajitsu no Odori (qcb + K). You can whiff-cancel these, too. In addition, during a backstep, doing Raijin no Tsue (air qcf + K) so that the very tip will touch is also powerful. The hitbox alone is strong, so just take care to use it so that you don’t expose an opening. | |||
You can also use Mugetsu no Raiun (hcf + P/K), mostly A, in block strings from st.CD, cr.C, and (other) cancelable normals, to clam up the opponent. However, you have to be careful, because if the opponent reads ahead just right, they can use invincible and/or quick-startup moves to counter. | |||
For anti-air, don’t use anything but A-Mugetsu no Raiun (hcf + A) and supers. In the case of supers, you have to be careful, because if you don’t take good aim, you could be taking a counter-hit. | |||
Shukumei, Gen'ei, Shinshi ((S)DM qcf qcf + K) can be used for interrupting and for reversals; the startup is slow, so if you are not careful, you will get burned. | |||
Canceling j.CD into Raijin no Tsue (air qcf + K) can be unexpectedly effective. Use it more than twice against one player, though, and it’s counter paradise. Choose it according to the opponent, if you can. | |||
== Fastest Attacks == | |||
* 0F: C throw; D throw | |||
* 1F: - | |||
* 2F: - | |||
* 3F: - | |||
* 4F: '''''cl.C'''''; '''''cr.C''''' | |||
* 5F: '''''cl.A'''''; '''''cl.B'''''; '''''st.A'''''; '''''st.B'''''; '''''cr.A'''''; cr.B | |||
* 6F: - | |||
* 7F: - | |||
* 8F: cl.D; st.D | |||
* 9F: - | |||
* 10F: cr.D | |||
==Combos== | |||
* cl.C / cr.C > | |||
** (S)DM qcf qcf + P | |||
** (S)DM qcf qcf + B | |||
** f + B (2 hits) > qcb + C | |||
* cr.A, cr.A / st.A > (S)DM qcf qcf + P | |||
* cr.B, st.B (1 hit) > (S)DM qcf qcf + P | |||
* hcf + P/K (Hit back on opponent.), any combo | |||
* Simple buffer: | |||
** cl.A > (S)DM qcf qcf + P | |||
*** qcf + A > qcf + P | |||
** cr.B, st.B (1 hit) > (S)DM qcf qcf + P | |||
*** cr.B, qcf + B > qcf + P (As cr.B is not cancelable, qcf + B will chain into a normal attack.) | |||
** cl.C > (S)DM qcf qcf + P | |||
*** qcf + C > qcf + P | |||
** cl.C > (S)DM qcf qcf + B | |||
*** qcf + C > qcf + B | |||
{{StrategyCorner| | |||
* MAX: cl.C > {{f}} + B (2 hits) > {{qcb}} + P | |||
deals ??? than | |||
* cl.C > {{qcf}} {{qcf}} + P | |||
Keep this in mind, when you need to decide whether to trigger MAX or keep meter for a DM. | |||
}} | |||
== Links == | |||
{{Navbox-KOF98}} | |||
[[Category:The King of Fighters '98: The Slugfest]] | [[Category:The King of Fighters '98: The Slugfest]] | ||
Latest revision as of 04:18, 1 January 2021
Introduction
Colors
Gameplay Overview
The majority of her special moves are for zoning; wedging them in at point blank is a problem. If you make a tiny mistake in reading the opponent, it resounds in a big way, so this character is not really oriented towards beginners. her normal and command moves are the same as the normal Shermie's.
In-depth Analysis
Movelist
The basics
At far to mid range, zoning is done with Mugetsu no Raiun (hcf + P/K), but if you make it just a little too close, or use the A version, the opponent can be expected to roll or jump in, to give you a hard time. Though you should put it right on the opponent’s location sometimes (all bluff is no bluff at all!). Whiff canceling from cr.C, st.B, st.CD, and such is also essential feinting.
It is also essential to occasionally zone/feint with Yatanagi no Muchi (qcb + P) and Shajitsu no Odori (qcb + K). You can whiff-cancel these, too. In addition, during a backstep, doing Raijin no Tsue (air qcf + K) so that the very tip will touch is also powerful. The hitbox alone is strong, so just take care to use it so that you don’t expose an opening.
You can also use Mugetsu no Raiun (hcf + P/K), mostly A, in block strings from st.CD, cr.C, and (other) cancelable normals, to clam up the opponent. However, you have to be careful, because if the opponent reads ahead just right, they can use invincible and/or quick-startup moves to counter.
For anti-air, don’t use anything but A-Mugetsu no Raiun (hcf + A) and supers. In the case of supers, you have to be careful, because if you don’t take good aim, you could be taking a counter-hit.
Shukumei, Gen'ei, Shinshi ((S)DM qcf qcf + K) can be used for interrupting and for reversals; the startup is slow, so if you are not careful, you will get burned.
Canceling j.CD into Raijin no Tsue (air qcf + K) can be unexpectedly effective. Use it more than twice against one player, though, and it’s counter paradise. Choose it according to the opponent, if you can.
Fastest Attacks
- 0F: C throw; D throw
- 1F: -
- 2F: -
- 3F: -
- 4F: cl.C; cr.C
- 5F: cl.A; cl.B; st.A; st.B; cr.A; cr.B
- 6F: -
- 7F: -
- 8F: cl.D; st.D
- 9F: -
- 10F: cr.D
Combos
- cl.C / cr.C >
- (S)DM qcf qcf + P
- (S)DM qcf qcf + B
- f + B (2 hits) > qcb + C
- cr.A, cr.A / st.A > (S)DM qcf qcf + P
- cr.B, st.B (1 hit) > (S)DM qcf qcf + P
- hcf + P/K (Hit back on opponent.), any combo
- Simple buffer:
- cl.A > (S)DM qcf qcf + P
- qcf + A > qcf + P
- cr.B, st.B (1 hit) > (S)DM qcf qcf + P
- cr.B, qcf + B > qcf + P (As cr.B is not cancelable, qcf + B will chain into a normal attack.)
- cl.C > (S)DM qcf qcf + P
- qcf + C > qcf + P
- cl.C > (S)DM qcf qcf + B
- qcf + C > qcf + B
- cl.A > (S)DM qcf qcf + P
Strategy Corner
- MAX: cl.C >
 + B (2 hits) >
  + P
+ P
deals ??? than
- cl.C >

 + P
+ P
Keep this in mind, when you need to decide whether to trigger MAX or keep meter for a DM.
