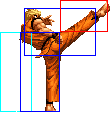
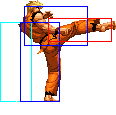
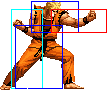
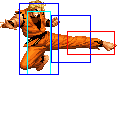
| (15 intermediate revisions by 5 users not shown) | |||
| Line 1: | Line 1: | ||
[[image:ryo98_stance.gif|right]] | [[image:ryo98_stance.gif|right]] | ||
==Gameplay | ==Gameplay Overview== | ||
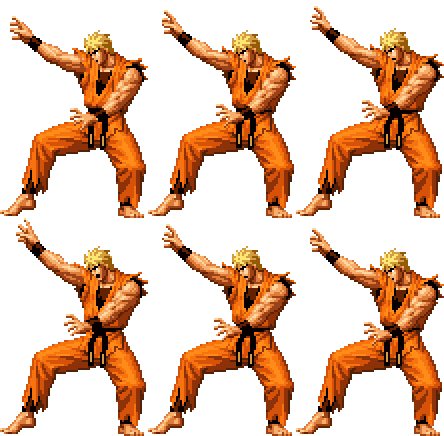
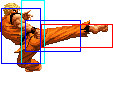
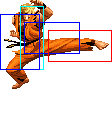
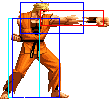
'94 Ryo trades '98 Ryo's versatility and mix up options for a zoning centered, shoto esque gameplay style. His main weapons and what differences him from his regular counterpart are his high-priority, low-risk DP and a long range fireball. He can still be used as a poking, pressure character like '98 Ryo, only not as effectively. | '94 Ryo trades '98 Ryo's versatility and mix up options for a zoning centered, shoto esque gameplay style. His main weapons and what differences him from his regular counterpart are his high-priority, low-risk DP and a long range fireball. He can still be used as a poking, pressure character like '98 Ryo, only not as effectively. | ||
| Line 17: | Line 17: | ||
|} | |} | ||
==[[ | ==[[The King of Fighters 2002/Normals Guide|Movelist]]== | ||
{|border="1" | {|border="1" | ||
! | ! | ||
| Line 59: | Line 59: | ||
|align="center"| HL | |align="center"| HL | ||
|colspan="3" | [[image:Ryo98_clD.png|center]] | |colspan="3" | [[image:Ryo98_clD.png|center]] | ||
| | |Cancelable. cl.C is better | ||
|- | |- | ||
|colspan="9" align="center"| '''Standing Far''' | |colspan="9" align="center"| '''Standing Far''' | ||
| Line 94: | Line 94: | ||
|valign="bottom" style="border-right:0px;"| [[image:Ryo98_stD1.png|center]] | |valign="bottom" style="border-right:0px;"| [[image:Ryo98_stD1.png|center]] | ||
|colspan="2" valign="bottom" style="border-left:0px;"| [[image:Ryo98_stD2.png|center]] | |colspan="2" valign="bottom" style="border-left:0px;"| [[image:Ryo98_stD2.png|center]] | ||
| | |long poke. anti-air on 1st hit | ||
|- | |- | ||
! [[image:snkc.gif]]+[[image:snkd.gif]] | ! [[image:snkc.gif]]+[[image:snkd.gif]] | ||
| Line 129: | Line 129: | ||
|valign="bottom" style="border-right:0px;"| [[image:Ryo98_crC1.png|center]] | |valign="bottom" style="border-right:0px;"| [[image:Ryo98_crC1.png|center]] | ||
|colspan="2" valign="bottom" style="border-left:0px;"| [[image:Ryo98_crC2.png|center]] | |colspan="2" valign="bottom" style="border-left:0px;"| [[image:Ryo98_crC2.png|center]] | ||
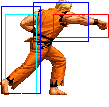
|align="left"|Extremely fast for ground-to-ground situations. A great pressure tool; you will be cancelling it into qcf+P a lot. Links from cr.B/cr.A. Works very well as an anti-air too. | |align="left"|Extremely fast for ground-to-ground situations. A great pressure tool; you will be cancelling it into qcf + P a lot. Links from cr.B/cr.A. Works very well as an anti-air too. | ||
|- | |- | ||
! [[image:snkd.gif]] | ! [[image:snkd.gif]] | ||
| Line 137: | Line 137: | ||
|align="center"| L | |align="center"| L | ||
|colspan="3" | [[image:Ryo98_crD.png|center]] | |colspan="3" | [[image:Ryo98_crD.png|center]] | ||
| | |sweep attack. cancelable | ||
|- | |- | ||
|colspan="9" align="center"| '''Jump''' | |colspan="9" align="center"| '''Jump''' | ||
| Line 163: | Line 163: | ||
|align="center"| H | |align="center"| H | ||
|colspan="3" | [[image:Ryo98_jC.png|center]] | |colspan="3" | [[image:Ryo98_jC.png|center]] | ||
| | |Ryo's main cross-up. Good jump-in (better than j.D) . | ||
|- | |- | ||
! [[image:snkd.gif]] | ! [[image:snkd.gif]] | ||
| Line 179: | Line 179: | ||
|align="center"| HL | |align="center"| HL | ||
|colspan="3"| [[image:Ryo98_jCD.png|center]] | |colspan="3"| [[image:Ryo98_jCD.png|center]] | ||
| | |Jump-in. | ||
|- | |- | ||
|colspan="9" align="center"| '''Command Normals''' | |colspan="9" align="center"| '''Command Normals''' | ||
|- | |- | ||
! f+[[image:snka.gif]]<br><br> | ! f + [[image:snka.gif]]<br><br> | ||
|align="center"| 17/9/11 | |align="center"| 17/9/11 | ||
| | | | ||
| Line 191: | Line 191: | ||
|rowspan="2" align="left"|Overhead, excellent used as a meaty attack. | |rowspan="2" align="left"|Overhead, excellent used as a meaty attack. | ||
|- | |- | ||
! f+[[image:snka.gif]]<br>(cancel) | ! f + [[image:snka.gif]]<br>(cancel) | ||
| | | | ||
| | | | ||
| Line 199: | Line 199: | ||
|colspan="9" align="center"| '''Special Moves''' | |colspan="9" align="center"| '''Special Moves''' | ||
|- | |- | ||
! <br>qcf+[[image:snka.gif]]<br><br> | ! <br>qcf + [[image:snka.gif]]<br><br> | ||
|align="center"| 13/36 | |align="center"| 13/36 | ||
| | | | ||
| Line 205: | Line 205: | ||
|align="center"| HL | |align="center"| HL | ||
|rowspan="2" colspan="3"| [[image:ORyo98_qcfP.png|center]] | |rowspan="2" colspan="3"| [[image:ORyo98_qcfP.png|center]] | ||
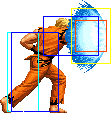
|rowspan="2" align="left"|'''Ko ou Ken (qcf+P)''' | |rowspan="2" align="left"|'''Ko ou Ken (qcf + P)''' | ||
*A good full screen projectile. Can miss small crouching characters next to you, so be careful against them. | *A good full screen projectile. Can miss small crouching characters next to you, so be careful against them. | ||
|- | |- | ||
! qcf+[[image:snkc.gif]] | ! qcf + [[image:snkc.gif]] | ||
|align="center"| 13/38 | |align="center"| 13/38 | ||
| | | | ||
| Line 214: | Line 214: | ||
|align="center"| HL | |align="center"| HL | ||
|- | |- | ||
! dp+[[image:snka.gif]] | ! dp + [[image:snka.gif]] | ||
|align="center"| 2/3+12/21 | |align="center"| 2/3+12/21 | ||
| | | | ||
| Line 221: | Line 221: | ||
|valign="bottom" style="border-right:0px;"| [[image:ORyo98_dpA1.png|center]] | |valign="bottom" style="border-right:0px;"| [[image:ORyo98_dpA1.png|center]] | ||
|colspan="2" valign="bottom" style="border-left:0px;"| [[image:ORyo98_dpA2.png|center]] | |colspan="2" valign="bottom" style="border-left:0px;"| [[image:ORyo98_dpA2.png|center]] | ||
|rowspan="2" align="left"|'''Kohou (dp+P)''' | |rowspan="2" align="left"|'''Kohou (dp + P)''' | ||
* The A version is one of the best, if not the best, anti-airs in the game. Like Ryu's DP in SF, it has good startup invincibility, has better range than regular Ryo's DP and it's hard to punish. EX Ryo's main strength compared to his normal version. | * The A version is one of the best, if not the best, anti-airs in the game. Like Ryu's DP in SF, it has good startup invincibility, has better range than regular Ryo's DP and it's hard to punish. EX Ryo's main strength compared to his normal version. | ||
|- | |- | ||
! dp+[[image:snkc.gif]] | ! dp + [[image:snkc.gif]] | ||
|align="center"| 5/3+17/28 | |align="center"| 5/3+17/28 | ||
| | | | ||
| Line 232: | Line 232: | ||
|colspan="2" valign="bottom" style="border-left:0px;"| [[image:ORyo98_dpC2.png|center]] | |colspan="2" valign="bottom" style="border-left:0px;"| [[image:ORyo98_dpC2.png|center]] | ||
|- | |- | ||
! <br> | ! <br>air qcf + [[image:snka.gif]]<br><br> | ||
|align="center"| 14/18+2+~10 | |align="center"| 14/18+2+~10 | ||
| | | | ||
| Line 238: | Line 238: | ||
|align="center"| HL | |align="center"| HL | ||
|rowspan="2" colspan="3"| [[image:ORyo98_jqcfP.png|center]] | |rowspan="2" colspan="3"| [[image:ORyo98_jqcfP.png|center]] | ||
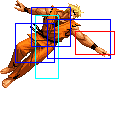
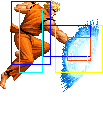
|rowspan="2" align="left"|'''Kuuchuu Ko ou Ken ( | |rowspan="2" align="left"|'''Kuuchuu Ko ou Ken (Air qcf + P)''' | ||
*An Akuma-esque diagonal air fireball. It's not as safe as Akuma's, because Ryo 'hangs' up a bit while performing it, giving your opponent the chance to roll and punish. Use it mainly to punish baited anti-airs. | *An Akuma-esque diagonal air fireball. It's not as safe as Akuma's, because Ryo 'hangs' up a bit while performing it, giving your opponent the chance to roll and punish. Use it mainly to punish baited anti-airs. | ||
|- | |- | ||
! | ! air qcf + [[image:snkc.gif]] | ||
|align="center"| 14/20+2+~10 | |align="center"| 14/20+2+~10 | ||
| | | | ||
| Line 247: | Line 247: | ||
|align="center"| HL | |align="center"| HL | ||
|- | |- | ||
! hcb+[[image:snkb.gif]] | ! hcb + [[image:snkb.gif]] | ||
|align="left"| | |align="left"| | ||
| | | | ||
| Line 255: | Line 255: | ||
|colspan="2" valign="bottom" style="border-left:0px;"| [[image:ORyo98_hcbB2.png|center]] | |colspan="2" valign="bottom" style="border-left:0px;"| [[image:ORyo98_hcbB2.png|center]] | ||
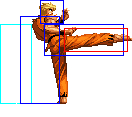
|rowspan="2" align="left"|'''Hien Shippuu Kyaku (hcb + K)''' | |rowspan="2" align="left"|'''Hien Shippuu Kyaku (hcb + K)''' | ||
*Both versions are unsafe and easily punishable when blocked, so use them mainly in combos. | *Both versions are unsafe and easily punishable when blocked, so use them mainly in combos. The B version can sometimes be useful to catch jumping enemies that are outside the range of your DP. Still, be careful when using it. | ||
|- | |- | ||
! hcb+[[image:snkd.gif]] | ! hcb + [[image:snkd.gif]] | ||
| | | | ||
| | | | ||
| Line 266: | Line 266: | ||
|valign="bottom" style="border-left:0px;"| [[image:ORyo98_hcbD3.png|center]] | |valign="bottom" style="border-left:0px;"| [[image:ORyo98_hcbD3.png|center]] | ||
|- | |- | ||
! <br>f | ! <br>f b f + [[image:snka.gif]]<br><br> | ||
|align="center"| 13/43/18 | |align="center"| 13/43/18 | ||
| | | | ||
| Line 274: | Line 274: | ||
|rowspan="2" valign="bottom" style="border-right:0px; border-left:0px;"| [[image:ORyo98_fbfP2.png|center]] | |rowspan="2" valign="bottom" style="border-right:0px; border-left:0px;"| [[image:ORyo98_fbfP2.png|center]] | ||
|rowspan="2" valign="bottom" style="border-left:0px;"| [[image:ORyo98_fbfP3.png|center]] | |rowspan="2" valign="bottom" style="border-left:0px;"| [[image:ORyo98_fbfP3.png|center]] | ||
|rowspan="2" align="left"|'''Zanretsu Ken (f | |rowspan="2" align="left"|'''Zanretsu Ken (f b f + P)''' | ||
*Ryo doesn't have much of a use for this move. As an anti-air it's an inferior option, it doesn't deal a lot of damage, and it leaves you open for a long time with a ' | *Ryo doesn't have much of a use for this move. As an anti-air it's an inferior option, it doesn't deal a lot of damage, and it leaves you open for a long time with a 'Please do a max damage combo and kill me' sign in your head. Avoid. | ||
|- | |- | ||
! f | ! f b f + [[image:snkc.gif]] | ||
|align="center"| 13/87/20 | |align="center"| 13/87/20 | ||
| | | | ||
| Line 287: | Line 287: | ||
===Desperation Moves=== | ===Desperation Moves=== | ||
'''Ryuuko Ranbu (qcf | |||
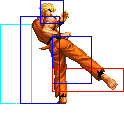
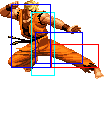
* '''Ryuuko Ranbu (qcf hcb + P)''' - A multi hit DM. If blocked, Ryo will keep pulling attacks as if it connected, but omitting his finishing DP. This is mostly bad, as it will leave you open for a long time after it finishes, and your opponent can just Guard Cancel Roll and punish you if he has a free stock. Still, if your opponent has no stock and very little bar left, a blocked Ryuuko Ranbu (after a blocked cl.C for example) can finish him off thanks to the chip damage it deals. | |||
Useful mainly in combos. | Useful mainly in combos. | ||
| Line 293: | Line 294: | ||
A version comes out faster and covers less distance, C version is the opposite. MAX version does more hits. | A version comes out faster and covers less distance, C version is the opposite. MAX version does more hits. | ||
'''Haou Shoukou Ken (f | |||
* '''Haou Shoukou Ken (f hcf + P)''' - A bigger, more damaging Ko ou Ken. Goes through normal projectiles. A version is slower, and is sometimes difficult to evade if your opponent doesn't guess which version you are doing. An early roll or jump expecting a C version will fall directly into it. | |||
C version travels faster, and is sometimes good to use it as a counter to normal projectiles. Just be aware of its startup, so fast projectiles could hit you before you pull it. | C version travels faster, and is sometimes good to use it as a counter to normal projectiles. Just be aware of its startup, so fast projectiles could hit you before you pull it. | ||
| Line 303: | Line 305: | ||
==Combos== | ==Combos== | ||
*cr.B, cr.C | * cr.A / cr.B x 2, st.A > | ||
** hcb + B | |||
* cr.B, cr.A/cl.A > | |||
** hcb + D (Very close.) | |||
** hcb + B | |||
* (cr.B (optional), cr.C) / cl.C, | |||
** DM qcf hcb + P | |||
** DM f hcf + A | |||
** hcb + D | |||
** f + A | |||
{{StrategyCorner| | |||
* MAX: cl.C > {{hcb}} + D | |||
deals ??? than | |||
* cl.C > {{qcf}} {{hcb}} + P | |||
Keep this in mind, when you need to decide whether to trigger MAX or keep meter for a DM. | |||
}} | |||
== Links == | |||
{{ | {{Navbox-KOF98}} | ||
[[Category:The King of Fighters '98: The Slugfest]] | [[Category:The King of Fighters '98: The Slugfest]] | ||
Latest revision as of 01:13, 24 February 2021
Gameplay Overview
'94 Ryo trades '98 Ryo's versatility and mix up options for a zoning centered, shoto esque gameplay style. His main weapons and what differences him from his regular counterpart are his high-priority, low-risk DP and a long range fireball. He can still be used as a poking, pressure character like '98 Ryo, only not as effectively.
Colors

|

|

|

|
Movelist
Desperation Moves
- Ryuuko Ranbu (qcf hcb + P) - A multi hit DM. If blocked, Ryo will keep pulling attacks as if it connected, but omitting his finishing DP. This is mostly bad, as it will leave you open for a long time after it finishes, and your opponent can just Guard Cancel Roll and punish you if he has a free stock. Still, if your opponent has no stock and very little bar left, a blocked Ryuuko Ranbu (after a blocked cl.C for example) can finish him off thanks to the chip damage it deals.
Useful mainly in combos.
A version comes out faster and covers less distance, C version is the opposite. MAX version does more hits.
- Haou Shoukou Ken (f hcf + P) - A bigger, more damaging Ko ou Ken. Goes through normal projectiles. A version is slower, and is sometimes difficult to evade if your opponent doesn't guess which version you are doing. An early roll or jump expecting a C version will fall directly into it.
C version travels faster, and is sometimes good to use it as a counter to normal projectiles. Just be aware of its startup, so fast projectiles could hit you before you pull it.
Both versions can be good to catch jumping opponents.
MAX versions are bigger and deal more damage / hits. The A version has the same speed as the C version.
Combos
- cr.A / cr.B x 2, st.A >
- hcb + B
- cr.B, cr.A/cl.A >
- hcb + D (Very close.)
- hcb + B
- (cr.B (optional), cr.C) / cl.C,
- DM qcf hcb + P
- DM f hcf + A
- hcb + D
- f + A
Strategy Corner
- MAX: cl.C >
 + D
+ D
deals ??? than
- cl.C >

 + P
+ P
Keep this in mind, when you need to decide whether to trigger MAX or keep meter for a DM.
