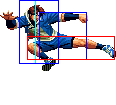
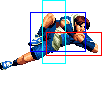
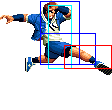
No edit summary |
(dumpling super) |
||
| (33 intermediate revisions by 6 users not shown) | |||
| Line 1: | Line 1: | ||
[[image:Kensou98_stance.gif|right]] | |||
==Introduction== | ==Introduction== | ||
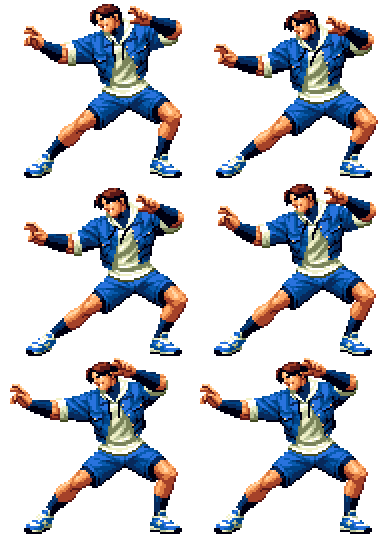
Kensou is Chinese, which means he's really cheap in fighting games. That's good, because he's in a fighting game. This one. KOF98. His favorite food is giant dinosaur eggs, which he eats during one of his supers. He can unleash the power of the dinosaur with various dinosaur moves, like his Dinosaur Kick or Dinosaur Fireball or Dinosaur Sweep. | Kensou is Chinese, which means he's really cheap in fighting games. That's good, because he's in a fighting game. This one. KOF98. His favorite food is giant dinosaur eggs, which he eats during one of his supers. He can unleash the power of the dinosaur with various dinosaur moves, like his Dinosaur Kick or Dinosaur Fireball or Dinosaur Sweep. | ||
===Colors=== | |||
{| | |||
! [[image:snka.gif]] | |||
! [[image:snkb.gif]] | |||
! [[image:snkc.gif]] | |||
! [[image:snkd.gif]] | |||
|- | |||
| [[image:Kensou98_colorA.png]] | |||
| [[image:Kensou98_colorB.png]] | |||
| [[image:Kensou98_colorC.png]] | |||
| [[image:Kensou98_colorD.png]] | |||
|} | |||
==Gameplay Overview== | ==Gameplay Overview== | ||
| Line 6: | Line 19: | ||
==In-depth Analysis== | ==In-depth Analysis== | ||
===[[The King of Fighters 2002/Normals Guide|Movelist]]=== | |||
{|border="1" | |||
!width="8%"| | |||
! Frames | |||
! Advantage | |||
! Cancel | |||
! Block | |||
!colspan="2"| Hitbox | |||
! Notes | |||
|- | |||
|colspan="8" align="center"| '''Standing Close''' | |||
|- | |||
! [[image:snka.gif]] | |||
|align="center"| 5/4/5 | |||
|align="center"| +3/+1 | |||
|align="center"| C | |||
|align="center"| HL | |||
|colspan="2" | [[image:Kensou98_stA.png|center]] | |||
| Identical to standing far A | |||
|- | |||
! [[image:snkb.gif]] | |||
|align="center"| 4/5/6 | |||
|align="center"| +1/-1 | |||
|align="center"| C | |||
|align="center"| HL | |||
|colspan="2" | [[image:Kensou98_clB.png|center]] | |||
| Good combo filler, chainable from lights and cancelable. | |||
|- | |||
! [[image:snkc.gif]] | |||
|align="center"| 8/7/15 | |||
|align="center"| -2/-4 | |||
|align="center"| C | |||
|align="center"| HL | |||
|colspan="2" | [[image:Kensou98_clC.png|center]] | |||
| | |||
|- | |||
! [[image:snkd.gif]] | |||
|align="center"| 5/10/16 | |||
|align="center"| -6/-8 | |||
|align="center"| C | |||
|align="center"| HL | |||
|colspan="2" | [[image:Kensou98_clD.png|center]] | |||
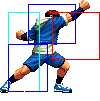
| Kensou's fastest comboable heavy attack. The best close-up meaty as is it cancelable. | |||
|- | |||
|colspan="8" align="center"| '''Standing Far''' | |||
|- | |||
! [[image:snka.gif]] | |||
|align="center"| 5/4/5 | |||
|align="center"| +3/+1 | |||
|align="center"| C | |||
|align="center"| HL | |||
|colspan="2" | [[image:Kensou98_stA.png|center]] | |||
| Can be used as an anti-air vs short hop. | |||
|- | |||
! [[image:snkb.gif]] | |||
|align="center"| 5/5/7 | |||
|align="center"| 0/-2 | |||
|align="center"| - | |||
|align="center"| HL | |||
|colspan="2" | [[image:Kensou98_stB.png|center]] | |||
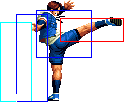
| An awesome fast/long range mid poke. Whenever Kensou is at the max range if his st.B, you should probably be doing st.B. Anti-air vs short hop. | |||
|- | |||
! [[image:snkc.gif]] | |||
|align="center"| 13/5(10)6/19 | |||
|align="center"| -5/-7 | |||
|align="center"| -/C | |||
|align="center"| HL/HL | |||
|valign="bottom" style="border-right:0px;"| [[image:Kensou98_stC1.png|center]] | |||
|valign="bottom" style="border-left:0px;"| [[image:Kensou98_stC2.png|center]] | |||
| 2nd hit is cancelable. Usually this move happens on accident, since it's really slow on startup. But if it does come out, you can cancel the 2nd hit into anything (even on whiff). So if it gets blocked you can cancel into fireball or something, and on hit you can confirm into his B kick super (qcf hcb + B). | |||
|- | |||
! [[image:snkd.gif]] | |||
|align="center"| 8/4/20 | |||
|align="center"| -4/-6 | |||
|align="center"| - | |||
|align="center"| HL | |||
|colspan="2"| [[image:Kensou98_stD.png|center]] | |||
| Imagine his st.B, but a bit shorter range and more recovery, but a higher hitbox for anti-air. A good poke, just be aware of the recovery. | |||
|- | |||
! [[image:snkc.gif]]+[[image:snkd.gif]] | |||
|align="center"| 20/7/19 | |||
|align="center"| KD/-4 | |||
|align="center"| S | |||
|align="center"| HL | |||
|colspan="2"| [[image:Kensou98_stCD.png|center]] | |||
| The startup looks much like his fireball, so you can use this to whiff cancel into a fireball or other moves as a fake-out. | |||
|- | |||
|colspan="8" align="center"| '''Crouching''' | |||
|- | |||
! [[image:snka.gif]] | |||
|align="center"| 3/4/5 | |||
|align="center"| +3/+1 | |||
|align="center"| C | |||
|align="center"| HL | |||
|colspan="2" | [[image:Kensou98_crA.png|center]] | |||
| Your #1 in-close poking tool. Use this in block strings to push them back into a st.B, then mixup and zone from there. | |||
|- | |||
! [[image:snkb.gif]] | |||
|align="center"| 6/4/5 | |||
|align="center"| +3/+1 | |||
|align="center"| - | |||
|align="center"| L | |||
|colspan="2" | [[image:Kensou98_crB.png|center]] | |||
| Well, it's low, but it's not very fast for a crouching B. | |||
|- | |||
! [[image:snkc.gif]] | |||
|align="center"| 7/8/13 | |||
|align="center"| -1/-3 | |||
|align="center"| C | |||
|align="center"| HL | |||
|colspan="2" | [[image:Kensou98_crC.png|center]] | |||
| An okay move, but you're better off using cl.D for combos or cr.D for zoning. | |||
|- | |||
! [[image:snkd.gif]] | |||
|align="center"| 7/7/19 | |||
|align="center"| KD/-8 | |||
|align="center"| C | |||
|align="center"| L | |||
|colspan="2" | [[image:Kensou98_crD.png|center]] | |||
| One of the best, arguably the best sweep in the game. Crouches extremely low like Leona's, and is cancelable. Easy to cancel in whiff as well. A prime zoning tool when used with fireballs. | |||
|- | |||
|colspan="8" align="center"| '''Jump''' | |||
|- | |||
! [[image:snka.gif]] | |||
|align="center"| 6/8 | |||
|align="center"| -/- | |||
|align="center"| C | |||
|align="center"| H | |||
|colspan="2" | [[image:Kensou98_jA.png|center]] | |||
| Cancelable. Use jumping B. | |||
|- | |||
! [[image:snkb.gif]] | |||
|align="center"| 6/8 | |||
|align="center"| -/- | |||
|align="center"| C | |||
|align="center"| H | |||
|colspan="2" | [[image:Kensou98_jB.png|center]] | |||
| Crosses up, cancelable, good air-to-air. | |||
|- | |||
! [[image:snkc.gif]] | |||
|align="center"| 6/9 | |||
|align="center"| -/- | |||
|align="center"| - | |||
|align="center"| H | |||
|colspan="2" | [[image:Kensou98_jC.png|center]] | |||
| Most damaging followup to his Punchy Throw if you want a reset. Other than that, not notable. | |||
|- | |||
! [[image:snkd.gif]] | |||
|align="center"| 6/6 | |||
|align="center"| -/- | |||
|align="center"| - | |||
|align="center"| H | |||
|colspan="2"| [[image:Kensou98_jD.png|center]] | |||
| Non-knockdown jump-in of choice, crosses up. | |||
|- | |||
! [[image:snkc.gif]]+[[image:snkd.gif]] | |||
|align="center"| 14/5 | |||
|align="center"| KD/- | |||
|align="center"| S | |||
|align="center"| HL | |||
|colspan="2"| [[image:Kensou98_jCD.png|center]] | |||
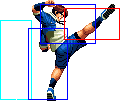
| Comes out fast for a CD. Very good air-to-air, especially from a super jump. Can even cross up (tight window). | |||
|- | |||
|colspan="8" align="center"| '''Neutral Jump''' | |||
|- | |||
! [[image:snkb.gif]] | |||
|align="center"| 6/8 | |||
|align="center"| -/- | |||
|align="center"| - | |||
|align="center"| H | |||
|colspan="2" | [[image:Kensou98_njB.png|center]] | |||
| | |||
|- | |||
|colspan="8" align="center"| '''Command Normals''' | |||
|- | |||
! <br>f + [[image:snka.gif]]<br><br> | |||
|align="center"| 21/12/13 | |||
|align="center"| -5/-7 | |||
|align="center"| - | |||
|align="center"| H | |||
|rowspan="2" colspan="2"| [[image:Kensou98_fA.png|center]] | |||
|rowspan="2"| Overhead. Faster, cancelable, and non-overhead when chained. This is good for block strings when chained, as it'll push very fast back to cancel into a fireball. | |||
|- | |||
! f + [[image:snka.gif]]<br>(cancel) | |||
|align="center"| 17/12/13 | |||
|align="center"| -5/-7 | |||
|align="center"| S | |||
|align="center"| HL | |||
|- | |||
! f + [[image:snkb.gif]] | |||
|align="center"| 12/6/13 | |||
|align="center"| +1/-1 | |||
|align="center"| - | |||
|align="center"| HL | |||
|colspan="2"| [[image:Kensou98_fB.png|center]] | |||
| Jumping kick move, knocks down if it his an airborne opponent. This also sets up for his pseudo-combos into his proximity unblockables if it hits (dp + P and qcf qcf + P). | |||
|} | |||
===Normal Throws=== | ===Normal Throws=== | ||
'''b or f+D''' - Breakable, forward knockdown, back turned, rollable. | * '''b or f + C''' - Breakable, forward knockdown, face forward, rollable. | ||
* '''b or f + D''' - Breakable, forward knockdown, back turned, rollable. | |||
Neither of them are very good. | Neither of them are very good. | ||
=== | ===Special Moves=== | ||
''' | * '''Fireball aka Choubyudaiya! (qcb + P)''' - It's a fireball! A goes slow, C goes fast. This is a very good zoning tool, but it's a little different from some other fireballs. First of all, Kensou crouches during the startup, and the fireball appears above his head. Because of this, you can use it as a very effective anti-air. Time it like you would a relatively early dp. Secondly, while this fireball occupies a very nice position on the screen, it's recovery is much worse than some other fireballs in KOF98. You can be hit and comboed from a lot of distances if your opponent jumps or super jumps over your fireball. In addition to this, some moves like Iori's Maiden Masher super or Chris's slide go under the fireball, so you must be aware of these matchups and learn to rely more on your good pokes. | ||
''' | * '''Scissor Upkicks (rdp + K)''' - Not invincible, but very fast and good priority. The D version doesn't knock down on the 1st or 2nd hit, so use that one as anti-air only. This move can also stop crossups, as his back leg has it's own hitbox on startup. | ||
''' | * '''Jump Kicky Move (hcf + P)''' - A version stays on the ground, C version flies diagonally up-forward. The C version has upper-body auto guard, and the A version shrinks his hitbox down on startup, but neither has invincibility. The A version is safe from some things, but still punishable by plenty of fast/ranged moves. C version is good anti-air. | ||
''' | * '''Dive Punch (air qcb + P)''' - Totally shitty ass unsafe move. Unsafe on hit, even. Some characters cannot really punish it, but anyone with a fast+long range move can. | ||
''' | * '''Panchy Throw (dp + P)''' - Proximity unblockable. This means you can only perform the move when the opponent is in a throw-able state (ie close, in hitstun, or out of blockstun). This allows you to 'safely' perform it or cancel moves into it on block and it will not execute as an automatic hit-check. This has invincibility on startup, but can trade. | ||
''' | ==Desperation Moves== | ||
* '''Ball Blast (qcf qcf + P)''' - Startup is invincible before the flash. Works like his Punchy Throw as a proximity unblockable. If your opponent doesn't do anything before the flash, it will hit, but it can still trade with moves after the flash if they attack beforehand. MAX version does more damage, and Kensou flies back after it's done. You can use recovery roll (AB as you touch the ground) to quick rise from the blow back. | |||
''' | * '''Kicky Super (qcf hcb + K)''' - Not Invincible, either version. B version is a good combo ender. MAX version does more damage. D and MAX versions whiff on crouchers. | ||
''' | * '''Bun Eatin (qcb qcb + P)''' - Kensou eats a hot bun and regains a very small amount of life (8). Pretty much asking to be comboed most of the time, but you can use it right before a time-up in a close match. Also, you can throw a A fireball from fullscreen and perform this super to make it unblockable. This could be used on someone who is turtling for a time-up win. MAX version refills more life (16) in the short-term before Kensou chokes on it and loses it all, giving the move a ton more recovery while actually healing less (1 net HP). | ||
== Fastest Attacks == | |||
''' | * 0F: C throw; D throw | ||
* 1F: - | |||
* 2F: - | |||
* 3F: '''cr.A''' | |||
* 4F: '''cl.B''' | |||
* 5F: '''cl.A'''; '''cl.D'''; '''st.A'''; st.B | |||
* 6F: cr.B | |||
* 7F: '''cr.C'''; '''cr.D''' | |||
* 8F: '''cl.C'''; st.D | |||
* 9F: - | |||
* 10F: - | |||
==Combos== | |||
* Best jump-ins: | |||
** j.D (Can crossup.) | |||
* cr.A / cr.B, cr.A > | |||
** (S)DM qcf qcf + P | |||
** Punchy Throw (dp + P > tap P rapidly), [junggler] | |||
Two weak attacks only on point blank. | |||
* cr.A / cr.B, cr.A, cr.A, st.B | |||
* Corner & out of MAX: cl.D > f + A > DM Kick Super (qcf hcb + K) | |||
* st.C (2 hits) > | |||
** (S)DM Kick Super (qcf hcb + K) | |||
** (S)DM qcf qcf + P | |||
** hcf + A | |||
* cl.D | |||
** (S)DM qcf hcb + K | |||
** (S)DM qcf qcf + P | |||
** Punchy Throw (dp + P > tap P rapidly), [junggler] | |||
** hcf + A | |||
* ... Punchy Throw (dp + P > tap P rapidly), | |||
** rdp + D (Corner.) | |||
** hcf + C (Timming required to do full 3 hits.) | |||
** sj.CD | |||
** sj.C (Reset.) | |||
* | * Pseudo combo, corner only: cl.D > f + B, | ||
** (S)DM Ball Blast (qcf qcf + P) | |||
** Punchy Throw (dp + P > tap P rapidly), [junggler] | |||
Since dp + P or qcf qcf + P will only activate if your opponent is in a throw-able state, they won't execute if they are blocking. This makes combos like cl.D > qcf qcf + P an automatic hit-check into super. | |||
*cl. | * Simple buffers: | ||
** cr.B, st.A / cl.A / cl.B > (S)DM qcf qcf + P | |||
*** cr.B, qcf + A/B > qcf + P (As cr.B is not cancelable, qcf + A/B will chain into a normal attack.) | |||
** cl.C / cl.D > (S)DM qcf qcf + P | |||
*** qcf + C/D > qcf + P | |||
** cl.C / cl.D > (S)DM qcf hcb + K | |||
*** qcf + C/D > hcb + K | |||
*cl.D | {{StrategyCorner| | ||
* MAX: cl.D > (dp + P > tap P rapidly), {{hcf}} + C | |||
deals ??? than | |||
* | * cl.D > {{qcf}} {{hcb}} + K | ||
Keep this in mind, when you need to decide whether to trigger MAX or keep meter for a DM. | |||
}} | |||
{{ | == Links == | ||
{{Navbox-KOF98}} | |||
[[Category:The King of Fighters '98: The Slugfest]] | [[Category:The King of Fighters '98: The Slugfest]] | ||
[[Category:Sie Kensou]] | |||
Latest revision as of 14:05, 14 November 2023
Introduction
Kensou is Chinese, which means he's really cheap in fighting games. That's good, because he's in a fighting game. This one. KOF98. His favorite food is giant dinosaur eggs, which he eats during one of his supers. He can unleash the power of the dinosaur with various dinosaur moves, like his Dinosaur Kick or Dinosaur Fireball or Dinosaur Sweep.
Colors

|

|

|

|
Gameplay Overview
Kensou is very good zoning/poking character. He has some decent combo and mixup ability, but this is hankered by his slow jump and short hop. Still, he has enough close range tools to keep opponents out and mixup when they have a counter to his strong zoning with fireballs. He is a mid-tier character and a good choice for a beginner.
In-depth Analysis
Movelist
Normal Throws
- b or f + C - Breakable, forward knockdown, face forward, rollable.
- b or f + D - Breakable, forward knockdown, back turned, rollable.
Neither of them are very good.
Special Moves
- Fireball aka Choubyudaiya! (qcb + P) - It's a fireball! A goes slow, C goes fast. This is a very good zoning tool, but it's a little different from some other fireballs. First of all, Kensou crouches during the startup, and the fireball appears above his head. Because of this, you can use it as a very effective anti-air. Time it like you would a relatively early dp. Secondly, while this fireball occupies a very nice position on the screen, it's recovery is much worse than some other fireballs in KOF98. You can be hit and comboed from a lot of distances if your opponent jumps or super jumps over your fireball. In addition to this, some moves like Iori's Maiden Masher super or Chris's slide go under the fireball, so you must be aware of these matchups and learn to rely more on your good pokes.
- Scissor Upkicks (rdp + K) - Not invincible, but very fast and good priority. The D version doesn't knock down on the 1st or 2nd hit, so use that one as anti-air only. This move can also stop crossups, as his back leg has it's own hitbox on startup.
- Jump Kicky Move (hcf + P) - A version stays on the ground, C version flies diagonally up-forward. The C version has upper-body auto guard, and the A version shrinks his hitbox down on startup, but neither has invincibility. The A version is safe from some things, but still punishable by plenty of fast/ranged moves. C version is good anti-air.
- Dive Punch (air qcb + P) - Totally shitty ass unsafe move. Unsafe on hit, even. Some characters cannot really punish it, but anyone with a fast+long range move can.
- Panchy Throw (dp + P) - Proximity unblockable. This means you can only perform the move when the opponent is in a throw-able state (ie close, in hitstun, or out of blockstun). This allows you to 'safely' perform it or cancel moves into it on block and it will not execute as an automatic hit-check. This has invincibility on startup, but can trade.
Desperation Moves
- Ball Blast (qcf qcf + P) - Startup is invincible before the flash. Works like his Punchy Throw as a proximity unblockable. If your opponent doesn't do anything before the flash, it will hit, but it can still trade with moves after the flash if they attack beforehand. MAX version does more damage, and Kensou flies back after it's done. You can use recovery roll (AB as you touch the ground) to quick rise from the blow back.
- Kicky Super (qcf hcb + K) - Not Invincible, either version. B version is a good combo ender. MAX version does more damage. D and MAX versions whiff on crouchers.
- Bun Eatin (qcb qcb + P) - Kensou eats a hot bun and regains a very small amount of life (8). Pretty much asking to be comboed most of the time, but you can use it right before a time-up in a close match. Also, you can throw a A fireball from fullscreen and perform this super to make it unblockable. This could be used on someone who is turtling for a time-up win. MAX version refills more life (16) in the short-term before Kensou chokes on it and loses it all, giving the move a ton more recovery while actually healing less (1 net HP).
Fastest Attacks
- 0F: C throw; D throw
- 1F: -
- 2F: -
- 3F: cr.A
- 4F: cl.B
- 5F: cl.A; cl.D; st.A; st.B
- 6F: cr.B
- 7F: cr.C; cr.D
- 8F: cl.C; st.D
- 9F: -
- 10F: -
Combos
- Best jump-ins:
- j.D (Can crossup.)
- cr.A / cr.B, cr.A >
- (S)DM qcf qcf + P
- Punchy Throw (dp + P > tap P rapidly), [junggler]
Two weak attacks only on point blank.
- cr.A / cr.B, cr.A, cr.A, st.B
- Corner & out of MAX: cl.D > f + A > DM Kick Super (qcf hcb + K)
- st.C (2 hits) >
- (S)DM Kick Super (qcf hcb + K)
- (S)DM qcf qcf + P
- hcf + A
- cl.D
- (S)DM qcf hcb + K
- (S)DM qcf qcf + P
- Punchy Throw (dp + P > tap P rapidly), [junggler]
- hcf + A
- ... Punchy Throw (dp + P > tap P rapidly),
- rdp + D (Corner.)
- hcf + C (Timming required to do full 3 hits.)
- sj.CD
- sj.C (Reset.)
- Pseudo combo, corner only: cl.D > f + B,
- (S)DM Ball Blast (qcf qcf + P)
- Punchy Throw (dp + P > tap P rapidly), [junggler]
Since dp + P or qcf qcf + P will only activate if your opponent is in a throw-able state, they won't execute if they are blocking. This makes combos like cl.D > qcf qcf + P an automatic hit-check into super.
- Simple buffers:
- cr.B, st.A / cl.A / cl.B > (S)DM qcf qcf + P
- cr.B, qcf + A/B > qcf + P (As cr.B is not cancelable, qcf + A/B will chain into a normal attack.)
- cl.C / cl.D > (S)DM qcf qcf + P
- qcf + C/D > qcf + P
- cl.C / cl.D > (S)DM qcf hcb + K
- qcf + C/D > hcb + K
- cr.B, st.A / cl.A / cl.B > (S)DM qcf qcf + P
Strategy Corner
- MAX: cl.D > (dp + P > tap P rapidly),
 + C
+ C
deals ??? than
- cl.D >

 + K
+ K
Keep this in mind, when you need to decide whether to trigger MAX or keep meter for a DM.
