TheLoudCat (talk | contribs) |
|||
| (31 intermediate revisions by 8 users not shown) | |||
| Line 1: | Line 1: | ||
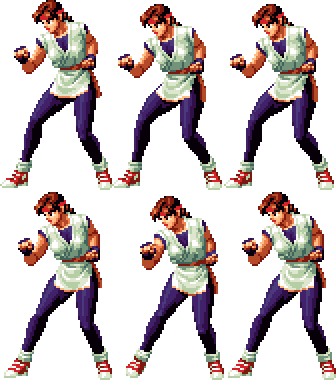
[[image:Yuri98_stance.gif|right]] | |||
==Introduction== | ==Introduction== | ||
Slap slap slap, clap clap clap. | |||
===Colors=== | ===Colors=== | ||
{| | {| | ||
| Line 14: | Line 17: | ||
==Gameplay Overview== | ==Gameplay Overview== | ||
The KOF 94/AoF 2 version of Yuri Sakazaki is a zoning-focused version of the KoF98 Yuri with the Choupa and Slap attack. | |||
Her main weakness is that she has no meterless reversal and very limited combo options, such as a lack of a good meterless | |||
low confirm. | |||
Low-Mid tier character. | |||
==In-depth Analysis== | ==In-depth Analysis== | ||
===[[ | ===[[The King of Fighters 2002/Normals Guide|Movelist]]=== | ||
{|border="1" | {|border="1" | ||
!width="10%"| | !width="10%"| | ||
| Line 34: | Line 42: | ||
|align="center"| HL | |align="center"| HL | ||
|colspan="2" | [[image:Yuri98_stA.png|center]] | |colspan="2" | [[image:Yuri98_stA.png|center]] | ||
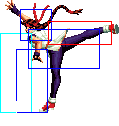
| | |Very fast and cancelable. Good vs short hop. good priority. | ||
|- | |- | ||
! [[image:snkb.gif]] | ! [[image:snkb.gif]] | ||
| Line 42: | Line 50: | ||
|align="center"| L | |align="center"| L | ||
|colspan="2" | [[image:Yuri98_clB.png|center]] | |colspan="2" | [[image:Yuri98_clB.png|center]] | ||
| | |Low move and cancelable. | ||
|- | |- | ||
! [[image:snkc.gif]] | ! [[image:snkc.gif]] | ||
| Line 59: | Line 67: | ||
|align="center"| HL | |align="center"| HL | ||
|colspan="2" | [[image:Yuri98_clD.png|center]] | |colspan="2" | [[image:Yuri98_clD.png|center]] | ||
| | |Best move to a meaty. Cancelable. | ||
|- | |- | ||
|colspan="8" align="center"| '''Standing Far''' | |colspan="8" align="center"| '''Standing Far''' | ||
| Line 69: | Line 77: | ||
|align="center"| HL | |align="center"| HL | ||
|colspan="2" | [[image:Yuri98_stA.png|center]] | |colspan="2" | [[image:Yuri98_stA.png|center]] | ||
| | |Very fast and cancelable. Good vs short hop. good priority. | ||
|- | |- | ||
! [[image:snkb.gif]] | ! [[image:snkb.gif]] | ||
| Line 77: | Line 85: | ||
|align="center"| HL | |align="center"| HL | ||
|colspan="2" | [[image:Yuri98_stB.png|center]] | |colspan="2" | [[image:Yuri98_stB.png|center]] | ||
| | |Close range poke. Not cancelable. | ||
|- | |- | ||
! [[image:snkc.gif]] | ! [[image:snkc.gif]] | ||
| Line 85: | Line 93: | ||
|align="center"| HL | |align="center"| HL | ||
|colspan="2" | [[image:Yuri98_stC.png|center]] | |colspan="2" | [[image:Yuri98_stC.png|center]] | ||
| | |Long range poke. Not cancelable. | ||
|- | |- | ||
! [[image:snkd.gif]] | ! [[image:snkd.gif]] | ||
| Line 93: | Line 101: | ||
|align="center"| HL | |align="center"| HL | ||
|colspan="2" | [[image:Yuri98_stD.png|center]] | |colspan="2" | [[image:Yuri98_stD.png|center]] | ||
| | |Long range poke. Not cancelable. | ||
|- | |- | ||
! [[image:snkc.gif]]+[[image:snkd.gif]] | ! [[image:snkc.gif]]+[[image:snkd.gif]] | ||
| Line 128: | Line 136: | ||
|valign="bottom" style="border-right:0px;"| [[image:Yuri98_crC1.png|center]] | |valign="bottom" style="border-right:0px;"| [[image:Yuri98_crC1.png|center]] | ||
|valign="bottom" style="border-left:0px;"| [[image:Yuri98_crC2.png|center]] | |valign="bottom" style="border-left:0px;"| [[image:Yuri98_crC2.png|center]] | ||
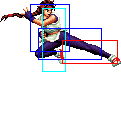
| | |Good as an anti-air. First part of this move is cancelable. Good priority. | ||
|- | |- | ||
! [[image:snkd.gif]] | ! [[image:snkd.gif]] | ||
|align="center"| | |align="center"| 7/5/21 | ||
|align="center"| KD/-9 | |align="center"| KD/-9 | ||
|align="center"| C,S,Su | |align="center"| C,S,Su | ||
|align="center"| L | |align="center"| L | ||
|colspan="2" | [[image:Yuri98_crD.png|center]] | |colspan="2" | [[image:Yuri98_crD.png|center]] | ||
| | |Sweep move. Cancelable. | ||
|- | |- | ||
|colspan="8" align="center"| '''Jump''' | |colspan="8" align="center"| '''Jump''' | ||
| Line 154: | Line 162: | ||
|align="center"| H | |align="center"| H | ||
|colspan="2" | [[image:Yuri98_jB.png|center]] | |colspan="2" | [[image:Yuri98_jB.png|center]] | ||
| | |Air-to-air move. | ||
|- | |- | ||
! [[image:snkc.gif]] | ! [[image:snkc.gif]] | ||
| Line 162: | Line 170: | ||
|align="center"| H | |align="center"| H | ||
|colspan="2" | [[image:Yuri98_jC.png|center]] | |colspan="2" | [[image:Yuri98_jC.png|center]] | ||
| | |Yuri's main jump-in. | ||
|- | |- | ||
! [[image:snkd.gif]] | ! [[image:snkd.gif]] | ||
| Line 170: | Line 178: | ||
|align="center"| H | |align="center"| H | ||
|colspan="2" | [[image:Yuri98_jD.png|center]] | |colspan="2" | [[image:Yuri98_jD.png|center]] | ||
| | |Yuri's cross-up. air-to ground move. | ||
|- | |- | ||
! [[image:snkc.gif]]+[[image:snkd.gif]] | ! [[image:snkc.gif]]+[[image:snkd.gif]] | ||
| Line 196: | Line 204: | ||
|align="center"| H | |align="center"| H | ||
|colspan="2" | [[image:Yuri98_juB.png|center]] | |colspan="2" | [[image:Yuri98_juB.png|center]] | ||
| | |Instant overhead. | ||
|- | |- | ||
! [[image:snkc.gif]] | ! [[image:snkc.gif]] | ||
| Line 212: | Line 220: | ||
|align="center"| H | |align="center"| H | ||
|colspan="2" | [[image:Yuri98_juD.png|center]] | |colspan="2" | [[image:Yuri98_juD.png|center]] | ||
| | |Air-to-air move. | ||
|- | |- | ||
|colspan="8" align="center"| '''Command Normals''' | |colspan="8" align="center"| '''Command Normals''' | ||
|- | |- | ||
! f+[[image:snkb.gif]] | ! f + [[image:snkb.gif]] | ||
|align="center"| 14/12/13 | |align="center"| 14/12/13 | ||
|align="center"| -5/-7 | |align="center"| -5/-7 | ||
| Line 226: | Line 234: | ||
|colspan="8" align="center"| '''Special Moves''' | |colspan="8" align="center"| '''Special Moves''' | ||
|- | |- | ||
! qcf+[[image:snka.gif]] | ! qcf + [[image:snka.gif]] | ||
|align="center"| 15/39 | |||
| | | | ||
| | |||
|align="center"| HL | |||
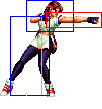
|rowspan="2" colspan="2" | [[image:ExYuri98_qcfP.png|center]] | |||
|rowspan="2"|'''Ko'ou Ken - qcf + P''' | |||
Your main zoning tool and combo ender. | |||
|- | |||
! qcf + [[image:snkc.gif]] | |||
|align="center"| 15/41 | |||
| | |||
| | |||
|align="center"| HL | |||
|- | |||
! qcf + [[image:snkb.gif]] | |||
|align="center"| 21/15+13+8 | |||
| | |||
| | |||
|align="center"| HL | |||
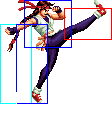
|rowspan="2" colspan="2" | [[image:ExYuri98_qcfK.png|center]] | |||
|rowspan="2"|'''Raiou Ken - qcf + K''' | |||
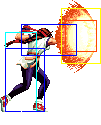
B is bad. | |||
Use D to punish projectile spammers. | |||
|- | |||
! qcf + [[image:snkd.gif]] | |||
|align="center"| 26/19+18+10 | |||
| | |||
| | |||
|align="center"| HL | |||
|- | |||
! qcb + [[image:snka.gif]] | |||
|align="center"| 13/12/25 | |||
| | |||
| | |||
|align="center"| HL | |||
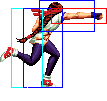
|colspan="2" | [[image:ExYuri98_qcbA.png|center]] | |||
|rowspan="2"|'''Saiha - qcb + P''' | |||
Deals good damage. A is a decent anti-air, C has a slower | |||
startup but bigger hitbox. Use C as a very close combo ender. | |||
|- | |||
! qcb + [[image:snkc.gif]] | |||
|align="center"| 17/12/29 | |||
| | | | ||
| | | | ||
|align="center"| HL | |align="center"| HL | ||
| | |colspan="2" | [[image:ExYuri98_qcbC.png|center]] | ||
|rowspan="2"|''' | |- | ||
! hcb + [[image:snkb.gif]] | |||
|align="center"| 8+5/16/32 | |||
| | |||
| | |||
|align="center"| Grab | |||
|colspan="2" rowspan="2"| [[image:ExYuri98_hcbK.png|center]] | |||
|rowspan="2"|'''Hyakuretsu Binta - hcb + K''' | |||
Yuri runs up to the enemy, grabbing them and slaps them | |||
silly. B and D control the distance she runs. | |||
Can be used in tick throws once in a while, and in the | |||
unblockable projectile glitch setup. | |||
|- | |||
! hcb + [[image:snkd.gif]] | |||
|align="center"| 8+5/24/34 | |||
| | |||
| | |||
|align="center"| Grab | |||
|- | |||
|colspan="8" align="center"| '''DMs''' | |||
|- | |- | ||
! qcf+[[image: | ! qcf hcb + [[image:snkb.gif]] | ||
| | | | ||
| | | | ||
| | | | ||
|align="center"| HL | |align="center"| HL | ||
|colspan="2" rowspan="3"| [[image:Yuri98_qcfhcbK.png|center]] | |||
|rowspan="3"|'''Hien Hou'ou Kyaku - qcf hcb + K''' | |||
Deals great damage. Your main combo ender. | |||
|- | |- | ||
! qcf+[[image: | ! qcf hcb + [[image:snkd.gif]] | ||
| | | | ||
| | | | ||
| | | | ||
|align="center"| HL | |align="center"| HL | ||
|- | |- | ||
! qcf+[[image: | ! qcf hcb + [[image:kick.gif]]<br>(SDM) | ||
| | | | ||
| | | | ||
| Line 254: | Line 323: | ||
|align="center"| HL | |align="center"| HL | ||
|- | |- | ||
! | ! qcf qcf + [[image:snka.gif]] | ||
|align="center"| 1+4/-/29 | |||
| | |||
| | |||
|align="center"| HL | |||
|rowspan="3" valign="bottom" style="border-right:0px;"| [[image:ExYuri98_qcfx2P1.png|center]] | |||
|rowspan="3" valign="bottom" style="border-left:0px;"| [[image:ExYuri98_qcfx2P2.png|center]] | |||
|rowspan="3"|'''Shin! Yuri Chou Upper - qcf qcf + P''' | |||
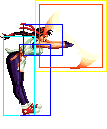
Short ranged, but it deals HUGE damage. Has invincibility. | |||
|- | |||
! qcf qcf + [[image:snkc.gif]] | |||
|align="center"| 1+4/-/34 | |||
| | | | ||
| | |||
|align="center"| HL | |||
|- | |||
! qcfx2+[[image:punch.gif]]<br>(SDM) | |||
|align="center"| 1+4/-/32 | |||
| | | | ||
| | | | ||
|align="center"| HL | |align="center"| HL | ||
|- | |- | ||
! | ! <br>f hcf + [[image:snka.gif]]<br><br> | ||
| | | | ||
| | | | ||
| | | | ||
|align="center"| HL | |align="center"| HL | ||
|colspan="2" | [[image: | |colspan="2" rowspan="2"| [[image:exYuri98_fhcfP.png|center]] | ||
|rowspan="3"|'''Haou Shoukou Ken - f hcf + P''' | |||
A projectile super, it's a good punish option. | |||
|- | |- | ||
! | ! f hcf + [[image:snkc.gif]] | ||
| | | | ||
| | | | ||
| | | | ||
|align="center"| HL | |align="center"| HL | ||
|- | |- | ||
! | ! f hcf + [[image:punch.gif]]<br>(SDM) | ||
| | | | ||
| | | | ||
| | | | ||
|align="center"| HL | |align="center"| HL | ||
|colspan="2"| [[image:Yuri98_fhcfP_SDM.png|center]] | |||
|- | |||
|} | |} | ||
===Normal Throws=== | |||
* '''b or f + C''' - | |||
Breakable. Techable. | |||
* '''b or f + D''' - | |||
Breakable. Techable. Back-Turned knockdown. | |||
* '''In air, b / d / f + C / D''' - | |||
Techable. Back-Turned knockdown. | |||
==Combos== | ==Combos== | ||
* Best Jump-ins: | |||
* j.C | |||
* j.D (Can crossup.) | |||
* cr.B, cr.A > | |||
** (S)DM qcf qcf + A | |||
** (S)DM qcf hcb + K | |||
* (cr.B (optional), cr.C) / cl.D / cl.C > | |||
** (S)DM qcf qcf + A (Very close.) | |||
** (S)DM qcf hcb + K | |||
** qcb + P (Close) | |||
** qcf + P | |||
* Meterless combos: | |||
** j.C/D > cr.c/cl.c > qcf.A/C (Most reliable one) | |||
** j.D > cl.C > qcb.C (Very close/After crossup) | |||
* With meter: | |||
** st.A/cl.C/cr.C/cl.D/cl.B > qcf + qcf + P | |||
** st.A/cl.C/cr.C/cl.D/cl.B > qcf + hcb + K | |||
{{StrategyCorner| | |||
* MAX: cl.D > {{qcb}} + P | |||
deals ??? than | |||
* cl.D > {{qcf}} {{hcb}} + K | |||
Keep this in mind, when you need to decide whether to trigger MAX or keep meter for a DM. | |||
}} | |||
{{ | == Links == | ||
{{Navbox-KOF98}} | |||
[[Category:The King of Fighters '98: The Slugfest]] | [[Category:The King of Fighters '98: The Slugfest]] | ||
Latest revision as of 16:50, 2 October 2022
Introduction
Slap slap slap, clap clap clap.
Colors

|

|

|

|
Gameplay Overview
The KOF 94/AoF 2 version of Yuri Sakazaki is a zoning-focused version of the KoF98 Yuri with the Choupa and Slap attack. Her main weakness is that she has no meterless reversal and very limited combo options, such as a lack of a good meterless low confirm.
Low-Mid tier character.
In-depth Analysis
Movelist
Normal Throws
- b or f + C -
Breakable. Techable.
- b or f + D -
Breakable. Techable. Back-Turned knockdown.
- In air, b / d / f + C / D -
Techable. Back-Turned knockdown.
Combos
- Best Jump-ins:
- j.C
- j.D (Can crossup.)
- cr.B, cr.A >
- (S)DM qcf qcf + A
- (S)DM qcf hcb + K
- (cr.B (optional), cr.C) / cl.D / cl.C >
- (S)DM qcf qcf + A (Very close.)
- (S)DM qcf hcb + K
- qcb + P (Close)
- qcf + P
- Meterless combos:
- j.C/D > cr.c/cl.c > qcf.A/C (Most reliable one)
- j.D > cl.C > qcb.C (Very close/After crossup)
- With meter:
- st.A/cl.C/cr.C/cl.D/cl.B > qcf + qcf + P
- st.A/cl.C/cr.C/cl.D/cl.B > qcf + hcb + K
Strategy Corner
- MAX: cl.D >
 + P
+ P
deals ??? than
- cl.D >

 + K
+ K
Keep this in mind, when you need to decide whether to trigger MAX or keep meter for a DM.
