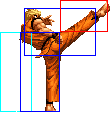
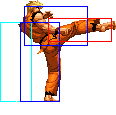
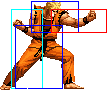
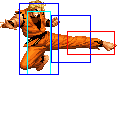
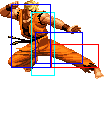
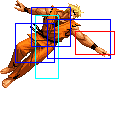
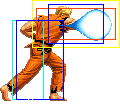
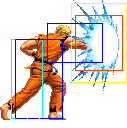
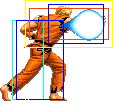
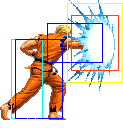
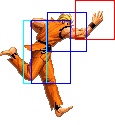
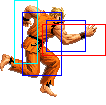
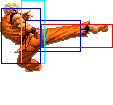
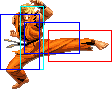
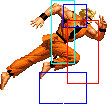
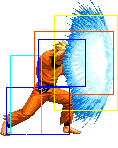
(→Combos) |
NiteLiteFGC (talk | contribs) m (fixed an error with the movelist) |
||
| (25 intermediate revisions by 4 users not shown) | |||
| Line 1: | Line 1: | ||
[[image:ryo98_stance.gif|right]] | [[image:ryo98_stance.gif|right]] | ||
==Introduction== | ==Introduction== | ||
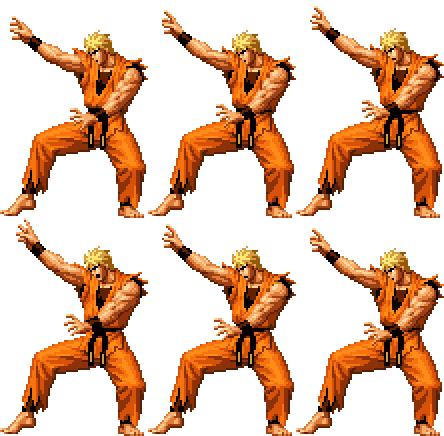
Ryo Sakazaki is an accomplished punchman and a master of | Ryo Sakazaki is an accomplished punchman and a master of ''kyokugenryu'', the art of combat Lamaze. Although this allows him to punch very hard it sadly leaves him too relaxed to do combos. | ||
===Colors=== | ===Colors=== | ||
{| | {| | ||
| Line 15: | Line 15: | ||
|} | |} | ||
==Gameplay overview== | ==Gameplay overview== | ||
==[[ | ==[[The King of Fighters 2002/Normals Guide|Movelist]]== | ||
{|border="1" | {|border="1" | ||
!width="6%"| | !width="6%"| | ||
| Line 127: | Line 127: | ||
|valign="bottom" style="border-right:0px;"| [[image:Ryo98_crC1.png|center]] | |valign="bottom" style="border-right:0px;"| [[image:Ryo98_crC1.png|center]] | ||
|colspan="2" valign="bottom" style="border-left:0px;"| [[image:Ryo98_crC2.png|center]] | |colspan="2" valign="bottom" style="border-left:0px;"| [[image:Ryo98_crC2.png|center]] | ||
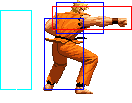
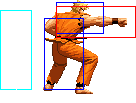
|align="left"|Extremely fast for ground-to-ground situations. A great pressure tool; you will be cancelling it into qcf+P a lot. Links from cr.B/cr.A. Works very well as an anti-air too. | |align="left"|Extremely fast for ground-to-ground situations. A great pressure tool; you will be cancelling it into qcf + P a lot. Links from cr.B / cr.A. Works very well as an anti-air too. | ||
|- | |- | ||
! [[image:snkd.gif]] | ! [[image:snkd.gif]] | ||
| Line 181: | Line 181: | ||
|colspan="9" align="center"| '''Command Normals''' | |colspan="9" align="center"| '''Command Normals''' | ||
|- | |- | ||
! f+[[image:snka.gif]] | ! f + [[image:snka.gif]] | ||
|align="center"| 17/9/11 | |align="center"| 17/9/11 | ||
|align="center"| -/- | |align="center"| -/- | ||
| Line 189: | Line 189: | ||
|rowspan="2" align="left"|Overhead, excellent used as a meaty attack. | |rowspan="2" align="left"|Overhead, excellent used as a meaty attack. | ||
|- | |- | ||
! f+[[image:snka.gif]]<br>(cancel) | ! f + [[image:snka.gif]]<br>(cancel) | ||
|align="center"| -/-/- | |align="center"| -/-/- | ||
|align="center"| -/- | |align="center"| -/- | ||
| Line 197: | Line 197: | ||
|colspan="9" align="center"| '''Special Moves''' | |colspan="9" align="center"| '''Special Moves''' | ||
|- | |- | ||
! <br>qcf+[[image:snka.gif]]<br><br> | ! <br>qcf + [[image:snka.gif]]<br><br> | ||
|align="center"| 13/3+6/27 | |align="center"| 13/3+6/27 | ||
| | | | ||
| Line 204: | Line 204: | ||
|valign="bottom" style="border-right:0px;"| [[image:Ryo98_qcfA1.png|center]] | |valign="bottom" style="border-right:0px;"| [[image:Ryo98_qcfA1.png|center]] | ||
|colspan="2" valign="bottom" style="border-left:0px;"| [[image:Ryo98_qcfA2.png|center]] | |colspan="2" valign="bottom" style="border-left:0px;"| [[image:Ryo98_qcfA2.png|center]] | ||
|rowspan="2" align="left"|'''Ko ou Ken (qcf+P)''' | |rowspan="2" align="left"|'''Ko ou Ken (qcf + P)''' | ||
|- | |- | ||
! qcf+[[image:snkc.gif]] | ! qcf + [[image:snkc.gif]] | ||
|align="center"| 19/3+6/29 | |align="center"| 19/3+6/29 | ||
| | | | ||
| Line 231: | Line 231: | ||
|colspan="2" valign="bottom" style="border-left:0px;"| [[image:Ryo98_dpC2.png|center]] | |colspan="2" valign="bottom" style="border-left:0px;"| [[image:Ryo98_dpC2.png|center]] | ||
|- | |- | ||
! <br>qcf+[[image:snkb.gif]]<br><br> | ! <br>qcf + [[image:snkb.gif]]<br><br> | ||
|align="center"| 25/6/17 | |align="center"| 25/6/17 | ||
|align="center"| KD/-4 | |align="center"| KD/-4 | ||
| Line 238: | Line 238: | ||
|rowspan="2" valign="bottom" style="border-right:0px;"| [[image:Ryo98_qcfK1.png|center]] | |rowspan="2" valign="bottom" style="border-right:0px;"| [[image:Ryo98_qcfK1.png|center]] | ||
|colspan="2" rowspan="2" valign="bottom" style="border-left:0px;"| [[image:Ryo98_qcfK2.png|center]] | |colspan="2" rowspan="2" valign="bottom" style="border-left:0px;"| [[image:Ryo98_qcfK2.png|center]] | ||
|rowspan="2" align="left"|'''Mouko Raijin Setsu (qcf+K)''' | |rowspan="2" align="left"|'''Mouko Raijin Setsu (qcf + K)''' | ||
|- | |- | ||
! qcf+[[image:snkd.gif]] | ! qcf + [[image:snkd.gif]] | ||
|align="center"| 27/6/21 | |align="center"| 27/6/21 | ||
|align="center"| KD/-6 | |align="center"| KD/-6 | ||
| Line 246: | Line 246: | ||
|align="center"| H | |align="center"| H | ||
|- | |- | ||
! <br> | ! <br>qcb + [[image:snka.gif]]<br><br> | ||
|align="center"| 12/2+6/32 | |align="center"| 12/2+6/32 | ||
|align="center"| -5/-7 | |align="center"| -5/-7 | ||
| Line 253: | Line 253: | ||
|valign="bottom" style="border-right:0px; border-bottom:0px;"| [[image:Ryo98_qcbP1.png|center]] | |valign="bottom" style="border-right:0px; border-bottom:0px;"| [[image:Ryo98_qcbP1.png|center]] | ||
|colspan="2" valign="bottom" style="border-left:0px; border-bottom:0px;"| [[image:Ryo98_qcbP2.png|center]] | |colspan="2" valign="bottom" style="border-left:0px; border-bottom:0px;"| [[image:Ryo98_qcbP2.png|center]] | ||
|rowspan="2" align="left"|'''Mouko Raijin Gou (qcb+P)''' | |rowspan="2" align="left"|'''Mouko Raijin Gou (qcb + P)''' | ||
|- | |- | ||
! | ! qcb + [[image:snkc.gif]] | ||
|align="center"| 16/3+6/35 | |align="center"| 16/3+6/35 | ||
| | | | ||
| Line 263: | Line 263: | ||
|colspan="2" valign="bottom" style="border-left:0px; border-top:0px;"| [[image:Ryo98_qcbP4.png|center]] | |colspan="2" valign="bottom" style="border-left:0px; border-top:0px;"| [[image:Ryo98_qcbP4.png|center]] | ||
|- | |- | ||
! hcb+[[image:snkb.gif]] | ! hcb + [[image:snkb.gif]] | ||
|align="center"| 6/3+6/30 | |align="center"| 6/3+6/30 | ||
| | | | ||
| Line 270: | Line 270: | ||
|valign="bottom" style="border-right:0px;"| [[image:Ryo98_hcbD3.png|center]] | |valign="bottom" style="border-right:0px;"| [[image:Ryo98_hcbD3.png|center]] | ||
|colspan="2" valign="bottom" style="border-left:0px;"| [[image:Ryo98_hcbK2.png|center]] | |colspan="2" valign="bottom" style="border-left:0px;"| [[image:Ryo98_hcbK2.png|center]] | ||
|rowspan="2" align="left"|'''Hien Shippuu Kyaku (hcb+K)''' | |rowspan="2" align="left"|'''Hien Shippuu Kyaku (hcb + K)''' | ||
* Both versions are unsafe and easily punishable when blocked, so use them mainly in combos. | * Both versions are unsafe and easily punishable when blocked, so use them mainly in combos. The B version can sometimes be useful to catch jumping enemies that are outside the range of your DP. Still, be careful when using it. | ||
|- | |- | ||
! hcb+[[image:snkd.gif]] | ! hcb + [[image:snkd.gif]] | ||
|align="center"| 9/4+5+9+6/27 | |align="center"| 9/4+5+9+6/27 | ||
| | | | ||
| Line 282: | Line 282: | ||
|valign="bottom" style="border-left:0px;"| [[image:Ryo98_hcbD3a.png|center]] | |valign="bottom" style="border-left:0px;"| [[image:Ryo98_hcbD3a.png|center]] | ||
|- | |- | ||
! hcf+[[image:punch.gif]] | ! hcf + [[image:punch.gif]] | ||
|align="center"| 7/39/14 | |align="center"| 7/39/14 | ||
|align="center"| | |align="center"| | ||
| Line 288: | Line 288: | ||
|align="center"| - | |align="center"| - | ||
|colspan="3" | [[image:Ryo98_hcfP.png|center]] | |colspan="3" | [[image:Ryo98_hcfP.png|center]] | ||
| '''Kyokugen-ryuu Renbu Ken (hcf+P)''' | | '''Kyokugen-ryuu Renbu Ken (hcf + P)''' | ||
*proximity unblockable | *proximity unblockable | ||
|- | |- | ||
|colspan="9" align="center"| '''DMs''' | |colspan="9" align="center"| '''DMs''' | ||
|- | |- | ||
! qcf | ! qcf hcb + [[image:snka.gif]] | ||
|align="center"| 1+10/13/32 | |align="center"| 1+10/13/32 | ||
| | | | ||
| Line 304: | Line 304: | ||
* A version comes out faster and covers less distance, C version is the opposite. MAX version does more hits. | * A version comes out faster and covers less distance, C version is the opposite. MAX version does more hits. | ||
|- | |- | ||
! qcf | ! qcf hcb + [[image:snkc.gif]] | ||
|align="center"| 1+12/26/36 | |align="center"| 1+12/26/36 | ||
| | | | ||
| Line 310: | Line 310: | ||
|align="center"| HL | |align="center"| HL | ||
|- | |- | ||
! qcf | ! qcf hcb + [[image:punch.gif]]<br>(SDM) | ||
|align="left"| 1+14/13(or26)/38 | |align="left"| 1+14/13(or26)/38 | ||
| | | | ||
| Line 316: | Line 316: | ||
|align="center"| HL | |align="center"| HL | ||
|- | |- | ||
! f | ! f hcf + [[image:snka.gif]] | ||
|align="center"| 1+12/52 | |align="center"| 1+12/52 | ||
| | | | ||
| Line 328: | Line 328: | ||
* MAX versions are bigger and deal more damage / hits. The A version has the same speed as the C version. | * MAX versions are bigger and deal more damage / hits. The A version has the same speed as the C version. | ||
|- | |- | ||
! f | ! f hcf + [[image:snkc.gif]] | ||
|align="center"| 1+17/55 | |align="center"| 1+17/55 | ||
| | | | ||
| Line 334: | Line 334: | ||
|align="center"| HL | |align="center"| HL | ||
|- | |- | ||
! f | ! f hcf + [[image:punch.gif]]<br>(SDM) | ||
|align="center"| 1+17/57 | |align="center"| 1+17/57 | ||
| | | | ||
| Line 341: | Line 341: | ||
|colspan="3"| [[image:Ryo98_fhcfP_SDM.png|center]] | |colspan="3"| [[image:Ryo98_fhcfP_SDM.png|center]] | ||
|- | |- | ||
! | ! qcf qcf + [[image:snka.gif]] | ||
|align="center"| 1+8/9/34 | |align="center"| 1+8/9/34 | ||
| | | | ||
| Line 349: | Line 349: | ||
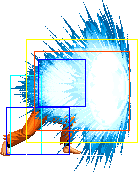
|rowspan="3" align="left"|'''Tenchi Haou Ken (qcf,qcf + P)'''<br> | |rowspan="3" align="left"|'''Tenchi Haou Ken (qcf,qcf + P)'''<br> | ||
DM version does little damage (roughly like a standing C) normally, but does around half a bar if you get a counter. Obviously, getting a counter with this move is quite difficult. You can try to trade it with any move you see coming with anticipation, but those situations will be rare.<br> | DM version does little damage (roughly like a standing C) normally, but does around half a bar if you get a counter. Obviously, getting a counter with this move is quite difficult. You can try to trade it with any move you see coming with anticipation, but those situations will be rare.<br> | ||
The SDM version is quite more interesting. It deals slightly more damage than the DM version (even if you get a counter hit), but instantly dizzies your opponent. You can do c.B, c.A/s.A, SDM Tenchi Haou Ken and then follow up with anything you want (j. | The SDM version is quite more interesting. It deals slightly more damage than the DM version (even if you get a counter hit), but instantly dizzies your opponent. You can do c.B, c.A/s.A, SDM Tenchi Haou Ken and then follow up with anything you want (j.C, cl.C > Kyokugen-ryuu Renbu Ken (hcf + P) / D Hien Shippuu Kyaku (hcb + D) if you have no stocks, j.D, cl.C > A DM Ryuuko Ranbu if you have one stock, or, if you have two, a SDM R. Ranbu or a combo into a second SDM Tenchi Haou Ken), which makes Ryo a very scary character when in MAX mode and with a stock. | ||
|- | |- | ||
! | ! qcf qcf + [[image:snkc.gif]] | ||
|align="center"| 1+12/9/37 | |align="center"| 1+12/9/37 | ||
| | | | ||
| Line 357: | Line 357: | ||
|align="center"| HL | |align="center"| HL | ||
|- | |- | ||
! | ! qcf qcf + [[image:punch.gif]]<br>(SDM) | ||
|align="center"| 1+6/9/39 | |align="center"| 1+6/9/39 | ||
| | | | ||
| Line 365: | Line 365: | ||
|} | |} | ||
== Fastest Attacks == | |||
* 0F: C throw; D throw | * 0F: C throw; D throw | ||
* 1F: '''cr.C''' | * 1F: '''cr.C''' | ||
* 2F: '''cl.C'''; dp+A | * 2F: '''cl.C'''; dp + A | ||
* 3F: '''cl.A'''; '''cl.B'''; '''st.A'''; '''cr.A'''; cr.B | * 3F: '''cl.A'''; '''cl.B'''; '''st.A'''; '''cr.A'''; cr.B | ||
* 4F: '''cl.D'''; dp+C | * 4F: '''cl.D'''; dp + C | ||
* 5F: st.B | * 5F: st.B | ||
* 6F: hcb+B | * 6F: hcb + B | ||
* 7F: st.C; '''cr.D'''; hcf+P; qcf | * 7F: st.C; '''cr.D'''; hcf + P; SDM qcf qcf + P | ||
* 8F: - | * 8F: - | ||
* 9F: CD; hcb+D; qcf | * 9F: '''CD'''; hcb + D; DM qcf qcf + A | ||
* 10F: - | * 10F: - | ||
==Combos== | ==Combos== | ||
* Best jump-ins: | |||
** j.C | |||
* cr.A / cr.B x 2, st.A > | * cr.A / cr.B x 2, st.A > | ||
** qcf qcf + A | ** SDM qcf qcf + P, any combo (As the opponent will be dizzed.) | ||
** DM qcf qcf + A | |||
** hcb + B | ** hcb + B | ||
* cr.B, cr.A/cl.A > | * cr.B, cr.A / cl.A > | ||
** qcf qcf + | ** SDM qcf qcf + P, any combo (As the opponent will be dizzed.) | ||
** hcf + P, [junggler] | ** hcf + P, [junggler] (Close.) | ||
** hcb + D ( | ** hcb + D (Very close. Whiffs on some crouchers.) | ||
** DM qcf qcf + A | |||
** hcb + B | ** hcb + B | ||
* (cr.B | * (cr.B, cr.C) / cl.C, | ||
** SDM qcf qcf + P, any combo (As the opponent will be dizzed.) | |||
** DM qcf hcb + P | ** DM qcf hcb + P | ||
** DM f hcf + A | ** DM f hcf + A | ||
** hcf + P, [junggler] (Close.) | |||
** hcf + P, [junggler] | ** hcb + D (Whiffs on some crouchers.) | ||
** hcb + D | ** qcb + C > dp + C (Very close or dp + C may miss.) | ||
** DM qcf qcf + P | |||
** qcf + A | ** qcf + A | ||
** f + A | ** f + A | ||
| Line 411: | Line 419: | ||
{{ | * Simple buffers: | ||
** cr.B, st.A / cl.A / cl.B > (S)DM qcf qcf + A | |||
*** cr.B, qcf + A/B > qcf + A (As cr.B is not cancelable, qcf + A/B will chain into a normal attack.) | |||
His SDM qcf qcf + P followed by a simple BnB combo (like j.C, cl.C > hcb + D) deals more damage than SDM qcf hcb + P. | |||
His DM qcf qcf + P on counter does a little more damage than cl.C > DM qcf hcb + P, but less than j.C, cl.C > DM qcf hcb + P. | |||
Ryo is the only character that may spend 5 bars in the same combo (without tricks or special setups), like this one: | |||
* cr.C / cl.C / cr.A / st.A / cl.A > SDM qcf qcf + P, | |||
** MAX mode, j.C, cr.C / cl.C > SDM qcf qcf + P, | |||
*** j.C, cr.C / cl.C > qcf hcb + P | |||
{{StrategyCorner| | |||
* MAX: cl.C > {{hcf}} + P, j.CD | |||
deals ??? than | |||
* cl.C > {{qcf}} {{hcb}} + P | |||
Keep this in mind, when you need to decide whether to trigger MAX or keep meter for a DM. | |||
}} | |||
== Links == | |||
{{Navbox-KOF98}} | |||
[[Category:The King of Fighters '98: The Slugfest]] | [[Category:The King of Fighters '98: The Slugfest]] | ||
[[Category:Ryo Sakazaki]] | |||
Latest revision as of 09:49, 22 April 2022
Introduction
Ryo Sakazaki is an accomplished punchman and a master of kyokugenryu, the art of combat Lamaze. Although this allows him to punch very hard it sadly leaves him too relaxed to do combos.
Colors
Gameplay overview
Movelist
Fastest Attacks
- 0F: C throw; D throw
- 1F: cr.C
- 2F: cl.C; dp + A
- 3F: cl.A; cl.B; st.A; cr.A; cr.B
- 4F: cl.D; dp + C
- 5F: st.B
- 6F: hcb + B
- 7F: st.C; cr.D; hcf + P; SDM qcf qcf + P
- 8F: -
- 9F: CD; hcb + D; DM qcf qcf + A
- 10F: -
Combos
- Best jump-ins:
- j.C
- cr.A / cr.B x 2, st.A >
- SDM qcf qcf + P, any combo (As the opponent will be dizzed.)
- DM qcf qcf + A
- hcb + B
- cr.B, cr.A / cl.A >
- SDM qcf qcf + P, any combo (As the opponent will be dizzed.)
- hcf + P, [junggler] (Close.)
- hcb + D (Very close. Whiffs on some crouchers.)
- DM qcf qcf + A
- hcb + B
- (cr.B, cr.C) / cl.C,
- SDM qcf qcf + P, any combo (As the opponent will be dizzed.)
- DM qcf hcb + P
- DM f hcf + A
- hcf + P, [junggler] (Close.)
- hcb + D (Whiffs on some crouchers.)
- qcb + C > dp + C (Very close or dp + C may miss.)
- DM qcf qcf + P
- qcf + A
- f + A
- ... hcf + P,
- j.CD
- qcf + A (out of the corner)
- dp + A (corner)
- j.C (reset)
- Simple buffers:
- cr.B, st.A / cl.A / cl.B > (S)DM qcf qcf + A
- cr.B, qcf + A/B > qcf + A (As cr.B is not cancelable, qcf + A/B will chain into a normal attack.)
- cr.B, st.A / cl.A / cl.B > (S)DM qcf qcf + A
His SDM qcf qcf + P followed by a simple BnB combo (like j.C, cl.C > hcb + D) deals more damage than SDM qcf hcb + P.
His DM qcf qcf + P on counter does a little more damage than cl.C > DM qcf hcb + P, but less than j.C, cl.C > DM qcf hcb + P.
Ryo is the only character that may spend 5 bars in the same combo (without tricks or special setups), like this one:
- cr.C / cl.C / cr.A / st.A / cl.A > SDM qcf qcf + P,
- MAX mode, j.C, cr.C / cl.C > SDM qcf qcf + P,
- j.C, cr.C / cl.C > qcf hcb + P
- MAX mode, j.C, cr.C / cl.C > SDM qcf qcf + P,
Strategy Corner
- MAX: cl.C >
 + P, j.CD
deals ??? than
- cl.C >

 + P
+ P
Keep this in mind, when you need to decide whether to trigger MAX or keep meter for a DM.
