No edit summary |
(Added key move demos) |
||
| Line 10: | Line 10: | ||
|name=Blood Storm | |name=Blood Storm | ||
|input=6A | |input=6A | ||
|image= | |image=SCVI_NTM_6A.mp4 | ||
|imageSize=320px | |||
|data= | |data= | ||
{{KeyMove-SCVI | {{KeyMove-SCVI | ||
| Line 22: | Line 23: | ||
|name=Mail Crusher | |name=Mail Crusher | ||
|input=3AA | |input=3AA | ||
|image= | |image=SCVI_NTM_3AA.mp4 | ||
|imageSize=320px | |||
|data= | |data= | ||
{{KeyMove-SCVI | {{KeyMove-SCVI | ||
| Line 34: | Line 36: | ||
|name=Jade Slicer | |name=Jade Slicer | ||
|input=2A | |input=2A | ||
|image= | |image=SCVI_NTM_2A.mp4 | ||
|imageSize=320px | |||
|data= | |data= | ||
{{KeyMove-SCVI | {{KeyMove-SCVI | ||
| Line 46: | Line 49: | ||
|name=Quick Neck Buster | |name=Quick Neck Buster | ||
|input=agA | |input=agA | ||
|image= | |image=SCVI_NTM_agA.mp4 | ||
|imageSize=320px | |||
|data= | |data= | ||
{{KeyMove-SCVI | {{KeyMove-SCVI | ||
| Line 58: | Line 62: | ||
|name=Double Avenger | |name=Double Avenger | ||
|input=6BB | |input=6BB | ||
|image= | |image=SCVI_NTM_6BB.mp4 | ||
|imageSize=320px | |||
|data= | |data= | ||
{{KeyMove-SCVI | {{KeyMove-SCVI | ||
| Line 73: | Line 78: | ||
|name=Death Smash | |name=Death Smash | ||
|input=3B | |input=3B | ||
|image= | |image=SCVI_NTM_3B.mp4 | ||
|imageSize=320px | |||
|data= | |data= | ||
{{KeyMove-SCVI | {{KeyMove-SCVI | ||
| Line 88: | Line 94: | ||
|name=Shadow Buster | |name=Shadow Buster | ||
|input=2B | |input=2B | ||
|image= | |image=SCVI_NTM_2B.mp4 | ||
|imageSize=320px | |||
|data= | |data= | ||
{{KeyMove-SCVI | {{KeyMove-SCVI | ||
| Line 103: | Line 110: | ||
|name=Upper Claw | |name=Upper Claw | ||
|input=WR B | |input=WR B | ||
|image= | |image=SCVI_NTM_WRB.mp4 | ||
|imageSize=320px | |||
|data= | |data= | ||
{{KeyMove-SCVI | {{KeyMove-SCVI | ||
| Line 118: | Line 126: | ||
|name=Adamantine Cracker | |name=Adamantine Cracker | ||
|input=6K | |input=6K | ||
|image= | |image=SCVI_NTM_6K.mp4 | ||
|imageSize=320px | |||
|data= | |data= | ||
{{KeyMove-SCVI | {{KeyMove-SCVI | ||
| Line 130: | Line 139: | ||
|name=Dark Rush Kick | |name=Dark Rush Kick | ||
|input=3K | |input=3K | ||
|image= | |image=SCVI_NTM_3K.mp4 | ||
|imageSize=320px | |||
|data= | |data= | ||
{{KeyMove-SCVI | {{KeyMove-SCVI | ||
| Line 142: | Line 152: | ||
|name=Dark Low Kick | |name=Dark Low Kick | ||
|input=2K | |input=2K | ||
|image= | |image=SCVI_NTM_2K.mp4 | ||
|imageSize=320px | |||
|data= | |data= | ||
{{KeyMove-SCVI | {{KeyMove-SCVI | ||
| Line 154: | Line 165: | ||
|name=Midnight Launcher | |name=Midnight Launcher | ||
|input=A+B | |input=A+B | ||
|image= | |image=SCVI_NTM_A+B.mp4 | ||
|imageSize=320px | |||
|data= | |data= | ||
{{KeyMove-SCVI | {{KeyMove-SCVI | ||
| Line 166: | Line 178: | ||
|name=Soul Wave | |name=Soul Wave | ||
|input=6A+B | |input=6A+B | ||
|image= | |image=SCVI_NTM_6A+B.mp4 | ||
|imageSize=320px | |||
|data= | |data= | ||
{{KeyMove-SCVI | {{KeyMove-SCVI | ||
| Line 181: | Line 194: | ||
|name=Death Rage | |name=Death Rage | ||
|input=22A | |input=22A | ||
|image= | |image=SCVI_NTM_22A.mp4 | ||
|imageSize=320px | |||
|data= | |data= | ||
{{KeyMove-SCVI | {{KeyMove-SCVI | ||
| Line 193: | Line 207: | ||
|name=Ether Splitter | |name=Ether Splitter | ||
|input=66B | |input=66B | ||
|image= | |image=SCVI_NTM_66B.mp4 | ||
|imageSize=320px | |||
|data= | |data= | ||
{{KeyMove-SCVI | {{KeyMove-SCVI | ||
| Line 205: | Line 220: | ||
|name=Crimson Vortex | |name=Crimson Vortex | ||
|input=66A+B | |input=66A+B | ||
|image= | |image=SCVI_NTM_66A+B.mp4 | ||
|imageSize=320px | |||
|data= | |data= | ||
{{KeyMove-SCVI | {{KeyMove-SCVI | ||
Latest revision as of 15:00, 2 January 2022
Introduction
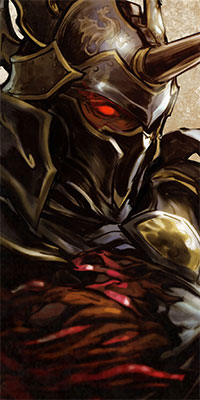
A big baddie with a big mutated arm and a big sword, what’s not to like? As expected from his giant weapon and stature, Nightmare has threatening damage with dominant mid-range attacks and added pressure from his stance mix-ups. Use of his unique Night Terror Charge, which gives him access to Soul Charge moves without meter, allows him to really keep the enemy on the back foot. He also has armored attacks and his aGI bubble to keep his turn. When not initiating offense and catching the enemy with aGIs he suffers from both a lack of fast attacks and in particular some of the worst punishment in the game, including no standing i12 punisher (which makes a huge amount of otherwise unsafe attacks safe against him).
As per the archetype, he is a "high-risk, high-reward" character. To get the most out of Nightmare you will have to be willing to play high stakes when the situation calls for it. Patience is paramount, you will need to pick your spots and wait for the right moment attack. Knowing your range and spacing is essential.
| Strengths | Weaknesses |
|---|---|
|
|
Unique Mechanics
Night Terror Charge
After landing certain attacks Nightmare enters Night Terror Charge (NTC), granting him access to one Soul Charge attack. He will glow with a red aura in this state. The state will end after this attack but he can re-enter by landing certain attacks.
See Strategy for a full breakdown.
| Nightmare #SCVI_NTM |
|---|
| His dark, azure armor invokes the night; his helmet covers all but his red, glowing eyes; his trunk-like right arm holds a great sword with a cursed eye glaring from its center... Could such a monstrous being really exist? Appearing from out of shadows like the advent of nightfall, this barbaric knight reaps the souls of the living as if they were mere stalks of corn. His name came to represent fear and desperation to all who heard it. |
Key Moves
