m (→Combos) |
No edit summary |
||
| (13 intermediate revisions by 5 users not shown) | |||
| Line 3: | Line 3: | ||
{{KOF98CharacterBox| KOF98_terry_small.png}} | {{KOF98CharacterBox| KOF98_terry_small.png}} | ||
Terry is a true-blue red-blooded American who likes Football, pizza, and beer. Since he is not Japanese, he isn't a top tier character, but he comes very close. | Terry is a true-blue red-blooded American himbo who likes Football, pizza, and beer. Since he is not Japanese, he isn't a top tier character, but he comes very close. | ||
{{Nutshell| | {{Nutshell| | ||
Terry is a mid-to-close range pressure character, focusing on chunky block strings, guard breaking, and raw brute force rather than mixups. He is just under the top tier, and a good solid character for beginners to use in my opinion. He doesn't have many uses for meter, so he is best used as a battery/point character (ie the first character on your team). He doesn't require strong execution; the hardest common thing he has is df + C combos. | Terry is a mid-to-close range pressure character, focusing on chunky block strings, guard breaking, and raw brute force rather than mixups. He is just under the top tier, and a good solid character for beginners to use in my opinion. He doesn't have many uses for meter, so he is best used as a battery/point character (ie the first character on your team). He doesn't require strong execution; the hardest common thing he has is {{df}} + C combos. | ||
}} | }} | ||
<br> | <br> | ||
| Line 32: | Line 32: | ||
| [[image:Terry98_colorD.png]] | | [[image:Terry98_colorD.png]] | ||
|} | |} | ||
==[[ | |||
==[[The King of Fighters 2002/Normals Guide|Movelist]]== | |||
{|border="1" | {|border="1" | ||
! | ! | ||
| Line 380: | Line 381: | ||
|} | |} | ||
== Fastest Attacks == | |||
=== Ground === | |||
* 0F: C throw; D throw | * 0F: C throw; D throw | ||
* 1F: - | * 1F: - | ||
* 2F: - | * 2F: - | ||
* 3F: '''cl.A'''; '''cl.C'''; '''cl.D'''; '''st.A'''; '''cr.A''', cr.B, | * 3F: '''cl.A'''; '''cl.C'''; '''cl.D'''; '''st.A'''; '''cr.A''', cr.B, '''df + C''' | ||
* 4F: '''cl.B''' | * 4F: '''cl.B''' | ||
* 5F: st.B; st.C; cr.C; qcb + B; dp + P | * 5F: st.B; st.C; '''cr.C'''; qcb + B; dp + P | ||
* 6F: dp + B; DM qcf qcf + B | * 6F: dp + B; DM qcf qcf + B | ||
* 7F: - | * 7F: - | ||
* 8F: SDM qcf qcf + K | * 8F: SDM qcf qcf + K | ||
* 9F: qcb + D; dp + D | * 9F: qcb + D; dp + D | ||
* 10F: cr.D | * 10F: '''cr.D''' | ||
=== Air === | |||
* 0F: - | |||
* 1F: - | |||
* 2F: - | |||
* 3F: j.B | |||
* 4F: j.A; j.C; j.D | |||
* 5F: | |||
* 6F: - | |||
* 7F: - | |||
* 8F: - | |||
* 9F: - | |||
* 10F: - | |||
== Combos == | == Combos == | ||
| Line 421: | Line 439: | ||
*** qcf + A | *** qcf + A | ||
** (S)DM B High Angle Geyser (qcf qcf + B) | ** (S)DM B High Angle Geyser (qcf qcf + B) | ||
** dp + | ** dp + D | ||
** dp + | ** dp + C | ||
* cl.D > f + A (2 hits) > B Power Charge (hcf + B), sj.D | * cl.D > f + A (2 hits) > B Power Charge (hcf + B), sj.D | ||
Sets up a | Sets up a short hop crossup. | ||
| Line 464: | Line 482: | ||
Both SDMs will not do full hits in the corner, but this will not leave you | Both SDMs will not do full hits in the corner, but this will not leave you vulnerable. | ||
{{StrategyCorner| | {{StrategyCorner| | ||
* MAX: cl.D > hcf + B, dp + D | * MAX: cl.D > {{hcf}} + B, {{dp}} + D | ||
deals ??? than | deals ??? than | ||
* cl.D > qcf qcf + D | * cl.D > {{qcf}} {{qcf}} + D | ||
Keep this in mind, when you need to decide whether to trigger MAX or keep meter for a DM. | Keep this in mind, when you need to decide whether to trigger MAX or keep meter for a DM. | ||
}} | }} | ||
== Links == | |||
{{ | {{Navbox-KOF98}} | ||
[[Category:The King of Fighters '98: The Slugfest]] | [[Category:The King of Fighters '98: The Slugfest]] | ||
[[Category:Terry Bogard]] | |||
Latest revision as of 01:14, 1 February 2021
Terry Bogard
Terry is a true-blue red-blooded American himbo who likes Football, pizza, and beer. Since he is not Japanese, he isn't a top tier character, but he comes very close.
In a nutshell
Terry is a mid-to-close range pressure character, focusing on chunky block strings, guard breaking, and raw brute force rather than mixups. He is just under the top tier, and a good solid character for beginners to use in my opinion. He doesn't have many uses for meter, so he is best used as a battery/point character (ie the first character on your team). He doesn't require strong execution; the hardest common thing he has is ![]() + C combos.
+ C combos.
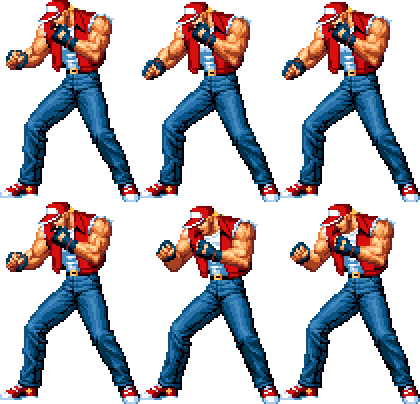
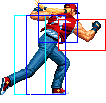
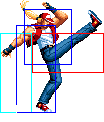
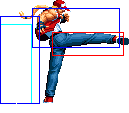
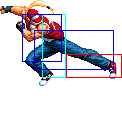
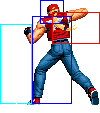
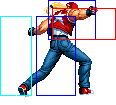
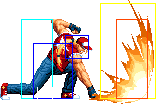
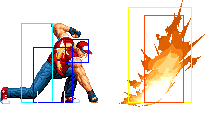
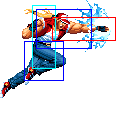
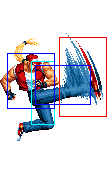
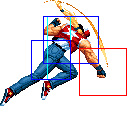
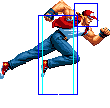
| Stand | Crouch | Jump | Run |
|---|---|---|---|

|

|
|
Colors

|

|

|

|
Movelist
Fastest Attacks
Ground
- 0F: C throw; D throw
- 1F: -
- 2F: -
- 3F: cl.A; cl.C; cl.D; st.A; cr.A, cr.B, df + C
- 4F: cl.B
- 5F: st.B; st.C; cr.C; qcb + B; dp + P
- 6F: dp + B; DM qcf qcf + B
- 7F: -
- 8F: SDM qcf qcf + K
- 9F: qcb + D; dp + D
- 10F: cr.D
Air
- 0F: -
- 1F: -
- 2F: -
- 3F: j.B
- 4F: j.A; j.C; j.D
- 5F:
- 6F: -
- 7F: -
- 8F: -
- 9F: -
- 10F: -
Combos
Some standard combos everyone should know.
- Best jump-ins:
- j.D (Can crossup.)
- cl.D / cl.C (2 hits) > df + C (optional) >
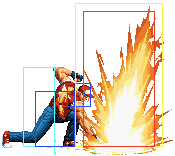
- (S)DM D High Angle Geyser (qcf qcf + D)
- (S)DM C Power Geyser (qcb db f + C)
- B Power Charge (hcf + B), [junggler]
- qcb + A
- qcf + A
- cr.B, cr.A
- df + C
- (S)DM D High Angle Geyser (qcf qcf + D)
- (S)DM C Power Geyser (qcb db f + C)
- B Power Charge (hcf + B), [junggler]
- qcb + A
- qcf + A
- (S)DM B High Angle Geyser (qcf qcf + B)
- dp + D
- dp + C
- df + C
- cl.D > f + A (2 hits) > B Power Charge (hcf + B), sj.D
Sets up a short hop crossup.
- ... hcf + B,
- dp + D (If not too far.)
- dp + C (Must cancel from previous move.)
- j.D (reset)
Anytime you land a B Power Charge (hcf + B), you have 3 options:
- sj.D, which is the least damage, but forces a reset and puts you right next them with a lot of advantage.
- Cancel (>) into C Rising Tackle (dp + C). This only does a bit more damage than the above, and is a normal knockdown, which means they have the choice to roll or stay down. I don't recommend it.
- D Power Dunk (dp + D). This only works if you're close. This does the best damage and forces a slam, so you can set up whatever you want; a crossup, meaty, short hop mixup, whatever. Usually the only situations where it doesn't connect is either of the first two combos I listed after a jump-in if you include the df + C. You can omit the df + C after a jump-in midscreen to connect it.
- Simple buffers:
- cr.B, st.A / cl.A > (S)DM qcf qcf + B
- cr.B, qcf + A > qcf + B (As cr.B is not cancelable, qcf + A will chain into a normal attack.)
- cl.B > (S)DM qcf qcf + B
- qcf + B > qcf + B
- cl.D > (S)DM qcf qcf + D
- qcf + D > qcf + D
- cr.B, st.A / cl.A > (S)DM qcf qcf + B
The only reason I list Burn Knuckle (qcf + A) as a combo ender is because it's much easier to cancel from df + C than Power Charge (hcf + B). You should use Burn Knuckle at first for the cr.B combo, but practice comboing into Power Charge, as it's always a better combo option. Burn Knuckle even misses (is blockable) midscreen from the cr.B combo.
The combo hard attack > df + C > qcb + A has less range, is harder and deals the same damage as hard attack > hcf + B, dp + D so no much reason to use the first.
The (S)DM qcf qcf + D deals more damage than (S)DM qcb db f + C. But df + C > (S)DM qcb db f + C deals more damage than
(S)DM qcf qcf + D.
You can can combo into Power Geyser from any of this stuff, and it does just a bit more than a D Power Dunk ender. Since Terry is used as a battery, usually you won't be using it, but being aware of this combo option is good.
Generally I recommend not using f + A in combos, as the damage sucks and it messes up the range for the Power Dunk ender off Power Charge. It does have one good use, which I noted in the last combo I listed as a crossup setup. Since you're further away when you land from the sj.D, you can short hop (sh) into sh.C/D and crossup a crouching opponent.
Both SDMs will not do full hits in the corner, but this will not leave you vulnerable.
Strategy Corner
- MAX: cl.D >
 + B,
+ B,  + D
+ D
deals ??? than
- cl.D >

 + D
+ D
Keep this in mind, when you need to decide whether to trigger MAX or keep meter for a DM.
