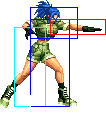
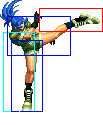
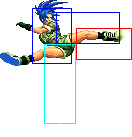
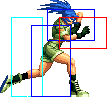
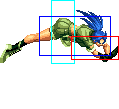
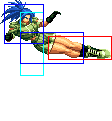
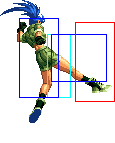
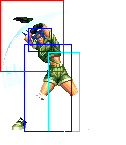
(→Combos) |
Lichmassacre (talk | contribs) m (Old Navbox removed for new Navbox.) |
||
| (25 intermediate revisions by 2 users not shown) | |||
| Line 31: | Line 31: | ||
Leona is a mostly a poking/counter-poke/mobility-based character who is also very fast and had some good pressure and options. Her low pokes are some of the best in the game because of their range and low-crouch properties. Many of her jumping attacks have good priority and can be used as instant overheads. Her run is extremely low, and allows her to run under high fireballs such as Takuma's, as well as some jump-ins. She falls around the mid tier, but she can deal with the top tiers reasonably well, similar to Mai. She requires some accurate execution for reliable combo/mixup damage, and some more thinking than most characters, so I wouldn't recommend her to a beginner, but if you are an intermediate player and enjoy playing characters with a lots of poking/prodding ability with some weird properties, I'd recommend her. | Leona is a mostly a poking/counter-poke/mobility-based character who is also very fast and had some good pressure and options. Her low pokes are some of the best in the game because of their range and low-crouch properties. Many of her jumping attacks have good priority and can be used as instant overheads. Her run is extremely low, and allows her to run under high fireballs such as Takuma's, as well as some jump-ins. She falls around the mid tier, but she can deal with the top tiers reasonably well, similar to Mai. She requires some accurate execution for reliable combo/mixup damage, and some more thinking than most characters, so I wouldn't recommend her to a beginner, but if you are an intermediate player and enjoy playing characters with a lots of poking/prodding ability with some weird properties, I'd recommend her. | ||
==[[ | ==[[The King of Fighters 2002/Normals Guide|Movelist]]== | ||
{|border="1" | {|border="1" | ||
!width="11%"| | !width="11%"| | ||
| Line 77: | Line 77: | ||
|valign="bottom" style="border-right:0px;"| [[image:Leona98_clD1.png|center]] | |valign="bottom" style="border-right:0px;"| [[image:Leona98_clD1.png|center]] | ||
|valign="bottom" style="border-left:0px;" colspan="2"| [[image:Leona98_clD2.png|center]] | |valign="bottom" style="border-left:0px;" colspan="2"| [[image:Leona98_clD2.png|center]] | ||
|Main comboing tool. Fast, cancellable on 2nd hit into specials/supers or f+B into V Slasher | |Main comboing tool. Fast, cancellable on 2nd hit into specials/supers or f + B into V Slasher | ||
|- | |- | ||
|colspan="9" align="center"| '''Standing Far''' | |colspan="9" align="center"| '''Standing Far''' | ||
| Line 168: | Line 168: | ||
|align="center"| H | |align="center"| H | ||
|colspan="3" | [[image:Leona98_jA.png|center]] | |colspan="3" | [[image:Leona98_jA.png|center]] | ||
|Notable because it is cancellable and hyperhop A can be used as an instant overhead, so hyperhop A | |Notable because it is cancellable and hyperhop A can be used as an instant overhead, so hyperhop A > V Slasher works | ||
|- | |- | ||
! [[image:snkb.gif]] | ! [[image:snkb.gif]] | ||
| Line 240: | Line 240: | ||
|colspan="9" align="center"| '''Command Normals''' | |colspan="9" align="center"| '''Command Normals''' | ||
|- | |- | ||
! <br>f+[[image:snkb.gif]]<br><br> | ! <br>f + [[image:snkb.gif]]<br><br> | ||
|align="center"| 26/1/20 | |align="center"| 26/1/20 | ||
|align="center"| KD/-3 | |align="center"| KD/-3 | ||
| Line 248: | Line 248: | ||
| | | | ||
|- | |- | ||
! f+[[image:snkb.gif]]<br>(cancel) | ! f + [[image:snkb.gif]]<br>(cancel) | ||
|align="center"| 18/3/15 | |align="center"| 18/3/15 | ||
|align="center"| +2/0 | |align="center"| +2/0 | ||
| Line 257: | Line 257: | ||
|colspan="9" align="center"| '''Special Moves''' | |colspan="9" align="center"| '''Special Moves''' | ||
|- | |- | ||
! <br> | ! <br>(d) u + [[image:snka.gif]]<br><br> | ||
|align="center"| 4/2+2+2/31 | |align="center"| 4/2+2+2/31 | ||
|align="center"| -15/-17 | |align="center"| -15/-17 | ||
| Line 265: | Line 265: | ||
|rowspan="2" valign="bottom" style="border-right:0px; border-left:0px;"| [[image:Leona98_duP2.png|center]] | |rowspan="2" valign="bottom" style="border-right:0px; border-left:0px;"| [[image:Leona98_duP2.png|center]] | ||
|rowspan="2" valign="bottom" style="border-left:0px;"| [[image:Leona98_duP3.png|center]] | |rowspan="2" valign="bottom" style="border-left:0px;"| [[image:Leona98_duP3.png|center]] | ||
|rowspan="2"|'''Moon Slasher ( | |rowspan="2"|'''Moon Slasher ((d) u + P)''' | ||
*No invincibility, but is fast and has a nice, big hitbox. Does a lot of damage on counter-hit, and can be used as an early anti-air. Hard to punish for some characters at range. I recommend the C version, but the A version is faster and can be harder to punish. | *No invincibility, but is fast and has a nice, big hitbox. Does a lot of damage on counter-hit, and can be used as an early anti-air. Hard to punish for some characters at range. I recommend the C version, but the A version is faster and can be harder to punish. | ||
|- | |- | ||
! | ! (d) u + [[image:snkc.gif]] | ||
|align="center"| 6/2+2+2/34 | |align="center"| 6/2+2+2/34 | ||
|align="center"| -18/-20 | |align="center"| -18/-20 | ||
| Line 274: | Line 274: | ||
|align="center"| HL | |align="center"| HL | ||
|- | |- | ||
! | ! (b) f + [[image:snka.gif]] | ||
|align="center"| 27/18/3 | |align="center"| 27/18/3 | ||
| | | | ||
| Line 280: | Line 280: | ||
|align="center"| HL | |align="center"| HL | ||
|colspan="3"| [[image:Leona98_bfA.png|center]] | |colspan="3"| [[image:Leona98_bfA.png|center]] | ||
|rowspan="2"| '''Baltic Launcher ( | |rowspan="2"| '''Baltic Launcher ((b) f + P) | ||
*C version will crossup large characters after a non-cancelled f+B | *C version will crossup large characters after a non-cancelled f + B | ||
|- | |- | ||
! | ! (b) f + [[image:snkc.gif]] | ||
|align="center"| 34+13/36/4 | |align="center"| 34+13/36/4 | ||
| | | | ||
| Line 294: | Line 294: | ||
===Normal Throws=== | ===Normal Throws=== | ||
* '''b or f+C''' - Breakable, forward knockdown, face forward, rollable. | * '''b or f + C''' - Breakable, forward knockdown, face forward, rollable. | ||
* '''b or f+D''' - Breakable, reverse knockdown, face forward, un-rollable. | * '''b or f + D''' - Breakable, reverse knockdown, face forward, un-rollable. | ||
* '''b or f or d+C/D in air''' - Unbreakable, forward knockdown, back turned, un-rollable. | * '''b or f or d + C/D in air''' - Unbreakable, forward knockdown, back turned, un-rollable. | ||
| Line 313: | Line 313: | ||
* ''' | * '''Eye Slasher (qcb + P)''' - This is what comes out when you mess up tigerknee V Slasher. NEVER EVER IN YOUR GODDAMN LIFE USE THIS MOVE PLEASE | ||
* | * (b) f + P | ||
See description on Movelist section. | |||
* | * (d) u + P | ||
See description on Movelist section. | |||
* ''' | * '''X Calibur ((d) u + K)''' - Can hop over fireballs, etc. Can cross up on wakeup, too, but theres not many setups with recovery roll. Combos from Ground Saber or Baltic Launcher in the corner. | ||
* '''Ground Saber ~ Gliding Buster ((b) f + B / (b) f + D > f + D)''' - D version goes further and has a followup by hitting f + D when it connects (not recommended). This move gives frame advantage on block, so try something like repeated cr.C > Ground Saber in the corner, and if it hits, cr.C -> opponent lands cr.C > Ground Saber repeat etc. You can combo X Calibur or V Slasher in the corner if it hits, as well. | |||
* '''Earring Bakudan (qcb + K)''' - B/D control the arc. Can hit low. A good pressure tool to run in behind from far away. Just be aware of the startup. | |||
===Desperation Moves=== | ===Desperation Moves=== | ||
* '''Rebel Spark (qcb | * '''Rebel Spark (qcb hcf + K)''' - D version has invincibility at the beginning, and can even be used as an anti-air if timed properly (similar to Iori's Maiden Masher), or as a reversal. Combos from close D. MAX version shares the same properties, but is faster and way safer. Be a dick and throw out the MAX version, then do some gay shit when they try to run in and punish it like a cr.B or a Moon Slasher or another Rebel Spark (card starts). | ||
* '''V Slasher aka Vagina Blast (qcf | * '''V Slasher aka Vagina Blast (air qcf hcb + P)''' - Super fast. A version is invincible up to the hit (can trade), while C version has more invincibility. Combos from a chained f + B. Can be used to bait certain anti-airs, punish whiffs, and can be tiger-kneed (qcf hcb ub + P or qcf uf hcb + P), MAX version shares the properties and does more damage. | ||
* '''Gravity Storm (qcf | * '''Gravity Storm (qcf qcf + P)''' - A version is invincible, while C version seems to not be. Really weird super, not really recommended, but it looks cool. Not much range, and if it hits them in the air, you're screwed. Both MAX versions are invincible, do more damage, and look even cooler! | ||
== Fastest Attacks == | |||
* 0F: C throw; D throw | * 0F: C throw; D throw | ||
| Line 343: | Line 349: | ||
* 2F: '''cr.C''' | * 2F: '''cr.C''' | ||
* 3F: '''cl.A'''; '''cl.C'''; st.A; '''cr.A'''; cr.B | * 3F: '''cl.A'''; '''cl.C'''; st.A; '''cr.A'''; cr.B | ||
* 4F: '''cl.D'''; st.B; d u + A | * 4F: '''cl.D'''; st.B; (d) u + A | ||
* 5F: '''cl.B''' | * 5F: '''cl.B''' | ||
* 6F: d u + C | * 6F: (d) u + C | ||
* 7F: cr.D | * 7F: cr.D | ||
* 8F: - | * 8F: - | ||
| Line 352: | Line 358: | ||
==Combos== | ==Combos== | ||
* Best jump-ins: | |||
** j.C | |||
** j.D | |||
* cr.B x 2, cr.A > | * cr.B x 2, cr.A > | ||
** C Moon Slasher (d u + C) | ** C Moon Slasher ((d) u + C) | ||
| Line 364: | Line 375: | ||
** f + B > (S)DM C V Slasher (air qcf hcb + C) | ** f + B > (S)DM C V Slasher (air qcf hcb + C) | ||
** (S)DM Rebel Spark (qcb hcf + K) (SDM only if very close) | ** (S)DM Rebel Spark (qcb hcf + K) (SDM only if very close) | ||
** f + B (Only comboable option without meter...) | ** f + B (Only comboable option without meter from a stand attack...) | ||
* j.A / j.D > (S)DM C V Slasher (air qcf hcb + C) | * j.A / j.D > (S)DM C V Slasher (air qcf hcb + C) | ||
Instant overhead (using hyper hop) or far/high jump combo. | Instant overhead (using hyper hop) or far/high jump combo. As an instant overhead the initial jump attack may miss if you are very close. | ||
* j.D, | * j.D, j.D > (S)DM C V Slasher (air qcf hcb + C) | ||
Far and deep jump combo. | Far and deep jump combo. | ||
* Baltic Launcher ((b) f + P) / Ground Saber ((b) f + K) | * Baltic Launcher ((b) f + P) / Ground Saber ((b) f + K) | ||
** DM qcf qcf + P (Corner.) (Stylishly combo :) and does a | ** DM qcf qcf + P (Corner.) (Stylishly combo :) and does a tiny more damage than others DMs. On MAX use other supers as the SDM will miss the second part.) | ||
** (S)DM Rebel Spark (qcb hcf + K) ( | ** (S)DM Rebel Spark (qcb hcf + K) (Corner or if recover too early.) | ||
** (S)DM V Slasher (air qcf hcb + P) | ** (S)DM V Slasher (air qcf hcb + P) | ||
** C Moon Slasher (d u + C) | ** C Moon Slasher ((d) u + C) | ||
** X Calibur (d u + D) (Corner or very close.) | ** X Calibur ((d) u + D) (Corner or very close.) | ||
** j.CD | ** j.CD | ||
** j.D (reset) | ** j.D (reset) | ||
| Line 386: | Line 397: | ||
* Point blank: cr.A / cl.A / cl.D (1 hit) > (S)DM qcf qcf + P | * Point blank: cr.A / cl.A / cl.D (1 hit) > (S)DM qcf qcf + P | ||
This will deal less damage than combos with the others supers using cl.C (2) or cr.C. | |||
* Simple buffers: | |||
** j.A / j.D > (S)DM qcf hcb + C | |||
*** qcf uf + A/D > hcb + C | |||
** f + B > (S)DM qcf hcb + C | |||
*** qcf + B > hcb + C | |||
** cl.A / cl.D (1 hit) > (S)DM qcf qcf + P | |||
*** qcf + A/D > qcf + P | |||
| Line 392: | Line 412: | ||
The hyper hop A/D combo is hard, but it is an instant overhead into nice damage, so again, hit up practice mode! | The hyper hop A/D combo is hard, but it is an instant overhead into nice damage, so again, hit up practice mode! | ||
| Line 399: | Line 419: | ||
{{StrategyCorner| | {{StrategyCorner| | ||
* MAX: cr.C > d u + C | * MAX: cr.C > (d) {{u}} + C | ||
deals ??? than | deals ??? than | ||
* | * cr.C > {{f}} + B > air {{qcf}} {{hcb}} + C | ||
Keep this in mind, when you need to decide whether to trigger MAX or keep meter for a DM. | Keep this in mind, when you need to decide whether to trigger MAX or keep meter for a DM. | ||
| Line 409: | Line 429: | ||
{{ | |||
== Links == | |||
{{Navbox-KOF98}} | |||
[[Category:The King of Fighters '98: The Slugfest]] | [[Category:The King of Fighters '98: The Slugfest]] | ||
Latest revision as of 04:03, 1 January 2021
Introduction
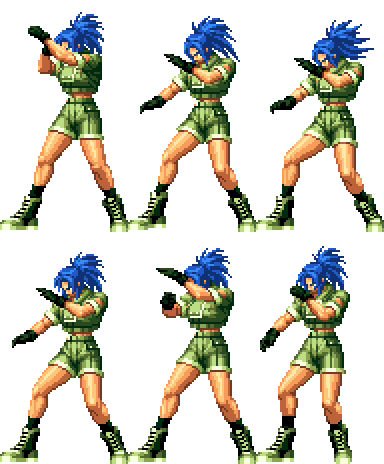
Leona has a rich African heritage and wears shorts.
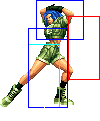
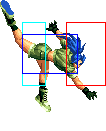
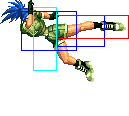
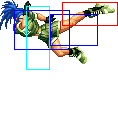
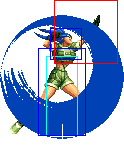
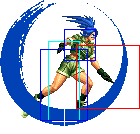
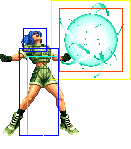
| Stand | Crouch | Jump | Grab | Run |
|---|---|---|---|---|

|

|

|
Colors

|

|

|

|
Gameplay Overview
Leona is a mostly a poking/counter-poke/mobility-based character who is also very fast and had some good pressure and options. Her low pokes are some of the best in the game because of their range and low-crouch properties. Many of her jumping attacks have good priority and can be used as instant overheads. Her run is extremely low, and allows her to run under high fireballs such as Takuma's, as well as some jump-ins. She falls around the mid tier, but she can deal with the top tiers reasonably well, similar to Mai. She requires some accurate execution for reliable combo/mixup damage, and some more thinking than most characters, so I wouldn't recommend her to a beginner, but if you are an intermediate player and enjoy playing characters with a lots of poking/prodding ability with some weird properties, I'd recommend her.
Movelist
Normal Throws
- b or f + C - Breakable, forward knockdown, face forward, rollable.
- b or f + D - Breakable, reverse knockdown, face forward, un-rollable.
- b or f or d + C/D in air - Unbreakable, forward knockdown, back turned, un-rollable.
Well, Leona's throw game is bad. C throw doesn't have the blue grab 'effect', but the D one isn't rollable. You can at least set up wakeups from the D one with a ambiguous ground roll. The air throw is good, of course.
Other Normal Moves
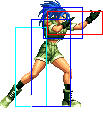
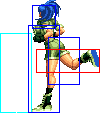
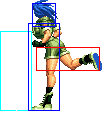
- Run: Leona has a short hurtbox during her run and is able to pass below high moves and fireballs - similar to Iori's Maiden Masher super (qcf hcb + P).
Special Moves
- Eye Slasher (qcb + P) - This is what comes out when you mess up tigerknee V Slasher. NEVER EVER IN YOUR GODDAMN LIFE USE THIS MOVE PLEASE
- (b) f + P
See description on Movelist section.
- (d) u + P
See description on Movelist section.
- X Calibur ((d) u + K) - Can hop over fireballs, etc. Can cross up on wakeup, too, but theres not many setups with recovery roll. Combos from Ground Saber or Baltic Launcher in the corner.
- Ground Saber ~ Gliding Buster ((b) f + B / (b) f + D > f + D) - D version goes further and has a followup by hitting f + D when it connects (not recommended). This move gives frame advantage on block, so try something like repeated cr.C > Ground Saber in the corner, and if it hits, cr.C -> opponent lands cr.C > Ground Saber repeat etc. You can combo X Calibur or V Slasher in the corner if it hits, as well.
- Earring Bakudan (qcb + K) - B/D control the arc. Can hit low. A good pressure tool to run in behind from far away. Just be aware of the startup.
Desperation Moves
- Rebel Spark (qcb hcf + K) - D version has invincibility at the beginning, and can even be used as an anti-air if timed properly (similar to Iori's Maiden Masher), or as a reversal. Combos from close D. MAX version shares the same properties, but is faster and way safer. Be a dick and throw out the MAX version, then do some gay shit when they try to run in and punish it like a cr.B or a Moon Slasher or another Rebel Spark (card starts).
- V Slasher aka Vagina Blast (air qcf hcb + P) - Super fast. A version is invincible up to the hit (can trade), while C version has more invincibility. Combos from a chained f + B. Can be used to bait certain anti-airs, punish whiffs, and can be tiger-kneed (qcf hcb ub + P or qcf uf hcb + P), MAX version shares the properties and does more damage.
- Gravity Storm (qcf qcf + P) - A version is invincible, while C version seems to not be. Really weird super, not really recommended, but it looks cool. Not much range, and if it hits them in the air, you're screwed. Both MAX versions are invincible, do more damage, and look even cooler!
Fastest Attacks
- 0F: C throw; D throw
- 1F: -
- 2F: cr.C
- 3F: cl.A; cl.C; st.A; cr.A; cr.B
- 4F: cl.D; st.B; (d) u + A
- 5F: cl.B
- 6F: (d) u + C
- 7F: cr.D
- 8F: -
- 9F: -
- 10F: -
Combos
- Best jump-ins:
- j.C
- j.D
- cr.B x 2, cr.A >
- C Moon Slasher ((d) u + C)
- cr.C > C Moon Slasher ((d) u + C)
- cr.C / cl.D (2 hits) / st.C
- f + B > (S)DM C V Slasher (air qcf hcb + C)
- (S)DM Rebel Spark (qcb hcf + K) (SDM only if very close)
- f + B (Only comboable option without meter from a stand attack...)
- j.A / j.D > (S)DM C V Slasher (air qcf hcb + C)
Instant overhead (using hyper hop) or far/high jump combo. As an instant overhead the initial jump attack may miss if you are very close.
- j.D, j.D > (S)DM C V Slasher (air qcf hcb + C)
Far and deep jump combo.
- Baltic Launcher ((b) f + P) / Ground Saber ((b) f + K)
- DM qcf qcf + P (Corner.) (Stylishly combo :) and does a tiny more damage than others DMs. On MAX use other supers as the SDM will miss the second part.)
- (S)DM Rebel Spark (qcb hcf + K) (Corner or if recover too early.)
- (S)DM V Slasher (air qcf hcb + P)
- C Moon Slasher ((d) u + C)
- X Calibur ((d) u + D) (Corner or very close.)
- j.CD
- j.D (reset)
- Point blank: cr.A / cl.A / cl.D (1 hit) > (S)DM qcf qcf + P
This will deal less damage than combos with the others supers using cl.C (2) or cr.C.
- Simple buffers:
- j.A / j.D > (S)DM qcf hcb + C
- qcf uf + A/D > hcb + C
- f + B > (S)DM qcf hcb + C
- qcf + B > hcb + C
- cl.A / cl.D (1 hit) > (S)DM qcf qcf + P
- qcf + A/D > qcf + P
- j.A / j.D > (S)DM qcf hcb + C
Her cr.B, cr.A chain is a bit harder than most characters, but it is important to her mixup game, so practice it.
The hyper hop A/D combo is hard, but it is an instant overhead into nice damage, so again, hit up practice mode!
The Baltic Launcher combos when done from the A version will generally only work in the corner, but V Slasher can hit if it hits as a high anti-air.
Strategy Corner
- MAX: cr.C > (d)
 + C
+ C
deals ??? than
- cr.C >
 + B > air
 + C
+ C
Keep this in mind, when you need to decide whether to trigger MAX or keep meter for a DM.
