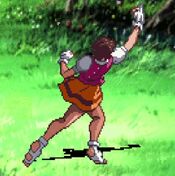
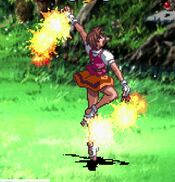
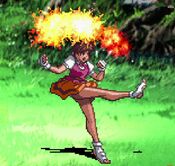
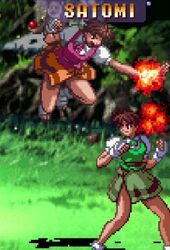
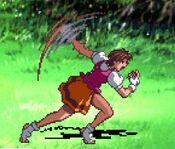
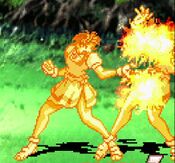
Advanced V.G. 2/Satomi/Move List

From SuperCombo Wiki


Move List

Normals


Lp.png
AVG2 Satomi stLP.jpg
Damage Guard Startup Active Recovery Frame Adv
- Mid - - -

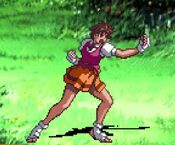
A quick backfist strike that is an awesome button. Good speed and range.

Chains to:
D.pngLp.png > Lk.png > D.pngLk.png > Hp.png > Hk.png
Any part of the chain may be omitted, HP/HK may be swapped

Lk.png
AVG2 Satomi stLK.jpg
Damage Guard Startup Active Recovery Frame Adv
- Mid - - -

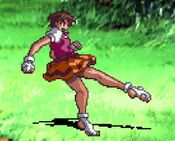
A low-looking shin kick, still a mid but it easily links into itself multiple times and can special cancel, meaning you can get Gokuensho as an ender.

Chains to:
D.pngLk.png

Hp.png
AVG2 Satomi stHP.jpg
Damage Guard Startup Active Recovery Frame Adv
- Mid 5 - - -

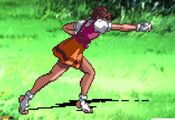
The button of all time. Satomi lets loose a killer poke with only 5f of start-up. Outside of some interactions where it can be low-profiled, this button can strike fear into the opponent with it's speed and range. Not only that, but because it's also her dashing attack she can give this bad boy crazy momentum by doing the dashing version. 5HP is one of the strongest single buttons in the game and enables Satomi to out footsie most characters without breaking a sweat.

Chains to:
Hk.png

Hk.png
AVG2 Satomi stHK.jpg
Damage Guard Startup Active Recovery Frame Adv
- Mid - -+1 -

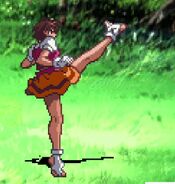
An inside spinning roundhouse that could have used some additional frames of animation to get that across. While it does special cancel, its range is inferior to 5HP. However once inside the oppoenent's range this becomes more useful as it is +1 on block.


D.pngLp.png
AVG2 Satomi crLP.jpg
Damage Guard Startup Active Recovery Frame Adv
- Mid - - -

A quick elbow jab, the range is stubby but it has awesome chain routes.

Chains to:
D.pngHp.png
(Lk.png) > D.pngLk.png > D.pngHk.png

D.pngLk.png
AVG2 Satomi crLK.jpg
Damage Guard Startup Active Recovery Frame Adv
- Low - - -

No links, no chains, but with the threat of a Gokuensho overhead it doesn't necessarily need it. Because of how fast Gokuensho is, 2LK can just pressure them to block low or if they really want to block Gokuensho, allow her to get free 2LKs in.


D.pngHp.png
AVG2 Satomi crHP.jpg
Damage Guard Startup Active Recovery Frame Adv
- Mid - - -

The button of all time's little brother. While not quite as good as 5HP, 2HP has the advantage of not being about to be low-profiled. Because of this Satomi can switch between the two depending on her needs to bully the opponent at range.


D.pngHk.png
AVG2 Satomi crHK.jpg
Damage Guard Startup Active Recovery Frame Adv
- Low - - -

A sweep that actually juggles, so you can score some extra damage off of it.


j.Lp.png
AVG2 Satomi jLP.jpg
Damage Guard Startup Active Recovery Frame Adv
- High - - -

A small karate chop, its downward hitbox is actually quite good and it can cross up.

Chains to:
j.Hp.png / j.Hk.png

j.Lk.png
AVG2 Satomi jLK.jpg
Damage Guard Startup Active Recovery Frame Adv
- High - - -

Satomi's best ranged air normal, it's got the biggest hitbox and controls space quite nicely.

Chains to:
j.Hp.png / j.Hk.png

j.Hp.png
AVG2 Satomi jHP.jpg
Damage Guard Startup Active Recovery Frame Adv
- High - - -

A fierce downward punch. Not particularly special, but good as a jump-in tool.


j.Hk.png
AVG2 Satomi jHK.jpg
Damage Guard Startup Active Recovery Frame Adv
- High - - -

You would like to believe this kick has a good hitbox, but it actually has less range than 2LK. Really a bit of a shame.


Command Normals

Df.pngHp.png
AVG2 Satomi 3HP.jpg
Damage Guard Startup Active Recovery Frame Adv
- Mid - - -

A command launcher. It could probably do as an anti-air in a pinch, but this is Satomi we are talking about, she has much better AA options.


Df.pngHk.png
AVG2 Satomi 3HK.jpg
Damage Guard Startup Active Recovery Frame Adv
- Low - - -

Instantly gives her low-profile and has excellent range, meaning it can be a terror to deal with in neutral.


Special Moves

Kaenzan
AVG2 Satomi Kaenzan.jpg
Rdp.pngP.png
Version Damage Guard Startup Active Recovery Frame Adv
Lp.png - Mid - - -

Satomi hops upward, spinning her arms with accompanying flames. An incredible anti-air, not only is it useful in stopping air advances, but Satomi is considered airborne during her entire recovery. Now this does not necessarily stop her from being punished, but any opponent thinking they are going to get a grounded punish will have their combo whiff. Due note that this is strictly for anti-airing, this has almost no effectiveness as a reversal against grounded opponents.

Hp.png - Mid - - -

Satomi jumps a noticeable amount higher for the HP version.

Lp.png + Hp.png - Mid - - -

Bar none the best anti-air in the game. The hitbox on EX Kaenzan is so big that it will even catch cross-up attempts. Not only that but anyone hit by EX Kaenzan will warp in front of Satomi, which is important because she can link a second EX Kaenzan afterwards. Always keep meter on deck for this, as it shuts down any aerial option the opponent has.


Gokuensho
AVG2 Satomi Gokuensho.jpg
Qcb.pngK.png
Version Damage Guard Startup Active Recovery Frame Adv
Lk.png - High - - -

A mad quick overhead, it does cause a knockdown so she cannot use it as a combo starter but mixing it with 2LK is a legitimate mixup when pressuring the opponent. You can threaten this with dash momentum by jump cancelling the dash and then special cancelling the jump; Dash into 2147 LK.

Hk.png - - - -

LK is your mixup tool, but HK is slower and more damaging which means its best for combos.

Lk.png + Hk.png - - - -

A triple series of flame wheel kicks that comes out fast and recovers even faster on hit. You can link out of this as you are +6 on hit, giving you cr.LP/cr.LK/3H for standing opponents and cr.LK/Another EX Gokensho


Shinku Karatake Wari
AVG2 Satomi Shinku Karatake Wari.jpg
Hcf.pngP.png
Version Damage Guard Startup Active Recovery Frame Adv
Lp.png - High - - -

Satomi leaps high, like REAL high in the air and comes down with a flaming chop. Practically useless because the start-up is monumental. You can directionally influence Satomi's trajectory in air with either left or right and after she lands you can hit HP for a non-combo follow-up flame swipe.

Hp.png - High - - -

Seriously, Satomi jumps off the screen in this version. It takes forever.

Lp.png + Hp.png - - - -

Satomi engulfs herself in flames on the way up, meaning she's an active hitbox before leaving the ground. This is an inherently much more useful version of Shinku Karatake Wari, but it's true power is hitting during a juggle. If you EX Shinku Karatake Wari after a launcher like 3HP Satomi deals way more damage while in the air if her body arcs where they are. This is very tricky to time correctly, but off the right juggle you can make bank.


Ouhou
AVG2 Satomi Ouhou.jpg
Qcb.pngP.png
Version Damage Guard Startup Active Recovery Frame Adv
Lp.png - - - -

Projectile reflector. A big help against the more zoning-heavy characters as Satomi doesn't really have any other tools to help against zoning. There is a strike attached to it but the range and damage are absolutely pitiful.

Hp.png - - - -

With roughly the same startup and only slightly less pitiful damage, the HP version is fundamentally the same.


Guard Cancels

Lp.png Guard Cancel
AVG2 Satomi stLP.jpg
Damage Guard Startup Active Recovery Frame Adv

Uses Satomi's Lp.png. Has the highest return of any of her guard cancels due to its chain routes, but it can be hampered by its short range.


Lk.png Guard Cancel
AVG2 Satomi stLK.jpg
Damage Guard Startup Active Recovery Frame Adv

Uses Satomi's Lk.png. Less rewarding than the LP guard cancel, but slightly more reliable due to its range.


Hp.png Guard Cancel
AVG2 Satomi Gokuensho.jpg
Damage Guard Startup Active Recovery Frame Adv

Uses Satomi's Lk.png Gokuensho.


Hk.png Guard Cancel
AVG2 Satomi Kaenzan.jpg
Damage Guard Startup Active Recovery Frame Adv

Uses Satomi's Lp.png Kaenzan. Has the best hitbox of her guard cancels, but despite its invincibility, the guard cancel freeze frames make this option surprisingly slow, which hinders its reliability somewhat.


Super Moves

Hissatsu Kyokushinken
AVG2 Satomi Hissatsu Kyokushinken.jpg
F.pngHcf.pngK.png
Damage Guard Startup Active Recovery Frame Adv
- - - -

A dashing 2 bar ranbu super, deals awesome damage if done raw but with no fixed damage it will scale when in combos. Regardless, it is a useful way to cash out meter.


Game Navigation

General
Controls
HUD
System
Advanced Mechanics
FAQ
Characters
Kyoko
Chiho
Tamao
Yuka
Satomi
Manami
Saki
Ayako
Elirin
Jun
Kaori
Reimi
Boss Characters
Material
Miranda