Advanced V.G. 2/Kyoko/Move List

From SuperCombo Wiki


Move List

Standing Normals

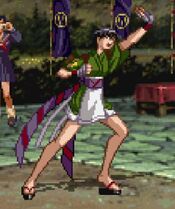
Lp.png
AVG2 Kyoko stLP.jpg
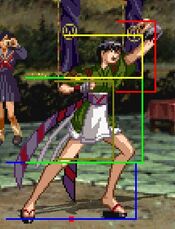
AVG2 Kyoko stLPhitbox.jpg
Show Hitboxes
Hide Hitboxes
Damage Guard Startup Active Recovery FrameAdv
Mid 4 2 6 -

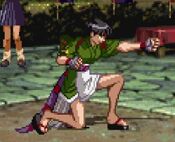
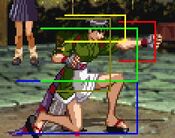
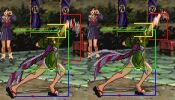
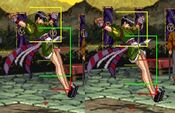
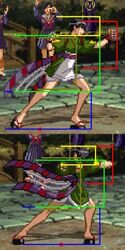
A short elbow jab, the speed and recovery on this bad boy is insane, it has no chains but due to how fast it is it can link into every other standing or crouching normal she has. The range is also much better than what it looks like, albeit still a short jab. Special cancelable.


Lk.png
AVG2 Kyoko stLK.jpg
AVG2 Kyoko stLKhitbox.jpg
Show Hitboxes
Hide Hitboxes
Damage Guard Startup Active Recovery FrameAdv
Mid 5 2 13 -

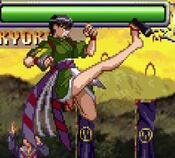
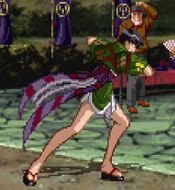
A long front kick, one of Kyoko's best space control and harassment tools as it has quick startup, good range (for a light), and she can link into itself or special cancel it (although linking multiple times will put you out of range for an Ominaeshi).


Hp.png
AVG2 Kyoko stHP.jpg
AVG2 Kyoko stHPhitbox.jpg
Show Hitboxes
Hide Hitboxes
Damage Guard Startup Active Recovery FrameAdv
Mid 5 2 13 -

An upward palm strike, awful horizontal range means this is primarily used in juggle combos with the very occasional anti-air use. Special cancellable.

Chains to:
Hk.png / D.pngHk.png

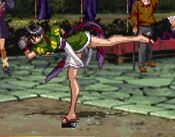
Hk.png
AVG2 Kyoko stHK.jpg
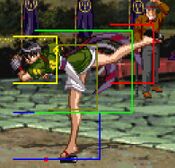
AVG2 Kyoko stHKhitbox.jpg
Show Hitboxes
Hide Hitboxes
Damage Guard Startup Active Recovery FrameAdv
Mid 9 2 16 -

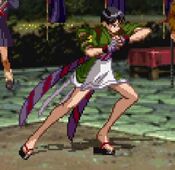
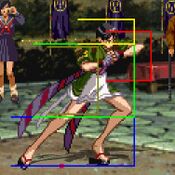
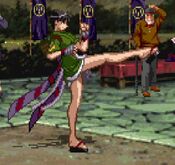
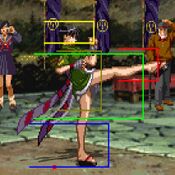
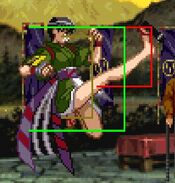
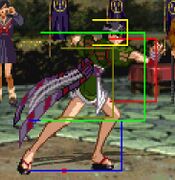
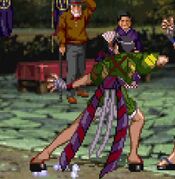
A reverse kick, kinda useless as it actually has less range than stLK and has so much pushback that special cancelling it into Ominaeshi will whiff anywhere but point blank. This will move Kyoko forward a little bit after recovering.


Crouching Normals

D.pngLp.png
AVG2 Kyoko crLP.jpg
AVG2 Kyoko crLPhitbox.jpg
Show Hitboxes
Hide Hitboxes
Damage Guard Startup Active Recovery FrameAdv
Mid 4 2 4 -

A quick punch, much like its standing version it too can link into every other standing or crouching normal and is special cancellable.


D.pngLk.png
AVG2 Kyoko crLK.jpg
AVG2 Kyoko crLKhitbox.jpg
Show Hitboxes
Hide Hitboxes
Damage Guard Startup Active Recovery FrameAdv
Low 3 2 11 -

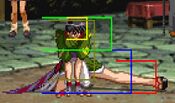
A quick low kick with good range and good recovery, can link into itself and 2LP but does not offer enough hitstun for anything else. Is special cancellable.


D.pngHp.png
AVG2 Kyoko crHP.jpg
AVG2 Kyoko crHPhitbox.jpg
Show Hitboxes
Hide Hitboxes
Damage Guard Startup Active Recovery FrameAdv
Mid 6 2 14 -

A rising palm strike from crouching position, Kyoko's launcher. The goal is to link into this because this is what starts her damage and thusly starts her gameplan.

Chains to:
D.pngHk.png

D.pngHk.png
AVG2 Kyoko crHK.jpg
AVG2 Kyoko crHKhitbox.jpg
Show Hitboxes
Hide Hitboxes
Damage Guard Startup Active Recovery FrameAdv
Low 8 2 14 -

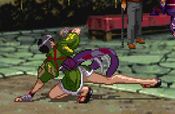
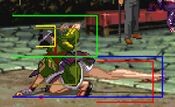
A good sweep, acceptable range, special cancellable, and is her OTG pickup.


Jumping Normals

j.Lp.png
AVG2 Kyoko jLP.jpg
AVG2 Kyoko jLPhitbox.jpg
Show Hitboxes
Hide Hitboxes
Damage Guard Startup Active Recovery FrameAdv
High 4 14 4 -

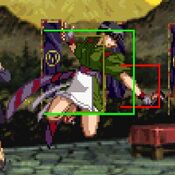
Kyoko adds a little spice to her palm strike by using her sandal as a weapon. A very fast air normal with an ok hitbox and great active length that's best used to lock down the opponent in the air than as an air to air.

Chains to:
j.Lk.png > j.Hp.png > j.Hk.png
Any button may be omitted, HP/HK may be swapped

j.Lk.png
AVG2 Kyoko jLK.jpg
AVG2 Kyoko jLKhitbox.jpg
Show Hitboxes
Hide Hitboxes
Damage Guard Startup Active Recovery FrameAdv
High 6 14 4 -

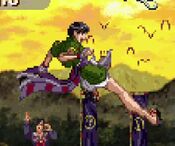
A downward angled kick, better range than j.LP and still chains into all other air normals.

Chains to:
j.Lp.png > j.Hp.png > j.Hk.png
Any button may be omitted, HP/HK may be swapped

nj.Lk.png
AVG2 Kyoko njLK.jpg
AVG2 Kyoko njLKhitbox.jpg
Show Hitboxes
Hide Hitboxes
Damage Guard Startup Active Recovery FrameAdv
High 3 12 6 -

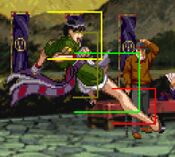
An upward angled kick, shorter range than the diagonal version but is her only air normal made for catching someone your height or higher.

Chains to:
j.Lp.png > j.Hp.png > j.Hk.png
Any button may be omitted, HP/HK may be swapped

j.Hp.png
AVG2 Kyoko jHP.jpg
AVG2 Kyoko jHPhitbox.jpg
Show Hitboxes
Hide Hitboxes
Damage Guard Startup Active Recovery FrameAdv
High 12 2 14 -

The sandal is back! The range is a little too shallow and not very active to use as a jump in reliably, even if she shift her hurtbox upwards, so it's best used for meter building and air juggles.

Chains to:
j.Hk.png

j.Hk.png
AVG2 Kyoko jHK.jpg
AVG2 Kyoko jHKhitbox.jpg
Show Hitboxes
Hide Hitboxes
Damage Guard Startup Active Recovery FrameAdv
High 8 6 9 -

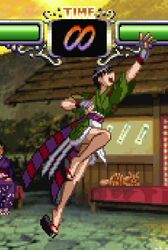
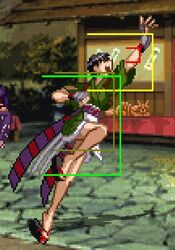
Now THAT'S a jump-in! Kyoko puts her ankles into it as this move will hit anything below her, to the point where it can instant overhead a crouching opponent. Best saved last in your air chain unless you need the height of jHP.

Chains to:
j.Hp.png

Command Normals

B.pngHp.png
AVG2 Kyoko 4HP.jpg
AVG2 Kyoko 4HPhitbox.jpg
Show Hitboxes
Hide Hitboxes
Damage Guard Startup Active Recovery FrameAdv
Mid 6 4 22 -

A short-range hook slap, slightly less range than stLP (partially due to the back input). Special cancels, but doesn't really do a whole lot for you compared to any other button that hits at the same range.


Throws

Kotegaeshi
AVG2 Kyoko PThrow.jpg
cl. B.png/F.png + P.png
Damage Guard Startup Active Recovery FrameAdv

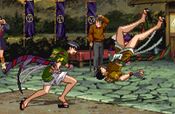
Kyoko throws wrist lock then throws the opponent away from her, does not allow OTG extensions and the recovers slower than most. Useful as a defensive option if you don't want to risk EX Ominaeshi being baited or taking time to input Jinchouge.


Guard Cancels

Lp.png Guard Cancel
AVG2 Kyoko stHP.jpg
AVG2 Kyoko stHPhitbox.jpg
Show Hitboxes
Hide Hitboxes
Damage Guard Startup Active Recovery FrameAdv

Uses Kyoko's Hp.png. A very good guard cancel option to use against airborne opponents, since its high angle will catch them and launch for a juggle.


Lk.png Guard Cancel
AVG2 Kyoko stHK.jpg
AVG2 Kyoko stHKhitbox.jpg
Show Hitboxes
Hide Hitboxes
Damage Guard Startup Active Recovery FrameAdv

Uses Kyoko's Hk.png. More reliable against grounded opponents than LP guard cancel due to its horizontal range. Cancel into Ominaeshi for a combo afterwards.


Hp.png Guard Cancel
AVG2 Kyoko Ominaeshi.jpg
AVG2 Kyoko Ominaeshihitbox.jpg
Show Hitboxes
Hide Hitboxes
Damage Guard Startup Active Recovery FrameAdv

Uses Kyoko's Lp.png Ominaeshi.


Hk.png Guard Cancel
AVG2 Kyoko Sazanka.jpg
AVG2 Kyoko Sazankahitbox.jpg
Show Hitboxes
Hide Hitboxes
Damage Guard Startup Active Recovery FrameAdv

Uses Kyoko's Lk.png Sazanka.


Special Moves

Ominaeshi
AVG2 Kyoko Ominaeshi.jpg
Qcf.pngP.png ~ P.png
AVG2 Kyoko Ominaeshihitbox.jpg
Show Hitboxes
Hide Hitboxes
Version Damage Guard Startup Active Recovery FrameAdv
Lp.png Mid 8 4 14

A short-range lackadaisical uppercut attack. Has an advancing elbow follow-up called Otokoeshi, performed by pressing P again. The strength of Otokoeshi is determined by the version of Ominaeshi used. The LP version stays in place. Can also be performed with SP1, but the follow up still requires pressing P.

Otokoeshi is 7f start 4 act 34 rec 38 rec

Hp.png Mid 9 5 16 -

The HP version moves forward slightly. You want to use HP Ominaeshi in combos. Near and at max range, Otokoeshi will not connect on the ground.

Otokoeshi is 7f start 4 act 34 rec 38 rec

Lp.pngHp.png Mid 1 + 6 4, (6), 4 40 -

EX version has both hits come out automatically, deals strong damage and is your LDP unblockable, so it's worth keeping a bar stocked for this if you need it.

Hcf.png + P.png+Hk.png X, 1 Mid 8 8 7 -

SECRET (No Flash): Essentially HP Ominaeshi, but with a notable difference to Otokoeshi: in exchange for incredibly reduced damage (only dealing 1pt!), it builds significantly more meter than other versions of the move -- a quarter of a bar on whiff, and half a bar on hit! Unlike most other secret moves, this is extremely useful for Kyoko, since meter is so important to the rest of her gameplan. It will also play a special sound effect to signify you did the secret version, besides the absurd amount of meter built.

However, bear in mind that, Jinchouge will take priority over this move when in range. Also unlike a lot of other secret moves, this does not overlap with an EX or Super, meaning you can continue to use it after you build 1 bar.

This version also has some oddities to it. Firstly, you can not cancel into it and must instead link into it, the best scenario for this is off of a jump in. Secondly, the Otokoeshi followup does not hit opponents in a juggle state and, even more oddly, will not grant *any* meter. Lastly, the Otokoeshi followup only has 1 frame of blockstun so... try to only use this version for combos or when the opponent is not in range to punish you.

Otokoeshi is 7f startup, 4 active, 38 recovery, KD on hit and genuine death for you on block.


Shakunage
AVG2 Kyoko Shakunage.jpg
Rdp.pngP.png
AVG2 Kyoko Shakunagehitbox.jpg
Show Hitboxes
Hide Hitboxes
Version Damage Guard Startup Active Recovery FrameAdv
Lp.png N/A 3 40 10 -

A series of three catch counters, no version can catch lows or projectiles.

LP version catches jumping normals and overheads. This version will launch the opponent upwards for a juggle, a good way to catch people out for being too predictable with air buttons in neutral and as an occasional read against characters with grounded overheads (i.e Elirin and Satomi).

Hp.png N/A 3 40 10 -

HP version catches grounded mids. This version will launch the opponent in front of you for a juggle, same applications as the LP version, although the time to convert afterwards is limited.

Lp.pngHp.png N/A 4 20 10 -

LP+HP version functions the same as the HP version but side swaps and does slightly less damage. This version is a frame slower to be active, is not as active as the LP/HP versions, and rather than launch them, they are knocked down to the ground. Best used when your back is in or near the corner so that you can OTG followup on no techs and punish the tech roll if they do.


Sazanka
AVG2 Kyoko Sazanka.jpg
Dp.pngK.png
AVG2 Kyoko Sazankahitbox.jpg
Show Hitboxes
Hide Hitboxes
Version Damage Guard Startup Active Recovery FrameAdv
Lk.png N/A 10 15 43 -

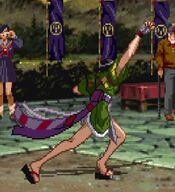
Leaping anti-air grab. Even though it's unblockable, the lack of useful invincibility and it's poor hitbox makes this move difficult to use as an anti-air. On the flipside, it's use in combos is highly valuable, since it provides a hard knockdown, setting up Kyoko's incredibly scary okizeme. Head invul on frames 2-7 and frames 52-62. Can also be performed with SP2.

Hk.png N/A 13 19 49 -

The HP version leaps higher and does more damage, otherwise used the same as the L version. Head invul on frames 3-9 and frames 65-75.

Lk.pngHk.png N/A 1 + 8 24 54 -

The EX version is particularly useful since it deals more damage and is easily confirmable as a super cancel from Ominaeshi. Head invul on frames 1-6 and frames 71-81.

F.pngHcf.pngHp.pngHk.png N/A 13 19 49 -

SECRET (no Flash): Effectively the same as HK Sazanka, except it travels the same height as the EX version. Jinchouge will take priority at close range (Housenka if you have 2 or more meters). Head invul on frames 3-9 and frames 65-75.


Jinchouge
AVG2 Kyoko Jinchouge.jpg
cl.Hcf.pngHk.png
Version Damage Guard Startup Active Recovery FrameAdv
Hk.png N/A 1 N/A N/A -

Kyoko's command grab. A nice option to have against people who are turtling up too much against your offense. In the corner, this can net you a combo with an OTG pickup, so it becomes doubly useful there. Bear in mind, though, that you need to be careful when executing this move from a dash -- if you have no meter you'll often get Sazanka, and if you have two bars you might accidentally let Hosenka rip. Best to try and tick into it.


Super Moves

Housenka
AVG2 Kyoko Housenka.jpg
cl.F.pngHcf.pngK.png
Damage Guard Startup Active Recovery FrameAdv
N/A 1 N/A N/A -

1F command grab super that's unjumpable after the flash. Because of the way the final group of hits work, the best damage will often come from landing this in the center of the screen (not the center of the stage). However, you can combo after this in the corner by following up with Ominaeshi (it will whiff, but Otokoeshi will hit), which you can then extend with a super cancel if you feel like dumping meter. Can also be performed with SP1+SP2.


Game Navigation

General
Controls
HUD
System
Advanced Mechanics
FAQ
Characters
Kyoko
Chiho
Tamao
Yuka
Satomi
Manami
Saki
Ayako
Elirin
Jun
Kaori
Reimi
Boss Characters
Material
Miranda