Moves List
Ground Normals
| Damage |
7 |
|
| Stun |
2
|
| Chain Cancel |
No
|
| Special Cancel |
Yes
|
| Super Cancel |
Yes
|
| Meter on whiff/hit |
0/1
|
| Frame Count |
6/6/9
|
| Block Stun |
-1
|
| Hit Stun/Counter Hit |
0/+5
|
| Damage |
13 |
|
| Stun |
4
|
| Chain Cancel |
No
|
| Special Cancel |
Yes
|
| Super Cancel |
Yes
|
| Meter on whiff/hit |
1/3(A)/4(X,V)
|
| Frame Count |
6/5/12
|
| Block Stun |
+2
|
| Hit Stun/Counter Hit |
+3/+7
|
| Damage |
13 |
|
| Stun |
4
|
| Chain Cancel |
No
|
| Special Cancel |
Yes
|
| Super Cancel |
Yes
|
| Meter on whiff/hit |
1/3(A)/4(X,V)
|
| Frame Count |
8/4/13
|
| Block Stun |
+2
|
| Hit Stun/Counter Hit |
+3/+7
|
| Damage |
17 |
|
| Stun |
8
|
| Chain Cancel |
No
|
| Special Cancel |
No
|
| Super Cancel |
No
|
| Meter on whiff/hit |
1/4(A)6(X,V)
|
| Frame Count |
15/4/13
|
| Block Stun |
+6
|
| Hit Stun/Counter Hit |
+7/launch
|
| Damage |
18 |
|
| Stun |
8
|
| Chain Cancel |
No
|
| Special Cancel |
No
|
| Super Cancel |
No
|
| Meter on whiff/hit |
1/4(A)/6(X,V)
|
| Frame Count |
18/4/11
|
| Block Stun |
+8
|
| Hit Stun/Counter Hit |
+9/launch
|
| Damage |
6 |

|
| Stun |
2
|
| Chain Cancel |
No
|
| Special Cancel |
Yes
|
| Super Cancel |
Yes
|
| Meter on whiff/hit |
0/1
|
| Frame Count |
3/4/9
|
| Block Stun |
+1
|
| Hit Stun/Counter Hit |
+2/+7
|
| Damage |
12 |
|
| Stun |
4
|
| Chain Cancel |
No
|
| Special Cancel |
Yes
|
| Super Cancel |
Yes
|
| Meter on whiff/hit |
1/3(A)4(X,V)
|
| Frame Count |
7/4/13
|
| Block Stun |
+2
|
| Hit Stun/Counter Hit |
3/+7
|
| Damage |
17 |
|
| Stun |
8
|
| Chain Cancel |
No
|
| Special Cancel |
No
|
| Super Cancel |
No
|
| Meter on whiff/hit |
1/4(A)6(X,V)
|
| Frame Count |
11/5/25
|
| Block Stun |
-8
|
| Hit Stun/Counter Hit |
-7/launch
|
| Damage |
7 |
|
| Stun |
2
|
| Chain Cancel |
No
|
| Special Cancel |
Yes
|
| Super Cancel |
Yes
|
| Meter on whiff/hit |
0/1
|
| Frame Count |
4/4/8
|
| Block Stun |
+2
|
| Hit Stun/Counter Hit |
+3/+8
|
| Damage |
12 |
|
| Stun |
4
|
| Chain Cancel |
No
|
| Chain Cancel |
No
|
| Chain Cancel |
No
|
| Meter on whiff/hit |
1/3(A)4(X,V)
|
| Frame Count (A,V) |
9/4/17
|
| Frame Count (X) |
8/6/17
|
| Block Stun |
-2(Z,V) -4(X)
|
| Hit Stun/Counter Hit |
-1/+3(A,V) -3/+1(X)
|
| Damage |
13,15 |
 |
|
| Stun |
8
|
| Chain Cancel |
No
|
| Special Cancel |
Yes
|
| Super Cancel |
Yes
|
| Meter on whiff/hit |
1/4(A)6(X,V)
|
| Frame Count |
7/2/32
|
| Block Stun |
-11
|
| Hit Stun/Counter Hit |
-10/Launch
|
| Damage |
6 |
|
| Stun |
2
|
| Chain Cancel |
No
|
| Special Cancel |
Yes
|
| Super Cancel |
Yes
|
| Meter on whiff/hit |
0/1
|
| Frame Count |
4/6/7
|
| Block Stun |
+1
|
| Hit Stun/Counter Hit |
+2/+7
|
| Damage |
11 |
|
| Stun |
4
|
| Chain Cancel |
No
|
| Special Cancel |
No
|
| Super Cancel |
Yes
|
| Meter on whiff/hit |
1/3(A)4(X,V)
|
| Frame Count |
9/6/14
|
| Block Stun |
-1
|
| Hit Stun/Counter Hit |
0/+4
|
| Damage |
15,13 |
 |
|
| Stun |
8
|
| Chain Cancel |
No
|
| Special Cancel |
No
|
| Super Cancel |
No
|
| Meter on whiff/hit |
1/4(A)6(X,V)
|
| Frame Count |
9/13/21
|
| Block Stun |
-11
|
| Hit Stun/Counter Hit |
-/-
|
Air Normals
| Damage |
7 |
|
| Stun |
1
|
| Meter on whiff/hit |
1/0
|
| Frame Count |
8/10/12
|
| Damage |
7 |
|
| Stun |
1
|
| Meter on whiff/hit |
1/0
|
| Frame Count |
8/10/12
|
| Damage |
12 |
|
| Stun |
4
|
| Meter on whiff/hit |
1/3(A)6(XV)
|
| Frame Count |
8/6/11
|
| Damage |
12 |
|
| Stun |
4
|
| Meter on whiff/hit |
1/3(A)6(XV)
|
| Frame Count |
8/6/11
|
| Damage |
17 |
|
| Stun |
8
|
| Meter on whiff/hit |
1/4(A)6(XV)
|
| Frame Count |
8/4/21
|
| Damage |
17 |
|
| Stun |
8
|
| Meter on whiff/hit |
1/4(A)6(XV)
|
| Frame Count |
6/2/21
|
| Damage |
6 |
|
| Stun |
2
|
| Meter on whiff/hit |
0/1
|
| Frame Count |
5/10/9
|
| Damage |
5,7 |
 |
|
| Stun |
2
|
| Meter on whiff/hit |
0/1
|
| Frame Count |
5/10/9
|
| Damage |
11 |
|
| Stun |
4
|
| Meter on whiff/hit |
1/3(A)4(XV)
|
| Frame Count |
6/8/9
|
| Damage |
11 |
|
| Stun |
4
|
| Meter on whiff/hit |
1/3(A)4(XV)
|
| Frame Count |
6/8/9
|
- Neutral/Diagonal Jump Roundhouse:
| Damage |
16 |
|
| Stun |
8
|
| Meter on whiff/hit |
1/4(A)6(XV)
|
| Frame Count |
6/4/11
|
Special Moves
Jigoku Scrape
 +
+
| Damage |
11 |
 |
 |
 |
 |
 |
|
| Stun |
8
|
| Meter on whiff |
4(A)7(XV)
|
| Meter on Hit |
3(A)4(XV)
|
| Block Stun |
-11
|
| Hit Stun/Counter Hit |
-6/-
|
| Frame Count |
14 |
4 |
26
|
| Damage |
12 |
 |
 |
 |
 |
 |
|
| Stun |
8
|
| Meter on whiff |
4(A)7(XV)
|
| Meter on Hit |
3(A)4(XV)
|
| Block Stun |
-14
|
| Hit Stun/Counter Hit |
-9/-
|
| Frame Count |
14 |
6 |
27
|
| Damage |
13,11 |
 |
 |
 |
 |
 |
 |
|
| Stun |
8,4
|
| Meter on whiff |
4(A)7(XV)
|
| Meter on Hit |
3(A)4(XV)
|
| Block Stun |
-16
|
| Hit Stun |
-
|
| Frame Count |
14 |
6 |
29
|
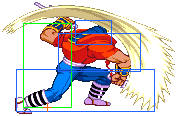
Sodom will slide forward, swinging his jitte/katana. The strength of the punch button used determines the angle of the attack.
Butsumetsu Buster
 +
+
|
Jab |
Strong |
Fierce |
Jab |
Strong |
Fierce
|
| Damage |
20 |
23 |
26 |
 |
 |
|
| Stun |
0
|
| Meter on whiff |
3(A)4(XV)
|
| Meter on hit |
10(A)16(XV)
|
| Frame Count |
1
|
Sodom lunges forward, grabs the opponent, jumps up, then slams them to the ground. The strength of the punch button determines the height and damage. Jab version has the most reach. Fierce the least.
Daikyou Burning
+
|
Short |
Forward |
Roundhouse
|
| Damage |
16+4x4 |
16+4x4+3 |
16+4x5 |
 |
 |
 |
 |
 |
 |
|
| Stun |
0
|
| Meter on whiff |
6(A)9(XV)
|
| Meter on Hit |
3(A)4(XV)
|
| Block Stun |
-36 |
-50 |
-64
|
| Hit Stun/Counter Hit |
-
|
| Frame Count (Short) |
17 |
27 |
23
|
| Frame Count (Forward) |
17 |
35 |
29
|
| Frame Count (Roundhouse) |
17 |
43 |
35
|
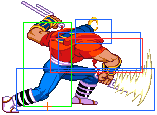
Sodom runs forward, both weapons held in front of him. If he makes contact he will pin the opponent with the weapons, dragging them on the ground. After awhile they will catch fire, at which point Sodom releases them. Kick button strength used determines damage, how long Sodom runs and number of hits.
Shirraha Catch
 +
+
|
Short |
Forward |
Roundhouse
|
| Damage |
18 |
19 |
20 |
 |
 |
 |
 |
 |
|
| Stun |
0
|
| Meter on whiff |
3(A)4(XV)
|
| Meter on Hit |
4(A)6(XV)
|
| Frame Count (Short) |
6 |
24 |
34
|
| Frame Count (Forward) |
7 |
26 |
40
|
| Frame Count (Roundhouse) |
8 |
28 |
46
|
This counter is very specific as it only works on overheads, avoid using this move.
Tengu Walking
 +
+
| Damage |
4x3 |
 |
 |
 |
 |
 |
|
| Stun |
2x3
|
| Meter on whiff |
4(A)7(XV)
|
| Meter on hit |
1x3
|
| Block Stun |
-1
|
| Hit Stun/Counter Hit |
0/-
|
| Frame Count |
15 |
22 |
4
|
Done just before landing after getting knocked down or air reset.
- Reversal Version
- Short Version
| Damage |
4x2 |
 |
|
|
|
|
 |
|
| Stun |
2x1
|
| Meter on whiff |
4(A)7(XV)
|
| Meter on hit |
1x2
|
| Block Stun |
-11
|
| Hit Stun/Counter Hit |
-12/-
|
| Frame Count |
23 |
4 |
8
|
| Damage |
4x3 |
|
|
|
|
|
|
|
| Stun |
2x3
|
| Meter on whiff |
4(A)7(XV)
|
| Meter on hit |
1x3
|
| Block Stun |
-7
|
| Hit Stun/Counter Hit |
-6/-
|
| Frame Count |
23 |
4 |
8
|
| Damage |
4x4 |
|
|
|
|
|
|
|
| Stun |
2x4
|
| Meter on whiff |
4(A)7(XV)
|
| Meter on hit |
1x3
|
| Block Stun |
-3
|
| Hit Stun/Counter Hit |
-2/-
|
| Frame Count |
23 |
4 |
8
|
Reversal only move, unlike the other version there is no invulnerability at the start, button strength determines how many times it hits, slightly faster but the short and forward versions are unsafe only the roundhouse version is safe and it shares the same hit/hurt boxes.
Yagura Reverse
- Back, Down, Down-Back + Kick
- Basically a standing Tengu Walking, pretty good priority but has limited uses.
Kouten Okiagari
- (When knocked over)Forward, Down-Forward, Down + Punch
- Sodom rolls up into a ball, rolling away from his attacker. Good defensive alternative to the standard recovery roll that everyone in Alpha 3 has.
Super Combos
Ten Chuu Satsu
- 720 + Punch
- Sodom grabs the opponent with both of his weapons and proceeds to devastate them with several slam moves.
- A-ism Level 1 (jab) - After the grab, you do a small BB followed by a fierce-looking BB.
- A-ism Level 2 (strong) - After the grab, you do a small BB, then leap up into the air where you pause for a few moments, finally coming down with full force to the ground for massive damage.
- A-ism Level 3 (fierce) - This begins looking like Level 2; you do a small BB, jump up, stall, and slam the opponent hard to the ground, but then you proceed to drag them in a DB move. Big Damage
Meido no Miyage
- Double Quarter Circle Forward + Punch
- Sodom lashes forward with his weapon of choice in a superized version of his Jigoku Scrape manuever.
- A-ism Level 1 (jab) - Three quick uppward slashes, similar to the jab and strong Jigoku Scrapes, hitting three times with juggling ability. Excellent anti-air, useful for ending combos. Relatively safe on block.
- A-ism Level 2 (strong) - A series of four quick forward-moving slashes that go a long distance, each hitting multiple times, the last an overhead slash similar to the fierce Jigoku Scrape for varying hit amounts.
- A-ism Level 3 (fierce) - All of the hits of a Level 2, followed by a leap in the air with a very strong arcing swipe similar in style to a jumping fierce.
- X-ism - Simply a Level 3 version of the move.
~Move Descriptions taken from Joseph Parise's Sodom FAQ.
The Basics
Which Ism?
A-Ism
Gains a great level 1 super, but loses too many good normals and is missing his god tier customs.
V-Ism
V-ISM is what takes Sodom from mid tier to top tier. Having access to some of the best customs in the game with the longest activation range changes his threat in neutral significantly.
Also gains access to b. FP and b. MP, which are amazing normals.
X-Ism
His Sais are replaced by Katanas that accentuate some of his pokes. Gets a dope X-ISM exclusive BGM, but never really worth running over A or V Sodom.


