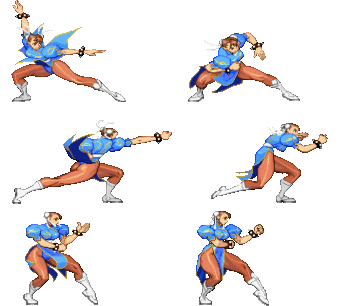
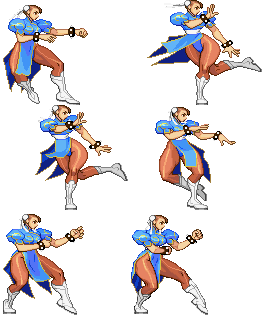
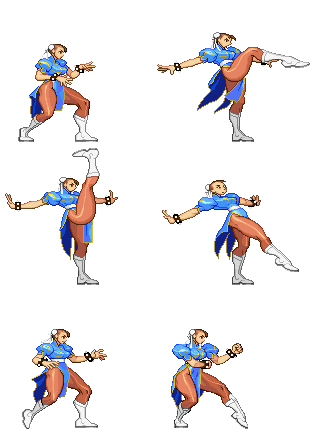
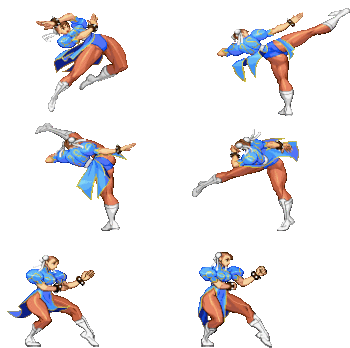
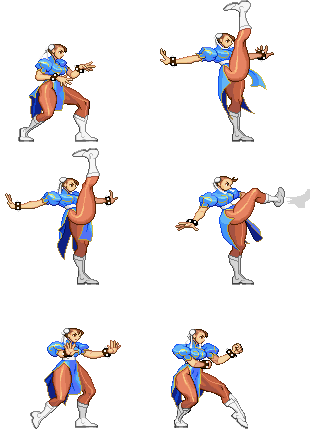
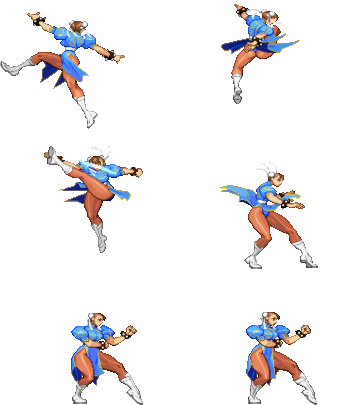
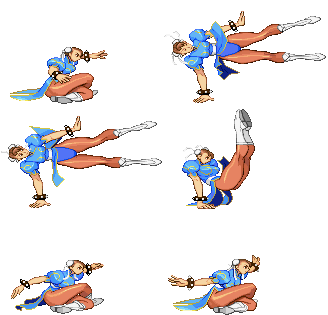
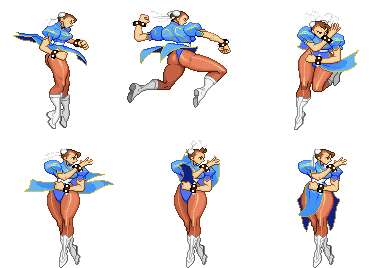
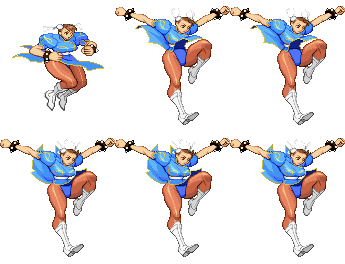
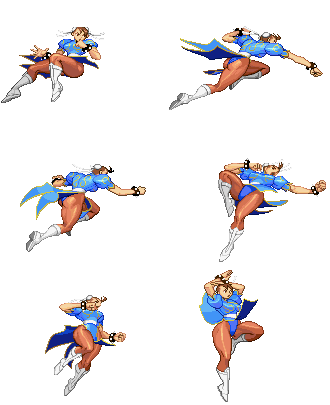
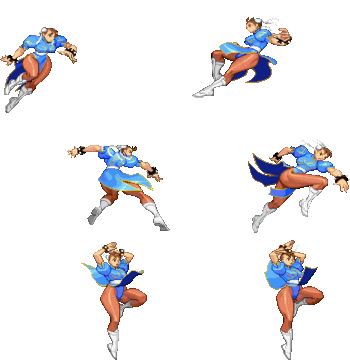
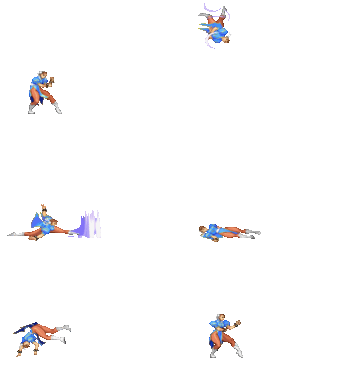
Street Fighter 3: 3rd Strike/Chun-Li

From SuperCombo Wiki
< Street Fighter 3: 3rd Strike
Revision as of 04:12, 24 August 2021 by RaVen-ahzi (talk | contribs) (Created page with "{{Infobox Character 3S |name=Chun-Li |hash=CNL |image=Chunli3sport.gif |health=1120 |stun=64 |SA1=1/88 |SA2=1/104 |SA3=3/72 |fDash=17 |bDash=26 |nJump=43(4+36+3) |bJump=43(4+3...")
(diff) ← Older revision | Latest revision (diff) | Newer revision → (diff)

Introduction

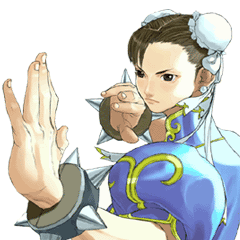
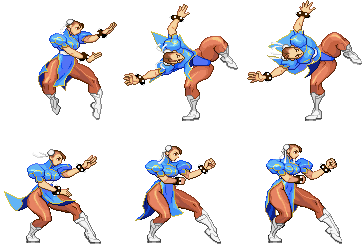
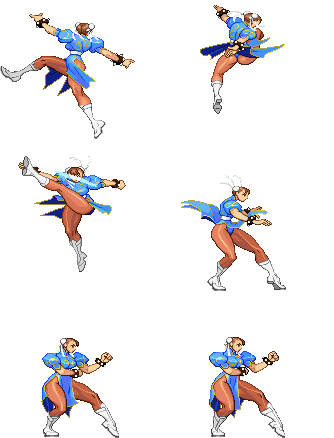
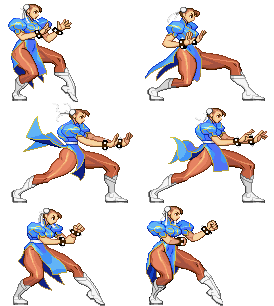
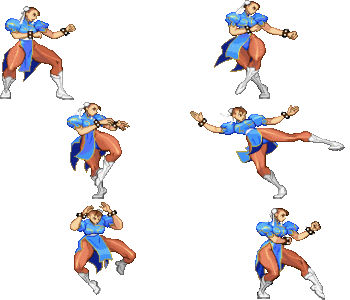
Chun-Li returns to the third World Warrior tournament, albeit a little different stylistically, both in her appearance and her fighting style. She's still just as quick and agile, but her actions are more fluid. No longer fighting for the sake of revenge, but for the protection of others, she seems more confident in her fighting ability as well.

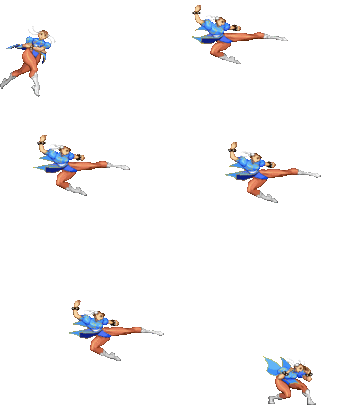
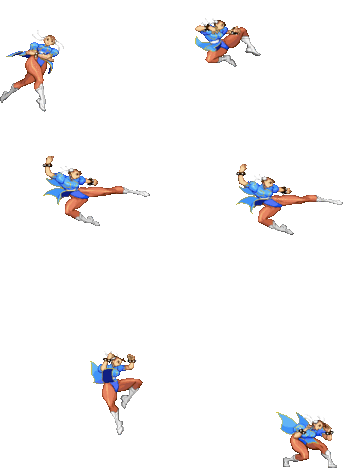
In her most notorious incarnation, Chun-Li is a defensive beast. She's known for her overwhelming neutral presence, sporting absurdly strong buttons for controlling space in a myriad of ways. Long reaching lows like 2MK, far ranged heavy buttons like 5HP, and absurdly high priority buttons like 4HP let Chun keep the pace regardless of the gamestate. Her jabs are absurdly fast as well, namely her 2 frame 2LP, giving her a fast defensive option to rely on. On offense, she's known for her amazing strike/throw, complimented by pressure resets like 6MK and her amazing 5MK kara throw, which adds an incredible amount of range to her already strong throw.

Likely Chun-Li's most powerful tool is her SAII, Houyoku-Sen. It's a blindingly fast rush super that hits 17 times total for massive damage, combos from all of her pokes at all ranges, and can be superjump cancelled for followup juggles that lead to shockingly strong mixups. It has some invulnerability, allowing it to beat fireballs and pokes with low active frames, and comes with a healthy amount of chip damage for sealing out rounds with a difficult parry. Notably, it stocks 2 bars, letting Chun use her EX moves more. The most notable fact about stocking 2 bars is the fear that one stock puts into the opponent usually lets you more safely build the second bar, and most characters will die after two SAII uses.

Chun-Li is a solidly top 1 character, with no losing matchups and few real weaknesses. You will have to learn to properly play neutral, as her low health and lack of strong anti-airs means a few bad decisions ends the round, but realistically she's quite simple, fun, and incredibly rewarding to play.

Super Arts


SAI (Kikou-Shou)

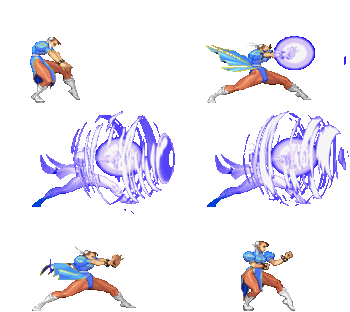
Kikou-Shou is a relatively high-damage super and comes with a rather short bar, which means you can have this super stocked more often than the Houyoku-Sen. It does more chip damage and is more difficult to parry than the Houyoku-Sen, but the primary drawbacks are the fact that it only comes with one stock, and that its range is fairly limited; you cannot cancel a max-ranged 2MK into a Kikou-Shou and expect it to hit. For this reason, and its singular bar, SA2 is considered a much more powerful super. However, the SA1 does have its merits as an anti-air or chipout tool.

SAII: (Houyoku-Sen)

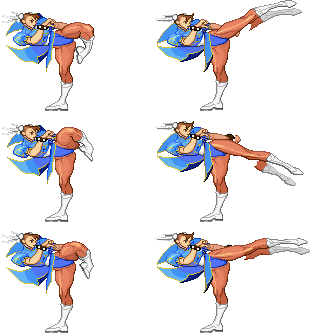
Chun-Li's most powerful Super Art is Houyoku-Sen. It's a reversal and anti-projectile tool, has a healthy stock of two supers, is very damaging, is almost a guaranteed free ride for your opponent into the corner, and can be super-cancelled or linked into using many of her attacks, most notably off of 2MK. The Houyoku-Sen's final kick can be super-jump cancelled, and the opponent may be juggled following the Houyoku-Sen, or reset into a mixup. SA2 is also a 17-hit Super Art, making it a notorious ender of rounds via chip damage. You may also cancel a Kikouken or EX Kikouken into the Houyoku-Sen for the purpose of disrupting the timing for the opponent should they decide to try and parry it. Its two stocks also consitute to an incredibly oppressive gameplan once Chun has a super stocked, where she's allowed to poke and kara throw her way to towards another bar against a now defensive opponent, while confirming SA2 off of any opening she is given. Even once a super is used, there's a good chance she'll have another one very soon.

SAIII: (Tensei-Ranka)

Tensei-Ranka comes with much more meter than Chun's other options at 3 bars, but it's much more difficult to use successfully. Unless the opponent is very tall or standing, you will not be able to hit them on the way up using the super, which turns the Tensei-Ranka most of the time into an extremely delayed, reactable overhead. It is best used as an anti-air or confirmable damage off of an anti-air, however its short range and poor invulnerability can still lose to jumping opponents. Worst of all, it loses Chun-Li's infamous 2MK confirm, which leaves this super with the large amount of bar it stores as its only read advantage, and not one Chun cares too much for.


Strengths Weaknesses
  • One of the scariest super arts in the game with SAII. High damage and stun, a lot of corner carry, mixup options, crazy range and quick startup.
  • The best pokes in the game - very hard to punish, while having a lot of range, damage, or followup options on block or hit.
  • The best kara throw in the game, allowing her to punish effectively with throws and annoy with throw loops from ranges where it may seem easy to walk/mash out.
  • An unusually low crouch that ducks under a ton of things.
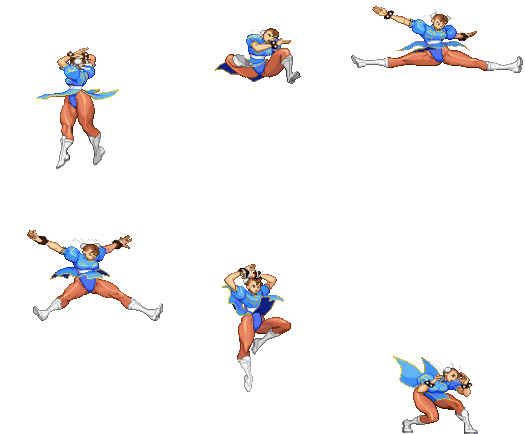
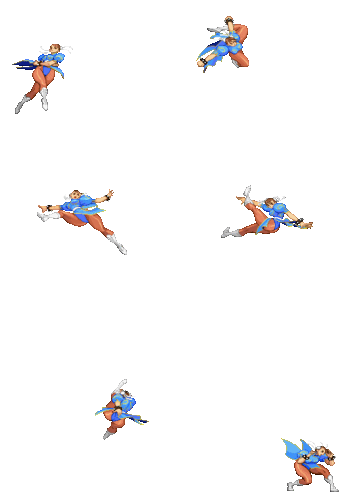
  • Great mobility, with a solid walk and dash alongside a solid jump and a unique walljump.
  • A suite of anti-airs that all come with noticeable drawbacks, forcing her to constantly consider how she chooses to anti-air.
  • Limited combo options without a full bar of meter, making her reward off of punishes limited.
Chun-Li
#3S_CNL
Chunli3sport.gif
Vitals
Life Points 1120
Stun Points 64
Super Art Stock/Size
SA1 1/88
SA2 1/104
SA3 3/72
Ground Movement
Forward Dash duration/distance 17
Back Dash duration/distance 26
Jumping
Back Jump duration 43(4+36+3)
Neutral Jump duration 43(4+36+3)
Forward Jump duration 43(4+36+3)
Back Super Jump duration 51(5+43+3)
Neutral Super Jump duration 47(5+39+3)
Forward Super Jump duration 49(5+41+3)
Wake up
Wake up duration 88
Quick rise duration 61
3S Frame Data Glossary
Active

How many frames a move remains active (can hurt opponents) for. Consecutive sets of active frames on a multi-hit move are separated by an asterisk (ex: 3*5). If there is a gap between sets of active frames, the gap is denoted by a number in parentheses (ex: 2(4)2)

Attack

Attack level is L for low attacks (must be blocked crouching), H is for High attacks (which can be blocked high or low) and M for overhead (must be blocked standing). T is for throw attacks (which cannot be blocked).

Cancel options

Available cancel options.

  • "ch": Chain cancel (into itself or another light attack), refer to description for options.
  • "self": Self-only chain cancel. Much more restrictive than a standard chain cancel.
  • "tc": Target combo, refer to description for options. Successive attacks in a target combo may warrant their own move entry.
  • "dash": Grounded dashes.
  • "sj": Super jump.
  • "sp": Special move.
  • "su": Super Art.
Damage

Attack damage on hit in life points. Notation may denote multi-hit or "sweet spot" damage values on certain frames.

Hit/Block

These are frame advantage values when the attack hits or is blocked. If the number is positive, then the move will end before the defender can act again. If the number is negative, the defender will be able to act before the attacker and maybe even punish. D refers to knockdown on hit.

"Cr. Hit" is an additional frame advantage value denoting if the advantage on hit changes when the defender is being hit while crouching.

Kara Range

Almost all normal attacks can be canceled into a special or a multi-button command within three frames of startup. During that time, some attacks will shift position forward or backward and affect the reach of the special or command accordingly. This is denoted in pixels of range. There are a handful of moves in the game that can be kara-canceled after this initial window and will be denoted as a late kara-cancel.

Link

A combo that is performed by inputting the second move after the first move has completely recovered (as opposed to cancelling the first move's animation). In 3S, the final frame of a move's hitstun allows a character to block a normal or special move, as well as some projectile supers. Therefore, an attack's frame advantage must be 2 frames greater than the followup move's startup in order to link. Ex: a +6 normal can link into a 4f normal/special, or a 5f super.

Parry

This field will show a value of A if the attack can be parried standing or crouching, H if it must be parried standing or L if it must be parried crouching.

Recovery

How many frames it takes for a move to finish after it's been active.

Startup

How many frames it takes before the move becomes 'active' or has a hitbox. 3S uses classic startup notation, which does not include the first active frame. A move with 3 startup becomes active on frame 4.

Stun

Amount of stun added to the opponent's stun bar on hit.

Throw range

Range in pixels from the center of the character to the center of the opponent which allows a grab to connect.

Frame Data

5LP (cl)
Close LP
Lp.png (cl)
(chunlicloselp).gif
Startup Active Recovery Block Hit Cr. Hit Damage Stun Kara Guard Level Parry Level
2 2 6 2 2 2 5 3 - - A
Cancel Options Self Meter Gain Whiff Hit Block / Tech Opponent Meter Gain Hit Block / Tech
- - - - - -
  • Cancel options: sp su
FATonline.png
5LP (far)
Far LP
Template:Far (far)
(chunlilp).gif
Startup Active Recovery Block Hit Cr. Hit Damage Stun Kara Guard Level Parry Level
3 5 4 2 2 2 3 3 - - A
Cancel Options Self Meter Gain Whiff Hit Block / Tech Opponent Meter Gain Hit Block / Tech
- - - - - -
  • Cancel options: ch sp su
FATonline.png
5MP
Stand MP
Mp.png
(chunlimp).gif
Startup Active Recovery Block Hit Cr. Hit Damage Stun Kara Guard Level Parry Level
6 8 9 -2 -1 - 17 11 - - H
Cancel Options Self Meter Gain Whiff Hit Block / Tech Opponent Meter Gain Hit Block / Tech
- - - - - -
  • Cancel options: sp su
  • Self meter gain: Whiff: 2, Hit: 10, Block: 5.
  • Opponent meter gain: Whiff: 0, Hit: 2, Block: 0.
FATonline.png
5HP
Stand HP
Hp.png
(chunlihp).gif
Startup Active Recovery Block Hit Cr. Hit Damage Stun Kara Guard Level Parry Level
8 6 17 -2 - 2 19 11 - - H
Cancel Options Self Meter Gain Whiff Hit Block / Tech Opponent Meter Gain Hit Block / Tech
- - - - - -
  • Self meter gain: Whiff: 3, Hit: 18, Block: 9.
  • Opponent meter gain: Whiff: 0, Hit: 4, Block: 0.
FATonline.png
5LK
Stand LK
Lk.png
(chunlilk).gif
Startup Active Recovery Block Hit Cr. Hit Damage Stun Kara Guard Level Parry Level
3 5 9 1 1 1 7 3 - - A
Cancel Options Self Meter Gain Whiff Hit Block / Tech Opponent Meter Gain Hit Block / Tech
- - - - - -
FATonline.png
5MK (cl)
Close MK
Mk.png (cl)
(chunliclosemk).gif
Startup Active Recovery Block Hit Cr. Hit Damage Stun Kara Guard Level Parry Level
6 2 25 -2 - - 14 5 - - H
Cancel Options Self Meter Gain Whiff Hit Block / Tech Opponent Meter Gain Hit Block / Tech
- - - - - -
  • 2 kara range
  • Self meter gain: Whiff: 2, Hit: 10, Block: 5.
  • Opponent meter gain: Whiff: 0, Hit: 2, Block: 0.
FATonline.png
5MK (far)
Far MK
Mk.png (far)
(chunlimk).gif
Startup Active Recovery Block Hit Cr. Hit Damage Stun Kara Guard Level Parry Level
7 6 19 -5 -3 -1 16 11 - - H
Cancel Options Self Meter Gain Whiff Hit Block / Tech Opponent Meter Gain Hit Block / Tech
- - - - - -
  • 32 kara range
  • Self meter gain: Whiff: 2, Hit: 10, Block: 5.
  • Opponent meter gain: Whiff: 0, Hit: 2, Block: 0.
FATonline.png
5HK (cl)
Close HK
Hk.png (cl)
(chunliclosehk).gif
Startup Active Recovery Block Hit Cr. Hit Damage Stun Kara Guard Level Parry Level
4 9 12 -3 -1 1 21 15 - - H
Cancel Options Self Meter Gain Whiff Hit Block / Tech Opponent Meter Gain Hit Block / Tech
- - - - - -
  • Cancel options: sj
  • 16 kara range
  • Self meter gain: Whiff: 3, Hit: 18, Block: 9.
  • Opponent meter gain: Whiff: 0, Hit: 4, Block: 0.
FATonline.png
5HK (far)
Far HK
Hk.png (far)
(chunlihk).gif
Startup Active Recovery Block Hit Cr. Hit Damage Stun Kara Guard Level Parry Level
12 1 15 - 2 4 21 13 - - H
Cancel Options Self Meter Gain Whiff Hit Block / Tech Opponent Meter Gain Hit Block / Tech
- - - - - -
  • Self meter gain: Whiff: 3, Hit: 18, Block: 9.
  • Opponent meter gain: Whiff: 0, Hit: 4, Block: 0.
  • Airborne from frames 1-19
FATonline.png


Command Normals

4MP
Sourenshou
Backhand Slaps
B.png+Mp.png
(chunlihk).gif
Startup Active Recovery Block Hit Cr. Hit Damage Stun Kara Guard Level Parry Level
5 3 18 -2 - - 17 15 - - H
Cancel Options Self Meter Gain Whiff Hit Block / Tech Opponent Meter Gain Hit Block / Tech
- - - - - -
  • Cancel options: sp su
  • 2 kara range
  • Self meter gain: Whiff: 2, Hit: 11, Block: 6.
  • Opponent meter gain: Whiff: 0, Hit: 2, Block: 0.
FATonline.png
4HP
Hakkei
Double Palm Strike
B.png+Hp.png
(chunlibhp).gif
Startup Active Recovery Block Hit Cr. Hit Damage Stun Kara Guard Level Parry Level
7 9 10 -1 1 3 23 15 - - H
Cancel Options Self Meter Gain Whiff Hit Block / Tech Opponent Meter Gain Hit Block / Tech
- - - - - -
  • Cancel options: sp su
  • Self meter gain: Whiff: 3, Hit: 18, Block: 9.
  • Opponent meter gain: Whiff: 0, Hit: 4, Block: 0.
FATonline.png
6MK
Senjoushuu
Stepping Kick
F.png+Mk.png
(chunlifmk).gif
Startup Active Recovery Block Hit Cr. Hit Damage Stun Kara Guard Level Parry Level
11 7 11 - 1 2 14 5 - - H
Cancel Options Self Meter Gain Whiff Hit Block / Tech Opponent Meter Gain Hit Block / Tech
- - - - - -
  • Self meter gain: Whiff: 2, Hit: 10, Block: 5.
  • Opponent meter gain: Whiff: 0, Hit: 2, Block: 0.
FATonline.png
5MK (hold)
Kakushuu Rakukyaku
Stand MK (Hold)
Mk.png (hold)
(chunlimkmk).gif
Startup Active Recovery Block Hit Cr. Hit Damage Stun Kara Guard Level Parry Level
5 6*1*1 15 -1 3 3 - - - - H*H*H
Cancel Options Self Meter Gain Whiff Hit Block / Tech Opponent Meter Gain Hit Block / Tech
- - - - - -
  • 1st hit forces standing
FATonline.png
6HK
Yokusenkyaku
Forward Heavy Kick
F.png+Hk.png
(chunlifhk).gif
Startup Active Recovery Block Hit Cr. Hit Damage Stun Kara Guard Level Parry Level
12 1 15 - 2 4 21 13 - - H
Cancel Options Self Meter Gain Whiff Hit Block / Tech Opponent Meter Gain Hit Block / Tech
- - - - - -
  • Self meter gain: Whiff: 3, Hit: 18, Block: 9.
  • Opponent meter gain: Whiff: 0, Hit: 4, Block: 0.
  • Airborne from frames 1-19
FATonline.png
3HK
Tenshin Shuukyaku
Sideswitch Leap Kick
Df.png+Mk.png
(chunlidfhk).gif
Startup Active Recovery Block Hit Cr. Hit Damage Stun Kara Guard Level Parry Level
37 5 2 5 - - 19 13 - - H
Cancel Options Self Meter Gain Whiff Hit Block / Tech Opponent Meter Gain Hit Block / Tech
- - - - - -
  • Self meter gain: Whiff: 3, Hit: 18, Block: 9.
  • Opponent meter gain: Whiff: 0, Hit: 4, Block: 0.
FATonline.png


Crouching Normals

2LP
Crouch LP
D.png+Lp.png
(chunliclp).gif
Startup Active Recovery Block Hit Cr. Hit Damage Stun Kara Guard Level Parry Level
2 4 5 3 3 3 3 3 - - A
Cancel Options Self Meter Gain Whiff Hit Block / Tech Opponent Meter Gain Hit Block / Tech
- - - - - -
  • Cancel options: ch sp su
FATonline.png
2MP
Crouch MP
D.png+Mp.png
(chunlicmp).gif
Startup Active Recovery Block Hit Cr. Hit Damage Stun Kara Guard Level Parry Level
8 2 18 -4 -3 -2 16 3 - - L
Cancel Options Self Meter Gain Whiff Hit Block / Tech Opponent Meter Gain Hit Block / Tech
- - - - - -
  • 4 kara range
  • Self meter gain: Whiff: 2, Hit: 10, Block: 5.
  • Opponent meter gain: Whiff: 0, Hit: 2, Block: 0.
FATonline.png
2HP
Crouch HP
D.png+Hp.png
(chunlichp).gif
Startup Active Recovery Block Hit Cr. Hit Damage Stun Kara Guard Level Parry Level
8 2 22 -1 1 3 19 5 - - H
Cancel Options Self Meter Gain Whiff Hit Block / Tech Opponent Meter Gain Hit Block / Tech
- - - - - -
  • Cancel options: sp su
  • 2 kara range
  • Self meter gain: Whiff: 3, Hit: 18, Block: 9.
  • Opponent meter gain: Whiff: 0, Hit: 4, Block: 0.
FATonline.png
2LK
Crouch LK
D.png+Lk.png
(chunliclk).gif
Startup Active Recovery Block Hit Cr. Hit Damage Stun Kara Guard Level Parry Level
4 2 6 3 3 3 3 3 - - L
Cancel Options Self Meter Gain Whiff Hit Block / Tech Opponent Meter Gain Hit Block / Tech
- - - - - -
  • Cancel options: ch
FATonline.png
2MK
Crouch MK
D.png+Mk.png
(chunlicmk).gif
Startup Active Recovery Block Hit Cr. Hit Damage Stun Kara Guard Level Parry Level
6 2 14 -2 -1 - 16 3 - - L
Cancel Options Self Meter Gain Whiff Hit Block / Tech Opponent Meter Gain Hit Block / Tech
- - - - - -
  • Cancel options: sp su
  • Self meter gain: Whiff: 2, Hit: 10, Block: 5.
  • Opponent meter gain: Whiff: 0, Hit: 2, Block: 0.
FATonline.png
2HK
Crouch HK
D.png+Hk.png
(chunlichk).gif
Startup Active Recovery Block Hit Cr. Hit Damage Stun Kara Guard Level Parry Level
7 3 21 -7 D D 19 5 - - A
Cancel Options Self Meter Gain Whiff Hit Block / Tech Opponent Meter Gain Hit Block / Tech
- - - - - -
  • Self meter gain: Whiff: 3, Hit: 18, Block: 9.
  • Opponent meter gain: Whiff: 0, Hit: 4, Block: 0.
FATonline.png


Jumping Normals

8LP
Jump LP (Neutral)
U.png+Lp.png
(chunlinjlp).gif
Startup Active Recovery Block Hit Cr. Hit Damage Stun Kara Guard Level Parry Level
4 - - - - - 7 7 - - A
Cancel Options Self Meter Gain Whiff Hit Block / Tech Opponent Meter Gain Hit Block / Tech
- - - - - -
FATonline.png
9.LP
Jump LP
Uf.png+Lp.png
(chunlijlp).gif
Startup Active Recovery Block Hit Cr. Hit Damage Stun Kara Guard Level Parry Level
2 - - - - - 7 7 - - H
Cancel Options Self Meter Gain Whiff Hit Block / Tech Opponent Meter Gain Hit Block / Tech
- - - - - -
FATonline.png
8MP
Jump MP (Neutral)
U.png+Mp.png
(chunlinjmp).gif
Startup Active Recovery Block Hit Cr. Hit Damage Stun Kara Guard Level Parry Level
6 - - - - - 14 11 - - H
Cancel Options Self Meter Gain Whiff Hit Block / Tech Opponent Meter Gain Hit Block / Tech
- - - - - -
  • Self meter gain: Whiff: 2, Hit: 10, Block: 5.
  • Opponent meter gain: Whiff: 0, Hit: 2, Block: 0.
FATonline.png
9MP
Startup Active Recovery Block Hit Cr. Hit Damage Stun Kara Guard Level Parry Level
4 - - - - - 10 9 - - H
Cancel Options Self Meter Gain Whiff Hit Block / Tech Opponent Meter Gain Hit Block / Tech
- - - - - -
  • Self meter gain: Whiff: 2, Hit: 10, Block: 5.
  • Opponent meter gain: Whiff: 0, Hit: 2, Block: 0.
FATonline.png
8HP
Jump HP (Neutral)
U.png+Hp.png
Startup Active Recovery Block Hit Cr. Hit Damage Stun Kara Guard Level Parry Level
10 3 - - - - 23 15 - - H
Cancel Options Self Meter Gain Whiff Hit Block / Tech Opponent Meter Gain Hit Block / Tech
- - - - - -
  • Self meter gain: Whiff: 3, Hit: 18, Block: 9.
  • Opponent meter gain: Whiff: 0, Hit: 4, Block: 0.
FATonline.png
9HP
Jump HP
Uf.png+Hp.png
(chunlijhp).gif
Startup Active Recovery Block Hit Cr. Hit Damage Stun Kara Guard Level Parry Level
9 6 - - - - 14 9 - - H
Cancel Options Self Meter Gain Whiff Hit Block / Tech Opponent Meter Gain Hit Block / Tech
- - - - - -
  • Self meter gain: Whiff: 3, Hit: 18, Block: 9.
  • Opponent meter gain: Whiff: 0, Hit: 4, Block: 0.
FATonline.png
8LK
Jump LK (Neutral)
U.png+Lk.png
(chunlinjlk).gif
Startup Active Recovery Block Hit Cr. Hit Damage Stun Kara Guard Level Parry Level
5 22 - - - - 7 7 - - H
Cancel Options Self Meter Gain Whiff Hit Block / Tech Opponent Meter Gain Hit Block / Tech
- - - - - -
FATonline.png
j.LK
Jump LK
Uf.png+Lk.png
(chunlijlk).gif
Startup Active Recovery Block Hit Cr. Hit Damage Stun Kara Guard Level Parry Level
5 - - - - - 8 5 - - H
Cancel Options Self Meter Gain Whiff Hit Block / Tech Opponent Meter Gain Hit Block / Tech
- - - - - -
FATonline.png
8MK
Jump MK (Neutral)
U.png+Mk.png
(chunlinjmk).gif
Startup Active Recovery Block Hit Cr. Hit Damage Stun Kara Guard Level Parry Level
6 2 - - - - 14 9 - - H
Cancel Options Self Meter Gain Whiff Hit Block / Tech Opponent Meter Gain Hit Block / Tech
- - - - - -
  • Self meter gain: Whiff: 2, Hit: 10, Block: 5.
  • Opponent meter gain: Whiff: 0, Hit: 2, Block: 0.
FATonline.png
j.MK
Jump MK
Uf.png+Mk.png
(chunlijmk).gif
Startup Active Recovery Block Hit Cr. Hit Damage Stun Kara Guard Level Parry Level
6 13 - - - - 16 9 - - H
Cancel Options Self Meter Gain Whiff Hit Block / Tech Opponent Meter Gain Hit Block / Tech
- - - - - -
  • Self meter gain: Whiff: 2, Hit: 10, Block: 5.
  • Opponent meter gain: Whiff: 0, Hit: 2, Block: 0.
FATonline.png
8HK
Jump HK (Neutral)
U.png+Hk.png
(chunlinjhk).gif
Startup Active Recovery Block Hit Cr. Hit Damage Stun Kara Guard Level Parry Level
8 5 - - - - 23 13 - - H
Cancel Options Self Meter Gain Whiff Hit Block / Tech Opponent Meter Gain Hit Block / Tech
- - - - - -
  • Self meter gain: Whiff: 3, Hit: 18, Block: 9.
  • Opponent meter gain: Whiff: 0, Hit: 4, Block: 0.
FATonline.png
j.HK
Jump HK
Uf.png+Hk.png
(chunlijhk).gif
Startup Active Recovery Block Hit Cr. Hit Damage Stun Kara Guard Level Parry Level
10 3 - - - - 19 13 - - H
Cancel Options Self Meter Gain Whiff Hit Block / Tech Opponent Meter Gain Hit Block / Tech
- - - - - -
  • Self meter gain: Whiff: 3, Hit: 18, Block: 9.
  • Opponent meter gain: Whiff: 0, Hit: 4, Block: 0.
FATonline.png
2HP (air)
Suitotsuda
Air Smash Punch
D.png+Hp.png (air)
(chunlijdhp).gif
Startup Active Recovery Block Hit Cr. Hit Damage Stun Kara Guard Level Parry Level
10 3 - - - - - 15 - - H
Cancel Options Self Meter Gain Whiff Hit Block / Tech Opponent Meter Gain Hit Block / Tech
- - - - - -
  • Self meter gain: Whiff: 2, Hit: 10, Block: 5.
  • Opponent meter gain: Whiff: 0, Hit: 0, Block: 0.
FATonline.png
2MK (air)
Yousoukyaku
Air Stomp
D.png+Mk.png (air)
(chunlijdmk).gif
Startup Active Recovery Block Hit Cr. Hit Damage Stun Kara Guard Level Parry Level
9 - - - - - 8 5 - - H
Cancel Options Self Meter Gain Whiff Hit Block / Tech Opponent Meter Gain Hit Block / Tech
- - - - - -
FATonline.png
j.HP-HP
Jump HP-HP (TC)
Hp.png,Hp.png (air)
(chunlijhphp).gif
Startup Active Recovery Block Hit Cr. Hit Damage Stun Kara Guard Level Parry Level
2 6 - - - - ? 5 - - H*H
Cancel Options Self Meter Gain Whiff Hit Block / Tech Opponent Meter Gain Hit Block / Tech
- - - - - -
  • Slams opponent into ground, but if Chun-Li lands first, she can link into a juggle
FATonline.png


Throws

LPLK
Koshuutou
Throw
B.png/F.png+Lp.png+Lk.png
(chunlitr).gif
Startup Active Recovery Block Hit Cr. Hit Damage Stun Kara Guard Level Parry Level
2 1 21 - - - 21 8 - - -
Cancel Options Self Meter Gain Whiff Hit Block / Tech Opponent Meter Gain Hit Block / Tech
- - - - - -
  • 26 throw range
FATonline.png
LPLK (air)
Ryuuseiraku
Air Throw
Lp.png+Lk.png (air)
(chunliatr).gif
Startup Active Recovery Block Hit Cr. Hit Damage Stun Kara Guard Level Parry Level
5 1 - - - - 14 8 - - -
Cancel Options Self Meter Gain Whiff Hit Block / Tech Opponent Meter Gain Hit Block / Tech
- - - - - -
  • 25 throw range
FATonline.png


Walljump

9 (wall)
Triangle Jump
Wall Jump
Uf.png/Ub.png (towards wall)
Startup Active Recovery Block Hit Cr. Hit Damage Stun Kara Guard Level Parry Level
6 - - - - - - - - - -
Cancel Options Self Meter Gain Whiff Hit Block / Tech Opponent Meter Gain Hit Block / Tech
- - - - - -
FATonline.png


Universal Overheads

MPMK
Kakushiken
Universal Overhead
MPMK
Startup Active Recovery Block Hit Cr. Hit Damage Stun Kara Guard Level Parry Level
16 10 5 -5~7 0 ~8 1~9 7 3 - - H
Cancel Options Self Meter Gain Whiff Hit Block / Tech Opponent Meter Gain Hit Block / Tech
- - - - - -
FATonline.png


Taunts

HPHK
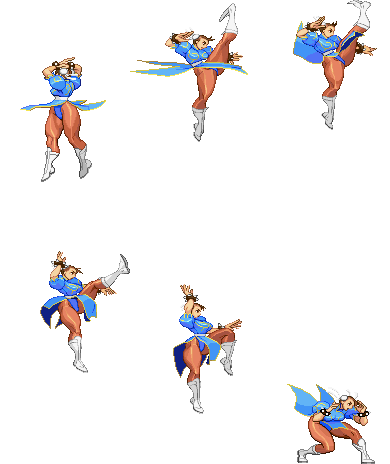
Yawn
Hp.png+Hk.png
(chunlit1).gif
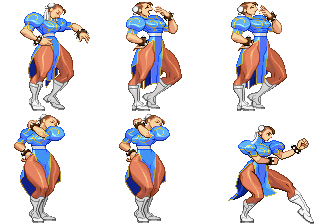
Taunt (Yawn-Shoulder Pat)
(chunlit2).gif
Taunt (Yawn-Neck Crack)
(chunlit3).gif
Taunt (Yawn-Back Crack)
Startup Active Recovery Block Hit Cr. Hit Damage Stun Kara Guard Level Parry Level
- - - - - - - - - - -
Cancel Options Self Meter Gain Whiff Hit Block / Tech Opponent Meter Gain Hit Block / Tech
- - - - - -
  • Multiple versions of taunt exist and occur at random
FATonline.png


SPECIALS

41236P
LP Startup Active Recovery Block Hit Cr. Hit Damage Stun Kara Guard Level Parry Level
14 36 45 -17 - - 8 3 - - H
Cancel Options Self Meter Gain Whiff Hit Block / Tech Opponent Meter Gain Hit Block / Tech
- - - - - -
  • Cancel options: su
FATonline.png


MP Startup Active Recovery Block Hit Cr. Hit Damage Stun Kara Guard Level Parry Level
13 17 38 -10 - - 8 3 - - H
Cancel Options Self Meter Gain Whiff Hit Block / Tech Opponent Meter Gain Hit Block / Tech
- - - - - -
  • Cancel options: su
FATonline.png


HP Startup Active Recovery Block Hit Cr. Hit Damage Stun Kara Guard Level Parry Level
11 7 32 -4 - - 8 3 - - H
Cancel Options Self Meter Gain Whiff Hit Block / Tech Opponent Meter Gain Hit Block / Tech
- - - - - -
  • Cancel options: su
FATonline.png


EX Startup Active Recovery Block Hit Cr. Hit Damage Stun Kara Guard Level Parry Level
15 - 41 -7 - - 14 3 - - H
Cancel Options Self Meter Gain Whiff Hit Block / Tech Opponent Meter Gain Hit Block / Tech
- - - - - -
  • Cancel options: su
  • Self meter gain: Whiff: -40, Hit: -40, Block: -40.
  • Opponent meter gain: Whiff: 0, Hit: 0, Block: 0.
FATonline.png
LK, LK, LK
LK Startup Active Recovery Block Hit Cr. Hit Damage Stun Kara Guard Level Parry Level
6 7 - - - - 17 11 - - H
Cancel Options Self Meter Gain Whiff Hit Block / Tech Opponent Meter Gain Hit Block / Tech
- - - - - -
  • Self meter gain: Whiff: 3, Hit: 20, Block: 14.
  • Opponent meter gain: Whiff: 0, Hit: 4, Block: 0.
FATonline.png


MK Startup Active Recovery Block Hit Cr. Hit Damage Stun Kara Guard Level Parry Level
6 4 - - - - 18 11 - - H
Cancel Options Self Meter Gain Whiff Hit Block / Tech Opponent Meter Gain Hit Block / Tech
- - - - - -
  • Self meter gain: Whiff: 3, Hit: 20, Block: 14.
  • Opponent meter gain: Whiff: 0, Hit: 4, Block: 0.
FATonline.png


HK Startup Active Recovery Block Hit Cr. Hit Damage Stun Kara Guard Level Parry Level
5 4 - - - - 21 11 - - H
Cancel Options Self Meter Gain Whiff Hit Block / Tech Opponent Meter Gain Hit Block / Tech
- - - - - -
  • Self meter gain: Whiff: 3, Hit: 20, Block: 14.
  • Opponent meter gain: Whiff: 0, Hit: 4, Block: 0.
FATonline.png


EX Startup Active Recovery Block Hit Cr. Hit Damage Stun Kara Guard Level Parry Level
3 4 - - - - 28 11 - - H
Cancel Options Self Meter Gain Whiff Hit Block / Tech Opponent Meter Gain Hit Block / Tech
- - - - - -
  • Self meter gain: Whiff: -40, Hit: -40, Block: -40.
  • Opponent meter gain: Whiff: 0, Hit: 0, Block: 0.
FATonline.png
28K
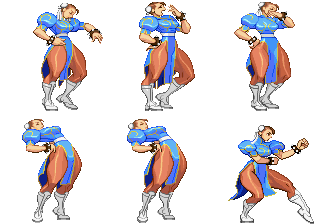
LK Startup Active Recovery Block Hit Cr. Hit Damage Stun Kara Guard Level Parry Level
12 4 - - - - 21 15 - - H
Cancel Options Self Meter Gain Whiff Hit Block / Tech Opponent Meter Gain Hit Block / Tech
- - - - - -
  • Self meter gain: Whiff: 3, Hit: 20, Block: 14.
  • Opponent meter gain: Whiff: 0, Hit: 4, Block: 0.
FATonline.png


MK Startup Active Recovery Block Hit Cr. Hit Damage Stun Kara Guard Level Parry Level
14 6 - - - - 27 17 - - H
Cancel Options Self Meter Gain Whiff Hit Block / Tech Opponent Meter Gain Hit Block / Tech
- - - - - -
  • Self meter gain: Whiff: 3, Hit: 23, Block: 17.
  • Opponent meter gain: Whiff: 0, Hit: 4, Block: 0.
FATonline.png


HK Startup Active Recovery Block Hit Cr. Hit Damage Stun Kara Guard Level Parry Level
17 8 - - - - 32 17 - - H
Cancel Options Self Meter Gain Whiff Hit Block / Tech Opponent Meter Gain Hit Block / Tech
- - - - - -
  • Self meter gain: Whiff: 3, Hit: 26, Block: 20.
  • Opponent meter gain: Whiff: 0, Hit: 4, Block: 0.
FATonline.png


EX Startup Active Recovery Block Hit Cr. Hit Damage Stun Kara Guard Level Parry Level
12 10 - - - - 35 19 - - H
Cancel Options Self Meter Gain Whiff Hit Block / Tech Opponent Meter Gain Hit Block / Tech
- - - - - -
  • Self meter gain: Whiff: -40, Hit: -40, Block: -40.
  • Opponent meter gain: Whiff: 0, Hit: 0, Block: 0.
  • Invincibility frames on _____
FATonline.png
63214K
LK Startup Active Recovery Block Hit Cr. Hit Damage Stun Kara Guard Level Parry Level
22 3 18 -2 - - 17 11 - - H
Cancel Options Self Meter Gain Whiff Hit Block / Tech Opponent Meter Gain Hit Block / Tech
- - - - - -
  • Self meter gain: Whiff: 3, Hit: 17, Block: 11.
  • Opponent meter gain: Whiff: 0, Hit: 4, Block: 0.
FATonline.png


MK Startup Active Recovery Block Hit Cr. Hit Damage Stun Kara Guard Level Parry Level
24 3 18 -2 - - 19 13 - - H
Cancel Options Self Meter Gain Whiff Hit Block / Tech Opponent Meter Gain Hit Block / Tech
- - - - - -
  • Self meter gain: Whiff: 3, Hit: 18, Block: 12.
  • Opponent meter gain: Whiff: 0, Hit: 4, Block: 0.
FATonline.png


HK Startup Active Recovery Block Hit Cr. Hit Damage Stun Kara Guard Level Parry Level
29 3 17 -1 - - 21 15 - - H
Cancel Options Self Meter Gain Whiff Hit Block / Tech Opponent Meter Gain Hit Block / Tech
- - - - - -
  • Self meter gain: Whiff: 3, Hit: 19, Block: 13.
  • Opponent meter gain: Whiff: 0, Hit: 4, Block: 0.
FATonline.png


EX Startup Active Recovery Block Hit Cr. Hit Damage Stun Kara Guard Level Parry Level
31 1 18 -2 - - 28 17 - - H
Cancel Options Self Meter Gain Whiff Hit Block / Tech Opponent Meter Gain Hit Block / Tech
- - - - - -
  • Self meter gain: Whiff: -40, Hit: -40, Block: -40.
  • Opponent meter gain: Whiff: 0, Hit: 0, Block: 0.
FATonline.png
236236P (SA1)
Kikoshou
SA1
Qcf.pngQcf.png+P.png (SA1)
(chunlisa1).gif
Startup Active Recovery Block Hit Cr. Hit Damage Stun Kara Guard Level Parry Level
1 20 48 -39 - - 57 - - - A
Cancel Options Self Meter Gain Whiff Hit Block / Tech Opponent Meter Gain Hit Block / Tech
- - - - - -
FATonline.png
236236K (SA2)
Houyoku Sen
SA2
Qcf.pngQcf.png+K.png (SA2)
(chunlisa2).gif
Startup Active Recovery Block Hit Cr. Hit Damage Stun Kara Guard Level Parry Level
3 19 35 -23 - - 67 24 - - H
Cancel Options Self Meter Gain Whiff Hit Block / Tech Opponent Meter Gain Hit Block / Tech
- - - - - -
FATonline.png
236236K (SA3)
Tensei Ranka
SA3
Qcf.pngQcf.png+K.png (SA3)
(chunlisa3).gif
Startup Active Recovery Block Hit Cr. Hit Damage Stun Kara Guard Level Parry Level
3 16 46 -30 - - 49 19 - - A
Cancel Options Self Meter Gain Whiff Hit Block / Tech Opponent Meter Gain Hit Block / Tech
- - - - - -
FATonline.png

3S Navigation

General
Controls
Notation
HUD
Glossary
System
FAQ
Characters
Akuma
Alex
Chun-Li
Dudley
Elena
Hugo
Ibuki
Ken
Makoto
Q
Necro
Oro
Remy
Ryu
Sean
Twelve
Urien
Yang
Yun
Gill