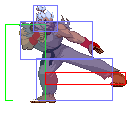
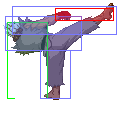
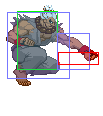
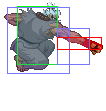
Introduction
With Akuma being a shoto, and thusly having the ability to play a good keep away game, using an aggresive playstyle is the sure way to go. Given his ability to hit hard, control space (and thus the opponent's movement or lack there of), and mix up, it becomes very easy to get in close and land the VCs or Supers that can mean the game.
Keeping on the offensive is also a big part of Akuma's gameplan. To offset Akuma's amazing versatility, his defense/stun are below average. This means that your mistakes get punished harder, especially if that stun damage gets stacked up. Fortunately, you have several tools to keep your opponent on the defensive. Remember, the more your opponent has to think, the more likely it is he will slip up and give you an opening. More on this in the strategy section.
Here's a rundown of the ism choices for Akuma and some of their differences.
- A-ism - A-Akuma has a lot of flexability due to his myriad of powerful super combos, most of which can be cancelled from all of his numerous attack options. He also has the Shun Goku Satsu at his disposal, allowing for very deadly mindgames.
- X-ism - Akuma loses 4 very important things in x-ism. 1, air blocking. Due to his low defense/stun, this hurts his game a LOT. 2, alpha counters. Another terrible loss when coupled with his bad defenses. 3, the hyakki shu. this hurts his mix-up game, which is crucial, and his mobility. And 4, ALL of his super combos, barring the Shun Goku Satsu, limiting his combos, damage capability, and gameplan due to reliance on tactics needed to land the powerful, but predictable super.
- V-ism - This is where Akuma thrives, and it makes him one of the most powerful characters in Alpha 3. His VC flexability is insane, allowing for combos in any situation, including unblockables, that are very consistant. He also has his entire available move set (without supers, of course), and also has all of his close range attack available on command, which expands his ability to mix up his game even further.
|
|
| Pros |
Cons |
- King of flex. Has options for literally every possible scenario
- Great set of shoto normals, including the same hopkick as Ryu
- Divekick is incredibly fast and difficult to react to
- Great air mobility with both divekick and air tatsu
- Incredibly difficult to keep cornered due to teleport and air tatsu
- Difficult to anti-air consistently due to divekick, tatsu and air fireball all being strong air options
- Tatsus put opponent in a juggle state, setting up tech traps
- Kick air throw has a very large grab radius and sets up good situations
- Can easily/safely force damage from a variety of situations with unblockable setups, since you're not limited to only activating as a read or reaction punish. These can lead to nasty resets if the opponent doesn't have meter.
- Can start OTG customs off sweep Valle VCs that lead to 70-80% damage
- Insanely fast meter build with tatsu spam
- Fireball knocks down at close range
- Strong guard crush potential with b. RH on V-ISM
- DP option-selects make it difficult for opponents to safely counter-activate or alpha counter against his setups
|
- Fireball recovery is longer than other shotos
- Red fireball and roll inputs overlap, which can cause more errors than you might think
- Lacks the stun potential that Ryu has
- Neutral without meter isn't as oppressive as other top tiers like Sodom or Sakura
- OTGs have a high execution requirement for consistency
|
the CRAB
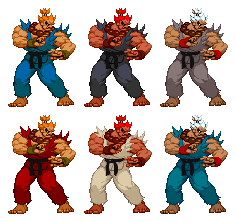
Colors
First row: Punch X-ISM, A-ISM, V-ISM
Second row: Kick X-ISM, A-ISM, V-ISM

Moves List
Throws
Seoi Nage
 /
/ +
+
|

|
| Damage |
20
|
| Stun |
2
|
| Meter Gain |
(A)1(XV)3
|
| Frame Count |
5/1/20
|
Tomoe Nage
 /
/ +
+
|

|
| Damage |
20
|
| Stun |
2
|
| Meter Gain |
(A)1(XV)3
|
| Frame Count |
5/1/20
|
Jigoku-gurum
Any direction but  /
/ +
+
|

|
| Damage |
20
|
| Stun |
2
|
| Meter on whiff/hit |
(A)1(XV)3/(A)3(XV)4
|
| Frame Count |
1/1/1(before landing)
|
One of the best air throws in the game. good for catching back recovery in the air eg. after landing his tatsu.
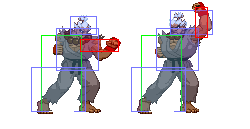
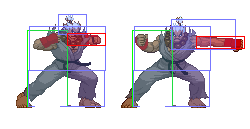
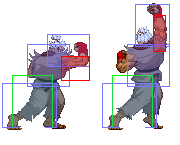
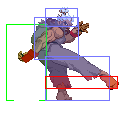
Ground Normals
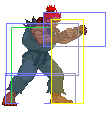
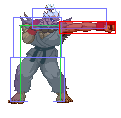
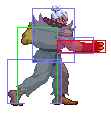
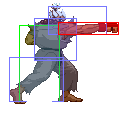
| Damage |
5 |

|
| Stun |
2
|
| Chain Cancel |
Yes
|
| Special Cancel |
Yes
|
| Super Cancel |
Yes
|
| Meter on whiff/hit |
0/1
|
| Frame Count |
3/4/6
|
| Block Stun |
+4
|
| Hit Stun/Counter Hit |
+5/+10
|
| Damage |
5 |

|
| Stun |
2
|
| Chain Cancel |
yes
|
| Special Cancel |
yes
|
| Super Cancel |
yes
|
| Meter on whiff/hit |
0/1
|
| Frame Count |
3/4/7
|
| Block Stun |
+3
|
| Hit Stun/Counter Hit |
+4/+9
|
| Damage |
13 |

|
| Stun |
4
|
| Chain Cancel |
no
|
| Special Cancel |
yes
|
| Super Cancel |
yes
|
| Meter on whiff/hit |
1/3(A)4(XV)
|
| Frame Count |
4/4/20
|
| Block Stun |
-5
|
| Hit Stun/Counter Hit |
-4/0
|
| Damage |
13 |

|
| Stun |
4
|
| Chain Cancel |
no
|
| Special Cancel |
no
|
| Super Cancel |
no
|
| Meter on whiff/hit |
1/3(A)4(XV)
|
| Frame Count |
5/8/15
|
| Block Stun |
-4
|
| Hit Stun/Counter Hit |
-3/+1
|
| Damage |
11 |

|
| Stun |
4
|
| Chain Cancel |
no
|
| Special Cancel |
yes
|
| Super Cancel |
yes
|
| Meter on whiff/hit |
1/3(A)4(XV)
|
| Frame Count |
4/4/11
|
| Block Stun |
+4
|
| Hit Stun/Counter Hit |
+5/+9
|
| Damage |
16/12 |

|
| Stun |
8
|
| Chain Cancel |
no
|
| Special Cancel |
yes
|
| Super Cancel |
yes
|
| Meter on whiff/hit |
1/4(A)6(XV)
|
| Frame Count |
4/5/26
|
| Block Stun |
-8
|
| Hit Stun/Counter Hit |
-7/Launch
|
| Damage |
19/18 |

|
| Stun |
8
|
| Chain Cancel |
no
|
| Special Cancel |
yes
|
| Super Cancel |
yes
|
| Meter on whiff/hit |
1/4(A)6(XV)
|
| Frame Count |
8/6/23
|
| Block Stun |
-6
|
| Hit Stun/Counter Hit |
-5/launch
|
| Damage |
15/12 |

|
| Stun |
8
|
| Chain Cancel |
no
|
| Special Cancel |
yes
|
| Super Cancel |
yes
|
| Meter on whiff/hit |
1/4(A)6(XV)
|
| Frame Count |
6/2/27
|
| Block Stun |
-6
|
| Hit Stun/Counter Hit |
-5/launch
|
| Damage |
6 |

|
| Stun |
2
|
| Chain Cancel |
no
|
| Special Cancel |
yes
|
| Super Cancel |
yes
|
| Meter on whiff/hit |
0/1
|
| Frame Count |
5/5/14
|
| Block Stun |
-5
|
| Hit Stun/Counter Hit |
-4/+1
|
| Damage |
4 |

|
| Stun |
2
|
| Chain Cancel |
yes
|
| Special Cancel |
yes
|
| Super Cancel |
yes
|
| Meter on whiff/hit |
0/1
|
| Frame Count |
4/4/6
|
| Block Stun |
+4
|
| Hit Stun/Counter Hit |
+5/+10
|
| Damage |
12 |

|
| Stun |
4
|
| Chain Cancel |
no
|
| Special Cancel |
yes
|
| Super Cancel |
yes
|
| Meter on whiff/hit |
1/3(A)4(XV)
|
| Frame Count |
4/6/17
|
| Block Stun |
-4
|
| Hit Stun/Counter Hit |
-3/+1
|
| Damage |
12 |

|
| Stun |
4
|
| Chain Cancel |
no
|
| Special Cancel |
no
|
| Super Cancel |
no
|
| Meter on whiff/hit |
1/3(A)4(XV)
|
| Frame Count |
7/8/15
|
| Block Stun |
-4
|
| Hit Stun/Counter Hit |
-3/+1
|
| Damage |
10 |

|
| Stun |
4
|
| Chain Cancel |
no
|
| Special Cancel |
yes
|
| Super Cancel |
yes
|
| Meter on whiff/hit |
1/3(A)4(XV)
|
| Frame Count |
5/3/16
|
| Block Stun |
0
|
| Hit Stun/Counter Hit |
+1/+5
|
- Close Standing Roundhouse:
| Damage |
9+8(AV)8+9(X) |

|
| Stun |
8x2
|
| Chain Cancel |
no
|
| Special Cancel |
no
|
| Super Cancel |
no
|
| Meter on whiff/hit |
1/3+1(A)1/4+1(V)1/4+1(X)
|
| Frame Count |
6/4,4/18(AV)6/2,4/23(X)
|
| Block Stun |
+1(AV)-4(X)
|
| Hit Stun/Counter Hit |
+2(AV)-3(X)/Launch(2nd hit)
|
| Damage |
16 |

|
| Stun |
8
|
| Chain Cancel |
no
|
| Special Cancel |
no
|
| Super Cancel |
no
|
| Meter on whiff/hit |
1/4(A)6(XV)
|
| Frame Count |
11/3/19
|
| Block Stun |
+1
|
| Hit Stun/Counter Hit |
+2/launch
|
| Damage |
14 |

|
| Stun |
8
|
| Chain Cancel |
no
|
| Special Cancel |
no
|
| Super Cancel |
no
|
| Meter on whiff/hit |
1/4(A)6(XV)
|
| Frame Count |
5/6/31
|
| Block Stun |
14
|
| Hit Stun/Counter Hit |
-
|
Air Normals
| Damage |
8 |

|
| Stun |
2
|
| Chain Cancel |
no
|
| Special Cancel |
no
|
| Super Cancel |
no
|
| Meter on whiff/hit |
no
|
| Frame Count |
5/10/6
|
| Damage |
12 |

|
| Stun |
4
|
| Chain Cancel |
no
|
| Special Cancel |
no
|
| Super Cancel |
no
|
| Meter on whiff/hit |
1/3(A)4(XV)
|
| Frame Count |
5/8/2(N.Jump)6/8/2(D.Jump)
|
| Damage |
16 |

|
| Stun |
8
|
| Chain Cancel |
no
|
| Special Cancel |
no
|
| Super Cancel |
no
|
| Meter on whiff/hit |
1/4(A)6(XV)
|
| Frame Count |
8/6/2(N.Jump)7/6/2(D.Jump)
|
| Damage |
7 |

|
| Stun |
2
|
| Chain Cancel |
no
|
| Special Cancel |
no
|
| Super Cancel |
no
|
| Meter on whiff/hit |
0/1
|
| Frame Count |
5/10/2
|
| Damage |
7 |

|
| Stun |
2
|
| Chain Cancel |
no
|
| Special Cancel |
no
|
| Super Cancel |
no
|
| Meter on whiff/hit |
0/1
|
| Frame Count |
5/10/2
|
| Damage |
10 |

|
| Stun |
4
|
| Chain Cancel |
no
|
| Special Cancel |
no
|
| Super Cancel |
no
|
| Meter on whiff/hit |
1/3(A)4(XV)
|
| Frame Count |
5/6/12
|
| Damage |
11 |

|
| Stun |
4
|
| Chain Cancel |
no
|
| Special Cancel |
no
|
| Super Cancel |
no
|
| Meter on whiff/hit |
1/3(A)4(XV)
|
| Frame Count |
6/8/8
|
| Damage |
17 |

|
| Stun |
8
|
| Chain Cancel |
no
|
| Special Cancel |
no
|
| Super Cancel |
no
|
| Meter on whiff/hit |
1/4(A)6(XV)
|
| Frame Count |
12/6/11
|
- Diagonal Jump Roundhouse:
| Damage |
15 |

|
| Stun |
8
|
| Chain Cancel |
no
|
| Special Cancel |
no
|
| Super Cancel |
no
|
| Meter on whiff/hit |
1/4(A)6(XV)
|
| Frame Count |
6/6/8
|
Command Normals
- Zugai Hasatsu/Overhead:
 +
+
| Damage |
8+6 |

|
| Stun |
2x2
|
| Chain Cancel |
no
|
| Special Cancel |
no
|
| Super Cancel |
no
|
| Meter on whiff/hit |
1/1x2(A)3+1(XV)
|
| Frame Count |
20/3,3/20
|
| Block Stun |
-4
|
| Hit Stun/Counter Hit |
-3/?
|
- Senpuu Kyaku:
 +
+
| Damage |
12 |

|
| Stun |
4
|
| Chain Cancel |
no
|
| Special Cancel |
no
|
| Super Cancel |
no
|
| Meter on whiff/hit |
1/3(A)4(XV)
|
| Frame Count |
23/2/13
|
| Block Stun |
+4
|
| Hit Stun/Counter Hit |
0/+5
|
- Tenma Kuujin Kyaku/Divekick: In Air(apex):
 +
+
| Damage |
11/12 |

|
| Stun |
4
|
| Chain Cancel |
no
|
| Special Cancel |
no
|
| Super Cancel |
no
|
| Meter on whiff/hit |
1/3(A)4(XV)
|
| Frame Count |
3/15/1
|
Special Moves
I'll be listing which special moves can be used in specific "isms" by A (a/z-ism), X (x-ism) and V (v-ism).
Gou Hadouken(A,X,and V-Ism)
- Quarter Circle Forward + Punch
- Basic fireball. Damage decreases gradually the farther it travels as with all the Alpha 3 projectiles. The strength of the punch used determines the speed and power (LP being the slowest, HP the fastest). Knocks down if it hits close. Great for spacing, especially when coupled with the arial variant. Just dont abuse it. Predictability = punishment.
Zanku Hadouken(A,X,and V-Ism)
- (In Air)Quarter Circle Forward + Punch
- A fireball launched from a jump that comes down diagonally. Another great zoning tool. More info in the strategy section.
Shakunetsu Hadouken(A,X,and V-Ism)
- Half Circle Back + Punch
- A fireball that hits three times, scores a knockdown, and lights the opponent on fire. This move has horrible wind-up time, making it very easy to see coming. Good for chip damage, and has it's VC uses, but not much else. Use it sparingly.
Gou Shouryuken(A,X,and V-Ism)
- Forward ,Down ,Down-Forward + Punch
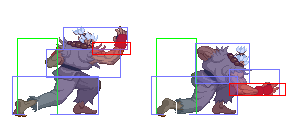
- A flying uppercut that hits 3 times for good damage. This is your primary anti-air move. Also very useful for wake-ups and reversals. I recommend only using the LP version of this move, as the HP version doesnt do much more damage, and leaves you VERY open if you miss.
Tatsumaki Zanku Kyaku(A,X,and V-Ism)
- Quarter Circle Back + Kick
- Can be performed in the air
- Akuma's "hurricane kick", travels more distance depending on the strength of kick used. Good for juggles, great for juggle set ups. Use sparingly, however, becuase if predicted, again, you'll be punished.
Zenpou Tenshin(A and V-Ism)
- Quarter Circle Back + Punch
- A forward rolling move that travels farther depending on the strength of punch used. I believe this move to be useless except maybe in mindgames. You are completely vulnerable during this move. I don't use it at all.
Ashura Senku(A,X,and V-Ism)
- Forward, Down, Down-Forward or Back, Down, Down-Back + 3 Punches or 3 Kicks
- A teleport that sends you farther depending on the use of 3P or 3K. A good move to give yourself a chance to back off of an opponent or get yourself out of a corner, however you are vulnerable during the start up and wind-down, so get yourself a little breathing room first.
Tenma Kujin Kyaku(A,X,and V-Ism)
- During a forward jump, press Down + MK at the apex
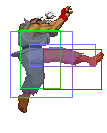
- Akuma's diving kick. Incredibly useful move for mindgames. It has decent priority, stops his jump in midair, and be combo'd out of a verified hit. I'll go over some of it's many uses in the strategy section.
Hyakki Shu(A and V-Ism)
- Down ,Down-Forward ,Forward ,Up-Forward + Punch
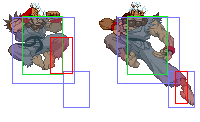
- This move sends Akuma rolling into the air at varying distances depending on the strength of punch used. The move itself is a set up for several other moves. It has incredible combo ability when used after a pop-up and in VC's, but don't use any of the variations alone, as the priority isn't great, and it's easy to see coming. He IS flying across the screen, afterall. (Note that if you are having trouble performing this move, it's much easier to use D,DF,F,UF,U+P.) The variants are as follows:
- Hyakki Go Zan
- Perform Hyakki Shu and then do nothing
- When Akuma lands, he drops into a sliding kick that sweeps the opponent. Use sparingly and only for mindgames. You can't combo out of it, and it's easy to see coming.
- Hyakki Go Sho
- Perform Hyakki Shu and then press Punch
- Akuma uses a flying palm strike. Good in combos and VCs, but not alone unless you anticipate an arial.
- Hyakki Go Sen
- Perform Hyakki Shu and then press Kick
- Akuma performs a flying dropkick. Same rules apply for Hyakki Go Sho.
- Hyakki Go Sai
- Perform Hyakki Shu and then press Forward or Back + Punch when close
- Akuma grabs the opponent for a flip throw. This move has to be performed very close and near the shoulder of the opponent and can also be used against an airborne enemy. Can also be used to OTG throw during a VC.
- Hyakki Go Tsui
- Perform Hyakki Shu and then press Forward or Back + Kick when close
- Akuma grabs his opponent for a multi-flipping neckbreaker of sorts. This move must be performed very close and near the midsection of the opponent and can also be performed on airborn foes.
Zugai Hasatsu(A,X,and V-Ism)
- Forward+MP
- A chop that hits twice as an overhead. Great for mindgames on a downed opponent.
Senpu Kyaku(A,X,and V-Ism)
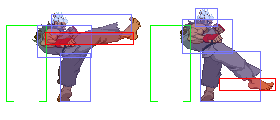
- Forward + MK
- A hop kick. Great poke in that it goes over low attacks, and the recovery can be cancelled, making for great mindgames and applying pressure.
the CRAB
Super Combos
Messatsu Gou Hadou(A-Ism)
- Double Half Circle Back + Punch
- Akuma's super fireball. When using all three bars it hits 8 times. Goes through regular progectiles.
Messatsu Gou Shoryu(A-Ism)
- Double Quarter Circle Forward + Punch
- Akuma's super dragon punch. Again, hits 8 times at maximum level. DO NOT use this as an anti-air unless you really feel you need the extra invincibility frames b/c most of the hits will miss.
Tenma Gou Zankuu(A-Ism)
- (In Air)Double Quarter Circle Forward + Punch
- An arial super fireball. Unless you're using it as an anti-anti-air, this move is worthless. It does an absurdly low amount of damage for a super. You're better off stuffing AA attempts with the zanku hadoken.
Shun Goku Satsu(A and X-Ism)
- LP, LP, Forward, LK, HP
- Ahh, the Raging Demon. The name of this move roughly translates into "instant hell murder". Akuma slides across the ground, grabs his opponent, and the screen goes black as the hits rack up. This move does obscene damage, but is very hard to land due to his slow startup time. It is, however, very gratifying.
the CRAB
File:Example.jpgItalic text
