SeenConnroy (talk | contribs) (→Move List: Adding frame data, updating move descriptions, and her regular throw.) |
SeenConnroy (talk | contribs) (→Move List: Finished framedata, updating some move descriptions, and added hitboxes.) |
||
| Line 22: | Line 22: | ||
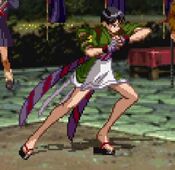
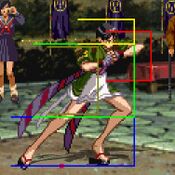
{{MoveData | {{MoveData | ||
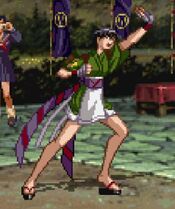
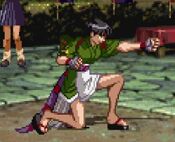
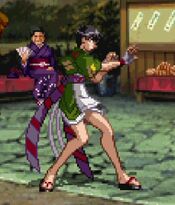
|image=AVG2_Kyoko_stLK.jpg | |image=AVG2_Kyoko_stLK.jpg | ||
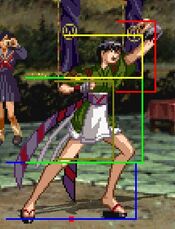
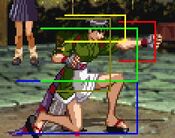
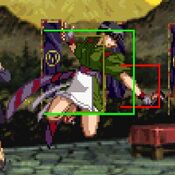
|hitbox= | |hitbox=AVG2_Kyoko_stLKhitbox.jpg | ||
|caption= | |caption= | ||
|name={{Icon-Capcom|LK}} | |name={{Icon-Capcom|LK}} | ||
| Line 130: | Line 130: | ||
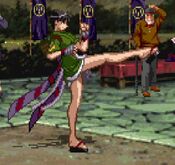
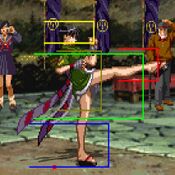
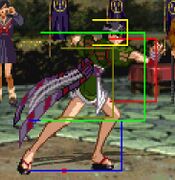
{{MoveData | {{MoveData | ||
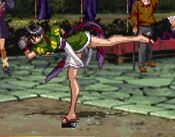
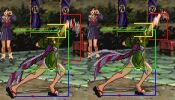
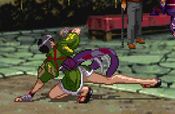
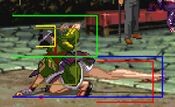
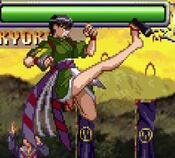
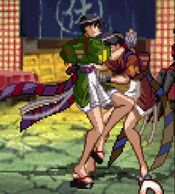
|image=AVG2_Kyoko_crHK.jpg | |image=AVG2_Kyoko_crHK.jpg | ||
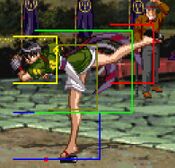
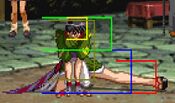
|hitbox=AVG2_Kyoko_crHKhitbox.jpg | |||
|caption= | |caption= | ||
|name={{Motion|2}}{{Icon-Capcom|HK}} | |name={{Motion|2}}{{Icon-Capcom|HK}} | ||
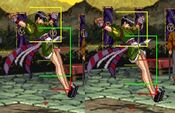
| Line 148: | Line 149: | ||
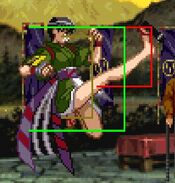
{{MoveData | {{MoveData | ||
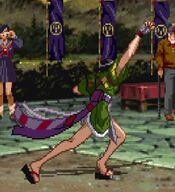
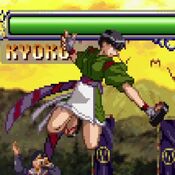
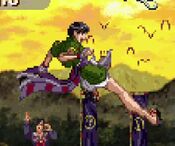
|image=AVG2_Kyoko_jLP.jpg | |image=AVG2_Kyoko_jLP.jpg | ||
|hitbox= | |hitbox=AVG2_Kyoko_jLPhitbox.jpg | ||
|caption= | |caption= | ||
|name=j.{{Icon-Capcom|LP}} | |name=j.{{Icon-Capcom|LP}} | ||
| Line 168: | Line 169: | ||
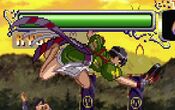
{{MoveData | {{MoveData | ||
|image=AVG2_Kyoko_jLK.jpg | |image=AVG2_Kyoko_jLK.jpg | ||
|hitbox=AVG2_Kyoko_jLKhitbox.jpg | |||
|caption= | |caption= | ||
|name=j.{{Icon-Capcom|LK}} | |name=j.{{Icon-Capcom|LK}} | ||
| Line 187: | Line 189: | ||
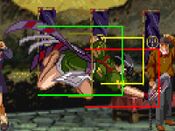
{{MoveData | {{MoveData | ||
|image=AVG2_Kyoko_njLK.jpg | |image=AVG2_Kyoko_njLK.jpg | ||
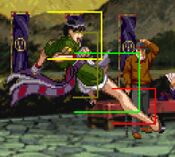
|hitbox=AVG2_Kyoko_njLKhitbox.jpg | |||
|caption= | |caption= | ||
|name=nj.{{Icon-Capcom|LK}} | |name=nj.{{Icon-Capcom|LK}} | ||
| Line 206: | Line 209: | ||
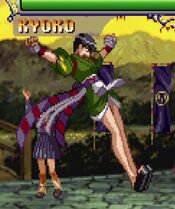
{{MoveData | {{MoveData | ||
|image=AVG2_Kyoko_jHP.jpg | |image=AVG2_Kyoko_jHP.jpg | ||
|hitbox=AVG2_Kyoko_jHPhitbox.jpg | |||
|caption= | |caption= | ||
|name=j.{{Icon-Capcom|HP}} | |name=j.{{Icon-Capcom|HP}} | ||
| Line 224: | Line 228: | ||
{{MoveData | {{MoveData | ||
|image=AVG2_Kyoko_jHK.jpg | |image=AVG2_Kyoko_jHK.jpg | ||
|hitbox=AVG2_Kyoko_jHKhitbox.jpg | |||
|caption= | |caption= | ||
|name=j.{{Icon-Capcom|HK}} | |name=j.{{Icon-Capcom|HK}} | ||
| Line 244: | Line 249: | ||
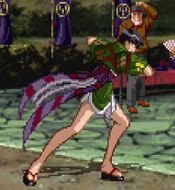
{{MoveData | {{MoveData | ||
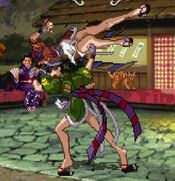
|image=AVG2_Kyoko_4HP.jpg | |image=AVG2_Kyoko_4HP.jpg | ||
|hitbox=AVG2_Kyoko_4HPhitbox.jpg | |||
|caption= | |caption= | ||
|name={{Motion|4}}{{Icon-Capcom|HP}} | |name={{Motion|4}}{{Icon-Capcom|HP}} | ||
| Line 254: | Line 260: | ||
|recovery=22 | |recovery=22 | ||
|frameAdv=- | |frameAdv=- | ||
|description= A short-range hook slap, slightly less range than stLP (due to the back input). Special cancels, but doesn't really do a whole lot for you compared to any other button that | |description= A short-range hook slap, slightly less range than stLP (partially due to the back input). Special cancels, but doesn't really do a whole lot for you compared to any other button that hits at the same range. | ||
}} | }} | ||
}} | }} | ||
| Line 371: | Line 377: | ||
|guard= Mid | |guard= Mid | ||
|startup=9 | |startup=9 | ||
|active= | |active=5 | ||
|recovery= | |recovery=16 | ||
|frameAdv=- | |frameAdv=- | ||
|description= The HP version moves forward slightly. You want to use HP Ominaeshi in combos. Near and at max range, Otokoeshi will not connect on the ground. Otokoeshi is 7f start 4 act 34 rec 38 rec | |description= The HP version moves forward slightly. You want to use HP Ominaeshi in combos. Near and at max range, Otokoeshi will not connect on the ground. | ||
Otokoeshi is 7f start 4 act 34 rec 38 rec | |||
}} | }} | ||
{{AttackData-AVG2 | {{AttackData-AVG2 | ||
| Line 381: | Line 389: | ||
|damage= | |damage= | ||
|guard= Mid | |guard= Mid | ||
|startup= | |startup=1 + 6 | ||
|active= | |active=4, (6), 4 | ||
|recovery= | |recovery= 40 | ||
|frameAdv=- | |frameAdv=- | ||
|description=EX version has both hits come out automatically, deals strong damage and has some defensive utility due to it being an instant super at close range, so it's worth keeping a bar stocked for this if you need it. | |description=EX version has both hits come out automatically, deals strong damage and has some defensive utility due to it being an instant super at close range, so it's worth keeping a bar stocked for this if you need it. | ||
}} | }} | ||
{{AttackData-AVG2 | {{AttackData-AVG2 | ||
|header=no | |header=no | ||
|version={{Motion|41236}} + {{Icon-Capcom|P}}+{{Icon-Capcom|HK}} | |version={{Motion|41236}} + {{Icon-Capcom|P}}+{{Icon-Capcom|HK}} | ||
|damage=1 | |damage= ,1 | ||
|guard= Mid | |guard= Mid | ||
|startup= | |startup=8 | ||
|active= | |active=8 | ||
|recovery= | |recovery=7 | ||
|frameAdv=- | |frameAdv=- | ||
|description= SECRET (No Flash): Essentially HP Ominaeshi, but with a notable difference to Otokoeshi: in exchange for incredibly reduced damage (only dealing 1pt!), it builds significantly more meter than other versions of the move -- a quarter of a bar on whiff, and half a bar on hit! Unlike most other secret moves, this is extremely useful for Kyoko, since meter is so important to the rest of her gameplan. It will also play a special sound effect to signify you did the secret version, besides the absurd amount of meter built. | |description= SECRET (No Flash): Essentially HP Ominaeshi, but with a notable difference to Otokoeshi: in exchange for incredibly reduced damage (only dealing 1pt!), it builds significantly more meter than other versions of the move -- a quarter of a bar on whiff, and half a bar on hit! Unlike most other secret moves, this is extremely useful for Kyoko, since meter is so important to the rest of her gameplan. It will also play a special sound effect to signify you did the secret version, besides the absurd amount of meter built. | ||
| Line 464: | Line 471: | ||
|recovery=43 | |recovery=43 | ||
|frameAdv=- | |frameAdv=- | ||
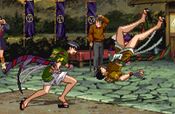
|description= Leaping anti-air grab. Even though it's unblockable, the lack of invincibility makes this move difficult to use as an anti-air. | |description= Leaping anti-air grab. Even though it's unblockable, the lack of useful invincibility and it's poor hitbox makes this move difficult to use as an anti-air. On the flipside, it's use in combos is highly valuable, since it provides a hard knockdown, setting up Kyoko's incredibly scary okizeme. Head invul on frames 2-7 and frames 52-62. Can also be performed with '''SP2'''. | ||
}} | }} | ||
{{AttackData-AVG2 | {{AttackData-AVG2 | ||
| Line 471: | Line 478: | ||
|damage= | |damage= | ||
|guard= N/A | |guard= N/A | ||
|startup= | |startup=13 | ||
|active= | |active=19 | ||
|recovery= | |recovery=49 | ||
|frameAdv=- | |frameAdv=- | ||
|description= | |description= The HP version leaps higher and does more damage, otherwise used the same as the L version. Head invul on frames 3-9 and frames 65-75. | ||
}} | }} | ||
{{AttackData-AVG2 | {{AttackData-AVG2 | ||
| Line 482: | Line 489: | ||
|damage= | |damage= | ||
|guard= M/A | |guard= M/A | ||
|startup= | |startup=1 + 8 | ||
|active= | |active=24 | ||
|recovery= | |recovery=54 | ||
|frameAdv=- | |frameAdv=- | ||
|description=The EX version is particularly useful since it deals more damage and is easily confirmable as a super cancel from Ominaeshi. | |description=The EX version is particularly useful since it deals more damage and is easily confirmable as a super cancel from Ominaeshi. Head invul on frames 1-6 and frames 71-81. | ||
}} | }} | ||
{{AttackData-AVG2 | {{AttackData-AVG2 | ||
| Line 493: | Line 500: | ||
|damage= | |damage= | ||
|guard= Mid | |guard= Mid | ||
|startup= | |startup=13 | ||
|active= | |active=19 | ||
|recovery= | |recovery=49 | ||
|frameAdv=- | |frameAdv=- | ||
|description= SECRET (no Flash): Effectively the same as HK Sazanka, except it travels the same height as the EX version. Jinchouge will take priority at close range (Housenka if you have 2 or more meters) | |description= SECRET (no Flash): Effectively the same as HK Sazanka, except it travels the same height as the EX version. Jinchouge will take priority at close range (Housenka if you have 2 or more meters). Head invul on frames 3-9 and frames 65-75. | ||
}} | }} | ||
}} | }} | ||
| Line 510: | Line 517: | ||
|damage= | |damage= | ||
|guard= N/A | |guard= N/A | ||
|startup= | |startup=1 | ||
|active= | |active=N/A | ||
|recovery= | |recovery=N/A | ||
|frameAdv=- | |frameAdv=- | ||
|description= Kyoko's command grab. A nice option to have against people who are turtling up too much against your offense. In the corner, this can net you a combo with an OTG pickup, so it becomes doubly useful there. Bear in mind, though, that you need to be careful when executing this move from a dash -- if you have no meter you'll often get Sazanka, and if you have two bars you might accidentally let Hosenka rip. Best to try and tick into it. | |description= Kyoko's command grab. A nice option to have against people who are turtling up too much against your offense. In the corner, this can net you a combo with an OTG pickup, so it becomes doubly useful there. Bear in mind, though, that you need to be careful when executing this move from a dash -- if you have no meter you'll often get Sazanka, and if you have two bars you might accidentally let Hosenka rip. Best to try and tick into it. | ||
| Line 528: | Line 535: | ||
|damage= | |damage= | ||
|guard= N/A | |guard= N/A | ||
|startup= 1 | |startup=1 | ||
|active=N/A | |active=N/A | ||
|recovery=N/A | |recovery=N/A | ||
Revision as of 04:00, 3 September 2024
Move List
Standing Normals
| Damage | Guard | Startup | Active | Recovery | FrameAdv |
|---|---|---|---|---|---|
| Mid | 4 | 2 | 6 | - | |
|
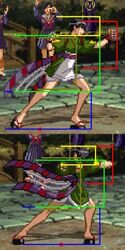
A short elbow jab, the speed and recovery on this bad boy is insane, it has no chains but due to how fast it is it can link into every other standing or crouching normal she has. The range is also much better than what it looks like, albeit still a short jab. Special cancelable. | |||||
| Damage | Guard | Startup | Active | Recovery | FrameAdv |
|---|---|---|---|---|---|
| Mid | 5 | 2 | 13 | - | |
|
A long front kick, one of Kyoko's best space control and harassment tools as it has quick startup, good range (for a light), and she can link into itself or special cancel it (although linking multiple times will put you out of range for an Ominaeshi). | |||||
| Damage | Guard | Startup | Active | Recovery | FrameAdv |
|---|---|---|---|---|---|
| Mid | 9 | 2 | 16 | - | |
|
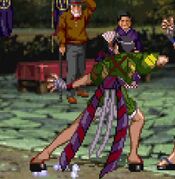
A reverse kick, kinda useless as it actually has less range than stLK and has so much pushback that special cancelling it into Ominaeshi will whiff anywhere but point blank. This will move Kyoko forward a little bit after recovering. | |||||
Crouching Normals
| Damage | Guard | Startup | Active | Recovery | FrameAdv |
|---|---|---|---|---|---|
| Mid | 4 | 2 | 4 | - | |
|
A quick punch, much like its standing version it too can link into every other standing or crouching normal and is special cancellable. | |||||
| Damage | Guard | Startup | Active | Recovery | FrameAdv |
|---|---|---|---|---|---|
| Low | 3 | 2 | 11 | - | |
|
A quick low kick with good range and good recovery, can link into itself and 2LP but does not offer enough hitstun for anything else. Is special cancellable. | |||||
| Damage | Guard | Startup | Active | Recovery | FrameAdv |
|---|---|---|---|---|---|
| Low | 8 | 2 | 14 | - | |
|
A good sweep, acceptable range, special cancellable, and is her OTG pickup. | |||||
Jumping Normals
| Damage | Guard | Startup | Active | Recovery | FrameAdv |
|---|---|---|---|---|---|
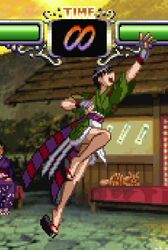
| High | 4 | 14 | 4 | - | |
| Damage | Guard | Startup | Active | Recovery | FrameAdv |
|---|---|---|---|---|---|
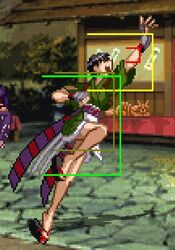
| High | 8 | 6 (4, 2) | 9 | - | |
Command Normals
| Damage | Guard | Startup | Active | Recovery | FrameAdv |
|---|---|---|---|---|---|
| Mid | 6 | 4 | 22 | - | |
|
A short-range hook slap, slightly less range than stLP (partially due to the back input). Special cancels, but doesn't really do a whole lot for you compared to any other button that hits at the same range. | |||||
Throws
| Damage | Guard | Startup | Active | Recovery | FrameAdv |
|---|---|---|---|---|---|
|
Kyoko throws wrist lock then throws the opponent away from her, does not allow OTG extensions and the recovers slower than most. Useful as a defensive option if you don't want to risk EX Ominaeshi being baited or taking time to input Jinchouge. | |||||
Guard Cancels
Special Moves
Super Moves
| Damage | Guard | Startup | Active | Recovery | FrameAdv |
|---|---|---|---|---|---|
| N/A | 1 | N/A | N/A | - | |
|
1F command grab super that's unjumpable after the flash. Because of the way the final group of hits work, the best damage will often come from landing this in the center of the screen (not the center of the stage). However, you can combo after this in the corner by following up with Ominaeshi (it will whiff, but Otokoeshi will hit), which you can then extend with a super cancel if you feel like dumping meter. Can also be performed with SP1+SP2. | |||||
