| Line 277: | Line 277: | ||
|version={{Icon-Capcom|HK}} | |version={{Icon-Capcom|HK}} | ||
|damage= | |damage= | ||
|guard= | |guard= Mid | ||
|startup= | |startup= | ||
|active=- | |active=- | ||
| Line 288: | Line 288: | ||
|version={{Icon-Capcom|LK}} + {{Icon-Capcom|HK}} | |version={{Icon-Capcom|LK}} + {{Icon-Capcom|HK}} | ||
|damage= | |damage= | ||
|guard= | |guard= Mid | ||
|startup= | |startup= | ||
|active=- | |active=- | ||
| Line 299: | Line 299: | ||
|version={{motion|6}}{{Motion|41236}} + {{Icon-Capcom|LK}}{{Icon-Capcom|HK}} | |version={{motion|6}}{{Motion|41236}} + {{Icon-Capcom|LK}}{{Icon-Capcom|HK}} | ||
|damage= | |damage= | ||
|guard= | |guard= Mid | ||
|startup= | |startup= | ||
|active=- | |active=- | ||
| Line 310: | Line 310: | ||
|version={{motion|236}}{{Motion|41236}} + {{Icon-Capcom|LK}} | |version={{motion|236}}{{Motion|41236}} + {{Icon-Capcom|LK}} | ||
|damage= | |damage= | ||
|guard= | |guard= Mid | ||
|startup= | |startup= | ||
|active=- | |active=- | ||
| Line 321: | Line 321: | ||
|version={{motion|236}}{{Motion|41236}} + {{Icon-Capcom|HK}} | |version={{motion|236}}{{Motion|41236}} + {{Icon-Capcom|HK}} | ||
|damage= | |damage= | ||
|guard= | |guard= Mid | ||
|startup= | |startup= | ||
|active=- | |active=- | ||
| Line 349: | Line 349: | ||
|version={{Icon-Capcom|HK}} | |version={{Icon-Capcom|HK}} | ||
|damage= | |damage= | ||
|guard= | |guard= Mid | ||
|startup= | |startup= | ||
|active=- | |active=- | ||
| Line 360: | Line 360: | ||
|version={{Icon-Capcom|LK}} + {{Icon-Capcom|HK}} | |version={{Icon-Capcom|LK}} + {{Icon-Capcom|HK}} | ||
|damage= | |damage= | ||
|guard= | |guard= Mid | ||
|startup= | |startup= | ||
|active=- | |active=- | ||
Latest revision as of 12:35, 27 March 2023
Normals
| Damage | Guard | Startup | Active | Recovery | FrameAdv |
|---|---|---|---|---|---|
| - | Mid | - | - | - | |
|
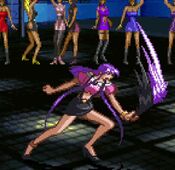
Ayako's signature anti-air. Her upward fan strike will reliably knock opponents out of the air and also covers space vertical for when she has the opponent in the corner and they want to jump out. This will whiff on crouchers however. | |||||
| Damage | Guard | Startup | Active | Recovery | FrameAdv |
|---|---|---|---|---|---|
| - | High | - | - | - | |
|
After her 5HP, if held down Ayako will twirl her fan and do a standing overhead. Not particularly fast or anything, but it's worth having in the back pocket. | |||||
| Damage | Guard | Startup | Active | Recovery | FrameAdv |
|---|---|---|---|---|---|
| -32 | Mid | - | - | - | |
|
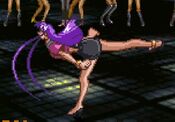
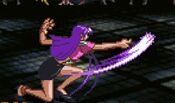
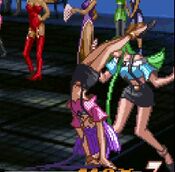
A stiff mule kick, not a good horizontal poke but it is a little wider than the normally superior 5HP. She is the only character who's dashing attack is her 5HK instead of stHP. | |||||
| Damage | Guard | Startup | Active | Recovery | FrameAdv |
|---|---|---|---|---|---|
| - | Mid | - | --1 | - | |
|
A crouching hand strike. It can cancel, but has no chain routes, which limits its usefulness. Its only major draw is that it has a good chunk more range than 2LK, but even there it's outclassed by the mighty 5LK. | |||||
| Damage | Guard | Startup | Active | Recovery | FrameAdv |
|---|---|---|---|---|---|
| - | Mid | 10 | - | - | - |
|
With the majority of Ayako's standing attacks being upward angled, her 2HP becomes her biggest horizontal poke. It natively special cancels so you can poke into Rave Storm if your confirms are on point | |||||
| Damage | Guard | Startup | Active | Recovery | FrameAdv |
|---|---|---|---|---|---|
| - | Low | - | - | - | |
|
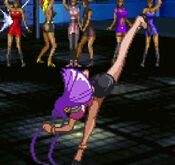
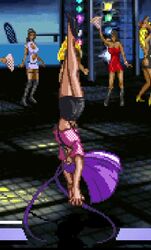
Ayako busts out the moves with a breakdancing spin that has 3 hits during it's long active time. Due to pushback, if this gets blocked it can wind up being very punishable. The flipside is that the 3rd hit has the most range so you might be able to tag them if they go in for an early punish but this is not a plan you want to set your clock to. | |||||
| Damage | Guard | Startup | Active | Recovery | FrameAdv |
|---|---|---|---|---|---|
| - | High | 8 | - | - | - |
|
A downward angled fan chop, probably her best choice for a jump in. It's best strength is that if you do rising jLP or jLK you can chain into this and it will connect, but that's really all you get so don't go planning your day around it. Proper setup with a super jump can make this crossup, but it's not free. | |||||
| Damage | Guard | Startup | Active | Recovery | FrameAdv |
|---|---|---|---|---|---|
| - | High | 6 | - | - | - |
|
Good startup, but realistically you don't to use this due to the njHK technique. A decent enough air normal if you get it however. | |||||
| Damage | Guard | Startup | Active | Recovery | FrameAdv |
|---|---|---|---|---|---|
| - | High | - | - | - | |
|
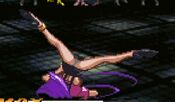
A split-legged kick, powerful as it is active on both sides. It is possible to get this in a angled jump by pumping additional inputs, if you do 69 jLK 8 jHK you can get njHK to come out during a diagonal jump. | |||||
Command Moves
| Damage | Guard | Startup | Active | Recovery | FrameAdv |
|---|---|---|---|---|---|
| - | N/A | 1 | - | - | - |
|
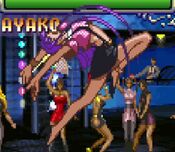
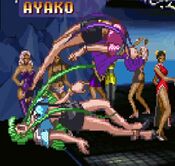
Ayako grabs the opponent and flips down to Earth to slam them, probably her best aerial option as other facets of her aerial game are purely fine. Because of her aerial guard cancel glitch, this throw becomes crazy powerful in air-to-air situations as you can guard cancel out of blocking an attack and straight up throw them for trying. | |||||
Special Moves
| Damage | Guard | Startup | Active | Recovery | FrameAdv |
|---|---|---|---|---|---|
| High | - | - | - | ||
|
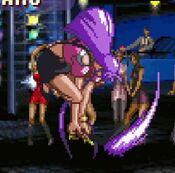
If you input this move just before landing, you essentially get an empty flip without any landing recovery. Since the Fan Chop itself is an overhead, you can set up some very tricky high/low mixups if your opponent is respecting you. | |||||
| Damage | Guard | Startup | Active | Recovery | FrameAdv |
|---|---|---|---|---|---|
| N/A | - | - | - | ||
|
Ayako's throw option out of Tornado Attack, getting the timing down on where exactly you need to input it to get Frankensteiner and not Fan Chop is tricky. | |||||
| Damage | Guard | Startup | Active | Recovery | FrameAdv |
|---|---|---|---|---|---|
| Mid | - | - | - | ||
|
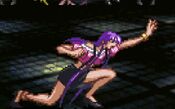
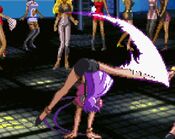
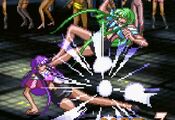
A slide that knocks down, but is NOT A LOW. Her mixup is actually delayed Fan Chop overhead or land and then cr.LK because this is not a mixup tool. Quite punishable if it gets blocked, but it very easily leads into a combo on hit in the corner. | |||||
Guard Cancels
Note: Ayako's ![]() and
and ![]() guard cancels change which move she uses depending on whether she performs the guard cancel standing or crouching.
guard cancels change which move she uses depending on whether she performs the guard cancel standing or crouching.
Super Moves
| Damage | Guard | Startup | Active | Recovery | FrameAdv |
|---|---|---|---|---|---|
| N/A | 1 | - | - | - | |
|
A 1F command throw super. Although it costs two bars, it's an incredibly useful tool to keep in your back pocket. It also doesn't have a whiff animation, so if you're not in range for the throw, you'll just get Mach Spin, which makes it pretty strong against jump-out attempts. | |||||
| Damage | Guard | Startup | Active | Recovery | FrameAdv |
|---|---|---|---|---|---|
| Mid | - | - | - | ||
|
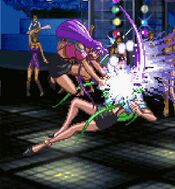
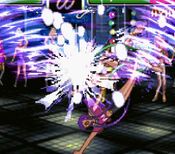
Stands for Final Tornado Illusion Crisis. Although the damage on this attack is huge, only use this when you're sure it'll get you the win. The startup is very slow, and because Ayako poses after the super finishes, the recovery means that sometimes you can be unsafe on hit. | |||||

